H3C_S5500基本配置思路及实用命令
华三S5500交换机配置
基于多个VLAN 在一个端口
[H3C]interface GigabitEthernet 1/0/2 进入第二个端口设置
[H3C-GigabitEthernet1/0/2]port link-type trunk 端口的链路类型的树干
[H3C-GigabitEthernet1/0/2]port trunk permit vlan all 如果使用单独的就不用增加这项
[H3C]pim
static-rp 192.168.100.1
undo 删除
[H3C]undo vlan 103 删除vlan 103
[H3C]interface GigabitEthernet 1/0/3 进入端口3
Please wait........................................... Done.
[H3C-GigabitEthernet1/0/2]quit 设置好了第二个端口的VLAN可以通过所有
[H3C-GigabitEthernet1/0/2]port trunk permit vlan 122 在此端口上增加VLAN组
[H3C-Vlan-interface104]ip address 192.168.69.1 255.255.255.0 设置IP
步骤三:将所要配置端口加入到VLAN组
[H3C] interface GigabitEthernet 1/0/1 设置第一个端口
[H3C-GigabitEthernet1/0/1]port access vlan 101 设置端口一为VLAN 101组
[H3C-GigabitEthernet1/0/3]undo port link-type 删除port link-type
H3C5500详细配置及说明
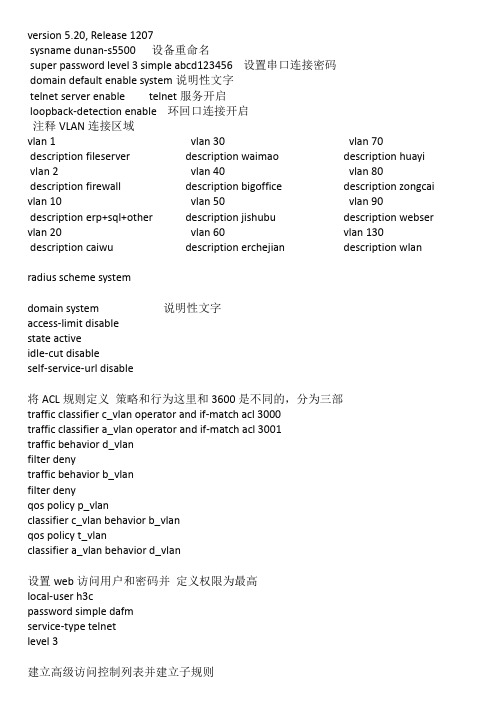
version 5.20, Release 1207sysname dunan-s5500 设备重命名super password level 3 simple abcd123456 设置串口连接密码 domain default enable system说明性文字telnet server enable telnet服务开启loopback-detection enable 环回口连接开启注释VLAN连接区域vlan 1description fileserver vlan 2description firewallvlan 10description erp+sql+other vlan 20description caiwu vlan 30description waimaovlan 40description bigofficevlan 50description jishubuvlan 60description erchejianvlan 70description huayivlan 80description zongcaivlan 90description webservlan 130description wlanradius scheme systemdomain system 说明性文字access-limit disablestate activeidle-cut disableself-service-url disable将ACL规则定义策略和行为这里和3600是不同的,分为三部traffic classifier c_vlan operator and if-match acl 3000traffic classifier a_vlan operator and if-match acl 3001traffic behavior d_vlanfilter denytraffic behavior b_vlanfilter denyqos policy p_vlanclassifier c_vlan behavior b_vlanqos policy t_vlanclassifier a_vlan behavior d_vlan设置web访问用户和密码并定义权限为最高local-user h3cpassword simple dafmservice-type telnetlevel 3建立高级访问控制列表并建立子规则acl number 3000rule 0 deny tcp source 192.168.50.0 0.0.0.255 destination 192.168.90.0 0.0.0.255 rule 1 deny tcp source 192.168.130.0 0.0.0.255 destination 192.168.90.0 0.0.0.255 rule 2 deny tcp source 192.168.130.0 0.0.0.255 destination 192.168.20.0 0.0.0.255 rule 3 deny tcp source 192.168.130.0 0.0.0.255 destination 192.168.30.0 0.0.0.255 rule 4 deny tcp source 192.168.130.0 0.0.0.255 destination 192.168.40.0 0.0.0.255 rule 5 deny tcp source 192.168.130.0 0.0.0.255 destination 192.168.50.0 0.0.0.255 rule 6 deny tcp source 192.168.130.0 0.0.0.255 destination 192.168.60.0 0.0.0.255 rule 7 deny tcp source 192.168.130.0 0.0.0.255 destination 192.168.70.0 0.0.0.255 rule 8 deny tcp source 192.168.130.0 0.0.0.255 destination 192.168.80.0 0.0.0.255 rule 9 deny tcp source 192.168.50.0 0.0.0.255 destination 192.168.80.0 0.0.0.255 rule 10 deny tcp source 192.168.50.0 0.0.0.255 destination 192.168.70.0 0.0.0.255 rule 11 deny tcp source 192.168.50.0 0.0.0.255 destination 192.168.60.0 0.0.0.255 rule 12 deny tcp source 192.168.80.0 0.0.0.255 destination 192.168.20.0 0.0.0.255 rule 13 deny tcp source 192.168.50.0 0.0.0.255 destination 192.168.40.0 0.0.0.255 rule 14 deny tcp source 192.168.50.0 0.0.0.255 destination 192.168.30.0 0.0.0.255 rule 15 deny tcp source 192.168.50.0 0.0.0.255 destination 192.168.20.0 0.0.0.255 rule 16 deny tcp source 192.168.50.0 0.0.0.255 destination 192.168.130.0 0.0.0.255 rule 17 deny tcp source 192.168.80.0 0.0.0.255 destination 192.168.30.0 0.0.0.255 rule 18 deny tcp source 192.168.80.0 0.0.0.255 destination 192.168.40.0 0.0.0.255 rule 19 deny tcp source 192.168.80.0 0.0.0.255 destination 192.168.50.0 0.0.0.255 rule 20 deny tcp source 192.168.80.0 0.0.0.255 destination 192.168.60.0 0.0.0.255 rule 21 deny tcp source 192.168.80.0 0.0.0.255 destination 192.168.70.0 0.0.0.255 rule 22 deny tcp source 192.168.80.0 0.0.0.255 destination 192.168.90.0 0.0.0.255 rule 23 deny tcp source 192.168.80.0 0.0.0.255 destination 192.168.130.0 0.0.0.255 acl number 3001rule 0 deny tcp source 192.168.90.0 0.0.0.255 destination 192.168.1.0 0.0.0.255 rule 1 deny tcp source 192.168.90.0 0.0.0.255 destination 192.168.10.0 0.0.0.255 rule 2 deny tcp source 192.168.90.0 0.0.0.255 destination 192.168.20.0 0.0.0.255 rule 3 deny tcp source 192.168.90.0 0.0.0.255 destination 192.168.30.0 0.0.0.255 rule 4 deny tcp source 192.168.90.0 0.0.0.255 destination 192.168.40.0 0.0.0.255 rule 5 deny tcp source 192.168.90.0 0.0.0.255 destination 192.168.60.0 0.0.0.255 rule 6 deny tcp source 192.168.90.0 0.0.0.255 destination 192.168.70.0 0.0.0.255 rule 7 deny tcp source 192.168.90.0 0.0.0.255 destination 192.168.80.0 0.0.0.255 rule 8 deny tcp source 192.168.90.0 0.0.0.255 destination 192.168.130.0 0.0.0.255 配置VLAN网关,实际为设置vlan 间路由interface NULL0interface Vlan-interface 1ip address 192.168.1.1 255.255.255.0interface Vlan-interface 2ip address 192.168.2.2 255.255.255.0interface Vlan-interface 10ip address 192.168.10.1 255.255.255.0interface Vlan-interface 20ip address 192.168.20.1 255.255.255.0interface Vlan-interface 30ip address 192.168.30.1 255.255.255.0interface Vlan-interface 40ip address 192.168.40.1 255.255.255.0interface Vlan-interface 50ip address 192.168.50.1 255.255.255.0interface Vlan-interface 60ip address 192.168.60.1 255.255.255.0interface Vlan-interface 70ip address 192.168.70.1 255.255.255.0interface Vlan-interface 80ip address 192.168.80.1 255.255.255.0interface Vlan-interface 90ip address 192.168.90.1 255.255.255.0interface Vlan-interface 30ip address 192.168.130.1 255.255.255.0将接口划入vlaninterface GigabitEthernet1/0/1port access vlan 10interface GigabitEthernet1/0/2port access vlan 10interface GigabitEthernet1/0/3port access vlan 10interface GigabitEthernet1/0/4port access vlan 90定义策略到接口qos apply policy t_vlan inboundinterface GigabitEthernet1/0/5 port access vlan 20 interface GigabitEthernet1/0/6 port access vlan 20 interface GigabitEthernet1/0/7 port access vlan 30 interface GigabitEthernet1/0/8 port access vlan 30 interface GigabitEthernet1/0/9 port access vlan 40 interface GigabitEthernet1/0/10 port access vlan 40 interface GigabitEthernet1/0/11 port access vlan 50 定义策略到接口qos apply policy p_vlan inboundinterface GigabitEthernet1/0/12 port access vlan 50定义策略到接口qos apply policy p_vlan inboundinterface GigabitEthernet1/0/13 port access vlan 60 interface GigabitEthernet1/0/14 port access vlan 60 interface GigabitEthernet1/0/15 port access vlan 70 interface GigabitEthernet1/0/16 port access vlan 70 interface GigabitEthernet1/0/17 port access vlan 80定义策略到接口qos apply policy p_vlan inboundinterface GigabitEthernet1/0/18 port access vlan 80定义策略到接口qos apply policy p_vlan inboundinterface GigabitEthernet1/0/19 port access vlan 130定义策略到接口qos apply policy p_vlan inboundinterface GigabitEthernet1/0/20 port access vlan 130定义策略到接口qos apply policy p_vlan inboundinterface GigabitEthernet1/0/21 duplex full flow-control interface GigabitEthernet1/0/22interface GigabitEthernet1/0/23 port access vlan 2 interface GigabitEthernet1/0/24 port access vlan 2 interface GigabitEthernet1/0/25 shutdowninterface GigabitEthernet1/0/26 shutdowninterface GigabitEthernet1/0/27 shutdowninterface GigabitEthernet1/0/28 shutdown配置到防火墙的默认路由ip route-static 0.0.0.0 0.0.0.0 192.168.2.1简单网络管理协议的描述snmp-agentsnmp-agent local-engineid 800063A20300E0FC123456 snmp-agent sys-info version v3load xml-configuration开启aux口和telnet访问的权限并设定串口访问密码user-interface aux 0authentication-mode passwordset authentication password simple abcd123456user-interface vty 0 4user privilege level 3set authentication password cipher ^BM!.M()1=%X)AG\U/NCA!!protocol inbound telnet华为路由器交换机配置命令:交换机命令[Quidway]dis curr;显示当前配置[Quidway]display interfaces;显示接口信息[Quidway]display vlanall;显示路由信息[Quidway]display version;显示版本信息[Quidway]super password;修改特权用户密码[Quidway]sysname;交换机命名[Quidway]interface ethernet0/1;进入接口视图[Quidway]interface vlanx;进入接口视图[Quidway-Vlan-interfacex]ip address 10.65.1.1 255.255.0.0;配置VLAN的IP地址[Quidway]ip route-static 0.0.0.0 0.0.0.0 10.65.1.2;静态路由=网关[Quidway]rip;三层交换支持[Quidway]user-interface vty 0 4;进入虚拟终端[S3026-ui-vty0-4]authentication-mode password;设置口令模式[S3026-ui-vty0-4]set authentication-mode password simple222;设置口令[S3026-ui-vty0-4]user privilege level3;用户级别[Quidway]interface ethernet0/1;进入端口模式[Quidway]int e0/1;进入端口模式[Quidway-Ethernet0/1]duplex {half|full|auto};配置端口工作状态[Quidway-Ethernet0/1]speed{10|100|auto};配置端口工作速率[Quidway-Ethernet0/1]flow-control;配置端口流控[Quidway-Ethernet0/1]mdi{across|auto|normal};配置端口平接扭接[Quidway-Ethernet0/1]portlink-type{trunk|access|hybrid};设置端口工作模式[Quidway-Ethernet0/1]port access vlan3;当前端口加入到VLAN[Quidway-Ethernet0/2]port trunk permitvlan{ID|All};设trunk允许的VLAN[Quidway-Ethernet0/3]port trunk pvid vlan3;设置trunk端口的PVID [Quidway-Ethernet0/1]undoshutdown;激活端口[Quidway-Ethernet0/1]shutdown;关闭端口[Quidway-Ethernet0/1]quit;返回 [Quidway]vlan3;创建VLAN[Quidway-vlan3]port ethernet0/1;在VLAN中增加端口[Quidway-vlan3]port e0/1;简写方式[Quidway-vlan3]port ethernet0/1 to ethernet0/4;在VLAN中增加端口[Quidway-vlan3]port e0/1 to e0/4;简写方式[Quidway]monitor-port;指定镜像端口[Quidway]port mirror;指定被镜像端口[Quidway]port mirror int_listobserving-portint_typeint_num;指定镜像和被镜像[Quidway]description string;指定VLAN描述字符[Quidway]description;删除VLAN描述字符[Quidway]display vlan[vlan_id];查看VLAN设置[Quidway]stp{enable|disable};设置生成树,默认关闭[Quidway]stp priority 4096;设置交换机的优先级[Quidway]stp root{primary|secondary};设置为根或根的备份[Quidway-Ethernet0/1]stpcost200;设置交换机端口的花费[Quidway]link-aggregatione0/1toe0/4ingress|both;端口的聚合[Quidway]undolink-aggregatione0/1|all;始端口为通道号[SwitchA-vlanx]isolate-user-vlanenable;设置主vlan[SwitchA]isolate-user-vlansecondary;设置主vlan包括的子vlan[Quidway-Ethernet0/2]porthybridpvidvlan;设置vlan的pvid[Quidway-Ethernet0/2]porthybridpvid;删除vlan的pvid[Quidway-Ethernet0/2]porthybridvlanvlan_id_listuntagged;设置无标识的vlan 如果包的vlanid与PVId一致,则去掉vlan信息.默认PVID=1。
S5500系列交换机基本QINQ功能的配置
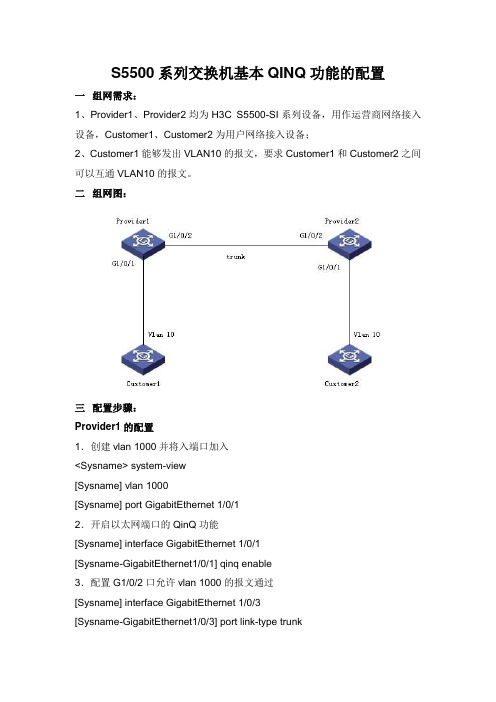
S5500系列交换机基本QINQ功能的配置一组网需求:1、Provider1、Provider2均为H3C S5500-SI系列设备,用作运营商网络接入设备,Customer1、Customer2为用户网络接入设备;2、Customer1能够发出VLAN10的报文,要求Customer1和Customer2之间可以互通VLAN10的报文。
二组网图:三配置步骤:Provider1的配置1.创建vlan 1000并将入端口加入<Sysname> system-view[Sysname] vlan 1000[Sysname] port GigabitEthernet 1/0/12.开启以太网端口的QinQ功能[Sysname] interface GigabitEthernet 1/0/1[Sysname-GigabitEthernet1/0/1] qinq enable3.配置G1/0/2口允许vlan 1000的报文通过[Sysname] interface GigabitEthernet 1/0/3[Sysname-GigabitEthernet1/0/3] port link-type trunk[Sysname-GigabitEthernet1/0/3] port trunk permit vlan 1000Provider2的配置Provider2的配置与Provider1完全相同配置完成后,Customer1和Customer2同属于VLAN10,且ip地址在同一网段的主机可以相互ping通。
四配置关键点:1.如果与provider1(或者provider2)相连的设备为其他厂商的设备,请确定该设备以太网协议类型值是否为0x8100,如果不是请在provider1(或者provider2)全局视图下应用qinq ethernet-type命令进行配置,例如该设备以太网协议类型值9100,则配置qinq ethernet-type 9100。
H3C S5500-SI 二层动态链路聚合典型配置

H3C S5500-SI 二层动态链路聚合典型配置一、组网需求:Device A与Device B通过各自的以太网端口GigabitEthernet1/0/1~GigabitEthernet1/0/3相互连接。
通过配置动态链路聚合,实现出负荷在各成员端口间的分担,并采用源MAC地址与目的MAC地址相结合的聚合负载分担模式。
二、组网图:三、配置步骤:1. 配置Device A#配置聚合负载分担模式为源MAC地址与目的MAC地址相结合的方式。
<DeviceA> system-view[DeviceA] link-aggregation load-sharing mode source-mac destination-mac# 创建二层聚合端口1,并配置成动态聚合模式。
[DeviceA] interface bridge-aggregation 1[DeviceA-Bridge-Aggregation1] link-aggregation mode dynamic[DeviceA-Bridge-Aggregation1] quit#分别将端口GigabitEthernet1/0/1至GigabitEthernet1/0/3加入到聚合组1中。
[DeviceA] interface GigabitEthernet 1/0/1[DeviceA-GigabitEthernet1/0/1] port link-aggregation group 1[DeviceA-GigabitEthernet1/0/1] quit[DeviceA] interface GigabitEthernet 1/0/2[DeviceA-GigabitEthernet1/0/2] port link-aggregation group 1[DeviceA-GigabitEthernet1/0/2] quit[DeviceA] interface GigabitEthernet 1/0/3[DeviceA-GigabitEthernet1/0/3] port link-aggregation group 12. 配置Device BDevice B的配置与Device A相似,配置过程略。
H3C S5500 V2基本配置及配置命令
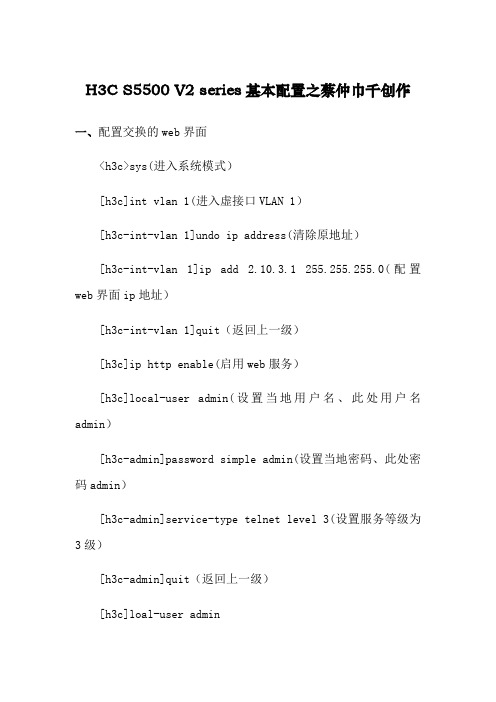
H3C S5500 V2 series基本配置之蔡仲巾千创作一、配置交换的web界面<h3c>sys(进入系统模式)[h3c]int vlan 1(进入虚接口VLAN 1)[h3c-int-vlan 1]undo ip address(清除原地址)[h3c-int-vlan 1]ip add 2.10.3.1 255.255.255.0(配置web界面ip地址)[h3c-int-vlan 1]quit(返回上一级)[h3c]ip http enable(启用web服务)[h3c]local-user admin(设置当地用户名、此处用户名admin)[h3c-admin]password simple admin(设置当地密码、此处密码admin)[h3c-admin]service-type telnet level 3(设置服务等级为3级)[h3c-admin]quit(返回上一级)[h3c]loal-user admin[h3c-admin]service-type terminal telnet http https(平安防护措施、认证方式)[h3c-admin]quit(返回上一级)注:以上配置完成后接入服务器用IE访问IP地址2.10.3.1访问二、交换机划分vlan<h3c>sys(进入系统模式)[h3c]vlan 2(划分vlan 2)[h3c-vlan 2]quit(返回上一级)[h3c]vlan 3(划分vlan 3)[h3c-vlan 3]quit(返回上一级)[h3c]vlan 2(进入vlan 2)[h3c-vlan 2]port g/0/1 to g1/0/12(对vlan 2进行端口划分-此处vlan 2划分到1-12端口)[h3c-vlan 2]quit(返回上一级)[h3c]vlan 3(进入vlan 3)[h3c-vlan 3]port g/0/13 to g1/0/24(对vlan 3进行端口划分-此处vlan3划分到13-24端口)注:以上配置是根据现场要求24口交换机划分两个vlan平分所有端口三、交换机VLAN IP 互通[h3c]int vlan 2[h3c-vlan-interface 2]ip add 192.168.2.1 255.255.255.0[h3c-vlan-interface 2]quit[h3c]int vlan 3[h3c-vlan-interface 3]ip add 192.168.3.1 255.255.255.0[h3c-vlan-interface 3]quit注:以上配置完成后能通过vlan 2 的端口与vlan 3 的端口互通。
H3C-S5500基本配置思路及实用命令
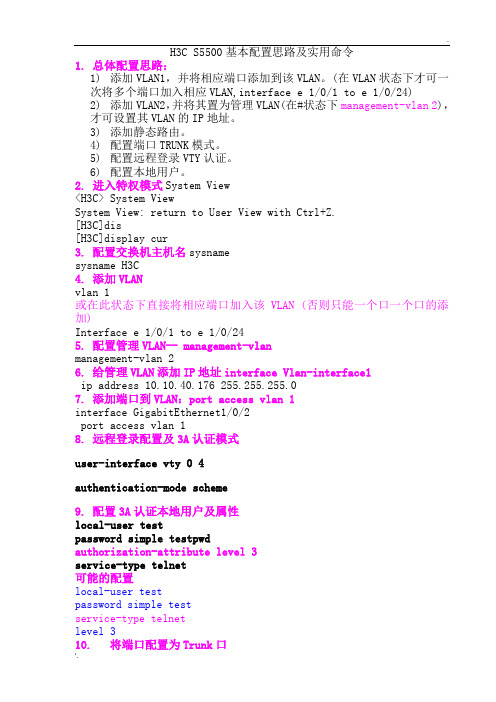
H3C S5500基本配置思路及实用命令1.总体配置思路:1)添加VLAN1,并将相应端口添加到该VLAN。
(在VLAN状态下才可一次将多个端口加入相应VLAN,interface e 1/0/1 to e 1/0/24)2)添加VLAN2,并将其置为管理VLAN(在#状态下management-vlan 2),才可设置其VLAN的IP地址。
3)添加静态路由。
4)配置端口TRUNK模式。
5)配置远程登录VTY认证。
6)配置本地用户。
2.进入特权模式System View<H3C> System ViewSystem View: return to User View with Ctrl+Z.[H3C]dis[H3C]display cur3.配置交换机主机名sysnamesysname H3C4.添加VLANvlan 1或在此状态下直接将相应端口加入该VLAN (否则只能一个口一个口的添加)Interface e 1/0/1 to e 1/0/245.配置管理VLAN-- management-vlanmanagement-vlan 26.给管理VLAN添加IP地址interface Vlan-interface1ip address 10.10.40.176 255.255.255.07.添加端口到VLAN:port access vlan 1interface GigabitEthernet1/0/2port access vlan 18.远程登录配置及3A认证模式user-interface vty 0 4authentication-mode scheme9.配置3A认证本地用户及属性local-user testpassword simple testpwdauthorization-attribute level 3service-type telnet可能的配置local-user testpassword simple testservice-type telnetlevel 310.将端口配置为Trunk口interface GigabitEthernet1/0/20port link-type trunkport trunk permit vlan all11.添加静态路由ip route-static 0.0.0.0 0.0.0.0 10.10.40.112.查看路由表display ip routing-table[H3C]display ip routing-tableRouting Tables: PublicDestinations : 7 Routes : 7Destination/Mask Proto Pre Cost NextHop Interface0.0.0.0/0 Static 60 0 10.10.40.1 Vlan210.10.40.0/24 Direct 0 0 10.10.40.180Vlan210.10.40.180/32 Direct 0 0 127.0.0.1 InLoop0127.0.0.0/8 Direct 0 0 127.0.0.1 InLoop0127.0.0.1/32 Direct 0 0 127.0.0.1 InLoop0192.168.76.0/24 Direct 0 0 192.168.76.3Vlan76192.168.76.3/32 Direct 0 0 127.0.0.1 InLoop013.显示当前配置display current-configuration[H3C]display current-configuration14.查看端口及VLAN的up/down状态display brief interface[H3C]display brief interfaceThe brief information of interface(s) under route mode:Interface Link Protocol-link Protocol type Main IPNULL0 UP UP(spoofing) NULL --Vlan1 UP UP ETHERNET 192.168.76.3Vlan2 UP UP ETHERNET 10.10.40.180The brief information of interface(s) under bridge mode:Interface Link Speed Duplex Link-typePVIDGE1/0/1 UP 1G(a) full(a) access1GE1/0/2 DOWN auto auto access1GE1/0/3 DOWN auto auto access1GE1/0/9 DOWN auto auto access1GE1/0/10 DOWN auto auto access1display brief interface GigabitEthernet 1/0/1[H3C]display brief interface GigabitEthernet 1/0/1The brief information of interface(s) under bridge mode:Interface Link Speed Duplex Link-typePVIDGE1/0/1 UP 1G(a) full(a) access1display brief interface Vlan-interface 1[H3C]display brief interface Vlan-interface 1The brief information of interface(s) under route mode:Interface Link Protocol-link Protocol type Main IPVlan1 UP UP ETHERNET 192.168.76.315.查看MAC地址缓存表display mac-address[H3C]display mac-addressMAC ADDR VLAN ID STATE PORT INDEX AGING TIME(s)0000-e7a7-2374 1 Learned GigabitEthernet1/0/19 AGING0000-e8f1-6952 1 Learned GigabitEthernet1/0/19 AGING0001-6c41-9cee 1 Learned GigabitEthernet1/0/19 AGING000c-2919-0d6c 1 Learned GigabitEthernet1/0/19 AGING000c-2961-d8ea 1 Learned GigabitEthernet1/0/19 AGING16.查看某一端口的MAC地址缓存表display mac-address interface GigabitEthernet 1/0/1[H3C]display mac-address interface GigabitEthernet 1/0/1MAC ADDR VLAN ID STATE PORT INDEX AGING TIME(s)0016-3642-e888 1 Learned GigabitEthernet1/0/1 AGING0016-eca2-d69d 1 Learned GigabitEthernet1/0/1 AGING001c-25d8-77b6 1 Learned GigabitEthernet1/0/1 AGING0024-1d6e-6fbe 1 Learned GigabitEthernet1/0/1 AGING17.查看ARP缓存表display arp[H3C]display arpType: S-Static D-DynamicIP Address MAC Address VLAN ID Interface Aging Type192.168.76.56 0016-eca2-d69d 1 GE1/0/1 20D192.168.76.131 0016-3642-e888 1 GE1/0/1 19D192.168.76.171 0024-1d6e-6fbe 1 GE1/0/1 13D10.10.40.1 0018-742d-4fc0 2 GE1/0/19 14D192.168.76.1 0018-742d-4fc0 1 GE1/0/19 10D18.Tftp备份配置1)查看配置文件名及所在文件夹-dir配置文件名可能为startup.cfg或config.cfg配置文件可能在flash:/或unit1>flash:/目录下<jyzx-px-zhongxin>dir flash:/Directory of flash:/0 -rw- 8221183 Aug 11 2010 16:27:52s5500tpsi-cmw520-r2202p11.bin1 -rw- 2365 Apr 26 2000 12:13:58 startup.cfg(配置文件名)31496 KB total (23460 KB free)<jyzx-bg-3-d>dirDirectory of unit1>flash:/1 -rw- 3146 Jan 01 2004 00:00:00 config.def2 (*) -rw- 3711222 Mar 25 2011 16:51:52s31si_e-cmw310-r2211p07.bin3 (*) -rw- 886025 Jan 01 2004 00:00:00h3c-http3.1.9-0019.web4 (*) -rw- 2834 Apr 03 2000 01:20:33 config.cfg(配置文件名)7239 KB total (2739 KB free)(*) -with main attribute (b) -with backup attribute(*b) -with both main and backup attribute<jyzx-bg-4-x>tftp 172.16.8.91 put unit1>flash:/config.cfg 10.10.40.185.txtFile will be transferred in binary mode.Sending file to remote tftp server. Please wait... |TFTP: 2979 bytes sent in 0 second(s).File uploaded successfully.<jyzx-bg-4-x>dirDirectory of unit1>flash:/1 -rw- 3146 Jan 01 2004 00:00:00 config.def2 (*) -rw- 3711222 Mar 25 2011 16:51:52 s31si_e-cmw310-r2211p07.bin3 (*) -rw- 886025 Jan 01 2004 00:00:00 h3c-http3.1.9-0019.web4 (*) -rw- 2979 Apr 02 2000 07:17:02 config.cfg7239 KB total (2739 KB free)(*) -with main attribute (b) -with backup attribute(*b) -with both main and backup attribute2)配置可以使用tftp的ACLacl number 2000rule permit source 172.16.8.91 0[jyzx-px-zhongxin]acl number 2000[jyzx-px-zhongxin-acl-basic-2000]rule permit source 172.16.8.91 ?0 Wildcard bits : 0.0.0.0 ( a host )X.X.X.X Wildcard of source[jyzx-px-zhongxin-acl-basic-2000]rule permit source 172.16.8.91 03)配置tftp服务器- tftp-server acl 2000tftp-server acl 2000[jyzx-px-zhongxin]tftp-server acl 2000The ACL number does not exist or contains no rule. Continue? [Y/N]:y(如果还没有配置ACL,则会有此提示)[jyzx-px-zhongxin]tftp client source ip 172.16.8.914)备份配置文件到tftp软件所在目录下(在用户视图下,即“>”状态下)tftp 172.16.8.91 put flash:/startup.cfg (无目标文件名则表示与源文件名同名)tftp 172.16.8.91 put flash:/startup.cfg startup.txt(将配置文件保存为txt文件)<jyzx-px-zhongxin>tftp 172.16.8.91 put flash:/startup.cfgFile will be transferred in binary modeSending file to remote TFTP server. Please wait... \TFTP: 2365 bytes sent in 0 second(s).File uploaded successfully.<jyzx-px-zhongxin>tftp 172.16.8.91 put flash:/startup.cfg 10.10.40.177.txtFile will be transferred in binary modeSending file to remote TFTP server. Please wait... \TFTP: 2365 bytes sent in 0 second(s).File uploaded successfully.5)小结过程在特权状态下配置ACL和Tftp-server信息acl number 2000rule permit source 172.16.8.91 0quittftp-server acl 2000save在用户视图下备份配置tftp 172.16.8.91 put flash:/startup.cfg 10.10.40.177.txt19.关闭实时信息- undo info-center enable[jyzx-bg-4-x]undo info-center enable% Information center is disabled20.问题1:无法用system-view命令进入特权模式原因:因为local-user中用户认证属性设置不对,level 3必须设置。
H3C S5500操作手册
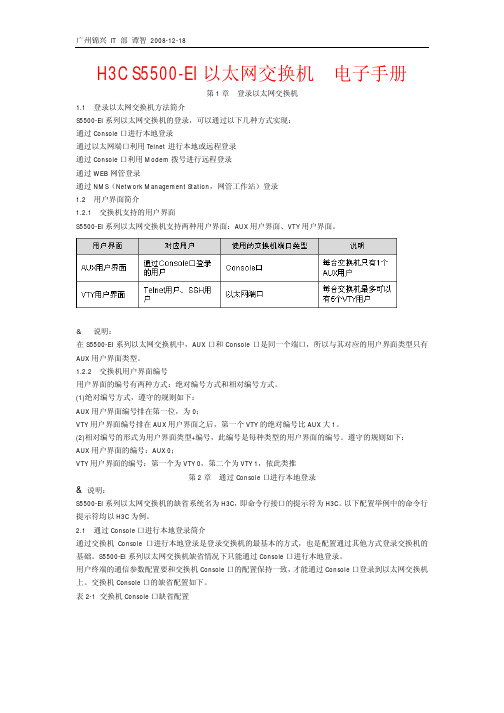
H3C S5500-EI 以太网交换机 电子手册
第 1 章 登录以太网交换机 1.1 登录以太网交换机方法简介 S5500-EI 系列以太网交换机的登录,可以通过以下几种方式实现: 通过 Console 口进行本地登录 通过以太网端口利用 Telnet 进行本地或远程登录 通过 Console 口利用 Modem 拨号进行远程登录 通过 WEB 网管登录 通过 NMS(Network Management Station,网管工作站)登录 1.2 用户界面简介 1.2.1 交换机支持的用户界面 S5500-EI 系列以太网交换机支持两种用户界面:AUX 用户界面、VTY 用户界面。
Copyright (c) 2004-2007 Hangzhou H3C Tech. Co., Ltd. Creation date : Dec 3 2007, 16:21:08 CPU Clock Speed : 533MHz
广州锦兴 IT 部 谭智 2008-12-18
BUS Clock Speed : 133MHz
广州锦兴 IT 部 谭智 2008-12-18
用户登录到交换机上后,可以对 Console 口进行相关的配置.
2.2 通过 Console 口登录交换机 第一步:如图 2-1 所示,建立本地配置环境,只需将 PC 机(或终端)的串口通过配置电缆与以太网交换机 的 Console 口连接。
第二步:在 PC 机上运行终端仿真程序(如 Windows 3.X 的 Terminal 或 Windows 9X/Windows 2000/Windows XP 的超级终端等,以下配置以 Windows XP 为例),选择与交换机相连的串口,配置终端通信参数为:波特 率为 9600bit/s、8 位数据位、1 位停止位、无校验和无流控,如图 2-2 至图 2-4 所示。
H3C S5500 V2基本配置及配置命令

H3C S5500 V2 series基本配置一、配置交换的web界面<h3c>sys(进入系统模式)[h3c]int vlan 1(进入虚接口VLAN 1)[h3c-int-vlan 1]undo ip address(清除原地址)[h3c-int-vlan 1]ip add 2.10.3.1 255.255.255.0(配置web界面ip地址)[h3c-int-vlan 1]quit(返回上一级)[h3c]ip http enable(启用web服务)[h3c]local-user admin(设置本地用户名、此处用户名admin)[h3c-admin]password simple admin(设置本地密码、此处密码admin)[h3c-admin]service-type telnet level 3(设置服务等级为3级)[h3c-admin]quit(返回上一级)[h3c]loal-user admin[h3c-admin]service-type terminal telnet http https(安全防护措施、认证方式)[h3c-admin]quit(返回上一级)注:以上配置完成后接入服务器用IE访问IP地址2.10.3.1访问二、交换机划分vlan<h3c>sys(进入系统模式)[h3c]vlan 2(划分vlan 2)[h3c-vlan 2]quit(返回上一级)[h3c]vlan 3(划分vlan 3)[h3c-vlan 3]quit(返回上一级)[h3c]vlan 2(进入vlan 2)[h3c-vlan 2]port g/0/1 to g1/0/12(对vlan 2进行端口划分-此处vlan 2划分到1-12端口)[h3c-vlan 2]quit(返回上一级)[h3c]vlan 3(进入vlan 3)[h3c-vlan 3]port g/0/13 to g1/0/24(对vlan 3进行端口划分-此处vlan3划分到13-24端口)注:以上配置是根据现场要求24口交换机划分两个vlan平分所有端口三、交换机VLAN IP 互通[h3c]int vlan 2[h3c-vlan-interface 2]ip add 192.168.2.1 255.255.255.0[h3c-vlan-interface 2]quit[h3c]int vlan 3[h3c-vlan-interface 3]ip add 192.168.3.1 255.255.255.0[h3c-vlan-interface 3]quit注:以上配置完成后能通过vlan 2 的端口与vlan 3 的端口互通。
- 1、下载文档前请自行甄别文档内容的完整性,平台不提供额外的编辑、内容补充、找答案等附加服务。
- 2、"仅部分预览"的文档,不可在线预览部分如存在完整性等问题,可反馈申请退款(可完整预览的文档不适用该条件!)。
- 3、如文档侵犯您的权益,请联系客服反馈,我们会尽快为您处理(人工客服工作时间:9:00-18:30)。
H3C S5500基本配置思路及实用命令1.总体配置思路:1)添加VLAN1,并将相应端口添加到该VLAN。
(在VLAN状态下才可一次将多个端口加入相应VLAN,interface e 1/0/1 to e 1/0/24)2)添加VLAN2,并将其置为管理VLAN(在#状态下management-vlan 2),才可设置其VLAN的IP地址。
3)添加静态路由。
4)配置端口TRUNK模式。
5)配置远程登录VTY认证。
6)配置本地用户。
2.进入特权模式System View<H3C> System ViewSystem View: return to User View with Ctrl+Z.[H3C]dis[H3C]display cur3.配置交换机主机名sysnamesysname H3C4.添加VLANvlan 1或在此状态下直接将相应端口加入该VLAN (否则只能一个口一个口的添加)Interface e 1/0/1 to e 1/0/245.配置管理VLAN-- management-vlanmanagement-vlan 26.给管理VLAN添加IP地址interface Vlan-interface1 ip address 10.10.40.176 255.255.255.07.添加端口到VLAN:port access vlan 1interface GigabitEthernet1/0/2port access vlan 18.远程登录配置及3A认证模式user-interface vty 0 4authentication-mode scheme9.配置3A认证本地用户及属性local-user testpassword simple testpwdauthorization-attribute level 3service-type telnet可能的配置local-user testpassword simple testservice-type telnetlevel 310.将端口配置为Trunk口interface GigabitEthernet1/0/20port link-type trunkport trunk permit vlan all11.添加静态路由ip route-static 0.0.0.0 0.0.0.0 10.10.40.112.查看路由表display ip routing-table[H3C]display ip routing-tableRouting Tables: PublicDestinations : 7 Routes : 7Destination/Mask Proto Pre Cost NextHop Interface0.0.0.0/0 Static 60 0 10.10.40.1 Vlan210.10.40.0/24 Direct 0 0 10.10.40.180 Vlan210.10.40.180/32 Direct 0 0 127.0.0.1 InLoop0127.0.0.0/8 Direct 0 0 127.0.0.1 InLoop0127.0.0.1/32 Direct 0 0 127.0.0.1 InLoop0192.168.76.0/24 Direct 0 0 192.168.76.3 Vlan76192.168.76.3/32 Direct 0 0 127.0.0.1 InLoop013.显示当前配置display current-configuration[H3C]display current-configuration14.查看端口及VLAN的up/down状态display brief interface[H3C]display brief interfaceThe brief information of interface(s) under route mode:Interface Link Protocol-link Protocol type Main IP NULL0 UP UP(spoofing) NULL -- Vlan1 UP UP ETHERNET 192.168.76.3 Vlan2 UP UP ETHERNET 10.10.40.180The brief information of interface(s) under bridge mode:Interface Link Speed Duplex Link-type PVIDGE1/0/1 UP 1G(a) full(a) access 1GE1/0/2 DOWN auto auto access 1GE1/0/3 DOWN auto auto access 1GE1/0/9 DOWN auto auto access 1GE1/0/10 DOWN auto auto access 1 display brief interface GigabitEthernet 1/0/1[H3C]display brief interface GigabitEthernet 1/0/1The brief information of interface(s) under bridge mode:Interface Link Speed Duplex Link-type PVIDGE1/0/1 UP 1G(a) full(a) access 1display brief interface Vlan-interface 1[H3C]display brief interface Vlan-interface 1The brief information of interface(s) under route mode:Interface Link Protocol-link Protocol type Main IP Vlan1 UP UP ETHERNET 192.168.76.315.查看MAC地址缓存表display mac-address[H3C]display mac-addressMAC ADDR VLAN ID STATE PORT INDEX AGING TIME(s) 0000-e7a7-2374 1 Learned GigabitEthernet1/0/19 AGING 0000-e8f1-6952 1 Learned GigabitEthernet1/0/19 AGING 0001-6c41-9cee 1 Learned GigabitEthernet1/0/19 AGING 000c-2919-0d6c 1 Learned GigabitEthernet1/0/19 AGING 000c-2961-d8ea 1 Learned GigabitEthernet1/0/19 AGING16.查看某一端口的MAC地址缓存表display mac-address interface GigabitEthernet 1/0/1[H3C]display mac-address interface GigabitEthernet 1/0/1MAC ADDR VLAN ID STATE PORT INDEX AGING TIME(s) 0016-3642-e888 1 Learned GigabitEthernet1/0/1 AGING 0016-eca2-d69d 1 Learned GigabitEthernet1/0/1 AGING 001c-25d8-77b6 1 Learned GigabitEthernet1/0/1 AGING 0024-1d6e-6fbe 1 Learned GigabitEthernet1/0/1 AGING17.查看ARP缓存表display arp[H3C]display arpType: S-Static D-DynamicIP Address MAC Address VLAN ID Interface Aging Type192.168.76.56 0016-eca2-d69d 1 GE1/0/1 20 D192.168.76.131 0016-3642-e888 1 GE1/0/1 19 D192.168.76.171 0024-1d6e-6fbe 1 GE1/0/1 13 D10.10.40.1 0018-742d-4fc0 2 GE1/0/19 14 D192.168.76.1 0018-742d-4fc0 1 GE1/0/19 10 D18.Tftp备份配置1)查看配置文件名及所在文件夹-dir配置文件名可能为startup.cfg或config.cfg配置文件可能在flash:/或unit1>flash:/目录下<jyzx-px-zhongxin>dir flash:/Directory of flash:/0 -rw- 8221183 Aug 11 2010 16:27:52 s5500tpsi-cmw520-r2202p11.bin1 -rw- 2365 Apr 26 2000 12:13:58 startup.cfg(配置文件名) 31496 KB total (23460 KB free)<jyzx-bg-3-d>dirDirectory of unit1>flash:/1 -rw- 3146 Jan 01 2004 00:00:00 config.def2 (*) -rw- 3711222 Mar 25 2011 16:51:52 s31si_e-cmw310-r2211p07.bin3 (*) -rw- 886025 Jan 01 2004 00:00:00 h3c-http3.1.9-0019.web4 (*) -rw- 2834 Apr 03 2000 01:20:33 config.cfg(配置文件名) 7239 KB total (2739 KB free)(*) -with main attribute (b) -with backup attribute(*b) -with both main and backup attribute<jyzx-bg-4-x>tftp 172.16.8.91 put unit1>flash:/config.cfg 10.10.40.185.txtFile will be transferred in binary mode.Sending file to remote tftp server. Please wait... |TFTP: 2979 bytes sent in 0 second(s).File uploaded successfully.<jyzx-bg-4-x>dirDirectory of unit1>flash:/1 -rw- 3146 Jan 01 2004 00:00:00 config.def2 (*) -rw- 3711222 Mar 25 2011 16:51:52 s31si_e-cmw310-r2211p07.bin3 (*) -rw- 886025 Jan 01 2004 00:00:00 h3c-http3.1.9-0019.web4 (*) -rw- 2979 Apr 02 2000 07:17:02 config.cfg7239 KB total (2739 KB free)(*) -with main attribute (b) -with backup attribute(*b) -with both main and backup attribute2)配置可以使用tftp的ACLacl number 2000rule permit source 172.16.8.91 0[jyzx-px-zhongxin]acl number 2000[jyzx-px-zhongxin-acl-basic-2000]rule permit source 172.16.8.91 ?0 Wildcard bits : 0.0.0.0 ( a host )X.X.X.X Wildcard of source[jyzx-px-zhongxin-acl-basic-2000]rule permit source 172.16.8.91 03)配置tftp服务器- tftp-server acl 2000tftp-server acl 2000[jyzx-px-zhongxin]tftp-server acl 2000The ACL number does not exist or contains no rule. Continue? [Y/N]:y(如果还没有配置ACL,则会有此提示)[jyzx-px-zhongxin]tftp client source ip 172.16.8.914)备份配置文件到tftp软件所在目录下(在用户视图下,即“>”状态下)tftp 172.16.8.91 put flash:/startup.cfg (无目标文件名则表示与源文件名同名)tftp 172.16.8.91 put flash:/startup.cfg startup.txt(将配置文件保存为txt文件)<jyzx-px-zhongxin>tftp 172.16.8.91 put flash:/startup.cfgFile will be transferred in binary modeSending file to remote TFTP server. Please wait... \TFTP: 2365 bytes sent in 0 second(s).File uploaded successfully.<jyzx-px-zhongxin>tftp 172.16.8.91 put flash:/startup.cfg 10.10.40.177.txtFile will be transferred in binary modeSending file to remote TFTP server. Please wait... \TFTP: 2365 bytes sent in 0 second(s).File uploaded successfully.5)小结过程在特权状态下配置ACL和Tftp-server信息acl number 2000rule permit source 172.16.8.91 0quittftp-server acl 2000save在用户视图下备份配置tftp 172.16.8.91 put flash:/startup.cfg 10.10.40.177.txt19.关闭实时信息- undo info-center enable[jyzx-bg-4-x]undo info-center enable% Information center is disabled20.问题1:无法用system-view命令进入特权模式原因:因为local-user中用户认证属性设置不对,level 3必须设置。