PF9830通讯软件使用说明
3.0使用手册

软件使用中应当注意的事项;1. 对于v1,v2轨以上的轨道,做轨间特技可利用fx轨,“添加特技素材”后直接把固定特技拖上去即可,但是没有入出方式可选。
2. 故事板的长度和素材长度没有显示,打入出点后能够在故事板回放窗看到。
3. Tp-link网卡在超微主板上和DTV卡有冲突,会导致DIGISUITE驱动状态异常。
拔下网卡并重装驱动即可4. 在使用IDE硬盘作为系统盘的情况下,必须将系统的虚拟内存交换页面文件设置在高速数据硬盘构成的带区集分区上5. X-8000/6000中,在进行mpg文件合成的时候,应该先打开vu表,生成文件的时候应注意vu 表是否正常,如果vu表没起来,表示合成的文件没有声音,要重新生成。
如果有数字卡的话,注意要将音频设置为模拟的输出。
解决方案:1. 唱词文件从中间播造成声画不对位解决:唱词文件不要做太长,每次从头开始播2. 采集素材时能看到图象,停止后找不到素材解决:修改路径设置3. X-9000打包后生成的素材有横向条纹原因:整个带区集呈危险状态,硬盘或电源故障解决: 更换硬盘更换电源4. X-8000设置将MAX卡扩展到整屏时死机,同时打包花屏(MAX卡必须用排线与显卡相连)。
解决:MAX卡或跨桥坏,逐一试着更换5. X-9000带模拟BOB盒“硬件参数”存不住,尤其音频输入输出解决:暂无办法,只能多次设置直到存住为止。
修改时要拖动滑杆不要改数字6. X-9000输入无色彩解决:修改“硬件参数”中输入视频的色饱和度7. X-9000中XCG的项目文件调到故事板中最后一帧永远时黑场解决:暂无办法,如果要跟其它层做过渡特技,打包后再进行8. X-9000中在XCG里做唱词,打开文件时会死机解决:不用“打开”,用“拷贝-粘贴9. 保存特技时存不住解决:1)系统默认的“TEMP”名不能用2)用“另存为”按钮,不能用“保存”按钮10. 用相同用户名登陆但看不到以前的工作(包括素材,项目,故事板)解决:检查是否登陆在同一栏目下,若不是改之11. SQL SERVER 数据库无法启动解决:1)看是否修改了WIN2000的用户登陆密码,若是,修改为原来的2)重新安装SQL SERVER数据库,并在安装时选择用本地用户登陆3) 重装200012. 在运行X-EDIT软件过程中报SQL SERVER 的错误解决:若素材不重要,重新执行SQL脚本文件,否则先将数据库备份,重新执行SQL脚本后再恢复数据库13. X-9000做静帧,如果是摇镜头可能会抖动解决:可设置成0.01倍速度14.做淡入淡出特技过渡不平滑,会闪一下解决:改变入出方式15.故事板播放时,报sql server 通讯失败解决方法:重新建立dynetmange和dycommondate两个数据库,但原来的信息会丢失。
983操作指南2013

创建模板
Bioanalytic
Template Name: 模板名称
Comment: 注释
点击<Next>下一步
创建模板
设定检测流程
Bioanalytic
四种类型可选: 1. Photo: 照片(明场) 2. Luminescence: 发光 3. Fluorescence: 荧光 4. Transillumination: 透射
Enable Accumulation: Enable,Disabled (图像累积) Numbers of Iterations: 累积次数
点击<Next>下一步。
创建模板
3. Fluorescence荧光检测设置—激发滤光片
Bioanalytic
Slider: 激发滤光片滑块 Filter: 选择激发滤光片 Energy[%]: 灯能量强度 Quick Check: 快速检查(预览)
点击<Next>下一步
创建模板
2. Luminescence发光检测设置—图像后期处理
Bioanalytic
Cosmic Suppression: Enable,Disabled (宇宙斑抑制) Enable Accumulation: Enable,Disabled (图像累积) Numbers of Iterations: 累积次数
点击<Next>下一步。
软件安装
选择数据库位置
Bioanalytic
点击<Next>下一步。
软件安装
选择仪器控制器连接
Bioanalytic
点击<Next>下一步。
软件安装
可选禁用用户管理
983M V2.05B-5A版 PLC使用说明

目录PLC版本变更记录 (1)1 GSK983M-H 五轴操作面板地址表 (2)2. I/O地址表 (3)2.1输入信号一览表 (3)2.2输出信号一览表 (5)3 PLC信号说明 (7)3.1输入信号电平说明 (7)3.2输出信号的电平说明 (8)3.3各输入信号的具体说明 (8)4. PC参数说明 (11)5 M代码功能说明 (15)6 刀库功能 (16)6.1刀库控制的总刀数的设定 (16)6.2指令换刀 (17)6.3换刀动作描述 (17)6.4正常使用刀库应注意的问题 (18)6.5刀库数据设定 (18)6.6刀号显示 (18)6.7主轴夹紧、松开刀具功能 (19)7 刀库的调试 (19)7.1刀库调试状态的设定和取消 (19)7.2进行刀库调试前需设定的参数 (19)7.3刀库调试状态下的功能检验 (19)7.4刀库调试注意事项 (20)8.机床进给轴的回零 (20)8.1各轴回零键自保 (20)8.2X轴负方向回零自保的设定 (20)8.3回零倍率的限制 (20)9主轴功能 (20)9.1无齿轮换档的变频或伺服主轴 (20)9.2主轴定向功能 (21)10 手轮 (21)11 移动轴快速速度调整(G0速度调整) (21)12 冷却功能 (21)13 水阀沖屑功能 (21)14 主轴吹风 (21)15 工件吹风 (22)16 机床工作灯 (22)17 排屑器 (22)18 超程解除 (22)19 第四轴回转松/紧控制或工装控制 (22)20 防护门功能 (23)21 润滑 (24)22PLC报警操作信息一览表 (24)23.换刀宏程序(参考) (28)PLC版本变更记录MV2.05B-5A版PLC支持五轴配机械手刀库的加工中心,支持变频、伺服主轴。
日期 PLC版本变更内容2007-11-13 MV1.0B—×× 首版2007-12-5 MV1.02B—×× 删除Z轴抱闸控制的内容。
PF9833 三相 PWM 专用测试仪 用户手册说明书
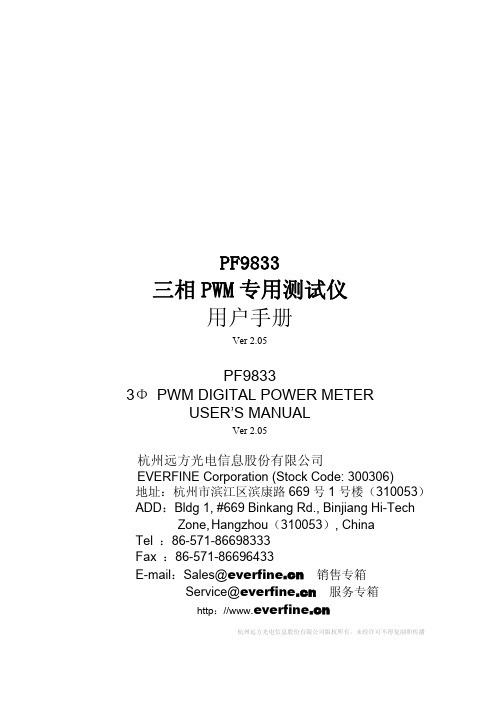
PF9833三相PWM专用测试仪用户手册Ver2.05PF98333ΦPWM DIGITAL POWER METERUSER’S MANUALVer2.05杭州远方光电信息股份有限公司EVERFINE Corporation(Stock Code:300306)地址:杭州市滨江区滨康路669号1号楼(310053)ADD:Bldg1,#669Binkang Rd.,Binjiang Hi-Tech Zone,Hangzhou(310053),ChinaTel:86-571-86698333Fax:86-571-86696433E-mail:Sales@销售专箱Service@服务专箱http://杭州远方光电信息股份有限公司版权所有,未经许可不得复制和传播前言感谢购置远方PF9833三相PWM专用测试仪。
本用户手册包含仪器功能、操作过程以及安全规定等,为了确保正确使用本仪器,在操作仪器前请仔细阅读手册。
请妥善保存手册,以便碰到问题时能快速查阅。
注意:● 本公司奉行不断完善改进产品的宗旨,因此手册内容有可能改变,恕不另行通知。
● 我们已经尽最大努力准备本手册以确保其准确性,如果有疑问或发现错误,请直接与本公司或本公司授权代理商联系。
● 对于手册内容如有不同理解,以本公司技术部门解释为准。
开箱检查用户第一次打开仪器包装箱时,请对照装箱清单检查仪器和配件,若发现仪器或配件错误、配件不齐或是不正常,请与销售商或生产商联系。
杭州远方光电信息股份有限公司版权所有,未经许可不得复制和传播。
1版权申明The copyright of this manual and the related information belongs to EVERFINE,and it is protected by the copyright law of Peoples Republic of China and other relevant international treaties.Copying,modifying,spreading, excerpting,backing up or translating the whole or part contents of this manual by any company or personnel without the written permission of EVERFINE is prohibited.Otherwise it will be treated as infringement and the infringer will assume law responsibility and all loss of EVERFINE.Any infringement related above can be traced back to the responsible user by the unique product number printed in the manual.If EVERFINE has signed a written agreement with user and the contents in the agreement are in conflict with above terms,the contents in the written agreement have preferential force effect.本用户手册及包括的任何资料,其版权归远方公司所有,受中华人民共和国著作权法或国际相关法律保护。
PT980 用户手册

操作界面........................................................................................................................16
ac100240v5060hz10w最大3mw待机5452055590无凝结595无凝结12米250克156长mm72宽mm31高mmwincenet60可选linuxfccpart15classbceemcclassbcccnlscancompage8熟悉产品产品外观5121013143611151617181920okscanc1274fn891指示灯4蜂鸣器孔7主键盘10手写笔13产品标牌16电池盖锁19sim卡插槽2耳麦miniusb接口被动式5识读窗口8通讯口11侧按键f1414手带卡扣17复位孔20sd卡插槽3侧按键f136液晶屏9ic卡插槽12红外通讯口15序列号标签18电池触点21sam卡插槽nlscancompage9熟悉产品指示灯和键盘1234okscanc678105fn91gprs指示灯gprs模块上电但sim卡未
熟悉产品........................................................................................................................9
产品外观 .................................................................................................................................................9 指示灯和键盘 ..........................................................................................................................................10 底座 ..........................................................................................................................................................11 枪把 ..........................................................................................................................................................12
FP93参数及程序简易操作说明

按 PTN 可返回 按⌒(圆弧形箭头)键设置步运行时间(画面 2-2):tIA/0001
范围:00.00~99.59(时间单位参照 3 程序时间选择) 按⌒(圆弧形箭头)键设置步 PID(画面 2-3):PIdn/0
1. 程序/定值选择
按 GRP 选择 FIX 定值参数画面群(画面 3-0):FIX/SEt 按⌒(圆弧形箭头)键(画面 3-1):FIX/on
ON 定值模式 OFF 程序模式
2. 定值设定值设定
方法一:按 GRP 选择 FIX 定值参数画面群(画面 3-0):FIX/SEt 按⌒(圆弧形箭头)键设定定值运行温度值(画面 3-2):F_SV/0
4. 程序设置
在基本窗口下按 GRP 选择程序窗口群(画面 1-0):ProG/SEt 按⌒(圆弧形箭头)键设置曲线 1 的起始值(画面 1-1):S_SV/50 按⌒(圆弧形箭头)键设置曲线 1 的结束步(画面 1-2):EStP/10
设定范围:1~改组曲线的最大步数 时序信号 TS1、TSs2 及报警信号 EV1、EV2 没使用时不需要设置。 按⌒(圆弧形箭头)键设置曲线的循环次数(画面 1-14):Pcnt/1
ห้องสมุดไป่ตู้
此处设置为 01:00(1h)
按 进行第二步 PID 设置: ↓
此处设置为 0
按 返回
,再按 进入第三步 参数设置
第三步目标值: ↓
按 进行第三步运行时间: ↓
按 进行第三步 PID 设置: ↓ 依次往后设置即可
此处设置为 150℃ 此处设置为 02:00(2h)
ad9833使用案例
ad9833使用案例
AD9833是一款用于产生频率可编程的正弦波和方波信号的数字频率合成器(DDS)。
以下是AD9833的使用案例:
1. 连接硬件:
- 将AD9833芯片插入电路板上的相应插槽。
- 连接芯片的引脚到其他电路元件,如电源、时钟源和输出。
2. 配置寄存器:
- 使用SPI或I2C接口与AD9833进行通信。
- 通过写入寄存器来配置AD9833的工作模式、频率和相位。
- 可以配置频率控制字寄存器(Frequency Control Word Register)和相位控制字寄存器(Phase Control Word Register)。
3. 配置输出:
- 选择输出波形类型(正弦波、方波或三角波)。
- 配置输出频率和相位。
- 设置输出幅度。
4. 启动AD9833:
- 启动AD9833芯片以开始产生输出信号。
- 配置时钟源,选择外部时钟源或内部时钟源。
5. 监测输出:
- 监测AD9833产生的输出信号,可以使用示波器或其
他测试设备。
- 确保输出频率、相位和波形符合预期。
6. 调整输出:
- 根据需要,可以通过重新配置寄存器来调整输出信号
的频率、相位和幅度。
- 可以使用微控制器或其他控制设备来实时调整AD9833
的配置。
需要注意的是,AD9833的具体使用方法可能会因为使用的
开发平台、编程语言和应用环境的不同而有所差异。
因此,建议参考AD9833的数据手册和相关的应用笔记来获取更详
细和具体的使用指南。
帕莱恩技术Pliant MicroCom 900XR系统操作手册说明书
Phone +1.334.321.1160Toll-Free 1.844.475.4268 or 1.844.4PLIANT Fax +1.334.321.1162COPYRIGHT © 2020 Pliant Technologies, LLC. All rights reserved. Pliant ®, MicroCom ™, and the Pliant “P” are trademarks of Pliant Technologies, LLC. All other trademarks are property of their respective owners.CONTENTSIntroduction (1)What’s Included with MicroCom 900XR? (2)Controls (3)Display Indicators (3)Setup (4)Battery (4)Operation (5)Menu Settings (6)Device Specifications (8)Product Care and Maintenance (9)Product Support (9)License Information (10)Pliant Warranty Statement (11)INTRODUCTIONWe at Pliant Technologies want to thank you for purchasing MicroCom 900XR. MicroCom 900XR is a robust two-channel full-duplex multi-user wireless intercom system that operates in the 900MHz frequency band to provide superior range and performance, all without the need for a basestation. The system features lightweight belt packs and provides exceptional sound quality, enhanced noise cancellation, and long-life battery operation. In addition, the MicroCom’s IP67-rated belt pack is built to endure the wear and tear of everyday use, as well as the extremes in outdoor environments. In order to get the most out of your new MicroCom 900XR, please take a few moments to read this manual completely so that you better understand the operation of this product. This document applies to models PMC-900XR and PMC-900XR-AN*. For questions not addressed in this manual, feel free to contact the Pliant Technologies Customer Support Department using the information on page 9.*PMC-900XR-AN is approved for use in Australia and New Zealand and operates within the 915–928 MHz frequency range.PRODUC T FEATURES• Robust Two Channel System• Simple to Operate• Up to 10 full-duplex Users• Pack to Pack Communication• Unlimited Listen-Only Users• 900 MHz Frequency Band• Frequency Hopping• Ultra Compact, Small and Lightweight• Rugged, IP67-Rated Belt Pack• Long 12-hour battery life• Field Replaceable Battery• Available Drop-in ChargerWHAT’S INCLUDED WITH MICROCOM900XR?• Belt Pack• Li-Ion Battery (Installed during shipment)• USB Charging Cable• Belt Pack Antenna (Detached during shipment. Attach it to the belt pack prior to operation.)• Quick Start GuideOPTIONAL ACCESSORIES• PAC-USB5-CHG: MicroCom 5-Port USB Charger• PAC-MCXR-5CASE: IP-67-rated MicroCom Hard Carry Case• PAC-MC-SFTCASE: MicroCom Soft Travel Case• PBT-XRC-55: MicroCom XR 5+5 Drop-In Belt Pack and Battery Charger• PHS-SB11LE-DMG: SmartBoom® LITE Single Ear Pliant headset with Dual Mini connector for MicroCom• PHS-SB110E-DMG: SmartBoom PRO Single Ear Pliant headset with Dual Mini connector for MicroCom• PHS-SB210E-DMG: SmartBoom PRO Dual Ear Pliant headset with Dual Mini connector for MicroCom• PHS-IEL-M: MicroCom in-ear headset, single ear, left only• PHS-IELPTT-M: MicroCom in-hear headset with push-to-talk (PTT) button, single ear, left only • PHS-LAV-DM: MicroCom lavalier microphone and eartube• PHS-LAVPTT-DM: MicroCom lavalier microphone and eartube with PTT buttonCONTROLSDISPLAY INDICATORSStatus/Charge LED Power ButtonTalk ButtonHeadset ConnectionUSB Charger ConnectionVolume +/– ButtonsMode Button OLED Screen AntennaChannel Button Master Pack Indicator Battery Status Mode IndicatorSignal Indicator Talk Indicator Lock Indicator User Role Active Channel Volume LevelSETUP1. Attach the belt pack antenna. It is reverse threaded; screw counter-clockwise.2. Connect a headset to the belt pack.3. Power on. Press and hold the POWER button for two (2) seconds, until the screen turns on.4. Access the menu. Press and hold the MODE button for 2 seconds, until the screen changes to<SETTING MODE>. Short-press MODE to scroll through the settings, and then scroll through setting options using VOLUME +/−. Press and hold MODE to save your selections and exit the menu.a. Select a Group. Select a group number from 00–51 (or 00-24 for PMC-900XR-AN model).Important: Belt packs must have the same group number to communicate.b. Select an ID. Select a unique ID number.• 5u mode ID options: M, 01–04, S, or L• 10u mode* ID options: M, 01–09, S, or L• One pack must always use the “M” ID and serve as the master pack for proper system function. An “M” indicator designates the master pack on its OLED.• Listen-only packs must use the “L” ID. You may duplicate ID “L” on multiple belt packs.• Shared packs must use the “S” ID. You may duplicate ID “S” on multiple belt packs, but only one shared pack may talk at a time.• When using “S” IDs, the last full-duplex ID (“04” in 5u mode or “09” in 10u mode) cannot be used.c. Confirm pack’s Security Code. Belt packs must use the same security code to worktogether as a system.*10u mode is the default setting. See page 7 for information about changing mode. BATTERYThe rechargeable Lithium-ion battery is installed in the device at shipment. To recharge the battery, either 1) plug the USB charging cable into the device USB port or 2) connect the device to the drop-in charger (PBT-XRC-55, sold separately). The LED in the top right corner of the devicewill illuminate solid red while the battery is charging and will turn off once the battery is fully charged. The battery charge time is approximately 3.5 hours from empty (USB port connection) or approximately 6.5 hours from empty (drop-in charger). The belt pack may be used while charging, but doing so may lengthen battery charge time.OPERATION• LED Modes - LED is blue and double blinks when logged in and single blinks when logged out. LED is red when battery charging in progress. LED turns off when charging is complete. • Lock - To toggle between Lock and Unlock, press and hold the TALK and MODE buttons simultaneously for 3 seconds. “Lock”appears on the OLED when locked. This function locks the Talk and Mode buttons, but it does not lock headset volume control or the Power or Channel buttons.• Volume Up and Down - Use the + and − buttons to control theheadset volume. “Volume” and a stair-step indicator display the belt pack’s current volume setting on the OLED. You will hear a beep in your connected headset volume is changed. You will hear adifferent, higher-pitched beep when maximum volume is reached.• Talk - Use the Talk button to enable or disable talk for the device. “TALK” appears on the OLED when enabled. »Latch talking is enabled/disabled with a single, short press of the button. »Momentary talking is enabled by pressing and holding the button for 2 seconds or longer; talk will remain on until the button is released. »Shared users (“S” ID), can enable talk for their device with the momentary talking function (press and hold while talking.) Only one Shared user can talk at a time.• Channel - Use the Channel button to toggle between the channelsenabled on the belt pack.• Out of Range Tones - The user will hear three quick tones when the belt pack logs out of the system, and they will hear two quick tones when it logs in.OPERATING MULTIPLE MICROCOM SY STEMS IN ONE LOC ATIONEach separate MicroCom system should use the same Group and Security Code for all belt packs in that system. Pliant recommends that systems operating in proximity to one another set their Groups to be at least ten (10) values apart. For example, if one system is using Group 03, anothersystem nearby should use Group 13.Figure 1: Lock IndicatorFigure 2: Volume SettingFigure 3: Talk Indicator Figure 4: Channel IndicatorMENU SETTINGSThe following settings are adjustable from the belt pack menu.1. To access the menu, press and hold the MODE button for 3 seconds, until the screen changes to<Setting Mode>.2. Short-press the MODE button to scroll through the settings: Group, ID, Side Tone, Mic Gain,Channel A, Channel B, and Security Code.3. While viewing each setting, you may scroll through its options using the VOLUME+/− buttons;then, continue to the next menu item by pressing the MODE button. See the Table below for the available options under each setting.4. Once you have finished your changes, press and hold MODE to save your selections and exit themenu.*10u mode is the default setting. See page 7 for information about changing mode.RECOMMENDED SET TINGS BY HE ADSE TThe following table provides recommended MicroCom settings for several common headset models.TECH MENU - MODE SE T TING CHANGEChanging your MicroCom 900 XR packs to use “5u” mode limits the number of users to 5 but allows for greater RF range for those users.1. Access the belt pack’s Tech Menu by simultaneously pressing and holding the CHANNEL andMODE buttons until <Tech Menu> displays.2. Scroll between the “5u” (5 users) and “10u” (10 users) options using the VOLUME+/− buttons.3. Press and hold MODE to save your selections and exit the Tech menu. The belt pack willautomatically power off.4. Press and hold the POWER button for two (2) seconds; the belt pack will power back on and willbe using the newly selected mode.DEVICE SPECIFICATIONS* Notice about Specifications: While Pliant Technologies makes every attempt to maintain the accuracy of the information contained in its product manuals, that information is subject to change without notice. Performance specifications included in this manual are design-centered specifications and are included for customer guidance and to facilitate system installation. Actual operating performance may vary. Manufacturer reserves the right to change specifications to reflect latest changes in technology and improvements at any time without notice.** PMC-900XR-AN is approved for use in Australia and New Zealand and operates within the 915–928 MHz frequency range.PRODUCT CARE AND MAINTENANCEClean using a soft, damp cloth.CAUTION: Do not use cleaners that contain solvents. Keep liquid and foreign objects out of the device openings. If the product is exposed to rain, gently wipe off all surfaces,cables, and cable connections as soon as possible and allow unit to dry before storing. PRODUCT SUPPORTPliant Technologies offers technical support via phone and email from 07:00 to 19:00 Central Time (UTC−06:00), Monday through Friday.1.844.475.4268 or +1.334.321.1160****************************************Visit for product support, documentation, and live chat for help. (Live chat available 08:00 to 17:00 Central Time (UTC−06:00), Monday through Friday.)RETURNING EQUIPMENT FOR REPAIR OR MAINTENANCEAll questions and/or requests for a Return Authorization Number should be directed to the CustomerServicedepartment(***************************************).Donotreturnany equipment directly to the factory without first obtaining a Return Material Authorization (RMA) Number. Obtaining a Return Material Authorization Number will ensure that your equipment is handled promptly.All shipments of Pliant products should be made via UPS, or the best available shipper, prepaid and insured. The equipment should be shipped in the original packing carton; if that is not available, use any suitable container that is rigid and of adequate size to surround the equipment with at least four inches of shock-absorbing material. All shipments should be sent to the following address and must include a Return Material Authorization Number:Pliant Technologies Customer Service DepartmentAttn: Return Material Authorization #205 Technology ParkwayAuburn, AL USA 36830-0500LICENSE INFORMATIONPLIANT TECHNOLOGIES MICROCOM FCC COMPLIANCE STATEMENT00004394 (FCCID: YJH-GM-900MSS)00004445 (FCCID: YJH-GM-24G)This equipment has been tested and found to comply with the limits for a Class B digital device, pursuant to Part 15 of the FCC Rules. These limits are designed to provide reasonable protection against harmful interference in a residential installation. This equipment generates, uses and can radiate radio frequency energy and, if not installed and used in accordance with the instructions, may cause harmful interference to radio communications. However, there is no guarantee that interference will not occur in a particular installation. If this equipment does cause harmful interference to radio or television reception, which can be determined by turning the equipment off and on, the user is encouraged to try to correct the interference by one of the following measures:• Reorient or relocate the receiving antenna.• Increase the separation between the equipment and receiver.• Connect the equipment into an outlet on a circuit different from that to which the receiver is connected.• Consult the dealer or an experienced radio/TV technician for help.C AUTIONModifications not expressly approved by the party responsible for compliance could void the user’s authority to operate the equipment.FCC Compliance Information: This device complies with Part 15 of the FCC Rules. Operation is subject to the following two conditions: (1) This device may not cause harmful interference, and (2) this device must accept any interference received, including interference that may cause undesired operation.IMPORTANT NOTEFCC RF Radiation Exposure Statement: This equipment complies with FCC RF radiation exposure limits set forth for an uncontrolled environment.The antennas used for this transmitter must be installed to provide a separation distance of atleast 5 mm from all persons and must not be co-located or operating in conjunction with any other antenna or transmitter.C ANADIAN COMPLIANCE STATEMENTThis device contains licence-exempt transmitter(s)/receiver(s) that comply with Innovation, Science and Economic Development Canada’s licence-exempt RSS(s). (Specifically RSS 247 Issue 2 (2017-02) and RSS-GEN Issue 5 (2019-03). Operation is subject to the following two conditions:• (1) This device may not cause interference.• (2) This device must accept any interference, including interference that may cause undesired operation of the device.PLIANT WARRANTY STATEMENTCrewCom® and MicroCom™ products are warranted to be free from defects in materials and workmanship for a period of two years from the date of sale to the end user, under the following conditions:• First year of warranty included with purchase.• Second year of warranty requires product registration on the Pliant website.Tempest® professional products carry a two-year product warranty.All headsets and accessories (including Pliant-branded batteries) carry a one-year warranty.The sole obligation of Pliant Technologies, LLC during the warranty period is to provide, without charge, parts and labor necessary to remedy covered defects appearing in products returned prepaid to Pliant Technologies, LLC. This warranty does not cover any defect, malfunction, or failure caused by circumstances beyond the control of Pliant Technologies, LLC, including but not limited to negligent operation, abuse, accident, failure to follow instructions in the Operating Manual, defective or improper associated equipment, attempts at modification and/or repair not authorized by Pliant Technologies, LLC, and shipping damage. Products with their serial numbers removed or effaced are not covered by this warranty.This limited warranty is the sole and exclusive express warranty given with respect to Pliant Technologies, LLC products. It is the responsibility of the user to determine before purchase that this product is suitable for the user’s intended purpose. ANY AND ALL IMPLIED WARRANTIES, INCLUDING THE IMPLIED WARRANTY OF MERCHANTABILITY, ARE LIMITED TO THE DURATION OF THIS EXPRESS LIMITED WARRANTY. NEITHER PLIANT TECHNOLOGIES, LLC NOR ANY AUTHORIZED RESELLER WHO SELLS PLIANT PROFESSIONAL INTERCOM PRODUCTS IS LIABLE FOR INCIDENTAL OR CONSEQUENTIAL DAMAGES OF ANY KIND.PART S LIMITED WARRANT YReplacement parts for Pliant Technologies, LLC products are warranted to be free from defects in materials and workmanship for 120 days from the date of sale to the end user.This warranty does not cover any defect, malfunction, or failure caused by circumstances beyond the control of Pliant Technologies, LLC, including but not limited to negligent operation, abuse, accident, failure to follow instructions in the Operating Manual, defective or improper associated equipment, attempts at modification and/or repair not authorized by Pliant Technologies, LLC, and shipping damage. Any damage done to a replacement part during its installation voids the warranty of the replacement part.This limited warranty is the sole and exclusive express warranty given with respect to Pliant Technologies, LLC products. It is the responsibility of the user to determine before purchase that this product is suitable for the user’s intended purpose. ANY AND ALL IMPLIED WARRANTIES, INCLUDING THE IMPLIED WARRANTY OF MERCHANTABILITY, ARE LIMITED TO THE DURATION OF THIS EXPRESS LIMITED WARRANTY. NEITHER PLIANT TECHNOLOGIES, LLC NOR ANY AUTHORIZED RESELLER WHO SELLS PLIANT PROFESSIONAL INTERCOM PRODUCTS IS LIABLE FOR INCIDENTAL OR CONSEQUENTIAL DAMAGES OF ANY KIND.。
PF9830通讯软件使用说明
P9830通讯软件使用说明
1.安装
将远方光盘插入光盘驱动器,进入光盘中的PF9830_X.XX,运行SETUP.EXE,即进入安装程序,完成安装。
安装完成后生成的PF9830.exe自动保存在在目标路径(默认为
C:\EVERFINE\PF9830_X.XX)。
2.启动
单击“开始”按钮,然后指向“所有程序”,进入“Everfine”菜单,单击PF9830.exe,或双击快捷方式,即进入PF9830通讯软件窗口主界面,如图1。
图1 PF9830通讯软件窗口主界面
3.参数设置选项
在PF9830通讯软件窗口的“测试”菜单栏下“通讯串口”里可以选择通讯串口,单击“开始测试”或工具栏中的,开始通讯。
“文件”菜单里的“新建”和工具栏里的可以打开一个新通讯窗口;“打
开”和工具栏里的可以打开已有的“.pf30”文件,“保存”和工具栏里的
可以保存当前数据文件,“另存为”可以保存新数据文件,“打印”和工具栏里的可以打印测量数据和产品信息,“最近文件”可以查看最近打开过的文件,“退出”选项可以退出该通讯软件。
当仪器数据通讯过后可以在“显示”菜单栏下的“产品信息”里填写相关内容。
选择“查看”菜单栏里的“工具栏”和“状态栏” 分别可以隐藏和显示工具栏和状态栏。
“帮助”菜单栏里的“关于PF9830”和工具栏里的可以查看该软件的版本号及相关信息。
三相智能电量测试仪(PF9830)使用规范
9、通过窗口C功能键,选择“TIME”,再按“开始”按钮,仪器开始测量消耗功率,测量结束后,按复位键退出“积分”功能。
10、当使用外部电压互感器(PT)或电流互感器(CT)时,按互感器的比率设定电压(窗口A)、电流(窗口B)、功率(窗口C)的变比系数。当变比指示灯亮时,表示变比功能开启,反之,则变比功能无效。
数测量程序,除功率因数(PF)在窗口B显示外,其余均在窗口A读取,通过“相选择”读取不同相线测试值,“功能”按钮选择读取不同的参数值。
5、电压及电流量程可按相应按钮在窗口C进行设定(电压600V/300V/150V,电流20A/4A/0.8A)。
6、按下谐波“分析”键后,该仪器可对电源的电压、电流谐波的参数进行测量,此时窗口A除显示谐波次数、总谐
波失真度(tHd)外,也可通过功能键显示其它测量参数。窗口B可选择显示电压各次谐波/总谐波失真的有效值(V)及相对值(V%)。窗口C可选择显示电流各次波/总谐波失真的有效值(A)及相对值(A%)、电压波峰比(Ucf)、电流波峰比(Icf)。
7、通过谐波分析的“设定”按钮可设定谐波失真计算模式MODE(有IEC及CSA两种计算模式)及谐波分析相线ELEM。
文件编号
三相智能电量测试仪(PF9830)使用规范
制订日期
2008年07月11日
页数:1/1
WI07.017-2008-007
修订日期
年月日版次:0Fra bibliotek一、适用范围版本
A
PF9830三相智能电量测试仪
二、操作步骤
1、将仪器的供电电源接入市电,被测相线串联接在大红柱A与其正下方的黑柱之间,通过仪器测量其电流参数。将
- 1、下载文档前请自行甄别文档内容的完整性,平台不提供额外的编辑、内容补充、找答案等附加服务。
- 2、"仅部分预览"的文档,不可在线预览部分如存在完整性等问题,可反馈申请退款(可完整预览的文档不适用该条件!)。
- 3、如文档侵犯您的权益,请联系客服反馈,我们会尽快为您处理(人工客服工作时间:9:00-18:30)。
P9830通讯软件使用说明
1.安装
将远方光盘插入光盘驱动器,进入光盘中的PF9830_X.XX,运行SETUP.EXE,即进入安装程序,完成安装。
安装完成后生成的PF9830.exe自动保存在在目标路径(默认为
C:\EVERFINE\PF9830_X.XX)。
2.启动
单击“开始”按钮,然后指向“所有程序”,进入“Everfine”菜单,单击PF9830.exe,或双击快捷方式,即进入PF9830通讯软件窗口主界面,如图1。
图1 PF9830通讯软件窗口主界面
3.参数设置选项
在PF9830通讯软件窗口的“测试”菜单栏下“通讯串口”里可以选择通讯串口,单击“开始测试”或工具栏中的,开始通讯。
“文件”菜单里的“新建”和工具栏里的可以打开一个新通讯窗口;“打
开”和工具栏里的可以打开已有的“.pf30”文件,“保存”和工具栏里的
可以保存当前数据文件,“另存为”可以保存新数据文件,“打印”和工具栏里的可以打印测量数据和产品信息,“最近文件”可以查看最近打开过的文件,“退出”选项可以退出该通讯软件。
当仪器数据通讯过后可以在“显示”菜单栏下的“产品信息”里填写相关内容。
选择“查看”菜单栏里的“工具栏”和“状态栏” 分别可以隐藏和显示工具栏和状态栏。
“帮助”菜单栏里的“关于PF9830”和工具栏里的可以查看该软件的版本号及相关信息。