(参考资料)神州数码防火墙命令
神州数码Juniper防火墙安装手册

Juniper防火墙安装手册神州数码(深圳)有限公司二零零五年十二月Juniper 防火墙安装手册项目编号 Juniper200601 文档名称 Juniper防火墙安装手册编写人完成日期 2006.01.18文档修订记录:日期修订版本修订内容修订人2005.12.18 V1.0 NSRP设置、L2TP设置梁文辉2005.12.19 V1.0 透明模式、故障排除技巧刘平、李滨2006.01.16 V1.0 NAT模式和路由模式安装张坤目录一、透明模式 (5)1.1 、网络结构图 (5)1.2、配置文件 (5)二、NAT模式 (8)2.1 、网络结构图 (8)2.2、安装步骤 (8)2.2.1 初始化配置 (8)2.2.2 管理功能设置 (11)2.2.3 安全区 (12)2.2.4 端口设置 (13)2.2.5 设置路由 (14)2.2.6 NAT设置 (16)2.2.7 端口服务 (19)2.2.8 定义策略 (21)三、路由模式 (24)3.1 、网络结构图 (24)3.2、安装步骤 (24)3.2.1 初始化配置 (24)3.2.2 管理功能设置 (27)3.2.3 安全区 (28)3.2.4 端口设置 (29)3.2.5 Route 模式设置 (30)3.2.6 设置路由 (31)3.2.7 定义策略 (32)四、动态路由 (35)五、VPN (35)5.1 C LIENT TO SITE (35)5.2 建立L2TP (44)5.2.1网络结构图 (44)5.2.2配置防火墙 (45)5.5.3 测试 (54)六、HA (56)6.1、网络拓扑结构图 (56)6.2、设置步骤 (56)6.3、命令行配置方式 (57)6.4、图形界面下的配置步骤 (61)七、故障排除 (65)7.1 常用TROUBLESHOOTING命令 (65)7.1.1 get system (65)7.1.2 get route (65)7.1.3 get arp (66)7.1.4 get sess (66)7.1.5 debug (67)7.1.6 set ffilter (68)7.1.7 snoop (69)7.2 T ROUBLESHOOTING ROUTE (70)7.2.1 Example 1- no route (70)7.2.2 Example 2- no policy (70)7.3 T ROUBLESHOOTING NAT (71)7.3.1 Interface NAT-src (71)7.3.2 policy NAT-src (71)7.3.3 policy NAT-dst (72)7.3.4 VIP (74)7.3.5 MIP (74)7.4 T ROUBLESHOOTING VPN (75)7.4.1 常用调试命令 (75)7.4.2 常见错误(以下日志是从VPN接收端收集) (76)一、透明模式1.1 、网络结构图接口为透明模式时,NetScreen设备过滤通过防火墙的数据包,而不会修改IP数据包包头中的任何源或目的地信息。
DCFW-1800GES系列防火墙简易使用手册

DCFW-1800G/E/S系列防火墙简易使用手册神州数码网络集团客服中心技术支持部第1章硬件说明 (4)第2章安装前准备 (4)2.1通过控制台接入防火墙(CLI) (4)2.2SSH远程管理方法 (4)2.3WEB页面管理方法 (5)2.4防火墙密码恢复方法 (6)2.5恢复出厂配置方法 (7)2.6防火墙升级方法 (8)2.7恢复备份版本方法 (10)2.8更改逻辑端口同物理端口对应关系方法 (11)2.9防火墙当前运行配置下载方法 (12)2.10防火墙出厂默认配置 (13)第3章功能配置 (13)3.1防火墙接口IP地址更改方法 (14)3.2防火墙默认网关配置方法 (15)3.3防火墙静态路由添加方法 (15)3.4服务(端口)添加方法(3.6及之前版本) (16)3.5安全规则添加方法(3.6及之前版本) (16)3.6动态NAT配置方法(3.6及之前版本) (18)3.7静态NAT配置方法(3.6及之前版本) (18)3.8端口映射配置方法(3.6及之前版本) (19)3.9日志记录方法(3.6及之前版本) (19)3.10源地址路由配置方法(3.6及之前版本) (26)第4章典型应用 (31)4.1常用路由模式的配置(3.6及之前版本) (31)4.2防火墙做PPTP拨号服务器的配置(3.6及之前版本) (42)4.3如何封堵病毒端口(3.6及之前版本) (48)关于本手册本手册主要介绍DCFW-1800G/E/S防火墙的常用配置方法,并举例进行说明,希望能够帮助用户快速的了解和使用DCFW-1800G/E/S防火墙。
如果系统升级,本手册内容进行相应更新,恕不事先通知。
第1章硬件说明无第2章安装前准备2.1 通过控制台接入防火墙(CLI)z将DCFW-1800防火墙console线缆一端和防火墙控制台端口相连,另一端与计算机的串口相连。
z打开计算机超级终端,将串口设置为如下模式:9600波特率,8个数据位,无奇偶校验位,1个停止位,无流控。
网御神州F3防火墙命令配置
dust> sysip add fe1 10.1.1.1 255.255.255.0 admin on ping on traceroute on
dust> sysip del 192.168.100.1
dust> sysip disp
dust> anti icmpflood fe1 1000
dust> anti pingofdeath fe1 800
dust> anti udpflood fe1 1000
dust> anti disp
#系统信息 sysinfo
dust> sysinfo disp
dust> sysinfo disp if
dust> limitp2p set [kazaa { permit|deny|limit}] // kazaa 协议限制
dust> limitp2p set [soul{ permit|deny|limit}] // soul 协议限制
dust> limitp2p set [winmx{ permit|deny|limit}] // winmx 协议限制
mngmailbox clear
mngmailbox disp
# 管理方式 mngmode
dust> mngmode ssh on
dust> mngmode ssh off
dust> mngmode disp
dust> mnghost add 192.168.10.1 “This is my host”
神州数码防火墙讲解PPT-4-接口高级配置

冗余接口(redundant IF)
• 冗余接口能够实现两个物理接口的备份。 一个冗余接口绑定到两个物理接口。一个 物理接口为主接口处理流向该冗余接口的 流量。另外一个接口作为备用接口在主接 口发生故障时升级为主接口继续处理流量
创建冗余接口
创建冗余接口
在全局配置模式下,输入以下命令可创建一个冗余接口并且进入冗余 接口配置模式;如果指定的接口名称已存在,则直接进入该接口的配 置模式: interface redundantNumber WebUI:访问页面“网络>接口”,从新建按钮旁的下拉菜单选择<冗 余接口>/<冗余子接口>
接口代理ARP
代理ARP功能是指安全网关接口在收到以不同网段IP 地址为目的IP的ARP请求报文时,以自己的MAC地址 作为源地址回应ARP请求。代理ARP功能仅使用于三 层接口。在接口配置模式下,使用以下命令配置接 口的代理ARP功能: proxy-arp [dns]
-proxy-arp -开启接口的代理arp功能。 -proxy-dns -当需要实现IP即插即用时,使用该参数
删除冗余接口
在全局配置模式下使用no interface redundantNumber 命令删除指定的
冗余子接口。
添加物理接口到冗余接口
WebUI:请按照以下步骤添加接口道冗余接口 1、访问页面“网络>接口”,点击以太网接口对应的编辑按 钮 2、为接口选择<无绑定安全域>。 3、选择输入冗余接口并从<接口组>下拉菜单中选择相应冗 接口
议程:接口高级配置
• 冗余接口 – 冗余接口介绍 – Lab • 集聚接口 – 集聚接口介绍 – Lab 其他接口功能 – 镜像接口 – 接口监控 – 接口代理ARP – 接口逆向路由 – 回环接口
神州数码防火墙讲解PPT-2-搭建配置环境

……
Copyright (c) 2001-2010 by DigitalChina Networks Limited. Product name: DCFW-1800S-L-V3 S/N: 0802049090018950 Assembly number: B056 Boot file is DCFOS-4.0R4.bin from flash Built by buildmaster2 2010/06/08 10:58:01
搭建配置环境
章节目标
• 通过完成此章节课程,您将可以:
● ●
●
了解系统构架的功能 根据需要选择配置环境 搭建配置环境
议程:搭建配置环境
系统构件
• 搭建配置环境
系统构件
外部存储
FTP/TFTP USB
DCFW Networks Device
Interface
RAM
Tables Buffers Running Config Serial cable
允许管理的接口 ethernet 0/0 http://192.168.1.1 用户名和密码为admin
配置接口(WebUI)
• 网络>接口 点击需配置接口右侧编辑按钮
编辑接口
• 网络>接口>基本配置
选择安全域类型 绑定到何安全域
↖
接口IP地址
开放管理服务 开放管理服务
配置默认路由(WebUI)
CLI:
Console connection (安全) Telnet (TCP/IP port 23) SSH(密文传输 TCP22)
WebUI:
HTTP port 80 (缺省tcp80,可以修改) HTTPS port443 (可以修改)
神州数码配置命令归纳(已更新)
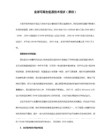
第一部分交换机配置一、基础配置1、模式进入Switch>Switch>enSwitch#configSwitch(Config)#interface ethernet 0/22、配置交换机主机名命令:hostname <主机名>3、配置交换机IP地址Switch(Config)#interface vlan 1Switch(Config-If-Vlan1)#ip address 10.1.128.251 255.255.255.0Switch(Config-If-Vlan1)#no shut4、为交换机设置Telnet授权用户和口令:登录到Telnet的配置界面,需要输入正确的用户名和口令,否则交换机将拒绝该Telnet用户的访问。
该项措施是为了保护交换机免受非授权用户的非法操作。
若交换机没有设置授权Telnet用户,则任何用户都无法进入交换机的Telnet配置界面。
因此在允许Telnet方式配置管理交换机时,必须在Console的全局配置模式下使用命令username <username>privilege <privilege> [password (0 | 7) <password>]为交换机设置Telnet授权用户和口令并使用命令authentication line vty login local打开本地验证方式,其中privilege选项必须存在且为15。
例:Switch>enableSwitch#configSwitch(config)#username test privilege 15 password 0 testSwitch(config)#authentication line vty login localSwitch(Config)#telnet-user test password 0 testSwitch (Config)#telnet-server enable://启动远程服务功能5、配置允许Telnet管理交换机的地址限制(单独IP或IP地址段)(1)限制单个IP允许Telnet登录交换机switch(config)#authentication security ip 192.168.1.2(2)限制允许IP地址段Telnet登录交换机switch(config)#access-list 1 permit 192.168.1.0 0.0.0.255switch(config)#authentication ip access-class 1 in5、为交换机设置Web授权用户和口令:web-user <用户名>password {0|7} <密码>例:Switch(Config)#web-user admin password 0 digital6、设置系统日期和时钟:clock set <HH:MM:SS> <YYYY/MM/DD>7、设置退出特权用户配置模式超时时间exec timeout <minutes > //单位为分钟,取值范围为0~3008、保存配置:write9、显示系统当前的时钟:Switch#show clock10、指定登录用户的身份是管理级还是访问级Enable [level {visitor|admin} [<密码>]]11、指定登录配置模式的密码:Enable password level {visitor|admin}12、配置交换机的用户名密码:username admin privilege 15 password 0 admin00013、配置enable密码为ddd:enable password 0 ddd level 1514、配置登录时认证:authentication line vty login local15、设置端口的速率和双工模式(接口配置模式下)命令:speed-duplex {auto | force10-half | force10-full | force100-half | force100-full | {{force1g-half | force1g-full} [nonegotiate [master | slave]] } }no speed-duplex二、单交换机VLAN划分1、VLAN基本配置(1)新建VLAN:vlan <vlan-id>(2)命名VLAN:name <vlan-name>(3)为VLAN 分配交换机端口Switch(Config-If-Vlan1)#switchport interface Ethernet 0/2(4)设置Trunk 端口允许通过VLAN:Switch(Config-ethernet0/0/5)#switchport trunk allowed vlan 1;3;5-202、划分VLAN:(1)进入相应端口:Switch(config)#interface Ethernet 0/2(2)修改模式:Switch(Config-ethernet0/0/5)switchport mode access(3)划分VLAN:Switch(Config-ethernet0/0/5)#switchport access vlan 4三、跨交换机VLAN划分(两台交换机作相同操作)1、新建VLAN2、划分VLAN3、修改链路模式(1)进入相应端口:Switch(config)#interface Ethernet 0/1(2)修改模式:Switch(config-if)#switchport mode trunk四、VLAN间主机的通信1、新建VLAN2、划分VLAN3、修改链路模式(1)进入相应端口:Switch(config)#interface Ethernet 0/1(2)修改模式:Switch(config-if)#switchport mode trunk注意:如果是三层交换机,在修改模式先封装802.1协议:Switch(config-if)#switchport trunk encapsulation dot1q4、建立VLAN子接口(1)、进入VLAN接口模式:Switch(config)#interface vlan 2(2)、设置VLAN子接口地址:Switch(config-if)#ip address 192.168.0.1 255.255.255.0 (3)、打开端口:Switch(config-if)#no shutdown5、设置各主机IP地址、子网掩码、网关注意:(1)各主机IP地址应与其所在的VLAN在同一网段。
神州数码dcfw1800系列安全网关命令手册40r4c
神州数码dcfw1800系列安全网关命令手册40r4c一、系统基本命令1. 登录与退出(1)登录网关admindcfw1800> enablePassword:admindcfw1800configure terminal输入管理员密码后,即可进入配置模式。
(2)退出网关admindcfw1800exit退出配置模式后,系统将返回用户模式。
2. 查看系统信息(1)查看系统版本admindcfw1800show version执行此命令,可以查看当前网关的软件版本、硬件版本等信息。
(2)查看系统状态admindcfw1800show system status执行此命令,可以查看网关的运行状态、CPU使用率、内存使用率等信息。
3. 配置系统时间(1)设置系统时间admindcfw1800clock set HH:MM:SS YYYYMMDD将HH:MM:SS替换为具体的小时、分钟和秒,将YYYYMMDD替换为具体的年、月、日。
(2)查看系统时间admindcfw1800show clock执行此命令,可以查看当前网关的系统时间。
二、接口配置命令1. 查看接口状态admindcfw1800show interface执行此命令,可以查看所有接口的状态、速率、双工模式等信息。
2. 配置接口(1)进入接口配置模式admindcfw1800interface <interfacetype> <interfacenumber>将<interfacetype>替换为接口类型(如GigabitEthernet),将<interfacenumber>替换为接口编号(如0/0)。
(2)设置接口描述admindcfw1800description <descriptiontext>将<descriptiontext>替换为接口描述信息。
(3)设置接口速率和双工模式admindcfw1800speed <speed> duplex <duplexmode>将<speed>替换为接口速率(如1000),将<duplexmode>替换为双工模式(如full或half)。
神州数码路由交换命令
特别注意交换机恢复出厂:set dfault write reloadfirewall enable#全局开启firewall enablefirewall default {permit | deny} 设置防火墙默认动作跟踪路由tracertTelnet,SSH远程登录路由器aaa authentication login default localaaa authentication enable default enableusername abc password 123enable password 0 123line vty 0login authentication default交换机Switch(config)# telnet-server enableSwitch(config)#username test privilege 15 password 0 testSwitch(config)#authentication line vty login localauthentication securityip <ip-addr> 配置Telnet登录到交换机的安全IP地址限制允许IP地址段Telnet登录交换机switch(config)#access-list1permit192.168.1.0 0.0.0.255switch(config)#authentication ip access-class 1 inSwitch(config)#ssh-server enableSwitch(config)#username test privilege 15 password 0 testSwitch(config)#authentication line vty login localSwitch(config)#interface vlan 1Switch(Config-if-Vlan1)#ip address 100.100.100.200 255.255.255.0ssh-server timeout <timeout> 设置SSH认证超时时间ssh-server authentication-retries <authentication-retires> 设置SSH认证重试次数switch(config)#ip http serverswitch(config)#username test privilege15password0 testswitch(config)#authentication line web login localswitch(config)#ip http secure-serverDHCPswitch(config)#service dhcpswitch(config)#ip dhcp pool vlan10switch(dhcp-vlan10-config)#network10.1.1.1 24switch(dhcp-vlan10-config)#default-router10.1.1.1中继:switch(config)#service dhcpswitch(config)#ip forward-protocol udp bootpsswitch(config-Vlan20)#ip help-address 10.1.1.1dhcp绑定,不允许手动配置ip地址#全局开启DHCP Snooping和DHCP Snooping绑定功能DHCP分配固定ip:switch(config)#ip dhcp excluded-address 10.1.1.2 10.1.1.10 不自动分配地址池switch(config)#ip dhcp pool 10switch(dhcp-vlan10-config)#host10.1.1.5switch(dhcp-vlan10-config)#default-router10.1.1.1switch(dhcp-vlan10-config)#hardware-address 00-0B-4C-9E-2a -1C绑定硬件地址#全局开启DHCP Snooping和DHCP Snooping绑定功能switch(config)#ip dhcp snooping enableswitch(config)#ip dhcp snooping binding enableswitch(config)#interface ethernet1/24switch(Config-Ethernet1/24)#ip dhcp snooping trust#设置E 1/1端口可以自动绑定DHCP获得的IP地址switch(config)#interface ethernet1/1switch(Config-Ethernet1/1)#ip dhcp snooping binding user-controlswitch(Config-Ethernet1/1)#exit#手动绑定PC 1的IP地址和MAC地址switch(config)#ip dhcp snooping binding user 00-11-11-11-11-11address 10.1.1.2mask 255.255.255.0vlan1interface 1/2路由器:Router_config#ip dhcpd enable //启动DHCP 服务Router_config#ip dhcpd pool 1Router_config_dhcp#network 192.168.1.0 255.255.255.0Router_config_dhcp#range 192.168.1.11 192.168.1.20Router_config_dhcp#lease 1 //定义租期Router_config_dhcp#dns-server 1.1.1.1 //定义DNS服务器地址Router_config_dhcp#default-router 192.168.1.1端口安全Switchport port-security lock 锁定安全端口,使pc只能通过此端口通信Switchport port-security convert 动态学习macMac-address-table blackhole address aa-bb-cc-dd-ee-ff vlan 30 mac表过滤端口操作端口IP mac绑定#全局打开AM功能Switch(config)#am enable#端口 1/1开启AM功能,绑定IPSwitch(config)#interface ethernet 1/1Switch(config-If-Ethernet 1/1)#am portSwitch(config-If-Ethernet 1/1)#am ip-pool 1.1.1.2 2Switch(config-If-Ethernet 1/1)#exit#端口 1/2开户AM功能,绑定IP、MACSwitch(config)#interface ethernet1/2Switch(config-If-Ethernet 1/2)#am portSwitch(config-If-Ethernet 1/2)#am mac-ip-pool00-44-44-44-44-44 1.1.1.4Switch(config-If-Ethernet 1/2)#exit端口限速Switch(config)#interface ethernet 1/1Switch(Config-If-Ethernet1/1)#bandwidth control10000both 限速10MB参数:both为端口收发时均进行带宽控制;receive为仅在端口接收数据时进行带宽控制;transmit为仅在端口发送数据时进行带宽控制。
- 1、下载文档前请自行甄别文档内容的完整性,平台不提供额外的编辑、内容补充、找答案等附加服务。
- 2、"仅部分预览"的文档,不可在线预览部分如存在完整性等问题,可反馈申请退款(可完整预览的文档不适用该条件!)。
- 3、如文档侵犯您的权益,请联系客服反馈,我们会尽快为您处理(人工客服工作时间:9:00-18:30)。
Configure static MAC address entry Configure the description of MAC address
解释
Enter configuration mode Import image/license/configuration to system
Export image/license/log/configuration/database/pktdumpfrom
system Reset functions or clear the screen
Configure ECMP route selection type Expand source NAT's port resource
Configure Flex QoS for IP queue Configure Flex QoS ramp-up rate
Configure flow Configure the work status of the flow on core0
Configure block notification Configure class map Configure clock time
Configure serial console functions
contentfilter contentfilter-profile
cwmp ddns dhcp-server dot1x ecmp-route-select expanded-port-pool flex-qos flex-qos-up-rate flow flow-on-core0 fragment ftp gratuitous-arp-send gtp-profile ha host-blacklist hostname http https im-profile interface
ip ipsec isakmp isp-network l2-nonip-action l2tp l2tp-include-ppp-acf language logging longlife-sess-percent mac-address-static mac-description mail-profile monitor nat nbc-user-notification nbtstat ntp password-policy pbr-policy
Configure address (address-group) Configure admin options Configure ALG options Configure application Configure static ARP entry Configure behavior profile
Configure global IP settings Configure IPSec parameters Configure ISAKMP parameters
Configure ISP Network Configure action for Layer-2 non-IP packets
Set l2tp pool name Send l2tp PPP packet with ACF Configure language of the system
DCFW-1800# configure DCFW-1800(config)# ?
aaa-server
address admin
alg app arp behavior-profile block-notification class-map clock console
Configure AAA server
Configure fragmentation parameter Configure ftp service
Configure gratuitous ARP send list Configure GTP Profile Configure HA Configure Host blacklist
Configure host name of the system Configure HTTP options Configure HTTPS options Configure IM profile Configure interface
Save configuration Show running system information Configure terminal line parameters
Trace route to destination Negate debugging functions Back to the default configuration
Configure content filter Configure content filter profile Configure parameters for cwmp Configure parameters for DDNS
Configurቤተ መጻሕፍቲ ባይዱ DHCP Server Configure 802.1X
神州数码防火墙命令
命令
Login:admin Password:admin DCFW-1800# ?
configure import
export
clear debug delete exec
exit help ping reboot remove rollback save show terminal traceroute undebug unset
Debugging functions Delete a file
Perform command operation Exit
CLI help Test network connectivity
Reboot system Remove nbc database Rollback startup with one backup