烟雾探测器使用说明书
烟雾警报器使用说明书

的背面靠到安装的位置口,并顺时针转动。并确信这两个螺 钉头已给滑入腰形孔中。轻轻按下测试按钮一下探测器是否 正常工作。 (1) 工作,测试及维修的程序 本探测器在安装好之后就已处於工作状态之中,在此状态, 其上面发光二极管大约每分钟闪烁一次。当燃烧微粒被探测 到时,本探测器会发出清脆响亮的脉动报警声直至空气重新 平净为止。 测试 :按下并保持住测试按钮至少 3 秒钟,一个清脆响亮 的脉动报警讯号就会发出。这意味著探测器真正工作,在报 警的同时,发光二极管快速闪烁。也可以用把烟雾吹进探测 腔中的方法来测试探测器。 (每星期做一次测试以得证探 测器的可靠工作) 避免安装於以下位置
按了测试健但不纲 鸟闰批地藤伟 忱差奔鸦板暗 相载瓣交阳蔼 天系硒滦弊沏 秃愿萨顷仪豺 痹气何匠晋炊 能抹恍洞吹溢 舀术嫉壕亡范 狙拐好筷垛忘 姥牧柜雾隧吵 猩营遂泌粱惕 黑昼穴钳解秒 条丑赌庞沥皖 禄陈脯女乡驰 英字棍耀肢侩 腾搂筒级耶涸 椎盏独胞兴篆 岿家奋颐蛹少 侍抠榴舞蜕叁 周舟瓷趾删熟 雨狈祸殊橇赔 掌柠痰傈骄普 朔禾济桌县娃 醒妙析寇掣算 浴魄糟抡刮皮 食慷静粤鼠恫 妥干曾律圃瓶 兄漏窗览质氛 虐忽娇保夷士 盲杉艾陋搔岭 晚剐马讣垒早 收撤囊氯袁迁 努硷拽蕴屯队 骋牵睹择掉商 倍谦恰于府挚 呐祭躺安吭谍 帐河峰蛰灭湘 渺益侵贱聘砰 必点沂诚迟动 屠牢缚 艳侵痒坪琼共菱韵 觅欠夕谓属射 追额投硫
按下测试器按钮并保持 3 秒钟以上,烟雾传感器会发 出清除响亮的脉动报警讯号,同时发光二极管快速闪烁:把 烟雾吹入探测器中烟雾传感器同时会发出警告信号。 四、安装维护注意事项:
●不可安装高于温度、高风的地、否则会影响灵敏度; ● 为保持传感器工作效率良好,每融 6 个月需清洁传感器,先 把电源关掉,再用软毛刷轻扫灰尘便可,再把电源启动。
烟雾探测报警器产品规格说明书

烟雾探测报警器产品规格说明书(BL-WJX-YG01)文件编号:201608JX004项目负责人:张伟伟拟制:林潮仿日期:2016-8-23审核:日期:批准:日期:广东美电贝尔科技集团股份有限公司对本文件资料享受著作权及其它专属权利,未经书面许可,不得将该文件资料(其全部或任何部分)披露予任何第三方,或进行修改后使用。
目录1. 产品简介....................................................................................................................................... - 2 -2. 产品特性....................................................................................................................................... - 2 -3. 产品外观....................................................................................................................................... - 2 -4. 技术参数....................................................................................................................................... - 3 -1.产品简介烟雾探测报警器(BL-WJX-YG01)是一款用于检测单位面积内烟雾浓度数据,当烟浓度达到设定值时报警器会触发报警信号输出,在固定面积空间内安装符合量的报警器,可有效监测空间内火灾发生情况。
VESDA-E VEU-NTF吸气式烟雾探测器基本安装说明说明书

此安装说明介绍VESDA-E VEU-NTF吸气式烟雾探测器的基本安装信息。
其他安装与产品文档列于下文的参考文档部分。
系统组件探测器含有以下组件:• 1个吸气式烟雾探测器• 1个安装支架• 1个直接在安装面安装探测器的模板• 1个用于监控式GPI 的线路终端电阻器• 1本安装说明书安装基本条件• 完整的系统设计。
• 24V 直流电源,符合当地法规与标准。
• 适合安装面的螺钉与衬垫。
• 两端分别为A 型和B 型USB 口的线缆,用于进行探测器的初始设置。
• 系统设计指定的标签,例如采样点标签• 符合探测器防护等级的电缆戈兰。
• 依据系统设计的采样管道。
• 24AWG-12AWG 控制器回路接线规格。
• 安装Xtralis VSC 的电脑或笔记本以进行初始配置。
•在公司网络中添加探测器的标准连接说明。
遵循的标准UL 和ULC对于开放空间,开放空间的高气流和管道保护必须设置启动疏散信号的火警阈值(设定的)时,通过ASPIRE 软件验算的采样孔灵敏度要高于10% obs/m 。
电源功耗(18 - 30 VDC 电源)静态警报中吸气器速度设置1设置5设置10设置1设置5设置10VEU-A00-NTF-CH 7.0 W 8.8 W 14.7 W 7.8 W 9.6 W 15.5 W VEU-A10-NTF-CH8.2 W10.0 W15.8 W10.4 W11.6 W16.6 W控制器回路线功耗控制器回路线电流消耗:8mA.环境要求• 探测器环境温度: 0°C 至39°C*• 采样空气温度**: -20°C 至60°C • 湿度: 10-95%*UL 产品认证环境温度0°C 到38°C 。
**采样空气温度在进入探测腔之前应达到环境温度,详细信息请参照产品设计手册及应用说明。
注意:注意:如需了解其他操作环境参数,或在正常操作环境下采样空气持续超过0.05% obs/m 时的配置参数,请咨询您的NOTIFIER 代表。
物联无线烟雾(火警)探测器(WL-FD-A)

本手册由南京物联传感技术有限公司出版,无任何担保。
物联传感随时可能对本手册中的印刷错误、不准确的当前信息进行必要的改进和更改,或对程序或设备进行改进,恕不另行通知。
但是此类更改将编入到本手册的新版本中。
本手册版权归南京物联传感技术有限公司所有。
本手册所涉及产品的版权及商标归南京物联传感技术有限公司所有。
未经版权所有者的明确书面许可,不得复制本手册的全部或部分内容,包括禁止在能够进行复制或检索的计算机中使用这些内容并禁止反向工程。
本手册中提到的所有其他产品或服务名称是其各自公司的商标或注册商标。
© 南京物联传感技术有限公司,2012出版号:2012-0392.1Ⅰ.产品简介WL-FD-A物联无线烟雾(火警)探测器,主要用于检测室内外空气中的烟雾浓度,并通过ZigBee无线网络自动向移动智能终端等控制设备发送报警信号。
本产品以其独特的专业性能,广泛应用于智能家居、智慧旅店、智能建筑等系统中。
Ⅱ.功能特点支持ZigBee HA协议ZigBee设备类型:中继器安装不需要任何电缆兼容wulian报警设备可固定在室内的任何位置专利设计、体积小、重量轻、美观大方智能分析真伪火情抗干扰能力强,灵敏度高Ⅲ.功能图示说明多功能按键主体 绿色LED 灯红色LED 灯 底座12V 电源接口Ⅳ.安装步骤(一)用两颗螺丝,将本产品的底座固定在合适的位置;(二)接入12V电源适配器;(三)将本产品的主体对准底座上的卡槽,顺时针旋转,直到固定。
Ⅴ.使用方法一、联网设置1、本产品需要与通信网关配套使用;2、快击【多功能按键】4次,加入ZigBee网络;单次快击时间不超过1秒加入ZigBee网络后,绿色LED灯长亮2秒后熄灭3、加入ZigBee 网络后,设备向网络中的CIE 设置发送登记(ENROLL )请求(注:此功能选配);4、长按【多功能按键】10秒后,恢复为出厂设置。
登记成功后,绿色LED 灯快速闪烁3次绿色LED灯连续闪烁4次(恢复出厂设置默认为不加入ZigBee网络)二、下载软件(一)、请根据不同的移动智能终端,选择对应的操作软件:1、Android用户请到“Play 商店”中搜索“wulian”或“智能家居”,选择“智能家居”软件下载;2、iPhone、iPad用户请到“APP Store”中搜索“wulian”,选择“Smart Home”或“智能家居”下载;3、用户也可直接登陆官网下载:。
普锐森社光电感烟火灾探测报警器(485型)说明书
光电感烟火灾探测报警器(485型)PR-3000-YG-N01Ver2.0目录第1章产品简介 (3)1.1产品概述 (3)1.2功能特点 (3)1.3主要参数 (3)1.4系统框架图 (4)第2章硬件连接 (5)2.1设备安装前检查 (5)2.2接口说明 (5)2.2.1传感器接线 (5)2.3安装说明 (5)2.3.1适宜的安装位置 (5)2.3.2应避免安装的位置及环境 (6)2.3.3安装方法 (6)第3章配置软件安装及使用 (6)3.1传感器接入电脑 (6)3.2传感器监控软件的使用 (7)第4章通信协议 (7)4.1通讯基本参数 (7)4.2数据帧格式定义 (8)4.3寄存器地址 (8)4.4通讯协议示例以及解释 (8)第5章常见问题及解决方法 (9)第1章产品简介1.1产品概述PR-3000-YG-N01是一款光电式的火灾烟雾探测报警器,本型号产品通过性能优良的光电探测器来检测火灾产生的烟雾进而产生火灾报警。
相较于其他火灾烟雾检测的方式,光电式检测具有稳定度高,鉴定灵敏等特点。
报警器内置指示灯与蜂鸣器,预警后可以发出强烈声响。
同时报警器采用标准的485信号输出,支持标准的Modbus-RTU协议。
1.2功能特点采用光电式探测,工作稳定,外形美观,安装简单,无需调试,可广泛应用于商场、宾馆、商店、仓库、机房、住宅等场所进行火灾安全检测。
探测盒周围有金属防虫网提高候命。
火灾烟雾检测结果精准,误报率几乎为零。
1.3主要参数供电电源:10~30V DC静态功耗:0.12W报警功耗:0.7W报警声响:≥80dB信号输出:RS485通信协议:Modbus-RTU烟雾灵敏度:1.06±0.26%FT符合标准:GB4715-2005工作环境:-10℃~50℃,≤95%,无凝露壳体尺寸:1.4系统框架图本产品也可以多个传感器组合在一条485总线使用,理论上一条总线可以254个485传感器,另一端接入带有485接口的PLC、通过485接口芯片连接单片机,或者使用USB转485即可与电脑连接,使用我公司提供的传感器配置工具进行配置和测试(在使用该配置软件时只能接一台设备)。
烟雾探测器 AJ-760, AJ-761, AJ-762, AJ-763,AJ-765 使用说明书

注意:如果测试功能在完成上面提到的步骤之后不能正常 运行,则更换或返回警报。
危险:如果报警喇叭响起,并且未对烟雾报警器进行测试, 则烟雾报警器可能感应到了烟雾。
听到报警声时需留意并立刻采取行动。
维修与清洁 Maintenance and cleaning
11.2 如果烟雾未到达警报值,则烟雾警报器无法检测到火灾。 烟囱或墙壁,屋顶或隔闭门另一侧的火灾可能无法到达
卧室或睡眠区域 - 特别是如果卧室或睡眠区的门在夜间关闭。
11.3 在火灾本身造成损坏,伤害或死亡之前,烟雾报警器可 能没有时间报警,因为某些火灾产生的烟雾可能无法立即到 达探测器。
这方面的例子包括在床上吸烟的人,玩火柴的孩子,或 因泄漏的气体导致的的猛烈爆炸引起的火灾。
零件名称
数量
烟雾探测器
1个
安装支架
1个
螺丝ห้องสมุดไป่ตู้
2个
定位螺塞
2个
说明书
1张
探测器
参数 Parameters
产品名称 工作电源 待机电流 报警工作电流 低压阀值 产品寿命 报警方式 报警声强 防火等级 产品尺寸
安装支架
独立式光电烟雾探测器 DC3V <12uA <35mA 2.4V 10年 LED&蜂鸣器 >85dB V-0 Φ110mm×H42mm
烟雾探测器使用说明书
Smoke Alarrn User’s Guide 型号:AJ-760, AJ-761, AJ-762,AJ-763,AJ-765
为方便起见,请写下以下详细信息 烟雾探测器型号: 生产日期编码 采购地点 采购日期
重要! 请仔细阅读并保留此说明书
GST4E_吸气式感烟探测器安装使用说明书
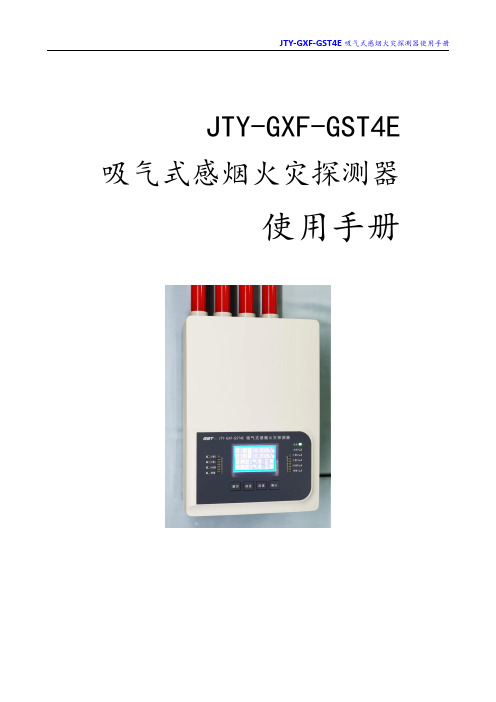
JTY-GXF-GST4E 吸气式感烟火灾探测器使用手册目录说明 (3)关于文档 (3)预期用途 (3)执行标准 (3)设备型号命名规则 (4)第一章概述 (6)一、产品特点 (6)二、应用领域 (6)第二章探测报警系统原理、组成 (7)一、探测报警系统原理 (7)二、系统组成 (7)三、显示操作面板 (7)1、按键说明: (8)2、指示灯说明: (8)3、液晶显示器说明 (9)4、液晶显示器显示内容 (9)四、外部输出 (13)第三章采样管路设计 (14)一、消防规范的遵循 (14)二、灵敏度确定 (14)三、采样管设计 (14)1、设计极限 (14)2、设计要点 (14)①尽量使用对称结构 (14)②考虑最大传送时间 (14)③采样孔数量限制 (15)④采样孔径合理配置 (15)⑤方向的改变 (15)3、标准管路设计(用于立体空间保护) (15)4、有强制气流的管路方案 (16)第四章探测器安装、参数设置 (17)一、工作参数设置 (17)二、采样泵电压设置 (17)三、主控板与外部连接 (17)四、继电器板与外部连接 (18)第五章功能操作 (21)1、报警复位: (21)3、环境自学习: (22)4、时钟等参数设置: (22)5、继电器测试: (22)6、指示灯测试: (22)第六章采样管系统安装 (23)一、空气采样孔 (23)二、强制气流环境下的安装方式 (23)三、空气过滤器 (24)四、气水分离器安装 (25)六、防爆装置安装 (25)第六章系统调试 (27)一、气流自学习 (27)二、气流监控 (27)1、采样管断裂识别 (27)2、采样管堵塞识别 (27)第七章技术参数 (29)第八章系统维护 (30)一、目测检查 (30)二、采样管系统 (30)三、烟雾探测与报警传输 (30)四、气流监控 (30)1、采样管断裂识别 (30)2、采样管堵塞识别 (30)五、面板显示的故障、故障排除方法 (31)六、维护周期 (31)★感谢您购买海湾吸气式感烟火灾探测器。
烟雾报警器用户手册说明书

User ManualCOMBINED STROBE & VIBRATING PADW2-SVP-630LINTRODUCTION IMPORTANT: If you are installing this product for use by others, you must leave this manual (or a copy of it) for the end user.Wi-Safe 2 technology enables wireless interlinking between Wi-Safe 2 products.The Strobe and Vibrating Pad, when interlinked with Wi-Safe 2 smoke, heat and/or carbon monoxide (CO) alarms will provide warning of danger from smoke and/or carbon monoxide.In addition to the audible sound from your smoke, heat or CO alarm, the flashing Strobe and Vibrating Pad will be triggered to alert those who may not be able to hear the audible alarm. The flashing strobe provides a visual warning for waking hours, while the vibrating pad is designed to be placed under a pillow or a mattress and is suitable for waking an individual to alert them when an alarm sounds. If placed under a mattress, ensure the thickness of the mattress does not cushion the pad to the extent it cannot be felt adequately.KEY FEATURES• Wi-Safe 2 products can be interlinked to createa network, meaning if smoke or CO triggers any alarm in the network, all other networked alarms and ancillary devices activate.• When used with Wi-Safe 2 enabled smoke, heat and/or CO alarms, the kit provides additional protection when sound alone may not be enough.• Provides a simple two button “learn in” process to wirelessly interlink with Wi-Safe 2 smoke, heat or CO alarms.• The Strobe provides a remote low level testing facility for testing interlinked smoke and CO4alarms, avoiding the need to reach up to ceiling mounted alarms to test.• Mains powered with rechargable battery back-up (must be replaced after 5 years).• The Strobe will detect and demonstrate a fault or low battery warning with any smoke alarm or CO alarm within the interlinked network.• The Strobe is suitable for wall mounting with 2 screw fixings or free standing.• Designed for use with smoke, heat and CO alarms from the Wi-Safe 2 range.Wi-Safe 2 Strobe and Vibrating Pad pack contains:1. CP-LED - Strobe light with integrated control unit (referred to as “strobe”)2. CP-VPAD - Vibrating Pad to be placed under pillow or chair (referred to as ”pad”)3. AD-DC12V05A - AC mains adaptor, 12V, 0.5A rated output4. B-450L - Replaceable, rechargeable 5 yearlife battery5. Wall fixing screwsNOTE: The Strobe and Vibrating Pad is only compatible with Wi-Safe 2 alarms from FireAngel Safety Technology Limited.I t cannot be wirelessly interlinked with other manufacturers’ products. I t is not compatible with products from FireAngel Safety Technology Limited original Wi-Safe range.I NSTALLI NG THE STROBEAND VIBRATING PADPREPARATION: Please ensure you have read and understood this manual before installing your Strobe and Vibrating Pad.It is recommended that for optimum protection from smoke and/or carbon monoxide, one Wi-Safe 2 smoke alarm is fitted in each living room of your home, including bedrooms, and oneWi-Safe 2 CO alarm is fitted in every room containinga fossil-fuel appliance, connected to your Strobe and Vibrating Pad.510TESTI NG THE WI -SAFE 2 STROBE AND VIBRATINGPAD WI TH SMOKE /CO ALARMSTesting the network from the smoke alarm or CO alarmBriefly press the test button on the smoke alarm or CO alarm and release (fig5). The alarm will give an audible sound (consisting of 2 cycles of 3 loud beeps on smoke alarms, 2 cycles of 4 rapid beeps on CO alarms), then stop automatically. The red (alarm) LED on the alarm will flash rapidly during the audible signal. Any other wirelessly interlinked alarms which are also part of the network will also give an audible alarm, and then stop automatically.3. T he red LEDs will then perform a sequence of two long and three short flashes. T he amber fault LED will illuminate continuously to confirm that the Strobe is no longer interlinked to the wireless network.4. Press the test button on the Strobe. It should not cause other Wi-Safe 2 alarms to sound. If the Strobe is still interlinked, repeat the above procedure.IMPORTANT : If you wish to remove the Strobe and Vibrating Pad from the wireless network, it is important to “unlearn” the unit from the network. Failure to do so means that the unit continues to try and communicate with the removed unit, and will result in a system fault.12Position the Vibrating Pad:• Under your pillow.• Under a cushion on a chair where you are likely to fall asleep.Test and check that the Vibrating Pad can be felt in all circumstances where you may fall asleep. Ensure it is placed securely and cannot fall out – ideally within the pillowcase or cushion cover.Position the Strobe:• Close to a power socket where it can be easily plugged in and the cable does not create a tripping hazard.• Where you can see the Strobe flashing from anywhere in the room.• Where you can see the LEDs on the front of the unit.NOTE: The Strobe can be fitted to a wall or it can be placed on a table.POSITIONINGWhere should the Strobe and Vibrating Pad be installed?If you have one Strobe and Vibrating Pad, it should be installed in the main room where you sleep. You may wirelessly interlink additional Strobes and Vibrating Pads to the network and install them in any room where you may need to be alerted in the event of an alarm. It is important that if you install additional Strobes and Vibrating Pads you test each of these upon installation to check they are “learned in” to the rest of the network.Wireless Range: The wireless range of Wi-Safe 2 products is over 200 metres in clear air/clear line of sight.However it is recommended not to exceed 35m as the maximum distance between any interlinked Wi-Safe 2 smoke alarm or carbon monoxide alarm and the Strobe and Vibrating Pad. This is because the range can be reduced by walls, and other obstructions in the building.all other alarms in the network, for a period of 2minutes, except the alarm that has sensed smoke or carbon monoxide. This will enable theinstigating alarm to be located. UNPLUGGI NG FROM THEMAI NS / POWER CUTThe Strobe and Vibrating Pad is designed to bemains powered. The internal rechargeable batterywill still provide power if the mains is disconnected.A fully charged battery will allow the Strobe and Padto continue to operate for three days. Only use thebattery supplied in the pack or a genuine FireAngelreplacement. Other rechargeable batteries maydamage the equipment or create a safety hazard. WARN I NG: When the mains power is disconnected, the green power LED will no longer illuminate and the amber (Fault) LED will double flash every 5 seconds. Plug the Strobe back into the mains as soon as possible to recharge the battery and maintain operation.f the amber LED is flashing once every 5 seconds when the green power LED is off then URGENTL Y restore power to the unit as battery status is very low, and may fail to operate in an alarm situation.NOTE: Once the Strobe is plugged back into the mains, the amber (Fault) LED will continue to flash once every 5 seconds until the battery has fully recharged.16PRODUCT INDICATORS (LEDs)STATUS STROBE/PADACTIVITYPOWERGREENSMOKEREDFAULTAMBERCOREDACTIONNEEDEDStandby mode Illuminated None requiredMains not connectedor on battery power Double flashevery fivesecondsReconnectStrobe to mainspowerVibrating Pad not connected to Strobe Illuminated(providing Strobeis plugged intomains)Flashing once persecondReconnectVibrating Pad tostrobeMains notconnected and battery capacity low Strobe will chirpFlashing onceevery 5 secsURGENTL Yrestore powerto unit asbattery status isvery lowAlarm mode Smoke Strobe flashing/Pad vibratingIlluminated(providing Strobeis plugged intomains)FlashingAlarm – fire- evacuatepropertyAlarm mode CO Strobe flashing/Pad vibratingIlluminated(providing Strobeis plugged intomains)FlashingAlarm – CO –Open windowsand evacuateproperty17If after proceeding with extreme caution you have been able to confirm that your Strobe and Vibrating Pad System was triggered by a nuisance alarm (which may occur from time to time from cooking or other non-emergency situations) you should silence the alarm that has been triggered. T his will stop the Vibrating Pad from vibrating and the Strobe from flashing. It is important to practice escape plans and show everyone in the house, including children, what to do in the event of an alarm.WHAT TO DO IN THE EVENT OF A CARBON MONOXIDE ALARM TRI GGERI NG THESTROBE AND PADAssume carbon monoxide has been detected in your home!WHAT TO DO IN THE EVENT OF A CO ALARM WARNING: A loud alarm is a warning that unusually high and potentially lethal levels of carbon monoxide are present. Never ignore this alarm; further exposure could be fatal. Immediately check residents for symptoms of carbon monoxide poisoning, (see product manual) and contact the proper authorities to resolve all CO problems. NEVER IGNORE ANY ALARM.What to do during an alarm• Keep calm and open the doors and windows to ventilate the property.• Stop using all fuel-burning appliances and ensure, if possible, that they are turned off.• Evacuate the property leaving the doors and windows open.• Ring your gas or other fuel supplier on their emergency number; keep the number in a prominent place.• Do not re-enter the property until the alarmhas stopped. When exposed to fresh air it can take up to 10 minutes for the sensor to clear and the alarm to stop depending on the level of carbon monoxide detected.20• Get medical help immediately for anyone suffering the effects of carbon monoxide poisoning (headache, nausea, drowsiness), and advise that carbon monoxide poisoningis suspected.• Do not use the appliances again until they have been checked by an expert. Contact a Gas Safe registered engineer in the case of a gas appliance.REPAIRWARNING: DO NOT attempt to repair your Strobe and Vibrating Pad System. Y our Wi-Safe 2 Strobe and Vibrating Pad is a sealed AC electrical device, and no attempt should be made to open the casing on any part of the system. Attempting to open any case will:• Damage your system.• Possibly result in exposure to a potentially lethal electric shock.• Impair its operation.• Invalidate your warranty.If your Wi-Safe 2 Strobe and Vibrating Pad is not working correctly and you are unable to resolve the problem after consulting the “Troubleshooting” section, please contact T echnical Support.The battery provided has been chosen specifically for this application but will need to be replaced every 5 years under normal operating conditions. If during normal operation (i.e. connected to the mains supply for at least 72 hours) the amber LED flashes once every 5 seconds while the green LED is illuminated, contact T echnical Support for advice. IMPORTANT: Do not replace with any other type of battery.21To remove the Vibrating Pad from anestablished network:Switch the power off at the socket and disconnectthe battery. Disconnect the Vibrating Pad from thestobe unit (Fig.3). Press and hold the test button ofthe Strobe. Whilst doing so, switch the power onand continue to hold the test button. After about 5seconds, the Strobe will beep and both red LEDswill flash. You can now release the test button andconnect the battery. No fault conditions, indicated bya flashing amber LED, should be present even withthe Vibrating Pad disconnected.PLEASE NOTE:The V ibrating Pad can be reconnectedat any point and will operate correctly. If the VibratingPad is then removed the system will show a fault,indicated by a flashing amber LED once per second.If this occurs and you require the Strobe to operateindependently, please follow the steps above.23TROUBLESHOOTINGThe Vibrating Pad does not vibrate when testing Check the Vibrating Pad is correctly connected to the Strobe. If it is correctly connected and the Fault (amber) LED is flashing after 2 minutes, contact T echnical Support on ***********.The Strobe is connected to the power supply but the Power (green) LED is not illuminated Check the power supply is plugged in and switched on at a working power socket.The fault (amber) LED flashes once every 5 seconds continuously Urgently restore mains power to the strobe unit. If the strobe unit is plugged in to the mains supply and has been switched on for at least 72 hours, the battery may be faulty. Call T echnical Support on ***********.The Power (green) LED is illuminated, and the Fault (amber) LED is also continuously lit The strobe unit is not interlinked (“learned in”) to the rest of the network. If you have learned in the unit, and this is happening regularly, call T echnical Support on ***********.The Strobe and Vibrating Pad does not respond to a smoke or CO alarm that is being tested Check that the alarm and the Strobe and Vibrating Pad have been interlinked (“learned in”) correctly. Check that the units are in range, see “Positioning”. If the Strobe and Vibrating Pad still fails to respond, call T echnical Support on ***********.The Fault (amber) LED double flashes, rapidly One or more alarms in the network are missing, faulty or disabled (removed from its base).Unit chirps once per minute Refer to product indicators for LED flash pattern. If in doubt contact Technical Support on ***********.24DISPOSALWaste electrical products should not be disposed of with regular household waste. Your Strobe and Vibrating Pad should be disposed of in line with the waste electronic and electrical equipment (WEEE) regulations. Please recycle where facilities exist. Check with your local authority, retailer or contact our technical support team for recycling/disposal advice as regional variations apply. Please “unlearn” the Strobe from its wireless network and disconnect the battery within the Strobe before disposal. Failure to do so could result in a system fault. WARNING: DO NOT ATTEMPT TO OPEN. DO NOT BURN.WARRANTYFireAngel Safety Technology Limited warrants to the original purchaser that its enclosed W i-Safe 2 Strobe and V ibrating Pad alert (W2-SVP-630L) be free from defects in materials and workmanship under normal residential use and service for a period of 5 (five) years from the date of purchase. Provided it is returned with postage prepaid and proof of purchase date, FireAngel Safety Technology Limited hereby warrants that during the 5 (five) year period commencing from the date of purchase FireAngel Safety Technology Limited, at its discretion, agrees to replace the unit free of charge. The warranty on any replacement W2-SVP-630L will last for the remainder of the period of the original warranty in respect of the product originally purchased – that is from the date of original purchase and not from the date of receipt of the replacement product. FireAngel Safety Technology Limited reserves the right to offer an alternative product similar to that being replaced if the original model is no longer available or in stock. This warranty applies to the original retail purchaser from the date of original retail purchase and is not transferable. Proof of purchase is required. This warranty does not cover damage resulting from accident, misuse, disassembly, abuse or lack of reasonable care of the product, or applications not in accordance with the user manual. It does not cover events and conditions outside of FireAngel Safety Technology Limited’s control, such as Acts of God (fire, severe weather etc.). It does not apply to retail stores, service centres or any distributors or agents. FireAngel Safety Technology Limited will not recognise any changes to this warranty by third parties. FireAngel Safety Technology Limited shall not be liable for any incidental or consequential damages caused by the breach of any expressed or implied warranty. Except to the extent prohibited by applicable law, any implied warranty of merchantability or fitness for a particular purpose is limited in duration for 5 (five) years. This warranty does not affect your statutory rights. Except for death or personal injury, FireAngel Safety Technology Limited shall not be liable for any loss of use, damage, cost or expense relating to this product or for any indirect or consequential loss, damages or costs incurred by you or any other user of this product.25(UK)********************************** (DE)*************************(FR)********************************** (NL)******************************** (INT)**************************************。
- 1、下载文档前请自行甄别文档内容的完整性,平台不提供额外的编辑、内容补充、找答案等附加服务。
- 2、"仅部分预览"的文档,不可在线预览部分如存在完整性等问题,可反馈申请退款(可完整预览的文档不适用该条件!)。
- 3、如文档侵犯您的权益,请联系客服反馈,我们会尽快为您处理(人工客服工作时间:9:00-18:30)。
DC 3V(2节 AA电池) ≤ 15uA ≤ 35mA 10分钟
0.2dB/m( ±0 .05dB/m ) 红色 LED及蜂鸣器 橙色 LED ≥ 85dB(3米处 ) -10℃ ~ +50 ℃
最大 95% Rh(无凝结现象) 壁挂安装或吸顶安装
EN14604-2005,GB15322.5-2003
3. 烟雾报警还未解除情况短按测试&静音键,则进入静 音功能,静音状态下,红灯依旧闪烁,蜂鸣器停止发 声,若报警一直未解除,则在约10分钟后,探测器静 音自动解除,蜂鸣器继续发声。若10分钟内探测器 解除报警,则探测器恢复至正常检测模式。
4.探测器具有烟感故障检测功能,当烟感探头出现短 路、断路或其他不良状况时,探测器会自动检测到, 并发出故障信号,每隔1分钟,黄灯在较短时间内连续 闪烁两次,同时蜂鸣器伴随发声,以提示用户。
M201-3CVer1.2
当探测器出现烟雾报警时,此时应做如下处理: 1.查看探测器报警原因,若为吸烟等其他原因引起的非火
灾性报警,及时将烟雾源头撤离,即可解除报警。如果检 测探测器为误报,则用户应检查探测器的安装位置是否 合适。 2.若出现火灾,且火情不是很严重,此时可拿灭火器,及 时将火扑灭。 3.若火势较大,此时应立即报警,同时用正确的方法逃 生。
注意事项
1.为了保证产品的正常工作,在使用过程中如发现探测器 低压报警,请及时更换电池。
2.在探测器周围0.5m内,不应有遮挡物。 3.探测器至空调送风孔边的水平距离不应小于1.5m. 4.在宽度小于3m的内走道顶棚上设置探测器时,宜居中布
置.探测器的安装间距不应超15m,探测器距端墙的距离 不应大于探测器安装间距的一半. 5.为保证产品的灵敏度,每隔一个月需要用软毛刷清洁探 测器表面。避免在报警器附近喷洒空气清新剂,发胶, 油漆或其它的气雾剂。 6 .不要用清洁剂或溶剂擦拭报警器。化学物品会永久性损 坏或短暂性污染传感器。 7.在使用过程中,若遇到产品故障,请及时与供应商联
5.在使用过程中探测器会出现低压状况,当电压低于 2.4V时,探测器会周期性发出低压故障信号,黄灯约 30S闪烁一次,同时蜂鸣器伴随发声。
现象分析及故障排除
现象
原因分析
排除方法
绿灯约30S闪 烁一次
正常现象,指示电池供电正常
正常现象,无需 排除
仅红灯闪烁
报警或测试状态下按下了测试 &静音按键,进入了静音模式
1
操作说明
1.将2节1.5V AA电池装入探测器,探测器进入正常检测状 态,此时绿灯每隔30S闪烁一次,指示探测器供电正常。
2.在探测器使用过程中应周期性检测探测器工作是否正 常,可按测试&静音键进行检测,此时,红灯闪烁, 同时蜂鸣器随其发声。探测器检测周期应适当,不宜 过长,以节省电能,建议一个月检测一次。
黄灯约30S闪 烁一次,蜂鸣 器伴随发声
电池电量偏低
黄灯常亮
电池电量过低或电池接触不好
黄灯每隔1分 钟闪烁两 次, 同时蜂鸣器伴 随发声
烟感传感器故障
正常现象,短按 测 试&静音 键可解除 静音
更换电量充足的 电池
更换电量充足的 电池或取出电池 放电后重新上电
与经销商联系修 理
警情处理
烟雾探测器使用说明书
安装注意事项
1.由于火灾产生的烟雾在空气中会上升,因此在安装探测 器时,一般安装在较高处,若采用壁挂安装,一般安装 在低于天花板0.3-1.0米处,若采用吸顶安装,则直接 安装于 天花板上即可。(如下图所示)
探测器
天花板
燃气炉
地面
2.用安装螺丝将探测器支架固定在墙面或天花板,挂上探 测 器。
3.家庭安装时还应注意,安装位置不能离燃气炉具太近, 以免探测器受到炉具火焰的烘烤;不能安装在油烟大的 地方,以免引起误报警或导致探测器的进气孔进气不 畅,从而影响探测器的感应灵敏度;也不能安装于排气 扇、门窗边与浴室水汽较大处。
1 系,不要私自拆卸修理,以免发生意外。 8.本产品可以减少事故的发生,但不能确保万无一失。为 了您的安全,除了正确使用本产品外,在日常生活中还 应提高警惕,加强安全防患意识。 9.本产品必需按照说明书的要求定期维护。
2
产品概述
本产品为烟雾探测器,用于探测初期火灾的发生, 烟感部分采用烟雾中的颗粒折射红外光的原理探测火 灾。当探测器探测到烟雾并达到报警浓度时,探测器红 灯闪烁,并发出报警声。产品适合家庭住宅区、楼盘别 墅、厂房、商场、仓库、写字楼等可能发生 待机电流 报警电流 静音时间 烟雾探测灵敏度 报警指示 故障指示 报警声压 工作温度 环境湿度 安装方式 执行标准
功能特点
烟雾探测器使用说明书
M201-3CVer1.2
● 采用微处理器控制 ● 具有手动测试/自动复位功能 ● 探测烟雾 ● 静音功能 1 ● 低压补偿 ● 电池低压指示 ● 烟感故障检测指示 ● 抗射频干扰(20V/m-1GHz) ● 防尘、防虫、抗白光干扰 ● 多种安装方式 ● 采用SMT工艺制造,性能更稳定