Halcon学习之四:有关图像生成的函数
Halcon学习之四:有关图像生成的函数
6. regiongrowing (Image, Regions, 3, 3, 1, 100) 7. * 生成 ImageMean 8. region_to_mean (Regions, Image, ImageMean) 9. * 将 Region 转换为二进制图像 10. region_to_bin (Regions, BinImage, 255, 0, 512, 512) 11. * 将 Region 转换为 Label 图像 12. region_to_label (Regions, ImageLabel, 'int4', 512, 512)
实验结果:
* 读取图像 read_image (Image, 'G:/Halcon/机器视觉/images/bin_switch/bin_switch_2.png' * 复制图像 copy_image (Image, DupImage) * 区域生长算法 regiongrowing (Image, Regions, 3, 3, 1, 100) * 生成ImageMean region_to_mean (Regions, Image, ImageMean) * 将Region转换为二进制图像 region_to_bin (Regions, BinImage, 255, 0, 512, 512) * 将Region转换为Label图像 region_to_label (Regions, ImageLabel, 'int4', 512, 512)
Halcon 学习之四:有关图像生成的函数
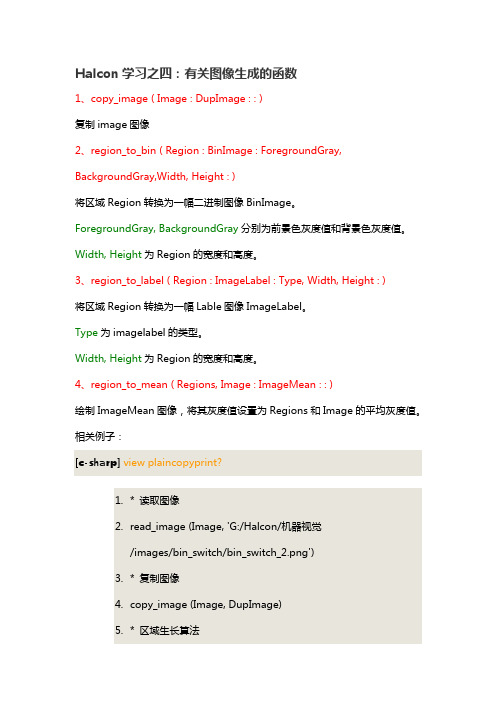
1、copy_image ( Image : DupImage : : ) 复制 image 图像 2、region_to_bin ( Region : BinImage : ForegroundGray, BackgroundGray,Width, Height : ) 将区域 Region 转换为一幅二进制图像 BinImage。 ForegroundGray, BackgroundGray 分别为前景色灰度值和背景色灰度值。 Width, Height 为 Region 的宽度和高度。 3、region_to_label ( Region : ImageLabel : Type, Width, Height : ) 将区域 Region 转换为一幅 Lable 图像 ImageLabel。 Type 为 imagelabel 的类型。 Width, Height 为 Region 的宽度和高度。 4、region_to_mean ( Regions, Image : ImageMean : : ) 绘制 ImageMean 图像,将其灰度值设置为 Regions 和 Image 的平均灰度值。 相关例子: [c-sharp] view plaincopyprint? 1. * 读取图像 2. read_image (Image, 'G:/Halcon/机器视觉 /images/bin_switch/bin_switch_2.png') 3. * 复制图像 4. copy_image (Image, DupImage) 5. * 区域生长算法
halcon的导函数
halcon的导函数导函数是Halcon中一类十分重要的函数,在对图像进行处理时起到了至关重要的作用。
导函数常常被用来检测视觉中不同物体之间的边界和轮廓以及图像的特征提取等。
在Halcon中,导函数包括一系列不同的函数,本文将会详细介绍几种常用的导函数及其使用方法。
1. EdgeAmplitudeEdgeAmplitude函数可以用来检测图像中的边缘,并将其转换为灰度图像。
该函数的参数包括输入图像、输出图像以及各种边缘检测的参数。
用户可以根据需求调整这些参数以实现最优的边缘检测效果。
2. EdgeAngleEdgeAngle函数可用于检测图像中的边缘方向。
该函数的参数包括输入图像、输出图像以及边缘检测的参数。
EdgeAngle可以返回的边缘方向信息有不同的表示方式,包括绝对方向和相对方向。
绝对方向是自图像水平方向开始逆时针旋转的角度,而相对方向是与前一个边缘线段的夹角。
3. SobelAmplitudeSobelAmplitude函数可以用于进行Sobel算子实现的灰度图像边缘检测。
该函数的参数包括输入图像、输出图像以及各种算子的参数。
SobelAmplitude可以检测灰度图像中的水平和竖直边缘,返回的是使得边缘检测算法取得最大梯度值时使用的边缘方向。
4. SobelAngleSobelAngle函数也可用于Sobel算子边缘检测,并返回Sobel算子的边缘方向信息。
SobelAngle函数的参数包括输入图像、输出图像以及各种算子的参数。
SobelAngle可以返回的是使得边缘检测算法取得最大梯度值时使用的边缘方向。
总之,以上4种导函数是Halcon中常用的导函数之一,可以用于图像边缘和特征提取等应用,但需要根据实际需要调整函数参数以实现最优的效果。
除了上述介绍的导函数外,Halcon中还有其他导函数,可以根据实际需要进行探究和使用。
halcon的gen_contours_skeleton_xld用法
Halcon的gen_contours_skeleton_xld用法一、简介在H al co n图像处理软件中,`g en_c on to u rs_s ke le to n_xld`是一个非常有用的函数,用于生成一组特定形状的轮廓或骨架。
本文将介绍该函数的基本用法及其在图像处理中的应用。
二、g e n_c o n t o u r s_s k e l e t o n_x l d函数概述`g en_c on to ur s_ske l et on_x ld`函数是H al co n图像处理库中的一个函数,其用途是基于输入的轮廓或骨架数据,生成新的轮廓或骨架数据。
该函数的基本语法如下:```p yt ho ng e n_co nt ou rs_s kel e to n_xl d(Co nt our s:t up le,M od e:str i ng,M et r ic:s tr in g,Le ngt h:i nt)```参数说明:-C on to ur s:输入轮廓或骨架数据;-M od e:轮廓或骨架生成模式;-M et ri c:度量类型;-L en gt h:长度控制参数。
三、使用示例下面通过几个具体的示例介绍`g en_c on to u rs_s ke le to n_xld`函数的使用方法。
1.生成轮廓首先,我们将使用`g e n_po ly go ns_x ld`函数生成一个轮廓,然后通过`ge n_co nt ou rs_s k el et on_x ld`函数生成新的轮廓。
代码如下:```p yt ho ng e n_po ly go ns_x ld([100,200,300],[200,400,300],C ont o ur)g e n_co nt ou rs_s kel e to n_xl d(Co nt our,'c on to ur','l e ng t h',20)```在这个例子中,我们先使用了`g en_p ol yg o ns_x ld`函数生成一个三角形轮廓,并将其保存在变量`C on to ur`中。
halcon 函数gamma_image 函数说明 -回复

halcon 函数gamma_image 函数说明-回复Function Overview:The gamma_image function is a powerful tool in the Halcon software library. It allows users to adjust the gamma correction of an image. Gamma correction is a technique used to alter the brightness levels of an image in a non-linear fashion. This function has several parameters that can be adjusted to achieve the desired effect.Step 1: Understanding Gamma CorrectionGamma correction is used to modify the brightness levels of an image to match the characteristics of a display device. It is essential because human perception of brightness is not linear; our eyes perceive changes in brightness logarithmically. Gamma correction is applied to achieve a more visually pleasing image by compensating for the non-linear response of the display.Step 2: Analyzing the Function ParametersThe gamma_image function has several parameters that need to be understood before using it effectively. These parameters include the input image, the gamma factor, the minimum intensity, and the maximum intensity. Let's delve into each parameter in detail:- Input Image: This parameter specifies the image upon which gamma correction will be applied. It can be a grayscale or color image. The image can be stored in memory or loaded from a file.- Gamma Factor: The gamma factor is the most critical parameter in the function. It determines the amount of gamma correction applied to the image. A value less than 1 reduces the brightness, while a value greater than 1 increases it. The gamma factor directly influences the overall contrast of the image.- Minimum Intensity: This parameter sets the minimum intensity level of the output image. Any pixel with an intensity below this value will be adjusted to the minimum value. It can be useful for excluding dark areas from gamma correction.- Maximum Intensity: This parameter sets the maximum intensity level of the output image. Any pixel with an intensity above this value will be adjusted to the maximum value. It can be useful for excluding bright areas from gamma correction.Step 3: Applying Gamma CorrectionTo use the gamma_image function, follow these steps:1. Load an input image: This can be done using the appropriate Halcon function to read an image from file or capturing it from a camera.2. Set the desired gamma factor: Determine whether you want to increase or decrease the image's brightness. Experiment with different gamma values to achieve the desired effect.3. Adjust the minimum and maximum intensity values: If needed, set the range of intensity values you want to exclude from gamma correction. This helps retain the details in darker or brighter regions of the image.4. Call the gamma_image function: Pass the input image, gamma factor, minimum intensity, and maximum intensity as parameters to the function. It will perform the gamma correction and produce the output image.5. Display or save the output image: Use the appropriate Halcon function to display the adjusted image on-screen for visualinspection or save it to the disk for further analysis and processing.Step 4: Additional ConsiderationsHere are some additional points to keep in mind while using the gamma_image function:- Gamma correction can impact image details: Depending on the chosen gamma value, details in dark or bright regions of the image may be lost or enhanced. It is essential to find the right balance that preserves the crucial details.- Image quality considerations: Applying gamma correction can introduce artifacts or loss of information in the image. It is advisable to work with high-quality images and considerpost-processing techniques to alleviate these issues.- Optimization considerations: The gamma_image function can be computationally intensive for large images. Consider using optimized programming techniques or applying the function on smaller image patches to improve processing speed.In conclusion, the gamma_image function in Halcon is a versatiletool for adjusting the gamma correction of images. By understanding the function parameters and following thestep-by-step process, users can effectively apply gamma correction to enhance image brightness and contrast. It offers a wide range of possibilities for image enhancement and adaptation to different display devices with non-linear brightness characteristics.。
博客halcon学习经验

HALCON是当今machine vision技术的代表,它总是以最新科技为基础,提供了现今市场中最强大的vision library。
除了提供了完整的标准machine vision功能,还有一系列优异的功能,例如,3D相机校正,形状以及原件导向的匹配,次像元精度的物体撷取,计算,利用双像立体量测,任意形状的ROI,以及更多的功能。
用HALCON 来开发程序的流程:1 、利用 HDevelop 检视分析影像,建立计算雏形,最后完成视觉计算方法的发展。
程序可以分成不同的子程序,每个procedures 可以只做一件事,像初始化,计算,或是清除。
主程序用于呼叫其它子程序,传递影像或是接收显示结果。
最后,程序输出成我们要用的程序代码,接续下一步工作。
2 、完整的程序发展是在程序设计环境中进行,像是 Microsoft Visual Studio 。
由 HDevelop 输出的程序代码,透过指令加入程序中 ( 例如 include) 。
至于程序的接口等等则是利用程序语言的功能来建构,接下来, compiled and linked ,产生应用程序。
自行撰写的程序和 HALCON library 一起装入机器中出货,或是将程序卖到客户处。
参数和数据结构:HALCON 有两种基本的数据型态 : 图像数据 (iconic ,例如影像 ) 以及控制数据 ( control ,例如变量,整数,字符串,handle 等等 ) 。
所有运算子的参数都是以相同的方式排列:输入图像,输出图像,输入控制,输出控制。
当然,并非所有的运算子都具有上列四类参数,不过参数排列的次序依旧相同。
ROI :影像中要处理的数据范围。
region 即是一堆像元的集合。
region 中的像元不一定要相连,如果要让相连接的像元成为一个 region ,只要呼叫运算子 connection 即可。
XLD 包含了所有等值线以及多边型的数据。
XLD 对象中除了点坐标数据,还包含了全域或区域属性,例如 edge 方向,或是分割时的 regression 参数等等。
HALCON函数介绍

HALCON函数介绍HALCON函数介绍(转)sobel_amp( Image : EdgeAmplitude : FilterType, Size : )根据图像的一次导数计算图像的边缘close_edges( Edges, EdgeImage : RegionResult : MinAmplitude : )close_edges_length( Edges, Gradient : ClosedEdges : MinAmplitude, MaxGapLength : ) 使用边缘高度图像关闭边缘间隙。
输出的区域包含杯关闭的区域。
(感觉是对边缘的扩充)derivate_gauss( Image : DerivGauss : Sigma, Component : )watersheds( Image : Basins, Watersheds : : )从图像中提取风水岭。
zero_crossing( Image : RegionCrossing : : )零交点(二次导数)diff_of_gauss( Image : DiffOfGauss : Sigma, SigFactor : )近似日志算子( 拉普拉斯高斯) 。
laplace_of_gauss( Image : ImageLaplace : Sigma : )拉普拉斯高斯edges_color_sub_pix( Image : Edges : Filter, Alpha, Low, High : )精确的亚像素边缘提取(彩色图像)edges_sub_pix( Image : Edges : Filter, Alpha, Low, High : )精确边缘提取的亚像素(灰度图像)edges_color( Image : ImaAmp, ImaDir : Filter, Alpha, NMS, Low, High : )根据颜色进行边缘提取edges_image( Image : ImaAmp, ImaDir : Filter, Alpha, NMS, Low, High : )边缘提取skeleton( Region : Skeleton : : )计算区域的框架Skeleton == Regionfrei_amp( Image : ImageEdgeAmp : : )Frei-chen模板进行边缘检测(振幅)frei_dir( Image : ImageEdgeAmp, ImageEdgeDir : : ) Frei-chen 模板进行边缘检测(振幅和方向)nonmax_suppression_dir( ImgAmp, ImgDir : ImageResult : Mode : )使用方向图像抑制所有的超过给定最大值的图像灰度值的点gen_contours_skeleton_xld( Skeleton : Contours : Length, Mode : ) 将系统框架转换成XLD轮廓laplace( Image : ImageLaplace : ResultType, MaskSize, FilterMask : )使用有限差分计算拉普拉斯变换info_edges( : : Filter, Mode, Alpha : Size, Coeffs )估计滤波器的宽度kirsch_dir( Image : ImageEdgeAmp, ImageEdgeDir : : )使用Kirsch算子计算出边缘(振幅和方向)prewitt_amp( Image : ImageEdgeAmp : : )使用Prewitt 算子计算出边缘(振幅)kirsch_amp( Image : ImageEdgeAmp : : ) 使用Kirsch 算子计算出边缘(振幅)highpass_image( Image : Highpass : Width, Height : )从高频成分提取的图像。
halcon 几何变换

halcon 几何变换
Halcon是一款用于机器视觉应用开发的软件库,其几何变换功能可以用来对图像进行平移、旋转、缩放和仿射等变换操作。
在Halcon中,可以使用以下函数来实现几何变换:
1. affine_trans_image():用于对图像进行仿射变换,可以通过指定仿射矩阵来进行旋转、平移、缩放和错切等变换操作。
2. hom_mat3d_translate():用于对3D图像进行平移变换,可以通过指定平移向量来实现。
3. hom_mat3d_rotate():用于对3D图像进行旋转变换,可以通过指定旋转轴和旋转角度来实现。
4. projective_trans_image():用于对图像进行透视变换,可以通过指定透视矩阵来实现。
5. hom_mat2d_identity():用于创建2D仿射变换的单位矩阵,可以用来初始化变换矩阵。
这些函数可以在Halcon的开发环境中使用,详细的使用方法和参数说明可以参考Halcon的官
方文档。
halcon中的get_shape_model_contours
halcon中的get_shape_model_contours【原创版】目录1.概述 halcon 中的 get_shape_model_contours 函数2.get_shape_model_contours 函数的作用3.get_shape_model_contours 函数的使用方法4.get_shape_model_contours 函数的优点和局限性5.总结正文一、概述 halcon 中的 get_shape_model_contours 函数在计算机视觉领域,获取物体的边缘和轮廓是常见的任务之一。
为了实现这一目标,人们通常使用各种图像处理方法。
在 halcon 中,get_shape_model_contours 函数是一种有效的工具,可以帮助用户获取图像中物体的边缘和轮廓。
二、get_shape_model_contours 函数的作用get_shape_model_contours 函数的主要作用是提取图像中物体的边缘和轮廓。
它可以自动识别图像中的物体,并生成物体边缘和轮廓的模型。
这个模型可以用于许多应用,例如物体识别、物体跟踪和物体分割等。
三、get_shape_model_contours 函数的使用方法在使用 get_shape_model_contours 函数时,用户需要首先创建一个halcon 图像,并读取要处理的图像。
然后,用户需要调用get_shape_model_contours 函数,并将图像作为参数传递。
函数将返回一个结果,其中包含物体边缘和轮廓的模型。
四、get_shape_model_contours 函数的优点和局限性get_shape_model_contours 函数有许多优点,例如速度快、准确度高、易于使用等。
它可以在实时图像处理系统中快速提取物体的边缘和轮廓,因此非常适合用于实时物体识别和跟踪。
然而,get_shape_model_contours 函数也存在一些局限性。
- 1、下载文档前请自行甄别文档内容的完整性,平台不提供额外的编辑、内容补充、找答案等附加服务。
- 2、"仅部分预览"的文档,不可在线预览部分如存在完整性等问题,可反馈申请退款(可完整预览的文档不适用该条件!)。
- 3、如文档侵犯您的权益,请联系客服反馈,我们会尽快为您处理(人工客服工作时间:9:00-18:30)。
6. regiongrowing (Image, Regions, 3, 3, 1, 100) 7. * 生成 ImageMean 8. region_to_mean (Regions, Image, ImageMean) 9. * 将 Region 转换为二进制图像 10. region_to_bin (Regions, BinImage, 255, 0, 512, 512) 11. * 将 Region 转换为 Label 图像 12. region_to_label (Regions, ImageLabel, 'int4', 512, 512)
实验结果:
* 读取图像 read_image (Image, 'G:/Halcon/机器视觉/images/bin_switch/bin_switch_2.png' * 复制图像 copy_image (Image, DupImage) * 区域生长算法 regiongrowing (Image, Regions, 3, 3, 1, 100) * 生成ImageMean region_to_mean (Regions, Image, ImageMean) * 将Region转换为二进制图像 region_to_bin (Regions, BinImage, 255, 0, 512, 512) * 将Region转换为Label图像 region_to_label (Regions, ImageLabel, 'int4', 512, 512)
Halcon 学习之四:有关图像生成的函数
1、copy_image ( Image : DupImage : : ) 复制 image 图像 2、region_to_bin ( Region : BinImage : ForegroundGray, BackgroundGray,Width, Height : ) 将区域 Region 转换为一幅二进制图像 BinImage。 ForegroundGray, BackgroundGray 分别为前景色灰度值和背景色灰度值。 Width, Height 为 Region 的宽度和高度。 3、region_to_label ( Region : ImageLabel : Type, Width, Height : ) 将区域 Region 转换为一幅 Lable 图像 ImageLabel。 Type 为 imagelabel 的类型。 Width, Height 为 Region 的宽度和高度。 4、region_to_mean ( Regions, Image : ImageMean : : ) 绘制 ImageMean 图像,将其灰度值设置为 Regions 和 Image 的平均灰度值。 相关例子: [c-sharp] view plaincopyprint? 1. * 读取图像 2. read_image (Image, 'G:/Halcon/机器视觉 /images/bin_switch/bin_switch_2.png') 3. * 复制图像 4. copy_image (Image, DupImage) 5. * 区域生长算法