制冰机说明书 新
猛世制冰机说明书

猛世制冰机说明书
猛世制冰机是一种用于制作冰块的设备。
以下是其使用说明书:
1. 准备工作:
- 将猛世制冰机放置在平坦的台面上。
- 将冰箱与电源连接,并确保电源开关处于关闭状态。
- 确保水箱中已经加满适量的清水。
2. 打开电源:
- 将电源插头插入电源插座,并将电源开关打开。
- 此时,猛世制冰机将开始工作。
3. 选择制冰模式:
- 猛世制冰机通常提供不同的制冰模式,如普通冰块和透明
冰块。
- 选择您需要的制冰模式,通常通过旋转操作按钮来实现。
4. 开始制冰:
- 如果猛世制冰机配备了冰块制作模具,只需将其放置在指
定位置即可。
- 如果没有模具,则直接将水倒入水箱中。
5. 等待制冰完成:
- 根据不同的制冰模式,猛世制冰机可能需要几分钟或几小
时才能完成制冰过程。
- 在制冰过程中,请确保电源一直处于开启状态,并保持水
箱中的水位稳定。
6. 取出冰块:
- 当制冰完成后,猛世制冰机通常会发出响铃提示。
- 打开制冰机的冰箱门,并使用专用工具或手动取出冰块。
- 注意安全,避免手部直接接触冰块以防凍伤。
7. 关闭电源:
- 在使用完猛世制冰机后,确保将电源开关关闭,并拔掉电源插头。
请务必按照说明书的操作步骤来正确使用猛世制冰机。
如果有任何问题或疑问,请咨询相关专业人士或联系制造商的客户服务部门。
turboair制冰机说明(一)

turboair制冰机说明(一)
Turboair制冰机说明
简介
•Turboair制冰机是一款高效、可靠的制冰设备。
•适用于各类商业场所和家庭使用。
•本说明将为您提供详细的操作指南和维护要点。
功能特点
•快速制冰:Turboair制冰机采用高性能压缩机,能够快速制取大量冰块。
•多种规格:可根据需求选择不同规格的冰块尺寸。
•自动控制:具备智能控制系统,自动监测温度和制冰进程。
操作步骤
1.准备工作:
–确保Turboair制冰机接通电源并正常工作。
–确保制冰机内有足够的水。
2.选择制冰模式:
–根据需要,选择合适的制冰模式(例如制冰块、制冷水等)。
3.调整制冰时间:
–根据需求,设定制冰时间。
4.开始制冰:
–按下开始按钮,制冰机将开始运行。
5.检查制冰进程:
–观察制冰机的显示屏,确保制冰进程正常进行。
6.完成制冰:
–制冰完成后,制冰机会自动停止运行。
–打开制冰机门,取出制成的冰块或冷水。
维护要点
•定期清洁:每隔一段时间清洁制冰机内部,避免积累灰尘和污垢。
•及时排水:定期排放制冰机内部的残留水,保持机器内部清洁干燥。
•注意电源:使用过程中,注意电源插头的安全,避免受潮和损坏。
请按照以上步骤正确操作Turboair制冰机,并保养好设备,以保证其良好的性能和使用寿命。
如有更多问题,请参阅Turboair制冰机的详细说明书或联系售后服务部门。
制冰机使用说明书

制冰机使用说明书1. 引言制冰机是一种常见的厨房电器,能够在短时间内制备冰块,为人们的生活带来便利。
本使用说明书将提供详细的操作步骤和注意事项,以确保用户正确、安全地使用制冰机。
2. 准备工作2.1 检查包装在使用制冰机之前,请仔细检查包装是否完好,并核对是否收到以下配件:制冰机主体、冰块模具、电源适配器和使用说明书。
2.2 检查电源确保制冰机所处的电源稳定可靠,并检查电源适配器是否与型号一致。
3. 操作步骤3.1 清洗冰块模具将冰块模具取出,并使用洗涤剂和清水彻底清洗。
确保冰块模具干燥后,将其放回制冰机主体。
3.2 加水打开制冰机的水箱,确保水箱是干净的,并在标有“最高水位”线的注水口加入适量的清洁水。
3.3 连接电源将电源适配器连接到制冰机主体,然后将适配器插头插入电源插座。
请务必不要在相关操作时湿手或带有潮湿物品。
3.4 开机将制冰机的开关拨至“ON”位置,确认指示灯亮起。
此时,制冰机开始工作。
3.5 选择模式根据自己的需求选择制冰机的工作模式。
一般情况下,制冰机提供快速制冰和节能制冰两种模式可供选择。
将模式选择开关拨至相应位置。
3.6 制冰根据所选择的模式,制冰机将开始制冰。
在制冰的过程中,请勿随意拔掉电源或做其他干扰操作。
3.7 完成制冰制冰机制冰完成后,将会发出相应的提示音。
此时,您可以根据需要关闭制冰机并取出冰块。
4. 注意事项4.1 安全使用在使用制冰机时,请务必遵循以下安全事项:- 不要将手插入制冰机的工作区域或水箱;- 制冰机仅供家庭使用,请勿将其用于其他用途;- 在清洗、维修或移动制冰机时,务必先拔掉电源插头。
4.2 清洁与维护为确保制冰机的正常工作和延长使用寿命,请定期进行以下操作:- 清洁冰块模具和水箱;- 避免将制冰机长时间暴露在阳光直射下;- 定期检查电源适配器和电源线是否有损坏。
5. 故障排除5.1 制冰机无法正常启动- 检查电源适配器是否连接到电源插座;- 确保电源插座正常工作;- 检查电源适配器是否与制冰机连接牢固。
SD-700制冰机说明书
SD-700制冰机说明书
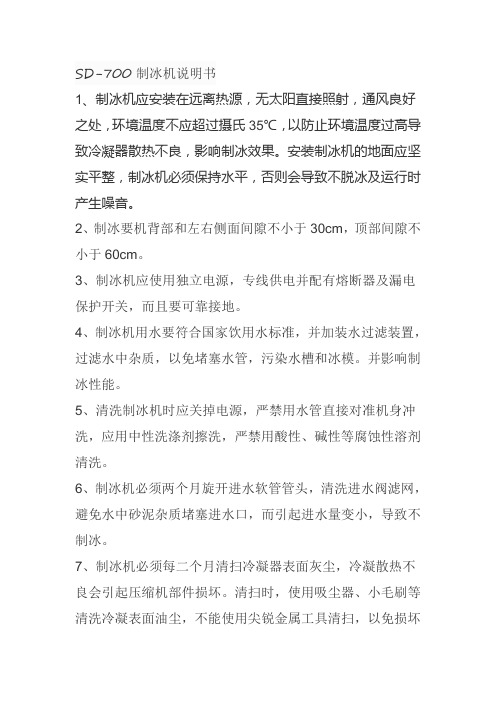
1、制冰机应安装在远离热源,无太阳直接照射,通风良好之处,环境温度不应超过摄氏35℃,以防止环境温度过高导致冷凝器散热不良,影响制冰效果。
安装制冰机的地面应坚实平整,制冰机必须保持水平,否则会导致不脱冰及运行时产生噪音。
2、制冰要机背部和左右侧面间隙不小于30cm,顶部间隙不小于60cm。
3、制冰机应使用独立电源,专线供电并配有熔断器及漏电保护开关,而且要可靠接地。
4、制冰机用水要符合国家饮用水标准,并加装水过滤装置,过滤水中杂质,以免堵塞水管,污染水槽和冰模。
并影响制冰性能。
5、清洗制冰机时应关掉电源,严禁用水管直接对准机身冲洗,应用中性洗涤剂擦洗,严禁用酸性、碱性等腐蚀性溶剂清洗。
6、制冰机必须两个月旋开进水软管管头,清洗进水阀滤网,避免水中砂泥杂质堵塞进水口,而引起进水量变小,导致不制冰。
7、制冰机必须每二个月清扫冷凝器表面灰尘,冷凝散热不良会引起压缩机部件损坏。
清扫时,使用吸尘器、小毛刷等清洗冷凝表面油尘,不能使用尖锐金属工具清扫,以免损坏
冷凝器。
8、制冰机的水管、水槽、储冰箱及保护胶片要每两个月清洗一次。
9、制冰机不使用时,应清洗干净,并用电吹风吹干冰模及箱内水分,放在无腐蚀气体及通风干燥的地方,避免露天存放。
思诺特制冰机SD120说明书
思诺特制冰机SD120说明书
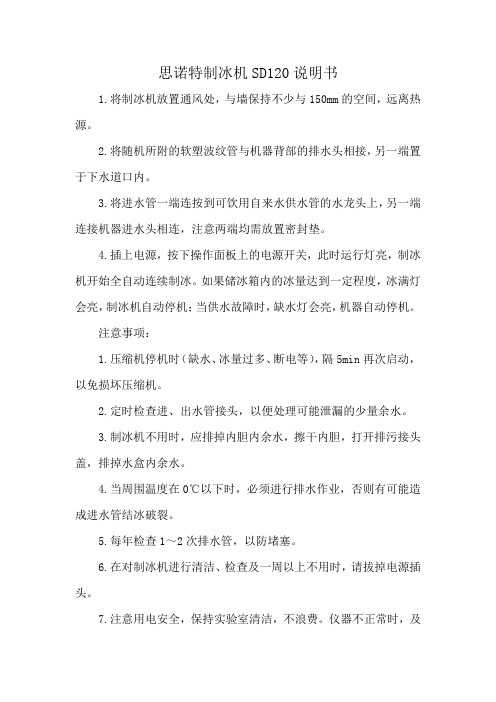
1.将制冰机放置通风处,与墙保持不少与150mm的空间,远离热源。
2.将随机所附的软塑波纹管与机器背部的排水头相接,另一端置于下水道口内。
3.将进水管一端连按到可饮用自来水供水管的水龙头上,另一端连接机器进水头相连,注意两端均需放置密封垫。
4.插上电源,按下操作面板上的电源开关,此时运行灯亮,制冰机开始全自动连续制冰。
如果储冰箱内的冰量达到一定程度,冰满灯会亮,制冰机自动停机;当供水故障时,缺水灯会亮,机器自动停机。
注意事项:
1.压缩机停机时(缺水、冰量过多、断电等),隔5min再次启动,以免损坏压缩机。
2.定时检查进、出水管接头,以便处理可能泄漏的少量余水。
3.制冰机不用时,应排掉内胆内余水,擦干内胆,打开排污接头盖,排掉水盒内余水。
4.当周围温度在0℃以下时,必须进行排水作业,否则有可能造成进水管结冰破裂。
5.每年检查1~2次排水管,以防堵塞。
6.在对制冰机进行清洁、检查及一周以上不用时,请拔掉电源插头。
7.注意用电安全,保持实验室清洁,不浪费。
仪器不正常时,及
时上报,不得自行处理。
制冰机说明书 新

制冰机PC板(新)使用指南ICE MACHINE PC BOARD USE MANUAL2008.12Contents一、C ircuit board layout1、Ice making PC board layout(back)…………………………………………………………2、Ice making external indicator small board layout……………………………………………………3、Ice making Infrared sensitivity small board layout………二、Fault indicator…………………………………………………………………………三、DIP switch………………………………………………………………………………….1、8-bit DIP switch……………………………………………………………………………..2、4-bit DIPswitch…………………………………………………………………………………………..四、Electrical wiring diagram………………………………………………………………………………1、Ice making PC board wring diagram…………………………………………………………2、Ice making external indicator small board wring diagram……………………………………………………3、Ice making sensor wring diagram………五、Infrared receiver sensitivity…………………………………………………………………………..1、Full ice sensor sensitivity settings……………………………………2、Full ice sensor sensitivity adjustment methods……………………………3、DIP switch setting methods table……………………………………一.线路板布局 ................................................................................................................... - 4 -1.制冰机PC板布局图_反面........................................................................................ - 4 -2.制冰机_外接指示灯小板布局 .................................................................................. - 6 -3.制冰机_红外灵敏度小板布局 .................................................................................. - 7 -二.故障指示灯 ................................................................................................................... - 7 -三.拨码开关 ....................................................................................................................... - 8 -1.八位拨码开关 ............................................................................................................ - 8 -2.四位拨码开关 ............................................................................................................ - 9 -四.接线图 ......................................................................................................................... - 10 -1.制冰机PC板接线图................................................................................................ - 10 -2.制冰机_外接指示灯小板接线图 ............................................................................ - 11 -3.制冰机传感器接线图 .............................................................................................. - 11 -五.红外接收灵敏度 ......................................................................................................... - 12 -1.冰满传感器灵敏度出厂设置 102.冰满传感器灵敏度调节方法 103.拨码开关设定方法表 10一.PC板布局1.制冰机PC板布局图_反面一、PC board layout1、Ice making PC board layout(back)2.制冰机_外接指示灯小板布局电源指示灯 冰满故障指示灯 缺水故障指示灯 冷凝故障指示灯/开机延时指示灯电机转速故障指示灯/蒸发故障指示灯3.制冰机_冰满传感器灵敏度小板布局二.故障指示灯绿色电源指示灯黄色冰满故障指示灯(长亮)黄色缺水故障指示灯(长亮)红色冷凝温度故障指示灯(长亮)/ 开机延时指示灯(闪烁)黄色电机转速故障指示灯(长亮)/ 蒸发温度故障指示灯(闪烁)*当电源频率低于45HZ/S超过5秒时,全部的指示灯同时闪烁图2-1三.拨码开关1.八位拨码开关(注意:重新设定拨码位置后要按复位键复位)开启开机延时检测取消蜂鸣器报警取消开机延时检测开启蜂鸣器报警选择1440RPM机型取消检验参数检测选择960RPM机型开启检验参数检测选择雪花机冰满传感器选择片冰机冰满传感器图3-1PC板上的中心位置上的八位拨码开关(图3-1)从左到右顺序。
睿美制冰机说明书

睿美制冰机说明书篇一:睿美制冰机说明书一、概述睿美制冰机是一种先进的制冰设备,可用于制作高质量、安全的冰块。
该制冰机采用高品质不锈钢材料制造,并配备了先进的制冰技术,可确保冰块的均匀性和质量。
二、功能与原理睿美制冰机具有以下几个功能:1. 制冰能力:睿美制冰机采用高速旋转的冰块旋转盘,产生大量冰晶,并在短时间内制出大量冰块。
2. 冰盘设计:睿美制冰机采用独特的冰盘设计,使冰块在制冰过程中更加均匀,确保冰块的质量和安全性。
3. 冰块尺寸:睿美制冰机可以根据需要调整冰块的大小,确保冰块符合要求,并能够适用于不同的应用场景。
4. 自动化控制:睿美制冰机采用智能化控制系统,可自动检测冰块的大小和形状,并自动调整制冰过程,确保冰块的质量和数量。
5. 维护和保养:睿美制冰机具有简单的维护和保养指南,以确保制冰机的正常运作。
三、使用方法1. 将睿美制冰机放置在平稳的地面上,并确保机器与墙壁、天花板等物体的距离适中。
2. 打开睿美制冰机的电源,并等待制冰过程开始。
3. 当制冰过程完成后,关闭睿美制冰机的电源,并断开水源。
4. 将睿美制冰机放置在干燥、通风的地方,进行维护和保养。
四、注意事项1. 在使用睿美制冰机时,应确保操作人员具有相关的制冰经验和技能。
2. 在使用睿美制冰机时,应确保机器在适当的温度下工作,以避免损坏。
3. 在使用睿美制冰机时,应避免与其他物品发生碰撞,以确保机器和物品的安全。
4. 在使用睿美制冰机时,应确保冰块的大小和形状符合要求,并确保冰块的质量和安全性。
篇二:睿美制冰机说明书致睿美制冰机的用户:感谢您选择睿美制冰机作为您冰块的生产和储存工具。
本说明书将为您提供关于睿美制冰机的基本信息和使用指南。
一、基本介绍睿美制冰机是一种先进的制冰机,可在短时间内制作出高质量、形状的冰块。
它采用不锈钢制造,并配备了坚固的结构,使制冰机在工作时更加稳定和安全。
该制冰机还可以根据需要调整冰的大小、形状和密度,以适应不同的冰块需求。
恒阳电器制冰机说明书
恒阳电器制冰机说明书
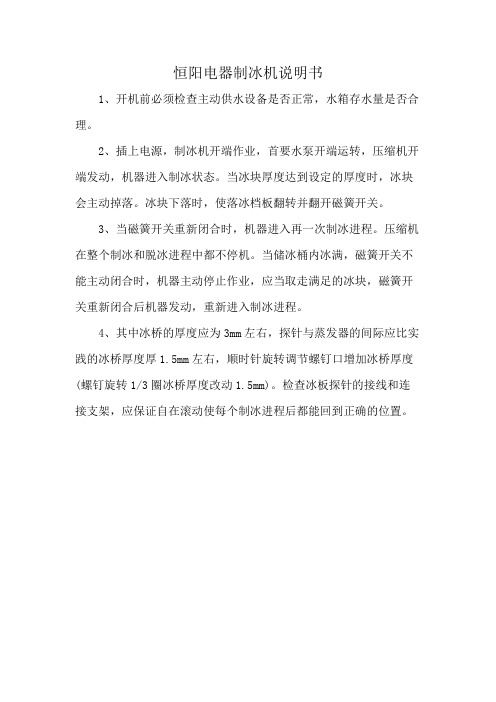
1、开机前必须检查主动供水设备是否正常,水箱存水量是否合理。
2、插上电源,制冰机开端作业,首要水泵开端运转,压缩机开端发动,机器进入制冰状态。
当冰块厚度达到设定的厚度时,冰块会主动掉落。
冰块下落时,使落冰档板翻转并翻开磁簧开关。
3、当磁簧开关重新闭合时,机器进入再一次制冰进程。
压缩机在整个制冰和脱冰进程中都不停机。
当储冰桶内冰满,磁簧开关不能主动闭合时,机器主动停止作业,应当取走满足的冰块,磁簧开关重新闭合后机器发动,重新进入制冰进程。
4、其中冰桥的厚度应为3mm左右,探针与蒸发器的间际应比实践的冰桥厚度厚1.5mm左右,顺时针旋转调节螺钉口增加冰桥厚度(螺钉旋转1/3圈冰桥厚度改动1.5mm)。
检查冰板探针的接线和连接支架,应保证自在滚动使每个制冰进程后都能回到正确的位置。
- 1、下载文档前请自行甄别文档内容的完整性,平台不提供额外的编辑、内容补充、找答案等附加服务。
- 2、"仅部分预览"的文档,不可在线预览部分如存在完整性等问题,可反馈申请退款(可完整预览的文档不适用该条件!)。
- 3、如文档侵犯您的权益,请联系客服反馈,我们会尽快为您处理(人工客服工作时间:9:00-18:30)。
PC BOARD OF ICE MAKING MACHINES INSTRUCTION2008.12ContentsⅠ、Circuit board layout1、Ice making machine PC board layout(back)…………………………………………………………2、Ice making machine external indicator small board layout……………………………………………………3、Ice making machine Infrared sensitivity small board layout………Ⅱ、Fault indicator…………………………………………………………………………Ⅲ、DIP switch………………………………………………………………………………….1、8-bit DIP switch……………………………………………………………………………..2、4-bit DIPswitch…………………………………………………………………………………………..Ⅳ、Electrical wiring diagram………………………………………………………………………………1、Ice making machine PC board wring diagram…………………………………………………………2、Ice making machine external indicator small board wring diagram……………………3、Ice making machine sensor wring diagram………Ⅴ、Infrared receiver sensitivity…………………………………………………………………………..1、Full ice sensor sensitivity setting……………………………………2、Full ice sensor sensitivity adjustment methods………………………………3、DIP switch setting methods table……………………………………Ⅰ、PC board layout1、Ice making PC board layout(back)2、Ice making external indicator small board layout3.Power indicator Full-ice fault indicator Short water fault indicator Condensing temperature fault indicatorLow-speed fault indicator/evaporationtemperature fault indicator3. Ice making full-ice sensor sensitivity small board layoutFigure 2-1* When the power frequency is lower than 45HZ and more than five seconds all the indicator light flashes at the same timeGreen Power indicatorYellow full-ice fault indicator(keep on)Yellow short water indicator(keep on)Red condensing temperature fault indicator(keep on) / startup delayindicator (flash on)Yellow low-speed alarm indicator(keep on)/evaporation temperature faultindicator(flash on)Ⅲ.DIP switch1. 8-bit DIP switch (Attention: Please press reset button before resetting DIP switch.)Select flake ice machine ’s ice-full sensor.Select scale ice machine ’s ice-full sensor.Figure 3-1Eight-bit DIP switches on the center of the PC board (Figure 3-1) is the order from left to right.The function of the first bit DIP switch: select the starting up delay function. When the first bit DIP switch dial on, the PC board will work as soon as the start-up. (this feature is used at the time of debugging or maintenance of ice-making machine). In contrast, PC-board does not work after the start-up, they have 5-minute delay before the work, which is in order to ensure the machine works after the sensor started to work normal.The function of the second and third bit DIP switch: select the full-ice sensor. Select scale ice machine ’s ice-full sensor when the second bit DIP switch dial ON. In contrast, select flake ice machine ’s ice-full sensor when the third bit DIP switch dial ONThe function of the fourth bit DIP switch: DIP invalid.The function of the fifth bit DIP switch: select the models of the reduce motor. Select the 960RPM model when the fifth bit DIP switch dial ON. In contrast, PC board selects 1440RPM model.( the location of switch has been set up at the factory, the user should not be struck)open starting up delay functioncancel the buzzer cancel starting up delay functionopen the buzzer select 1440RPM modelcancel the test parametermeasures select 960RPM modelopen the test parameter measuresThe function of the sixth bit DIP switch: select the buzzer alarm. when the sixth bit DIP switch dial ON, the buzzer will alarm when the faults appeared, in contrast, the buzzer is invalid. The function of the seventh bit DIP switch: DIP invalid.The function of the eighth bit DIP switch: select the test parameter measurement.(test the PC board designed parameters when it was made).( the switch has been set up closed at the factory, the user should not be struck)2. 8-bit DIP switch (Warning: Please press reset button before resetting DIP switch.)Figure 3-2Four-bit DIP switches on the center of the PC board (Figure 3-2) is the order from left to right.The function of the first bit DIP switch: select the test of motor speed. when DIP switch dial on, if there was speed fault in the course of PC board working, the low-rotating speed fault indicator would on. the PC board would continue to work.( this feature is used at the time of debugging or maintenance of ice-making machine). In contrast, if there was speed fault in the course of PC board working, all the work would stop.The function of the second bit DIP switch: select the test of condensing temperature sensor. when DIP switch dial on, if there was condensing temperature fault in the course of PC board working, the condensing temperature fault indicator would on. the PC board would continue to work.( this feature is used at the time of debugging or maintenance of ice-making machine). In contrast, if there was condensing temperature fault in the course of PC board working, the indicator would on and the compressor would stop immediately and the speed would stop in 3 minutes .The function of the third bit DIP switch: select the test of evaporation temperature sensor. when DIP switch dial on, if there was evaporation temperature fault in the course of PC boardopen the low-rotating speed fault protectionopen the evaporation temperature protection hide the low-rotating speed fault protectionhide the evaporation temperature protectionopen the condensing temperature protectionopen the full-ice protectionhide the condensing temperature protectionhide the full-ice protectionworking, the evaporation temperature fault indicator would on. the PC board would continue to work.( this feature is used at the time of debugging or maintenance of ice-making machine). In contrast, if there was evaporation temperature fault in the course of PC board working, the indicator would on(flash) and the compressor would stop immediately and the speed would stop in 3 minutes .The function of the fourth bit DIP switch: select the test of full-ice sensor. when DIP switch dial on, if there was full-ice fault in the course of PC board working, the full-ice fault indicator would on. the PC board would continue to work.( this feature is used at the time of debugging or maintenance of ice-making machine). In contrast, if there was full-ice fault in the course of PC board working, the indicator would on and the compressor would stop immediately and the speed would stop in 3 minutes .Ⅳ.Electrical wiring diagram1. Ice making PC board wring diagramIce making PC board layout (front) figure 4-12. Ice making external indicator small board wring diagramExternal indicator wring diagramFigure 4-2P o w e r i n d i c a t o r F u l l i c e f a u l t i n d i c a t o r S h o r t w a t e r f a u l t i n d i c a t o r C o n d e n s a t o r f a u l t i n d i c a t o r /d e l a y i n d i c a t o r R o t a t i n g s p e e d f a u l t i n d i c a t o r /e v a p o r a t o r f a u l t i n d i c a t o r3. Ice making sensor wring diagramPlug color : Redredwhiteyellow yellowⅤ.Full ice sensor sensitivity and DIP switch settings1、Full ice sensor sensitivity settingsFlake ice machine :XB70—XB XB550 model 5 indicator. Scale ice machine :PB0.4F/A —PB50F/A model 5 indicator.2、setup of full-ice sensor sensitivityFull-ice sensor sensitivity would become low and not to reliable work after a certain period use. At this tine, we can adjust the full-ice sensitivity resistor on the PC board to adjust the sensor sensitivity. Clockwise rotate adjustment resistance, will increase the number of lights, full-ice sensor sensitivity will increase too. In contrast, will reduce the number of lights, full-ice sensor sensitivity will reduce too4、 DIP switch setting methods tableMotor sensor缺 水1(ON): 取消冰满故障检测2(ON): 取消蒸发温度故障检测3(ON): 取消冷凝温度故障检测4(ON): 取消电机低速故障检测1(ON):取消开机延时2、3(ON): 选择片冰机冰满传感器2、3(OFF): 选择雪花机冰满传感器5(ON):选择960RPM机型5(OFF):选择1440RPM机型6(ON):开启蜂鸣器注意:重新设定拨码位置后要按复位键复位1(ON):Hide ice full protection.2(ON):Hide evaporation temperature protection.3(ON):Hide condensing temperature protection.4(ON):Hide low rotating speed protection.1(ON): Cancel starting up delay.2、3(ON):Select scale ice machine’s ice-full sensor2、3(OFF):Select flake ice machine’s ice-full sensor5(ON): Select 960RPM model.5(OFF): Select 1440RPM model.6(ON): Open the buzzer.Warning: Please press reset button before resetting DIP switch。