rc-4中文说明书 最新
MIGATRONIC RCI4设置手册说明书

#===============================================
#==
Analog output rules
==
#===============================================
RUL GRP 0 11 77 1 0000001000000000 0000000000000000; #-- [DSUB25.PIN24]
RUL GRP 0 11 77 2 0000001000000000 0000001000000000; #-- [DSUB25.PIN24]
RUL DIN10 0 11 1 0 0 1;
RUL DIN6 0 11 41 0 0 1;
#-- [DSUB25.PIN10]
DUO plus mode ON/OFF
RUL GRP RUL GRP
0 11 76 1 0000000110000000 0000000000000000; #-- [DSUB25.PIN23,11] DIN7=0,DIN8=0: DC 0 11 76 2 0000000110000000 0000000010000000; #-- [DSUB25.PIN23,11] DIN7=1,DIN8=0: PULSE
Panel lock
RUL DIN2 0 11 0 0 0 1;
#-- [DSUB25.PIN8]
Arc Trigger
RUL PRG 0 11 10 3 5 0 7;
#-- [DSUB25.PIN21,9,22] DIN3,4,5: Select program by index 1-7, 0: don’t change program
#==
EEP PR400RC操作手册0512

操作说明:开始运行系统之前,需要检查以下几点:1、所有控制器是否按升序地址排列?2、采煤工作面的每个控制器能被服务器访问吗?3、所有的控制器和服务器装置都装载了正确的控制程序了吗?4、所要求的总体和局部参数都已经发送到控制器了吗?5、所要开启的操作类型种类和要禁止的操作类型种类都已经发送到控制器了吗?6、每个支架控制器的单功能操作都正确无误,并且通过邻架控制的单功能操作也正确无误吗?7、控制器的显示屏可显示错误信息和其它相关信息吗?8、每个支架的急停开关、闭锁开关、蜂鸣器和显示屏都能正常运行吗?9、每个部件都可正常工作并且也没有显示错误信息吗?10、对系统进行操作时不会伤到任何人吗?11、每个支架的立柱是否达到最小初撑力的?只有在检查完这些项目后系统才可投入运行。
设备使用注意事项1、控制器键盘只能用手直接按动。
2、电控正常时禁止手动操作电磁阀手动按钮。
3、控制器应加防尘、防护罩。
4、电源箱地线必须正确连接。
5、最后一个电源箱开关应打到“断开”位置。
6、电磁阀手动按钮不能用尖利工具顶压。
7、严禁随意修改系统设备的所有参数。
8、各类电缆线连接要牢固、布局要合理,不能挤压,以防断裂。
9、维修支架时一定要将控制器打到闭锁状态。
没有意外情况不能按下红色的急停按钮和停止键(),以免影响其它控制器正常工作。
10、开机时,遥控器上的急停按钮必须处于拔出的状态,否则遥控器将不能启动。
11、在对遥控器进行充电之前,必须将急停按钮拔出,否则充电无效。
12、遥控器与支架控制器进行无线连接时,必须保证红外装置处的窗口洁净,否则可能导致无线连接无效。
13、禁止使用遥控器控制操作人员所在的支架。
我司使用控制器名称为PR400型控制器操作规程如下:一、手动邻架及隔架操作:1、预选键1:[1]选择想要控制的支架的方向预选键按一下邻架,按两下隔架,按三下,控制第三架。
[2]选择邻隔架支架。
[3]操作功能键:2、预选键2:[1]选择想要控制的方向[2]第二功能键(说明:选择执行的是斜线下面的功能。
霍尼韦尔X4使用中文说明

Impulse X4 系列便携式复合气体检测仪操作说明书!重要提示:!在首次使用仪器以前请认真阅读本手册,您将会掌握仪器正确的使用方法和了解仪器的功能,包括操作,维护,功能设置等内容。
!为了使操作者更安全,请按照手册中的要求,定期对仪器进行标定。
!如果在使用过程中,遇到的故障或问题在本手册中没有提到,请直接联系制造商Zellweger Analytics,或联系当地的代理商/服务商。
!警告和注意:·更换任何元器件都有可能损坏仪器的本质安全结构。
·如果需要使用存储卡,请选用Zellweger Analytics 提供的存储卡(订货号2566-0435),使用其它的存储卡有可能损坏仪器的本质安全结构。
·在允许的储存期之后激活检测器,有可能影响仪器的使用性能和保质期。
·应使用许可的5号干电池,如劲量电池,不要使用质量低下的干电池,以免影响仪器的本质安全性能。
·在更换电池时,应同时更换2节型号相同的新电池。
·在电池欠压提示后,应尽快更换新电池,以免旧电池漏液损坏仪器。
·在低温环境下,电池的寿命会缩短。
·更换电池时,应该在安全环境下进行。
·当更换任何一个传感器的情况下,都需要对仪器进行标定。
·在每天使用以前,应完成仪器的自检过程。
·定期的对仪器用标气进行测试,检查声、光、振动报警是否正常。
·标定时应选用厂家或国家认证合格企业提供的标准气体。
·标定时应在良好通风的环境下进行,以避免污染。
·不要在仪器电量不足的情况下标定。
·不要在富氧的环境下使用本仪器。
·可燃气体传感器的灵敏度会受到高浓度硫化物,卤素化合物,含硅化合物,以及含铅气体或蒸汽的影响,也叫“中毒”,应避免在以上的环境中使用仪器,如果必须使用,则使用完后应对仪器进行检测和标定,以免影响以后的使用。
莱客M4(四路)数字冷冻液淫制品控制杆说明书

4-way digital manifold be cool M4be cool M4 is the digital manifold with four-way valve block, equipped with a rechargeable battery. The execution of measurements on refrigeration and air conditioning systems and on heat pumps are facilitated by pre-configured parameters, such as superheating and subcooling, in addition to the possibility to reverse pressures on the instrument. The instrument can be remotely controlled and managed with Seitron be cool Mobile App.Pressure reversal set by the user on the instrumentSelection from more than 80 refrigerant gases (included R410, R32, R404) Intuitive and simple interface on a 5’’ touchscreen color display Real-time data analysis, also with mobile App Possibility to read and export data via USBIdeal for commissioning, servicing and maintenance of refrigeration and air conditioning systems and heat pumpsseitron be cool TECHNICAL FEATURESPressure working range: -1.0...+55.2 barVacuum measurement range: 0...19.000 micronSettable measurement units: psi, kg/cm2, cmHg, inHg, bar, kPa, MPaRefrigerant gases included: 88 (included R410, R32, R404)Power supply: Rechargeable battery (5000 mAh)Display: 5’’ touchscreen colors displayDimensions (LxWxH): 10 x 8.5 x 2.8“ (254 x 215 x 71 mm)Control your Manifold directly from theseitron be cool AppThe kit includes:-4-way digital manifold--Vacuum Probe-Flexible hoses (4 units)-Portable hard caseREFRIGERATION RANGERefrigerant Scale (up to 100 kg / 220 lb)be cool B100The be cool B100 wireless refrigerant scale allows you to weight refrigerant gases (up to 100 kg / 220 lb) in a simple, accurate and fast way.Management and display of measured values c an be done with the Seitron “be cool mobile App”.Stable and accurate sensor for a reliable measurementRobust aluminum scale, with impact-resistant rubber corners, easy to transport in the handy case Scale measurement with handheld controller or via smartphoneTECHNICAL FEATURES Working range: 0..100 kg / 220 lb Resolution: 5g Accuracy:±0.05% rdg+10gSettable measurement units: k g, lb Dimensions (LxWxH):10.5 x 10.5 x 3“ (271 x 271 x 74 mm)seitron be coolControl the refrigerant scale gases directly from seitron be cool App- Disposable batteries - Transport bag - Quick GuideREFRIGERATION RANGEHeated diode refrigerant leak detectorbe cool R1The be cool R1 refrigerant leak detector is the essential tool to reliably detect all common refrigerants, thanks to the heated diode sensor. Different sensitivity levels allow the user to detect also the smallest leaks, with indication on the display or with an alarm.Highly sensitive, responsive and long-lasting sensorReliable and easy detection of refrigerant leaks, with Automatic or Manual modes Detection of most common refrigerants: CFCs, HFCs, HCFCs, HFOs and blendsTECHNICAL FEATURESSensor: with heated diodeMinimum sensitivity: 3 g/yearDisplay: LCDRefrigerants available: CFCs, HCFCs, HFCs, HCs and HFOsFlexible probe length: 16.5” (420 mm)Smart Vacuum Gauge be cool V1The be cool V1 digital vacuum gauge with rechargeable batteries allows you, to measure the vacuum of refrigeration systems and heat pumps in a precise and easy way. Seitron be cool mobile app allows you to monitor and transmit data in real time.Simple data visualization on wide displayReal-time data monitoring and transfer via mobile App Offline data recordingTECHNICAL FEATURES Working Range:0..19,000 micronResolution: 1..400 1 µ 401..3,000 10 µ 3,001..10,000 100 µ 10,001..19,000 250 µOverload Vacuum27,5 barAccuracy: ±10% rdg ±10 µ (1...10,000 µ) ±20% rdg (10,000...19,000 µ)Settable measurement units: µ, mTorr, in/hg, Pa, Torr, KPa, mbar and psiaseitron be coolControl the vacuum gauge directly from the seitron be cool AppREFRIGERATION RANGESEITRON AMERICAS INC. 4622 E. Street Road Trevose, PA 19053 - USA Phone (215) 660-9777Fax (215) 660-9770************************ 。
RC4 中文操作手册范本
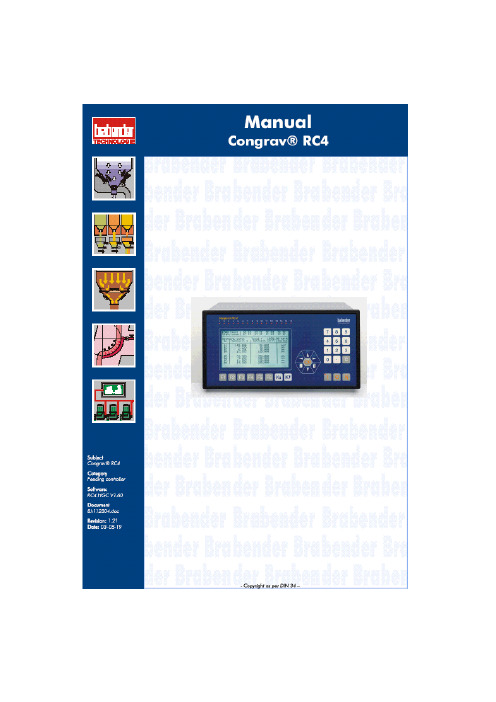
手册引导内容提要1介绍1.1手册结构1.2补充文件1.3操作手册使用人群1.4手册中使用的信号和警示1.5使用的方式和缩写1.6版本附件2设备描述2.1目的2.2潜在的危险3总述3.1电源3.2外加24VDC3.3使用的电缆型号3.4安全须知3.4.1Congrav RC-4使用安全须知3.4.2安装安全须知3.4.3接线安全须知3.4.4使用和操作安全须知4硬件描述4.1Congrav RC-4:类型4.2Congrav RC-4A:显示和按键4.2.1集成按键及其功能4.2.2显示和功能组成4.3参数更改4.3.1数字输入4.3.2固定参数设置的选择4.3.3如果….,更改参数不被接受4.4Congrav RC-4B:4.5Congrav RC-4的插卡槽4.5.1现场的可能连线4.6Congrav RC-4的基本功能4.6.1插入卡RC4-MSIO4.6.1.1XS1.1:与主计算机的连接4.6.1.2XS1.2:与ISC现场总线的连接4.6.1.3XS1.3:与调试解调器和工控电脑的连接4.7Congrav RC-4的选项卡4.7.1CDIO插入卡4.7.2DIOP插入卡4.7.2.1输入输出模式-数字式RC-4的终端功能4.7.3ANOP插入卡4.7.3.1输入输出模式-模拟式RC-4的终端功能4.7.4Profibus模式5调试5.1安装5.2调试,Congrav RC-4的开机5.3Congrav RC-4:软件升级5.4ISC-CM:软件升级6菜单页F100安装结构6.1F110:安装模式6.2模拟结构6.3F120:主计算机操作6.4F130:显示内容改变6.5连锁停机6.6时间和日期6.7F150:配方处理6.7.1设定值斜线,设定值阈值6.7.2调试操作7F200:打印机结构,内存值重设7.1打印功能7.2F210:如何清除记忆内容8F300:设定值输入和选择8.1安装设定值8.2加料器设定值8.2.1`设定值的模拟控制8.2.2设定值斜线,设定值阈值(菜单页F150)8.3选项8.4F310:滞后时间8.5报警停机9F400:安装的实际值,总产量重设9.1F430:总产量重设10单台加料器操作10.1加料器页的抬头10.2Kxx0:加料器控制10.3操作功能10.3.1开机 5410.3.2停机 5410.3.3报警重设10.3.4补料 5510.3.5删除 5510.3.6开始试样10.3.7开始去皮10.3.8右侧行实际值的显示10.4Kxx1:产品参数10.4.1自动去皮10.4.2检查最大输出10.4.3堆积密度10.4.4体积最大输出10.4.5十进制转换10.4.5.1十进制转换的设置10.4.6模式 5910.4.6.1失重式加料(GF)10.4.6.2体积式控制(VR)10.4.6.3体积式设置(VS)10.4.6.4排料(DI)10.4.6.5检查最大输出(CM)10.4.6.6重量式排料(GD)10.4.6.7体积式加料(VF)10.4.6.8测量(M)10.4.6.9运行过程中GF和VF模式转换10.5Kxx2:控制参数10.5.1PID控制的设置10.5.1.1控制成套配合10.5.1.2重量式计算最大输出10.5.1.2.1CM值的存储11F500:报警报告和开机条件11.1报警报告11.2缺省的开机条件11.3系列驱动控制操作的错误代码11.3.1系列变频器11.3.2振动放大器控制器ISC-VC11.4Kxx5:报警结构12硬件结构12.1 Kxx8:ISC-CM(-A)的硬件结构12.1.1 速度输入12.1.2 传感器(重量读取)的结构12.1.3 驱动控制器12.1.4 ISC-CM-A模拟输入输出的结构12.1.4.1 ISC-CM-A上单台控制的选项12.1.4.2 Kxx8:模拟输入12.1.4.3 Kxx8:模拟输出12.2 ANOP模拟输入输出的结构12.2.1 安装控制和安装的实际值12.2.1.1 菜单页F190的参数12.2.2 ANOP的组分功能12.2.2.1 模拟输入:模拟单台控制12.2.2.2 模拟输出:总操纵量或实际值12.2.2.2.1 模拟输出信号范围的定义12.3 CDIO的数字输入输出12.4 DIOP的数字输入输出12.4.1 DIOP:功能描述12.5 ISC现场总线机构12.5.1 如果构建总线通讯12.5.2 总线通讯的关闭12.6 调试解调器的机构12.7 主计算机操作机构12.7.1 MISO卡上的主计算机接口12.7.2 Profibus DP操作结构12.7.3 以太网接口的结构13校正程序13.1加料器参数13.2加料器参数功能解释13.2.1CP02-加料范围13.2.2CP04-欠载13.2.3CP03-最大输出量13.2.4CP05-过载13.2.5CP06-粗去皮13.2.6CP07-平均重量取数13.2.7CP08-总产量累计分值13.2.8CP09-最小速度13.2.9CP010-最大速度13.2.10CP11-控制偏差13.2.11CP12-报警停机滞后时间13.2.12CP13-联锁类型13.2.13CP14-实际值指示13.2.14CP15-杠杆臂值13.2.15CP16-料斗内容13.2.16CP17-最小补料料位13.2.17CP18-最大补料料位13.2.18CP19-Window/K1/滤波IDL/F, AED 13.2.19CP20-数字速度13.2.19.1标准速度监控13.2.19.2FlexWall-Plus加料器的运动监控13.2.19.3数字式速度取数13.2.19.4推荐输入13.2.20CP21-最大补料时间13.2.21CP22-补料优化13.2.22CP23-稳定时间13.2.23CP24-测样时间13.2.24CP25-防振(AV)切断时间13.2.25CP26-PID控制器接近时间13.2.26CP27-控制器自动化13.2.26.1控制器自动化13.2.26.2开机自动化13.2.26.2.1重复的开机自动化13.2.26.2.2总体开机自动化13.2.27CP28-滤波限制13.2.28CP29-实际值的接纳13.2.29CP30-总操纵量的接纳13.2.30CP31-体积控制(VR)实际值的接纳13.2.31CP32-开机滞后时间13.2.32CP33-称重桥(LWB)的长度13.2.33CP34-重量测试值(WTV)13.2.34CP35-摄取(AP)13.2.35CP36-自动去皮范围13.2.36CP37-无负载时间自动去皮13.2.37CP38-有比例的皮带速度13.2.38CP39-皮带长度13.2.39CP40-dead time way13.3附加参数13.3.1AP01-05 校正13.3.2AP11-可用的称重范围13.3.3AP12-drop out13.3.4AP13-速度模式13.3.5AP14-滑动影响13.3.6AP15-滑动值13.3.7AP16-速度接纳性13.3.8AP17-无负载时间13.3.9AP18-AT时间13.3.10AP19-驱动控制2最小13.3.11AP20-驱动控制2最大14硬件测试功能14.1F140:输入输出测试-外围(安装)14.2Kxx3:输入输出状态显示-外围14.3Kxx4:测试功能和模拟14.3.1模拟模式14.3.2输入输出测试(加料器)15名词解释附件11915.1技术数据15.2电磁兼容性15.3零配件清单15.4可能显示的模式清单15.5菜单页清单插图表图4-1:Congrav RC-4后部视图图4-2:Congrav RC-4后部视图(带ProfiBus模式)1 总介绍1.1手册的结构现有的操作手册包括:RC-4的:●技术操作和●RC-4 HGC软件(其版本请参见封页)按照下列顺序,每章独立描述一个完整的主题:●设备的描述●使用特性●硬件执行●硬件功能定义●操作●软件描述●参数描述和●结构例举1.2附加文件●ISC系统的描述●ISC-CM,ISC-FC和ISC-VC的技术手册●相应主计算机程序手册1.3操作手册所适用的人群操作手册适用于以下两组人群:●经过授权和培训过的专业技术人员来进行安装和其它电气工作。
RC-4H使用说明

您不可对本“软件产品”进行反向工程、反向编译或反汇编,但尽管有本限制,如适用法律明示允许上述活动,则不在此限。
您不借本“软件产品”。
本公司可为您提供与本“软件产品”有关的支持服务。
本“软件产品”(包括但不限于本“软件产品”中所含动画、录像、录音、音乐、文字等)、随附的印刷材料及本“软件产品”的任何副本的产权和著作权,均由本公司和其供应商拥有受著作权法保护。
因此,您必须将“软件产品”与任何拥有著作权的资料同样对待。
您不可复制随本“软件产品”随附的印刷材料USB连接本软件与数据记录仪通讯需要一个空闲的USB口。
那么您的计算机至少有一个空闲的USB口,否则您可能不能正常运行本软件所有通讯问题如果您在与数据记录仪通讯中遇到故障,请按如下顺序检查1)检查通讯缆线是否接紧。
2)查看驱动是否安装成功。
查看方式为,“我的电脑”——“设备管理器”——“端口”——“Silico Lab Cp210x Usb to UART Bridge”如果在此处无法找到“Silico Lab Cp210x Usb to UART Bridge”,则驱动没安装成功。
您可将本程序卸载重装。
(建议您在件,以防止误报!)3)换一个USB口连接。
若问题仍不能解决,您可以与供应商联系。
数据记录仪中没有数据如果当您从数据记录仪中下载数据而其中没有数据,问题可能是记录仪未启动,还没有开始记录。
本软件提供打印数据曲线图形与原始数据的功能,如果您无法实现打印功能,请检查系统是否安装了打印机,打印机驱动程序是否加电,打印机是否缺纸。
数据保存问题数据能保存到数据库以方便您今后对历史数据的查询。
如果系统不能完成数据保存功能,可能是安装不正确,或是程序被破坏,工具栏工具栏向上连接记录仪——计算机和记录仪建立通讯,连接成功后,进入参数设置界面或自动上传数据。
上传数据——从记录仪上传记录数据。
参数设置——打开记录仪参数设置界面。
系统/邮件设置——打开系统/邮件设置界面。
红色飓风4代RC445用户手册

XILINX 红色飓风4代-XILINXRC445硬件用户手册Rev. 1.1修订记录版本 修订日期 修订内容1.0 2011年2月25日用户手册初始版本1.1 2011年5月12日完善管脚分配目录修订记录 (2)目录 (3)飓风系列开发平台 (4)1 产品概述 (8)核心模块 (8)相关配件 (9)应用领域 (9)典型客户 (9)相关文档 (9)2 系统框图 (10)3 选购信息 (10)4 结构尺寸 (11)5 硬件资源 (13)5.1高速DDR2SDRAM (13)5.2FPGA配置方案 (15)5.3时钟分配方案 (16)5.4系统复位 (17)5.5USB2.0接口 (17)5.6用户输入输出设备 (19)5.7高速连接器 (20)5.8通用扩展连接器 (24)6 保修条款 (27)7 威视锐专业定制服务 (28)飓风系列开发平台飓风系列开发平台初学者入门-飓风2代国内多家培训机构指定实验平台,全国高校本科生、研究生电子设计竞赛的理想创新平台;国内销量第一的SoPC 和FPGA 入门开发板.适用但不限于以下专业:计算机、微电子、通信、测控技术与仪器设计、电子工程、机电一体化、自动化和IC 设计等. 同时提供ALT ALTERA ERA ERA 和和 XILINX XILINX 两个版本两个版本配套教程配套教程::开发开发者者提高-飓风3代独立完整的高性能百万门级SoPC 模块,结构紧凑.支持嵌入式软核处理器,uCLinux 操作系统及大容量SD 卡.提供120个独立IO 和6路时钟及SMA 接口. 同时提供ALTERA ALTERA 和和 XILINX XILINX 两个版本两个版本工程师创新-飓风4代名片大小120万门FPGA 最小系统,2Gb DDR2,最高12Gbps 吞吐率。
USB2.0接口,支持NIOSII 和uCLinux 操作系统。
提供120个独立高速IO 和6路时钟.支持模块叠加,是算法验证,数据采集和OEM 的理想选择配合红色飓风丰富的功能选件配合红色飓风丰富的功能选件,,可实现不同领域的创新设计 !红色系列开发平台SoPC 和数字多媒体开发平台 - RED2最高200万门FPGA 配置,丰富的外设接口,全面支持NIOSII 和uCLinux 操作系统。
嘉德利 RC-7Bi RC-4Bi 手动控制器说明书

ABI EDCFGHRC-4BiRC-7BiRC-1260BiInstructionManualRC-7BI MODEL SHOWN(The RC-4Bi has a 20-minute pause position between station #4 and "REST.") DESCRIPTION OF CONTROLS Refer to Figure 1A. HOUR DIAL with 23 CYCLE START PINS: The HOUR dial contains 23 pins for scheduling automatic "Starts" on any hour (except midnight—which is day changeover time). Embossed characters provide quick identification for each hour, AM or PM, noon and midnight. Captive type pins are designed for simple push-pull operation.B. DAY DIAL with 14 SCHEDULING PINS: The calendar DAY dial contains 14 cap-tive pins for scheduling irrigation everyday or any day within a two week range. Each pin represents a 24 hour period beginning at midnight. Embossed characters are on the dial, adjacent to each day of the week.C. STATION SELECTOR/INDICATOR DIAL: The STATION selector/indicator dial contains the timing controls (D) for each of the stations. The dial automatically rotates during a watering cycle with the current station appearing at the top, under the station pointer. REST indicates the system is off and no watering is taking place. The dial is also used for manual selection of any station for semi-automatic operation.Figure 1Save an extra 15% o new sprinkler timers andirrigation controllers at the Rain Bird Online Store.*Enter discount code:UPGRADE15at checkout to save an extra 15% o ** Additional discount not valid on clearance items, bundles or store specials. Discount applies to controller products only. Cannot be combined with other store discount codes. Valid at the Rain Bird Online Store only.Subject to change without notice.Still struggling with your old sprinkler timer? Having a hard time complying with local watering restrictions?Upgrading to a new Rain Bird sprinkler timer is easier than you might think.New timers are easier to program than ever before, with powerful features to help save you time and water while keeping your yard healthy and vibrant. There are lots of models to meet your needs, including indoor and outdoor versions, exible modular timers and even smart controllers thatautomatically adjust themselves based on the weather.Shop Now at andenjoy exclusive upgrade savings!Valve Output WiringThe controller transformer provides 24 VAC output for the station valves. The output leads are color coded and stamped with the corresponding station designations.(See Figure 3.)1. Connect one Lead from each valve to the desired sta-tion output lead using wire nuts.NOTE: If the Master Valve/Pump Start circuit is used,connect only one Rain Bird, 2 watt, solenoid valve per station.2. Connect the second lead from all valves to the white common output lead. Record the valve locations or land-scape zone identification for each station on the label in-side the cabinet door.Master Valve Wiring1. Connect one lead from a 24 VAC Master Valve to the controller Master Valve lead (Wht/Orn).2. Connect the other Master Valve lead to the controller common (white) along with the valve common leads.CAUTION: If a master valve is not being used, be sure to tape the end of the Master Valve lead to prevent any possibility of "shorting."OUTPUT LEAD COLOR CODE Station 1:Brown 2:Red 3:Orange 4:Yellow 5:Green 6:Blue 7:Violet 8:Gray 9:White 10:White/Blk 11:White/Bm 12:White/Red Master Valve:Wht/Orn Valve Common:White (2) Transformer:Wht/RedWht/Red w/ “line input” label Wht/Brn w/ “line input” labelFigure 3MOUNTING1. Choose a location that provides a minimum clearance of 13" wide x 8" high. Since the electrical connections are provided at the bottom of the cabinet, clearance should be allowed for the conduit connections etc. Refer to Figure2. The location must be within 5 feet of an electrical outlet.2. Remove the 4 panel mounting screws, and carefully lift out the panel.3. Position the cabinet on the wall at the mounting location, and with a pencil, mark the mounting holes desired (4 holes are provided) on the wall. Two vertical holes are provided for mounting to a wall stud. (Note: Use #10 screws).ELECTRICAL CONNECTIONSALL WIRING MUST BE INSTALLED AND CONNECTED IN ACCORDANCE WITH LOCAL CODES. A basic wiring diagram, with color code identification is provided on the inside surface of the cabinet for easy reference.A 1/4" dia. hole is provided in the bottom of the cabinet for insertion of the transformer input wire. See Figure 4.Prior to plugging the transformer into a 120 VACwall receptacle, insert the wire through the 1/4"hole in the lower left corner of the controller, tie an overhand knot in the wire about 5" from the end (inside the case). This will prevent inadver-tent disconnection of the wire. Connect one or-ange wire to the wht/red wire with the "line in-put" label and connect the other orange wire to the wht/brn wire with the "line input" label. (See Figure 4)Now, plug transformer into wall receptacle.(Note: International transformer is not "plug-in"type.)Instructions for Attaching Plug-In Transformer.Electrical System Checkout1. Rotate the STATION dial counterclockwise to position REST at the top directly un-der the Station pointer.2. Pull all pins on the HOUR and DAY dials to the "out" position.3. Put the MODE switch in the AUTO position.4. Make sure transformer is plugged into a wall receptacle.5. Adjust each station TIME control to the 5 minute mark. (See Figure6.)6. Rotate the STATION dial (counterclockwise) to position Station 1 under the pointer.Watering should commence shortly as the automatic mechanism latches with the Sta-tion dial.The 5-minute interval should provide sufficient time to observe control valve operation.If more time is required, simply adjust the timing knobs as necessary. The controller will advance through each station, in sequence, providing opportunity to observe each circuit for proper operation.Upon satisfactory checkout of the system, proceed to adjust the controller clock.SETTING THE CONTROLLERWith the main power ON, proceed to adjust the clock for the correct time and day.1. Put the MODE switch in the OFF position.2. Rotate the HOUR dial (clockwise only) to position the current time opposite theTIME pointer at the top of the panel. Observe the dial for the correct AM or PM numer-als.ATTACHING TRANSFORMER TOCONTRLLERFigure 4position the dial such that the TIMEpointer will point midway between the 1and 2 numerals on the PM side of thedial. If a more precise adjustment is de-sired, the best procedure would be topush-in the pin corresponding to the up-coming hour (in this example, the 2 PMpin) and on that hour, slowly rotate thedial until you hear the "click" of themicro-switch.3. Proceed to set the present day by ro-tating the calendar DAY dial to positionthe correct letter opposite the DAYpointer at the bottom of the dial.4. Next, rotate the STATION dial in acounterclockwise direction to positionREST at the top under the STATIONpointer. This completes the controllerclock setting.SCHEDULING AUTOMATIC OPERATIONMake sure the HOUR and DAY dials are set to the correct time and that all pins are in the "out" position.1. Push in the pin(s) corresponding to the day(s) on which watering is desired. Re-member, each DAY pin represents a 24 hour period beginning at midnight.2. Next, select the desired starting time(s) and push in the corresponding pin(s) on theHOUR dial.3. The first mark (square dot on the station dial) is the minimum time setting and rep-resents approximately 3 minutes. The small white arrow moves with the knob for visual indication of each setting. (There will be no valve output when the arrow is positioned between "off" and the "square dot.'') The ratchet notches represent 1 minute incre-ments for precise settings. The OFF position at each timing dial, omits the station fromthe schedule.quired to prevent a second start within a givenhour is 20 minutes. Conversely, the maximumaccumulated time to permit a cycle start on aconsecutive hour is 55 minutes. Total cycle timeof more than one hour is permissible.NOTE:It takes about 20 minutes for the hourdial pin that started a watering cycle to move offthe cycle-start switch behind the face panel. Tomake sure the RC-4Bi will not start another cy-cle when the combined running time of stations1 through 4 is less than 20 minutes, the con-troller will stop at the non-existent station #6 po-sition and time out 20 minutes before returningto "REST."This completes the automatic setting of the con-troller. Move the MODE switch to the AUTO po-sition. The controller will now automatically con-trol the landscape irrigation according to theSEMI-AUTOMATIC OPERATIONThe controller may be operated at any time in a semi-automatic mode simply by turn-ing the STATION dial counterclockwise to position the desired station at the top, justahead of the Station pointer. Allow the automatic mechanism to advance into the de-sired timing zone. The selected station will operate for the time set on the dial, afterwhich, the remaining stations will follow in sequence until the REST position again ap-pears under the Station pointer.RAIN SHUTDOWNThere may be occasions where it is desired to interrupt all landscape irrigation. Condi-tions such as rainy weather, system repair, landscape renovation, or other excavationwork. The temporary shutdown of the system is accomplished by moving the MODEswitch to the OFF position. This eliminates controller output to the valves without inter-rupting the controller timing circuitry. The controller will not operate either automati-cally or semi-automatically. A summary of the operating instructions is provided on thelabel inside the controller door.MAINTENANCEThe controller is designed to provide years of trouble-free service. The controller re-quires no preventative maintenance or lubrication. Should trouble occur, refer to theTroubleshooting chart for possible remedies, or contact your local authorized RainBird dealer.TROUBLESHOOTING CHARTDIFFICULTYPOSSIBLE CAUSEREMEDYClock stopped.a. Blown fusea. Replace fuse. If controller stops again, check system circuits to locate trouble.b.No power to controller. b. Check line voltage andconnections at each end.c. In the RC-4Bi, the station dial may be in the 20-minute pause position between sta-tion 4 and rest.c. Let controller time out for 20-minutes and return to "REST" automatically.DAY and HOUR dials function incorrectly.a. Clock set for incorrecttime.b. Pins incorrectly set.a. Reset clock for the "present" time.b. Check pin settings and "accumulated cycle time on station dial.DAY and HOUR dials function, but cycle will not start automatically.a. MODE switch in wrong po-sition. a. Move switch to AUTO po-sition.Controller recycles imme-diately without stopping in the REST position. a. Insufficient cycle time al-lowed.b. Total cycle time coincideswith a succeeding START pin.a. Adjust cycle time for morethan 15 minutes.b. Reset the HOUR pins or readjust the accumulated cycle time.Some stations do not op-erate.a. Station time set at OFF.b. Faulty valve wiring. a. Set TIME control for more than 3 minutes.b. Check connections be-tween controller and valves.Also, check valve actuators.Station dial does not stop at a "Timed" stationa. Insufficient time set on dial.a. Adjust the TIME control for more than 3 minutes.Should trouble be isolated in the controller mechanism, remove the entire panel as-sembly from the cabinet and return to your local distributor for repair.THANK YOU for your expression of confidence in Rain Bird Sprinkler Mfg. Corp. As the world's leading manufacturer of irrigation systems and components, our efforts are directed to providing you with the finest quality products and components available today.Your new Controller has been designed using proven technology. You will find it simple to use. We are confident that you will enjoy many years of reliable, trouble-free operation. This manual describes the Controller's functions in detail. We invite you to read it thoroughly so that you may use your Controller to its maximum capability.Again, thank you for providing Rain Bird with the opportunity to meet your irrigation needs.Customer Support Center6640 S. Bonney Ave. Tucson, AZ 857061-800-RAIN-BIRD。