slides in powerpoint
slides - powerpoint presentation
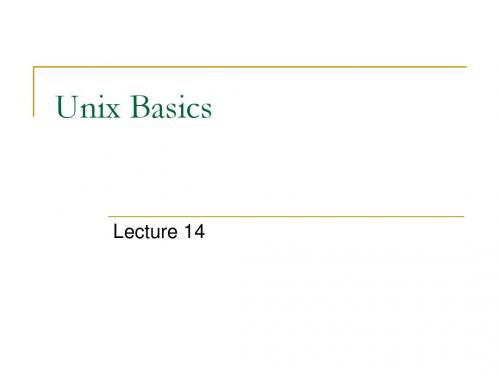
Effective user id (EUID)
Each process has three IΒιβλιοθήκη sReal user ID
(RUID) same as the user ID of parent (unless changed) used to determine which user started the process Effective user ID (EUID) from set user ID bit on the file being executed, or sys call determines the permissions for process Saved user ID (SUID) Allows restoring previous EUID
RUID 25 EUID 18
RUID 25 EUID 25
Careful with Setuid !
Can do anything that owner of file is allowed to do Anything Be sure not to Principle of least privilege
Unix Basics
Lecture 14
UNIX Introduction
The UNIX operating system is made up of three parts;
the kernel, the shell and the programs.
The kernel of UNIX is the hub of the operating system:
Unix
Developed at AT&T Bell Labs Single monolithic kernel
送给小白的你:iSlide插件,即便不懂设计,也能创建各类专业PPT幻灯片的一款高效插件!

选中页面中的图标,图片,插图从对应的 资源库中的任意替换
Select any icons, pictures or vectors in the slide and replace them with the resources in corresponding libraries
8大在线资源库,超20万PPT模板素材!
Design Tools
获取tailed tutorials, please click the "help'' button in the upper right corner of each tool window
?
简单到3步,快速创建您的专业PPT演示文档
填充替换 / Fill or Replace
自由替换主题中的图片/文本 Feel free to replace the pictures and text in the theme
主题库/Theme Library
➊ 选择主题 / Select a Theme
主题是一套包含主题字体 /色彩/参考线/版式预设的标准模板
Make a professional presentation, by just three simple steps
▼
1
2
3
主题库 / Theme Library
选择主题 / Select a Theme
图示库 / Diagram Library
插入图示 / Insert Diagrams
图片库 / Picture Library
9,000+ ever-updating PowerPoint diagrams/slides Automatically adapt to current theme color and layout
介绍PPT的英语作文

PowerPoint,commonly known as PPT,is a ubiquitous tool in the world of presentations.It is a software application developed by Microsoft that allows users to create,edit,and share professional presentations.Here is a detailed introduction to PPT, its features,and how it can be utilized effectively.1.Origin and Purpose:PowerPoint was first introduced in1987and has since become an essential part of the business and educational landscape.Its primary purpose is to facilitate the delivery of information in a visually appealing and organized manner.It is particularly useful for academic lectures,business meetings,and marketing presentations.2.Basic Structure:A PowerPoint presentation is typically composed of a series of slides.Each slide can contain text,images,charts,graphs,and multimedia elements such as videos or animations.The structure of a presentation can vary,but it usually starts with an introduction slide,followed by the main content,and concludes with a summary or call to action.3.Design and Layout:PowerPoint offers a wide range of templates and themes to help users create professionallooking ers can choose from various layouts to organize their content effectively.It is important to maintain a balance between aesthetics and readability,ensuring that the design does not overshadow the message.4.Text and Typography:The text in a PowerPoint slide should be concise and to the point.It is advisable to use bullet points or numbered lists to present information clearly.The choice of font and font size is crucial for readability.PowerPoint provides a variety of fonts,but it is generally recommended to stick to clean,legible fonts such as Arial or Calibri.5.Images and Graphics:Visual elements can greatly enhance the impact of a presentation.PowerPoint allows users to insert images,create charts,and use SmartArt to illustrate complex concepts.It is important to use highquality images and ensure that they are relevant to the content of the presentation.6.Animations and Transitions:Animations can make a presentation more engaging,but they should be used sparingly. Overuse of animations can be distracting and may detract from the message.Transitions between slides can also add a touch of professionalism but should be chosen carefully toensure they do not disrupt the flow of the presentation.7.Multimedia Integration:PowerPoint supports the integration of multimedia elements such as videos and audio clips.This can be particularly useful for presentations that require a more dynamic approach.However,it is important to ensure that multimedia content is embedded correctly and that the presentation can be viewed without interruption.8.Collaboration and Sharing:One of the key advantages of PowerPoint is its ability to facilitate ers can share their presentations online and work on them simultaneously with others.This feature is particularly useful for teams working on a project or for students working on a group assignment.9.Accessibility:PowerPoint has made strides in improving accessibility,allowing presentations to be more inclusive.Features such as alt text for images and closed captioning for videos ensure that presentations can be understood by a wider audience,including those with disabilities.10.Presentation Modes:PowerPoint offers different modes for presenting a slide deck.The Slide Show mode is the most common,where the presenter can navigate through the slides using a remote or keyboard.There is also a Kiosk mode,which is useful for displaying a presentation on a public screen without the need for a presenter.In conclusion,PowerPoint is a versatile tool that can be used in various settings to convey information effectively.Whether you are a student preparing for a class presentation or a professional looking to impress at a business meeting,mastering the art of creating compelling PowerPoint presentations can be a valuable skill.。
PowerPoint Slides

The bad news is that time flies. The good news is that you are the pilot. Michael Altshuler
The Three P’s • POSITIVE • PERSONAL • POSSIBLE
The SMART Way
– IMPORTANT: These are activities that lead to the achieving your goals and have the greatest impact on your life. – URGENT: These activities demand immediate attention, but are often associated with someone else’s goals rather than our own.
Module Four: Planning Wisely
• The hallmark of successful time management is being consistently productive each day. • Having a daily plan and committing to it can help you stay focused on the priorities of that particular day. • As well, you are more likely to get things accomplished if you write down your plans for the day.
Time Management
Corporate Training Materials
PPT高手进阶素材:005

For PowerPoint 97-2010
Page 6
YOUR LOGO
3D SLIDE MAN– CHECKLIST
CHOOSE YOUR OWN COLOR!
3D SLIDE MAN– HAPPY
3D FLOWS
Your Text
Your Tr footer
If you don’t want to use the size of the fonts as used in this placeholder it is possible to replace it by selecting different options.
Page 5
YOUR LOGO
Example text
Go ahead and replace it with your own text. This is an example text.
Your Logo
PYRAMID ILLUSTRATIONS
3 2
Example text
Go ahead and replace it with your own text.
Insert your text here Headline
This text is a placeholder and can be replaced by your own texts. This text does only demonstrate how your own text will be illustrated, if you are going to replace the placeholder.
Example text
1
Example text
用ppt教学的好处和坏处英语作文

用ppt教学的好处和坏处英语作文全文共6篇示例,供读者参考篇1Hello everyone! Today I want to talk about the pros and cons of using Powerpoint to teach in class. Let's start with the good things first!The advantages of using Powerpoint in teaching are:1. Makes learning fun and interesting: Powerpoint slides can include pictures, videos, and animations that make learning more engaging and exciting.2. Helps students understand complex topics: Visual aids in Powerpoint can help students better understand difficult concepts and remember key information.3. Organizes information effectively: Powerpoint allows teachers to present information in a structured and organized way, making it easier for students to follow along.4. Saves time: Powerpoint presentations can be prepared in advance, saving teachers time and allowing them to focus more on interacting with students during class.Now, let's talk about the disadvantages of using Powerpoint:1. Can be boring: Sometimes, staring at a screen full of text and images for a long time can be dull and monotonous for students.2. Over-reliance on technology: If the Powerpoint presentation fails or technical issues arise, it can disrupt the flow of the lesson and create challenges for the teacher.3. Limits creativity: Teachers may feel restricted by the format of Powerpoint and miss out on opportunities to explore more creative teaching methods.In conclusion, while Powerpoint can be a useful tool in teaching, it is important to use it thoughtfully and in moderation. Mixing in other teaching methods and activities can keep students engaged and help them learn more effectively. Thank you for listening!篇2PPT is a great tool for teachers to use in the classroom. There are lots of advantages to using PPT and some disadvantages too.The good things about PPT are that it can make lessons more fun and interesting. The pictures and videos can help usunderstand difficult topics better. It's also a good way to keep our attention because it's always changing. PPT can also help us remember things better as we can see the information in a visual way.But there are also some bad things about PPT. Sometimes the slides can be too busy and hard to read. And if the teacher relies too much on PPT, they might forget to interact with us and answer our questions. PPT can also be a distraction if we start looking at other things on the screen instead of listening to the teacher.Overall, PPT can be a really useful tool in the classroom if it's used in the right way. It's important for teachers to make sure the slides are clear and easy to understand, and to still interact with us during the lesson. So next time your teacher brings out the PPT, remember all the good things it can bring to the lesson!篇3Hello everyone! Today I want to talk about the pros and cons of using PowerPoint presentations in class. As we all know, PowerPoint is a popular tool for teachers to make their lessons more interactive and engaging. But is it always a good thing?Let's start with the good stuff. One of the biggest benefits of using PowerPoint is that it makes the lesson more visually appealing. Instead of just listening to the teacher talk, we get to see pictures, videos, and animations that help us understand the material better. It also helps us stay focused and interested in the lesson, instead of getting bored and distracted.Another advantage of using PowerPoint is that it can make complex information easier to understand. By breaking down the content into smaller chunks and using bullet points, charts, and graphs, the teacher can make it easier for us to digest the information and remember it later.Furthermore, PowerPoint allows teachers to easily share their lesson materials with us. They can upload their presentations online or send them to our email, so we can review the material at home or study for a test.However, there are also some downsides to using PowerPoint in class. One of the biggest drawbacks is that it can be too passive. Instead of actively participating in the lesson, we might just sit back and watch the slides go by. This could lead to us not fully understanding the material or not asking questions if we are confused.Another disadvantage is that some teachers rely too heavily on PowerPoint and forget to engage with us in other ways. They might just read off the slides without adding any extra explanations or examples, which can make the lesson boring and uninteresting.In conclusion, while PowerPoint can be a useful tool for enhancing our learning experience, it's important for teachers to use it in moderation and supplement it with other teaching methods. By combining PowerPoint with discussions, group activities, and hands-on experiments, we can get the most out of our education. Thank you for listening, and I hope you learned something new today!篇4Title: The Pros and Cons of Using PowerPoint for TeachingHey everyone! Today, I want to talk about using PowerPoint for teaching. It's something we see a lot in school, but is it always a good thing? Let's find out!First, let's talk about the good stuff. PowerPoint can make learning more fun and interactive. The slides can have pictures, videos, and animations that help us understand the topic better. It's like watching a movie in class!Also, PowerPoint is great for organizing information. The slides have bullet points and headings that make it easy to follow along. We can also take notes on the slides, which helps us remember the important stuff.Another cool thing about PowerPoint is that we can share our presentations with others. We can send them to our friends or even upload them online for everyone to see. It's like becoming a mini teacher!But, there are also some not-so-great things about PowerPoint. Sometimes, teachers rely too much on the slides and forget to engage with us students. It can feel like we're just reading off a screen instead of having a real conversation.Also, some teachers use too many words on the slides. It can be overwhelming and boring to read all that text. We want to see more pictures and videos, not a whole book on the screen!And finally, PowerPoint can be a distraction. We might get so caught up in the fancy animations and designs that we forget to pay attention to the actual lesson. It's like watching a movie when we should be studying!So, in conclusion, PowerPoint can be a great tool for teaching, but it's important to use it wisely. Let's keep things funand interactive, but also remember to engage with each other and focus on the lesson. Who knew a simple slideshow could have so much impact on our learning? Let's make the most of it!篇5Title: The Pros and Cons of Using PowerPoint for TeachingHey guys, today we're going to talk about the good things and not so good things about using PowerPoint for teaching. Let's get started!The good things about using PowerPoint are:1. Visual Aids: PowerPoint helps us to use pictures, diagrams, and charts to make our lessons more interesting and easier to understand.2. Organization: With PowerPoint, we can organize our information in a clear and structured way, making it easier for us and our classmates to follow along.3. Engagement: PowerPoint can be interactive with animations, transitions, and quizzes, making learning more fun and engaging.4. Accessibility: PowerPoint can be easily shared online or through email, allowing us to revisit the lesson anytime and anywhere.However, there are also some not so good things about using PowerPoint:1. Dependency: Sometimes we rely too much on PowerPoint and forget to engage with our classmates through discussions, activities, and experiments.2. Distraction: Too many slides, animations, and colors can be overwhelming and distracting, making it hard for us to focus on the key points.3. Passive Learning: Watching a presentation can be passive, and we may not retain as much information compared to hands-on learning experiences.4. Technical Issues: Sometimes PowerPoint can crash, the projector may not work, or the internet connection may fail, causing disruptions to our lesson.In conclusion, PowerPoint is a great tool for teaching, but we should use it responsibly and balance it with other teaching methods to create a well-rounded learning experience. Thanks for listening, and see you next time!篇6Hello everyone! Today, I want to talk about the advantages and disadvantages of using PowerPoint for teaching.Let's start with the good stuff. PowerPoint is super cool because you can make your presentation look really nice and colorful. You can add pictures, charts, and even videos to help explain your lesson. It can make learning more fun and interesting for us students.Another awesome thing about using PowerPoint is that it helps the teacher stay organized. They can plan out their lesson with slides in advance and make sure they cover all the important points. This way, they won't forget anything and we can learn everything we need to know.But, like everything else, PowerPoint has its downsides too. Sometimes, the teacher might rely too much on the slides and forget to explain things in more detail. This can make it hard for us to understand the lesson fully. Also, if the teacher has a lot of text on the slides, it can be boring for us to read and listen at the same time.Another disadvantage is that if the teacher's computer or the projector breaks down, then the whole lesson could be ruined.We would have to wait for it to get fixed and that can waste a lot of our learning time.In conclusion, using PowerPoint for teaching has its pros and cons. It can make learning more fun and organized, but it can also be a bit boring and unreliable. So, teachers should try to use it wisely and not overdo it. That way, we can all have a great time learning in school!Thank you for listening!。
PowerPoint英文教程
Microsoft PowerPoint TutorialSpecial notesIf you do not have your own copy of PowerPoint:•The Department of Biochemistry currently has three general use Macintosh computers in room 302 of the Biochemistry Addition. They are available to all Biochemistry studentsvia fob access.•DoIT maintains a list of computer labs on campus that are open to all students. You can view the list at /computerlabs/labs.asp.•If you would like to purchase Microsoft PowerPoint, it is available at a substantial discount from DoIT ($81) as part of the Microsoft Office Suite, see/wisc/.Need more help?The Media Lab staff in rm 401 is there to help. They can teach you how to make, or consult and help you make, or completely create your PowerPoint talk for you. You can find out more information on the web at /medialab. The Media Lab’s web site contains many “How to’s” on popular problems you will run in to as you create your PowerPoint presentations, Posters and Research articles.Ready to give your talk?The Biochemistry auditoriums in rooms 175 & B1118, hav e built-in computers. These Macintosh computers hav e driv es for floppies, CDs, zip discs, pen driv es, and are also on the Department’s network. Feel free to bring your personal laptop in and connect it to the built-in projection system in either of these rooms. Remember, to be safe, test your talk I I N AD VA NCE of your presentation date. The rooms are fob accessible.Whenever you intend to “show” your presentation on a computer other than the one it is developed on, it is a good idea to place a copy of the file, AND a copy of any included movies, into a special transfer folder, then use that folder to move the files to the second computer.•Place a folder called “Movies” in the same transfer folder as your presentation.•Place the movies you want to include into this “Movies” folder.•Use the Insert/Movies mode of PPT to place those movies into your presentation.•Now, when you move the transfer folder to any other computer, a copy of each required movie goes too, AND, they are in a folder (relative path) that your presentation can recognize and use.For security reasons, the computers in rooms 175 and B1118 do not appear on the Macintosh Chooser Appletalk menu. Instead, there is a separate serv er called “Maitre d” in the Biochemistry AppleTalk zone. Log on as “guest” v ia the chooser (no username or password required), or as “” via ftp (username: transfer, password: bioshow). Place a copy of your transfer folder (label with your name, please!) into the “pub” subdirectory of this serv er. You can retriev e it onto the auditorium Mac before your presentation. O O R… go directly to one of the auditoriums and link to your computer from there and then transfer your files.1) Open PowerPoint .Double click on the H H ardD rive folder iconDouble click on the A A pplications folder then the M M icrosoft O ffice X folderDouble click on the M M icrosoft PowerPoint program2) Starting a newpresentation . When you firstopen PPT, the program willshow you the project gallery,choose PowerPoint and a blankpresentation will open.3) Selecting a slidelayout . The next window topop up will ask you about thegeneral layout of the slides thatyou wish to use in thispresentation. Although there aremany options here (title slides,slides with or without additionaltext, slides with graphs, slides with clipart, etc) don’t let this bother you! Any particular slide can be changed later, and you can insert images, graphs, or movies at any stage on any kind of slide. You can see all 24 possible layouts by scrolling within this dialogue box.Select a generic slide layout with title and text called “B B ulleted List ”, as shown above.Click on the indicated slide template, then click O O K . The chosen slide (blank) will now fill your screen.Note:depending upon how PPT is configuredwhen first installed, and the settings in the PPT customize folder (Tools/customize), the v arioustoolbars and menus may look different fromplatform to platform.Don’t panic! All PPT functions are av ailablesomewhere in the menus and toolbars, you mayjust have to hunt a bit to find them.4)Use the Master Slide!!! You may set the background color, text size, font and style for each slide in your presentation by using the various menus at the top of the screen but it is much easier to pick a common format by specifying your preferences on the Master slide. This format will automatically be followed for all slides in your presentation, unless you turn it off for particular slides or chose to change any elements for a particular slide.Master”Choose the “F F ormat” menu, and then explore thevarious options in the “M M aster layout”, “S S lide colorscheme”, “B B ackground” and “Apply design” menu.Install any of these “looks” as your Master Slide, orchose your own fonts, colors, backgrounds and stylesfrom among the many selections (e.g., Format menu,Fonts).The presentation you are going to create is one that you and your colleague, Christopher Columbus, will use to convince Queen Isabella to finance your new venture, called New World Expeditions. There are three views one can use to create PPT slides: Normal, Outline and Slide. In Slide View you see one slide at a time as you type the text and draw the graphics. In Outline view you see the outline of all the text on your slide. In Normal View, you see the outline, the slide and a place for speaker notes.1) Return to the first blank slide in your presentation (NOT the Master slide), by c c licking on the Slide icon in the views button in the lower left corner of your screen (or select S S lides from the View menu)2) Type the title of the first slide into the title boxClick in the title box, then type: W W e must act soonClick inside the Body text box, then type the following short list, pressing return as indicated:F avorable weather <rtn>Increase in competition <rtn>Available c rew(don’t press <rtn>!)Click anywhere outside of the body or title boxes to deselect them.3)Save your work by choosing “S S ave” from the File menu, and selecting an appropriate file name (e.g. P P ractice_1.ppt).4) Now we will make 2 more slides from the Normal View. This method is a really slick way to enter lots of nicely formatted text. You can easily use it to create a lot of slides for a lecture.Choose N N ormal from the V V iew menu, or click the N N ormal icon in the lower left corner of the screen.Now click the NN ew Slide button, or select N N ew Slide from the I I nsert menu. This will create another “slide icon” in your outline and place the cursor next to it.Type the title of slide 2: E E xpedition plan then press <<rtn>Click the “Demote” arrow (see image), to indent, or demote one level in the outline.Type the two bullet items:P repare a fleet of three ships <rtn>H and-select a staf f of able office rs and sailors (press Option + <<rtn>)Type in the following title for slide 3: BB enefits to Spain <rtn>Now press the Tab key to indent one lev el and type the following the same way you typed thebulleted items above.S ignificant rise in trade <rtn>M ore revenue for the crown (don’t press <rtn>!)Your outline should look something like this.5) Go back to Slide view to see the new slides you have made. If you click on the thick double-arrow icons at lower right of screen, you can shuffle back and forth among your slides.6) Reordering slides in SlideSorter view.Click on the S S lideSorter icon (lower left), or select SlideSorter from the View menu.Click on the picture of slide 3, hold down the mouse button and d d rag this slide to position 2 of your presentation. Note how the slide content remains exactly the same but the slide order is now different.Note: the SlideSorter v iew is an excellent way to cut and paste slides from one presentation into another, or to reorder and/or delete slides from within a presentation. Just remember that each presentation will take its master format from its own master slide, and if you transfer in slides from another PPT file, they will assume the new master’s format in font, size, color and background. Therefore, it may be a good idea to pick a layout and master slide “look” that you like, and stick with it for many of your (and your lab-group’s) presentations. That way, you can mix and match slides from various presentations without messing up their carefully chosen color schemes!PPT contains text and drawing tools so you can create your own graphics to illustrate your presentation. In these Lessons, we will draw some simple pictures, then create a graph for inclusion on a slide. In subsequent Lessons (D) we will expand these processes by importing pre-existing graphics that you might already have prepared in another graphics program, or perhaps downloaded from the web.1) Return to Slide view , then i i nsert a new slide after slide 3.Click the N N ew Slide button at the top of the screen (or Insert menu New Slide)Select a slide format “Title Only”, but with no other body or insert boxes (see next figure).2) Use the PPT drawing tools and drawing toolbars at the left or bottom of the screen to create some images that Christopher C. can use to help convince the Queen that his ships are seaworthy and can cross the ocean. These drawing tools are standard for most graphics programs. Explore a bit, and ask for help if you have NEVER done anything like this before. A sample slide is shown below.Save your file again, so this elegant piece of work is properly enshrined on the hard drive.Special note: it is a GOOD piece of advice to sav e your file frequently, especially when working on irreplaceable artwork. Some systems can crash, and many a potential Picasso has ended up in electronic vapor-land, when the file wasn’t properly saved!3) Now insert another slide (#5), in which we will create a graph to show the Queen how her costs vs profits may stack up during the next 4 quarters of the fiscal year.Note: PPT contains sev eral automatic graphing, clipart, and organizational chart functions that make it easy to create these types of aids in your presentation. The chart function essentially contains a small spreadsheet and the projected chart is drawn from the data in this sheet. If you wish, you may link the data to an external spreadsheet (preferably Microsoft Excel), or copy existing data into the PPT sheet. Either way, when you update the data in the spreadsheet, the displayed chart is automatically updated too. The chart menu bar which appears when you initiate a chart (Insert a new slide, with a chart function, or choose “Chart” from the Insert menu) allows you to choose the type of chart, color it, label the axis, title the graph, etc.Change the default data in the chart spreadsheet to indicate how much profit in gold and silver the Queen might expect, vs her costs for this voyage. To do this, just select each spreadsheet cell in turn, and change its label or v alue. Note how the graph changes too, when you enter new v alues. (Example values, below left)When you are finished playing with the data and the chart, c c hoose Quit (Command or Control Q), to return to SlideView.Now you can add a title into the title box:P rofit vs CostsAlso a a dd some text to the body box to explain your data:1st through 3rd Qtr costs may increase slightly until New Worldmines are operational <rtn>Therea fter, the looted gold and silver should vastly exceedexpedition costs.Note how the program automatically creates bullets to start each new body text object. If you wish to turn off the bullets, select the appropriate text with your mouse, then select the Bullet option in the Format Palette or Format menu. This is also how you can change the shape of the bullets, or their size and color.1) Inserting PPT clipartIf you have not already done so, S S ave your file again.In Slide view, s s croll back to the “My Ships” graphic slide you created earlier.In the Insert menu, select P P icture then C C lipart. The Microsoft Clipart Gallery will open.You may wish to explore the v arious categories and clipart figures so you know what is available here.Select the category “w w eather” then highlight “t t he storm” to add to your presentation. (Thismay help convince the Queen that your voyage will be exceedingly dangerous!).Your selected clipart will appear on the slide, and sometimes be too big or too small.To Resize click once on it to highlight it, then use the mouse to grab and mov e one of the corner boxes in or out. If you hold down the Shift key while doing this, the picture’s height and width proportions will remain unchanged..Alternatively, double-click the image and the F F ormat Picture window will appear so you can scale your object by a defined percentage. Type 1120 in the dialogue box (120% of current size) then “O O K”. Your clipart will grow in proportion. D D r ag the storm with your mouse to a menacing position above your boats.Click once on the storm to select it. Then c c lick and drag it with the mouse w w hile you holddown the option key, the storm will duplicate when you let go of the mouse. When usingthe o o ption drag you must begin dragging the object before you hold down the option keyAND you must let go of the mouse button first and then the option key.Add a bunch of rain clouds, draw some lightning, create a thunderstorm on your slide!Note: as with most computer programs, pictures, clipart or movies inserted into PPT can be resized by clicking on their corner boxes and dragging to an appropriate shape. Howev er, this method can distort the figure’s proportions, display the pixels of the image or in the case of movies or .pict files, can also impair their ability to be displayed in OnScreenShows. We recommend that you only use the Object/Scale method of resizing for clipart, N N O T for images or mov ies. You may also use this feature to enlarge things by choosing a % that is >100 (e.g. 150%).2) Inserting MoviesNote: Ann Palmenberg has provided some sample QuickTime movies for use in your tutorial PPT presentation. Go to /acp and click on Public Data, Class Resources to download a quicktime movie file.Note: If you highlight an inserted mov ie you can select Loop from the Mov ie tools in the formatting palette. This way your movie will play over and over during your onscreen show.Note: PPT will use the QuickTime mov ie player that is installed on your Macintosh or PC. It does NOT have its own internal movie player. Moreover, unlike images that can be inserted into your PPT presentation, when you tell PPT to insert a movie, the program only really inserts a pointer to the location of that mov ie on your harddriv e. That is, PPT remembers where you told it to find that movie and goes back to that location whenever you want to play the movie. This is an IMPORTANT concept, because if you transfer your PPT presentation to another computer, you must also transfer the inserted movie files too, or the program can’t find them or play them.3) Inserting pictures into PPT is similar to the insertion of clipart.Create a new slides at the end of your presentation that contains only a title box. (Just like Lesson 3.1 above).Open this new slide in Slide view, then select “P P icture/ From File” from the “I I nsert” menu. In the dialogue box choose an image from your hard drive or download one from the web.Select a file then click O O K. The picture will appear in your slide, where it can be dragged to a favorable location.Note: You can insert many popular graphics formats into your PPT presentation: Joint Photographic Experts Group (JPEG), Macintosh Picture (PICT), Macintosh paint (PNTG), Portable Network Graphics (PNG), Windows Bitmap (BMP), Portable Document Format (PDF), Encapsulated postscript (EPS), Graphics Interchange Format (GIF), and Tagged Image File Format (TIFF).Note: Images should be inserted into PPT at the correct size. You should not have to scale them up or down in size. Scaling images up in size may show their pixels and scaling them down in size means the files are too large in size (bytes of information). There is a separate tutorial at /medialab under “How to” that goes ov er “getting images into PPT correctly”.Note: In the “Picture Palette” under “Tools” is a v ery useful element for working with pictures,called “Crop” (). Should you only require a small portion of a figure, the rest can be removed by judiciously cropping the edges of the inserted picture with this tool. You can also duplicate the picture and crop different portions from each image.1) Slide to slide transitions.Use Slide View to go back to the first slide of your presentation. Then click on the “O O nScreen” icon (the one that looks like a mov ie screen) in the lower left corner of your screen. The slide should FILL your Macintosh screen.Click <<rtn>, or click the mouse button, OR press the down-arrow key, to advance to the next slide. Note: There are 3 different ways to adv ance your slides sequentially during an “OnScreen” show: (1) by pressing the <rtn> key, (2) by pressing the “down-arrow” key, and (3) by clicking on your mouse. As you advance through your presentation, you can reverse the direction with the up-arrow key. Remember, some of these slides contain a lot of material, and each time you advance by any of the 3 modes, the computer must think a bit. Be patient.When you reach your movie slide, click twice on the movie to make it play. When you reach the end of your presentation, PPT will kick you out of OnScreenView and place you back into SlideView. You can end the OnScreen show at any time, by pressing the Escape (esc) key. Fun, isn’t it!If you wish, r r ear range the order of your slides using the SortViewer .While you are in the SortView mode, you can easily add animated transitions for the slides, so they appear to morph into one another during your On Screen show. To do this, c c lick on any slide, or group of slides to highlight it (them), then select a “S S lide t ransition” from the S S lideShow menu. Select “B B oxIn” “Checkerboard” or whatever else seems interesting.Save your file, then run it through the OnScreenShow again, to see what effects the v arious transitions have.If you like, you may select a different transition between every slide... but if you actually do this for a REAL presentation, your audience will probably find it distracting to the information flow.2) Building “body object” text.The entry of text into the “body-object” boxes that we practiced in Lesson 3, has two practical purposes. First, body-object text can be very easily entered in OutlineView, so it is directly formatted on new slides with almost no hassle. The second purpose for body text, is so text itself can be “built” or appear to be phased in, line by line, or point by point, during an OnScreenShow.Return to S S lideView, and select any of the 1st three slides we made (the slide should include a title and also several lines of body-text). Click on the body text to highlight it.In the S S lideShow menu, select A A nimation then W W ipe Right or any other effect, then return to SlideView.Now rerun your O O nScreenShow and watch what happens when you hit this slide. Each click of the mouse should have an effect.Note: When the text of a slide is “built” the first click of the mouse will launch the slide. The title and any graphics will appear according to the “transition” mode that is selected. The next click of the mouse will launch the first key point of the body text, and each subsequent click will launch the subsequent points, so they appear on the screen one at a time, even though in reality they are all part of the same slide.3) Building graphics, movies and other objects.PowerPoint will also allow you to “animate” v irtually any text, pictures, graphics, charts or mov ies on your slides and play them with desired effects during your presentations. If you hav e sev eral objects you want to link as a unit, be sure to “group” them before doing the following Lesson.Go to any of your slides that contains a few items of text, and perhaps some graphics, like your boat slide.Open the S S lideShow Custom animation menu.Choose an item on this slide (Group 3) that you wish to animate and then choose an E E ntry E f fect: for that item.If you choose to animate more than one object make sure you s s elect the order for each animation in the O O rder and Timing Tab. Decide whether you want that ev ent to happen at a specified timed interval, or at the next sequential mouse click.Remember also that you can t t est the ef fects you have created, by clicking on the P P lay button.Helpful hints for PowerPoint users1.Another way to “build” graphics is make successive slides, each with another part of the figure.Actually, it is easier to make the last slide (or the most complex slide) first, copy it successively in the Slide Sorter, then “erase” stuff from the initial slides so that it seems as if you are gradually adding more figures or text.2.Slide titles should nev er be less than 32 pt, for visibility. Text should nev er be less than 20 pt,and preferably larger.3.Remember the “Rule of 5 & 5”. In general, no more than fiv e lines of text on a slide and nomore than five words in each line of text on the slide! Think about it… if you use five lines of text and five words in each line that is 25 words for an audience to read and comprehend when they should be paying attention to you!4.Although PPT will allow the use of millions of colors, in truth there are few colors that makeeffective slides. Dark backgrounds (blue or black) are OK if the projection room is dark. In this case, yellow, white or light blue text will show up better. Other darker colors like green, orange, red may detract from your talk. Be careful if you use red text on a dark background. It may look fine on your computer but will project with poor contrast on the screen. Light backgrounds (white, grey) with dark text (black, dark blue, dark green), will always project nicely. Hint: the PPT default color schemes in F F ormat/ Color Schemes are effective, attractive and easy to use.5.If your mov ies don’t play right. Delete them then reinsert them. Sometimes, the PPT pathpointers get screwed up.6.OnScreenShows require an LCD projector that can hook up to your computer. Properlyinstalled, whatev er you then see on your computer screen will be projected for the audience.Sev eral campus halls, including Biochem 175 and B1118 are equipped for this. If you are planning to do a presentation elsewhere though, make sure you check out the equipment ahead of time in the Media Lab (rm 401 Biochem 98 Addition)/medialab.。
如何在幻灯片中设置幻灯片弹跳时间
如何在幻灯片中设置幻灯片弹跳时间在现代演示文稿中,幻灯片的切换效果是吸引观众目光的重要元素之一。
其中一种常见而有趣的切换效果是幻灯片弹跳时间。
通过设置幻灯片弹跳时间,可以让幻灯片视觉上更具活力和动感,增强观众对演示的注意力。
本文将介绍如何在幻灯片中设置幻灯片弹跳时间。
1. 打开幻灯片软件首先,打开你选择的幻灯片软件,这可以是Microsoft PowerPoint、Google Slides、Keynote或其他类似软件。
2. 创建幻灯片在软件中创建一个新的幻灯片或打开已有的演示文稿。
3. 选择幻灯片在演示文稿中选择你想要设置弹跳时间的幻灯片。
可以通过点击幻灯片缩略图或导航工具栏上的相关选项来选择。
4. 进入幻灯片切换设置在菜单栏或工具栏中找到“幻灯片切换”或类似的选项,点击进入幻灯片切换设置界面。
5. 选择弹跳时间在幻灯片切换设置界面中,找到与弹跳时间相关的选项。
根据你的软件版本和界面设计,这个选项可能被称为“过渡时间”、“转换时间”或类似的名称。
选择这个选项。
6. 设置弹跳时间在弹跳时间选项中,你可以设置幻灯片切换的持续时间。
根据软件的不同,你可以通过手动输入时间或通过拖动滑块来调整持续时间。
通常,时间以毫秒或秒为单位,例如500毫秒或1秒。
7. 预览效果在设置弹跳时间后,你可以通过预览功能或播放模式来查看效果。
这样可以帮助你判断弹跳时间是否符合你的预期和设计要求。
8. 应用到其他幻灯片(可选)如果你希望将相同的弹跳时间应用到其他幻灯片,可以在切换设置界面中选择“应用到全部”或者手动选择多个幻灯片。
9. 保存更改完成弹跳时间的设置后,记得保存你的演示文稿,以便在需要时使用。
总结:通过以上步骤,你可以在幻灯片中设置幻灯片弹跳时间。
这项功能可以为你的演示文稿增添活力和吸引力,使你的观众更加专注和参与进来。
在使用弹跳时间时,记得要根据实际需要调整时间长度,并保持合适的节奏,以确保观众的良好体验。
powerpoint演示文稿(powerpointpresentation)
powerpoint演示文稿(powerpoint presentation)Control of series cyclic slidesQ: I've done a lot of PowerPoint slides that need to be shown on the client that doesn't install PowerPoint, and some of the fragments or all of them need to be automatically recycled. How should I control it?Answer: you can create playlists first, and then play them with the Ppview32.exe player provided in the PowerPoint cd. The playlist creation method is as follows:Open Notepad or open a new empty document in any word processor. In the document, enter the filename of the presentation to be displayed (including file extensions). Note that each file name is entered into different rows. If the presentation is in a different folder, enter the path to the file location. For example: "C:\My Documents\Pres1.ppt"". Finally, save the document as a text file that extends to lst. If all of the presentations are in the same folder, then save the document to this folder. Otherwise, you can save the document to any folder you want.Note: if the name of the presentation file contains spaces, the file name will contain quotation marks, such as "Sales Presentation.ppt"".For playback loops, you can use the command line options to control the presentation of the presentation in the playlist. For example, to run the PRES1 slide repeatedly and press the Esc key until the PRES2 slide is repeated, until the Esc keyis pressed, the following format can be used:/l Pres1.ppt/l Pres2.pptAgain, you need to run each presentation once, and then start again at the end of the last presentation. You can use the following format:/l "Pres1.ppt", "Pres2.ppt", "Pres3.ppt""Four methods of playing PowerPoint presentations in different placesIn practical work, we often work reports, experience specific content made presentations, reporting to courseware form, sometimes encountered in PowerPoint made a presentation to another machine, because there is no software installation PowerPoint or PowerPoint fault and not playing. How should we deal with this situation, and what are the methods of dealing with it? Here will be the author summed up some of the experience in practical application and share with you.Direct copy methodIn general, the direct copy method is a simple and convenient method, but also one of the most dangerous method, because this method copies out of the presentation because there is no self playback, so only in those PowerPoint already installed computer playback. Therefore, it is recommended that you do notmake clear whether Power is installed in other computersDo not use this method in the case of Point.Two. Show slides directlyIn addition to playing the presentation in PowerPoint, we can also save it as a slide show file so that it can be shown directly in Windows.The method is: open the existing presentation, click the file menu, select "save as command, save as dialog, in which the" save type "drop-down list, select the" PowerPoint show ", then" save ", the current file extension PPS show file. After you want to play, just double-click this file, you can show this presentation. It is important to note that this file cannot be displayed in a machine without PowerPoint installed.Three 、 use PowerPoint playerSome friends may never have heard of PowerPoint players, and it's not surprising at all, because in PowerPoint2000, Microsoft has just added this feature. With it, we can not install PowerPoint can play the demo, and play in the player and the effect of the demonstration in PowerPoint exactly the same effect.To play a presentation on a machine without a PowerPoint, first copy the player file and the produced presentation on the floppy disk, and the player file is in "Microsoft/Office /Offic"EXlators "file name is Ppview32.exe (or directly in the Office2000 installation disk, suggest that you find) in the execution of the player and the presentation files are copied to the hard disk, otherwise the playback speed is too slow. The specific methods of use are as follows:The first to find the Ppview32.exe file, double-click to open the PowerPoint player.The selected file to play from the player window, then select the changing way in "changing" option, if you want to set the relevant options, click the options set, in which, if the demo files your own settings, select "use the saved settings, click OK after setting".C. note that if the password protected a slide show ", and select the presentation, when you click" display "button, the dialog box will pop up, ask you to enter the password, the password is to prevent others free to quit playing presentation.Four, the presentation packageSometimes we made the presentation may be larger, which contains a lot of pictures or links to the TrueType font, then using the three methods described above may be difficult to completely copy all internal links, and the package can be related to the presentation of all the content is preserved, even if the linked file or TrueType font is not afraid. Then will generate the Pngsetup.exe file package (package file name to copy) to other computers to unpack. The specific packaging process is as follows:I want to open the package of the presentation, the implementation of the "file / package" command system, "the packaging Wizard dialog box will pop up.Click the "next" button to enter the "select files" dialog box, which has two choices, we can browse to select other presentations, and allowed to pack multiple files at once.C. select the file, click "next" button, enter the "target" Wizard dialog box, the default is the floppy drive, but suggest that you select the hard disk access, which not only fast, but not easy to failure, when in need can also be copied to the floppy disk.Click the "next" button to enter the "link" in the dialog box, note that the link file must be packaged. For embedded TrueType fonts, one is best not to choose, because the selection will greatly increase the capacity of the package file. If you want to use some special fonts for beauty, it's better to use pictures instead of fonts directly.Click the "next" button to enter the "player" dialog box, if you want to play the presentation in Power Point is not installed on the machine, select the "player" Windows95 or NT a.Click the "next" button to enter the "complete" dialog box, click the finish button to begin the process of packaging, packaging after the end of the work, will give the package success tips, click OK to complete the work package.To pack the presentation broadcast on the other computer, must be generated to pack unpack the file to the destination computer. The specific process is as follows:The double Pngsetup.exe program, running the program will display the dialog box, select the unpacked files required position.The input of the target folder, click "OK", the system will prompt the user, if there is a file with the same name in the destination folder, unpack the file will overwrite it, click yes".At this time, began to unpack process, after completion will give a presentation has been successfully installed,If you want to run slide show now, click "yes" to play. (unit: Department of management of Armed Police Academy)。
如何在ppt中加入视频(HowdoIaddvideotoPPT)
如何在ppt中加入视频(How do I add video to PPT)First, add video in PPT(I) direct broadcast video;The method for playing the prepared video files as a movie file directly into the slide, this method is the most simple, the most intuitive, using this method, the video file into the slide, PowerPoint provides only a simple [pause] and [to play] control, and no other more the operation button to choose.The following are the specific steps:1. run the PowerPoint program and open the slides that need to be inserted into the video file.2. move the mouse to the menu bar, click the insert options, and execute the movie and sound from the open drop-down menu, the movie command in the file.3. in the pop-up file selection dialog box, will be prepared to choose video files (Note: only Windows media player can play in the film), and click Add button, so you can have the video file into the slide.Then according to the 4. screens (see below), "automatic" refers to when PPT entered the show state, automatically seeded in the video, "refers to in the click" need to click the mouse or other PgUp began to play video.5., you can also use the mouse to select the video file window,resize it, and move it to the right place,6., in the process of playing, you can move the mouse to the video window, click, the video will be suspended play. If you want to play again, click with the mouse.(two) insert controls to play videoThis method is to insert video files as controls into the slide, and then modify the control properties to achieve the purpose of video playback. Using this method, there are a variety of buttons to choose from, the playback process can be completely self control, more convenient and flexible. This method is more suitable for PowerPoint courseware in picture, text and video on the same page.1. run the PowerPoint program and open the slides that need to be inserted into the video file.2. move the mouse to the menu bar, click the view options, select the control toolbox from the open drop-down menu, and then select the [other controls' button from the lower menu.3. in the subsequent opening of the control interface options, select the "Windows Media Player" option, and then move the mouse to the editing area of PowerPoint, draw a rectangle of suitable size, then the area will be automatically changed to Windows Media Player player interface4. select the play screen with the mouse, then click the right mouse button, select the "properties" command from the pop-upshortcut menu, and open the "properties" window of the media player interface.5. in the properties window, enter the exact path and file name of the video file that needs to be inserted into the slide at the File Name setting item. Thus, when you turn on the slide, you can play the specified video via the play control button.6., in order to make the inserted video file better organized together with the slide, you can also modify the property settings interface, control bar, play slider bar, and the video properties bar position.7. during playback, you can control the video through the buttons in the media player, [stop], stop [pause] and [adjust volume] buttons.(three) insert objects to play videoThis method is to insert video files as objects into the slide, and unlike the two methods, it can select the video clips that need to be played, and then play it back. Implementation steps for:1. open the slides that need to insert video files, click the insert / object command, and then open the Insert Object dialog box.2. after selecting the new option, then select the video clip option at the corresponding object type settings bar, and then click ok.After 3., you automatically insert a "Windows Media Player" player in PPT, but only an empty player and does not contain any video. You need to move the mouse up, then right-click, and select properties". In the pop-up window, click the button after the "Customize" button, pop-up the properties dialog window, as follows.4. according to the window prompt, find the movie you need to play,And according to the need to set up other projects, can be determined.5. during playback, you can control the video through the buttons in the media player, [stop], stop [pause] and [adjust volume] buttons.The Windows Media Player video is described above, and it is the mode of operation in OFFICE2003. Another common type of RM video can also be inserted into PPT, except that the methods are slightly different. FLASH files are also very much current animated video, I would like to introduce you.Two, add flash video in PPTWith the PowerPoint courseware, with its simple and effective by people love, but not its animation Flash wonderful movie, if in the PowerPoint courseware by Flash film, PowerPoint can make the courseware more vivid, the following introduces several methods to use.First, insert object methodIn this way, a play window pops up when you play the slide, which responds to all Flash mouse events. You can also adjust the size of the window as needed. Its disadvantage is that after the play is over, click the [Close] button to close the window.1. run the PowerPoint program, open the slide to insert animation.2. select the insert option in the menu, and select the object from the open drop-down menu". The Insert Object dialog box appears, select file creation, click browse, select the Flash animation file you need to insert, and then click OK to return the slide.3. then, on the slide on the emergence of a Flash file icon, we can change the size of the icon or move the location, and then click the right mouse over the icon, select the action settings command.4. in the pop-up window, select "click" or "mouse" two labels can, then click the "object of action", select "activate" in the drop-down menu, then click OK to complete the operation, insert animation.Second, direct link methodThe feature of this method is simple, suitable for beginners in PowerPoint, and it can also insert EXE type files into theslides.1. run the PowerPoint program, open the slide to insert animation.2. insert any object in it, such as a paragraph of text, a picture, etc.. The purpose is to set hyperlinks to it. Preferably, this object is related to the content of the animation being linked to.3. select this object, click the Insert menu, and then click the hyperlink in the open drop-down menu".4. in the pop-up window, "link to", select the original file or Web page, click the [file] button, select the animation you want to insert, and click [OK] to complete. When you play animation, just click the hyperlink object that you set up.Third, the control embedded methodThis method is the animation as a control is inserted into PowerPoint, characteristics of the way it is the size of the window in the design on the fixed block size is set in the animation showing the size of the window. When the mouse is in the Flash play window, in response to the Flash mouse event, it is easy to control the mouse event in response to the PowerPoint when the mouse is outside the Flash window.1. run the PowerPoint program, open the slide to insert animation.2. click the view option in the menu, select the toolbox of the toolbar in the drop-down menu, and then select the other controls button from the drop-down menu.3. in the subsequent control options interface, select ShockwaveFlashObject "option," ten "word cursor, then edit area of the cursor to PowerPoint, draw a rectangle of suitable size, is the animation area, there will be a box.4. double click this box to appear the VB interface, where the property window has a custom attribute, and points to the three point next to the custom, which appears on the property page. In WOVIE URL, enter the full address of the Flash animation, and press ok. Note that the input path must be completely filled with the suffix name.One drawback of this method of inserting Flash animation is that when the slides are played, the Flash animation is automatically played and cannot be controlled autonomously.Fourth, record selection methodThis method uses the screen recorder software to record and delete the fragments needed in the Flash movie. Here's the screen video expert v.3.5 as an example to illustrate the usage after cutting film will record Avi format conversion software, open the video, a variety of settings in the window, in the "basic settings"directory check: "while recording sound recording frequency selection" automatic "," direct recording generation "and" Avi "in the compression settings selected" Microsoft Video 1 "Cinepak codec by" or Radius "compression program, finally select the file location; open full screen Flash film, recording the directory to check the" selection ", or" window ", generally do not choose" full ", the keyboard press F2 to start the video recording, and then press F2 the end, the software will automatically generate the Avi file and stored in a temporary folder. Then open the PowerPoint work interface, in accordance with the third methods, the use of "Windows Media Player" control embedded use, of course, can also make it record, generate exe program, insert PowerPoint use.In short, we can make any Flash movie or to reasonable fragments in PowerPoint courseware by PowerPoint, thus enhancing the interactivity, make this a simple and practical tool is full of vitality, make PowerPoint courseware more attractive.During the PPT slide show, some video is sometimes inserted to achieve the effect of the presentation. However, many people are very strange about this operation and do not know where to start. To explain in detail how to add video skills in PPT!Three, add video demo in pptFirst, you need to make sure that the video has been saved into the computer, and that the format is best not to use "RMVB", which is recommended by WMV;Go to the Insert tab, click the movie down button in the mediaclip Options group, and select the movie in the file";Select the video path in the pop-up insert window, and then click ok;OK, it will pop up later. "How do you want to start playing the film when the slide shows?"" Here, whether private demand is to choose the "automatic" or "click" (as the name implies, choose "automatic" automatic video playback, full screen if you choose "click" is after the full screen click the left mouse button to see video).OK, the video has been added to PPT, is that simple, and now try to play properly already!。
- 1、下载文档前请自行甄别文档内容的完整性,平台不提供额外的编辑、内容补充、找答案等附加服务。
- 2、"仅部分预览"的文档,不可在线预览部分如存在完整性等问题,可反馈申请退款(可完整预览的文档不适用该条件!)。
- 3、如文档侵犯您的权益,请联系客服反馈,我们会尽快为您处理(人工客服工作时间:9:00-18:30)。
Sally
Sally Pat
456 Main St
456 Main St 12 State St
555-2221
555-2223 555-1235
Winter 2002
Arthur Keller – CS 180
3–5
About Relational Model
Order of tuples not important Order of attributes not important (in theory)
3 <=5x3x7
Cardinality of domain Domains N N1 N2 A A1 A2 T T1 T2
Attribute
Component
.
.
N1 A1 T7 N1 A2 T1 N1 A3 T1 N2 A1 T1
N3
N4 N5
A3
T3
T4 T5 T6
Tuple µ
T7
Domain
name Sally Sally addr 123 Maple 123 Maple beer Bud Miller
• Notice the difference: Favorite is many-one; Likes is many-many.
Winter 2002 Arthur Keller – CS 180 3–12
Essential
if multiple roles for an E.S.
Winter 2002
Arthur Keller – CS 180
3–10
name
addr
name
manf
Drinkers
Likes
Beers
1
2
Favorite
Buddies husband wife
Married
Likes(drinker, beer) Favorite(drinker, beer) Married(husband, wife) Buddies(name1, name2)
Entity Set Relation
E.S. attributes become relational attributes.
name manf
Beers
Becomes:
Beers(name, manf)
Winter 2002
Arthur Keller – CS 180
3–8
Keys in Relations
Winter 2002
Arthur Keller – CS 180
3–6
Why Relations?
• Very simple model. • Often a good match for the way we think about our data. • Abstract model that underlies SQL, the most important language in DBMS’s today.
• Jan. 17 (TH)
Relational Algebra.
Read
SQL
Chapter 5. Project Part 1 due.
• Jan. 22 (T)
Queries. Read Sections 6.1-6.2. Assignment 2 due.
Winter 2002 Arthur Keller – CS 180 3–1
Example
Combine Drinker(name, addr) with Favorite(drinker, beer) to get Drinker1(name, addr, favBeer). • Danger in pushing this idea too far: redundancy. • e.g., combining Drinker with Likes causes the drinker's address to be repeated, viz.:
• For one-one relation Married, we can choose either husband or wife as key.
Winter 2002 Arthur Keller – CS 180 3–11
Combining Relations
Sometimes it makes sense to combine relations. • Common case: Relation for an E.S. E plus the relation for some many-one relationship from E to another E.S.
But
SQL uses “bags” while the abstract relational model is set-oriented.
Winter 2002
Arthur Keller – CS 180
3–7
Relational Design
Simplest approach (not always best): convert each E.S. to a relation and each relationship to a relation.
Relational Model
• Table = relation. • Column headers = attributes. name • Row = tuple WinterBrew BudLite …
Beers
manf Pete’s A.B. …
• Relation schema = name(attributes) + other structure info., e.g., keys, other constraints. Example: Beers(name, manf)
Beers(name, manf)
Winter 2002
Arthur Keller – CS 180
3–9
E/R Relationships Relations
Relation has attribute for key attributes of each E.S. that participates in the relationship. • Add any attributes that belong to the relationship itself. • Renaming attributes OK.
of one or more domains FINITE only; empty set allowed
Tuples = members of a relation inst. Arity = number of domains Components = values in a tuple Domains — corresp. with attributes Cardinality = number of tuples
Schedule
• Today: Jan. 10 (TH)
Relational Model,
Functional Dependencies. Read Sections 3.1-3.5.
• Jan. 15 (T)
Normal
Forms, Multivalued Dependencies. Read Sections 3.6-3.7. Assignment 1 due.
Winter 2002 Arthur Keller – CS 180 3–4
Relation Instance
Name Bob Address 123 Main St Telephone 555-1234
Bob
Pat Harry
128 Main St
123 Main St 456 Main St
555-1235
An attribute or set of attributes K is a key for a relation R if we expect that in no instance of R will two different tuples agree on all the attributes of K. • Indicate a key by underlining the key attributes. • Example: If name is a key for Beers:
Winter 2002
Arthur Keller – CS 180
3–13
ExaHosts
Hosts(hostName) Logins(loginName, hostName)
At(loginName, hostName, hostName2)
• In At, hostName and hostName2 must be the same host, so delete one of them. • Then, Logins and At become the same relation; delete one of them. • In this case, Hosts’ schema is a subset of Logins’ schema. Delete Hosts?
Winter 2002 Arthur Keller – CS 180 3–2
Relational Data Model
Set theoretic Relation as table Rows = tuples Domain — set of values Columns = components like a data type Names of columns = attributes Cartesian product (or product) Set of attribute names = schema D1 D2 ... Dn REL (A1,A2,...,An) n-tuples (V1,V2,...,Vn)