apache优化
Apache出现的CPU高占用率该怎么解决
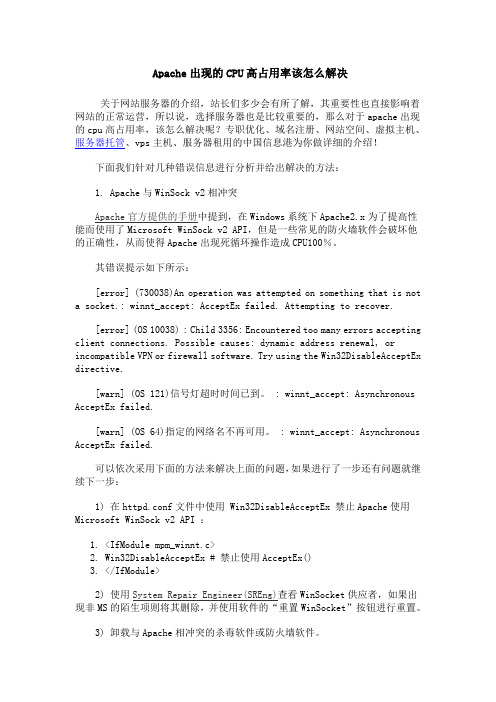
Apache出现的CPU高占用率该怎么解决关于网站服务器的介绍,站长们多少会有所了解,其重要性也直接影响着网站的正常运营,所以说,选择服务器也是比较重要的,那么对于apache出现的cpu高占用率,该怎么解决呢?专职优化、域名注册、网站空间、虚拟主机、服务器托管、vps主机、服务器租用的中国信息港为你做详细的介绍!下面我们针对几种错误信息进行分析并给出解决的方法:1. Apache与WinSock v2相冲突Apache官方提供的手册中提到,在Windows系统下Apache2.x为了提高性能而使用了Microsoft WinSock v2 API,但是一些常见的防火墙软件会破坏他的正确性,从而使得Apache出现死循环操作造成CPU100%。
其错误提示如下所示:[error] (730038)An operation was attempted on something that is not a socket.: winnt_accept: AcceptEx failed. Attempting to recover.[error] (OS 10038) : Child 3356: Encountered too many errors accepting client connections. Possible causes: dynamic address renewal, or incompatible VPN or firewall software. Try using the Win32DisableAcceptEx directive.[warn] (OS 121)信号灯超时时间已到。
: winnt_accept: Asynchronous AcceptEx failed.[warn] (OS 64)指定的网络名不再可用。
: winnt_accept: Asynchronous AcceptEx failed.可以依次采用下面的方法来解决上面的问题,如果进行了一步还有问题就继续下一步:1) 在httpd.conf文件中使用 Win32DisableAcceptEx 禁止Apache使用Microsoft WinSock v2 API :1.<IfModule mpm_winnt.c>2.Win32DisableAcceptEx # 禁止使用AcceptEx()3.</IfModule>2) 使用System Repair Engineer(SREng)查看WinSocket供应者,如果出现非MS的陌生项则将其删除,并使用软件的“重置WinSocket”按钮进行重置。
Apache与Tomcat协同配置参考
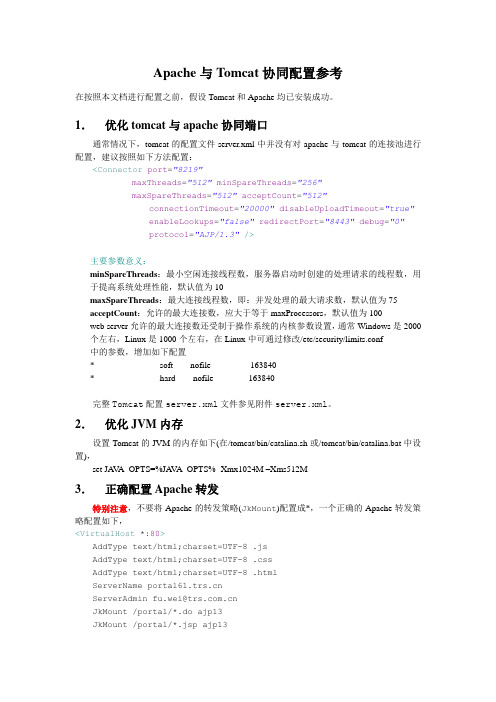
Apache与Tomcat协同配置参考在按照本文档进行配置之前,假设Tomcat和Apache均已安装成功。
1.优化tomcat与apache协同端口通常情况下,tomcat的配置文件server.xml中并没有对apache与tomcat的连接池进行配置,建议按照如下方法配置:<Connector port="8219"maxThreads="512"minSpareThreads="256"maxSpareThreads="512"acceptCount="512"connectionTimeout="20000"disableUploadTimeout="true"enableLookups="false"redirectPort="8443"debug="0"protocol="AJP/1.3"/>主要参数意义:minSpareThreads:最小空闲连接线程数,服务器启动时创建的处理请求的线程数,用于提高系统处理性能,默认值为10maxSpareThreads:最大连接线程数,即:并发处理的最大请求数,默认值为75acceptCount:允许的最大连接数,应大于等于maxProcessors,默认值为100web server允许的最大连接数还受制于操作系统的内核参数设置,通常Windows是2000个左右,Linux是1000个左右,在Linux中可通过修改/etc/security/limits.conf中的参数,增加如下配置* soft nofile 163840* hard nofile 163840完整Tomcat配置server.xml文件参见附件server.xml。
代码优化与性能分析工具

代码优化与性能分析工具在软件开发过程中,代码的优化和性能分析是非常重要的环节。
优化代码可以提高程序的执行效率,减少资源消耗,并改善用户体验。
而性能分析工具则可以帮助开发者发现代码中的性能瓶颈,有针对性地进行优化。
本文将介绍一些常用的代码优化和性能分析工具。
一、静态代码分析工具静态代码分析工具可以在编译阶段检查代码中的潜在问题和错误,并提供一些优化建议。
以下是一些常用的静态代码分析工具:1. 阿里巴巴编码规范插件:该插件可以检查代码是否符合阿里巴巴Java开发规范,并给出相应的修改建议。
2. FindBugs:FindBugs是一个用于静态分析Java字节码的工具,能够发现代码中的潜在问题和错误。
3. PMD:PMD是一个开源的代码分析工具,它可以检查代码中的潜在问题并提供相应的修复建议。
二、性能分析工具性能分析工具可以帮助开发者找到代码中存在的性能问题,提供详细的性能数据和分析报告,以便进行有针对性的优化。
以下是一些常用的性能分析工具:1. Java VisualVM:Java VisualVM是一款Java虚拟机监控和性能分析工具,可以监控应用程序的性能指标,并提供堆转储、线程转储和CPU快照等功能。
2. JProfiler:JProfiler是一款全功能的Java性能分析工具,可以实时监控代码的执行情况,并提供内存分析、线程分析和CPU分析等功能。
3. Apache JMeter:Apache JMeter是一款用于性能和负载测试的工具,可以模拟多种场景下的并发用户,并监控系统的性能指标。
4. Chrome开发者工具:Chrome开发者工具内置了一些强大的性能分析功能,可以监测网页的加载时间、JavaScript执行时间等信息,并提供相应的优化建议。
三、代码优化技巧除了使用工具进行性能分析,开发者还可以通过一些常用的代码优化技巧来改进程序的性能。
1. 减少IO操作:IO操作通常是程序性能的瓶颈之一。
Apache的KeepAlive参数

Apache的KeepAlive参数在Apache中,KeepAlive是HTTP协议中的一个特性,用于在同一个TCP连接上连续发送多个HTTP请求和响应。
它允许在单个连接上重用已经建立的TCP连接,从而减少了TCP连接的建立和关闭的开销,提高了性能。
在Apache中,有几个与KeepAlive相关的参数可以配置:1. KeepAlive:用于启用或禁用KeepAlive功能。
设置为Off表示禁用KeepAlive,设置为On表示启用KeepAlive。
2. MaxKeepAliveRequests:设置在单个KeepAlive连接上允许发送的最大HTTP请求次数。
当达到该次数后,Apache会关闭当前的KeepAlive连接,并建立新的连接。
这个参数的默认值是100,可以根据实际需求进行调整。
3. KeepAliveTimeout:设置KeepAlive连接的超时时间。
当在指定的时间内没有新的请求到达,Apache会主动关闭KeepAlive连接。
这个参数的默认值是5秒,可以根据实际需求进行调整。
4. MaxRequestsPerChild:设置每个工作进程处理的最大请求数。
当达到该请求数后,Apache会重启工作进程,以防止内存泄漏等问题。
这个参数的默认值是0,表示不限制请求数。
如果设置为非零值,可以提高服务器的稳定性。
通过适当地调整这些参数,可以优化Apache的性能和资源利用率。
下面是一些常见的优化建议:1. 启用KeepAlive功能,以减少TCP连接的建立和关闭的开销。
将KeepAlive参数设置为On。
2. 调整MaxKeepAliveRequests参数,以平衡TCP连接的重用和资源的释放。
如果服务器有足够的资源,可以增加这个值,以减少连接的重建次数。
3. 调整KeepAliveTimeout参数,以适应不同类型的应用场景。
如果网站的请求频率较高,可以将该值设置为较小的值,以提高性能。
apache优化配置

#define DEFAULT_SERVER_LIMIT 256
#define MAX_SERVER_LIMIT 20000
MaxRequestsPerChild 每个子进程处理的最大请求数
Timeout 10
KeepAlive On
MaxKeepAliveRequests 200
KeepAliveTimeout 15
<IfModule prefork.c>
StartServers 20
MinSpareServers 20
编译apache时可以选择工作模式
例:
如想使用worker模式,可以使用如下参数
./configure -with-mpm=worker
MaxClients是这些指令中最为重要的一个,设定的是Apache可以同时处理的请求,是对Apache性能影响最大的参数。其缺省值150是远远不够的,如果请求总数已达到这个值(可通过ps -ef|grep http|wc -l来确认),那么后面的请求就要排队,直到某个已处理请求完毕。这就是系统资源还剩下很多而HTTP访问却很慢的主要原因。系统管理员可以根据硬件配置和负载情况来动态调整这个值。虽然理论上这个值越大,可以处理的请求就越多,但Apache默认的限制不能大于256。如果把这个值设为大于256,那么 Apache将无法起动。事实上,256对于负载稍重的站点也是不够的。在Apache 1.3中,这是个硬限制。如果要加大这个值,必须在“configure”前手工修改的源代码树下的src/include/httpd.h中查找 256,就会发现“#define HARD_SERVER_LIMIT 256”这行。把256改为要增大的值(如4000),然后重新编译Apache即可。在Apache 2.0中新加入了ServerLimit指令,使得无须重编译Apache就可以加大MaxClients。
服务器性能优化工具推荐提升服务器性能的实用工具介绍

服务器性能优化工具推荐提升服务器性能的实用工具介绍服务器性能优化工具推荐提升服务器性能的实用工具介绍服务器性能对于现代企业的成功至关重要。
为了确保服务器的高效运行和最大化其性能,使用适当的工具是必不可少的。
本文将向您介绍一些实用的服务器性能优化工具,帮助您了解如何提升服务器性能,从而实现更好的业务表现。
一、监测工具1. PerfMonPerfMon是Windows操作系统自带的性能监测工具。
通过使用PerfMon,您可以实时监测服务器的关键性能指标,如CPU利用率、内存使用情况、磁盘活动等。
您可以创建自定义的性能计数器,并根据需要进行实时监测和分析。
2. NagiosNagios是一个广泛使用的开源监控软件,适用于多种操作系统。
它提供了全面的服务器性能监测和报警功能,通过可视化界面展示服务器状态、网络状态和服务运行情况,使管理员能够及时发现并解决潜在的性能问题。
二、调优工具1. Apache JMeterApache JMeter是一种开源的多线程测试工具,主要用于模拟负载压力和性能测试。
通过使用Apache JMeter,您可以模拟多用户同时访问服务器,并监测服务器的负载情况。
它提供了强大的测试脚本和报告功能,帮助您确定服务器在高负载下的性能瓶颈并进行相应调整。
2. MySQLTunerMySQLTuner是一款针对MySQL数据库的性能调优工具。
它能够分析MySQL服务器配置,并为您提供优化建议。
通过运行MySQLTuner,您可以优化数据库参数、优化查询语句、减少连接数等,从而提升MySQL数据库的性能和响应速度。
三、缓存工具1. MemcachedMemcached是一个广泛使用的分布式内存对象缓存系统。
通过将常用数据存储在内存中,Memcached能够大大减少服务器的数据库负载和响应时间。
它可用于各种编程语言,并且易于安装和配置。
2. Varnish CacheVarnish Cache是一个高性能的开源HTTP缓存工具。
Apacheaccess.logerror.log日志文件太大的解决优化方法

Apacheaccess.logerror.log⽇志⽂件太⼤的解决优化⽅法
有没有发现Apache⽣成的⽇志⽂件⼀天⽐⼀天⼤,不是⼀般⼤,若你apache安装在C盘,那可惨了,不⼏天硬盘就满了,太恐怖了,有没有办法优化⼀下⽇志,让它不那么⼤?答案是有的。
⼀、停⽌Apache服务,删除Apache下/logs/⽬录中的error.log和access.log⽂件。
⼆、打开Apache的conf/httpd.conf配置⽂件,找到以下配置信息:
ErrorLog logs/error.log
CustomLog logs/access.log common
请在上述两⾏配置代码前加“#”号注释掉,按照下⾯的修改:
错误⽇志⽂件error.log限制错误⽇志⽂件为 1M:
ErrorLog "|bin/rotatelogs.exe -l logs/error-%Y-%m-%d.log 1M”
或者每天⽣成⼀个错误⽇志⽂件:
ErrorLog "|bin/rotatelogs.exe -l logs/error-%Y-%m-%d.log 86400"
⽇志⽂件access.log限制访问⽇志⽂件为 1M:
CustomLog "|bin/rotatelogs.exe -l logs/access-%Y-%m-%d.log 1M” common
或者每天⽣成⼀个访问⽇志⽂件:
CustomLog "|bin/rotatelogs.exe -l logs/access-%Y-%m-%d.log 86400" common
修改完成后,保存httpd.conf⽂件,重启Apache,过两天再看下⽇志⽂件吧?肯定好多了。
apache用法

apache用法Apache是一款流行的web服务器软件,它能够提供网页浏览、动态内容创建、数据库服务等多种功能。
在本文中,我们将介绍Apache 的安装、配置、管理、安全性和优化等方面的知识。
一、安装Apache安装Apache非常简单,您可以从官方网站下载适合您操作系统的安装包。
在安装过程中,您需要选择安装路径、配置文件位置等选项,并设置一些基本参数。
安装完成后,您可以通过浏览器或命令行来测试Apache是否正常运行。
二、配置ApacheApache的配置文件位于`/etc/httpd/conf`目录下,该文件包含了Apache服务器的各种设置。
配置文件使用了较为简洁的语法,方便修改和调整。
您可以使用文本编辑器打开配置文件,根据您的需求进行修改。
在配置文件中,您可以设置虚拟主机、监听地址和端口、启用或禁用某些模块等功能。
同时,您还可以配置SSL证书,以实现安全传输。
配置完成后,需要重新启动Apache服务器,使配置生效。
三、管理ApacheApache提供了多种管理工具,方便您监控和调整服务器状态。
您可以使用命令行工具`apachectl`来查看服务器状态、启动和停止服务、重新加载配置等操作。
此外,您还可以使用Web管理工具,如Apache自带的Web管理界面或第三方工具,通过浏览器进行管理操作。
四、安全性Apache具有较高的安全性,但仍然需要注意一些安全问题。
首先,确保您的配置文件没有安全漏洞,如弱密码、不正确的权限设置等。
其次,及时更新Apache软件和配置文件,以修复潜在的安全漏洞。
最后,限制对配置文件的访问,以防止未经授权的修改。
五、优化Apache优化Apache可以提高服务器的性能和稳定性。
首先,优化虚拟主机配置,根据实际需求设置合适的资源分配和访问控制。
其次,使用缓存技术,如反向代理和缓存服务器,减少对数据库的访问次数。
此外,合理配置服务器硬件资源,如内存、硬盘和CPU,以充分利用服务器性能。
- 1、下载文档前请自行甄别文档内容的完整性,平台不提供额外的编辑、内容补充、找答案等附加服务。
- 2、"仅部分预览"的文档,不可在线预览部分如存在完整性等问题,可反馈申请退款(可完整预览的文档不适用该条件!)。
- 3、如文档侵犯您的权益,请联系客服反馈,我们会尽快为您处理(人工客服工作时间:9:00-18:30)。
mod_jk的优化配置Optimal mod_jk configurationThere are many potential problems associated with the default configuration of mod_jk. Let's say it is perfectly adequate for a very low traffic website, but when pushing any moderate to high load to mod_jk, there will be connection problems. This is not due to any bug in mod_jk whatsoever, however, it is because the default configuration makes no assumption about your existing hardware or potential load, so, therefore, it is not tuned accordingly.Note that the configuration recommendations here are optimal as a base configuration to avoid many of the common problems users experience with mod_jk. There exist many other useful optimizations, but these depend on the environment and web application in use. See /connectors-doc/reference/workers.html for details on all available mod_jk properties.Let's take a look at a typical default configuration for Apache/Tomcat/mod_jk:workers.propertiesworker.list=loadbalancer,statusworker.node1.port=8009worker.node1.host=worker.node1.type=ajp13worker.node1.lbfactor=1worker.node2.port=8009worker.node2.host= worker.node2.type=ajp13worker.node2.lbfactor=1worker.loadbalancer.type=lbworker.loadbalancer.balance_workers=node1,node2worker.status.type=statusJBoss Web's (Tomcat) server.xml AJP snippet:<Connector port="8009" address="${jboss.bind.address}" protocol="AJP/1.3"emptySessionPath="true" enableLookups="false" redirectPort="8443" ></Connector>Apache's httpd.conf:<IfModule prefork.c>StartServers 8MinSpareServers 5MaxSpareServers 20ServerLimit 256MaxClients 256MaxRequestsPerChild 4000</IfModule>The above configuration, under load, may cause mod_jk to be very slow and unresponsive, cause http errors, and cause half-closed connections. These problems can arise because there are no connection timeouts specified to take care of orphaned connections, no error handling properties defined in workers.properties, and no connection limits set in Apache and Tomcat.First off, lets take care of Tomcat:Configuring server.xml:The main concern with server.xml is setting the connectionTimeout which sets the SO_TIMEOUT of the underlying socket. So when a connection in Tomcat hasn't had a request in the amount of time specified byconnectionTimeout, then the connection dies off. This is necessary because if the connection hasn't been used for a certain period oftime then there is the chance that it is half-close on the mod_jk end.If the connection isn't closed there will be an inflation of threads which can over time hit the maxThreads count in Tomcat then Tomcat will not be able to accept any new connections. A connectionTimeout of 600000 (10 minutes) is a good number to start out with. There may be a situation where the connections are not being recycled fast enough, in this instance the connectionTimeout could be lowered to 60000 or 1 minute.When setting connectionTimeout in Tomcat, mod_jk should also have connect_timeout/prepost_timeout set, which allows detection that the Tomcat connection has been closed and preventing a retry request.The recommended value of maxThreads is 200 per CPU, so here we assume the server is a single core machine. If it has been quad core, we could push that value to 800, and more depending on RAM and other machine specs.<Connector port="8009"address="${jboss.bind.address}"emptySessionPath="true"enableLookups="false"redirectPort="8443"protocol="AJP/1.3"maxThreads="200"connectionTimeout="600000"></Connector>Configuring workers.properties:See comments inline.worker.list=loadbalancer,statusworker.template.port=8009worker.template.type=ajp13worker.template.lbfactor=1#ping_timeout was introduced in 1.2.27worker.template.ping_timeout=1000#ping_mode was introduced in 1.2.27, if not using 1.2.27 please specify connect_timeout=10000 and prepost_timeout=10000 as an alternativeworker.template.ping_mode=Aworker.template.socket_timeout=10#It is not necessary to specify connection_pool_timeout if you are running the worker mpm worker.template.connection_pool_timeout=600#Referencing the template worker properties makes the workers.properties shorter and more conciseworker.node1.reference=worker.templateworker.node1.host=192.168.1.2worker.node2.reference=worker.templateworker.node2.host=192.168.1.3worker.loadbalancer.type=lbworker.loadbalancer.balance_workers=node1,node2worker.loadbalancer.sticky_session=Trueworker.status.type=statusThe key points in the above workers.properties is we've added limits for the connections mod_jk makes. With the base configuration, socket timeouts default to infinite. The other important properties are ping_mode and ping_timeout which handle probing a connection for errors and connection_pool_timeout which must be set to equal server.xml's connectionTimeout when using the prefork mpm. When these two values are the same, after a connection has been inactive for x amount of time, the connection in mod_jk and Tomcat will be closed at the same time, preventing a half-closed connection.Configuring ApacheMake note that maxThreads for the AJP connection should coincide with the MaxClients set in Apache's httpd.conf. MaxClients needs to be set in the correct module in Apache.This can be determined by running httpd -V:# httpd -VServer version: Apache/2.2.3Server built: Sep 11 2006 09:43:05Server's Module Magic Number: 20051115:3Server loaded: APR 1.2.7, APR-Util 1.2.8Compiled using: APR 1.2.7, APR-Util 1.2.7Architecture: 32-bitServer MPM: Preforkthreaded: noforked: yes (variable process count)Server compiled with....-D APACHE_MPM_DIR="server/mpm/prefork"-D APR_HAS_SENDFILE-D APR_HAS_MMAP-D APR_HA VE_IPV6 (IPv4-mapped addresses enabled)-D APR_USE_SYSVSEM_SERIALIZE-D APR_USE_PTHREAD_SERIALIZE-D SINGLE_LISTEN_UNSERIALIZED_ACCEPT-D APR_HAS_OTHER_CHILD-D AP_HA VE_RELIABLE_PIPED_LOGS-D DYNAMIC_MODULE_LIMIT=128-D HTTPD_ROOT="/etc/httpd"-D SUEXEC_BIN="/usr/sbin/suexec"-D DEFAULT_PIDLOG="logs/httpd.pid"-D DEFAULT_SCOREBOARD="logs/apache_runtime_status"-D DEFAULT_LOCKFILE="logs/accept.lock"-D DEFAULT_ERRORLOG="logs/error_log"-D AP_TYPES_CONFIG_FILE="conf/mime.types"-D SERVER_CONFIG_FILE="conf/httpd.conf"Which tells me the Server MPM is Prefork. This is not always 100% accurate so you should also view the output of /etc/sysconfig/httpd to see if the following line is there: HTTPD=/usr/sbin/httpd.worker. If it is commented out you are running prefork, otherwise ifuncommented worker.httpd.conf:<IfModule prefork.c>StartServers 8MinSpareServers 5MaxSpareServers 20MaxClients 200MaxRequestsPerChild 0</IfModule>Or if Apache is using worker, it is<IfModule worker.c>StartServers 2MaxClients 200MinSpareThreads 25MaxSpareThreads 75ThreadsPerChild 25MaxRequestsPerChild 0</IfModule>MaxRequestsPerChild is 0, this is the recommended value when using mod_jk as mod_jk keeps open persistent connections. The key values in the above configuration are MaxClients and MaxRequestsPerChild, the rest of the values are left as default. Note that MaxRequestsPerChild is recommended to be 0 however the value may need to be greater than 0 depending on if Apache is used for other modules also, especially in the case of resource leakage.Advanced worker-mpm ConfigurationTo get the most out of your mod_jk setup you should be using Apache's worker mpm which provides a definite performance improvement over the prefork mpm. The following section will detail how to configure Apache/mod_jk/Tomcat with the worker mpm and the math behind the configuration.Let's start out with the worker mpm configuration<IfModule mpm_worker_module>ThreadLimit 100StartServers 5MaxClients 1000MinSpareThreads 100MaxSpareThreads 1000ThreadsPerChild 100MaxRequestsPerChild 0</IfModule>The optimal configuration completely depends on the hardware being used and the load requirements. But a general rule of thumb, keep processes low and thread count high. To determine the number of processes Apache will use simply divide MaxClients by ThreadPerChild. So in this case MaxClients (1000) / ThreadsPerChild (100) = Processes (10), so Apache will allocate a maximum of 100 threads per each 10 child processes resulting in a total of 1000 possible clients.Now to translate this to mod_jk, mod_jk maintains a connection pool for each worker defined in workers.properties. By default with Apache mod_jk sets connection_pool_size to ThreadsPerChild, so in the above case that would translate to 100, giving 1000 possible connections to JBoss. This may or may not be desired.Let's take a common example, there will be 3 JBoss servers that combined needed to be able to handle 900 concurrent connectionsworker.list=loadbalancer,statusworker.template.type=ajp13worker.template.port=8009worker.template.ping_mode=Aworker.template.connection_pool_size=30worker.template.socket_timeout=10worker.template.retries=20worker.node1.reference=worker.templateworker.node1.host=192.168.0.101worker.node2.reference=worker.templateworker.node2.host=192.168.0.102worker.node3.reference=worker.templateworker.node3.host=192.168.0.103worker.loadbalancer.type=lbworker.loadbalancer.balance_workers=node1,node2, node3worker.loadbalancer.sticky_session=Trueworker.status.type=statusThe above configuration tells mod_jk to multiplex 30 connections to the available Apache processes, which is 10 processes. So that means 30 connections multiplexed over 10 processesgives 300 possible connections to each backend worker. Furthermore, the total connections able to be used in this configuration from Apache is 900 which means 100 connections will be left over for static content or whatnot.Next configure maxThreads in each ajp connector to match the above.Node 1 ajp connector:<Connector port="8009"address="${jboss.bind.address}"emptySessionPath="true"enableLookups="false"redirectPort="8443"protocol="AJP/1.3"maxThreads="300"connectionTimeout="600000"></Connector>Node 2 ajp connector:<Connector port="8009"address="${jboss.bind.address}"emptySessionPath="true"enableLookups="false"redirectPort="8443"protocol="AJP/1.3"maxThreads="300"connectionTimeout="600000"></Connector>Node 3 ajp connector:<Connector port="8009"address="${jboss.bind.address}"emptySessionPath="true"enableLookups="false"redirectPort="8443"protocol="AJP/1.3"maxThreads="300"connectionTimeout="600000"></Connector>Remember when using connectionTimeout which is always recommended, prepost_timeout and connect_timeout also need to be set, which is done. I'm not showing sticky session configuration, but that covered in the main mod_jk article in using mod_jk with JBoss.。