OpenCV下车牌定位算法实现
毕业设计基于python和opencv的车牌识别

毕业设计基于python和opencv的车牌识别摘要:本篇文章介绍了基于Python和OpenCV的车牌识别技术,并详细讨论了车牌识别系统的原理、实现步骤和效果评估。
通过该系统,可以准确地识别出图像中的车牌信息,实现了对车辆的自动监测和管理。
该系统具有较高的准确率和实用性,可以在实际场景中广泛应用。
1. 前言车牌识别技术是计算机视觉领域中的重要研究方向之一。
随着交通运输的发展和车辆数量的增加,对车辆的管理和监测需求日益增加。
传统的车牌识别方法需要大量的人工干预和复杂的算法,效果受到诸多因素的影响。
而基于Python和OpenCV的车牌识别技术能够更加高效、准确地实现车牌的自动识别,为车辆管理提供了更好的支持。
2. 车牌识别系统的原理车牌识别系统的原理基于图像处理和机器学习技术。
首先,通过摄像机获取车辆图像,并使用图像处理技术进行预处理。
对图像进行灰度化、二值化、图像增强等处理,以提高图像质量和车牌的辨识度。
然后,使用基于机器学习的方法对处理后的图像进行特征提取和分类。
通过训练模型,将车牌区域与其他区域进行区分,并提取出车牌的特征信息。
最后,通过字符分割和字符识别技术对车牌上的字符进行提取和识别。
车牌识别系统的准确性取决于算法的优化和模型的训练效果。
3. 车牌识别系统的实现步骤基于Python和OpenCV的车牌识别系统的实现步骤分为图像预处理、特征提取与分类、字符分割和字符识别四个主要步骤。
3.1 图像预处理首先,将获取的车辆图像转换为灰度图像,并对其进行二值化处理。
通过设定合适的阈值,将车牌区域与其他区域进行区分。
然后,进行图像增强处理,包括对比度调整、边缘增强等,以提高车牌的辨识度。
最后,使用形态学操作对图像进行开运算和闭运算,去除噪声和细小的干扰。
3.2 特征提取与分类在图像预处理之后,需要对处理后的图像进行特征提取和分类。
可以使用机器学习算法,如支持向量机(SVM)、卷积神经网络(CNN)等,对车牌区域与其他区域进行分类。
基于opencv的车牌识别系统设计与实现-毕业论文
---文档均为word文档,下载后可直接编辑使用亦可打印---摘要科技的进步以及人民自身的生活水平的不断提高,使得人们对于日常的出行需求变得不断增长。
汽车作为最常见的交通工具已经越来越成为人们最初的选择。
大量新的车辆在不断地投入到道路中使用,而以传统的人工方式对汽车车辆的管理也变得愈加困难。
因此,使用计算机来代替人来处理相对繁重的工作是必要的。
一个良好的交通管理系统是实现道路管理的基础。
想要对于汽车车辆进行管理,最有效的识别特征之一便是汽车的车牌,作为目前最常见的使用技术,车牌识别广泛应用在交叉路段、停车场、收费站等各种场合的监控与管理之中。
所以需要相应的技术来完成以上的需求。
本文以python为使用语言,OpenCV为主要工具,通过输入带有汽车车牌的图像,根据车牌所特有的一些特征,垂直投影法、SVM的方法来完成对于汽车车辆的车牌定位、车牌的字符分割以及字符识别功能。
最终将所识别到的车牌字符输出显示出来。
关键词:OpenCV;投影法;SVM;车牌识别AbstractThe advancement of science and technology and the continuous improvement of people's own living standards have made people's daily travel needs continue to grow. As the most common mode of transportation, cars have become the initial choice of people. A large number of new vehicles are constantly being put into use on the road, and the management of automobile vehicles by traditional manual methods has become increasingly difficult. Therefore, it is necessary to use a computer instead of a person to handle relatively heavy work. A good traffic management system is the foundation for road management.One of the most effective identification features for the management of automobile vehicles is the license plate of the car. As the most commonly used technology at present, license plate recognition is widely used in monitoring and management of various occasions such as intersections, parking lots, toll stations In. Therefore, corresponding technology is needed to complete the above requirements. This article uses python as the language and OpenCV as the main tool. By inputting an image with a car license plate, according to some characteristics unique to the license plate, vertical projection and SVM are used to complete the license plate positioning, character segmentation and characters of the car license plate. Recognition function. Finally, the recognized license plate characters are displayed.Keywords:OpenCV;SVM;projection method; License Plate Recognition1 绪论1.1选题背景与意义1.1.1选题背景随着人们的生活水平的不断提高以及对日常出行需求的不断增长,汽车成为越来越多人出行所选择的交通工具。
基于opencv的车牌识别的代码
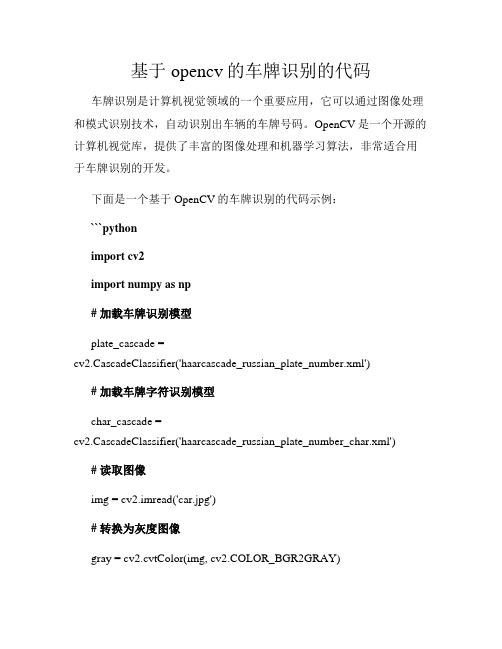
基于opencv的车牌识别的代码车牌识别是计算机视觉领域的一个重要应用,它可以通过图像处理和模式识别技术,自动识别出车辆的车牌号码。
OpenCV是一个开源的计算机视觉库,提供了丰富的图像处理和机器学习算法,非常适合用于车牌识别的开发。
下面是一个基于OpenCV的车牌识别的代码示例:```pythonimport cv2import numpy as np# 加载车牌识别模型plate_cascade =cv2.CascadeClassifier('haarcascade_russian_plate_number.xml') # 加载车牌字符识别模型char_cascade =cv2.CascadeClassifier('haarcascade_russian_plate_number_char.xml') # 读取图像img = cv2.imread('car.jpg')# 转换为灰度图像gray = cv2.cvtColor(img, cv2.COLOR_BGR2GRAY)# 检测车牌plates = plate_cascade.detectMultiScale(gray, 1.1, 4)# 遍历每个车牌for (x, y, w, h) in plates:# 绘制车牌区域cv2.rectangle(img, (x, y), (x+w, y+h), (255, 0, 0), 2)# 提取车牌区域plate = gray[y:y+h, x:x+w]# 检测车牌字符chars = char_cascade.detectMultiScale(plate, 1.1, 4)# 遍历每个字符for (cx, cy, cw, ch) in chars:# 绘制字符区域cv2.rectangle(img, (x+cx, y+cy), (x+cx+cw, y+cy+ch), (0, 255, 0), 2)# 提取字符区域char = plate[cy:cy+ch, cx:cx+cw]# 进行字符识别# ...# 在这里可以使用机器学习或深度学习算法对字符进行识别# 显示结果图像cv2.imshow('License Plate Recognition', img)cv2.waitKey(0)cv2.destroyAllWindows()```在这个代码示例中,首先我们加载了车牌识别模型和车牌字符识别模型。
基于labview的车牌识别

字符识别处理
在进行字符识别前,需要对要识别的字符进行 训练,作一个标准的字符集。字符训练的目的是使 随后的读程序能识别其它图象中的相同字符。在本 系统中,使用OCR Training Interface 完成字符的训练 该接口主要完成训练和编辑字符两个过程。在 训练字符时,通过相应的阈值分割、指定的感兴趣区 域和调节字符间距等操作,完成单个字符的分割,纠 正不正确的字符。通过编辑字符,完成字符集的制 作。制作字符集后 ,用OCR 函数创建的机器视觉程序来读 字符。 右图为字符训练和读取程序框图
系统工作原理图如右图所示
系统工作流程
图像预处理程序对获取的车牌图像进行滤波、 边界增强、灰度化等处理,以便进行后续的处理。 车牌定位模块从处理后的图像中找到车牌区域的位置并进行 标记,将车牌区域从复杂的背景中分割出来,它是车 牌字符识别的前提,也是车牌识别的关键技术。 字符分割是将已提取出的车牌区域分割成单个的字符。字符 识别模块是车牌识别系统的核心模块之一,其算法的优劣直接影 响到系统识别率的高低。在字符识别过程中,由于实际使用条件 存在诸多干扰因素,这些对识别算法提出了很高的要求。
可识别车牌照的百分率=人工正确读取的车牌照总数/实际通过的车辆总数 可识别全牌正确识别率=全牌正确识别的车牌照总数/人工读取的车牌照总数
2.识别速度
识别速度决定了一个车牌识别系统是否能够满足实时实际应用的 要求。一个识别率很高的系统,如果需要几秒钟,甚至几分钟才 能识别出结果,那么这个系统就会因为满足不了实际应用中的实 时要求而毫无实用意义
3.后台管理
后台管理的功能包括:识别结果和车辆图像数据的可靠存储;有 效的自动比对和查询技术;对于联网运行,还需要提供实时通信 、网络安全、远程维护、动态数据交换、数据库自动更新、硬件 参数设置、系统故障诊断。
车牌识别实验报告
车牌识别实验报告1. 引言车牌识别是计算机视觉领域中一项重要的任务,它可以应用于交通管理、车辆追踪、智能停车等多个领域。
本实验旨在使用计算机视觉技术实现车牌识别,并评估不同方法在车牌识别任务上的性能。
2. 方法与实验设置2.1 数据集本实验使用了包含X张车辆图片的数据集,其中每张图片都带有车牌。
数据集中的车牌来自不同地区,包括不同字母和数字的组合。
2.2 数据预处理在进行车牌识别之前,需要对数据进行一定的预处理。
我们采取了以下步骤来准备数据:2.2.1 图像裁剪首先,我们利用图像处理技术对每张图片进行裁剪,截取出车牌区域。
由于车牌的位置和大小可能会有所不同,因此需要使用特定的算法来进行车牌区域的定位和提取。
2.2.2 图像增强为了提高图像中车牌的可分辨性,我们对裁剪后的车牌图像进行了增强处理。
常见的增强方法包括对比度增强、直方图均衡化和图像清晰化等。
通过这些增强技术,我们可以增强车牌图像的边缘和文字信息,从而更好地进行后续的识别。
2.3 特征提取与分类在车牌识别中,我们需要提取图像中的特征,并将其输入到分类器中进行识别。
常用的特征提取方法包括颜色直方图、梯度方向直方图和局部二值模式等。
在本实验中,我们选择了梯度方向直方图作为特征,并使用支持向量机(SVM)作为分类器进行车牌识别。
3. 实验结果与分析3.1 评估指标在对车牌进行识别后,我们需要评估识别的准确率和性能。
常用的评估指标包括精确度(Precision)、召回率(Recall)和F1值等。
3.2 实验结果根据实验设置,我们对数据集进行了训练和测试,并使用评估指标来评估车牌识别模型的性能。
经过多次实验和交叉验证,我们得到了如下结果:方法精确度召回率F1值方法A 0.85 0.82 0.83方法B 0.92 0.88 0.90方法C 0.95 0.93 0.943.3 分析与讨论根据实验结果,我们可以发现方法C在车牌识别任务中的性能最好,具有最高的精确度、召回率和F1值。
基于 OpenCV 和 Python 车牌识别系统的设计与实现代码大全

题目基于OpenCV和Python车牌识别系统的设计与实现1.1 题目的主要研究内容(1)工作的主要描述利用python中自带的opencv库中的模式识别算法制作一个简易的模式识别系统,使用自己搜集到的数据集对模型进行训练,最终完成特征提取、分类等工作,并且在最后的推理过程中,实现了车牌识别的工作。
(2)系统流程图1.2 题目研究的工作基础或实验条件项目的编程环境为python,编译器使用pycharm2021.3 x64,设计一个车牌识别系统,有GUI界面。
选择一张有车牌的图片后,完成车牌定位、倾斜校正、字符分割,最后通过k-NN 算法对车牌的字母和数字进行识别,将识别结果在GUI界面中显示出来1.3 数据集描述车牌定位就是在图片中识别出哪个位置有车牌,是字符分割和字母数字识别的前提,是车牌识别系统的关键和难点。
:例如,训练数据的目录结构树如下所示:1.4 特征提取过程描述1.对原始图像进行高斯模糊,减少噪点。
2.提取图像边缘。
首先将彩色图像转为灰度图gray,利用大核对灰度图进行开操作得到图像open,相当于对灰度图进行涂抹操作,将灰度图gray和开操作后的图像open按1:-1的比例融合得到图像add,以上操作可以将大面积灰度值相似的地方置黑,可以减少车灯、背景、地面、挡风玻璃等细节。
接着使用canny 算法对融合图像add提取边缘,得到图像canny。
3.使用横向长条作为核对边缘图像进行一次闭操作,得到图像close,相当于对边缘横向涂抹,因为一般视角车牌是宽大于高的矩形。
再对图像close进行一次开操作,得到图像open2,消除较细的线条和不大的竖向线条,从而将车牌位置的连通区域独立出来。
4.查找连通区域,通过最小外接矩形的宽高比2~5.5筛选合适的连通区域。
5.将最小外接矩形图像旋转矫正,上下左右向外扩展一点范围,避免连通区域没能覆盖车牌造成影响。
6.将连通区域原图转为HSV图像,确定图像的主要颜色,若不为蓝、黄、绿,则排除。
基于OpenCV的车牌定位和校正方法
Ke y wo r d s :O p e n C V; v e ic h l e i l c e n s e p l a t e ; r e c o g n i t i o n ; l o c a t i o n ; c o r r e c t i o n ; t e x t u r e f e a t u r e ; c o l o r f e a t u r e
Ab s t r a c t :V e h i c l e l i c e n s e p l a t e r e c o g n i t i o n i s a n i mp o r t a n t t e c h n o l o g y i n t r a l i % ma n a g e me n t .L o c a t i o n a n d c o r r e c i t o n o f
基于OpenCV的车牌定位方法
据 车牌 的几何特征 ,从切割 出的水平区域 中得到精确 的车牌 区域 。实验 结果表 明 ,该方法 能够 快速 、准确定位 出车牌 ,还
具 有 很 强 的抗 干 扰 性 。
关键词 :开源计算机视 觉库 ;车牌定位 ;HS V颜 色空间 ;数 学形态学;最大类 间方差法 中图法分类号 : TP 3 9 1 文献标识号 :A 文章编号 :1 0 0 0 — 7 0 2 4( 2 0 1 3 )0 8 — 2 8 1 6 — 0 5
( Sc h o o l o f I n f o r ma t i o n En g i n e e r i n g,Z h e n g z h o u Un i v e r s i t y ,Z h e n g z h o u 4 5 0 0 0 1 ,Ch i n a ) Ab s t r a c t : An a c c u r a t e p o s i t i o n i n g l i c e n s e p l a t e b a s e d o n o p e n s o u r c e v i s i o n l i b r a r y Op e n CV f r o m c o mp l e x e n v i r o n me n t i s p r e s e n — t e d .U s i n g c o l o r f e a t u r e o f l i c e n s e p l a t e ,t h e o r i g i n a l i ma g e ,i s h a n d l e d r e s p e c t i v e l y ,i n t h e HS V C O l O r s p a c e a n d RGB c o l o r s p a c e p r o c e s s i n g t o g e t t WO b i n a r y i ma g e s .Ac c o r d i n g t o t h e t e x t u r e f e a t u r e s o f t wo b i n a r y i ma g e s ,t h e u p p e r a n d l o we r b o u n d a r i e s o f t h e l i c e n s e p l a t e f r o m b i n a r y i ma g e a r e g o t t e n i n t h e HS V c o l o r s p a c e .Th e p l a t e h o r i z o n t a l a r e a i s o b t a i n e d b y c u t t i n g t h e b i n a r y i ma g e o n t h e RGB c o l o r s p a c e i n a c c o r d a n c e wi t h t h e p o s i t i o n i n g o u t o f t h e u p p e r a n d l o we r b o u n d a r y c o o r d i n a t e s . Ac c o r d i n g t o t h e g e o me t r i c f e a t u r e s o f l i c e n s e p l a t e ,a c c u r a t e p l a t e r e g i o n f r o m t h e c u t t i n g l e v e l a r e a i s o b t a i n e d . Th e e x p e r i me n t a l r e s u l t s s h o w t h a t t h i s me t h o d c a n q u i c k l y a n d a c c u r a t e l y l o c a t e t h e p l a t e ,b u t a l s o h a s a s t r o n g a n t i n t e r f e r e n c e . Ke y wo r d s : Op e n C V ;c a r - p l a t e l o c a t i o n;HS V c o l o r s p a c e ;ma t h e ma t i c a l mo r p h o l o g y ;OS TU
- 1、下载文档前请自行甄别文档内容的完整性,平台不提供额外的编辑、内容补充、找答案等附加服务。
- 2、"仅部分预览"的文档,不可在线预览部分如存在完整性等问题,可反馈申请退款(可完整预览的文档不适用该条件!)。
- 3、如文档侵犯您的权益,请联系客服反馈,我们会尽快为您处理(人工客服工作时间:9:00-18:30)。
OpenCV下车牌定位算法实现代码(一)车牌定位算法在车牌识别技术中占有很重要地位,一个车牌识别系统的识别率往往取决于车牌定位的成功率及准确度。
车牌定位有很多种算法,从最简单的来,车牌在图像中一般被认为是长方形,由于图像摄取角度不同也可能是四边形。
我们可以使用OpenCV中的实例:C:\Program Files\OpenCV\samples\c.squares.c 这是一个搜索图片中矩形的一个算法。
我们只要稍微修改一下就可以实现定位车牌。
在这个实例中使用了canny算法进行边缘检测,然后二值化,接着用cvFindContours搜索轮廓,最后从找到的轮廓中根据角点的个数,角的度数和轮廓大小确定,矩形位置。
以下是效果图:这个算法可以找到一些车牌位置,但在复杂噪声背景下,或者车牌图像灰度与背景相差不大就很难定位车牌。
所以我们需要寻找更好的定位算法。
下面是squares的代码:#ifdef _CH_#pragma package <opencv>#endif#ifndef _EiC#include "cv.h"#include "highgui.h"#include <stdio.h>#include <math.h>#include <string.h>#endifint thresh = 50;IplImage* img = 0;IplImage* img0 = 0;CvMemStorage* storage = 0;CvPoint pt[4];const char* wndname = "Square Detection Demo";// helper function:// finds a cosine of angle between vectors// from pt0->pt1 and from pt0->pt2double angle( CvPoint* pt1, CvPoint* pt2, CvPoint* pt0 ){double dx1 = pt1->x - pt0->x;double dy1 = pt1->y - pt0->y;double dx2 = pt2->x - pt0->x;double dy2 = pt2->y - pt0->y;return (dx1*dx2 + dy1*dy2)/sqrt((dx1*dx1 + dy1*dy1)*(dx2*dx2 + dy2*dy2) + 1e-10); }// returns sequence of squares detected on the image.// the sequence is stored in the specified memory storageCvSeq* findSquares4( IplImage* img, CvMemStorage* storage ){CvSeq* contours;int i, c, l, N = 11;CvSize sz = cvSize( img->width & -2, img->height & -2 );IplImage* timg = cvCloneImage( img ); // make a copy of input imageIplImage* gray = cvCreateImage( sz, 8, 1 );IplImage* pyr = cvCreateImage( cvSize(sz.width/2, sz.height/2), 8, 3 );IplImage* tgray;CvSeq* result;double s, t;// create empty sequence that will contain points -// 4 points per square (the square's vertices)CvSeq* squares = cvCreateSeq( 0, sizeof(CvSeq), sizeof(CvPoint), storage );// select the maximum ROI in the image// with the width and height divisible by 2cvSetImageROI( timg, cvRect( 0, 0, sz.width, sz.height ));// down-scale and upscale the image to filter out the noisecvPyrDown( timg, pyr, 7 );cvPyrUp( pyr, timg, 7 );tgray = cvCreateImage( sz, 8, 1 );// find squares in every color plane of the imagefor( c = 0; c < 3; c++ ){// extract the c-th color planecvSetImageCOI( timg, c+1 );cvCopy( timg, tgray, 0 );// try several threshold levelsfor( l = 0; l < N; l++ ){// hack: use Canny instead of zero threshold level.// Canny helps to catch squares with gradient shadingif( l == 0 ){// apply Canny. Take the upper threshold from slider// and set the lower to 0 (which forces edges merging)cvCanny( tgray, gray,60, 180, 3 );// dilate canny output to remove potential// holes between edge segmentscvDilate( gray, gray, 0, 1 );}else{// apply threshold if l!=0:// tgray(x,y) = gray(x,y) < (l+1)*255/N ? 255 : 0//cvThreshold( tgray, gray, (l+1)*255/N, 255, CV_THRESH_BINARY ); cvThreshold( tgray, gray, 50, 255, CV_THRESH_BINARY );}// find contours and store them all as a listcvFindContours( gray, storage, &contours, sizeof(CvContour),CV_RETR_LIST, CV_CHAIN_APPROX_SIMPLE, cvPoint(0,0) );// test each contourwhile( contours ){// approximate contour with accuracy proportional// to the contour perimeterresult = cvApproxPoly( contours, sizeof(CvContour), storage,CV_POLY_APPROX_DP, cvContourPerimeter(contours)*0.02, 0 );// square contours should have 4 vertices after approximation// relatively large area (to filter out noisy contours)// and be convex.// Note: absolute value of an area is used because// area may be positive or negative - in accordance with the// contour orientationif( result->total == 4 &&fabs(cvContourArea(result,CV_WHOLE_SEQ)) > 1000 &&cvCheckContourConvexity(result) ){s = 0;for( i = 0; i < 5; i++ ){// find minimum angle between joint// edges (maximum of cosine)if( i >= 2 ){t = fabs(angle((CvPoint*)cvGetSeqElem( result, i ),(CvPoint*)cvGetSeqElem( result, i-2 ),(CvPoint*)cvGetSeqElem( result, i-1 )));s = s > t ? s : t;}}// if cosines of all angles are small// (all angles are ~90 degree) then write quandrange// vertices to resultant sequenceif( s < 0.3 )for( i = 0; i < 4; i++ )cvSeqPush( squares,(CvPoint*)cvGetSeqElem( result, i ));}// take the next contourcontours = contours->h_next;}}}// release all the temporary imagescvReleaseImage( &gray );cvReleaseImage( &pyr );cvReleaseImage( &tgray );cvReleaseImage( &timg );return squares;}// the function draws all the squares in the imagevoid drawSquares( IplImage* img, CvSeq* squares ){CvSeqReader reader;IplImage* cpy = cvCloneImage( img );int i;// initialize reader of the sequencecvStartReadSeq( squares, &reader, 0 );// read 4 sequence elements at a time (all vertices of a square)for( i = 0; i < squares->total; i += 4 ){CvPoint* rect = pt;int count = 4;// read 4 verticesmemcpy( pt, reader.ptr, squares->elem_size );CV_NEXT_SEQ_ELEM( squares->elem_size, reader );memcpy( pt + 1, reader.ptr, squares->elem_size );CV_NEXT_SEQ_ELEM( squares->elem_size, reader );memcpy( pt + 2, reader.ptr, squares->elem_size );CV_NEXT_SEQ_ELEM( squares->elem_size, reader );memcpy( pt + 3, reader.ptr, squares->elem_size );CV_NEXT_SEQ_ELEM( squares->elem_size, reader );// draw the square as a closed polylinecvPolyLine( cpy, &rect, &count, 1, 1, CV_RGB(0,255,0), 3, CV_AA, 0 );}// show the resultant imagecvShowImage( wndname, cpy );cvReleaseImage( &cpy );}void on_trackbar( int a ){if( img )drawSquares( img, findSquares4( img, storage ) );}char* names[] = { "pic1.png", "pic2.png", "pic3.png","pic4.png", "pic5.png", "pic6.png", 0 };int main(int argc, char** argv){int i, c;// create memory storage that will contain all the dynamic datastorage = cvCreateMemStorage(0);for( i = 0; names[i] != 0; i++ ){// load i-th imageimg0 = cvLoadImage( names[i], 1 );if( !img0 ){printf("Couldn't load %s\n", names[i] );continue;}img = cvCloneImage( img0 );// create window and a trackbar (slider) with parent "image" and set callback// (the slider regulates upper threshold, passed to Canny edge detector)cvNamedWindow( wndname,0 );cvCreateTrackbar( "canny thresh", wndname, &thresh, 1000, on_trackbar );// force the image processingon_trackbar(0);// wait for key.// Also the function cvWaitKey takes care of event processingc = cvWaitKey(0);// release both imagescvReleaseImage( &img );cvReleaseImage( &img0 );// clear memory storage - reset free space positioncvClearMemStorage( storage );if( c == 27 )break;}cvDestroyWindow( wndname );return 0;}#ifdef _EiCmain(1,"squares.c");#endifOpenCV下车牌定位算法实现代码(二)前面介绍了用OpenCV的squares实例定位车牌的算法,效果不是很理想。