PyroSiM中文版用户说明书
pymo使用说明说明书

pymo (python memories off) 使用说明V1.2.0– By chen_xin_ming目录第一章pymo简介 (5)第二章A VG的组成部分和移植方法简介 (6)第三章pymo的目录结构 (7)第四章游戏配置文件解析(gameconfig.txt) (8)第五章pymo中的坐标、颜色和时间表示方法 (9)一、坐标 (9)二、颜色 (9)三、时间 (9)第六章pymo支持的图像、音频、视频格式及转换方法 (10)一、图片 (10)二、塞班版本图片的透明 (10)三、安卓、PC版本图片的透明 (13)四、音频 (13)五、视频 (14)六、pymo推荐的图片、音频格式及参数 (15)七、系统图片的参数和要求 (15)第七章制作你的第一个游戏! (17)一、素材 (17)二、脚本 (17)三、运行 (18)第八章一些脚本范例 (19)一、游戏开始界面 (19)二、选择支示例 (20)三、每次游戏开始界面显示不同的图片(使用全局变量) (21)第九章鉴赏系统的编写 (23)一、CG鉴赏 (23)二、自动生成CG鉴赏缩略图 (24)三、音乐鉴赏 (24)第十章游戏资源的打包和发布 (26)一、资源打包 (26)二、游戏发布 (26)第十一章pymo android版、PC版注意事项 (27)第十二章脚本指令说明书 (28)一、对话文字显示指令 (28)1. #say (28)2. #text (28)3. #text_off (29)4. #waitkey (29)5. #title (29)6. #title_dsp (30)二、图像相关操作指令 (30)1. #chara (30)2. #chara_cls (31)4. #bg (31)5. #flash (32)6. #quake (32)7. #fade_out (32)8. #fade_in (33)9. #movie (33)10. #textbox (33)11. #chara_quake (33)12. #chara_down (34)13. #chara_up (34)14. #scroll (34)15. #chara_y (35)16. #chara_scroll (36)17. #anime_on (36)18. #anime_off (37)19. #chara_anime (38)三、变量、选择、跳转类指令 (38)1. #set (38)2. #add (38)3. #sub (39)4. #label (39)5. #goto (39)6. #if...goto (40)7. #change (40)8. #call (40)9. #ret (41)10. #sel (41)11. #select_text (41)12. #select_var (42)13. #select_img (42)14. #select_imgs (43)15. #wait (44)16. #wait_se (44)16. #rand (44)四、声音类指令 (45)1. #bgm (45)2. #bgm_stop (45)3. #se (45)4. #se_stop (46)5. #vo (46)五、系统类指令 (46)1. #load (46)2. #album (47)4. #date (47)5. #config (48)第一章pymo简介pymo全称Python Memories Off,是由chen_xin_ming开发的一款A VG游戏引擎。
PyroMAT 系统用户指南说明书
Application Notepyrogen or bacterial endotoxin test may be used in place of the in vivo rabbit pyrogen test, where appropriate.”Principle of the MATThe monocyte activation test (MAT) is the human in vitro alternative to the rabbit pyrogen test, and allows the detection of the full range of pyrogens, including endotoxins and non-endotoxin pyrogens (NEPs).By putting the product to be tested in contact withhuman monocytic cells, it will mimic what happens in the human body: in presence of pyrogens, the monocytes are activated and produce cytokines such as interleukin-6.The cytokines are then detected using an immunological assay (ELISA) involving specific antibodies and an enzymatic color reaction.Principle of the PyroMAT™ SystemThe PyroMAT™ System uses cryo-preserved Mono-Mac-6 (MM6) human monocytic cells as a source of monocytes. The response to pyrogenic substances is determined by measurement of interleukin-6 (IL-6) produced by the Mono-Mac-6 cells. For this purpose, the ELISA microplate supplied in the kit is coated with an antibody specific to IL-6.IL-6 molecules released by MM6 cells during incubation phase are transferred from the cells supernatant to the ELISA plate, and bound by the immobilized primary antibody.A secondary antibody, linked to an enzyme, is added to form an IL-6 bound complex. After washing anyunbound molecules, the IL-6 bound complex is detected in a color reaction started by the addition of an appropriate substrate.The color development is proportional to the amount of initial IL-6 production in the supernatant and measured with an absorbance reader.Reference Standard Endotoxins suitable for PyroMAT™ SystemIntroductionWhat is a pyrogen?A pyrogen is, by definition, a substance that produces a rise in temperature in a human or animal. Pyrogens constitute a heterogeneous group of contaminantscomprising microbial and non-microbial substances. The most widely known pyrogen is the endotoxin (LPS =Lipo-Polysaccharide), which is produced by gram-negative bacteria. Other microbial substances include thosederived from gram-positive bacteria like Lipoteichoic Acid (LTA), particles from viruses and pyrogens originating from yeasts and fungi. Non-microbial pyrogenicsubstances can be rubber particles, microscopic plastic particles or metal compounds in elastomers.Why to conduct a pyrogen test?Pyrogenic substances in pharmaceutical products can induce life-threatening fever reactions after injection into the human body. Therefore, it is a regulatory requirement to test such products for pyrogens to ensure product quality and patient safety.Purpose of the test is to prove that the amount of pyro-gens contained in the product will not exceed a certain threshold, known as the contaminant limit concentration (CLC), that will guarantee the patient safety.The monocyte activation test (MAT) method has been qualified and validated for the detection of pyrogens by the European Center for the Validation of Alternative Methods (ECVAM) in 2005 and by the InteragencyCoordinating Committee on the Validation of Alternative Methods (ICCVAM) in 2008.It has been among the compendial methods for pyrogen detection in the European Pharmacopeia since 2010 (Chapter 2.6.30). The MAT is also mentioned by the FDA "Guidance For Industry – Pyrogen and Endotoxins testing: Questions and Answers" as an alternative to the rabbit pyrogen test which should be validated according to USP <1225>. Additionally, the USP <151> Pyrogen Test mentions that, "A validated, equivalent in vitroThe life science business of Merck operates as MilliporeSigma in the U.S. and Canada.2Resuspension of RSELyophilized RSE were reconstituted and aliquoted according to supplier guidelines.Dilution of Reference Standard Endotoxin aliquotsThe standard endotoxin solutions were prepared from the RSE stock solution at 2000 EU/mL. Seven (7) endotoxin concentrations (0.0125, 0.025, 0.05, 0.1,0.2, 0.4, and 0.8 EU/mL) were prepared to generate the standard curve according to the following procedure:• Thaw a 50 µL-aliquot of RSE and vortex at maximum speed during 1 min.• Perform serial dilutions in endotoxin-free water, using endotoxin-free glass tubes, as described below. Make sure to vortex all the dilutions before using.Comparison of Reference Standard Endo-toxins (RSE) from different suppliersPreparation of endotoxin standard solutions is needed to assess the limit of detection (LOD) of the system, to build a standard curve for quantification or to estimate the pyrogen content of a sample, depending on the MAT method used.The use of a validated Reference Standard Endotoxin is required and such a standard can be supplied by the European Pharmacopeia (EDQM) or the United States Pharmacopeia (USP).Control Standard Endotoxins (CSE) provided by LAL suppliers should not be used for MAT test.The reference standard endotoxin (RSE) supplied by the USP / EDQM is a reference endotoxin preparation with a certified activity upon reconstitution. Control standard endotoxin preparations (CSEs) are qualified using the RSE, but their activity is certified only in combination with a test system, e.g. a defined preparation of limulus amoebocyte lysate used for the bacterial endotoxin test. Using these CSEs outside their test system might lead to unexpected results and is not recommended by the respective suppliers. As there is currently no dedicated reference standard for the pyrogen test available,standardization is achieved using a strong pyrogen like the RSE whose production and standardization is not depending on the use of a specific bacterial endotoxin test.The scope of this application note is to show the suitability of Reference Standard Endotoxins from different suppliers (USP/EDQM) for MAT with the PyroMAT™ System.PyroMAT™ Kit Pyr0MATkit PyroMAT™ Cells Pyr0MATcellsPyroMAT™ Endotoxin StandardEuropean Pharmacopoeia (EP) Reference Standard Endotoxin1.44161.0001Sigma-Aldrich RSEEuropean Pharmacopoeia (EP) Reference Standard EndotoxinE0150000ACILA RSE USP Reference Standard Endotoxin (USP) 10.000 E.U./Fl1220200NIBSC RSE 3rd International Standard 10,000 USP Endotoxin units Replacement I.S. for 94/58010/178Table 1: Materials used to generate standard curvesMaterialsFigure 2:Materials used to generate standard curves3MAT quick procedure with PyroMAT™Step 1: Preparation and incubation with PyroMAT™ cellsStep 2: Detection of IL-6 with ELISA1• Prepare suitable endotoxin standard dilutions• Load the different solutions on the 96-wells cell culture plate • Prepare the PyroMAT™ cells and dispense in each well2• Incubate the plate for 22 ±2 hours at 37 °C with humidified atmosphere, without CO 23• Transfer the cell supernatants into IL-6 microplate• Add the IL-6 conjugate to each well • Incubate 2 hours at room temperature 4• Remove the liquid and wash the plate 4 times• Prepare the substrate solution by mixing color reagent A and B and add the mixture to each well • Incubate 30 minutes at room temperature, in the dark5• Add the stop solution6• Read the plate at 450 nm and 630 nm within 30 minutes after adding the stop solutionFigure 3: PyroMAT TMworkflow with standard ELISA procedureResultsEndotoxin standard curves were generated using RSE from different suppliers. To be considered “VALID”, the endotoxin standard curve must fulfill the following acceptance criteria described in the EP Chapter 2.6.30 : Effect of dose criteria: a statistical test thatconfirms a positive dose/effect response.Goodness of fit: a statistical test that confirms the suitability of the regression model to describe the raw data. The data are modeled with a 5-parameter logistics regression model.Blank criteria: the mean of blank OD value should be below 0.1.LOD criteria: the test is valid if an LOD ≤ 0.05 EU/mL is reached.An additional criterion was implemented in the protocol to assess the reactivity of the standard curve:Minimum of reactivity: OD of the 4 replicates of the highest standard (0.8 EU/mL) should be above 3.It is not required by the European pharmacopeia and is given as an additional indication for the customer.Data analysis was performed using the PyroMAT™data analysis tool, which consists of a specific protocol developed for PyroMAT™ using Gen5 Software (Biotek).The Figure 4 presents the curves that were obtained with the PyroMAT™ system using Reference Standard Endotoxins (RSE) from four different suppliers as described in table 1.Figure 4: Comparison of standard curves generated with various Reference Standard EndotoxinsThe validity of the acceptance criteria for the endotoxin standard curve was determined using the PyroMAT™ data analysis tool (protocol for Gen5 Software).The Figure 5 shows the results obtained and the legend used in the software for data interpretation:All standard curves generated with RSE from different suppliers passed the acceptance criteria of a valid standard curve according to the EP chapter 2.6.30.ConclusionAll four different Reference Standard Endotoxins (RSE) tested led to the generation of a valid standard curve and can be used to perform MAT with PyroMAT™ system.MaterialEffect of close Goodness of Fit Blank Delta OD LOD criteria Minimum of reactivityPyroMAT™ Endotoxin Standard VALID VALID VALID VALID CONFORM Sigma-Aldrich RSE VALID VALID VALID VALID CONFORM ACILA RSE VALID VALID VALID VALID CONFORM NIBSC RSEVALIDVALIDVALIDVALIDCONFORMLegendEffect of Dose Criteria: VALID: p<0.01 LOD Criteria VALID: LOD ≤ 0.05 EU/mLINVALID: p≥0.01INVALID:LOD > 0.05 EU/mLGoodness of Fit Criteria: VALID: p>0.05 Additional Criteria – Minimum of reactivity CONFORM: All replicates of Delta OD at STD7 are above 3INVALID: p≤0.05 NOT REACHED: At least one replicate of Delta OD at STD7 is below 3BLK Delta OD Criteria: VALID: MEAN(BLK)<0.1 : Unable to EvaluateINVALID: MEAN(BLK)≥0.1Figure 5: Acceptance criteria for the endotoxin standard curves and legend for data interpretationTo place an order or receive technical assistanceIn Europe, please call Customer Service:France: 0825 045 645 Germany************ I taly: 848 845 645Spain: 901 516 645 Option 1Switzerland: 0848 645 645UnitedKingdom************For other countries across Europe, p lease call: +44 (0) 115 943 0840 Or visit: /officesFor Technical Service visit: /techservice /pyromatMerck, the vibrant M, Millipore and PyroMAT are trademarks of Merck KGaA or its afiliates. All other trademarks are the property of their respective owners. Detailed information on trademarks is available via publicly accessible resources.© 2018 Merck KGaA, Darmstadt, Germany and/or its affiliates. All Rights Reserved.MK_AN2150EN 2018-1255306/2018Merck KGaAFrankfurter Str. 250 64293 Darmstadt。
PyroSim入门指导

点击OK后,网格就生成了,如下图所示:1.3 定义粒子这里的粒子并不是通常CFD软件里的拉格朗日粒子,只是为了后处理方便而定义的示踪粒子。
选择Model > Edit Particles ...,然后点New。
不要选Particle Have Mass,这样粒子没有质量,仅是示踪粒子。
选中Color Particles During Animation,使用默认的颜色,红色。
这样在结果中会有红色的示踪粒子。
1.4 建立面实际上,在建立网格的时候,我们已经得到了计算模型。
这里的面是用来定义边界条件。
要注意的是,这里仅仅定义边界条件,而没有给模型中的面指定边界条件。
也就是说只定义边界上的物理条件,但并没有和模型中的边界联系起来。
定义入口边界。
Model > Edit Surface Properties ...,点New。
Surface name是BLOW,使用INERT作为模板。
选择surface type为"Fan/Wind”。
然后下面会有很多选项。
系统定义的表面类型都有明确的物理意义,还是比较好懂的。
Fan/Wind里可以定义入口空气的温度和速度。
为了便于区分,把Color选成蓝色。
Air Temperature = 20 C,Specify Normal Velocity = -1.0 m/s。
-1.0 m/s代表气流速度为1m/s,方向为进入计算域(+1.0m/s为出)。
第三个标签下,选中Emit Particles,Particle Type = PART。
最后点OK。
各步骤的截图如下:在这里例子里面,只需要定义BLOW这一个面,其余的面可以用系统定义的来表示。
1.5 定义边界条件这里是真正指定表面的边界条件。
定义入口。
选择Model > New Vent ...,在Specification标签下,Description = Vent Blow,Type = BLOW,Lies in the plane X = 0.0,Min Y = 3,Max Y = 7,Min Z = 3,Max Z = 7。
PyroSim入门教程文档
PyroSim入门教程文档1. 运行一个FDS例子1.1 启动PyroSim(并打开Example Guide, Chapter 1)。
具体就不多说了,开始>程序>…………下面是PyroSim启动时的截图,上面有中文“火”的写法,但是看起来似乎是源自日文汉字(Kanji)的火。
但是开发PyroSim的Thunderhead engineering是一家位于美国的公司。
1.2 建立网格选择Model > Edit Grid ... 在跳出的面板上点New。
把网格的边界设置为Min X = 0,Max X = 10,Min Y = 0,Max Y = 10,Min Z = 0,Max Z = 10。
同时把网格数量设为X cells = 20,Y cells = 20,Z cells = 20。
如下图所示:在FDS里面,基本形状只能是长方体的(尽管通过长方体的组合,能模拟复杂的几何形状)。
网格也只能是正交网格(点确定后可以看到)。
这个例子是模拟风洞内的燃烧,风洞尺寸为10米*10米*10米。
每边划分成20个网格,总共有8000个网格。
在FDS中,由于求解器的特殊要求,每边划分的单元数通常要求是2,3或5的倍数。
点击OK后,网格就生成了,如下图所示:1.3 定义粒子这里的粒子并不是通常CFD软件里的拉格朗日粒子,只是为了后处理方便而定义的示踪粒子。
选择Model > Edit Particles ...,然后点New。
不要选Particle Have Mass,这样粒子没有质量,仅是示踪粒子。
选中Color Particles During Animation,使用默认的颜色,红色。
这样在结果中会有红色的示踪粒子。
1.4 建立面实际上,在建立网格的时候,我们已经得到了计算模型。
这里的面是用来定义边界条件。
要注意的是,这里仅仅定义边界条件,而没有给模型中的面指定边界条件。
也就是说只定义边界上的物理条件,但并没有和模型中的边界联系起来。
密理博便携式多参数中文操作手册

Spectroquant ®Move100手持式多参数比色计操作手册目录1 准备工作. . . . . . . . . . . . . . . . . . . . . . . . . . . . . . . . . . . . . . . . . . . . . . . . . .31.1 包装内容. . . . . . . . . . . . . . . . . . . . . . . . . . . . . . . . . .. . . . . .. . . . . . . . . . . . . . 31.2 装入可充电电池. . . . . . . . . . . . . . . . . . . . . . . . . . . . . . . . . . . . . . . . . . . . . . .31.2.1 更换电池组. . . . . . . . . . . . . . . . . . . . . . . . . . . . . . . . . . . . . . . . . . . .41.2.2 储存数据-重要信息. . . . . . . . . . . . . . . . . . . . . . . . . . . . . . . . . . . . 41.3 键盘说明. . . . . . . . . . . . . . . . . . . . . . . . . . . . . . . . . . . . . . . . . . . . . . . . . . . . .41.4 首次启动MOVE100 多参数比色计. . . . . . . . . . . . . . . . . . . . . . . . . . . . . . . .51.5 模式Mode 菜单一览. . . . . . . . . . . . . . . . . . . . . . . . . . .. . . . . . . . . . . . . . . . .121.6 设置语言. . . . . . . . . . . . . . . . . . . . . . . . . . . . . . . . . . . . . . . . . . . . . . . . . . . . .131.7 删除数据. . . . . . . . . . . . . . . . . . . . . . . . . . . . . . . . . . . . . . . . . . . . . . . . . . . . .141.8 设置时间日期. . . . . . . . . . . . . . . . . . . . . . . . . . . . . . .. . . . . . . . . .. . . . . . . . . 141.9 显示日期时间. . . . . . . . . . . . . . . . . . . . . . . . . . . . . . .. . . . . . . . . . . . . . . . . . .151.10 自动关机功能. . . . . . . . . . . . . . . . . . . . . . . . . . . . . . . . .. . . . . . . . . . . . . . . .151.11 屏幕背景光. . . . . . . . . . . . . . . . . . . . . . . . . . . . . . . . .. . . . . . . . . . . . . . . . . .152 工作状态. . . . . . . . . . . . . . . . . . . . . . . . . . . . . . . . . . . . . . . . . . . . . . . . . . .162.1 选择测试方法. . . . . . . . . . . . . . . . . . . . . . . . . . . . . . . . . . . . . . . . . . . . . . . . . 162.2 使用测试试剂进行测试. . . . . . . . . . . . . . . . .. . . . . . . . . . . . . . . . . . . . . . . . . .182.3 多层次测试. . . . . . . . . . . . . . . . . . . . . . . . . . . . . . . . . . . . . . . . . . . . . . . . . . . 222.4 更改测试结果参考当量. . . . . . . . . . . . . . . . . . . . . .. . . . . . . . . . . . . . . . . . . . .232.5 测试吸光度. . . . . . . . . . . . . . . . . . . . . . . . . . . . .. . . . . . . . . . . . . . . . . . . . . . . 242.6 用户反应时间倒计时(计时器功能) . . . . . . . . . . . . . . . . . . . . . . . . . . . . . . . . .252.7 储存测试结果. . . . . . . . . . . . . . . . . . . . . . . . . . . . .. . . . . . . . . . . . . . . . . . . . . 262.8 调用储存的测试信息. . . . . . . . . . . . . . . . . . . . .. . . . . . . . . . . . . . . . . . . . . . . . 272.8.1 调用储存的所有测试结果. . . . . . . . . . . . . .. . . . . . . . . . . . . . . . . . . . 272.8.2 调用一定日期范围内的测试结果. . . . . . . . . . . . . . . . . . . . . . . . . . . . . 282.8.3 调用一定储存代码范围内的测试结果. . . . . . . . . . . . . . . . . . . . . . . . . 292.8.4 调用一定测试方法范围的储存结果. . . . . . . . . . . . . . . . . . . . . . . . . . . 31 2.9 删除储存的测试结果. . . . . . . . . . . . . . . . .. . . . . . . . . . . . . . . . . . . . . . . . . . . . . . . . . . . . . . .32准备工作1.1 包装内容Spectroquant® Move100多参数比色计的标准包装包含以下内容:•1个装在塑料便携箱里的多参数比色计•1套可充电电池包(型号AA/LR6)(a)•1个16mm圆形比色皿适配器(b)•1个16mm圆形比色皿适配器盖子(c)•1个24mm圆形比色皿适配器盖子(d)•1把螺丝刀(e)•英文操作手册•质量证明1.2 装入可充电电池/锂电池在初次使用仪器之前,可充电电池要先进行安装。
sims包用户指南说明书
Package‘sims’October14,2022Title Simulate Data from R or'JAGS'CodeVersion0.0.3Description Generates data from R or'JAGS'code for use in simulationstudies.The data are returned as an'nlist::nlists'object and/orsaved tofile as individual'.rds'files.Parallelization isimplemented using the'future'package.Progress is reported usingthe'progressr'package.License MIT+file LICENSEDepends R(>=3.6)Imports chk,future.apply,nlist,parallel,stats,yesnoSuggests covr,future,knitr,progressr,rjags,rmarkdown,testthat(>=3.0.0),withrVignetteBuilder knitrEncoding UTF-8Language en-USRoxygenNote7.1.2Config/testthat/edition3NeedsCompilation noAuthor Audrey Beliveau[aut],Joe Thorley[aut,cre](<https:///0000-0002-7683-4592>)Maintainer Joe Thorley<************************>Repository CRANDate/Publication2021-09-2018:50:02UTCR topics documented:sims_add (2)sims_check (2)sims_copy (3)sims_data (4)12sims_check sims_data_files (4)sims_info (5)sims_rdists (5)sims_simulate (6)Index8 sims_add Add Simulated DatasetsDescriptionAdd Simulated DatasetsUsagesims_add(path=".",nsims=1)Argumentspath A string specifying the path to the directory to add the data sets to.nsims A count of the number of additional datasets to generate.ValueA character vector of the names of thefiles created.sims_check Check Simulated DataDescriptionChecks the simulated data argument values in the’.sims.rds’file.Usagesims_check(path=".")Argumentspath A string of the path to the directory with the simulated data.DetailsThe checks include whether number and names of the datafiles in the directory are consistent with the number of simulations.sims_copy3 ValueAn informative error or invisible list of the argument values.Examplesset.seed(10)sims_simulate("a<-runif(1)",save=TRUE,path=tempdir(),exists=NA,ask=FALSE)(sims_check(tempdir()))sims_copy Copy Simulated DatasetsDescriptionCopy Simulated DatasetsUsagesims_copy(path_from=".",path_to=paste0(path_from,"_copy"),exists=FALSE,ask=getOption("sims.ask",TRUE),silent=FALSE)Argumentspath_from A string of the path to the directory containing the simulated datasets.path_to A string of the path to the directory to copy the simulated dataset to.exists Aflag specifying whether path_to should already exist.If exists=NA it doesn’t matter.If the directory already exists sims compatiblefiles are deletedif exists=TRUE or exists=NA otherwise an error is thrown.ask Aflag specifying whether to ask before deletingfiles.silent Aflag specifying whether to suppress warnings.ValueA character vector of the names of thefiles copied.4sims_data_files sims_data Simulated DatasetsDescriptionGets the simulated datasets as an nlist::nlists_object().There is no guarantee that all the datasets willfit in memory.Usagesims_data(path=".")Argumentspath A string of the path to the directory with the simulated data.ValueAn nlist::nlists_object()of the simulated datasets.Examplesset.seed(10)sims_simulate("a<-runif(1)",nsims=10L,path=tempdir(),exists=NA,ask=FALSE)library(nlist)sims_data(tempdir())sims_data_files Simulated Data FilesDescriptionGets the names of the simulated datafiles.Usagesims_data_files(path=".")Argumentspath A string of the path to the directory with the simulated data.ValueA character vector of the names of the simulated datafiles.sims_info5Examplesset.seed(10)sims_simulate("a<-runif(1)",nsims=10L,path=tempdir(),exists=NA,ask=FALSE)sims_data_files(tempdir())sims_info Simulated Data Argument ValuesDescriptionGets the simulated data argument values in the’.sims.rds’file.Usagesims_info(path=".")Argumentspath A string of the path to the directory with the simulated data.ValueA named list of the values in file.path(path, .sims.rds ).Examplesset.seed(10)sims_simulate("a<-runif(1)",path=tempdir(),exists=NA,ask=FALSE)sims_info(tempdir())sims_rdists Sims Random R DistributionsDescriptionGets the names of the R random variate generating functions listed in Distributions().Usagesims_rdists()ValueA character vector.Examplessims_rdists()sims_simulate Simulate DatasetsDescriptionSimulates datasets using JAGS or R code.By default returns the datasets as an nlist::nlists_object().If path is provided then the datasets are written to the directory as individual.rdsfiles.Usagesims_simulate(code,constants=nlist::nlist(),parameters=nlist::nlist(),monitor=".*",stochastic=NA,latent=NA,nsims=1,save=FALSE,path=".",exists=FALSE,rdists=sims_rdists(),ask=getOption("sims.ask",TRUE),silent=FALSE)Argumentscode A string of the JAGS or R code to generate the data.The JAGS code must notbe in a data or model block.constants An nlist object(or list that can be coerced to nlist)specifying the values of nodesin code.The values are included in the output dataset.parameters An nlist object(or list that can be coerced to nlist)specifying the values of nodesin code.The values are not included in the output dataset.monitor A character vector(or regular expression if a string)specifying the names of thenodes in code to include in the dataset.By default all nodes are included.stochastic A logical scalar specifying whether to monitor deterministic and stochastic(NA),only deterministic(FALSE)or only stochastic nodes(TRUE).latent A logical scalar specifying whether to monitor observed and latent(NA),onlylatent(TRUE)or only observed nodes(FALSE).nsims A whole number between1and1,000,000specifying the number of data sets tosimulate.By default1data set is simulated.save Aflag specifying whether to return the data sets as an nlists object or save inpath.If save=NA the datasets are returned as an nlists object and saved inpath.path A string specifying the path to the directory to save the data sets in.exists Aflag specifying whether the path directory should already exist(if exists=NA it doesn’t matter).rdists A character vector specifying the R functions to recognize as stochastic.ask Aflag specifying whether to ask before deleting sims compatiblefiles.silent Aflag specifying whether to suppress warnings.DetailsJAGS code is identified by the presence of’~’indicating a stochastic variable node.Otherwise codeis assumed to be R code and stochastic variable nodes are those where assignment is immediatelysucceeded by a call to one of the functions named in rdists.Both constants and parameters must be[nlist::nlist_object]s(or lists that can be coerced tosuch).The only difference between constants and parameters is that the values in constants areappended to the output data while the values in parameters are not.Neither constants or parameterscan include missing values nor can they have elements with the same name.Elements which are notin code are dropped with a warning(unless silent=TRUE in which case the warning is suppressed).Each set of simulated data set is written as a separate.rdsfile.Thefiles are labelled data0000001.rds,data0000002.rds,data0000003.rds etc.The argument values are saved in the hiddenfile.sims.rds.sims compatiblefiles are those matching the regular expression^((data\\\\d\{7,7\})|([.]sims))[.]rds$.Parallelization is implemented using the future package.ValueBy default an nlist::nlists_object()of the simulated data.Otherwise if path is defined savesthe datasets as individual.rdsfiles and returns TRUE.See Alsosims_rdists()Examplesset.seed(101)sims_simulate("a<-runif(1)",path=tempdir(),exists=NA,ask=FALSE)IndexDistributions(),5nlist::nlists_object(),4,6,7sims_add,2sims_check,2sims_copy,3sims_data,4sims_data_files,4sims_info,5sims_rdists,5sims_rdists(),7sims_simulate,68。
PyroSiM实例教程
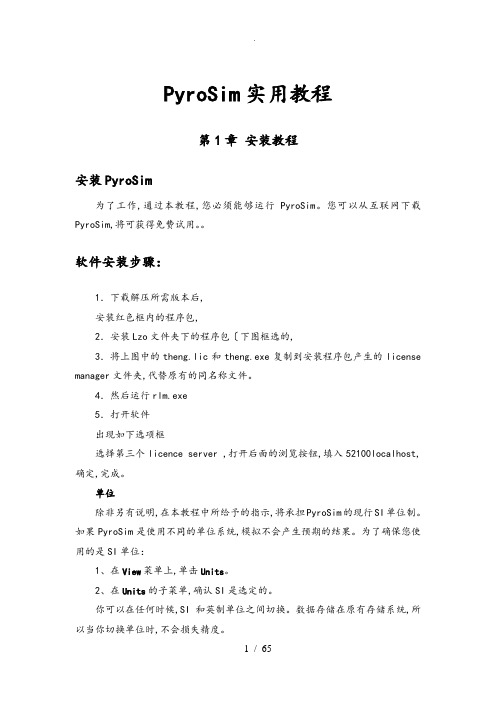
PyroSim实用教程第1章安装教程安装PyroSim为了工作,通过本教程,您必须能够运行PyroSim。
您可以从互联网下载PyroSim,将可获得免费试用。
软件安装步骤:1.下载解压所需版本后,安装红色框内的程序包,2.安装Lzo文件夹下的程序包〔下图框选的,3.将上图中的theng.lic和theng.exe复制到安装程序包产生的license manager文件夹,代替原有的同名称文件。
4.然后运行rlm.exe5.打开软件出现如下选项框选择第三个licence server ,打开后面的浏览按钮,填入52100localhost,确定,完成。
单位除非另有说明,在本教程中所给予的指示,将承担PyroSim的现行SI单位制。
如果PyroSim是使用不同的单位系统,模拟不会产生预期的结果。
为了确保您使用的是SI单位:1、在View菜单上,单击Units。
2、在Units的子菜单,确认SI是选定的。
你可以在任何时候,SI和英制单位之间切换。
数据存储在原有存储系统,所以当你切换单位时,不会损失精度。
操作的三维图像•为了旋转〔spin三维模型:选择然后在模型上单击左键并移动鼠标。
该模型会旋转,就像您选择球体上的一个点。
•放大zoom:选择〔或按住ALT键和垂直拖动鼠标。
选择然后按一下拖动以定义一个缩放框。
•移动move模式:选择〔或按住Shift键并拖动来重新定位模型窗口。
•改变重点:选择对象〔S,然后选择定义一个较小的"查看选定对象周围的领域。
选择将重置,包括整个模型。
•在任何时候,选择〔或按Ctrl + R,将重置模型。
您还可以使用Smokeview和以人为本的控制。
请参阅用户手册为PyroSim 说明。
FDS的概念和术语材料用于定义材料热性能和热解行为。
表面表面是用来定义在您的FDS模型的固体物体和通风口的属性。
在混合物或层表面可以使用先前定义的材料。
默认情况下,所有的固体物体和通风口都是有惰性的,一个固定的温度,初始温度。
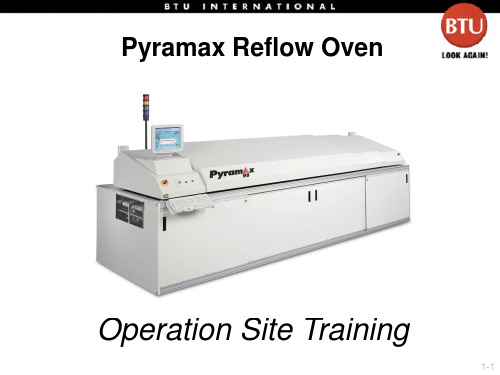
Pyramax中文入门版
Safety Labels 安全标签
Electrical
Crush
Crush
Pinch
Heat
Inhalation
EMO
Electrical under UPS
Safety Glasses
See Manual
Safety Gloves Lifting Point
Refractory Warning
performingdailynormalshutdownfurnacerecipesetpoints设定massflowsetpointtableconfigured气体流量设定gassamplingsequencecontroltable气体采样顺序控制pressurezonesetpointtable静压设定conveyorfieldssetpointtable带速设定temperaturezonesetpointtable炉温设定setpointfolder参数设定页面静压设定气体采样顺序设定冷却吹风马达功率设定带速设定炉温设定recipeoptions功能选定basicatmospherecontrolsettings气氛开关auxiliaryequipmentonoffsettings设备功能开关temperatureoutputalarmaffectsprocessstate温度输出报警影响运行状态gassamplingdisableenable气体取样开关optionsfolderreadyindictordisableenableready开关pressureoutputalarmaffectsprocessstate静压输出报警影响运行状态producttrackingdisableenable产品跟踪开关屏蔽ready气体采样产品跟踪温度输出报警影响运行状态静压输出报警影响运行状态选项页面主控制加热传送带氮气recipealarmsatmospherecontrolalarmstabletemperaturepoweroutputalarmtablemassflowsetpointtableconfiguredpressurezoneoutputalarmstableconveyoroutputalarmstabletemperaturecontrolalarmstablealarmsfolderpressurepoweroutputalarmtablemassflowoutputalarmstableconfigured警报页面温度报警控制表气体报警控制表带速报警控制表静压报警控制表温度功率输出报警控制表压力功率输出报警控制表预警低限预警高限报警低限报警高限recipepidtrimpid功率temperaturepidtrimsettingstablepidtrimrecipewindo
- 1、下载文档前请自行甄别文档内容的完整性,平台不提供额外的编辑、内容补充、找答案等附加服务。
- 2、"仅部分预览"的文档,不可在线预览部分如存在完整性等问题,可反馈申请退款(可完整预览的文档不适用该条件!)。
- 3、如文档侵犯您的权益,请联系客服反馈,我们会尽快为您处理(人工客服工作时间:9:00-18:30)。
第1章安装准备安装PyroSim为了工作,通过本教程,您必须能够运行PyroSim。
您可以从互联网下载PyroSim,将可获得免费试用。
单位除非另有说明,在本教程中所给予的指示,将承担PyroSim的现行SI单位制。
如果PyroSim 是使用不同的单位系统,模拟不会产生预期的结果。
为了确保您使用的是SI单位:1、在View菜单上,单击Units。
2、在Units的子菜单,确认SI是选定的。
你可以在任何时候,SI和英制单位之间切换。
数据存储在原有存储系统,所以当你切换单位时,不会损失精度。
操作的三维图像?为了旋转(spin)三维模型:选择然后在模型上单击左键并移动鼠标。
该模型会旋转,就像您选择球体上的一个点。
?放大zoom:选择(或按住ALT键)和垂直拖动鼠标。
选择然后按一下拖动以定义一个缩放框。
?移动move模式:选择(或按住Shift键)并拖动来重新定位模型窗口。
?改变重点:选择对象(S),然后选择定义一个较小的“查看选定对象周围的领域。
选择将重置,包括整个模型。
?在任何时候,选择(或按Ctrl+R),将重置模型。
您还可以使用Smokeview和以人为本的控制。
请参阅用户手册为PyroSim说明。
FDS的概念和术语材料用于定义材料热性能和热解行为。
表面表面是用来定义在您的FDS模型的固体物体和通风口的属性。
在混合物或层表面可以使用先前定义的材料。
默认情况下,所有的固体物体和通风口都是有惰性的,一个固定的温度,初始温度。
障碍物障碍物的根本在火灾动力学模拟的几何表示(FDS)[FDS-SMV的官方网站]。
障碍物两点定义在三维的矩形固体空间。
表面特性,被分配到每个面对的阻挠。
设备和控制逻辑可以定义创建或删除在模拟过程中的一个障碍。
当创建一个模型,障碍物的几何形状并不需要相匹配的几何网格的解决方案中使用。
然而,产品安全的解决方案将配合所有几何解决方案网状。
在FDS分析,阻塞所有的面转移到对应最近的网状细胞。
因此,一些障碍物有可能成为在分析厚;其他可能成为薄,对应于一个单细胞的脸,这有可能引入不必要的到模型的差距。
这些含糊之处,可避免使所有的几何对应网格间距。
通风口有一般使用上的通风口FDS集团来描述二维平面物体。
从字面上理解,一个用于排气模型组件通风系统的建筑,如扩散或回报。
在这些情况下,排气坐标定义为一个平面形成的边界风管。
你也可以使用通风口作为一种手段,应用到某一特定边界条件下的矩形表面。
例如一堆火,可由指定一个排气口或者网边界或固体表面上产生。
通风口表面定义了火所需要特性的。
计算网格在FDS集团直线域内进行的计算称为网格。
每个网格划分为矩形。
当进行选择时必须考虑这两个因素。
矩形尺寸达到了所需要的分辨率定义对象模型(障碍)和理想的流量动力学分辨率解决方案(包括当地消防诱导的影响)的要求。
虽然几何对象(障碍)在一个FDS场模拟分析中可以指定试样尺寸不落在矩形所处的坐标,但在FDS解决方案中,所有的阻力都转向了最近的矩形。
如果一个阻塞是非常小,两个面可以近似为相同的矩形。
FDS用户指南[McGrattan,克莱恩,Hostikka、弗洛伊德、2009]建议,全功能、障碍物应指定至少一层矩形的厚度。
作为一个结果,矩形大小必须足够小,但能够合理地代表问题的几何形状。
另外,矩形块应该尽可能接近立方体。
矩形尺寸是否足以解决水流动力条件方案只能由网格敏感性研究确定。
关于网格大小的模型敏感性将在章节5验证,对于核能电厂的火灾模型选择的的应用[美国:2007)。
它的职责是进行灵敏度分析,以研究作为部分任何仿真。
第二章ExampleProblemsProvidedwithFDS5如果你想要觉得有趣并能很快的进行一些实例分析,你可以导入包含了NIST的FDS5输入文件。
在PyroSim2009\SAMPLES\FDS5文件夹的PyroSim分布中提供了这些例子。
本章我们列举几个例子,当然你可以导入更多。
研究这些例子大大有利于了解不同类型的分析输入。
为了打开这些例子,你需要:1、获得所需的FDS5输入文件。
2。
打开PyroSim。
3。
在File中单击Import并选择FDS文件。
4。
在OpenFile对话框中,单击FDS输入文件。
PyroSim将导入该文件。
如果不能导入FDS 文件中的任何记录,PyroSim会发出警告。
5。
在File栏,单击Save,把它保存在一个新的目录中。
6。
在FDS菜单中,单击RunFDS将会启动分析。
分析结束后,SmokeView会开始查看结果。
重要事项:如果PyroSim不完全支持FDS输入文件,它会发出一个警告,其中包括关于如何处理陌生的记录信息。
在某些情况下,PyroSim能把记录添加到AdditionalRecords部分中并使模拟不受影响。
但如果记录是“下降”(即从模拟略),模拟结果将不再代表例子的原意。
乙醇潘火ethanol_pan.fds的例子说明了一个乙醇潘火。
该模型在图2.1中有所显示。
图2.2所示的是一个典型的结果。
FDS输入文件可以在以下网址下载:图2.1。
乙醇泛模型图2.2。
乙醇泛结果图2.3。
计算和测量的热释放速率的比较箱燃烧消失:box_burn_away.fds的例子说明了一个泡沫箱燃烧。
该模型如图2.4。
一个典型的结论如图2.5所示。
FDS输入文件可以在以下网址下载:图2.4。
泡沫箱燃烧距离模型图2.5。
泡沫箱烧掉结果绝缘钢柱insulated_steel_column.fds的例子说明了成列的热传导。
模型如图2.6所示。
一个典型的结论如图2.7所示。
FDS输入文件可以在下列网址中下载:Heat_Transfer/insulated_steel_column.fds。
图2.6。
绝缘钢柱模型图2.7。
绝缘钢柱结果水冷water_cooling.fdsSprinklers_and_Sprays/water_cooling.fds中下载。
图2.8。
水冷却模型图2.9。
水冷结果疏散PyroSim支持了FDS+EV AC疏散模型的输入。
evac_example1a.fds EV AC的信息PROJ/fdsevac/index.jsp。
请注意,Thunderhead的工程在EV AC和探路者模型可以用来提供备用疏散建模的方法。
图2.10。
疏散建模示例图2.11。
疏散模拟结果第三章BurnerFire在这个教程中,你将会创造一个500瓦的燃烧火焰并将测量烟柱中心高度为1.5米的温度。
这篇教程展示了该如何操作:·创建一个燃烧火焰·添加一个热电偶·添加一个温度可视化扫描平面·运用Smokeview观点查看3D结果·运用PyroSim观点查看2D结果图3.1,在这一例子的燃烧火焰在你开始之前,确保你使用SI单位(见第一章)。
创建网格这个例子里,我们将用0.13米宽的网细胞。
对500千瓦火焰来说,这个值大约是1/5特征直径(D*)。
就想拇指规则一样,在一个烟柱模型中,这是一样大的能够在仍然保持一个中等水平的建模精度网状细胞,[美国描述:2007)。
使用小网格细胞因子2应该减少误差4倍,但会增加仿真运行时间通过一个因素的16。
1.在Model菜单上,单击EditMeshes.....2.点击New。
3.接受默认名称MESH。
点击OK。
4.在MinX空格输入-1.0,在MaxX空格输入1.0。
5.在MinY空格输入-1.0,在MaxY空格输入1.0。
6.在MinZ空格输入0.0,在MaxZ空格输入3.0。
7.在XCells空格输入15。
8.在YCells空格输入15。
9.在ZCells空格输入24。
10.点击OK保存更改并关闭对话框EditMeshes。
图3.2。
创建网格创建燃烧器表面在FDS模型中表面是用于定义对象的性质。
在这个例子中,我们定义一个燃烧器表面,释放热量速率为500千瓦/平方米。
1.在Model菜单上,单击EditSurfaces....2.点击New....3.在SurfaceName空格中输入burner,见图3.3。
4.在SurfaceType菜单中,选择Burner。
5.点击OK,创造出新的默认燃烧器的表面。
图3.3。
创造一个新的燃烧器的表面1.在Description空格,输入500kW/m2burner,见图3.4。
2.点击OK保存更改并关闭EditSurfaces对话框。
图3.4。
定义参数为燃烧器的表面创造燃烧器通风口在这个例子中,我们使用一个通风口以及为了规定火焰预先建立起燃烧器表面。
(回忆在FDS中,一个“通风口”可以成为一个2D表面用于应用边界条件对一个矩形补丁。
)1.Model上的菜单,点击NewVent....2.在Description空格输入burnervent,见图3.5。
3.在Surface菜单,选择burner。
这说明先前创造了燃烧器的表面将定义通风口的性质。
4.点击Geometry标签。
在Plane菜单,选择Z。
5.在MinX空格输入-0.5,在MaxX空格输入0.5。
6.在MinY空格输入-0.5,在MaxY空格输入0.5。
7.点击OK,创造出新的燃烧器通风口。
图3.5。
创造燃烧器通风口创造顶部通风口1.Model上的菜单,点击NewVent....2.在Description空格输入opentop。
3.在Surface的列表中,选择OPEN。
这是一个默认的表面,这意味着这将成为一个开放的边界。
4.点击Geometry标签。
在Plane列表中,选择Z输入3.0。
5.在MinX空格输入-1.0,在MaxX空格输入1.0。
6.在MinY空格输入-1.0,在MaxY空格输入1.0。
7.点击OK创造开放的通风口。
添加一个热电偶1.在Devices菜单上,单击NewThermocouple....2.在DeviceName空格输入thermocoupleat1.5m。
3.位置Location行上,在Z框中,键入1.5。
4.单击OK以创建热电偶。
一个黄点会出现在模型中心。
点击ShowLabels,切换和关闭标签。
添加温度切片平面1在Output菜单上,单击Slices....2.在XYZPlane,单击该单元格,选择Y。
3.在PlaneValue列中,单击该单元格类型0.0。
4.在GasPhaseQuantity,单击该单元格,选择Temperature。
5.在使用UseVector?,单击该单元格,选择NO。
6.单击OK以创建切片平面。
单击ShowSlices,来控制切换切片机开启和关闭。
为更好地查看而旋转模型1.要重置变焦和正确选择中心,按Ctrl+R.PyroSim现在将向下俯视沿Z轴的模型。
2.在3D视图中按鼠标左键按钮leftmousebutton,来旋转模型。