常用配置命令及参数
交换机配置命令
交换机配置命令在网络设备中,交换机是起到连接多台计算机并实现数据交换的重要设备。
通过合理的配置命令,可以对交换机进行管理和优化,从而更好地满足网络的需求。
下面将介绍一些常用的交换机配置命令,并对其作出详细解释和应用。
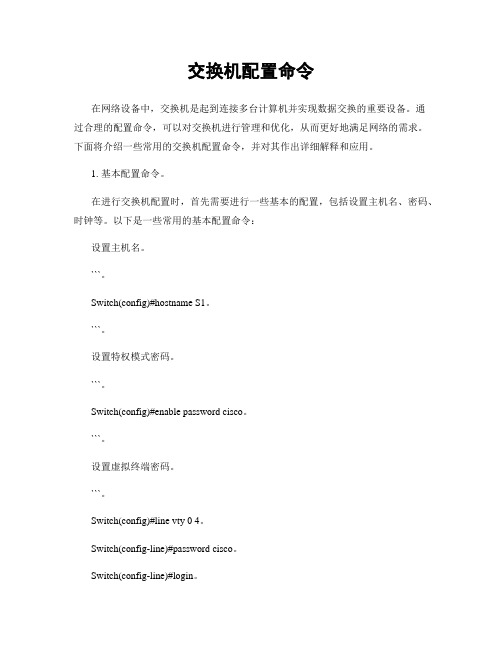
1. 基本配置命令。
在进行交换机配置时,首先需要进行一些基本的配置,包括设置主机名、密码、时钟等。
以下是一些常用的基本配置命令:设置主机名。
```。
Switch(config)#hostname S1。
```。
设置特权模式密码。
```。
Switch(config)#enable password cisco。
```。
设置虚拟终端密码。
```。
Switch(config)#line vty 0 4。
Switch(config-line)#password cisco。
Switch(config-line)#login。
设置时钟。
```。
Switch(config)#clock set 14:30:00 25 Dec 2022。
```。
这些基本配置命令可以帮助管理员对交换机进行基本的管理和保护,确保网络的安全和稳定。
2. VLAN配置命令。
VLAN(Virtual Local Area Network)是将局域网划分成多个虚拟局域网的技术,可以提高网络的灵活性和安全性。
以下是一些常用的VLAN配置命令:创建VLAN。
```。
Switch(config)#vlan 10。
Switch(config-vlan)#name Sales。
```。
配置端口的VLAN。
```。
Switch(config)#interface fastethernet 0/1。
Switch(config-if)#switchport mode access。
Switch(config-if)#switchport access vlan 10。
配置VLAN间的路由。
```。
Switch(config)#interface vlan 10。
了解Windows CMD命令的常用选项和参数

了解Windows CMD命令的常用选项和参数Windows CMD(命令提示符)是Windows操作系统中的一个命令行工具,它提供了许多强大的功能和选项,可以帮助用户更高效地管理和操作计算机。
在本文中,我们将了解一些常用的CMD命令选项和参数,并探讨它们的用途和功能。
1. 目录和文件管理在CMD中,我们可以使用一些命令来管理目录和文件。
其中,常用的命令选项和参数包括:- dir:用于列出当前目录下的文件和子目录。
可以使用参数如/s(显示文件大小)、/w(以宽格式显示)等来定制输出。
- cd:用于改变当前目录。
可以使用参数如/(回到上一级目录)、..(进入当前目录的上一级目录)等来导航。
- mkdir:用于创建新的目录。
可以使用参数如/p(创建多级目录)来定制创建方式。
- copy:用于复制文件。
可以使用参数如/y(覆盖现有文件)来控制复制行为。
- del:用于删除文件。
可以使用参数如/f(强制删除)来确认删除操作。
2. 系统信息和配置CMD还提供了一些命令选项和参数,用于查看和配置系统信息。
以下是一些常用的命令选项和参数:- systeminfo:用于显示系统的详细信息,包括操作系统版本、安装日期、物理内存等。
可以使用参数如/s(显示本地计算机信息)来指定显示方式。
- ipconfig:用于显示网络配置信息,包括IP地址、子网掩码、默认网关等。
可以使用参数如/all(显示详细信息)来获取更多信息。
- netstat:用于显示网络连接和统计信息。
可以使用参数如/a(显示所有连接)来过滤显示结果。
- tasklist:用于显示当前正在运行的进程列表。
可以使用参数如/svc(显示每个进程的服务信息)来获取更多信息。
- msconfig:用于配置系统启动项和服务。
可以使用参数如/services(只显示服务)来定制显示内容。
3. 网络和通信CMD还提供了一些命令选项和参数,用于网络和通信。
以下是一些常用的命令选项和参数:- ping:用于测试与目标主机的连接。
linux sysconfig命令的用法

linux sysconfig命令的用法Sysconfig是一个在Linux系统中常用的命令行工具,用于配置和管理系统参数。
它提供了许多与系统相关的配置选项,可以用于调整系统的性能、安全性和行为。
本篇文章将详细介绍Sysconfig命令的用法,包括基本语法、选项和参数说明。
一、基本语法sysconfig[选项]参数其中,选项和参数是可选的,具体含义如下:*参数:指定要配置的系统参数,可以是系统服务、网络接口、文件系统等。
二、常用选项和参数说明1.-a:添加配置参数。
2.-d:显示指定服务的详细信息。
3.-f:强制应用配置更改。
4.-m:使用图形界面进行配置。
5.-s:应用配置更改并重启系统。
6.参数:指定要配置的系统服务名称或文件系统路径。
三、用法示例1.配置网络接口参数:sysconfignetworkinginterface[参数]例如:sysconfignetworkinginterface="eth0"ipv4.addresses="192.168.0. 1/24"ipv6.addresses="fe80::1/64"该命令将为eth0接口配置IPv4和IPv6地址设置。
2.显示系统服务的详细信息:sysconfigserviceservice_name例如:sysconfigservicesshd该命令将显示SSH服务的详细信息,包括状态、日志文件等。
3.强制应用配置更改并重启相关服务:sysconfig[选项]参数-s例如:sysconfignetworkinginterface[参数]-s该命令将强制应用网络接口的配置更改,并重启相关服务以应用更改。
四、注意事项1.配置更改可能影响系统的性能和稳定性,请在执行之前备份重要数据。
2.使用Sysconfig进行配置时,请确保了解所配置参数的含义和影响,以免造成系统故障。
3.在使用强制应用配置更改和重启相关服务的选项时,请谨慎操作,以免造成数据丢失或系统崩溃。
netsh命令用法及参数

Netsh命令是一个用于配置和操作网络参数的命令行工具,它可以用于设置IP地址、DNS服务器、路由等参数。
以下是Netsh命令的一些常见用法和参数:
1. 设置IP地址:
```php
netsh interface ipv4 set address "本地连接" static 192.168.0.100 255.255.255.0 192.168.0.1
```
上述命令将本地连接的IP地址设置为192.168.0.100,子网掩码为255.255.255.0,网关为192.168.0.1。
2. 设置DNS服务器:
```php
netsh interface ipv4 set dns "本地连接" static 8.8.8.8
```
上述命令将本地连接的DNS服务器设置为8.8.8.8。
3. 显示网络配置:
```php
netsh interface ipv4 show config
```
上述命令将显示本地连接的网络配置信息。
4. 显示路由表:
```php
netsh interface ipv4 show route
```
上述命令将显示本地计算机的路由表。
除了以上示例,Netsh命令还提供了许多其他参数和选项,可以用于配置和操作网络参数。
要了解更多关于Netsh命令的详细信息和参数,可以查看Windows操作系统的帮助文档或运行`netsh /?`命令以获取帮助信息。
路由器的配置命令总结
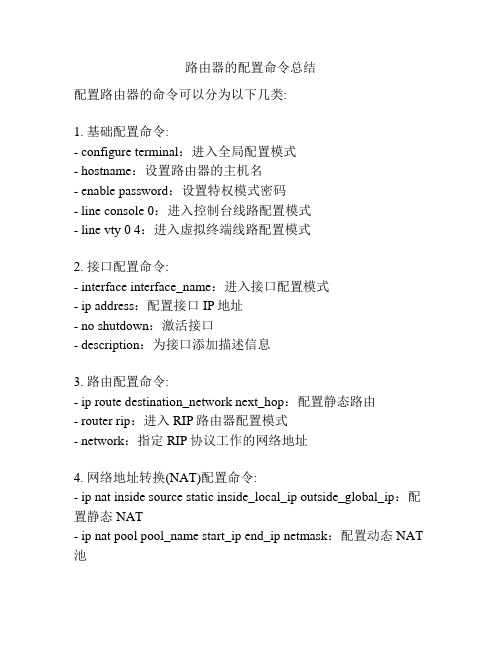
路由器的配置命令总结配置路由器的命令可以分为以下几类:1. 基础配置命令:- configure terminal:进入全局配置模式- hostname:设置路由器的主机名- enable password:设置特权模式密码- line console 0:进入控制台线路配置模式- line vty 0 4:进入虚拟终端线路配置模式2. 接口配置命令:- interface interface_name:进入接口配置模式- ip address:配置接口IP地址- no shutdown:激活接口- description:为接口添加描述信息3. 路由配置命令:- ip route destination_network next_hop:配置静态路由- router rip:进入RIP路由器配置模式- network:指定RIP协议工作的网络地址4. 网络地址转换(NAT)配置命令:- ip nat inside source static inside_local_ip outside_global_ip:配置静态NAT- ip nat pool pool_name start_ip end_ip netmask:配置动态NAT 池5. 访问控制列表(ACL)配置命令:- access-list acl_number {deny | permit} source destination:创建ACL规则- interface interface_name:进入接口配置模式- ip access-group acl_number {in | out}:应用ACL到接口6. VLAN配置命令:- vlan vlan_id:创建VLAN- switchport mode {access | trunk}:配置接口模式7. 安全配置命令:- enable secret:设置特权模式加密密码- username username password password:创建本地用户8. 特定协议配置命令:- router ospf process_ID:进入OSPF路由器配置模式- network network_address wildcard_mask area area_number:配置OSPF网络- router bgp autonomous_system_number:进入BGP路由器配置模式- neighbor ip_address remote-as autonomous_system_number:配置BGP邻居以上是一些常见的路由器配置命令,不同型号和品牌的路由器可能会有一些差异,具体命令请参考相应的操作手册或文档。
简述查看配置的几种命令

简述查看配置的几种命令查看配置是在计算机领域中非常常见的操作,可以帮助我们了解系统的当前设置和各种参数的取值。
本文将介绍几种常用的命令来查看配置。
一、ifconfig命令ifconfig命令用于显示或配置网络接口的信息。
通过运行ifconfig命令,我们可以查看网络接口的IP地址、子网掩码、MAC地址等信息。
命令格式:ifconfig [网络接口名]示例:ifconfig eth0二、netstat命令netstat命令用于显示网络连接、路由表、网络接口统计信息等。
通过运行netstat命令,我们可以查看当前系统的网络连接状态和网络接口的统计信息。
命令格式:netstat [选项]示例:netstat -a三、route命令route命令用于显示和操作IP路由表。
通过运行route命令,我们可以查看系统的路由表信息。
命令格式:route [选项]示例:route -n四、iptables命令iptables命令用于配置Linux内核的IPv4数据包过滤功能和网络地址转换(NAT)功能。
通过运行iptables命令,我们可以查看系统的防火墙规则和网络地址转换规则。
命令格式:iptables [选项]示例:iptables -L五、sysctl命令sysctl命令用于查看和修改内核参数。
通过运行sysctl命令,我们可以查看系统的各种内核参数的取值。
命令格式:sysctl [选项] [参数名]示例:sysctl -a六、lsblk命令lsblk命令用于列出系统中的块设备信息,如硬盘、分区等。
通过运行lsblk命令,我们可以查看系统中的块设备的信息。
命令格式:lsblk [选项]示例:lsblk七、lspci命令lspci命令用于列出系统中的PCI设备信息。
通过运行lspci命令,我们可以查看系统中的PCI设备的信息。
命令格式:lspci [选项]示例:lspci八、lsusb命令lsusb命令用于列出系统中的USB设备信息。
路由器的配置命令
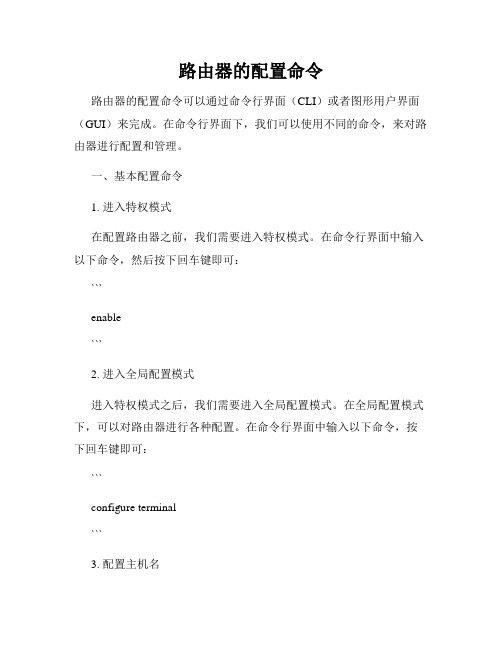
路由器的配置命令路由器的配置命令可以通过命令行界面(CLI)或者图形用户界面(GUI)来完成。
在命令行界面下,我们可以使用不同的命令,来对路由器进行配置和管理。
一、基本配置命令1. 进入特权模式在配置路由器之前,我们需要进入特权模式。
在命令行界面中输入以下命令,然后按下回车键即可:```enable```2. 进入全局配置模式进入特权模式之后,我们需要进入全局配置模式。
在全局配置模式下,可以对路由器进行各种配置。
在命令行界面中输入以下命令,按下回车键即可:```configure terminal```3. 配置主机名在全局配置模式下,我们可以为路由器配置一个唯一的主机名,以区分其他路由器。
在命令行界面中输入以下命令,按下回车键即可:```hostname Router1```这里的"Router1"可以替换为你想要的主机名。
4. 配置密码为了保护路由器的安全,我们可以为路由器配置密码。
以下是两种常用的密码配置命令:为特权模式设置密码:```enable secret password```为虚拟终端线路设置密码:```line vty 0 4password passwordlogin```这里的"password"可以替换为你想要的密码。
二、接口配置命令1. 进入接口配置模式在全局配置模式下,我们可以进入接口配置模式,对特定接口进行配置。
以下是两个常用的进入接口模式的命令:进入以太网接口配置模式:```interface Ethernet0/0```进入串口接口配置模式:```interface Serial0/0```2. 配置IP地址在接口配置模式下,我们可以为接口配置IP地址。
以下是一个配置IP地址的命令示例:```ip address 192.168.0.1 255.255.255.0```这里的"192.168.0.1"和"255.255.255.0"可以替换为你想要的IP地址和子网掩码。
H3C交换机常用配置命令大全
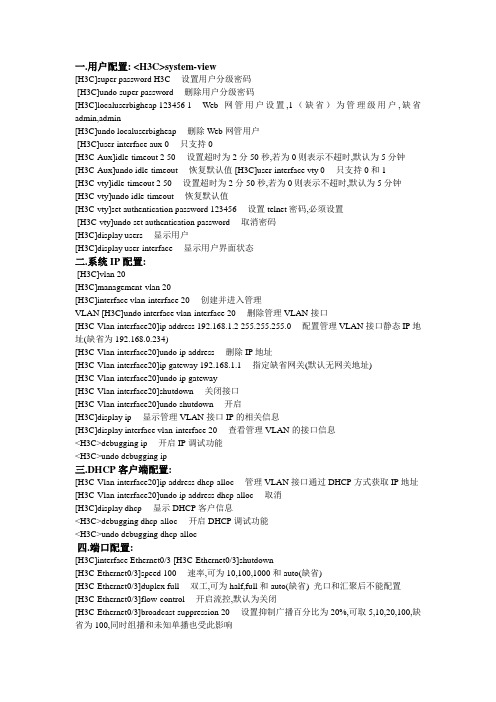
一.用户配置: <H3C>system-view[H3C]super password H3C 设置用户分级密码[H3C]undo super password 删除用户分级密码[H3C]localuserbigheap 123456 1 Web网管用户设置,1(缺省)为管理级用户,缺省admin,admin[H3C]undo localuserbigheap 删除Web网管用户[H3C]user-interface aux 0 只支持0[H3C-Aux]idle-timeout 2 50 设置超时为2分50秒,若为0则表示不超时,默认为5分钟[H3C-Aux]undo idle-timeout 恢复默认值 [H3C]user-interface vty 0 只支持0和1[H3C-vty]idle-timeout 2 50 设置超时为2分50秒,若为0则表示不超时,默认为5分钟[H3C-vty]undo idle-timeout 恢复默认值[H3C-vty]set authentication password 123456 设置telnet密码,必须设置[H3C-vty]undo set authentication password 取消密码[H3C]display users 显示用户[H3C]display user-interface 显示用户界面状态二.系统IP配置:[H3C]vlan 20[H3C]management-vlan 20[H3C]interface vlan-interface 20 创建并进入管理VLAN [H3C]undo interface vlan-interface 20 删除管理VLAN接口[H3C-Vlan-interface20]ip address 192.168.1.2 255.255.255.0 配置管理VLAN接口静态IP地址(缺省为192.168.0.234)[H3C-Vlan-interface20]undo ip address 删除IP地址[H3C-Vlan-interface20]ip gateway 192.168.1.1 指定缺省网关(默认无网关地址)[H3C-Vlan-interface20]undo ip gateway[H3C-Vlan-interface20]shutdown 关闭接口[H3C-Vlan-interface20]undo shutdown 开启[H3C]display ip 显示管理VLAN接口IP的相关信息[H3C]display interface vlan-interface 20 查看管理VLAN的接口信息<H3C>debugging ip 开启IP调试功能<H3C>undo debugging ip三.DHCP客户端配置:[H3C-Vlan-interface20]ip address dhcp-alloc 管理VLAN接口通过DHCP方式获取IP地址[H3C-Vlan-interface20]undo ip address dhcp-alloc 取消[H3C]display dhcp 显示DHCP客户信息<H3C>debugging dhcp-alloc 开启DHCP调试功能<H3C>undo debugging dhcp-alloc四.端口配置:[H3C]interface Ethernet0/3 [H3C-Ethernet0/3]shutdown[H3C-Ethernet0/3]speed 100 速率,可为10,100,1000和auto(缺省)[H3C-Ethernet0/3]duplex full 双工,可为half,full和auto(缺省) 光口和汇聚后不能配置[H3C-Ethernet0/3]flow-control 开启流控,默认为关闭[H3C-Ethernet0/3]broadcast-suppression 20 设置抑制广播百分比为20%,可取5,10,20,100,缺省为100,同时组播和未知单播也受此影响[H3C-Ethernet0/3]loopback internal 内环测试[H3C-Ethernet0/3]loopback external 外环测试,需插接自环头,必须为全双工或者自协商模式[H3C-Ethernet0/3]port link-type trunk 设置链路的类型为trunk,可为access(缺省),trunk [H3C-Ethernet0/3]port trunk pvidvlan 20 设置20为该trunk的缺省VLAN,默认为1(trunk线路两端的PVID必须一致)[H3C-Ethernet0/3]port access vlan 20 将当前access端口加入指定的VLAN [H3C-Ethernet0/3]port trunk permit vlan all 允许所有的VLAN通过当前的trunk端口,可多次使用该命令[H3C-Ethernet0/3]mdi auto 设置以太端口为自动监测,normal(缺省)为直通线,across为交叉线[H3C]link-aggregation Ethernet 0/1 to Ethernet 0/4 将1-4口加入汇聚组,1为主端口,两端需要同时配置,设置了端口镜像以及端口隔离的端口无法汇聚 [H3C]undo link-aggregation Ethernet 0/1 删除该汇聚组[H3C]link-aggregation mode egress 配置端口汇聚模式为根据目的MAC地址进行负荷分担,可选为 ingress,egress和both,缺省为both[H3C]monitor-port Ethernet 0/2 将该端口设置为镜像端口,必须先设置镜像端口,删除时必须先删除被镜像端口,而且它们不能同在一个端口,该端口不能在汇聚组中,设置新镜像端口时,新取代旧,被镜像不变[H3C]mirroring-port Ethernet 0/3 to Ethernet 0/4 both 将端口3和4设置为被镜像端口,both 为同时监控接收和发送的报文,inbound表示仅监控接收的报文,outbound表示仅监控发送的报文 [H3C]display mirror[H3C]display interface Ethernet 0/3<H3C>reset counters 清除所有端口的统计信息[H3C]display link-aggregation Ethernet 0/3 显示端口汇聚信息[H3C-Ethernet0/3]virtual-cable-test 诊断该端口的电路状况五.VLAN配置:[H3C]vlan 2[H3C]undo vlan all 删除除缺省VLAN外的所有VLAN,缺省VLAN不能被删除[H3C-vlan2]port Ethernet 0/4 to Ethernet 0/7 将4到7号端口加入到VLAN2中,此命令只能用来加access端口,不能用来增加trunk或者hybrid端口[H3C-vlan2]port-isolate enable 打开VLAN内端口隔离特性,不能二层转发,默认不启用该功能[H3C-Ethernet0/4]port-isolate uplink-port vlan 2 设置4为VLAN2的隔离上行端口,用于转发二层数据,只能配置一个上行端口,若为trunk,则建议允许所有VLAN通过,隔离不能与汇聚同时配置[H3C]display vlan all 显示所有VLAN的详细信息S1550E支持基于端口的VLAN,通过创建不同的user-group来实现,一个端口可以属于多个user-group,不属于同一个user-group的端口不能互相通信,最多支持50个user-group[H3C]user-group 20 创建user-group 20,默认只存在user-group 1[H3C-UserGroup20]port Ethernet 0/4 to Ethernet 0/7 将4到7号端口加入到VLAN20中,初始时都属于user-group 1中[H3C]display user-group 20 显示user-group 20的相关信息六.集群配置:S2100只能作为成员交换机加入集群中,加入后系统名改为"集群名_成员编号.原系统名"的格式.即插即用功能通过两个功能实现: 集群管理协议MAC组播地址协商和管理VLAN协商 [H3C]cluster enable 启用群集功能,缺省为启用[H3C]cluster 进入群集视图[H3C-cluster]administrator-address H-H-H name switch H-H-H为命令交换机的MAC,加入switch集群[switch_1.H3C-cluster]undo administrator-address 退出集群[H3C]display cluster 显示集群信息[H3C]management-vlan 2 集群报文只能在管理VLAN中转发,同一集群需在同一个管理VLAN中,需在建立集群之前指定管理VLAN<H3C>debugging cluster七.QoS配置:QoS配置步骤:设置端口的优先级,设置交换机信任报文的优先级方式,队列调度,端口限速[H3C-Ethernet0/3]priority 7 设置端口优先级为7,默认为0[H3C]priority-trust cos 设置交换机信任报文的优先级方式为cos(802.1p优先级,缺省值),还可以设为dscp方式(dscp优先级方式)[H3C]queue-scheduler hq-wrr 2 4 6 8 设置队列调度算法为HQ-WRR(默认为WRR),权重为2,4,6,8[H3C-Ethernet0/3]line-rate inbound 29 将端口进口速率限制为2Mbps,取1-28时,速率为rate*8*1024/125,即64,128,192...1.792M;29-127时,速率为(rate-27)*1024,即2M,3M,4M...100M,千兆时可继续往下取,128-240时,速率为(rate-115)*8*1024,即104M,112M,120M...1000M [H3C]display queue-scheduler 显示队列调度模式及参数 [H3C]display priority-trust 显示优先级信任模式八.系统管理:[H3C]mac-address blackhole H-H-H vlan 1 在VLAN1中添加黑洞MAC[H3C]mac-address static H-H-H interface Ethernet 0/1 vlan 1 在VLAN1中添加端口一的一个mac[H3C]mac-address timer aging 500 设置MAC地址表的老化时间为500s[H3C]display mac-address [H3C]display arp[H3C]mac-address port-binding H-H-H interface Ethernet 0/1 vlan 1 配置端口邦定[H3C]display mac-address port-binding [H3C]display saved-configuration [H3C]display current-c onfiguration <H3C>save[H3C]restore default 恢复交换机出厂默认配置,恢复后需重启才能生效[H3C]display version <H3C>reboot[H3C]display device [H3C]sysnamebigheap[H3C]info-center enable 启用系统日志功能,缺省情况下启用[H3C]info-center loghostip 192.168.0.3 向指定日志主机(只能为UNIX或LINUX,不能为Windows)输出信息,需先开启日志功能,缺省关闭[H3C]info-center loghost level 8 设置系统日志级别为8,默认为5.级别说明:1.emergencies 2.alerts 3.critical 4.errors 5.warnings 6.notifications rmational 8.debuggin g<H3C>terminal debugging 启用控制台对调试信息的显示,缺省控制台为禁用<H3C>terminal logging 启用控制台对日志信息的显示,缺省控制台为启用<H3C>terminal trapping 启用控制台对告警信息的显示,缺省控制台为启用[H3C]display info-center 显示系统日志的配置和缓冲区记录的信息[H3C]display logbuffer 显示日志缓冲区最近记录的指定数目的日志信息[H3C]display trapbuffer 显示告警缓冲区最近记录的指定数目的日志信息<H3C>reset logbuffer 清除日志缓冲区的信息 <H3C>reset trapbuffer 清除告警缓冲区的信息九.网络协议配置:NDP即是邻居发现协议,S1550E只能开启或关闭NDP,无法配置,默认有效保留时间为180s,NDP报文发送的间隔60s[H3C]ndp enable 缺省情况下是开启的[H3C-Ethernet0/3]ndp enable 缺省情况下开启 [H3C]display ndp 显示NDP配置信息[H3C]display ndp interface Ethernet 0/1 显示指定端口NDP发现的邻居信息 <H3C>debugging ndp interface Ethernet 0/1HABP协议即Huawei Authentication Bypass Protocol,华为鉴权旁路协议,是用来解决当交换机上同时配置了802.1x和HGMPv1/v2时,未经授权和认证的端口上将过滤HGMP报文,从而使管理设备无法管理下挂的交换机的问题。
- 1、下载文档前请自行甄别文档内容的完整性,平台不提供额外的编辑、内容补充、找答案等附加服务。
- 2、"仅部分预览"的文档,不可在线预览部分如存在完整性等问题,可反馈申请退款(可完整预览的文档不适用该条件!)。
- 3、如文档侵犯您的权益,请联系客服反馈,我们会尽快为您处理(人工客服工作时间:9:00-18:30)。
CISCO常用配置命令及参数(1)2011-10-27 10:30 佚名 NET130 字号: |CISCO的产品类型非常多,也是企业常常会选择的一个品牌。
所以,作为运维人员,维护企业的网络,对于Cisco的产品的配置也要有所了解。
AD:启动接口,分配IP地址:1.router>2.router> enable3.router#4.router# configure terminal5.router(config)#6.router(config)# interface Type Port7.router(config-if)# no shutdown8.router(config-if)# ip address IP-Address Subnet-Mask9.router(config-if)# ^z配置RIP路由协议:30秒更新一次1.router(config)# router rip2.router(config-if)# network Network-Number <--通告标准A,B,C类网-->3.router(config-if)# ^z配置IGRP路由协议:90秒更新一次1.router(config)# router igrp AS-Number <-- AS-Number范围1~65535-->2.router(config-if)# network Network-Number <--通告标准A,B,C类网-->3.router(config-if)# ^z配置Novell IPX路由协议:1.Novell RIP 60秒更新一次2.router(config)# ipx routing [node address]3.router(config)# ipx maximum-paths Paths <--设置负载平衡,范围1~512-->4.router(config)# interface Type Port5.router(config-if)# ipx network Network-Number [encapsulation encapsulation-type] [secondary] <--通告标准A,B,C类网-->6.router(config-if)# ^z配置DDR:1.router(config)# dialer-list Group-Number protocol Protocol-Type permit [list ACL-Number]2.router(config)# interface bri 03.router(config-if)# dialer-group Group-Number4.router(config-if)# dialer map Protocol-Type Next-Hop-Address name Hostname Telphone-Number5.router(config-if)# ^z配置ISDN:1.router(config)# isdn swith-type Swith-Type <--配置ISDN交换机类型,中国使用basic-net3-->2.router(config-if)# ^z配置Frame Relay:1.router(config-if)# encapsulation frame-relay [cisco | ietf ]2.router(config-if)# frame-relay lmi-type [ansi | cisco | q933a ]3.router(config-if)# bandwidth kilobits4.router(config-if)# frame-relay invers-arp [ Protocol ] [dlci ]5.<--配置静态Invers ARP表:6.router(config)# frame-relay Protocol Protocol-Address DLCI [ Broadcast ] [ ietf | cisco ] [ payload-compress | packet-by-packet ]7.-->8.<--设置Keepalive间隔:9.router(config-if)# keepalive Number10.-->11.<--为本地接口指定DLCI:12.router(config-if)# frame-lelay local-dlci Number13.-->14.<--子接口配置:15.router(config-if)# interface Type Port.Subininterface-Number [ multipoint | point-to-point ]16.router(config-subif)# ip unnumbered Interface17.router(config-subif)# frame-lelay local-dlci Number18.-->19.router(config-if)# ^z配置标准ACL:1.router(config)# access-list Access-List-Number [ permit | deny ] source [ source-mask ] <-- Access-List-Number 范围:1~99标准ACL;100~199扩展ACL;800~899标准IPX ACL;900~999扩展IPX ACL;1000~1099 IPX SAP ACL;600~699Apple Talk ACL-->2.router(config)# interface Type Port3.router(config-if)# ip access-group Access-List-Number [ in | out ]4.router(config-if)# ^z5.配置扩展ACL:1.router(config)# access-list Access-List-Number [ permit | deny ] [ Protocol | Protocol-Number ] source source-wildcard [ Source-Port ] des tination destination-wildcard [ Destination-Port ] [ established ]2.router(config)# interface Type Port3.router(config-if)# ip access-group Access-List-Number [ in | out ]4.router(config-if)# ^z5.配置命名ACL:1.router(config)# ip access-list [ standard | extended ] ACL-Name2.router(config [ std- | ext- ] nacl)# [ permit | deny ] [ IP-Access-List-Test-Conditions ]3.router(config [ std- | ext- ] nacl)# no [ permit | deny ] [ IP-Access-List-Test-Conditions ]4.router(config [ std- | ext- ] nacl)# ^z5.router(config)# interface Type Port6.router(config-if)# ip access-group [ACL-Name | 1~199 ] [ in | out ]7.router(config-if)# ^z配置DCE时钟:1.router# show controllers Type Port <--确定DCE接口-->2.router(confin-if)# clock rate 64000 <--进入DCE接口设置时钟速率-->3.router(config-if)# ^z配置PPP协议:1.router(config)# username Name password Set-Password-Here <--验证方建立数据库-->2.router(config)# interface Type Port3.router(config-if)# encapsulation ppp <--启动PPP协议-->4.router(config-if)# ppp outhentication [ chap | chap pap | pap chap |pap ] <--选择PPP认证-->5.router(config-if)# ppp pap sent-username Name password Password <--发送验证信息-->6.router(config-if)# ^zPAP单向认证配置实例:验证方:1.router-server(config)# username Client password 12345 <--验证方建立数据库-->2.router-server(config)# interface serial 03.router-server(config-if)# encapsulation ppp4.router-server(config-if)# ppp authentication pap <--选择使用PAP实现PPP认证-->5.router-server(config-if)# ^z被验证方:1.router-client(config-if)# encapsulation ppp2.router-client(config-if)# ppp pap sent-username Client password 12345 <--发送验证信息-->3.router-client(config-if)# ^zPAP双向认证配置实例:路由器 A:1.routerA(config)# username B password 123452.routerA(config)# interface serial 03.routerA(config-if)# encapsulation ppp4.routerA(config-if)# ppp authentication pap5.routerA(config-if)# ppp pap sent-username A password 543216.routerA(config-if)# ^z路由器 B:1.routerB(config)# username A password 543212.routerB(config)# interface serial 13.routerB(config-if)# encapsulation ppp4.routerB(config-if)# ppp authentication pap5.routerB(config-if)# ppp pap sent-username B password 123456.routerB(config-if)# ^zCHAP单向认证配置实例:验证方:1.router-server(config)# username router-client password 123452.router-server(config)# interface serial 03.router-server(config-if)# encapsulation ppp4.router-server(config-if)# ppp authentication chap5.router-server(config-if)# ^z被验证方:1.router-client(config-if)# encapsulation ppp2.router-client(config-if)# ppp authentication chap3.router-client(config-if)# ppp chap hostname router-client4.router-client(config-if)# ppp chap password 123455.router-client(config-if)# ^zCHAP双向认证配置实例:路由器 A:1.routerA(config)# username routerB password 123452.routerA(config)# interface serial 03.routerA(config-if)# encapsulation ppp4.routerA(config-if)# ppp authentication chap5.routerA(config-if)# ppp chap hostname routerA6.routerA(config-if)# ppp chap password 543217.routerA(config-if)# ^z路由器 B:1.routerB(config)# username routerA password 543212.routerB(config)# interface serial 13.routerB(config-if)# encapsulation ppp4.routerB(config-if)# ppp authentication chap5.routerB(config-if)# ppp chap hostname routerB6.routerB(config-if)# ppp chap password 123457.routerB(config-if)# ^zTelnet使用:1.routerA# terminal monitor <--可以传回在远端主机执行Debug命令的结果-->2.routerA# telnet IP-Address [ Router-Name ] <--Telnet到指定的地址或名字的主机-->3.routerB# [ exit | logout ] <--退出Telnet-->4.routerB# ++<6>再按<--挂起Telnet-->5.routerA# show sessions <--显示当前所有Telnet的信息,包括Connect-Number -->6.routerA# Connect-Number <--返回指定的Telnet连接-->7.routerA# disconnect IP-Address [ Router-Name ] <--断开指定地址或名字的主机的连接-->8.routerA# show user <--显示Telnet到本机的连接信息-->9.routerA# clear line [ 0 | 1 | 2 | 3 | 4 ] <--断开指定Telnet到本机的连接-->禁止任何Telnet到本机:1.router(config)# line vty 0 42.router(config-line)# access-class ACL-Number3.router(config)# ^z设置主机名:1.router(config)# hostname Set-Hostname2.router(config)# ^z3.router(config)# ^z设置用户模式密码:1.router(config)# line console 02.router(config-line)# login3.router(config-line)# password Set-Password4.router(config-line)# ^z设置Telnet密码:1.router(config)# line vty 0 42.router(config-line)# login3.router(config-line)# password Set-Password4.router(config-line)# ^z设置特权模式密码:1.router(config)# enable password Set-Password <--不加密的密码,明码-->2.router(config)# enable secret Set-Password <--经过加密的密码-->3.router(config)# ^z给所有密码加密:1.router(config)# service password-ancryption Set-Password-Here2.router(config)# no service password-ancryption <--取消加密-->3.router(config)# ^z设置登录Banner:1.router(config)# banner motd 分隔符 Set-Banner-Information-Here 分隔符<--前后分隔符一定要一致-->设置接口的描述信息:1.router(config-if)# description Set-Port-Information-Here2.router(config)# ^zCDP的控制:1.router(config-if)# cdp enable <--在指定端口启用CDP,缺省-->2.router(config-if)# no cdp enable <--在指定端口关闭CDP-->3.router(config)# cdp run <--使所有端口启用CDP-->4.router(config)# no cdp run <--使所有端口关闭CDP-->Ping的使用:1.router# ping IP-Address2.router# ping <--扩展Ping命令-->3.Protocol [ip]:[ Protocol-Type ] <--选择协议类型-->4.Target IP address:IP-Address <--输入测试地址-->5.Repeat count [5]:<--选择发送的ICMP包数量-->6.Datagram size [100]:<--选择每个包的大小-->7.Timeout in seconds [2]:<--设置每个包的超时时间-->8.Extended commands [n]:y <--使用扩展Ping命令-->9.Sweep range of sizes [n]:Tracke的使用:1.router# trace IP-Address [ Host-Name为Cisco 4000路由器指定媒体类型:1.router(config-if)# media-type 10baset <--使AUI(默认)失效,改为使用RJ-45-->2.router(config-if)# ^z更改路由器启动顺序:1.router(config)# boot system flash IOS-FileName2.router(config)# boot system tftp IOS-FileName TFTP-IP-Address3.router(config)# boot system rom4.router(config)# ^z修改寄存器数值:1.router(config)# config-register Value <--Cisco出厂默认Value=0x2102,Value范围:0x2100(进入ROM监视器),0x2101(使系统从ROM启动),0x2102~0x210F (使系统从NVRAM启动)。