CUBE Street_ 立体声音箱说明书
贝尔街音频(Beale Street Audio)In Ceiling 音箱和子音箱安装指南说明书

Beale Street AudioIC6-B, IC6-MB, IC6-BB, IC8-B, IC8-MB, IC8-BB, ICA6-B, ICA6-MB, ICA6-BB, IC6DVC-B, BS650 In Ceiling SpeakersICS6-MB, ICS8MB In Ceiling SubwoofersInstallation GuideIntroductionCongratulations and thank you for purchasing Beale Street Audio In Ceiling speakers and subwoofers with Sonic Vortex®.Our patented Sonic Vortex Technology is based on Ported Transmission Line design and incorporates a compact, integrated enclosure. Most In Ceiling speakers do not utilize a back box, even fewer have an enclosure, and only a Sonic Vortex speaker has an Integrated Transmission Line Ported Enclosure. Without something behind the speaker driver the music not only plays into the room, but also bleeds into adjoining rooms such as the attic or an occupied room. The bleed negatively affects performance, and sound consistency.The Sonic Vortex enclosure directs all of the sound from the speaker driver into the room it is intend to be in, so you get to enjoy your speakers without disturbing the rest of the house. Great bass response, stereo image, and big sound that you can’t get with any other in ceiling speaker.Beale Street Audio In Ceiling speakers and subwoofers install with ease using the ‘dog’ mounting system and magnetic bezelless grilles for fast, clean installations.Please follow the instructions in this manual to assure proper installation and to achieve the full performance and satisfaction you would expect from Beale Street Audio.Speaker PlacementWhen installing in ceiling speakers or subs, (or in ceiling anything for that matter) it is always a good idea to find out what is in the ceiling before cutting holes. Be aware of the location of plumbing, electrical and structural elements that may affect speaker placement.StereoIt is also a good idea to locate stereo speakers so they are centered tothe main listening position in which the user/s will normally be located. Whenever possible, try to position the left and right speakers at the same distance from each other as they are from the main listening position. SubwooferSubwoofers are omni-directional so placement of in ceiling subs is somewhat less critical, but placement can be affected (good and bad) by corners and walls, so try to find a location that will be somewhat unaffected by placement.AngledIf using the ‘Angled In’ speakers, be sure to position them so the speakers are facing into the room and directed toward the main listening position. SurroundLocate surround speakers according to the recommendations in the surround processor’s owner’s manualSPEAKER WIREPull one run of 16AWG stranded speaker wire from the amplifier location to each speaker location. If in pre-wire, while the walls are open and it’s easy, pull extra wire to any location that may be desirable to add speakers at a later date. Leave extra length of wire on each end to allow making connections and installing/removing speakers.Use the chart below to determine the proper gauge of wire, based upon wire length from the amp to the speakers. If using volume controls, include the total length from the amp to the volume control and then to the speakers.NEW CONSTRUCTIONBeale Street Audio speaker installation can be simplified by using a Beale Street Audio new construction EZBracket®, (sold separately; visit for additional information). This is installed prior to drywall installation and allows for precise speaker placement and simplifies the final installation of the speaker.EXISTING CONSTRUCTIONSpeaker wire must be run from the equipment or volume control location to each potential speaker location.• Choose a location for each speaker that is free of obstructions created by joists, HVAC duct-work, electrical wire runs, plumbing or anything else that might not allow for the depth of the speaker or createinterference or noise.• Once you have determined your locations, use a pencil to mark the hole to cut out for the speaker using the supplied template. Don’t forget to allow for the size of the speaker bezel if you are installing the speaker near a sidewall or other item that could become an obstacle.• If you are unsure of potential obstacles, carefully cut your holes using an angle to the inside of the cutout area. This will allow you to “plug” the hole easily if needed. If the area is clear and is a good location for the speaker, go ahead and cut the edges of the opening at 90 degrees to accommodate the speaker diameter.Cut hole at an angle in case patching is necessary• Strip the insulation on each conductor approximately 1/2” (12.7mm) and insert to the speaker terminals. Ensure that there are no stray strands of wire protruding from the connectors that can cause shorts. Observe proper polarity (+ to + and – to – for each speaker and at the amplifier) and that surround channels are properly positioned and connected, if used.• With the ‘dogs’ flush to the side of the speaker, insert the speaker into the ceiling and tighten each of the four screws for the speakers’ dogs,enough to clamp the speaker to the drywall. Do not over-tighten.• With the speaker installed, the tweeter can be pivoted to point directly into the main listening area for tighter imaging of high frequencycreate a more ambient sound.Carefully press the edge of thetweeter as shown to pivot thetweeter to the desired position.PAINTINGThe grille may be painted, but go as light as possible to not to clog the fine holes with paint. Only paint grilles when they have been removed from the speakers and be sure to remove the cloth on the backside of the grille before painting. If the cloth is not removed for painting, it will absorb the paint and clog the grille, significantly affecting the sound...and not in a good way. (We have taken great effort to eliminate any ‘color’ from the sound of our speakers, so let’s try to keep it that way...OK?)TROUBLESHOOTINGBeale Street Audio speakers are designed to function trouble-free. Most problems that occur are due to simple issues. If you have trouble, please check the list of simple fixes below.6.5” IN CEILINGIC6-B 6.5” In Ceiling 2 Way• Woofer: 6.5” Poly• 1” Silk Dome Tweeter• Butyl Rubber Surround• Sonic Vortex® Ported Transmission Line • Magnetic Bezelless Grille; White - Paintable • Impedance: 8Ω• Installed Frequency Response: 46 Hz - 22 kHz • Sensitivity: 89db• Gold Spring Push Terminal Connector• Depth 6.8” (172mm)• Speaker Weight: 7lbs (3.18kg)• Cutout: 8.4” (214mm)• Diameter 9.4” (239mm)• Power Handling: 5-120W• Pivoting Tweeter• EZBracket Size: FIC6-MB 6.5” In Ceiling 2 Way• Woofer: 6.5” Fluted Injected Poly• 1” Aluminum Dome Tweeter• Butyl Rubber Surround• Sonic Vortex® Ported Transmission Line • Magnetic Bezelless Grille; White - Paintable • Impedance: 8Ω• Installed Frequency Response: 43 Hz - 24 kHz • Sensitivity: 89db• Gold Spring Push Terminal Connector• Depth 6.8” (172mm)• Speaker Weight: 7.10 lbs (3.22kg)• Cutout: 8.4” (214mm)• Diameter 9.4” (239mm)• Power Handling: 5-120W• Pivoting Tweeter• EZBracket Size: FIC6-BB 6.5” In Ceiling 2 Way• Woofer: 6.5” Carbon Fiber• 1” Titanium Dome Tweeter• Butyl Rubber Surround• Sonic Vortex® Ported Transmission Line • Magnetic Bezelless Grille; White - Paintable • Impedance: 8Ω• Installed Frequency Response: 40 Hz - 25 kHz • Sensitivity: 89db• Gold Spring Push Terminal Connector• Depth 6.8” (172mm)• Speaker Weight: 7.10 lbs (3.22kg)• Cutout: 8.4” (214mm)• Diameter 9.4” (239mm)• Power Handling: 5-120W• Pivoting Tweeter• EZBracket Size: F 8” IN CEILINGIC8-B 8” In Ceiling 2 Way• Woofer: 8” Poly• 1” Silk Dome Tweeter• Butyl Rubber Surround• Sonic Vortex® Ported Transmission Line • Magnetic Bezelless Grille; White - Paintable • Impedance: 8Ω• Installed Frequency Response: 38 Hz - 22 kHz • Sensitivity: 92db• Gold Spring Push Terminal Connector• Depth 8.6” (219.5mm)• Speaker Weight: 8.38 lbs (3.8kg)• Cutout: 10.3” (261.5mm)• Diameter 11.3” (284mm)• Power Handling: 5-120W• Pivoting Tweeter• EZBracket Size: BIC8-MB 8” In Ceiling 2 Way• Woofer: 8” Fluted Injected Poly• 1” Aluminum Dome Tweeter• Butyl Rubber Surround• Sonic Vortex® Ported Transmission Line • Magnetic Bezelless Grille; White - Paintable • Impedance: 8Ω• Installed Frequency Response: 35 Hz - 24 kHz • Sensitivity: 92db• Gold Spring Push Terminal Connector• Depth 8.6” 219.5mm• Speaker Weight: 8.38 lbs (3.8kg)• Cutout: 10.3” (261.5mm)• Diameter 11.3” (284mm)• Power Handling: 5-120W• Pivoting Tweeter• EZBracket Size: BIC8-BB 8” In Ceiling 2 Way• Woofer: 8” Carbon Fiber• 1” Titanium Dome Tweeter• Butyl Rubber Surround• Sonic Vortex® Ported Transmission Line • Magnetic Bezelless Grille; White - Paintable • Impedance: 8Ω• Installed Frequency Response: 32 Hz - 25 kHz • Sensitivity: 92db• Gold Spring Push Terminal Connector• Depth 8.6” (219.5mm)• Speaker Weight: 8.38 lbs (3.8kg)• Cutout: 10.3” (261.5mm)• Diameter 11.3” (284mm)• Power Handling: 5-120W• Pivoting Tweeter• EZBracket Size: B6.5” ANGLED IN CEILINGICA6-B 6.5” Angled In Ceiling 2 Way• Woofer: 6.5” Poly• 1” Silk Dome Tweeter• Butyl Rubber Surround• Sonic Vortex® Ported Transmission Line • Magnetic Bezelless Grille; White - Paintable • Impedance: 8Ω• Installed Frequency Response: 46 Hz - 22 kHz • Sensitivity: 89db• Gold Spring Push Terminal Connector• Depth 6.8” (172mm)• 15 Degree Angled Woofer• Speaker Weight: 6.97 lbs (3.16kg)• Cutout: 8.4” (214mm)• Diameter 9.4” (239mm)• Power Handling: 5-120W• Pivoting Tweeter• EZBracket Size: FICA6-MB 6.5” Angled In Ceiling 2 Way• Woofer: 6.5” Fluted Injected Poly• 1” Aluminum Dome Tweeter• Butyl Rubber Surround• Sonic Vortex® Ported Transmission Line • Magnetic Bezelless Grille; White - Paintable • Impedance: 8Ω• Installed Frequency Response: 43 Hz - 24 kHz • Sensitivity: 89db• Gold Spring Push Terminal Connector• Depth 6.8” (172mm)• 15 Degree Angled Woofer• Speaker Weight: 6.97 lbs (3.16kg)• Cutout: 8.4” (214mm)• Diameter 9.4” (239mm)• Power Handling: 5-120W• Pivoting Tweeter• EZBracket Size: FICA6-BB 6.5” Angled In Ceiling 2 Way• Woofer: 6.5” Carbon Fiber• 1” Titanium Dome Tweeter• Butyl Rubber Surround• Sonic Vortex® Ported Transmission Line • Magnetic Bezelless Grille; White - Paintable • Impedance: 8Ω• Installed Frequency Response: 40 Hz - 25 kHz • Sensitivity: 89db• Gold Spring Push Terminal Connector• Depth 6.8” (172mm)• 15 Degree Angled Woofer• Speaker Weight: 6.97 lbs (3.16kg)• Cutout: 8.4” (214mm)• Diameter 9.4” (239mm)• Power Handling: 5-120W• Pivoting Tweeter 6.5” DUAL VOICE COILIC6DVC-B 6.5” In Ceiling Dual Voice Coil• Woofer: 6.5” Poly• 1” Silk Dome Tweeter• Butyl Rubber Surround• Sonic Vortex® Ported Transmission Line • Magnetic Bezelless Grille; White - Paintable • Impedance: 8Ω• Installed Frequency Response: 46 Hz - 22 kHz • Sensitivity: 89db• Connector Type: 4 Pin Terminal• Depth 6.8” (172mm)• Speaker Weight: 7lbs (3.18kg)• Cutout: 8.4” (214mm)• Diameter 9.4” (239mm)• Power Handling: 5-90W• Pivoting Tweeter• EZBracket Size: FCONTRACTOR SERIES SPEAKERSBS650 6.5” In Ceiling 2 Way• Woofer: 6.5” Poly• 1” Silk Dome Tweeter• Butyl Rubber Surround• Magnetic Bezelless Grille; White - Paintable • Impedance: 8Ω• Frequency Response: 46 Hz - 22 kHz• Sensitivity: 89db• Gold Spring Push Terminal Connector• Depth 3.3” (84mm)• Speaker Weight: 2.69lbs (1.22kg)• Cutout: 8.4” (214mm)• Diameter 9.4” (239mm)• Power Handling: 5-90W• Pivoting Tweeter• EZBracket Size: F6.5” IN CEILING SUBWOOFERICS6-MB 6.5” In Ceiling Subwoofer• Woofer: 6.5” Kevlar• Butyl Rubber Surround• Sonic Vortex® Ported Transmission Line • Magnetic Bezelless Grille; White - Paintable • Impedance: 4Ω• Installed Frequency Response: 38 Hz - 300 Hz • Sensitivity: 90db• Gold Spring Push Terminal Connector• Depth 6.8” (172mm)• Speaker Weight: 7.10 lbs (3.22kg)• Cutout: 8.4” (214mm)• Diameter 9.4” (239mm)• Power Handling: 5-120W• EZBracket Size: F8” IN CEILING SUBWOOFERICS8-MB 8” In Ceiling Subwoofer• Woofer: 8” Kevlar• Butyl Rubber Surround• Sonic Vortex® Ported Transmission Line • Grille: Magnetic Bezelless; White - Paintable • Impedance: 4Ω• Installed Frequency Response: 28 Hz - 300 Hz • Sensitivity: 90db• Gold Spring Push Terminal Connector• Depth 8.6” (219.5mm)• Speaker Weight: 11.8 lbs (5.35kg)• Cutout: 10.3” (261.5mm)• Diameter 11.3” (284mm)• Power Handling: 5-240W• EZBracket Size: BLimited Lifetime WarrantyFor Beale Street Audio Branded In-Wall and In-Ceiling Speakers and Subwoofers Purchased after May 1, 2017Limited WarrantyVanco warrants to you, the original consumer purchaser of speakers, that under proper use and conditions, and subject to the other conditions provided below, your speakers will be free from defective materials and workmanship for the life of the speakers. This warranty only applies to passive speakers. Active products, such as amplifiers, electronics, and powered subwoofers are not covered under the Lifetime Warranty. Please review the individual manual provided with each specific product for the warranty information. What Vanco Will DoIf a speaker proves defective in either material or workmanship, Vanco, at its option,will either (a) repair and return it to you, or (b) replace and ship you a new speaker of the same model, unless your model is no longer available, in which case Vanco may replace your speaker with a current model of comparable value. In either case, Vanco will pay the shipping charge of sending you (US only) a replacement speaker or your repaired speaker. If a current model is substituted for your speaker, a modification to the mounting surface may be required. Vanco is not responsible or liable to make, account for or pay the cost of any such modification.How To Make A Warranty ClaimThe first step in making a claim under this limited warranty is to contact the Vanco authorized distributor/dealer where you purchased the speaker, or if you are unable to contact the distributor/dealer, you can contact Vanco directly, for instructions on what action to take. If it is necessary to return the speaker, it must be shipped in appropriate packaging to the destination given to you, prepaid with signature required for delivery, and be accompanied by (1) a document providing your name, address, phone number and email address, and a statement of why you believe the speaker is defective, and (2) a copy of your original receipt or bill of sale that identifies you as the original purchaser of the speaker and the authorized distributor/dealer you purchased it from (“Proof of Purchase”). You have the risk of loss or damage in transit to the destination, and therefore you are responsible for insuring the shipment for the full value of the speaker. Freight collect shipments will be refused. If Vanco determines this limited warranty does not cover your claim, your speaker will be returned to you freight collect.Exclusions and LimitationsThis limited warranty does not cover:>Speaker failure caused by anything other than a defect in material and workmanship. >Consequential damage to other components, equipment or premises regardless of the reason.>The cost of removing and reinstalling your speaker.>The cost of returning your speaker to Vanco.>Any claims if you are unable to provide Proof of Purchase from a Vanco authorized distributor/dealer.Warranty continued next page11Limited Lifetime Warranty (cont)For Beale Street Audio Branded In-Wall and In-Ceiling Speakers andSubwoofers Purchased after May 1, 2017A NEW BRAND FROM Vanco International, LLC 506 Kingsland Drive Batavia, IL 60510Phone: 800.626.6445 Fax: ©2017BSAICIG070517 Rev 6 This Limited Warranty Is Null And Void If Your Speaker: >Was used in an application or environment other than that for which it was intended >Misused, abused, improperly installed or removed >Damaged by any accident, disaster or other cause not related to defects in materials and workmanship. >You sell or otherwise transfer your speaker to any other person. >Was modified or repaired by anyone other than Vanco, or its serial number is altered, defaced or removed.REPAIR OR REPLACEMENT OF YOUR SPEAKER UNDER THIS WARRANTY IS YOUR EXCLUSIVE REMEDY. IN NO EVENT WILL VANCO BE LIABLE FOR ANY AMOUNT GREATER THAN THE ACTUAL PURCHASE PRICE PAID BY YOU FOR THE SPEAKER. VANCO SHALL NOT BE LIABLE FOR ANY FOR SPECIAL, INCIDENTAL, CONSEQUENTIAL, OR INDIRECT DAMAGES HOWSOEVER CAUSED. THIS LIMITED WARRANTY REPRESENTS THE ENTIRE WARRANTY AGREEMENT BETWEEN YOU AND VANCO REGARDING YOUR SPEAKERS AND IS GIVEN IN LIEU OF ALL OTHER WARRANTIES, EXPRESS OR IMPLIED, INCLUDING WITHOUT LIMITATION IMPLIED WARRANTIES OF MERCHANTABILITY AND FITNESS FOR A PARTICULAR PURPOSE. THIS WARRANTY GIVES YOU SPECIFIC LEGAL RIGHTS AND YOU MAY ALSO HAVE OTHER RIGHTS THAT VARY, FROM STATE TO STATE. SOME STATES LIMIT WHAT WARRANTIES MAY BE EXCLUDED AS WELL AS HOW LONG AN IMPLIED WARRANTYLASTS, SO THESE LIMITATIONS MAY NOT APPLY TO YOU.The Vanco logo, Sonic Vortex logo, and Beale Street Audio Inc. logo are registered trademarks of Vanco International, LLC.Vanco, Sonic Vortex, Beale Street Audio, Get Reale. Get Beale., the Vortex logo, and the Beale Street Audio logo are trademarks of Vanco International, LLC.。
罗兰·CUBE·街道培训指南说明书

ROLAND CUBE STREETTRAINING GUIDEContents1. FEATURES2. QUICK DEMO3. FIVE FEATURES TO KNOW and SHOW4. ACCESSORIES5. CUBE STREET COSM AMPS and EFFECTS1. FEATURES∙Portable battery powered stereo DSP instrument amp/PA w/ 2 x 6.5”speakers and unique slanted cabinet∙Incredibly powerful tone and volume∙Two channels: MIC/LINE, and GUITAR/INSTRUMENT: each with independent delay/reverb and EQ∙GUITAR/INST channel has Eight COSM amp models on channel 2, including a new model suitable for acoustic guitar, keyboards, or otherinstruments: Instrument, JC Clean, Black Panel, Brit Combo, ClassicStack, R-Fier Stack, Acoustic Simulator, Mic∙Five Tone Controls: MIC/LINE Ch: Bass, Treble; GUITAR/INST Ch: Bass, Mid, Treble∙EFX: MIC/LINE: Delay/Reverb; GUITAR/INST: Chorus, Flanger, Phaser, Tremolo, plus Delay/Reverb∙MIC/LINE channel has Neutrik XLR/1/4” input: GUITAR /INST IS 1/4”∙Two Neodymium 6.5 speakers driven by two D-class digital power amps for true stereo high performance and reduced weight∙Built-in automatic chromatic tuner∙Battery powered: 15-hour battery life from 6 x AA batteries.∙AC Adapter (PSB-1U) included∙1/8” aux input for i-pods, CD players, MP-3 players, etc.∙Delay/reverb and EQ on both channels∙Footswitchable functions on each channel: Ch 1: Mute, Delay/Rev; Ch 2: EFX, Delay/Rev.∙MSRP $380.50, MAP $2792. QUICK DEMOThe Quick Demo is a way to get a customer interested in a product in less than 60 seconds.The Quick Demo: Show the Sound and PowerSTEP ONE: Tune Up1. Press and hold the TUNER button for about one second. The red LED willflash.2. Tune each string. The green LED indicates correct pitch.3. Press TUNER again to exit Tuner mode.STEP TWO: Show the Sounds1. Connect an electric guitar to the GUITAR /INSTRUMENT channel.2. Select a lead amp, such as BRIT COMBO, CLASSIC STACK, or R-FIER3. Set the GAIN to about 5 or higher.4. Play some heavy chords or leads.5. Experiment with the EQUALIZER, EFX, and DELAY/REVERB to checkout the sounds.6. Try some other COSM amps.STEP TWO: Show Versatility1. Connect an acoustic-electric guitar, keyboard or even a microphone to theMIC/LINE channel. If you are using an instrument, Set SELECT to LINE; if using a mic, set SELECT to MIC.2. Set VOLUME to about 5 or less.3. Play the acoustic guitar or keyboard or use the mic to show the loud andclear sound of these instruments.4. Experiment with the EQUALIZER and DELAY/REVERB to check out theirsounds.4. FIVE THINGS to KNOW and SHOW1. All purpose battery powered amp/PA: works anywhere, anytime withanything2. Two channels w/ independent EQ and effects on each3. Huge gain and volume for a small amp4. Famous Roland COSM amp models and EFX on guitar channel5. Connect mics, instruments, MP-3/CD player all at the same time4. ACCESSORIES1. 4 x BOSS FS-5U footswitches or 2 x BOSS FS-6 footswitches2. Two Roland PCS-31L insert cables3. Roland RH-20, RH-50, RH-200 or other headphones5. CUBE STREET COSM AMPS and EFFECTSNAME AMPInstrument Original Roland full range ampJC-120RolandJCCleanBlack Panel Fender Twin ReverbAC-30TBVoxBritComboClassic Stack Marshall PlexiMetal Stack Peavey EVH 5150RectifierDualR-FierBoogieMesaAcoustic Simulator AC-60/ w AC-3Mic Original Roland mic preEFFECTSCh1DelayReverbCh2ChorusFlangerPhaserTremoloDelayReverb。
CUBE简体说明书

中文简体使用手册亲爱的用户:非常感谢您选购这款CUBE产品。
我们衷心希望您能从中获得长久的享受。
祝愿您从该产品中获得最好的多媒体体验!本手册中包含的所有信息在出版时都是正确的。
但是,由于我们不断对产品进行更新和改进,因此在您设备上的软件,在外观和功能上可能与本手册中所描述的内容略有差别。
目录注意事项 (3)1. CUBE 基本功能 (4)1.1 CUBE 硬件配置----------------------------------------------------------------- 41.2 CUBE 软件配置----------------------------------------------------------------- 42. CUBE 设备描述 (5)2.1 触摸屏-------------------------------------------------------------------------- 52.2 Camera -------------------------------------------------------------------------- 52.3 Home键------------------------------------------------------------------------- 52.4 充电指示灯---------------------------------------------------------------------- 52.5 Menu键------------------------------------------------------------------------- 62.6 Back键--------------------------------------------------------------------------- 62.7 Mic孔---------------------------------------------------------------------------- 62.8 T-Flash卡------------------------------------------------------------------------ 62.9 Mini USB ------------------------------------------------------------------------- 62.10 电源拨钮----------------------------------------------------------------------- 62.11 Earjack -------------------------------------------------------------------------- 62.12 DC ------------------------------------------------------------------------------ 63. 首次使用CUBE (7)3.1 电池管理及充电------------------------------------------------------------------ 73.2 打开/关闭MID设备-------------------------------------------------------------- 73.3 与PC连接------------------------------------------------------------------------ 84. CUBE 设备基本操作 (8)4.1 主界面描述----------------------------------------------------------------------- 84.2 菜单界面描述-------------------------------------------------------------------- 104.3 状态栏描述---------------------------------------------------------------------- 104.4 使用触摸屏---------------------------------------------------------------------- 115. CUBE 设备基本设置 (12)5.1 无线控制------------------------------------------------------------------------ 125.2 声音和显示---------------------------------------------------------------------- 145.3 安全性和位置-------------------------------------------------------------------- 155.4 应用程序------------------------------------------------------------------------- 1615.5 SD卡和MID存储------------------------------------------------------------------ 165.6 日期和时间----------------------------------------------------------------------- 175.7 区域和文本----------------------------------------------------------------------- 175.8 触摸屏校准----------------------------------------------------------------------- 185.9 USB模式选择--------------------------------------------------------------------- 185.10 关于MID ------------------------------------------------------------------------ 186. CUBE 软件安装及管理 (19)6.1 APK安装器----------------------------------------------------------------------- 196.2 ES文件浏览器-------------------------------------------------------------------- 216.3 ES任务管理器-------------------------------------------------------------------- 226.4 应用市场------------------------------------------------------------------------ 237. CUBE 软件应用与操作 (23)7.1 图片浏览------------------------------------------------------------------------ 237.2 音乐播放------------------------------------------------------------------------ 257.3 视频播放------------------------------------------------------------------------ 277.4 电子书-------------------------------------------------------------------------- 287.5 将图片/音乐/视频等文件传输到CUBE 设备------------------------------------ 297.6 优酷----------------------------------------------------------------------------- 297.7 网络浏览器---------------------------------------------------------------------- 307.8 电子邮件------------------------------------------------------------------------ 317.9 网络聊天------------------------------------------------------------------------ 327.10 Google Map ------------------------------------------------------------------- 337.11 日历--------------------------------------------------------------------------- 347.12 计算器------------------------------------------------------------------------- 347.13 闹钟时钟----------------------------------------------------------------------- 347.14 天气预报----------------------------------------------------------------------- 358. CUBE 疑难解答 (35)2注意事项本手册包含重要的安全措施和正确使用产品的信息,以避免事故发生,确信在使用该产品之前仔细阅读该手册。
佛山双木三林科技有限公司音响系统使用说明书

使用说明书请将本音响系统安装在通风良好、阴凉、干燥、干净的位置,远离直射阳光热源、振动、灰尘、 潮湿或寒冷。
只能使用本机指定的电压。
使用高于指定数值的电压很危险,而且可能导致火灾,损坏本机或造成人身伤害。
对于使用高于指定电压造成的任何损害,我司将不负任何责任。
不要试图自行改造或修理本机。
如果需要任何服务,请与销售或者我司客服人员联系。
不管有任何理由,都没有打开机壳的必要。
如果打算长时间不使用本机(比如度假时),请从墙壁交流电源插座上断开电源线的连接。
重要提示:本说明书所提到的产品规格和资讯仅供参考。
如有内容更新,恕不另行通知。
一、服务期限佛山双木三林科技有限公司承诺产品的良好品质,产品自售出之后7天内正常使用情况下出现故障,客户可以选择退货或者保修(不影响二次销售才可退货)。
正常使用一年内出现故障可以免费保修。
二、购买日期以销售商开出的购机发票或收据日期为准,网购可以交易截图为准。
三、有以下情况都不能享受“三包”服务1.一切人为因素损坏,包括非正常工作环境下使用或不按照说明书使用。
2.用户私自拆机、改装、维修。
3.使用非指定或许可的配件造成损坏的。
4.机身的QC或保修贴损毁。
5.不能出示有效购机凭证。
6.不属于本公司产品。
四、保修方式为送修此条款只适于中国大陆,其它地区请参考当地销售代理商的规定和国家法规。
支持MQA全解码;旗舰DAC芯片AK4499, 业界最高性能。
失真度低至惊人的0.000068%(-123dB)!在使用A计权测量时, 更是低至0.000058%(-124dB)!动态范围高达131dB!USB使用XMOS第二代16核处理器XU216, 支持到原生DSD512和32位768kHz!时钟系统使用2颗美国ACCUSILICON超低相噪。
使用ALTERA的高速CPLD对时钟进行处理,降低JITTER。
特别设计和强化的电源系统,提供超低噪声的电源,输出底噪低至1.5uVrms!最新蓝牙支持LDAC,APTX/HD,SBC,AAC和业界最高规格的24bit/192kHz的UAT格式!支持LVDS电平的I2S传输(使用HDMI接口),可以最低JITTER地传输数字音频!固件升级功能,用户可以自行升级系统和USB的固件。
Roland CUBE-30X吉他音箱 说明书

2警告:为了避免火灾或电击伤害,请不要使设备暴露在淋雨处或潮湿的地方。
ATTENTIONRISK OF ELECTRIC SHOCKDO NOT OPEN等边三角图中的闪电箭头指示用于警告使用者产品内部具有未绝缘的“危险电压”部件,具有足以对人体造成电击伤害的危险。
警告:为了避免电击危险, 请勿自行拆开机壳(或背部)。
内部无使用者自行维修部件。
关于维修请洽询授权的售后服务中心。
等边三角图中的感叹号指示用于提示使用者附于本产品说明中的重要操作与维护指导。
避免火灾、电击以及人身伤害的指示重要安全指示 请保留这些指示警告:当使用电器产品时,请遵循以下基本注意事项:1. 请阅读所有的指示。
2.保留这些指示。
3. 请留意警告事项。
4. 请遵循所有注意事项。
5. 不要在靠近水的地方使用本产品。
6. 请使用干布进行清洁工作。
7. 请勿阻塞或影响本机正常通风。
请遵循原厂指示进行安装。
8. 本产品应要远离热源,像是电暖炉、暖气以及其它会发热的设备。
9. 请勿折掉接地形插头的安全装置。
极性插头有两端,其中一段比较宽。
接地形插头具有两端及一个三叉接地端。
较宽的接头端或是接地端是用于保护您的安全装置。
当这些插头类型与您的插座不匹配时,请更换适用的插座。
10.请小心维护电源线,以避免踩到或被插头部分被插座等物夹住。
11.仅可使用原厂附件或指定的选购品。
12.当发生雷击或处于长时期不使用情况时,请拔下插头。
13.关于维修服务请洽询授权的售后服务中心。
当本产品有损坏,如电源线或插头损坏、液体倾入或物品倒塌于本设备上,或经曝晒或雨淋受潮、操作故障、或是摔落等状况,请与维修服务中心联系。
避免火灾、电击以及人身伤害的指示关于和的注意事项 关于符号这些指示用于提醒使用者,本产品的不当使用可能会有致命危险或严重伤害。
符号用于提醒使用者重要的指示或警告。
其意义取决于三角型中的记号。
如左图般的记号是作为一般的注意、警告或慎防危险。
1.快速教你怎么用!

快速使用教程感谢使用Guitar Cube!拿到东西后请务必第一时间打开这份教程!并严格按照教程所说的步骤去操作!操作很简单,几分钟时间就可以顺利使用!事前准备:l 1台有USB接口的电脑。
l 设备连接线,吉他、贝司的话请用专业屏蔽线,送的线一般效果比较差。
l 耳机或音箱(普通电脑音箱,吉他音箱等。
吉他音箱的话可能还要个转接头)。
l 检查有接地线的地方,如电脑电源等接地是否良好。
第一步:把东西接上。
按下图把东西都接上。
用附带的USB线把Guitar Cube声卡和电脑连接。
旁边的Link灯(蓝色)会亮。
把耳机或音箱(如果是用吉他线接吉他音箱,需要一个大转小的转接头)插到Guitar Cube声卡的输出上(OUT)。
记住不是插在你电脑原来的声卡上!别忘了把输出音量(VOLUME)打开(往右开大,往左减小)。
如果用吉他、贝司、话筒等音频类设备,把这些东西插到Guitar Cube声卡的输入上(IN)。
旁边的输入增益旋钮(GAIN)是控制输入信号大小的。
往右增大,往左减小。
一般像吉他等乐器大概调到中间0dB左右的位置;话筒大概在3/4的位置。
具体要根据设备来调。
中间有个CLIP指示灯(红色),如果输入增益调得太大,信号就会超载、失真,这个灯就会亮!告诉你增益调太大了,要调小一点!输入增益对音色、噪声有重要影响。
对失真音色,可能动态不够,要适当调大,但一定保证CLIP灯不能亮!而有些清音音色则可能要调小一点以减小噪声!具体可以后面在使用时自己调节体会一下!如果你要使用MIDI键盘等MIDI设备,直接将该设备和电脑连接就可以了。
以上所有接插的地方都要保证完整插入,不要只插入一半,那样肯定是接触不良无法正常工作的!第二步:安装ASIO驱动。
找到”ASIO驱动”文件夹。
如果系统是WinXP/2000/2003,肯定是装32位的。
如果系统是Vista或者Win7的,又不知道是32位还是64位,随便点哪个装,能装的那个就对了!安装过程中如果系统、杀毒软件、360等有提示,允许程序继续,或将程序添加为信任!如果想用Guitar Cube听音乐,即千千静听、QQ等软件的声音都从Guitar Cube出来,需要设置Guitar Cube为默认的声卡。
蓝牙音响 Bluesound PULSE SOUNDBAR 2i 说明书
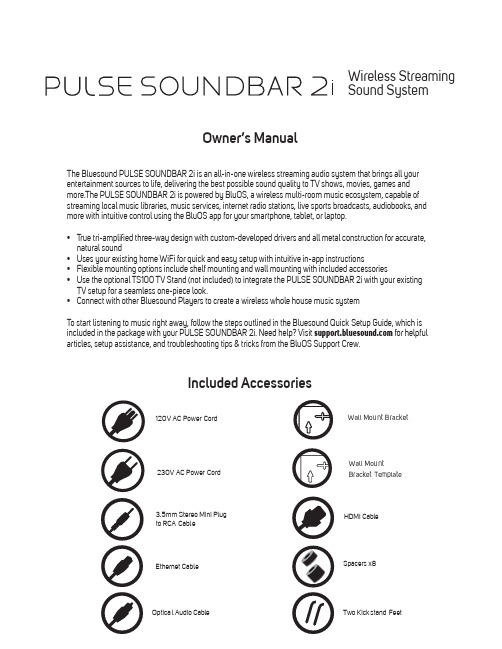
Owner’s ManualIncluded AccessoriesThe Bluesound PULSE SOUNDBAR 2i is an all-in-one wireless streaming audio system that brings all your entertainment sources to life, delivering the best possible sound quality to TV shows, movies, games and more.The PULSE SOUNDBAR 2i is powered by BluOS, a wireless multi-room music ecosystem, capable of streaming local music libraries, music services, internet radio stations, live sports broadcasts, audiobooks, and more with intuitive control using the BluOS app for your smartphone, tablet, or laptop.•T rue tri-amplified three-way design with custom-developed drivers and all metal construction for accurate,natural sound •Uses your existing home WiFi for quick and easy setup with intuitive in-app instructions •Flexible mounting options include shelf mounting and wall mounting with included accessories •Use the optional TS100 TV Stand (not included) to integrate the PULSE SOUNDBAR 2i with your existingTV setup for a seamless one-piece look. • Connect with other Bluesound Players to create a wireless whole house music systemT o start listening to music right away, follow the steps outlined in the Bluesound Quick Setup Guide, which is included in the package with your PULSE SOUNDBAR 2i. Need help? Visit for helpfularticles, setup assistance, and troubleshooting tips & tricks from the BluOS Support Crew.230V AC Power CordOptical Audio Cable Two Kickstand FeetSpacers x8120V AC Power Cord Ethernet Cable3.5mm Stereo Mini Plugto RCA Cable Wireless Streaming Sound SystemSTATUS INDICATOR:Below is a table of the LED blink codes and their corresponding descriptions.LED BLINK CODEDESCRIPTION Short blue flash, then redPowering up, rebooting the unit Solid greenHotspot Mode Flashing greenConnecting to Network White pulseSoftware update available Solid redUpgrade mode Alternate flashing red and green Upgrading… Flashing blueMute mode Solid whiteIndexing Solid blueConnected to Network – ready to use with BluOS App Flashing redFactory reset in progress Solid purple Hotspot timed out 1KICKSTAND LEGS (REMOVABLE): When placing the PULSE SOUNDBAR 2i on its own, attach the supplied Kickstand Legs for support. HDMI ARC: Using the HDMI cable provided, connect one end to the HDMI ARC input of the PULSE SOUNDBAR 2i andthe other end to an ARC-enabled HDMI output on your television. You may be required to enable ARC in your TV settings. Consult your user manual for more information.The HDMI source will appear as HDMI in the NAvigation Drawer of the BluOS App.SUBW OUT: The SUBW OUT connection can be used with a subwoofer cable (not provided). This is an optional connection since the PULSE SOUNDBAR 2i can be connected to a Bluesound PULSE SUB or RT100 wireless adaptor through a built-in wireless connection. For wired subwoofers, use the SUBW OUT port. Connect one end of a subwoofer cable to the SUBW OUT on the PULSE SOUNDBAR 2i and the other end to the corresponding input on the subwoofer.ANALOG AUDIO IN : Using the 3.5mm Stereo Mini Plug to RCA cable provided, connect the 3.5mm end to the Audio In of the PULSE SOUNDBAR 2i and the other end to the corresponding RCA output of a television or other audio source. The source will show as an Analog Input in the Navigation Drawer of the BluOS App.OPTICAL IN: Using the Digital Optical Audio Cable provided, connect one end to the Optical In of the PULSE SOUNDBAR 2i and the other end to the corresponding digital optical output of a television. The source will show as an Optical Input in the Navigation Drawer of the BluOS App.USB (TYPE B) : Use the SERVICE port in conjunction with USB (Type B Mini) to initially load firmware on the Player. This is not for consumer use. Only Authorized Bluesound Service personnel can access this USB port andSERVICE control button.USB (TYPE A) : Connect a USB mass storage device to the USB input. Typical USB mass storage devices compatible with the PULSE SOUNDBAR 2i include portable flash memory devices and external hard drives (FAT32 and NTFS formatted).LAN PORT: The LAN PORT connection can be used with the Ethernet cable provided. This is an optional connection since the PULSE SOUNDBAR 2i can be connected to the network through a Wi-Fi connection to your router. To setup the PULSE SOUNDBAR 2i using the LAN Port a Wired Ethernet connection is required. Using the Ethernet cable provided, connect one end of the Ethernet cable to the LAN port of your wired Ethernet broadband router and the other end to the PULSE SOUNDBAR 2i’s LAN port .SERVICE: Use the SERVICE port in conjunction with USB (Type B Mini) to initially load firmware on the Player. This is notfor consumer use. Only Authorized Bluesound Service personnel can access this USB port and SERVICE control button.STANDBY: Press and hold the standby button for 5 seconds to place the unit in 0.5W Standby or Vacation Mode if thePlayer will not be used for extended periods of time. In Vacation Mode, all network activity will also cease and the Player will not appear in the App or respond to App commands. Press the Standby Button again to restore the Player to Ready Mode. Standby can also be used to restore the Player to Factory Settings or manually place the Player in Upgrade Mode if upgrading using a USB Memory Stick.AC MAINS INPUT: The PULSE SOUNDBAR 2i comes supplied with two separate AC power cords. Select the AC powercord appropriate for your region. Before connecting the plug to the wall outlet, connect firmly the other end of the AC power cord to PULSE SOUNDBAR 2i’s AC Mains input socket. Never force the plug into a wall outlet. An adaptor may be necessary in certain regions. Always disconnect the plug from the wall outlet first, before disconnecting the cable from the PULSE SOUNDBAR 2i’s AC Mains input socket.23457689121110WARNING!THIS IS A FACTORY RESET OF YOUR PLAYER. ALL CUSTOMIZATION INCLUDING WI-FI NETWORK CONFIGURATION, FILE SHARES AND SAVED PLAYLISTS WILL BE LOST. YOU WILL HAVE TO RE-CREATE THESE O NCE C OMPLETE. T HIS P ROCESS I S O NLY R ECOMMENDED I F Y OUR P LAYER I S N OT F UNCTIONING AND AN INTERNET FIRMWARE UPGRADE HAS FAILED. FOR ANY QUESTIONS OR CONCERNS CONTACT AN AUTHORISED BLUESOUND CUSTOMER REPRESENTATIVE BEFORE PROCEEDING!Steps to Factory Reset:1.Disconnect the player from electrical power.2.Wait 30 seconds.3.Reconnect the power.4.Once the LED turns Red, press and hold the Standby button on the back of the player. The LED willimmediately turn Green and then back to Red – continue to hold the button for 30 seconds.5.After 30 seconds, the LED will begin to blink red – then release the button.6.All customization to the Bluesound player will be removed and restored to factory settings. IMPORTANT: Removing your finger from the Standby button at any time before the LED begins flashingred will cancel the factory reset and leave the player in Upgrade Mode. Just start the steps again to factory reset the player.You will know the factory reset is successful if the player returns to Hotspot mode (wireless connection –the LED will turn solid green). If the player is connected to your network through a wired Ethernet connection, it will simply connect as if it was a new player (LED will turn solid blue).© Bluesound International. Bluesound, the stylized wordmark and “B” logotype, the phrase“HiFi for a wireless generation”, PULSE SOUNDBAR 2i and all other Bluesound productnames and taglines are trademarks or registered trademarks of Bluesound International, adivision of Lenbrook Industries Limited. All other logos and services are trademarks or servicemarks of their respective owners.。
S400 ED-B3-MA-061130-001 双向三元素全范围塑料扬声器用户手册说明书

127178CONTENTSPRODUCT FEATURES ACOUSTIC CHARTS INSTALLATION DIMENSIONS SPECIFICATION LIMITED WARRANTY□□□□□□□2-way 3-transducer full range plastic speakerComprising double 4" high sensitivity, big power pro woofers.One 25mm silk soft dome tweeter 120×120dispersion °°Single-amp. modeSuits venues like supermarket or coffee house for background music application. Also canbe used in conference room or for personal multi-media purpose as a monitor.Special mounting bracket is designed for convenient min. 10° splay angle adjustment of thecabinet vertically.PRODUCT FEATURESSPECIFICATIONTransducersFrequency Response(-3dB)Dispersion(H ×V)Sensitivity(1m/1W)Crossover Point Power(RMS)Rated Impedance DC Impedance THDInput Connectors Net Weight Gross WeightDimensions (W ×D ×H)Packing Dimensions(W ×D ×H)Power(Program)Power(Peak)SPL(1m)Max.SPL(1m)LF: 4"×2HF:φ25mm ×180Hz-20kHz92dB 3kHz 80W 4Ω3.6Ω<3%4.5kg5.5kg120 ×120Binding Post111dB 117dB 160W 320W 182×182×320mm 230×230×375mm1 0 0dBS1809 01088 0 367 0 - 366 0 - 1085 0- 180501002005001k 2k 5k 10k 20k 20Hz1 4 0Deg 1 1 08 05 02 0- 1 0501002005001k 2k 5k 10k 20k 20Hz2 5 2D e g1 4 43 6- 7 2- 1 8- 2 8D e gFREQUENCY RESPONSEFREQUENCY RESPONSE20 Hz 501002005001K 2K 5K 10K20K Ohm345678910203040506070 Deg-180-150-120-90-60-300306090120150180Ohm345678910203040506070 Deg-180-150-120-90-60-300306090120150180HF IMPEDANCELF IMPEDANCE0- 10- 15- 20- 25dB 2 0050 01K2K5K1 0K2 0K 1 50 Hz01.53.04.5- 5ms100.0dBSPL90.080.070.050.060.018010836- 36- 108- 180D e gTHDWATERFALL100Hz160Hz200Hz400Hz630Hz1.0kHz1.6kHz3.15kHz6.3kHz 10kHz 16kHz2.5kHz0°30°60°90°120°150°180°210°240°270°300°330°0°30°60°90°120°150°180°210°240°270°300°330°0°30°60°90°120°150°180°210°240°270°300°330°0°30°60°90°120°150°180°210°240°270°300°330°0°30°60°90°120°150°180°210°240°270°300°330°0°30°60°90°120°150°180°210°240°270°300°330°0°30°60°90°120°150°180°210°240°270°300°330°0°30°60°90°120°150°180°210°240°270°300°330°0°30°60°90°120°150°180°210°240°270°300°330°0°30°60°90°120°150°180°210°240°270°300°330°0°30°60°90°120°150°180°210°240°270°300°330°0°30°60°90°120°150°180°210°240°270°300°330°HORIZONTAL DIRECTIVITYThe data of S400 horizontal directivity were collected by testing the speaker system in a big anechoic chamber.100Hz160Hz200Hz400Hz630Hz1.0kHz1.6kHz3.15kHz6.3kHz 10kHz 16kHz2.5kHz0°30°60°90°120°150°180°210°240°270°300°330°0°30°60°90°120°150°180°210°240°270°300°330°0°30°60°90°120°150°180°210°240°270°300°330°0°30°60°90°120°150°180°210°240°270°300°330°0°30°60°90°120°150°180°210°240°270°300°330°0°30°60°90°120°150°180°210°240°270°300°330°0°30°60°90°120°150°180°210°240°270°300°330°0°30°60°90°120°150°180°210°240°270°300°330°0°30°60°90°120°150°180°210°240°270°300°330°0°30°60°90°120°150°180°210°240°270°300°330°0°30°60°90°120°150°180°210°240°270°300°330°0°30°60°90°120°150°180°210°240°270°300°330°The data of S400 vertical directivity were collected by testing the speaker system in a big anechoic chamber.VERTICAL DIRECTIVITY182mm320m m182mmINSTALLATIONDIMENSIONSTop viewFront view吊装吊装平放50mm50m mLIMITED WARRANTYIf malfunction occurs during the specified warranty period from the date of original purchase, the product will be repaired or replaced without charge by Elder Audio.The Limited Warranty does not apply to:(a)exterior finish or appearance;(b)certain specific items described in the individual product data sheet or owner's manual;(c)malfunction resulting from use or operation of the product other than as specified in theindividual product data sheet or owner's manual;(d)malfunction resulting from misuse or abuse of the product;(e)malfunction occurring at any time after repairs have been made to the product by anyoneother than Elder Audio Service or any of its authorized service representatives.To obtain warranty service, customer must deliver proof of purchase of the product in the form of a bill of sale or receipt invoice.S400 Speakers and Speaker Systems are guaranteed against malfunction due to defects in materials or workmanship for a period of three (3) years from the date of original purchase. The Limited Warranty does not apply to burned voice coils or malfunctions such as cone and/or coil damage resulting from improperly designed enclosures. Additional details are included in the Limited Warranty statement.S400 Accessories are guaranteed against malfunction due to defects in materials or workmanship for a period of one (1) year from the date of original purchase. Additional details are included in the Limited Warranty statement.S400 Flying Hardware (including enclosure-mounted hardware and rigging accessories) is guaranteed against malfunction due to defects in materials or workmanship for a period of one (1) year from the date of original purchase. Additional details are included in the Limited Warranty statement.Specifications are subject to change without notice.。
- 1、下载文档前请自行甄别文档内容的完整性,平台不提供额外的编辑、内容补充、找答案等附加服务。
- 2、"仅部分预览"的文档,不可在线预览部分如存在完整性等问题,可反馈申请退款(可完整预览的文档不适用该条件!)。
- 3、如文档侵犯您的权益,请联系客服反馈,我们会尽快为您处理(人工客服工作时间:9:00-18:30)。
* 当您将设备翻转并进行操作的时候,请用一 叠报纸或杂志垫在设备的四个角上或两端, 以防止正面板上的按键和控制器受损。您也 可以试着确定摆放的位置以免按键和控制 器受损。
中文说明书
感谢并恭喜您选购 Roland CUBE STREET 电池供电立体声音箱。
使用本设备之前,请仔细阅读有关章节: z 安全使用本设备(第 2-第 3 页) z 重要注意事项(第 4 页)
为了能够让您全面掌握这一新设备的各种功能,请完整阅读本使用说明书。 请将说明书妥善保管并放置于随手可取之处以便查阅。
上海乐兰电子有限公司
5
面板描述
控制面板
MIC/LINE CHANNEL
1. INPUT 接口 连接话筒或线路输入乐器(原声吉他或键盘)。
2. SELECT 切换 按下按键切换适合于您连接设备(话筒/线路) 的输入电平。当您连接原声吉他或键盘,请选 择 Line。
3. VOLUME 旋钮 调节通道的音量。
主要特点:
z 轻巧的立体声音箱 这是一台内置有 2 台最新研发的 6.5 英寸高性能扬声器的小型立体声音箱,它的输出功能为 5W(2.5W + 2.5W)
z 由电池或 AC 供电的双单元操作功能 双单元操作功能可以胜任您随时随地的需求。 仅仅 6 节 AA 电池,CUBE STREET 可以工作 15 个小时。(电池寿命将取决于使用环境。)
y 请使用随机提供的交流电源适配器。 保证线路电压与交流电源上标明的 输入电压相符。其他交流电源使用 的电极或电压可能不同,使用不当 将导致设备损坏、发生故障或电击。
y 请使用本设备附属的电源导线。附属 的电源导线请勿使用于其他的设备。
y 电源线请勿过度扭曲或弯折,也不可 以在上面放置重物。这样可能会损坏 电源线而造成元件断裂与短路。损坏 的电线可能造成火灾和触电的危险!
符号用于提醒使用者重要的指示或警告。其 意义取决于三角型中的记号。如左图般的记号 是作为一般的注意、警告或慎防危险。
这些指示用于提醒使用者,本产品的 不当使用可能会导致物品的破坏或 受损。
符号用于提醒使用者禁止做哪些事。圆圈中 的标志指示使用者禁止做的事项。当出现左图 符号时,表示不能拆开本设备。
* 物品受损涉及对于家庭、家具或宠 物所造成的损害或不良后果。
y 请勿对电池进行充电、加热、拆卸或 抛入火中或水中。
y 请将本设备和 AC 适配器放置在不影 响其良好通风的场所或方向。
y 将 AC 适配器的插头插入或拔开插座 时,请拿住设备电源线的插头部分。
y 若怀疑您的地区可能发生雷击时,请 将电源插头拔掉。
y 请勿踩踏在设备上,也不要将重物放 置在设备上。
y 每隔一段时间,您必须将 AC 适配器 的电源插头拔掉,并用干布擦拭和清 除累积于插头的灰尘。当长期不使用 本设备时,也请将电源插头拔离插座。 在电源插头与电源插座之间沉积的灰 尘可能会使绝缘不良而导致火灾。
y 请避免电源线与各种导线互相缠绕, 此外,也请让孩童远离电源线与导线。
y 手部潮湿时,请勿拿取设备电源线或 将 AC 适配器的插头插入或拔离插座。
y 无论单独使用本产品或连接使用放大 器、音箱或耳机时,过大的音量可能 会导致听力永久的损害。请勿长期在 过大音量或任何会导致不适的音量下 使用。如果您感到任何听力的损失或 产生耳鸣,请迅速求诊。
y 请勿将任何物品(如易燃物、硬币、别 针等)或任何液体(水、饮料等) 掉入 或渗入琴体。
y 请注意家中的孩童。成人应监督孩童 行为,直到他有能力遵循必要的安全 指示操作本设备。
连接……………………………………………………………………………………………… 10 切换电源开关……………………………………………………………………………… 10
信号流程图…………………………………………………………………………………11
技术指标……………………………………………………………………………………11
y 移动本设备之前,请拔下 AC 适配器 连接线和所有与设备连接的外置设备 连接线。
y 电池使用不当将会产生爆炸、漏液而 造成故障和损坏。出于安全考虑,请 遵循以下注意事项(第 5 页)。 y 遵循安装指示,并注意正负极点。 y 请不要将新旧电池或不同类型的电 池混合使用。 y 设备长期不使用时,请将电池移除。 y 当电池发生漏液时,请使用柔软的 擦布或纸巾将电池槽中的液体擦干 净,并装入新的电池。为了避免液 体腐蚀您的皮肤,请不要让漏液接 触到您的手或皮肤。千万小心不要 使漏液接触到眼睛,如果液体进入 眼睛,立即使用清水进行冲洗。 y 不要将电池与金属物体放在一起, 如圆珠笔、项链或发卡等。
y 使用后的电池必须遵循您居住区域的 安全处理条例进行处置。
y 当您移除接地螺丝时,请将其放置于 孩童触及不到的安全之处,以防止孩 童误吞食。
上海乐兰电子有限公司
3
重要注意事项
电力供应:使用电池
y 当安装或更换电池时,请将设备电源关闭, 并且将与之连接的设备连线断开。这样可 以避免设备故障、音箱或其他设备的损坏。
y 本设备可能会干扰收音机或电视机的接收 信号。请不要将本设备放在这些接收信号 的设备旁边。
y 无线通讯设备如移动电话可能会造成此机 器产生杂音。这些无线通讯设备在接收或 发送信号时会干扰本机而产生杂音。请将 无线通讯设备放置在更远的地方或关闭。
y 请不要将本机直接曝晒在阳光下,或放在 热源旁边,或是放在密闭的车内空间,或 其它高温物体旁。过高的温度容易造成机 体变形及变色。
y 当插入或断开所有连接线时,请抓紧连接端 口——不要拉扯连接线,以防短路或损坏连 接线内部材料。
y 为避免干扰您的邻居,请将音量调节到适当 大小。您也可以使用耳机,这样就不必担心 对周围人的影响(尤其是在深夜)。
y 当您需要运送设备时,如果可能的话,尽量 将本机装入原包装箱(包括填充物)。否则, 请使用相类似的包装材料。
面板描述………………………………………………………………………………………… 6 控制面板…………………………………………………………………………………… 6 连接 AC 适配器…………………………………………………………………………… 9 使用电池注意事项………………………………………………………………………… 9 调音………………………………………………………………………………………… 9
COSM(复合声音对象模拟)是 Roland 模拟建模技术的专利,它分析声音受到电子 线路、结构和物质影响等要素,并将这些要素结合起来重塑原始的声音。
z 6 种数字效果 您可以通过踏板(另售)切换 EFX(合唱、镶边、相移或颤音)或延时和混响效果。
z 调音器 您可以为您的吉他进行调音。
z 立体声 AUX 输入 您可以连接 MP3 播放器或 CD 播放器,边弹奏吉他/乐器,边和播放的音频一起演奏。
* 当将设备翻转时,小心地进行操作,避免设 备摔落或颠覆。
4
目录
安全使用本设备……………………………………………………………………………2
重要注意事项………………………………………………………………………………4
目录…………………………………………………………………………………………5
y 避免强烈的碰撞。 (请勿摔落!)
y 请勿将电池置于过热的场所,如直射 阳光或明火的旁边。
2Leabharlann y 当发生以下情况时,请立即关闭电源, 将插头拔掉,并与“信息”页列表中 的当地 Roland 服务中心或 Roland 授 权经销商联系: y AC 适配器、电源线或是插头破损 y 发生冒烟或发出异味 y 异物或液体掉入或渗入本设备 y 本设备直接遭雨淋(或打湿) y 本设备操作不正常或是表现有明显 的变化
y 如果将本机从一个地方搬到一个温湿度差 别很大的地方,机内可能形成水气(冷凝 体),如果在这时使用本机,可能导致机器 损坏或发生故障。因此,使用本机前,必 须等待数小时,直至水气完全蒸发。
y 请不要将本机直接曝晒在阳光下,或放在 热源旁边,或是放在密闭的车内空间及其 它高温物体旁。过高的温度容易造成机体 变形及变色。
符号用于提醒使用者必须要执行的事。圆圈 中的标志指示使用者该做的事情。当出现左图
的符号时,表示必须将插头拔离插座。
……………………………………… 请始终遵循以下指示 ……………………………………
y 不要(以任何方式)打开本设备或 AC 适配器。
y 请勿自行拆开或改动本设备内置部 件和 AC 适配器。(除非本说明书中 提供安装选购配备指示)。请就近洽询“信息” 页列表中的当地 Roland 服务中心或 Roland 授 权经销商。
保养
y 日常清洁使用一块柔软、干燥或微湿的布料 擦拭机身。要去除顽固污渍,请使用柔和、 非研磨性的清洁剂。
y 为了防止设备退色或变形,请勿使用汽油、 稀释液、酒精或具有溶解能力的液体擦拭。
其他注意事项
y 使用设备的按钮、旋钮或其它控制器,以及 连接插孔和接口时,力量要适度,粗暴的操 作会使设备发生故障。
y 设备中提供有电池。然而,由于它们的主 要目的是用于设备测试,所以其使用寿命 可能受到限制。
y 与其他设备进行连接时,请关闭本设备的 电源。这样可以避免设备故障和音箱或其 他设备的损坏。
y 请勿将本设备与其他由逆变器控制的设备 (如冰箱、洗衣机、微波炉或空调)或带有 电机的电器设备共用一个电源输出口。由 于电器设备使用方法不同,产生的电源噪 音可能会导致本设备故障或产生噪音。若 无法使用独立电源插座,请在本设备与电 源输出口之间安装一个电源噪音滤波器。
z 耳机
编号:RSHM-2922 Copyright0 2008 ROLAND CORPORATION