途乐大屏导航说明书
涂盖车辆导航系统用户指南说明书
v3©2011 Sygic, a.s. All rights reserverd.I. Getting Started (1)The Navigation Screen (1)Entering an Address (2)Turn by Turn Navigation (5)Acquiring GPS Position (6)II. Navigation with Truck Attributes (7)Change the road restrictions in the map (8)III. Planning the Route (9)Navigating to a Point of Interest (9)Navigating Home (11)Navigating to Recent Destinations (11)Navigating to Favourite Destinations (12)IV. Altering the Route (14)Route Menu (14)Modifying the Route (16)Map Browsing Mode (17)Multi-stop route planning (19)Driver’s log (21)V. Online features (22)Connection (22)Traffic alerts (23)VI. Settings (25)Advanced settings (27)Disclaimer (28)ii User GuideI. Getting StartedThe Navigation Screen On startup, the application openswith the Navigation Screen, showing your position as a blue arrow. You can zoom in and out of the map by tapping the + and – buttons in the top corners of the screen.For further functions, enter the Main menu by tapping the map areaon the Navigation Screen. You can scroll between the menu pages by tapping the arrow buttons at the bottom of the screen or by sliding a finger across the screen.Sygic FLEET 10 1Entering an Address To set your destination by entering its address selectMain menu>Navigate to…>Address or Zip code. Next, you will be asked to select a Country a City, Street and House number or Street crossing. Enter the required names and numbers. Alternatively, just enter the first few letters of the city/street name to see a list of similar names. The list also features explanatory icons left to the city/street name: CityCapital cityCity centerStreetStreet crossingSelect the desired city/street from the list.When finished, a Confirmation Screen pops up showing the address entered.2 User GuideTap “On Map” to see the exact location of the address, or tap “Add to favorites” to store it among your frequently used destinations (see “Navigating to Favourite Destinations” on page 12).To set the address shown as your destination, tap the “Route Me!”button at the bottom of the screen. If you would rather be directed to a parking lot nearby, tap “Parking” and select from the list shown.To select a different address altogether, tap the “Back” button.If your device can determine your current position, your route will be calculated immediately from that positon. If your current position cannot be determined, you will be offered the following options:Wait for validsignal(Recommended)Your route will be calculatedfrom your current position assoon as a valid GPS signal isavailable (see “Acquiring GPSPosition” on page 6).Last valid positionYour route will be calculatedfrom your last known position(i.e. where you were justbefore the device lost GPSsignal).Select from mapAllows you to select anystarting point for the routecalculation.When route calculation is complete,the entire route is displayed on theSygic FLEET 10 3map (in blue) with total distance,estimated time of arrival (ETA), timeleft to destination and routecalculation method (Fastest,Economic, Shortest, Pedestrian,Bicycle) shown below the map.To accept the route and start turn byturn navigation, tap “Done”.If thevehicle starts to move, the Routesummary hides automatically.For further information on the route,tap “Details”.NOTE: By default, the method of route calculationis set to “Fastest”.4 User GuideTurn by Turn NavigationThe Navigation Screen will show the map of your surrounding area with the calculated route highlighted in blue.As you approach a junction, further directions are displayed to indicate which road to take.In addition to turn by turn directions, the Navigation Screen also provides a range of further useful information:1 Next maneuver2 Distance to next change ofdirection3 Current road/street4 Distance to destination5 GPS signal strength6 Current speed7 Estimated time of arrival atdestination8 Current city9 Lane Assistant10 Heading to destination11 Next road/street to take12 Map zoom in/out13 Speed camera warning14 Current speed limitSygic FLEET 10 5Acquiring GPS Position If there is no GPS signal, the screen becomes grey. This can happen under any of the following conditions:■The device is in a tunnel or at a location where signals from theGPS satellites are obstructed bybuildings, trees, electric cables or other objects.■Device system settings orProduct Settings are setincorrectly.The information below is not availableon Android.The signal strength bars at the bottom of the screen provide additional information:If the colour of the bars or the GPS port name/number turns red, re-check the GPS settings.If the bars are grey, move the device to an outdoor location with good visibility of the sky until the signal is regained and the bars become green. Tap the signal bars or selectMain menu>GPSto see more detailed GPS information.Once GPS signal is regainedturn by turn navigation resumes automatically.6 User GuideII. Navigation with Truck AttributesThe truck attributes of the map allow setting up the dimensions of the truck and then the route is calculated avoiding the routes, where the truck is not allowed to drive.To set up the truck dimensions, enter the Main menu , select Settings and then select Truck settings.In the settings screen you can set: Use truck attributes (Yes/No) Total weightAxle weightLengthWidthHeightMax speedAfter the parameters are set, they are used in route calculation from that time on. The calculated route will look like on the examples:US versionEuropean versionThe truck attributes of the roads are also displayed during the navigation.Sygic FLEET 10 7Change the road restrictions in the map Some road restrictions for thetrucks may not be set in the map. If this situation occurs, you can correct them manually. After correcting the road restrictions in the map, the computed routes will avoid the specific road in the future. You can also correct the maximum speed limit and the direction of the one-way-road.Tap on the road where you want to change the restrictions in the Browse map. The road will be highlighted in violet color. Tap and choose Change road restrictions . The following screen will show up:Here you can change the road restriction for the road you selected. With Road direction for example, you can set if the road is Closed, unidirectional, or Open.When setting the one-way-road, please select the “Positive” or “Negative”direction. You can check the correct direction of one-way-road by looking at the arrow in theBrowse map.8 User GuideIII. Planning the RouteNavigating to a Point of InterestIn addition to the road network, the map also stores the details of thousands of Points of Interest (POIs) such as gas stations, restaurants, hotels, tourist attractions and other facilities.To set a POI as your destination, first selectMain menu>Navigate to…>Point of Interest Next, define the area where you want to search for a POI. SelectNear my positionto search POIs around yourcurrent position;Near address…to search POIs near aparticular address (to beentered in the next step);Near destinationto search POIs near thecurrent destination (if set);In City…to search POIs in a particularcity (to be entered in thenext step);Searching POIsPOIs are arranged in groups (such as Food, Hotel or Motel etc.) to help find a facility even when you do not know its name or address.Once the search area is selected, a list of the POI groups is displayed.Tap on the POI group and you will see the list of all POIs that are nearby.NOTE: The distances shown in the list are relative to the search location.Scroll down the list and select your POI by tapping its name. To refine your search results, tap the keyboard icon at the bottom of the screen and type the name of the POI you are looking for. You can also enter partial names.When finished, a Confirmation Screen pops up showing the POI selected.To set the selected POI as your destination, tap the “Route Me!”button.Navigating HomeTo start using this feature, you need to set your home location first. SelectMain menu>Settings>Set home locationand enter your home address.Once your home address is stored, you can navigate home by simply selectingMain menu>Navigate to…>Home Navigating to Recent DestinationsSygic Mobile Maps keeps track of your recent destinations, making it easy to return to a previously set location.When entering an address through Main menu>Navigate to…>Address or Zip codethe list of previously selected Countries/Cities/Streets appears, as you go through the address details.They are marked with icon. You can directly go to a list of recent destination by selectingMain menu>Navigate to…>Historyand start navigation by selecting a previous destination from the list shown. Navigating to Favourite Destinations To view a list of your Favouritedestinations, selectMain menu>Navigate to…>Favouriteand start navigation by selecting a Favorite destination from the list shown.Select the desired Favorite destination by tapping it and then select your next option from the Confirmation Screen.Defining a new Favourite destinationTo add a new address to your Favourites tap "Add to favourites" in the Confirmation Screen or selectMain menu>Map>Select point on map >>Add as POI>Favorites or selectMain menu>Manage POI>Add POIIV. Altering the RouteRoute MenuYou can access detailed information about the calculated route from the Route menu. SelectMain menu>Route To get a schematic overview of the route, selectShow route summary>DetailsThe icons highlighted in blue indicate specific types of roads included in the route.To avoid a specific road type (e.g. Highways), tap the blue highlightedbutton.To get a detailed list of junctions and directions along the route, select Show route instructionsTo see the same junctions as a series of images, selectShow route as images To see the entire route on the map, selectShow on mapTo see the calculated route as if you were driving along (fly over mode) selectShow route demoModifying the RouteTo modify an existing route, first open the Alternative route menu: Main menu>Route>Alternative routeIf you do not like the calculated route and wish to calculate an alternative option, selectCompute alternativeTo calculate a detour (e.g. because the road ahead is closed), selectAvoid next...If you wish to travel through a certain place on your trip, selectTravel via...and add a waypoint the same way, as setting the destination in chapter “III. Planning the Route” on page 8. You can alsoAvoid traffic delayson your route. See Traffic alerts on page 23 for more details.If you want to cancel your modifications to the route, selectReset to original.If you wish to cancel the calculated route entirely, and use the navigation system only as an indicator of your current position, selectMain menu>Route>Cancel routeNOTE: You can find additional information about modification of calculated route in chapters “Error! Not a valid bookmark self-reference.” and “Multi-stop route planning”.Map Browsing Mode You can easily check andplan/modify your route in Map Browsing Mode. SelectMain menu>MapDrag the map by sliding your finger across the screen. Tap the map to select specific location.For map display options and additional functions tap the “Options” button and select one of the following items.Find...You can find a position byusing one of the optionsdescribed in chapter III.Planning the Route.Show current positionShow entire routeShow cityShows entire city on mapscreen.Show/Hide POIs...You can select, whichtypes of POI types aredisplayed when browsingthe map.To plan/modify your route, tap on a location on the map, then tap the button marked as “” to choose what you want to do with theselected point.Navigate thereSets the location as destination. The previously selected route will be deleted.Travel viaAdds the location as a new waypoint to your existing route between start and finish.ContinueAdds the location as a new waypoint after the existing destination.Add as POIStores the location in Favorites or in other POI category.Find nearby POI Searches POIs around the location.Avoid...Recalculates the route avoiding a set radius around the location. You will be asked to set the radius in the next step.Change road restrictionsMulti-stop route planningIf you have added some waypoints to your route via Map or Alternative route, you can edit them in Itinerary. It is also possible to optimize waypoints along the route,plan a new route or store it for future use.To edit the current route, select Main menu>Route>Itineraryand select the[Current route] to see the list of waypoints. The itinerary shows the starting point (marked with ), thenumbered waypoints and the final destination (marked with). The waypoints that you have alreadypassed are greyed out.You can add a waypoint to the itinerary by taping the button.Sygic FLEET 10 19Waypoint optionsTapping on any waypoint in the itinerary brings up the following list of options:Set as visitedStops navigating to theselected waypoint andrecalculates the route to thenext waypoint in the itinerary.Set as finish pointPuts the waypoint to the endand moves others upwards inthe itinerary.Set as via pointChanges the final destinationto an intermediate waypoint.Set as startStores the selected waypointas the starting point of theroute.Add nearby POIUse this option to search for aPOI (e.g. a hotel) near theselected waypoint, and thenadd it to the itinerary.Move upMoves the selected waypointup in the itinerary.Move downMoves the selected waypointdown in the itinerary.DeleteDeletes the selected waypointfrom the itinerary. Itinerary optionsFor additional itinerary functions tap the “Options” button at the bottom of the Itinerary Screen and select one of the following items.Optimize itineraryOptimizes the waypoint sequence in the itinerary.Save itinerarySaves the itinerary for future use. Delete itineraryDeletes the itinerary.20 User GuideDriver’s logIn Driver's log you can keep a record of all driven routes. The Driver’s log shows an overview of mileage on a particular day and tracks the driven route into a special file.You can turn the Driver’s log on by clicking Mainmenu>Route>Driver's log>Start route logWhen the route log is turned on, the icon appears in the right bottom corner.The route log stops when turning off the navigation or clicking >Finishroute logAn overview of the recorded routescan be seen in View logs .The routes are shown separated into months. In the list of routes, you can see the summary for the specific route. After you click the specific route, you will be able to see the details about stops on the route. Next to each stop you can see the duration of the stop and its distance from the start point.Sygic FLEET 10 21V. Online features ConnectionIn order to use online services (e.g. real time traffic and safety camera alerts) you will need to connect yourdevice to the internet. SelectMain menu>Settings>Online settings The button shows the actual status of the connection. If it shows “Disconnected” tap the button to go online. The window also shows the amount of data sent and received so that you can control data traffic.NOTE: The cost of data transfer depends on your mobile phone tariff. Make sure you know the cost before you start using online features. The costs can be considerably higher when you areroaming abroad.22 User GuideTraffic alertsAvailability of the traffic service dependson your product configuration.For more options, including roaming preferen ces, tap the “Options”button.To view real time alerts of traffic incidents along your calculated route, selectMain menu>Traffic>Incidents on route.The screen will show the incidents ordered by their distance from your current position. You can select which of them you want to avoid. To select all the listed incidents, tap the “Avoid all” button.To select individual incidents, first tap the incident to show its extent on the map.Tap “Avoid” to select it.Sygic FLEET 10 23Incidents selected for avoidance aremarked with a solid black circle.To recalculate the route avoidingthe selected traffic incidents, tap“Done” and from the Traffic menuselectOptimize route.Traffic incidents are also shown onthe map overview of your calculatedroute.24 User GuideVI. SettingsIMPORTANT: Menu items marked withare not available in all devices.To change factory settings, select Main menuSettingsNOTE: Icons always display the setting that will be activated when they are tapped. E.g.means that voice output and sounds are currently enabled, and tapping this button will disable the sounds.Set 2D/3DChange between 2D and 3Dmap viewDynamic controlSet the preference how toscroll within lists andmenus. Set Day/Night colors Disable soundsEnable soundsVolume settings*Set the sound intensity separately for low driving speed and for high speeds. Online settings* Connect or Disconnect your device from internet, check data transfers and set roaming preference. Online services* Activate / Deactivate Policetraps community service.Advanced settings(for advanced users only)Sygic FLEET 10 25For more information, see 25.Planning preferencesSet the routing algorithm: Fastest, Economic, Shortest, Pedestrian, Bicycle.Toll charge settingsSet the preference of paid road segments: avoid them, do not avoid them, or always ask.GPS hardware*Detailed configuration of GPS and TMC hardware. Signpost settingsSets the number of signpost tables displayed at one time and the level of detail (Full, Simplified, Single line).Preferred Other Rotate display*Change the display orientation (landscape / portrait).Keyboard settingsYou can switch between preferred keyboard layouts using button, that is available in every keyboard. Regional settingsSet kilometers/miles, format of time and GPS coordinates.Set language - language of user interface.Set voice - language of voice instructions.Switch mapLoad a different map data from your device. Backlight*Set backlight level for26 User GuideDay/Night mode.Set home locationAboutInformation about version, device code and available application memory. Please provide this information in communication with Sygic support.Advanced settings 1 Avoid U-TurnsEnable lane assistantEnable AutozoomWarn if Railway crossing2 Backlight settings3 Configuration of Information panel on the main screen4 Notification settings of maximum speed limitSygic FLEET 10 27DisclaimerThe information contained in this document is the property of Sygic a.s. and may be used only for the purposes of operating and supporting the relevant software created by Sygic a.s.Sygic a.s. reserves all rights concerning the information contained herein. This document or any part thereof may not be reproduced, distributed, or translated into other languages in any way or form except with the written approval of Sygic a.s.This document is provided to the user on an ‘as is’ basis. Although maximum car e was taken during preparation of this manual to provide accurate information and to avoid errors, some technical inaccuracies or editorial errors may occur, for which Sygic a.s. accepts no responsibility.In the interest of improving the content of the document, Sygic a.s. reserves the right to modify, amend or delete any part of the document at any time without prior notice.For more information and updates, visit © 2011 Sygic, a.s. All rights reserved.。
汽车导航系统的使用指南
汽车导航系统的使用指南汽车导航系统的使用指南当今社会,汽车导航系统成为了驾车时的重要辅助工具。
汽车导航系统可以帮助我们更加便捷地进行驾驶导航,避免了迷路的尴尬和经历无尽的焦虑。
本文将为您介绍汽车导航系统的使用指南,以帮助您更好地利用导航系统。
1. 更新地图数据在使用汽车导航系统之前,首先要确保地图数据是最新的。
因为道路网络的变化是常有的,新修的道路、交通限行以及施工路段都需要及时更新到导航系统中。
一般而言,汽车导航系统的制造商都会提供地图更新的服务,您可以通过官方网站或官方服务中心进行地图的升级。
及时更新地图数据能够确保导航系统的准确性和可靠性。
2. 设置语音导航在驾驶汽车时,安全是第一位的。
所以在使用导航系统之前,务必将语音导航打开,以避免分神操作。
语音导航会实时提醒您的行驶路线并进行语音播报,使您不需要低头看地图。
同时,还可以设置语音导航的音量和语音提示的频率,以便根据个人喜好进行调整。
3. 输入目的地导航系统最重要的功能之一就是帮助您找到目的地。
为了正常使用导航系统,您需要在系统里输入您的目的地。
大多数导航系统提供了多种输入方式,如关键字搜索、地图拖动以及直接输入地址等。
您可以选择最适合自己的方式进行目的地的输入操作。
4. 规划行车路线当您输入完目的地后,导航系统会自动规划最佳的行车路线。
一般而言,导航系统会提供多个可选的路线,您可以根据实际情况选择最适合的路线。
例如,如果您时间比较充裕,可以选择经过风景优美的路线;如果需要尽快到达目的地,可以选择高速公路的快速路线。
选择合适的行车路线有助于提高驾车的舒适度和效率。
5. 实时交通信息有些导航系统支持实时交通信息功能。
这一功能能够帮助您及时了解道路的拥堵程度和交通状况,以便及时避开拥堵路段,选择更加畅通的行车路线。
在使用该功能之前,请确保您的导航系统已经连接到互联网,以便获取准确的实时交通信息。
6. 更新路况信息在长途驾车时,路况信息的准确性对于您的行车体验至关重要。
途乐大屏导航说明书
途乐大屏导航说明书摘要:1.途乐大屏导航说明书简介2.途乐大屏导航的安装与设置3.途乐大屏导航的使用方法4.途乐大屏导航的功能特点5.途乐大屏导航的注意事项正文:途乐大屏导航说明书是一种针对汽车导航系统的使用指南,旨在帮助用户更好地理解和使用途乐大屏导航。
本文将从途乐大屏导航的安装与设置、使用方法、功能特点以及注意事项等方面进行详细介绍。
一、途乐大屏导航说明书简介途乐大屏导航是一款专为汽车设计的导航系统,适用于多种车型。
它具有高清大屏、触摸操作、智能导航等功能,为用户提供便捷的驾驶体验。
二、途乐大屏导航的安装与设置1.安装:途乐大屏导航需要专业安装,建议用户前往指定的汽车服务店进行安装。
2.设置:安装完成后,用户需要进行一系列设置,包括语言、导航路径、音频设置等,以便系统更好地适应个人需求。
三、途乐大屏导航的使用方法1.开机:用户只需按下开机键,即可启动途乐大屏导航。
2.导航:用户可通过触摸屏输入目的地,系统会自动规划最佳路径并进行导航。
3.音频:用户可通过触摸屏选择音频来源,如收音机、蓝牙音乐等。
4.其他功能:途乐大屏导航还具备倒车影像、行车记录仪等功能,用户可根据需要进行设置和使用。
四、途乐大屏导航的功能特点1.高清大屏:途乐大屏导航采用高清触摸屏,显示效果清晰,操作便捷。
2.智能导航:系统内置实时路况信息,可根据实际情况为用户规划最佳行驶路线。
3.多媒体播放:支持音频、视频等多种格式文件播放,满足用户娱乐需求。
4.倒车影像:集成倒车影像功能,帮助用户安全倒车。
5.行车记录仪:具备行车记录仪功能,可自动记录行车过程中的影像信息。
五、途乐大屏导航的注意事项1.安装过程中,请勿擅自拆卸设备,以免损坏。
2.使用过程中,请勿让设备进水或暴露在高温、阳光下,以免影响正常使用。
3.如遇问题,请及时联系专业人员进行处理,切勿擅自拆卸维修。
通过以上介绍,相信您对途乐大屏导航说明书已有所了解。
GPS导航使用说明
首先,只要不会对安装、使用手机软件一窍不通的话,乐图的安装、使用就不会有太大问题,当然不排除一些意外的问题出现。
所以,建议在乐图安装、使用有问题之前,先查阅官网的使用说明或论坛上的内容,自己先掌握以后还碰到问题的话再提问,效率会更好,比如“怎样下载乐图程序和地图”这类问题……不少人会暴汗的。
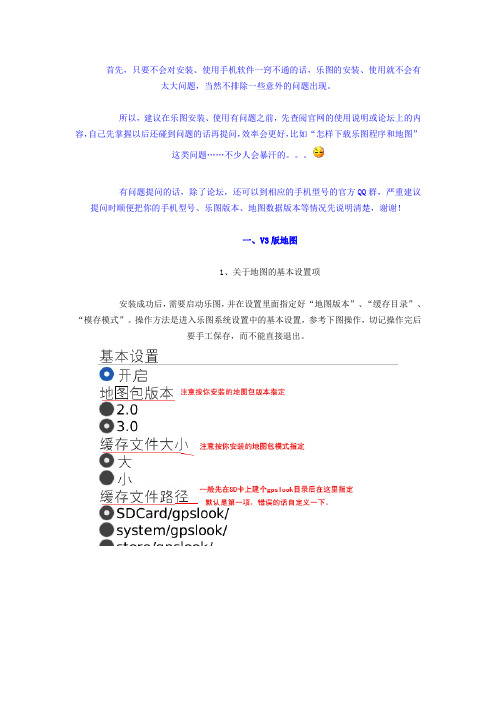
有问题提问的话,除了论坛,还可以到相应的手机型号的官方QQ群,严重建议提问时顺便把你的手机型号、乐图版本、地图数据版本等情况先说明清楚,谢谢!一、V3版地图1、关于地图的基本设置项安装成功后,需要启动乐图,并在设置里面指定好“地图版本”、“缓存目录”、“模存模式”。
操作方法是进入乐图系统设置中的基本设置,参考下图操作,切记操作完后要手工保存,而不能直接退出。
设置完成后退出乐图,将手机或SD卡连接到电脑,确认电脑能够访问到SD卡的内容,之后使用地图导入工具将地图导入到之前建立的gpslook目录。
2、关于地图的其他设置项如果地图显示有问题,可以检查一下其他设置是否被改变了,请参加下面图文。
在乐图设置里面的地图—》切换地图中是否选错了其他地图显示的区域是否未下载离线地图包、未开启自动下载地图,有时显示的比例也会影响到显示3、使用导入工具导入地图数据3.0地图包需要使用导入工具进行导入,而在导入前,需要在手机的储存卡建立一个gpslook目录,然后手机上启动乐图V3,进行设置(设置参考前面1、2小点),最重要最重要最重要的是:切记保存!没保存的话设置就白做了。
完成上面的操作、已经下载好V3地图包并且解压好之后,就可以将手机用U盘模式连接到电脑,或者直接用读卡器将你手机的储存卡连接到电脑,确保电脑能够读取卡里的数据,之后就可以用地图导入软件开始导入了。
免费的“全国地图包”是一定得安装的,导入地图时别忘了这个包。
导入操作非常简单,速度也非常快——启动导入工具—》选择解压缩后的地图包文件—》检测—》开始导入。
如果在检测时失败,如下图:这种错误的唯一原因:没有在手机里设置好V3并保存或电脑连接不到你的储存卡。
途岳12寸导航系统说明书
途岳12寸导航系统说明书随着科技的不断进步,导航系统已经成为如今车辆中的一项常见功能。
导航系统可以帮助驾驶者准确找到目的地,节省时间和精力。
而对于很多车主来说,正是导航系统的功能和性能对比,成为了选车时重要的参考因素之一。
在这篇文章中,我们将介绍途岳12寸导航系统的详细功能和操作方式,帮助您更好地了解这一产品。
1. 产品外观与硬件配置途岳12寸导航系统采用了现代简约的设计风格,独特的外观与车辆内饰相得益彰。
整个系统由一块高清触控屏幕构成,确保用户能够方便地进行各种操作。
在硬件配置方面,途岳12寸导航系统搭载了高性能处理器和充足的内存,确保系统运行的流畅性和响应速度。
2. 导航功能作为一款导航系统,途岳12寸导航系统提供了一系列实用的导航功能,帮助驾驶者快速找到目的地。
通过高精度的GPS定位和地图数据,系统能够准确显示当前位置并实时更新行驶路线。
同时,系统还提供了多种导航模式,包括驾车导航、步行导航和公交导航等,以满足用户不同的出行需求。
3. 娱乐功能除了导航功能,途岳12寸导航系统还具备丰富的娱乐功能,为驾驶者的行程增添乐趣。
用户可以通过系统触控屏幕选择音乐、视频、收音机等功能,让驾车变得更加轻松和愉悦。
此外,系统还支持蓝牙连接,用户可以将手机与导航系统连接,实现车载电话和音乐播放等功能。
4. 实用工具除了导航和娱乐功能,途岳12寸导航系统还提供了一些实用的工具,方便驾驶者在行程中使用。
例如,系统内置了行程记录功能,可以记录每次行驶的路线和时间,帮助用户回顾和统计行车数据。
另外,系统还提供了实时天气和实时交通信息,让驾驶者在行驶途中能够及时获取相关信息,做好出行准备和规划。
5. 系统操作途岳12寸导航系统的操作简单直观,用户可以通过触控屏幕进行各种操作。
在导航模式下,用户只需输入目的地信息,系统将自动规划行驶路线并显示在地图上。
在娱乐模式下,用户可以通过触控屏幕选择喜欢的音乐或视频进行播放。
此外,系统还提供了语音控制功能,用户可以通过语音指令实现一些基本操作,提高操作的便利性。
乐途CDS-1071汽车车载显示器使用说明书

动的部位上,以免不小心扯断电线。
·3·
系统连接
连接前的注意事项 ·这种产品只能使用+12V直流电源来操作。 ·了避免短路现象的发生,在连接前,必须将汽车点火开关关掉。 ·在连接+12V的电源线(黄色)前,必须先将其它的连接线都连接好。 ·尽量将所有的接地线连接到同一的接地点上。(一点接地) ·安装、使用和操作程序等若不遵照本说明书进行,很可能会受到激光
遥控器的介绍setupvolume013455osdrpt2dvddualremotecontrolsourcefmtxadjustlcdmutellamprdiscdisc设定键方向键暂停键快进退菜单键标题键返回键字幕键换碟灯控键切换开关音量调节角度键静音键屏显键重复键数字键前后一段选择键停止键慢放键调频波段键播放确认键电源?8?功能操作tft画面调整?按设定键setup键选择亮度bright的调节再按或键调节到适宜的亮度
可能的原因
可能的解决方法
不能打开电源
保险丝断裂
先检查保险丝是否真的断 裂,若已断裂,更换一个 与原来规格相同的保险丝。
·将+12V电源线(黄色)正确 本机电源线部分没 地连接好; 有正确连接好。 ·将接地线(黑色)也正确地
连接好
功能按键不作用 操作不正常, 本机死机了
按本机上地复位键, 将系统复位。
TX”键, 然后再按“-ADJUST+”键来切换选择以上 7个 FM频率。 (2)使用无线调频耳机或收音机来接收音频信号时,先使收音机处于 FM调频波段,再将无线调频耳机或收音机的FM频率调节到本机 红外线信号发射器输出的FM频率上,这样就可接收到外部设备输 入到监视器的音频信号。
功能使用说明书
随机播放
播放音频时,可以随机顺序播放所有曲目,轻触播放界面下方的 [ 始随机播放曲目。
∙[
] 高亮 :随机播放。
∙[
] 复原 :顺序播放。
] 功能图标,开
曲目选择
· 对于 CD/MP3 文件 : ① 轻触除屏幕左上角之外的任何区域可显示控制菜单。
② 轻触 [ ],将显示选曲界面,您可以直接输入数字 进行选择歌曲播放。
调用预设的电台
轻触预设电台列表中的 P1~P6,即可收听预设电台。
远程 / 本地选择
轻触 [ ] 图标,实现远程 / 本地切换功能。 [ 远程 ] :可以接收较弱信号电台 ; [ 本地 ] :只接收信号较强电台。
EQ
轻触 [
] 图标,进入 EQ 设置界面(详见调节音效章节)。
248
播放
插入光盘
您可以播放存储在以下光盘上的视频、音频或图像 : ∙ DVD-5、DVD-9、DVD-10、DVD-18、DVD+/-R、DVD+/-RW
播 放 ...................... 5 插入光盘................... 5 弹出碟片................... 5 视频播放触摸按键分布....... 5 USB/SD 设备................. 5 播放 / 暂停................. 6 随机播放................... 6 曲目选择................... 6 重复播放................... 6 重复 A-B 片断............... 7 选择音频模式............... 7 选择字幕语言............... 7 使用 DVD 菜单 / 标题......... 8 进度条..................... 8 画质调整................... 8 缩放图片................... 8 旋转图片................... 8 VCD/DVD 播放控制菜单........ 9
导航仪说明书
GPS导航仪使用说明书目录声明 (1)注意事项 (1)第一章配件及使用说明书信息 (2)1.1 产品包装 (2)1.2 说明书的使用 (2)第二章外观组件及基本使用说明 (3)2.1 产品外观 (3)2.2 基本使用 (3)2.3 导航仪供电、充电 (4)2.4 开机主界面及主要功能介绍 (8)第三章导航操作使用说明 (8)第四章媒体播放器使用说明 (8)4.1 MP3播放器 (8)4.2 视频播放器 (9)4.3 图片浏览器 (10)4.4 常用工具 (10)4.5 系统设置 (11)声明欢迎使用本公司GPS导航仪(以下简称导航仪)!本导航仪以GPS导航功能为主,支持音频播放、视频播放、图片浏览、电子书阅读等功能,是您出行休闲的好伴侣。
本导航仪采用当前最流行的ARM920T 内核的三星处理器,低功耗,性能优越。
人性化的用户界面,让您可以轻松操控。
请先仔细阅读本《使用说明书》的操作说明与注意事项,并只使用原厂提供的配件,以免造成无法预期的损坏。
如果您未依照正确的程序使用本导航仪或连接不兼容的配件,此行为将导致保修自动失效,甚至可能危害您及他人的安全,对此,本公司不承担任何责任。
由于交通建设的发展,可能出现导航电子地图数据与实际交通指示不完全一样的情况,请您务必遵照道路现状、实地标志等交通规则行驶。
在汽车行驶过程中查看或操作导航仪,可能会导致严重的交通事故,由于使用导致的交通意外及造成的各种损失,本公司不承担任何责任。
本说明书中的图片仅供参考,请以实物为准。
本《使用说明书》仅适用于本导航仪产品。
我公司保留对此《使用说明书》的最终解释权。
请用户将重要资料进行备份,因资料遗失所造成的损失,本公司不承担任何责任。
注意事项∙首次定位请在空旷处进行。
∙切勿在驾驶的同时对导航系统进行操作,保证行车安全。
∙不要自行拆卸设备。
设备有故障,请送与有资格的维修人员进行修理。
∙在以下情况下,不要直接关闭电源:正在导航、播放电影、音乐和图片。
- 1、下载文档前请自行甄别文档内容的完整性,平台不提供额外的编辑、内容补充、找答案等附加服务。
- 2、"仅部分预览"的文档,不可在线预览部分如存在完整性等问题,可反馈申请退款(可完整预览的文档不适用该条件!)。
- 3、如文档侵犯您的权益,请联系客服反馈,我们会尽快为您处理(人工客服工作时间:9:00-18:30)。
途乐大屏导航说明书
途乐大屏导航说明书
第一部分:产品介绍
1.1 产品概述
途乐大屏导航是一种高品质的车载导航系统,旨在为驾驶员提供全面而准确的导航服务。
它采用先进的导航技术和大尺寸的触控屏,使驾驶员能够轻松地查找目的地,并提供实时路况、收费站信息、周边设施和兴趣点等功能。
1.2 产品特点
(1)大尺寸触控屏:途乐大屏导航配备了一块大尺寸触控屏,使驾驶员能够清晰明了地查看地图信息和操作导航功能。
(2)高精度定位:途乐大屏导航采用了高精度的定位技术,
能够准确地定位车辆位置,并提供精确的导航路线规划。
(3)实时路况:途乐大屏导航能够实时获取路况信息,并将
其显示在地图上,帮助驾驶员选择最佳的行驶路线。
(4)多种导航方式:途乐大屏导航提供多种导航方式,包括
车辆导航、步行导航和公交导航,满足用户不同出行需求。
(5)丰富的兴趣点信息:途乐大屏导航内置了大量的兴趣点
信息,包括餐厅、加油站、停车场等,使驾驶员能够方便地找到周边设施。
(6)语音导航功能:途乐大屏导航支持语音导航功能,使驾
驶员能够专注于驾驶,同时听取导航提示。
1.3 产品配置
途乐大屏导航的主要配置如下:
(1)大尺寸触控屏:高分辨率的显示屏,支持多点触控操作。
(2)导航模块:高精度的导航模块,提供准确的定位和导航
功能。
(3)内存和存储:大容量的内存和存储空间,以支持地图数
据的快速加载和存储。
(4)语音模块:高清晰度的语音模块,支持清晰的语音导航
功能。
(5)电源供应:稳定的电源供应,确保导航系统的正常工作
和长时间使用。
第二部分:产品安装和使用
2.1 安装步骤
(1)寻找合适的安装位置:途乐大屏导航需要安装在车辆视
线不被阻挡的位置,且易于操作和观看。
(2)固定导航设备:使用固定装置将导航设备安装在所选择
的位置上,并确保其牢固稳定。
(3)连接电源:将电源线连接到车辆的电源系统,并确保连
接正确无误。
(4)连接天线:将天线连接到导航设备上,并确保信号良好。
(5)测试导航系统:启动导航系统,并进行测试,确保其正
常工作并能够接收卫星信号。
2.2 导航功能使用
(1)地图显示:在导航界面上,可以通过双指缩放、滑动等
手势来调整地图的显示,以便查看感兴趣的区域。
(2)目的地搜索:通过触摸屏上的搜索框,输入目的地的关
键字,如地址、商圈或兴趣点名称,导航系统将自动搜索并显示匹配的结果。
(3)路线规划:在选择目的地后,系统会自动规划最佳的行
驶路线,并提供详细的导航指示。
(4)实时路况:导航系统会实时获取路况信息,并将其显示
在地图上,以帮助驾驶员选择最佳的行驶路线。
(5)语音导航:导航系统支持语音导航功能,驾驶员只需关
注路况,同时听取导航系统的语音提示即可。
(6)兴趣点搜索:导航系统内置了大量的兴趣点信息,如餐厅、加油站、停车场等,可以通过搜索功能查找附近的兴趣点。
(7)离线导航:导航系统支持离线导航功能,用户可以下载
地图数据后,在没有网络的情况下进行导航操作。
(8)多种导航方式:导航系统提供车辆导航、步行导航和公
交导航等多种导航方式,用户可以根据出行需求选择合适的方式。
第三部分:故障排除和维护
3.1 常见故障及处理方法
(1)导航系统无法开机:检查导航设备是否连接了正确的电源,确认电源供应正常;或检查车辆的电池是否已耗尽,需要充电。
(2)无法收到导航信号:检查导航天线是否连接良好,确保
信号线没有断裂或损坏;或检查导航系统的设置,确认卫星信号接收功能已打开。
3.2 维护保养
(1)定期清洁触摸屏:使用干净的软布轻轻擦拭触摸屏,保
持屏幕干净,并避免使用含有化学物质的清洁剂来清洁屏幕。
(2)避免过度震动:避免在使用导航系统时发生剧烈的震动,以避免对导航设备造成损坏。
(3)定期更新地图数据:根据需要,定期通过官方渠道下载
最新的地图数据,以保证导航系统的信息准确性。
第四部分:注意事项
4.1 遵守交通规则:在使用导航系统时,驾驶员应始终遵守交
通规则,并且合理使用导航系统的功能,以确保驾驶安全。
4.2 定期更新软件:根据需要,导航系统的软件可以通过官方
渠道进行更新,以获得更好的性能和功能体验。
4.3 温度和湿度限制:导航系统适用于正常的温度和湿度环境,避免长时间暴露在高温、高湿度或低温环境中。
4.4 停车时注意安全:在停车时,不要紧急离开车辆并携带导
航设备,以防丢失或损坏。
4.5 正确保管:正确保管导航设备和相关配件,避免与尖锐物
体和大型电子设备一起存放,以免造成损坏。
总结:
途乐大屏导航是一款功能强大的车载导航系统,具有大尺寸触控屏、高精度定位、实时路况、丰富的兴趣点信息和语音导航
等特点。
在安装和使用时,需要注意安装位置选择、导航功能操作和维护保养等事项。
我们希望通过这份说明书,能够帮助用户更好地了解和使用途乐大屏导航。
如有任何问题,请及时联系我们的售后服务部门。
