
NS3000电子海图简明使用手册
NS3000电子海图简明使用手册字体: 小中大| 打印发表于: 2010-12-14 12:51 作者: landho 来源: 海员联盟1.通用操作说明Navi Sailor 3000电子海图系统运行在Windows NT下,符合Windows应用软件的标准,很多操作风格都和其他windows应用软件相似,现加以说明:1.1 右下角的主菜单的各菜单项,,除”Ahead”,”Review”,”ERBL”,”Zoom”,”Event”,”Info”即前两排菜单外,均为按钮选择型。
当点击该菜单项时,海图区的下部则会出现该菜单项的详细窗口,用户可在其中选择具体的操作,这时该菜单项呈白色,表示该按钮已按下。
如果要关闭该菜单,可再点击一下即可关闭。
若要选择其他菜单项,可直接点击该菜单项,若该菜单为白色,表示您在之前已对该菜单作过操作,并保存着当时的状态。
您只需点击屏幕左下角标记该菜单名称的一项,即可切换到该菜单项的具体操作。
这样您可同时打开多个菜单,并可在菜单之间切换,方便了用户的操作。
1.2 系统屏幕中快捷按钮:在海图的右边有一竖排快捷按钮,用户可以在操作电子海图的任何时刻点击快捷按钮进行相应的操作,当把光标移动到按钮上时会有该按钮的操作功能说明。
1.3 UTC和Local Time之间的切换,点击右上角当前时间左边时钟形状的按钮,即可在UTC和Local Time之前切换,并会有相应的提示。
UTC和Local Time及时区的设置,是在Config->Time Zone中进行设置。
2.本手册缩略语NS - NaviSailor 船商NaviSailor系列电子海图系统App. - Appendix 附录CMG - Course Made GoodCPP - Controllable Pitch Propeller 可变距螺旋桨ECDIS - Electronic Chart Display and Information System电子海图显示与信息系统ENC - Electronic Navigational Chart 电子导航海图ERBL - Electronic Range and Bearing Line 电子距离方位线ERML - Expected Relative Motion Line 预计相对运动线ETA - Estimated Time of Arrival 预计到达时间ETML - Expected True Motion LineFPP - Fixed Pitch propeller 固定距螺旋桨GMT - Greenwich Mean Time 格林威治时间GPS - Global Positioning System 全球定位系统HDG - heading 艏向HO - Hydrographic Office (国家)航道测量局ME - Main Engine 主机OS - Operationg System 操作系统RML - Relative Motion Line 相对运动线SENC - System Electronic Navigational Chart 系统导航电子海图SOG - Speed Over Ground 对地速度STG - Speed To Go 应采用的速度TML - True Motion Line 真运动线WP - Waypoint 转向点XTE - Cross Track Error 航迹横向误差3.控制面板介绍Navi Sailor 3000电子海图系统的控制面板由一定数量的窗口组成,窗口数目的多少由系统的分辨率决定。
在1024x768的分辨率下,可以显示11个窗口,而在1280x1024下则可显示12个窗口。
要设置系统的分辨率在程序项System Configuration 中设置。
控制面板的窗口显示在海图系统的右边,此外,所有数据窗口都可以用光标拖动。
窗口可以拖动在屏幕的任一区域,使用用户操作起来非常方便。
(如下图)3.1 Sensors and Network 窗口该窗口用来显示该电子海图系统的状态(即是Master还是Slave)及ARPA、雷达卡(RIB)的当前使用状态。
根据系统网络配置的不同,本机的电子海图系统的网络状态可以是如下状态:Master –表示本机作为主系统.Slave –表示本机作为从系统,所有数据都从Master传过来.电子海图系统可以接两套ARPA设备,并可从中任选一套来显示ARPA捕获的目标(具体与ARPA的连接请见技术手册),当显示A时表示正在使用ARPA-A系统,显示B时表示正在使用ARPA-B系统。
AIS –为按钮形状,按下去表示显示AIS目标,弹起时表示不显示AIS目标。
RIB –为按钮形状,按下去表示显示雷达卡(RIB)捕获的目标,弹起时表示不显示。
Overlay –为按钮形状,是否显示雷达叠加的图像。
3.2 time and Ship 窗口该窗口用来显示本船位置的状态及当前时间。
.(1) Position Dropped –表示本船的标识没有显示在海图区域上,在对海图进行操作时本船标识会丢失(当操作海图时,过小的比例尺及查看其他区域的海图等情况时,本船标识会丢失,这是正常现象),只需点击主菜单Ahead或按F8热键,本船标识即会显示在海图上。
(2)系统可显示两种类型的时间:UTC and 本船时间, 要在两种时间之间切换,只需要点击时钟图标。
3.3 Alarms 窗口Alarms窗口用来显示当前报警信息.该窗口显示的信息的说明如下:红色的ALARM闪烁时,表示系统存在未被确认的报警信息。
红色的ALARM不闪烁时,表示系统存在已被确认但还未处理的报警信息。
ARLARM按钮为灰色时,表明不存在报警信息。
此外,如果存在多条报警信息时,点击ALARM按钮可以显示所以所有报警信息列表。
如果报警信息为黑体,表明该信息未被确认。
若为常规字体则表明该报警信息已被确认但未被处理。
当所有报警都被确认后,则会显示“ No new alarms message ”3.4 Primary 窗口该窗口显示本船的坐标及从何GPS获取的位置信息。
当GPS信号丢失或接收到不正确的信号时,窗口内会显示一个特殊的红色三角标识符号。
3.5 Secondary 窗口当存在第二个GPS时,该窗口显示该GPS与主GPS的方位及距离。
当GPS信号丢失或接收到不正确的信号时,窗口内会显示一个特殊的红色三角标识符号。
3.6 COG\SOG\HDG\LOG 窗口该窗口显示本船的一些运行参数。
当某一数据丢失时,该参数的名称会变为红色。
3.7 charts Area 窗口该窗口显示海图的一些状态信息,可以改变海图的比例尺,确定是否自动调用海图等功能。
当选用的比例尺不适当时,会显示红色的提示信息。
Chart number (World) 按钮–点击该按钮可以显示所有含盖本船所在位置的海图列表,用户可以选择想要查看的海图,再点击鼠标即可查看。
1:100,000,000(比例尺按钮)–用户可以点击该按钮来选择适当的比例尺来查看海图。
Autoload –确定是否自动调用海图。
ON –自动调用海图,当本船航行到当前海图边缘时,相应的海图会自动调用。
OFF –不自动调用海图。
FIX –固定海图模式.Man. Corr.按钮–点击该按钮时,按钮按下去时,显示该功能为ON,再点击一下,按钮弹起来时,表明该功能为OFF。
如果存在手工更新修正的物标数据,并确定显示时,该按钮右边会有一亮圆点。
否则则会灰色.DANGEROUS SCALE –表明当前比例尺与海图原始比例尺大于5级的差别,系统认为会影响航行安全,所以显示该提醒信息,以提醒驾驶员注意。
NOT RECOM. SCALE –属于不建议的比例尺,即当前比例尺与海图原始比例尺相差不足5级时,系统会显示该提示信息。
我也来说两句查看全部回复最新回复•landho (2010-12-14 12:53:15)3.8 Add Info Area窗口有两个用户海图添加信息条可以为用户添加不同的信息叠加和显示。
包含有下列数据:– A/B –点击可以打开不同的用户海图以装载不同的海图数据层面(A or B);– Load Chart –点击即可显示已提供的不同用户海图的不同层面,如果装载了用户海图会在上面列出所装载的用户层面,通过按下小三角可以装入其它海图,原有的海图会卸载,以装入你指定的海图3.9 Multy Panel窗口多面板窗口用于显示各种各样的数据,通过按下小三角可以显示5个选页。
System information p系统信息页显示如下信息:– Drift –漂移水流方向和速度;– Safety contour – NS确定的安全等深线尺度;– Current –根据现在船位和时间计算出来的表面流和潮流的相加后的方向和速度;– Tide height –根据现在船位和时间,和最近的潮位参考点计算出的潮高;– Wind –来自风速风向仪的风的方向和速度;– Water temperature –来自水温计的水温;– Depth –来自测深仪的水深.Primary status information 定位状态页显示相关的定位系统的相关数据. 在PS模式下才会显示下列信息:– Fixed UTC –定位时的UTC时间;– Latitude –经度;– Longitude –纬度;– Quality –定位品质;– Satellites –目前用于定位的卫星数;– HDOP – HDOP因素;– Data age –数据有效期;– Station ID –差分台的识别名(仅在差分GPS下有).在ER模式下才会显示下列信息:- Target No –参照目标编号.- Bearing –目标方位值.- Distance –目标距离值.- 95% rmc error –在DR模式下才会显示下列信息:– Time in DR –推算经历的时间.–95% rmc error–Schedule information page进度页显示航路进度的相关信息.装载航路和航路点后会显示相关信息,如果相关参数超出安全设定范围,会以高亮红色显示。
包含下列信息:– WP –显示相关的航路上的航路点,小横线显示航路点;– ETA –根据现在的位置和速度计算出到达预置航路点的预计到达时间– TTG –根据预计到达时间(ETA)计算出的所需到达经历的时间t– PTA – (Planning Time of Arrival) –操作者在一个航路点输入一个计划到达时间用于下面的STG计算;– STG –操作者输入一个航路点的新计划到达时间用于上面的PTA计算;– Voyage plan航行计划–根据目前装载的航路ETA设置PTAle.Route information page航路信息页显示根据下一个航路点计算出的相关信息.– Route –导航模式下航路名;– Next WP –依据哪一个航路点计算;– Course –如果是航线RL型是航线方向,若是GC航线就是切线方向;– XTE –偏离航线距离;– BWP/DWP –下一个航路电的方位和距离;– TTG –根据COG 计算出到下一个航路点所需走的时间;– ETA –根据现在的位置和速度计算出到达下一个航路点的预计到达时间;– New course –下一断航线的航向.Environment Data page环境参数也用于图形显示潮高,潮流和表面流。
SIR-3000用户手册-d 20060315

TerraSIRch SIR-3000用户手册美国地球物理测量系统公司TerraSIRch SIR-3000用户手册 (1)第一部分介绍 (1)1.1仪器配置Unpacking Your System (1)1.2概述General Description (1)硬件连接Hardware Connections (1)第二部分 启动和设置TerraSIRch (6)2.1 硬件设置Hardware Setup (6)2.2 系统启动与显示 Boot-Up and Display Screen (8)数据显示窗口 Data Display Windows (9)2.3 系统模式和菜单:概述 System Modes and Menus (10)系统菜单SYSTEM (10)采集菜单COLLECT (12)雷达Radar (12)扫描SCAN (13)增益GAIN (15)信号位置POSITION (16)滤波器FILTERS (17)回放菜单PLAYBACK Menu (18)扫描SCAN (18)处理PROCESS (19)输出菜单OUTPUT Menu (19)显示DISPLAY (19)数据传输Transfer (20)2.4: 命令栏Command Bar (20)参数设置模式In Setup Mode (20)运行模式(In RUN Mode) (22)第三部分 TerraSIRch设置采集参数 (24)3.1: 二维采集参数设置 (24)第一步:系统启动 (24)第二步: 检查参数 (24)打开参数设置文件 Load SETUP (24)测量轮标定 Survey Wheel Calibration (25)测量轮的缺省设置: (26)检查时间窗口 Check RANGE (27)检查扫描数/单位距离 Check SCN/UNIT (27)检查增益 Check GAIN (28)第三步:资料采集 (28)3.2 三维采集参数设置Setup for Single Line 3-D Collection in TerraSIRch (29)第一步:选择天线,设置参数 (29)第二步:布置测量网格 (29)第三步:测网位置信息 (29)第四步:采集数据 (29)3.3 连续测量Setting Up for Time-Based Data Collection (30)第一步:系统启动。
默纳克3000电气原理图介绍和快捷调试

默纳克3000电气原理图介绍和快捷调试这次找的图纸是一份黙纳克3000的电气图,因为现在新时达和黙纳克的系统比较常用,所以这份图纸可能更有代表性一些吧,不过这个图纸我也是第二次看到,我本人擅长的不是黙纳克的系统,所以也算是和大家一起慢慢的琢磨着看,也就是说对于这份图纸来说我也是一个新人,所以难免有讲错的地方,还请大家多指正,让我一起跟着进步。
之所以不讲我擅长的图纸是因为那种品牌更多的人不熟悉,系统又不像莫纳克新时达这样直观,对于广大新手来说更难理解。
言归正传,拿到一份图纸,先翻看第一页,看右下角,右下角这个小表格里面一般注明这个图纸有多少页,是什么品牌,这一张是画的什么。
这样我们对这一本图纸有个大概的了解。
然后看正文,左边的文字是莫纳克3000的技术标准,画图的原则,右边是一个目录,那一页画的什么,方便我们去找。
如果是第一次接触一个电梯的图纸,肯定是很多原件看不懂的,不知道是干什么的,我们应该首先看元件代码表,我们看目录,第二页是电气代号说明,也就是元件代码表。
现在先翻到第二页这一页密密麻麻,都是符号,我们从上往下看,第一行,最左边1BFS 他的含义是缓冲器开关1,也就是说只要再图纸上看到BFS就是缓冲器开关,他的位置在哪呢?HTW ,这是什么意思?看右下角,HTW是井道,也就是说缓冲器开关是在井道里,在这里说一下,这个图纸等于是把底坑也划到井道里了,因为在右下角我们只能看到四个位置说明,轿厢,控制柜,主机,井道。
然后再看第三行,AB,就是警铃,在轿厢安装。
看图就是这样看,对着元件代码,能找到所有的东西第三张就是正经的图纸了,先看右下角,380电源供电回路,这就说明这一页画的是电源回路,看最后边,标的有ABNDEF,最上面标的12345678,这就是图纸的坐标,在整页图纸上找一个东西,只要把坐标横纵坐标对起来就知道在那一块了,比如说2B,写的QF1(10A)对照第二页的代码表,我们知道这是一个380的空开,最大的允许电流是10A,也就是说这个空开上电流如果超过10A空开就会动作,切断电路。
ENS3000使用手册
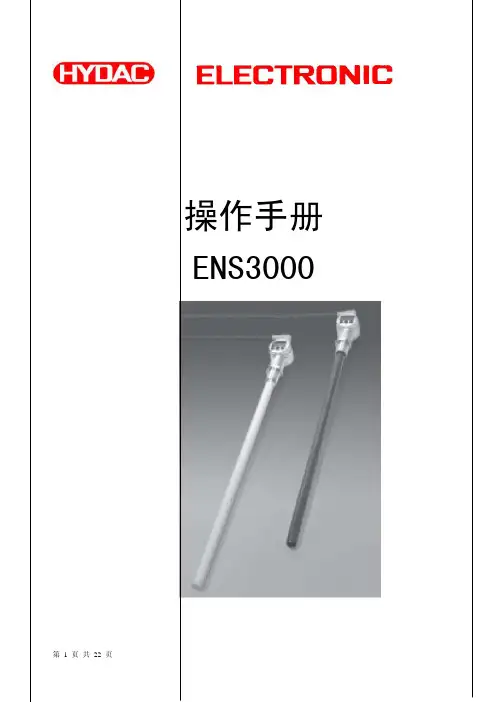
操作手册ENS3000目 录1. 功能2. 安装3. 操作键4. 数显5. 输出功能5.1. 开关量输出5.1.1. 开关点设置5.1.2. 视窗功能设置5.2. 模拟量输出5.3. 开关点和延滞的设置, 视窗功能的开关值设置5.4. 开关量输出的设置范围6. 基本设置6.1. 基本设置的变更6.2. 基本设置的概要7. 重置峰值8. 编程锁定8.1. 更改工作状态下的编程锁定8.2. 更改总编程锁定9. 故障信息10. 调整注意11. 线路图12. 技术参数12.1. ENS3000不带温度传感器12.2. ENS3000带温度传感器13. 订货代号14. 附件14.1. 用于电气连接14.2. 用于机械连接15. 安装尺寸16. 应用案例17. 记录z在小型塑料油箱内,应尽量安装在油箱的正中附近。
z如果介质污染较严重,设备应安装在有紊流的地方(比如:进/出口)z如果需要安装在加长杆上,则传感器必须安装在加长杆的正中,建议使用60mm 直径以上的加长杆,以保证测得数据正确。
z任何金属物体(比如金属管或加强筋)必须距离传感器的工作区60mm以上,否则它们会被误认为是被测量物。
z安装在油箱上,必须离油箱壁20mm以上可减少电磁干扰的注意事项:z用尽量短的屏蔽线连接z屏蔽线(如LIYCY 4x0.5mm2)z为减少干扰,必须根据环境条件由专业人员连接屏蔽线z必须避免接近会引起干扰的用户装置、电器、电子产品的连线,越远越好机械连接圈末端需要接地,如果未直接接地(如塑料油箱),我们建议使用1mm2短线接地。
ENS3000必须接近垂直安装,如果不垂直安装,则测量液位会根据倾斜角度增加,(如倾斜角度5°则±0.5%,倾斜角度10°则±1.5%)3. ENS3000的操作按键4. 数字显示通电后,该装置先短时显示“ENS”,随后显示当前液位值(基本设置)。
Niv是为液位的意思如果液位低于测量区域,则显示以下内容显示屏闪烁在基本设置中,可改变显示的字样:z显示液位最大值“n.TOP”该值为从ENS3000开启或从最后一次设置开始测出的系统中液位最大值 z显示液位最小大值“n.MIN”该值为从ENS3000开启或从最后一次设置开始测出的系统中液位最小值 z显示当前温度“TEMP”z显示温度最大值“T.TOP”该值为从ENS3000开启或从最后一次设置开始测出的系统中温度最大值 z显示温度最小值“T.MIN”该值为从ENS3000开启或从最后一次设置开始测出的系统中温度最小值如果当前压力低于产品的量程范围的,则显示“000”或预设停止值。
电子海图详细手册完整版

电子海图详细手册 HEN system office room 【HEN16H-HENS2AHENS8Q8-HENH1688】英国船商有限公司电子海图显示与信息系统(Navi-Sailor 2400 ECS/ECDIS)操作手册二OOO年七月S E T S T H E S T A N D A R D1.1介绍及注意事项1.1.1版权TRANSAS MARINE 是英国船商有限公司的注册商标。
NAVI-SAILOR是船商公司电子海图产品的注册商标。
软件版权在公司产品许可证中有规定,本手册属于船商公司产品,没有船商公司书面许可,不得复制及转载。
1.1.2 电子海图使用注意事项Navi-Sailor 2400 ECDIS(以下简称NS)应当与国家航道测量局公布的S57格式的海图配合使用,并且根据航道测量局的要求及时更新。
如果NS使用其它格式的海图,则应注意以下几点:船商生产的格式海图不是为了替代官方的海图。
船商海图无需包括最新的更新,只有与官方纸海图配合才能使用。
屏幕上显示的船位只是坐标的图形指示,实际船位要依靠与定位传感器如GPS连接。
在使用NS进行航线设计前,首先应使用适当比例尺的纸海图,并依据最新航海通告进行更新。
在将纸海图的其它数据转换到NS时,应首先注意纸海图数据和船商海图使用的WGS-84数据的可能差别。
1.2如何使用用户手册1.2.1用户手册简介及目的本手册的编排能使用户方便地找到所需信息,包含以下几部分:1.简介2.NaviSailor系列软件的基本功能及使用界面介绍3.NaviSailor各功能详细介绍4.附录5.NaviSailor软件"技术参考"手册简要介绍了NS系统的各个功能,并提供了各菜单功能的索引1.2.2本手册对操作描述方式的解释略1.2.3 本手册缩略语NS - NaviSailor 船商NaviSailor系列电子海图系统App. - Appendix 附录CMG - Course Made GoodCPP - Controllable Pitch Propeller 可变距螺旋桨ECDIS - Electronic Chart Display and Information System电子海图显示与信息系统ENC - Electronic Navigational Chart 电子导航海图ERBL - Electronic Range and Bearing Line 电子距离方位线ERML - Expected Relative Motion Line 预计相对运动线ETA - Estimated Time of Arrival 预计到达时间ETML - Expected True Motion LineFPP - Fixed Pitch propeller 固定距螺旋桨GMT - Greenwich Mean Time 格林威治时间GPS - Global Positioning System 全球定位系统HDG - heading 艏向HO - Hydrographic Office (国家)航道测量局ME - Main Engine 主机OS - Operationg System 操作系统RML - Relative Motion Line 相对运动线SENC - System Electronic Navigational Chart 系统导航电子海图SOG - Speed Over Ground 对地速度STG - Speed To Go 应采用的速度TML - True Motion Line 真运动线WP - Waypoint 转向点XTE - Cross Track Error 航迹横向误差2NaviSailor基本功能及使用界面介绍NS使用目的及操作模式2.1.1 NS使用目的及性能NaviSailor系列是为了保障航行安全的海图电子信息系统。
杰森9SX3000IM海上UPS商品说明说明书
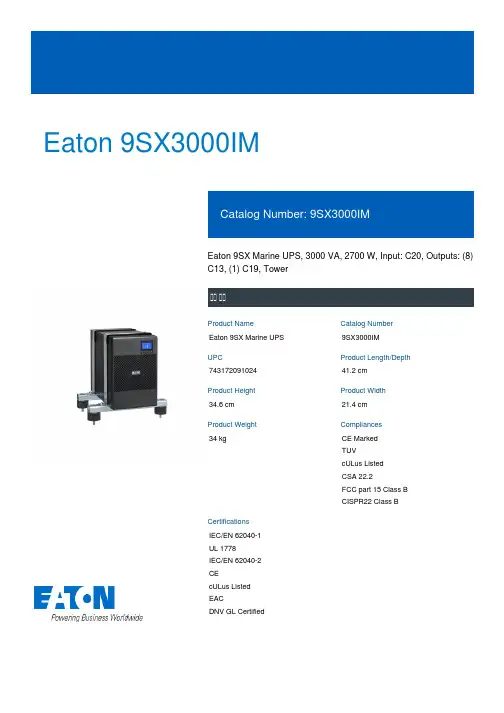
Eaton 9SX3000IMEaton 9SX Marine UPS, 3000 VA, 2700 W, Input: C20, Outputs: (8) C13, (1) C19, TowerEaton 9SX Marine UPS 9SX3000IM74317209102441.2 cm34.6 cm 21.4 cm34 kg CE MarkedTUVcULus ListedCSA 22.2FCC part 15 Class BCISPR22 Class BIEC/EN 62040-1UL 1778IEC/EN 62040-2CEcULus ListedEACDNV GL CertifiedProduct Name Catalog NumberUPC Product Length/DepthProduct Height Product WidthProduct Weight CompliancesCertificationsSecondary frequency - max60 HzOutput waveformSine waveMax number of battery packs4Wattage2700 WOutput power factor0.9Form factorTowerVoltage distortion output (linear load) - max3Includes network cardNoInput connectionC20Input voltage - min140 VOutput voltage - max240 VSecondary frequency - min50 HzSoftware compatibilityEaton Intelligent Power Manager, Eaton Intelligent Power ProtectorBattery replacementHot-swappable internal batteries and extended battery modules (EBMs)Battery typeSealed, lead-acidEfficiency92.4Special featuresDNV-GL approvedDouble conversion topology Constantly monitors power conditions and regulates voltage and frequency Provides more real power (watts) to protect more equipment with a 0.9 power factorEnergy efficient, reduce energy and cooling costs Internal bypass allows service continuity in case of UPS faultNext-generation graphical LCD displayMeter energy consumption (at the UPS level)Hot swappable batteries Advanced Battery Management (ABM) technology to increase battery lifetimeLong backup time with up to 4 optional EBMConstruction typeFree standing modelOutput voltage - min200 VColorBlackExtended battery capability YesOutput voltage range200/208/220/230/240 V +/- 2%TopologyOnline/Double-conversionBTU RatingOnline: 818Efficiency (eco-mode)97.4Runtime at half load15.5 minInput nominal voltage230V default (200/208/220/230/240V)Input power factor>.99Input frequency range40-70 HzInternal bypassYesInput voltage - max276 VVoltage typeACPhase (output)1Battery managementABM & Temperature compensated chargingmethod (user selectable) Automatic battery testDeep discharge protection Automatic recognition ofexternal battery unitsAuto shutdown functionYesNumber of Outputs C138Number of Outputs C191VA rating3000 VAPotential free switch contactYesReceptacle(8) C13, (1) C19Phase (input)1Package contentsUPSQuickstart guide(2) IEC-IEC output cables Serial cableUSB cableNoise level<45 dB at 1 meterFeed type1Runtime graphView runtime graphUser interfaceMultilingual graphical LCD displayBattery quantity8Voltage230VHot swap powerNoInput cord length1.8mTemperature range0° to 40°C (32° to 104°F)Ethernet interfaceNoCommunicationUSB port (HID compliant) Serial port (RS232)Mini-terminal block forremote power offMini-terminal block foroutput relayDry contacts (2 outputs, 1 input, optocoupler, DB9)Relative humidity0-96% non-condensingRack mounting kitNoEaton Corporation plcEaton House30 Pembroke RoadDublin 4, Ireland © 2023 Eaton. All Rights Reserved. Eaton is a registered trademark.All other trademarks areproperty of their respectiveowners./socialmedia 50/60 Hz6 min40 Hz12 V / 9 AhUPS230V default (200/208/220/230/240V)One slot for optional communication card200-276 V (140 V-276 V with derating)50/60 Hz70 Hz3000 mOutput frequencyRuntime at full loadPrimary frequency - minBattery ratingTypeOutput nominal voltageExpansion slotsInput voltage rangeNominal frequencyPrimary frequency - maxAltitude。
NS3000电子海图简明使用手册

NS3000电子海图简明使用手册字体: 小中大| 打印发表于: 2010-12-14 12:51 作者: landho 来源: 海员联盟1.通用操作说明Navi Sailor 3000电子海图系统运行在Windows NT下,符合Windows应用软件的标准,很多操作风格都和其他windows应用软件相似,现加以说明:1.1 右下角的主菜单的各菜单项,,除”Ahead”,”Review”,”ERBL”,”Zoom”,”Event”,”Info”即前两排菜单外,均为按钮选择型。
当点击该菜单项时,海图区的下部则会出现该菜单项的详细窗口,用户可在其中选择具体的操作,这时该菜单项呈白色,表示该按钮已按下。
如果要关闭该菜单,可再点击一下即可关闭。
若要选择其他菜单项,可直接点击该菜单项,若该菜单为白色,表示您在之前已对该菜单作过操作,并保存着当时的状态。
您只需点击屏幕左下角标记该菜单名称的一项,即可切换到该菜单项的具体操作。
这样您可同时打开多个菜单,并可在菜单之间切换,方便了用户的操作。
1.2 系统屏幕中快捷按钮:在海图的右边有一竖排快捷按钮,用户可以在操作电子海图的任何时刻点击快捷按钮进行相应的操作,当把光标移动到按钮上时会有该按钮的操作功能说明。
1.3 UTC和Local Time之间的切换,点击右上角当前时间左边时钟形状的按钮,即可在UTC和Local Time之前切换,并会有相应的提示。
UTC和Local Time及时区的设置,是在Config->Time Zone中进行设置。
2.本手册缩略语NS - NaviSailor 船商NaviSailor系列电子海图系统App. - Appendix 附录CMG - Course Made GoodCPP - Controllable Pitch Propeller 可变距螺旋桨ECDIS - Electronic Chart Display and Information System电子海图显示与信息系统ENC - Electronic Navigational Chart 电子导航海图ERBL - Electronic Range and Bearing Line 电子距离方位线ERML - Expected Relative Motion Line 预计相对运动线ETA - Estimated Time of Arrival 预计到达时间ETML - Expected True Motion LineFPP - Fixed Pitch propeller 固定距螺旋桨GMT - Greenwich Mean Time 格林威治时间GPS - Global Positioning System 全球定位系统HDG - heading 艏向HO - Hydrographic Office (国家)航道测量局ME - Main Engine 主机OS - Operationg System 操作系统RML - Relative Motion Line 相对运动线SENC - System Electronic Navigational Chart 系统导航电子海图SOG - Speed Over Ground 对地速度STG - Speed To Go 应采用的速度TML - True Motion Line 真运动线WP - Waypoint 转向点XTE - Cross Track Error 航迹横向误差3.控制面板介绍Navi Sailor 3000电子海图系统的控制面板由一定数量的窗口组成,窗口数目的多少由系统的分辨率决定。
CCS3000手册_new
CCS3000 使用手册内容内容 (2)插图 (3)1简介...................................................................................................... 错误!未定义书签。
2启动. (4)2.1解包 (4)2.2物理安装 (4)2.3电气连接 (5)3PC设置软件 (7)3.1密码 (9)3.2设置 (10)3.2.1测量模式 (11)3.2.2现场总线配置.......................................................................... 错误!未定义书签。
3.2.3串行l/4-20mA 配置 (11)3.2.4产品代码配置 (12)3.2.5产品过滤 (13)3.2.6以太网设置 (15)4标定...................................................................................................... 错误!未定义书签。
4.1.1纠正偏差方法 (16)4.1.2线性衰退 (17)5仪表选项............................................................................................... 错误!未定义书签。
5.1涡流冷却面板的连接................................................................ 错误!未定义书签。
插图插图 1 仪器安装配置 (5)插图 2 仪器连接 (6)插图 3 由自带电源驱动的远距离显示器, 非隔绝回路#1 (7)插图 4 由外部电源驱动的远距离显示器, 非隔绝回路#2 (7)插图 5 启动主屏幕 (8)插图 6 连接和开试测试后的主屏幕 (9)插图 7基本设置屏幕 (10)插图 8 测试设置屏幕 (10)插图 9 系列/4-20mA 设置屏幕 (11)插图 10产品代码设置–一般参数 (12)插图 11 产品规格参数 (13)插图 12阻尼&过滤带效果图 (14)插图 13 以太网设置 (15)插图 14 标定屏幕 (16)插图 15 发光管 (18)插图 16 嵌入式面板视图窗口 (18)插图 17观察管 (19)插图 18气动取样器 (19)1 简介感谢选用Sensortech Systems, Inc.附属公司MoistTech的测量仪。
【二副业务】FURUNO古野电子海图用户指南分享
【二副业务】FURUNO古野电子海图用户指南分享1 IntroductionThe purpose of this guide is to provide equipment-specific information to assist users inmanaging their AVCS ENC holdings.This guide should be used in conjunction with the AVCS User Guide, as well as the ECDIS Operators Manual or other documentation as supplied by the equipment manufacturer.The actual instructions and screenshots in this guide are based on the version of theFURUNO 3000 Series ECDIS installed in the UKHO as detailed on the front cover. There maybe minor differences between certain models (i.e. screen layouts may vary).2 Data ManagementAll electronic chart licensing and data management operations are carried out through the “Charts” Option on the Top Toolbar and then from the various Tabs on the left hand side ofthe Home screen on the FURUNO ECDIS:3 The User Permit Number (UPN)The User Permit Number is a 28 character alphanumeric string that is unique to each ECDIS installation or group of ECDIS, e.g. multiple bridge installations. The User Permit Numbershould have been supplied at the time of delivery and must be used when ordering an AVCS licence.To check the 'User Permit Number’:License: ENC → ENC User Permit → ENC User Permit’ Box1. Select 'License’ on the Home screen2. In the 'Licenses’ window, select 'ENC User Permit’The User Permit then appears in the 'ENC User Permit’ Box.4 Deleting ENC DataNew AVCS customers who had previously subscribed to other ENC services are strongly recommended to remove (purge) all ENC Permits and ENCs from the system before installing AVCS. For more information please refer to the 'Data Cleansing’ section in the AVCS UserGuide.Deleting 1 Chart OnlyManage Charts: Select Chart to be deleted → Delete Charts1. Select 'Manage Charts’ on the Home screen2. In the 'Manage Charts’ window, tick the Chart to be deleted3. Click on 'Delete Charts’An 'Attention’ window with the message “All selected Charts will be deleted. Do you wish to continue?” is then displayed. Click 'OK’ to confirm the deletion of the selected Chart.A final 'Attention’ window then confirms the deletion. Click 'OK’.The deleted Chart will disappear from the 'Licenses’ window.Deleting ALL ChartsManage Charts:Right-click to left of Type box → Select All → Delete Charts1. Select 'Manage Charts’ on the Home screen2. In the 'Manage Charts’ window, right-click the block to the left of the 'Type’ box.3. 2 options then appear 'Select All’ and 'Deselect All’. Click on 'Select All’.4. When all Charts are selected with a Tick in front of them, click on 'Delete Charts’An 'Attention’ window with the message “All selected Charts will be deleted. Do you wish to continue?” is then displayed. Click 'OK’ to confirm the deletion of all the selected Charts.A final 'Attention’ window then confirms the deletion. Click 'OK’.The deleted Charts will disappear from the 'Manage Charts’ window.5 Deleting ENC PermitsIf the user has previously subscribed to another ENC service it is advised to remove these ENC permits from the ECDIS system before use. The user must select the cells for which permits are to be deleted. In most instances this will simply involve selecting all cells. In certain circumstances it may be required to remove permits for individual cells, in this case simply select the cells for which permits need to be deleted.Deleting 1 Permit onlyLicense: ENC → Select Permit to be deleted → Delete Licenses1. Select 'License’ on the Home screen5. In the 'Licenses’ window, select the Chart for which the Permit is to be deleted, with a Tick in front of them6. Click on 'Delete Licenses’An 'Attention’ window with the message 'Selected group will be deleted. Do you wish to continue?’ is then displayed. Click 'OK’ to confirm the deletion of all the selected Charts.A final 'Attention’ window then confirms the deletion: '1 ENC Permit removed’. Click 'OK’. The deleted Chart will disappear from the 'Licenses’ window.Deleting ALL PermitsLicense: ENC → Select All Permits → Delete Licenses1. Select 'License’ on the Home screen2. In the 'Licenses’ window, right-click the block to the left of the 'Type’ box.3. 2 options then appear 'Select All’ and 'Deselect All’. Click on 'Select All’.4. Once all the Permits to be deleted are selected with a tick in front of them, click 'Delete Licences’ on this 'Licenses’ window.An 'Attention’ window with the message “Selected group will be deleted. Do you wish to continue?” is then displayed. Click 'OK’ to confirm the deletion of all the selected Charts.A final 'Attention’ window then confirms the deletion: 'XXX ENC Permits removed’. Click 'OK’. The deleted Charts will now disappear from the 'Licenses’ window.6 The Public KeyThe Admiralty Vector Chart Service currently uses the IHO.CRT, issued by the International Hydrographic Organisation, to authenticate its AVCS ENCs. However, the Furuno 3000 ECDIS uses the IHO.PUB Public Key which is included in all AVCS Media.To view the installed Public KeyPublic Key: Select Public Key window → Display Content1. Select 'Public Key’ Menu on the Home screen2. In the 'Select Public Key’ window appearing, when a Public Key is already activated, an 'A’populates the box next to the selected Public Key3. Click on 'Display Content’ to view the already activated Public KeyTo install a new Public KeyPublic Key: Select Public Key window → Load New Key1. Select 'Public Key’ Menu on the Home screen2. In the 'Select Public Key’ window appearing, click on 'Load New Key’ to install a new Public KeyOn the next 'Open File’ window, select the location where the new Public Key to install is stored (i.e. CD, DVD, USB). Select the IHO.PUB and click 'Open’.An 'Attention’ message confirming the installation of the new Public Key will appear on the screen. Click 'OK’.3. Highlight the new Public Key and select 'Activate’ to select the required Public Key to be installed4. An 'A’ will then populate the box next to the selected Public Key.5. Click 'Close’ to finish.7 Installing ENC PermitsTo install AVCS ENC Permits:License: Licenses → ENC Tab → Install Licenses → Select File window → Permit.txt file →Open → OK1. Select 'License’ on the Home screen and in the 'Licenses’ window, select the 'ENC’ Tab2. Select 'Install Licenses’In the next 'Select File’ window, highlight the Permit.txt file from the selected source location (i.e. USB), click 'Open’ and then 'OK’If needed, the Permit List can then be exported to external Media (i.e. CD, DVD, USB) by clicking on the 'Export List’ option:8 Installing AVCS Base CDsThere are currently 9 AVCS Base CDs but this number will grow as more ENCs become available for distribution within AVCS. It is unlikely that users will need to install all of the CDs in order to load all licensed ENCs. Reference to the Schedule A can avoid the unnecessary loading of some CDs and save the user time.The process described here should be used in almost all circumstances as it will automatically select data to be loaded according to the permit file installed by the user.Note: Ensure the latest permits have been installed before attempting to install any dataAuto Load: Search File Media → OK → Install Chart Data1. After having inserted the first AVCS Base CD identified in the Schedule A into the appropriate drive (i.e. D/Q), click on 'Auto Load’ on the Home screenAn 'Attention’ window then appears warning that 'this process takes time to complete and the operation speed of the system will decline. Do you wish to continue?’. Click 'OK’.Another 'Attention’ window confirms how many 'Charts are contained in the inserted AVCS Media and how many can be installed (based on the previously installed Permit file). Do you wish to continue?’. Click 'OK’.Note: Whenever Charts are cancelled, they will automatically be removed from the system. When this happens, this will be communicated in the 'Error/Warning Guidance’ window at the end of the installation.The AVCS Media will be read and a progress Bar will display on the 'Install Chart Data’ window on the screen.When the installation is complete, a window confirming the installation will appear, click'Confirm’(this window can take some time to appear even if the Progress Bar shows a completion rate of 100%)To check the details of the data installation, click on 'Show Details’ on the 'Install Chart Data’window. Click 'Finish’ to close. This process should be repeated until all required Base CDs have been installed.Note: Make sure that all the required AVCS Base CDs have been inserted and the import operations completed before installing the latest Update CD. Updates cannot be applied unless the ENC base file is present in the system database.9 Installing AVCS Update CDThe Weekly AVCS Update CD must only be inserted into the CD Drive after having installed the latest required Base CD(s).Insert the latest AVCS Update CD into the appropriate Drive (i.e. D/Q)Note: Base CDs are re-issued about every 6 to 8 weeks. The AVCS Update disc will indicate which Base disc week must have been installed. It is important that users do not attempt to load an Update CD that is not consistent with the Base CDs.Auto Load: Search File Media → OK → Install Chart Data1. Click on 'Auto Load’ on the Home screenAn 'Attention’ window then appears warning that 'this process takes time to complete and the operation speed of the system will decline. Do you wish to continue?’. Click 'OK’.Another 'Attention’ window confirms how many 'Charts are contained in the inserted AVCS Media and how many can be updated (based on the previously installed Permit file). Do you wish to continue?’. Click 'OK’.Note: Whenever Charts are cancelled, they will automatically be removed from the system. When this happens, this will be communicated in the 'Error/Warning Guidance’ window at the end of the installation.The AVCS Media will be read and a progress Bar will display on the 'Install Chart Data’ window on the screen.When the installation is complete, a window confirming the installation will appear, click'Confirm’(this window can take some time to appear even if the Progress Bar shows a completion rate of 100%)To check the details of the data installation, click on 'Show Details’ on the 'Install Chart Data’window. Click 'Finish’ to close.10 Installing AVCS DVDWhen using the AVCS DVD Service, only one disc needs to be installed because it contains all the Base ENCs and Updates up to the date of its issue.Insert the latest AVCS DVD into the appropriate Drive (i.e. D/Q)Note: The loading process within the ECDIS will be very similar to that required for the AVCS CD Service however there are some minor differences which are detailed belowAuto Load: Search File Media → OK → Install Chart Data1. Click on 'Auto Load’ on the Home screenAn 'Attention’ window then appears warning that 'this process takes time to complete and the operation speed of the system will decline. Do you wish to continue?’. Click 'OK’. Another 'Attention’ window confirms how many 'Charts are contained in the inserted AVCS Media and how many can be installed (based on the previously installed Permit file). Do you wish to continue?’. Click 'OK’.Note: Whenever Charts are cancelled, they will automatically be removed from the system. When this happens, this will be communicated in the 'Error/Warning Guidance’ window at the end of the installation.The AVCS Media will be read and a progress Bar will display on the 'Install Chart Data’ window on the screen.When the installation is complete, a window confirming the installation will appear, click'Confirm’(this window can take some time to appear even if the Progress Bar shows a completion rate of 100%)To check the details of the data installation, click on 'Show Details’ on the 'Install Chart Data’window. Click 'Finish’ to close.11 Installing AIO PermitsThe Admiralty Information Overlay (AIO) is installed in the Furuno FMD 3000 ECDIS by installing the Cell GB800001 included in the PERMIT.TXT file and then the AIO Data.To install the AIO Permits:License: Licenses → ENC Tab → Install Licenses → Select File window → Permit.txt file →Open → OK1. Select 'License’ on the Home screen and in the 'Licenses’ window, select the 'ENC’ Tab2. Select 'Install Licenses’In the next 'Select File’ window appearing, highlight the Permit.txt file which contains the AIO Permit from the selected source location (i.e. USB), click 'Open’ and then 'OK’3. The AIO Permit will now appear in the Licenses List12 Installing AIO CDThe AIO Media can only be installed when the usual AVCS S-63 1.1 Data has been previously installed. After having previously installed the Permit for the AIO Cell GB800001, the AIO Media now needs to be installed.Insert the latest AIO CD into the appropriate drive (i.e. D/Q)Auto Load: Search File Media → OK → Install Chart Data1. Click on 'Auto Load’ on the Home screenAn 'Attention’ window then appears warning that 'this process takes time to complete and the operation speed of the system will decline. Do you wish to continue?’. Click 'OK’.Another 'Attention’ window confirms how many 'Charts are contained in the inserted AVCS Media and how many can be installed (based on the previously installed Permit file). Do you wish to continue?’. Click 'OK’.The AIO CD will be read and a progress Bar will display on the 'Install Chart Data’ window on the screen.When the installation is complete, a window confirming the installation will appear, click'Confirm’(this window can take some time to appear even if the Progress Bar shows a completion rate of 100%)To check the details of the data installation, click on 'Show Details’ on the 'Install Chart Data’window. Click 'Finish’ to close.2. Once the AIO Permits and Media have been installed, the AIO is enabled3. If needed, the system will give the user the option of then disabling the AIO from the'Licenses’ window:13 Systems ChecksThe user has the option to review the status of all installed ENCs on the Furuno FMD 3000 ECDIS by consulting various Reports.1. Select 'Record’ on the Home screen2. Select 'Chart Log’3. Select 'ENC’A Report containing all the installed Cells then appears on the screen. This Report contains information about all the Update status of the Cells currently installed on the system. Select 'Close’ to close the Report.The Furuno FMD 3000 ECDIS displays the Cell status of the Cells installed within a colour coding system on the Geographical Display:Green: The Permit is valid and the ENC is available for use in SENC format. If the source of the ENC is a RENC, then the ENC is also up-to-date. If the source of the S-57 vector chart is something other than a RENC then all loaded updates are included into the SENC.Orange: You have a valid Permit and the ENC is available for use in SENC format but it is either not up-to-date or has been cancelled. This could be for several reasons, either the SENC is from a previous edition, the latest SENC update was missed or the ENC has been cancelled.Red: If an ENC is installed in the SENC but does not have a corresponding permit installed then the ENC is no longer available for display in the viewer.Blue: The conversion of the Cells from RENC to SENC as somehow failed during the conversion process. This can be due to a software upgrade or an issue with the data itself preventing the Furuno from successfully converting to SENC. For example, one Cell was up-to-date before a software upgrade and was not updated when the software was upgraded. Then the Cell would show as blue until the conversion process is completed. Contrary to the Magenta colour which means that the RENC to SENC conversion was not even started. Magenta: You have a permit to use the ENC, but the installed ENC is not available in SENC format and thus you cannot use the ENC currently.It is also possible to check the updating status of all Cells installed within the Cell Status mode:1. Select 'Cell Status’ on the Home screen2. The 'Cell Status’ window then appears displaying the Updating status of all Cells installed: If screenshots need to be taken (i.e. report specific issues), this is carried out in the Furuno FMD 3000 by clicking on 'Capture Screenshot’ on the Home screen.When the required screenshot is taken, it will be automatically saved on the system within the 'Settings’ Tab on the top MenuIn the next 'Settings’ window, find the screenshot previously taken (usually at the bottom of the drop down list), highlight it with a tick on its left hand side and then click on 'Export’. This will open a new window where you can then save this screenshot on the preferred source location (i.e. USB).14 TroubleshootingMany of the difficulties that could be experienced when using the Admiralty Vector Chart Service with this system can be avoided by carefully following the instructions in this guide. However, issues that are known to have caused confusion in the past are detailed in the Frequently Asked Questions (FAQ) section which can be found at:If you encounter problems that are not solved by referring to the FAQs, you may wish to seek Technical Support. Please see the section below for contact details.Who should you contact?You will receive the most effective support if you address your initial query to either yourECDIS Manufacturer or ADMIRALTY Chart Agent, but in certain circumstances you may need to contact the UKHO Customer Services.When reporting a chart related problem it is useful if you can provide the following details:> Licence number> Vessel name> ECDIS/Software Manufacturer> Details of error message – Including 'SSE’ error code> Screen shot(s) of error> Details of Base Discs used (date)> Details of Update CD used (date)> Details of Permits used (date)> Details of Cell number(s) errors apply to> Have there been any configuration changes to system(s)> Details of User Permit(s) and PIN Number(s)Emergency Chart Permit GenerationIn certain circumstances it may be necessary for a vessel to get access to an AVCS chart at very short notice, for instance if a route needs to be diverted due to a medical or safety emergency.In these emergency circumstances only, individual AVCS ENC Permits can be obtained from the UKHO 24 hours a day, 365days a year.To obtain the AVCS emergency permit, please quote:> Vessel Name> ECDIS User Permit Number> Required ENCsThe permits can be sent directly to the vessel by email wherever possible, by fax, or simply by reading the characters out over the telephone or radio.Please contact UKHO Customer Services using the contact details below:。
珠江富士3000
1)MOD : 表示电梯的运行模式。
ÖSTARTUP : 系统启动准备中。
ÖINSPECTION : 外部检修运行模式。
ÖOPP INSPECTION : OPP检修运行模式。
ÖCALIBRATION : 楼层高测定模式。
ÖPARKING : 锁梯模式。
ÖAUTO : 自动运行模式。
ÖOPP AUTO : OPP自动运行模式。
ÖAUTO REPEAT : 反复运行模式。
ÖINDEPENDENT : 独立运行模式。
ÖATTENDANT : 司机操作模式。
ÖFIREMAN CONTROL : 消防运行模式。
ÖEACH FLOOR STOP : 每层停止模式。
ÖFIRE CONTROL : 火灾管制运行模式。
ÖSEISMIC VERY LOW : 地震管制运行模式。
ÖSEISMIC LOW : 地震管制运行模式。
ÖSEISMIC HIGH : 地震管制运行模式。
ÖUPS CONTROL : 停电管制运行模式。
ÖGENERATOR CONTROL : 发电机运行模式。
ÖMOVING HOUSE : 搬家运行模式。
ÖOIL TEMP LOW : 低温检测油温传感器模式。
ÖOIL TEMP HIGH : 高温检测油温传感器模式。
ÖAUTO TUNING : 马达自学习功能模式。
ÖRESET : 系统重新设定中。
2)FLR : 表示现在电梯所在楼层。
3)DIR : 表示电梯运行方向。
停止时表示 ‘ - ’。
4)ACT : 表示运行状态以及错误警告。
ÖSystem Check : 正在准备 系统开动中。
ÖNot Calibration : 楼层高度测定没完毕。
★ 自动运行一定需要楼层高测定完毕。
NS3000电子海图简明使用手册
NS3000电子海图简明使用手册字体: 小中大| 打印发表于: 2010-12-14 12:51 作者: landho 来源: 海员联盟1.通用操作说明Navi Sailor 3000电子海图系统运行在Windows NT下,符合Windows应用软件的标准,很多操作风格都和其他windows应用软件相似,现加以说明:1.1 右下角的主菜单的各菜单项,,除”Ahead”,”Review”,”ERBL”,”Zoom”,”Event”,”Info”即前两排菜单外,均为按钮选择型。
当点击该菜单项时,海图区的下部则会出现该菜单项的详细窗口,用户可在其中选择具体的操作,这时该菜单项呈白色,表示该按钮已按下。
如果要关闭该菜单,可再点击一下即可关闭。
若要选择其他菜单项,可直接点击该菜单项,若该菜单为白色,表示您在之前已对该菜单作过操作,并保存着当时的状态。
您只需点击屏幕左下角标记该菜单名称的一项,即可切换到该菜单项的具体操作。
这样您可同时打开多个菜单,并可在菜单之间切换,方便了用户的操作。
1.2 系统屏幕中快捷按钮:在海图的右边有一竖排快捷按钮,用户可以在操作电子海图的任何时刻点击快捷按钮进行相应的操作,当把光标移动到按钮上时会有该按钮的操作功能说明。
1.3 UTC和Local Time之间的切换,点击右上角当前时间左边时钟形状的按钮,即可在UTC和Local Time之前切换,并会有相应的提示。
UTC和Local Time及时区的设置,是在Config->Time Zone中进行设置。
2.本手册缩略语NS - NaviSailor 船商NaviSailor系列电子海图系统App. - Appendix 附录CMG - Course Made GoodCPP - Controllable Pitch Propeller 可变距螺旋桨ECDIS - Electronic Chart Display and Information System电子海图显示与信息系统ENC - Electronic Navigational Chart 电子导航海图ERBL - Electronic Range and Bearing Line 电子距离方位线ERML - Expected Relative Motion Line 预计相对运动线ETA - Estimated Time of Arrival 预计到达时间ETML - Expected True Motion LineFPP - Fixed Pitch propeller 固定距螺旋桨GMT - Greenwich Mean Time 格林威治时间GPS - Global Positioning System 全球定位系统HDG - heading 艏向HO - Hydrographic Office (国家)航道测量局ME - Main Engine 主机OS - Operationg System 操作系统RML - Relative Motion Line 相对运动线SENC - System Electronic Navigational Chart 系统导航电子海图SOG - Speed Over Ground 对地速度STG - Speed To Go 应采用的速度TML - True Motion Line 真运动线WP - Waypoint 转向点XTE - Cross Track Error 航迹横向误差3.控制面板介绍Navi Sailor 3000电子海图系统的控制面板由一定数量的窗口组成,窗口数目的多少由系统的分辨率决定。