视频监控说明书(模板)
视频监控系统说明书

2012-5-20登录与退出双击桌面上的“客户端”图标或在“开始”菜单打开所有程序 Honeywell 霍尼韦尔安防集成平台 客户端 客户端。
打开客户端,显示如下登录画面:客户端登录界面输入正确的用户名和密码、选择站点名。
点击【确定】进入主界面:要退出客户端,选择菜单用户 退出或点击客户端主窗口右上角“”按钮实时视频管理在主界面的功能标签导航栏上点击“实时视频”标签页。
在“实时视频”标签页工作区中,可查看实时图像以及对设备进行设置。
“实时视频实时视频主界面设备导航右键菜单播放视频右键单击某个设备组或其子项中的视频通道,选择“播放视频”,则在视频窗口只放该设备组下的视频对象,选中根目录时不播放其子设备组中的视频对象。
右键单击个视频对象选择“播放视频”,则在当前指定视频窗口播放该视频图像。
拖拽视频鼠标左键点击右侧设备导航中的某个视频对象,直接拖拉到左侧某一个视频播放窗,则该路视频将在该窗口播放。
查找视频设备导航支持视频项的模糊查找功能。
在设备导航顶部的文本框里面输入需要查找频对象的信息,点击右边的“”开始查找。
支持循环查找,输入查找串后,多次点击“”,等同于查找下一个。
如果存在符条件的视频对象,则该路视频被标记为绿色,否则弹出窗口提示没有查找结果。
图5-21 视频查找实时监控实时监控主界面如下所示视频操作窗口间视频的拖拉交换:左键点击某一个视频窗口,并按住鼠标,将其拖动到另一个窗口,则这两个窗口间的视频将交换位置;从设备导航到播放窗口的视频拖拽:在设备导航上左键点击某一个视频对象,并按住鼠标,将其拖动到另一个窗口,则该视频对象将在该窗口播放;单窗口的全屏播放:左键双击任一个窗口,将只显示该窗口,同时隐藏其它的窗口;再次双击将复位。
多窗口的全屏播放:右键单击任一个窗口,选择“全屏”,则所有窗口视频将全屏播放;全屏以后,点击任一个窗口,选择“退出全屏”,将恢复正常的现实模式。
右键单击视频窗口区,出现如下视频操作菜单:菜单项功能描述参考下表(设备类型不同,可操作的菜单选项也会有所区别):视频播放窗口右键菜单主菜单功能属性设置提供视频参数、视频质量、字符叠加、DVR本地录像控制、OSD设置等相关参数设置。
Hikvision 视频监控产品使用和管理指南说明书

and other Hikvision's trademarks and logos are the properties of Hikvision in various jurisdictions. Other trademarks and logos mentioned are the properties of their respective owners.DisclaimerTO THE MAXIMUM EXTENT PERMITTED BY APPLICABLE LAW, THIS MANUAL AND THE PRODUCT DESCRIBED, WITH ITS HARDWARE, SOFTWARE AND FIRMWARE, ARE PROVIDED “AS IS” AND “WITH ALL FAULTS AND ERRORS”. HIKVISION MAKES NO WARRANTIES, EXPRESS OR IMPLIED, INCLUDING WITHOUT LIMITATION, MERCHANTABILITY HIKVISION BE LIABLE TO YOU FOR ANY SPECIAL, CONSEQUENTIAL, INCIDENTAL, OR INDIRECT DAMAGES, INCLUDING, AMONG OTHERS, DAMAGES FOR LOSS OF BUSINESS PROFITS, BUSINESS INTERRUPTION, OR LOSS OF DATA, CORRUPTION OF SYSTEMS, OR LOSS OF DOCUMENTATION, WHETHER BASED ON BREACH OF CONTRACT, TORT (INCLUDING NEGLIGENCE), PRODUCT LIABILITY ADVISED OF THE POSSIBILITY OF SUCH DAMAGES OR LOSS.YOU ACKNOWLEDGE THAT THE NATURE OF INTERNET PROVIDES FOR INHERENT SECURITY RISKS, AND HIKVISION SHALL NOT TAKE ANY RESPONSIBILITIES FOR ABNORMAL OPERATION, PRIVACY LEAKAGE OR OTHER DAMAGES RESULTING FROM CYBER-ATTACK, HACKER ATTACK, VIRUS INSPECTION, OR OTHER INTERNET SECURITY RISKS; HOWEVER, HIKVISION WILL PROVIDE TIMELY TECHNICAL SUPPORT IF REQUIRED.YOU AGREE TO USE THIS PRODUCT IN COMPLIANCE WITH ALL APPLICABLE LAWS, AND YOU ARE SOLELY RESPONSIBLE FOR ENSURING THAT YOUR USE CONFORMS TO THE APPLICABLE LAW. ESPECIALLY PRODUCT IN A MANNER THAT DOES NOT INFRINGE ON THE RIGHTS OF THIRD PARTIES, INCLUDING WITHOUT LIMITATION, RIGHTS OF PUBLICITY SHALL NOT USE THIS PRODUCT FOR ANY PROHIBITED END-USES, INCLUDING THE DEVELOPMENT OR PRODUCTION OF WEAPONS OF MASS DESTRUCTION, THE DEVELOPMENT OR PRODUCTION OF CHEMICAL OR BIOLOGICAL WEAPONS, ANY ACTIVITIES IN THE CONTEXT RELATED TO ANY NUCLEAR EXPLOSIVE OR UNSAFE NUCLEAR FUEL-CYCLE, OR IN SUPPORT OF HUMAN RIGHTS ABUSES.IN THE EVENT OF ANY CONFLICTS BETWEEN THIS MANUAL AND THE APPLICABLE LAW, THE LATER PREVAILS.Appearance1 1. Do not ingest battery, Chemical Burn Hazard2. Keep new and used batteries away from the children.3. If the battery compartment does not close securetyly, stop using the product and keep it away from children.4. This product contains a coin / button cell battery. If the coin / button cell battery is swallowed, it can cause severe internal burns in just 2 hours and lead to death.5. If you think batteries might have been swallowed or placed inside any part of the body, seek immediate medical attention.WarningCaution1. Risk of fire or explosion if the battery is replaced by an incorrect type.2. Improper replacement of the battery with an incorrect type may defeat a safeguard (for example, in the case of some lithium battery types).3. Do not dispose of the battery into fire or a hot oven, or mechanically crush or cut the battery, which may result in an explosion.4. Do not leave the battery in an extremely high temperature surrounding environment, which may result in an explosion or the leakage of flammable liquid or gas.5. Do not subject the battery to extremely low air pressure, which may result in an explosion or the leakage of flammable liquid or gas.6. Dispose of used batteries according to the instructionsTamperButton2Enrollment1. Check Signal StrengthSolid Green for 3 s - Strong Signal Flashing Green for 3 s - Medium Signal Solid Red for 3 s - Weak Signal Flashing red for 3S - Lost Signal3Installation1Enroll the Peripheral Locally2Enroll the Peripheral with QR and serial No.1. Log in to the APP Store, download and install the App .2. Power on the security control panel.3. Log in the APP and tap the icon "+" . Scan the QR code or input the control panel serial No. to add the control panel.1. In the APP , tap the "Enrollment Mode" button on the control panel page to make the control panel enter the enrollment status.2. Rotate the mounting plate and remove the rear panel.3. Power on the peripheral, and it will be automatically enrolled to the control panel.1. In the APP , tap the icon "+"and scan the QR code or serial No. on the peripheral.2. Rotate the mounting plate and remove the rear panel.3. Power on the peripheral, and it will be automatically enrolled to the control panel.2. Install the DetectorStand MountingPlace the detecor on the floor.Wall mounting1. Secure the mounting plate on the wall with supplied screws or sponge tape.2. Rotate and secure the device body on the mounting plate.Note: To make the TAMPER work properly, the thickness of the sponge tape should be no more than 1mm.4TestStand mounting test: Water on the probe of the detector. If the alarm is triggered, the LED keeps blue for 2 s.Wall mounting test:1. Connect the probe with the detetcor.2. Put the probe into a cup of water. If the alarm is triggered, the LED keeps blue for 2 s.a. b.876Operation Caution and Device Maintenance- All the electronic operation should be strictly compliance with the electrical safety regulations, fire prevention regulations and other related regulations in your local region.- Do not drop the device or subject it to physical shock, and do not expose it to high electromagnetism radiation. Avoid the equipment installation on vibrations surface or places subject to shock (ignorance can cause equipment damage).- Please make sure that the power has been disconnected before you wire, install or dismantle the device.- If smoke, odors or noise rise from the device, turn off the power at once and unplug the power cable, and then please contact the service center.- Do not drop the device or subject it to physical shock, and do not expose it to high electromagnetism radiation. Avoid the equipment installation on vibrations surface or places subject to shock (ignorance can cause equipment damage).- Do not place the device in extremely hot (refer to the specification of the device for the detailed operation temperature), cold, dusty or damp locations, and do not expose it to high electromagnetic radiation.- The device for indoor use shall be kept from rain and moisture.Exposing the equipment to direct sun light, low ventilation or heat source such as heater or radiator is forbidden (ignorance can cause fire danger).- Do not aim the device at the sun or extra bright places. A blooming or smear may occur otherwise (which is not a malfunction however), and affecting the endurance of sensor at the same time.- Improper use or replacement of the battery may result in hazard of explosion. Replace with the same or equivalent type only. Dispose of used batteries according to the instructions provided by the battery manufacturer.- Do not expose the device to the corrosive gas. Otherwise the equipment damage may occur. - Do not expose the device to the explosive situation.Set Up with App5Formatting1. Remove the battery.2. Hold the TAMPER button and power the detector on at the same time. The red LED flashes 3 time when the formatting is completed.。
洛雷克视频监控系统用户指南说明书
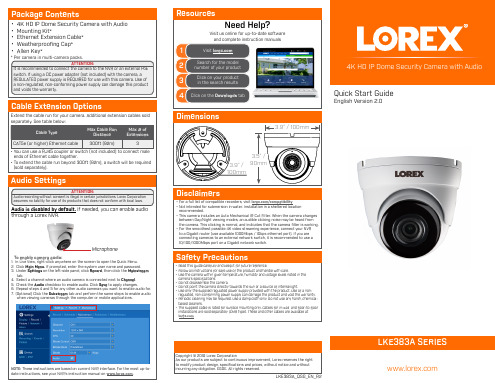
• 4K HD IP Dome Security Camera with Audio • Mounting Kit* • Ethernet Extension Cable* • Weatherproofing Cap* • Allen Key*
* Per camera in multi-camera packs.
Resources
Need Help?
Visit us online for up-to-date software and complete instruction manuals
1
Visit
2
Search for the model number of your product
when viewing cameras through the computer or mobile applications.
NOTE: These instructions are based on current NVR interface. For the most up-todate instructions, see your NVR’s instruction manual on .
regulated, non-conforming power supply can damage the product and void the warranty. • Periodic cleaning may be required. Use a damp cloth only. Do not use any harsh, chemical-
Cable Extension Options
Extend the cable run for your camera. Additional extension cables sold separately. See table below:
网络视频监控 说明书
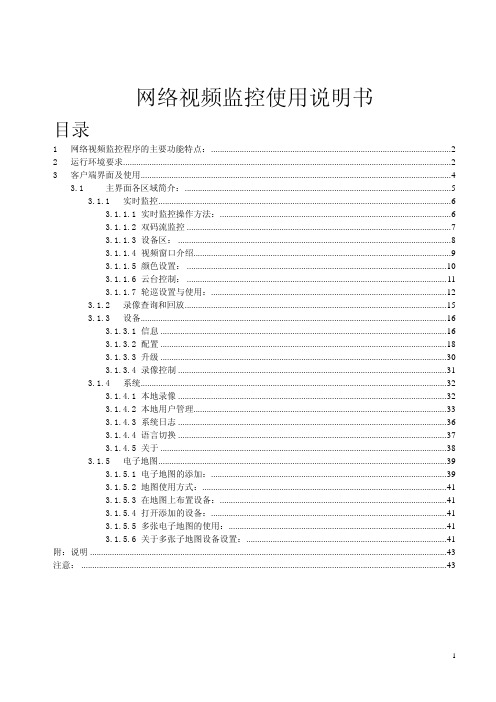
网络视频监控使用说明书目录1网络视频监控程序的主要功能特点: (2)2运行环境要求 (2)3客户端界面及使用 (4)3.1主界面各区域简介: (5)3.1.1实时监控 (6)3.1.1.1实时监控操作方法: (6)3.1.1.2双码流监控 (7)3.1.1.3设备区: (8)3.1.1.4视频窗口介绍 (9)3.1.1.5颜色设置: (10)3.1.1.6云台控制: (11)3.1.1.7轮巡设置与使用: (12)3.1.2录像查询和回放 (15)3.1.3设备 (16)3.1.3.1信息 (16)3.1.3.2配置 (18)3.1.3.3升级 (30)3.1.3.4录像控制 (31)3.1.4系统 (32)3.1.4.1本地录像 (32)3.1.4.2本地用户管理 (33)3.1.4.3系统日志 (36)3.1.4.4语言切换 (37)3.1.4.5关于 (38)3.1.5电子地图 (39)3.1.5.1电子地图的添加: (39)3.1.5.2地图使用方式: (41)3.1.5.3在地图上布置设备: (41)3.1.5.4打开添加的设备: (41)3.1.5.5多张电子地图的使用: (41)3.1.5.6关于多张子地图设备设置: (41)附:说明 (43)注意: (43)1网络视频监控程序的主要功能特点:1)电子地图功能。
2)本地用户权根管理。
3)支持解码卡上电视墙。
4)本地录像集中存储。
5)XML数据存储。
6) 支持用户界面DIY及多国语言。
7) 支持监控方案定制功能、多路多窗口视频轮巡、双码流监控、四路同时回放功能。
8)提供进行简单快速的进行设备配置管理。
9)可同时连接多设备、观看多设备视频(实时监视和回放)。
10)可对设备进行配置、日志查看和用户管理。
11)具有云台控制和查看多设备报警、录像信息功能。
12)可进行多设备同时升级功能。
2运行环境要求硬件:CPU:P4/2.0G以上显卡: 必须支持硬件缩放(如ATI、TNT2 PRO)(建议使用ATI9800及以上显卡,双通道)显存128M以上/128bit注:如果同时监看画面较多,内存、显卡、CPU相应提高配置。
LH Series 数字视频监控录制器说明书
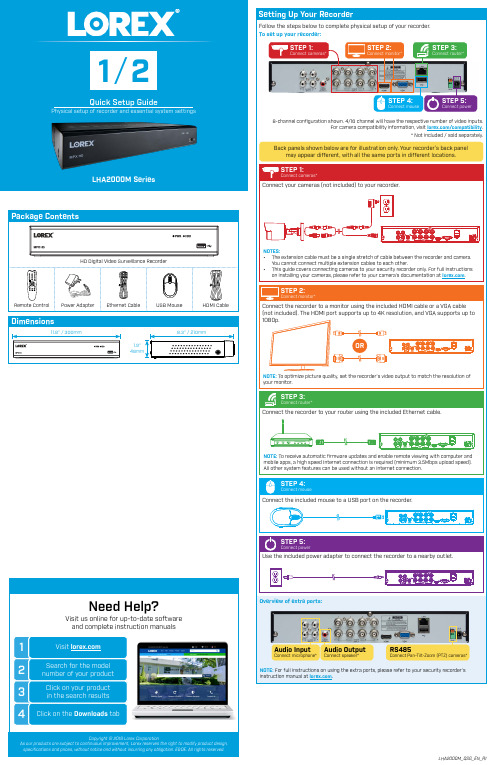
Package ContentsHD Digital Video Surveillance RecorderLHA2000M SeriesPhysical setup of recorder and essential system settingsSTEP 4:Connect mouseSTEP 5:Connect power* Not included / sold separately.8-channel configuration shown. 4/16 channel will have the respective number of video inputs. For camera compatibility information, visit /compatibility Back panels shown below are for illustration only. Your recorder’s back panelmay appear different, with all the same ports in different locations.Copyright © 2019 Lorex CorporationAs our products are subject to continuous improvement, Lorex reserves the right to modify product design, specifications and prices, without notice and without incurring any obligation. E&OE. All rights reserved.Once you have completed the physical setup of your recorder, follow the steps below to configure essential system settings. 1. LEFT-CLICK:Reference: Using the Mousesearch for recordings from, then click .Double-click any thumbnail Now that you have set up your recorder, see the following reference sections to learn more about using your system.Back up recordings from the hard drive to a USB flash drive (not included).Insert a USB flash drive (not included) into a free USB port on the recorder.From live view, right-click and then click Backup .Log in using the system user name (default: admin ) and your new, secure password. on the included remote control. bcClick to select the correct date from the calendar.Click to enter time using the on-screen keyboard.Select a date format from the dropdown.Select a time format from the dropdown. For 12Hour format, select either AM or PM from the second dropdown.Click Next to confirm.STEP 2: Firmware UpdateThis system features automatic firmware upgrades for enhanced functionality. It is required to upgrade your system to the latest firmware version.To upgrade firmware:1. After startup, a notification will appear asking you to upgrade the firmware if a newer version is available. Click OK to upgrade.2. The system will download and install the firmware upgrade. Wait for the firmware update to complete. The system may restart during the firmware upgrade process.IMPORTANT: Do not power off the recorder or disconnect the power cable during firmware installation.Review the information you have set for the recorder. To confirm, click Accept .a bcdeSelect a file format for your backed up files, then click Save .Select an area on the USB flash drive to save the backup files, then click OK .b acdef ghPlayback Type will cause the system to behave differently than described above. For full instructions on all playback functions, see your product。
视频监控系统说明书

TABLE OF CONTENTSPAGE iii INTRODUCTION & FEATURES………………………………………SYSTEM INCLUDES…………………………………………………..CONTROLS AND FUNCTIONSMonitor …....................................….……………………..……...Camera ...….……………..............................……….……...……INSTALLATIONCamera ......................................................……………….…....Monitor .....................................................................………......SYSTEM OPERATIONAdditional camera connection…………………………………….Auto Scanning………………………………………………………Auto & Manual Viewing Options………………………………….Selectable Dwell Settings…………………………………………Connecting The Monitor To A VCR ……...………………..…….OPTIONAL ACCESSORIES ..........................................................TROUBLE SHOOTING ..............................................………..…...TECHNICAL SPECIFICATIONS ....................................................CARE & MAINTENANCE……………………………..……………….12345567778991011SYSTEM INCLUDES:5.5”–2.4 GHz B&W Monitor 1 - 2.4 GHz B&W Wireless Camerawith camera stand & screwsOwner’s Manual Also includes:1 –9V DC 500mA Adapter (Camera)1 –13.8V DC 1000mA Adapter (Monitor) 1 –RCA Audio/Video CablesMounting hardwareWindow decals224810 11 12 131. Microphone –Built-in condenser microphone provides listen-in audiocapability from camera to monitor2. Lens –B&W CMOS Image Sensor24579Back View Front/Side View16To Power AdapterCH 1CH 2Auto ScanningThis video security system provides you the option to automaticallyswitch between the four camera locations. If you have fewer than four cameras, you can also set the system to scan between three or two locations.Setting Auto Scan to 2 or 3 camera locations:1.Press and hold the Auto/Manual button for more than 2 seconds. Allfour LED lights on the front of the monitor will turn ON.2.Continue to press and hold the Auto/Manual button. The Channel 4LED button will turn off. The system is now set to scan between three camera locations (Channel 1-3)3.Continue to press and hold the Auto/Manual button. The Channel 3LED button will now be turned off. The system is now set to scanbetween two camera locations (Channel 1-2)4.Continue to press and hold the Auto/Manual button to return to the fourcamera viewing option (all four LED lights will be illuminated)Auto & Manual Viewing OptionsThis system is preset to Manual mode, with a dwell time of 2 seconds.In Auto mode, the LED light will be ON.To manually view a specific camera location, set the Auto/Manual buttonto Manual. Then press the channel selector button to navigate between Channels 1-4.Press the Auto/Manual button to return to the Auto Mode feature. Selectable Dwell SettingsDwell Setting is the time duration between each camera view in the auto sequence modeThis system provides you the option of three selectable dwell times (2,5 and 10 seconds) when set to Auto Mode. This system is preset to two second selection.Changing Dwell Mode1.Press and hold the CH select button. The LED light will turn on toindicate that it is set to 2 seconds.2. Continue to press and hold the CH select button. The LED light willflash at a one second interval to indicate that it is now set to the 5 second interval3. Continue to press and hold the CH select button.4. The LED button will flash three times to indicate it is set to the 10 secondinterval.7MonitorTECHNICAL SPECIFICATIONS CameraImage sensorLensPicture Elements Scanning system Scanning frequency Sync. system ResolutionMin. illuminations Video OutputGamma characteristics Auto IrisMicrophone Transmitting frequency ModulationRF out levelVideo Output level AntennaDimensionsBattery Option Operating temperature Power source CMOS B&W3.6mm320 X 240 (B&W)2:1 interlace15.734 KHz(H) 59.94Hz (V) Internal Negative synchronization 240 Lines (B&W)**********(B&W)1.0Vp-p/75 Ohmr=0.45Electrical Auto IrisShutter sensitivity :1/60-1/6,000 Electrronic Condenser2.4 GHz-2.4835 GHz (4Ch)FM90dBu/V, 3m1.0Vp-p/75 OhmDipole6.2”(Length) x 2.2”(Diameter)4 “AA”batteries, not included-14ºto + 122ºF (-10ºC to + 50 ºC) 9V DC 500mA AdapterScreen Size 5.5”diagonalReceiving frequency 2.41GHz -2.4835GHz (4CH & AUTO) Output level 1.0Vp-p/75ohm (Video),1.0Vp-p (Audio)Sensitivity-25dBm to -80dBmAntenna DipoleResolution More than 280 linesSound output0.5 Watt.Power Source13.8V DC 1000mA Dimension 6.1”(W)×7.1”(H)×5.8”(D)Power consumption800 mAOperating Temperature14ºF to + 122ºF (-10ºC to + 50 ºC) Weight Approx. 2.9lbs or 1.32 KgMonitorBecause our product is subject to continuous improvement, SVC reserves the right to modify product designs and specifications without notice and without incurring any obligation. E&OE10CARE AND MAINTENANCE:Please follow these instructions to ensure proper care and maintenance of this systemKeep your monitor and camera dry. If it gets wet, wipe it dry immediately.Use and store your unit in normal temperatureenvironment. Extreme temperatures can shortenthe life of the electronic devices.Handle the monitor carefully. Dropping it can cause serious damage to the unit.Occasionally clean the unit with a damp cloth to keep it looking new. Do not use harsh chemicals, cleaning solvents or strong detergents to clean the unit.Keep the unit away from excessive dirt and dust. It can cause premature wear of parts.11。
视频监控产品技术说明书

视频监控产品技术说明书1. 高清晰度该视频监控产品具有高清晰度画面,能够实时显示监控区域的细节,保证监控效果清晰可见。
无论是在日间还是夜间,都能够提供清晰的监控画面。
2. 远距离监控该产品具有远距离监控的功能,用户可以通过互联网远程接入监控系统,无论身处何地都可以实时查看监控画面,实现远程监控和管理。
3. 智能识别该产品具有智能识别功能,能够实现对监控区域内的人、车等物体的智能识别,有效提高监控效率,并且支持对异常行为的智能识别和报警。
4. 多种监控模式该产品支持多种监控模式,包括全景监控、局部监控、自动巡航等多种监控模式,能够满足不同场景下的监控需求。
5. 安全可靠该产品采用了先进的加密技术,保证监控画面的安全传输和存储,能够有效防止监控画面被非法获取和篡改。
总而言之,该视频监控产品具有高清晰度、远距离监控、智能识别等多种特性,能够广泛应用于各种场景下的监控需求,为用户提供安全可靠的监控解决方案。
该视频监控产品还具有以下特点及功能:6. 多平台兼容该产品支持多平台兼容,可以在不同的操作系统上运行,包括Windows、MacOS、iOS 和Android 等,用户可以在不同的设备上实现监控画面的查看和管理。
7. 防水防尘该视频监控产品经过特殊设计,具有防水防尘功能,适用于室内和室外不同的监控场景,能够保证监控设备在恶劣天气下的正常工作和稳定运行。
8. 可扩展性该产品支持多种扩展功能,用户可以根据实际需要增加监控点数、存储容量以及其他功能,满足不同场景下的监控需求。
9. 灵敏度调节产品拥有灵敏度调节功能,用户可以根据不同环境下的需求进行调节,以适应不同环境下的监控要求。
从而提高监控对于异常事件的发现准确度。
10. 远程升级视频监控产品支持远程升级功能,用户可以通过互联网对监控设备进行远程升级,确保监控设备始终保持在最新状态。
11. 报警通知产品配备报警通知功能,一旦监控区域发生异常事件,监控设备将及时向用户发送报警通知,进行第一时间的警情处理。
海康威视 1080P 高清视频监控摄像机说明书
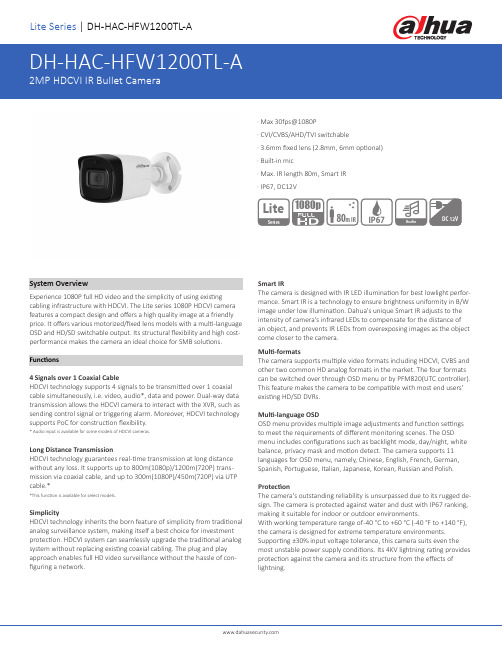
Lite Series | DH-HAC-HFW1200TL-ASystem OverviewExperience 1080P full HD video and the simplicity of using existing cabling infrastructure with HDCVI. The Lite series 1080P HDCVI camera features a compact design and offers a high quality image at a friendly price. It offers various motorized/fixed lens models with a multi-language OSD and HD/SD switchable output. Its structural flexibility and high cost-performance makes the camera an ideal choice for SMB solutions. Functions4 Signals over 1 Coaxial CableHDCVI technology supports 4 signals to be transmitted over 1 coaxial cable simultaneously, i.e. video, audio*, data and power. Dual-way data transmission allows the HDCVI camera to interact with the XVR, such as sending control signal or triggering alarm. Moreover, HDCVI technology supports PoC for construction flexibility.* Audio input is available for some models of HDCVI cameras.Long Distance TransmissionHDCVI technology guarantees real-time transmission at long distance without any loss. It supports up to 800m(1080p)/1200m(720P) trans-mission via coaxial cable, and up to 300m(1080P)/450m(720P) via UTP cable.**This function is available for select models.SimplicityHDCVI technology inherits the born feature of simplicity from traditional analog surveillance system, making itself a best choice for investment protection. HDCVI system can seamlessly upgrade the traditional analog system without replacing existing coaxial cabling. The plug and play approach enables full HD video surveillance without the hassle of con-figuring a network. Smart IRThe camera is designed with IR LED illumination for best lowlight perfor-mance. Smart IR is a technology to ensure brightness uniformity in B/W image under low illumination. Dahua's unique Smart IR adjusts to the intensity of camera's infrared LEDs to compensate for the distance of an object, and prevents IR LEDs from overexposing images as the object come closer to the camera.Multi-formatsThe camera supports multiple video formats including HDCVI, CVBS and other two common HD analog formats in the market. The four formats can be switched over through OSD menu or by PFM820(UTC controller). This feature makes the camera to be compatible with most end users' existing HD/SD DVRs.Multi-language OSDOSD menu provides multiple image adjustments and function settings to meet the requirements of different monitoring scenes. The OSD menu includes configurations such as backlight mode, day/night, white balance, privacy mask and motion detect. The camera supports 11 languages for OSD menu, namely, Chinese, English, French, German, Spanish, Portuguese, Italian, Japanese, Korean, Russian and Polish. ProtectionThe camera's outstanding reliability is unsurpassed due to its rugged de-sign. The camera is protected against water and dust with IP67 ranking, making it suitable for indoor or outdoor environments.With working temperature range of -40 °C to +60 °C (-40 °F to +140 °F), the camera is designed for extreme temperature environments. Supporting ±30% input voltage tolerance, this camera suits even the most unstable power supply conditions. Its 4KV lightning rating provides protection against the camera and its structure from the effects of lightning.· Max 30fps@1080P· CVI/CVBS/AHD/TVI switchable· 3.6mm fixed lens (2.8mm, 6mm optional)· Built-in mic· Max. IR length 80m, Smart IR· IP67, DC12VSeriesLite1080pDC 12VAudio80m IRPFA130-EIP66 Junction Box(For use alone or withPFA152-E pole mount)PFA152-EPole Mount Bracket(For use with PFA130-Ejunction box) Optional:PFA134Junction boxPFM800-EPassive HDCVI BalunPFM321D12V 1A Power AdapterPFM820UTC ControllerPFM904Integrated Mount TesterRev 001.001 © 2020 Dahua. All rights reserved. Design and specifications are subject to change without notice.Pictures in the document are for reference only, and the actual product shall prevail.。
- 1、下载文档前请自行甄别文档内容的完整性,平台不提供额外的编辑、内容补充、找答案等附加服务。
- 2、"仅部分预览"的文档,不可在线预览部分如存在完整性等问题,可反馈申请退款(可完整预览的文档不适用该条件!)。
- 3、如文档侵犯您的权益,请联系客服反馈,我们会尽快为您处理(人工客服工作时间:9:00-18:30)。
视频监控系统使用说明书1 简介视频监控系统V1.0客户端又可分为单机版和网络版客户端,其中网络版主要应用于嵌入式硬盘录像机远程管理的集中式控制管理,单机版则可用于较小的监控系统。
网络版需要凯凯网络视频监控系统服务端(v1.0)和网络客户端一起使用,视频监控系统服务端(以后简称服务端)具有对设备的集中管理和用户以及用户权限的管理功能,可以配置客户端的网络用户以及客户端用户的权限。
网络版客户端根据网络用户登录,没有添加用户和设备的功能,享有服务端给该用户分配的权限。
整个网络中分为一个服务端和多个客户端,服务端与客户端有机的联系在一起,共用一个数据库。
建议机器配置:CPU 3.0GHz 1G内存,128M独立显存。
使用1024*768,1152*864,1280*1024三种分辨率。
在其他分辨率下,服务端会以1024*768 的状态显示。
本手册是根据当前发布软件编写,由于软件更新,修改和升级,以及设备的升级,可能造成手册描述的技术问题存在不准确或不完善的地方,敬请谅解。
手册会定期更新,恕不另行通知。
2 软件的安装、卸载与使用3 设备的添加在对设备进行操作之前,需要在客户端软件里添加并设置监控点。
在登录客户端软件后,单击“配置”按钮,进入如图 3.1 所示的画面。
首先先增加区域,然后在该区域下添加设备。
说明:网络版客户端不具有添加设备和设备管理的功能,所有的设备的添加,删除都必须在服务端进行。
4 预览图像配置好设备后,单击返回或者单击上面的“预览”按钮,回到主界面。
如果用户已经设置好了监控点,预览的通道顺序,回到主界面时,默认是以列表的方式显示的。
如果已经设置了快捷播放方式,首先在左下方选择预览窗口模式,然后单击“播放”按钮,出现预览画面,“播放”按钮转换为“停止”,左边的树状目录的通道状态指示图标由“ ”变为“ ”。
单击“停止”停止预览。
5 云台控制进行云台控制前必须首先在“串口参数配置”界面配置 RS485 的相关参数,包括波特率,选用协议,解码器的地址,具体可参看串口配置。
然后在预览图像的时候,选择该路的图像,单击“云台控制”按钮,进入云台控制界面。
6 配置6.1 本地配置本地设置包括定义预览时播放的方式、客户端录像方式的设置及校时、图片抓取路径、图片的保存路径等参数的设置。
6.2 远程配置通过客户端应用程序,可以对服务器各项参数进行配置。
注意:远程配置界面随着服务器的类型的不同会有一些不同。
具体的参数设置等请参考各服务器的用户使用手册。
单击“远程配置”按钮,进入远程配置界面,选择配置项左边列表里的某个服务器,即可对该服务器各项参数进行配置。
若选择的服务器类型是 ME,则会弹出 ME 系列的远程配置界面,若选择的服务器类型是 HC,则会弹出 HC 系列的远程配置界面。
6.3 报警功能单机版客户端在快捷播放的模式下,右键点击区域弹出菜单可以对该区域下所有的设备进行布、撤防操作,右键点击设备对该设备执行布防撤防,其中菜单中显示“布防”说明该设备处于非布防状态,布防后设备的图标变换,并且菜单中显示变为“撤防”。
(注:分组播放模式无布防撤防操作。
)布防后,需要在报警联动中做相应的配置后,才能实现对不同类型报警的联动功能。
说明:网络版的客户端暂无报警布防和撤防的功能,需要通过设置管理主机将报警信息上传到客户端,通过客户端本地配置里设置上传报警信息京报警信息发送到服务端。
在配置界面中选择报警联动按钮:图 6.27 报警联动按钮进入报警联动配置界面,配置时步骤如下: 1、在中间界面的列表中选择一个设备,此时报警类型和报警联动类型显示为可编辑状态。
2、选择一个报警类型,此时报警联动类型中显示当前被选中的设备针对当前所选报警类型已经配置的报警联动类型。
3、用户可以选择或取消报警联动类型。
4、最后点击“确定”保存所做的修改操作。
选择报警弹图像时,收到相应设备相应报警类型的报警时弹出如下图的报警画面,若同时收到多个报警,则按先后顺序排列在报警队列中,点击“下一个”按钮可以查看报警队列中的所有报警图像。
选择电子地图报警联动时,收到报警后在电子地图界面里对应通道的热点会闪烁,用户点击闪烁的热点后停止闪烁,表示该报警已经接受处理。
选择报警日志联动时,收到报警后写入本地的数据库中用于报警日志的查询选择指示灯闪烁时,主界面中对应类型的报警灯会闪红,如图 6.28.2,点击“报警信息” 可以清除报警灯报警。
其中第一个报警灯表示信号量报警,第二个报警灯表示移动侦测报警,第三个报警灯表示信号量丢失报警或遮挡报警,其余的报警则对应第四个报警灯图 6.28.2 报警联动指示灯布防后,若收到报警信息,主界面中报警信息列表中会显示相应的报警信息,双击其中的任一条报警信息将以消息的形式显示该信息的详细信息,如图 6.28.3;图 6.28.3 报警联动配置界面右键点击任一条报警信息可以清空报警信息列表,如图 6.28.4,同时会重新接收在报警延时时间内收到的报警。
否则当报警信息达到 5000 条时自动清空报警信息,但不重新接收在报警延时时间内收到的报警。
另外,如果查看了报警信息,即点击了“报警信息”可以取消报警声音与报警指示灯联动,但不重新接收在报警延时时间内收到的报警。
图 6.28.4 报警联动配置界面6.4 日志查询单击“日志查询”按钮,进入日志查询窗口。
在右边的树中选择区域、服务器或者通道,选择所需查询日志的类型、开始时间和结束时间。
单击查询标志,将列出符合条件的日志。
双击列表左边的树,可以按天把该天内的所查询的日志信息显示出来。
日志查询完成后,单击其他按钮退出日志查询界面。
6.5 硬解码配置首先,进入本地配置,选择采用硬解码、硬解码模式及视频输出制式,保存后硬解码设置开始生效。
其中 MD 卡的硬解码模式有:默认配置、预览且上墙和不预览上墙三种。
在默认配置的模式下,按照每块4002MD卡解2路,每块4004MD卡解4路的方式,从设备管理的列表中获取特定个通道进行播放,并支持循环播放(在本地配置中选择循环播放)。
特点:配置简单,不受预览图像分辨率的限制,但减少了 MD的解码路数,且每个输出只有 1 画面分割。
在预览且上墙的模式下,PC中的预览窗口与电视墙的图像都通过MD卡解码,其解码通道需要在硬解码配置中设置(具体见后面的硬解码配置)。
特点:可以自由设置每个输出的画面分割(最多可以支持16画面分割),每块4002MD卡最多支持4路CIF,每块4004MD卡最多支持 8路CIF,且支持二次输出,但配置繁琐。
在不预览上墙的模式下,仅电视墙的图像通过 MD卡解码,预览窗口中的图像仍采用软解。
特点:除了预览且上墙中的特点以外,该模式下,同一路图像同时进行软解和硬解时只占用一路码流。
视频输出模式有两种:PAL制和NTSC制。
注意:此配置需要与设备中的图像及电视墙的制式一致,如果两者不一致电视墙上的图像会显示异常。
7 回放进入回放界面,选择页面上的一个按钮:本地回放、远程回放或图片回放则进入相应的回放控制界面。
在本地回放和远程回放的播放控制中,有以下控制按钮,如图:图 7.2 回放界面(播放控制)其中从左到右按钮的功能分别为:为播放按钮,本地回放与远程回放(文件)中该按钮用于在当前选中窗口中播放搜索列表中所选择文件,或恢复暂停、正常速度播放文件等。
按时间回放中,该按钮则用于播放指定时间的远程录像文件,或恢复暂停、正常速度播放文件等。
为暂停按钮,用于暂停正在播放的录像文件。
为停止按钮,用于停止当前选中窗口中在播放的录像文件。
为全部停止按钮,用于停止所有播放的录像文件。
为慢进按钮,用于减速播放录像文件,最多可以减速 16 倍。
为快进按钮,用于快进播放录像文件,最多可以快进 16 倍。
为返回到开始按钮,用于返回播放到录像文件的开始重新播放。
为快进到最后按钮,用于快进到录像文件的 99%播放。
为单帧后退按钮,只用于本地回放中。
为单帧快进按钮。
为抓图按钮,用于非暂停或单帧播放时。
另外,除了远程按时间回放以外,本地回放、远程按文件回放和图片回放均支持 4 个窗口同时回放的模式:为 1 画面分割回放模式按钮;为 4 画面分割回放模式按钮。
7.1 本地回放7.2 远程回放远程回放中分为按文件回放与按时间回放两种类型。
未选中“按时间回放”则默认为按文件回放。
7.3 图片回放区别于本地回放与远程回放的地方是图片回放可以按区域或设备搜索。
选择一个区域或设备或通道,点击搜索则文件列表中显示满足时间要求的图片名称与存储图片的时间。
用户拖动一个文件到播放窗口,播放所选的图片,且可以在播放控制信息中翻页浏览图片。
若选择自动播放图片,则可以按照设置好的延时自动翻页浏览图片。
其中播放控制中左边的两个按钮用来做窗口分割。
单选或多选文件列表中的图片,点击删除图片按钮,则可以删除所选择的图片。
其中回放时控制的按钮功能如下:为播放上一张图片按钮,直到当前窗口中播放的是列表中的第一张图片为止。
这里提到的上一张图片就是当前选中窗口中的图片在搜索列表里的前一张图片;为播放下一张图片按钮,直到当前窗口中播放的是列表中的最后一张图片为止。
这里提到的下一张图片就是当前选中窗口中的图片在搜索列表里的后一张图片;为播放上一页图片按钮,此时每个窗口分别播放上一张图片,直到每个窗口都播放至列表中的第一张图片为止;为播放下一页图片按钮,此时每个窗口分别播放下一张图片,直到每个窗口都播放至列表中的最后一张图片为止;为另存图片按钮,用于另存当前选中窗口中的图片。
选中自动播放图片时,自动播放下一页图片。
此时需要设置图片的播放延时时间。
8 其他功能。