Discovery Studio 讲义中文
Discovery Studio 讲义
Appendix : Preparing a PDB File for Use as a HomologyModeling TemplateThe basic principle of homology modeling is that you map the sequence of an unknown protein onto the structure of a known protein. Thus, if you do not have the known protein, or the template, you will not be able to build the model. A common source for templates is the Protein Data Bank at the Research Collaboratory for Structural Bioinformatics (RCSB). The website for the RCSB is /.The Protein Data Bank (PDB) is possibly the world’s leading public source of three-dimensional data for biological molecules (1). As of July 2006, over 37,000 entries could be found in the PDB. Hundreds more are being added every month. Both X-ray diffraction and other solid-state techniques account for the majority of the structures. However, over 5500 NMR structures are also available. These deposited structures include proteins, peptides, nucleic acids, carbohydrates, and complexes of these molecules.Preparation of these molecules for work in the Discovery Studio environment is a critical process to your modeling efforts. This exercise examines how to prepare a PDB file as a template for a homology modeling project. You will learn in the lesson how to:•Load a PDB file directly from the Protein Data Bank,•Produce and examine the Protein Report,•Remove the crystallographic unit cell,•Split the molecule,•Delete unneeded components, and•Save the completed file.1. Start Discovery StudioWe must have Discovery Studio running to start the exercise.Launch the Discovery Studio client if it not already running.If Discovery Studio is already running, from the Windows menu, select the Close All command. If you are prompted to save any molecules or data, select No.2. Load the PDB fileNow, we will load the PDB file directly from the RCSB through the Discovery Studio interface. Note: The File | Open URL… command only will obtain files through a network connection to a PDB server. An error is returned if the connection is not possible. Check with your instructor or system administrator if a connection is available from your workshop location.From the File pulldown menu, select the Open URL… command. In the dialog box, the URL should refer to the RCSB site. Replace the last four characters of the URL with 1T64.Click the Open button.If a connection to the PDB cannot be made, the required file is available in the DataFiles directory as 1T64_original.pdb.The structure displayed in the 3D Window is the crystal structure of two human HDAC8 proteins in complex with an inhibitor, 684 crystallographic waters, and several ions. The inhibitor is trichostatin A, a well-studied inhibitor of histone deacetylases (2).From the View menu, select the Hierarchy command.Note the distribution of components in the Hierarchy View. We will rearrange the components to facilitate working with the structure.3. Examine the Protein ReportBefore delving into the protein, we should take a moment to see what is there. A quick way of accomplishing this task is to use the Protein Report.In the Protein Reports and Utilities Tool Panel, go to the Protein Information section and click the Protein Report command.This will open an HTML Window with a text document summarizing key information about the 1T64 protein structure. As we have more than one molecule in the view, the report begins with a list of the molecules.Scrolling down the report you will notice that first there are two chains, A and B.Also, there are alternative conformations and missing residues for both chains. There are more problematic residues in the A chain than in the B chain.Scrolling further down you will see that there are several ligands and ions included in the structure as well as the crystallographic waters.Based upon the data reported, we could conclude that the B chain is a better template than the A chain. But we will need to clear our several nonprotein atoms as well.4. Remove the unit cellThe crystallographic unit cell often has little meaning in molecular mechanics calculations. Sometimes it is just easier to remove the unit cell.From the Structure menu, select the Crystal Cell pullright menu. Choose the Remove Cell command.Note the change in the Hierarchy View as the unit cell information is removed.Expand the object 1T64 to verify that the protein and water molecules are still present.5. Split the components of the molecular systemThis PDB file is composed of many parts. We can view the components through the Hierarchy Window explored in other exercises. However, we can actually separate the components of the PDB file quicker with the Split command.Access the Tools Explorer. Then access the Protein Reports and Utilities tools.Find the Split tool group. Three options are listed and will be described in a moment.Click the All command.Note the change in the Hierarchy View. The four components of the PDB file have beensegregated into separate objects and renamed.The four components are the protein (1t64_A and 1t64_B), the ligand (1t64_NonProtein), and the crystallographic water (1t64_Water).The three options for the Split command allow some flexibility in how to manipulate objects.All Splits out all chains and non-protein substructures into separate objects in the Hierarchy View and lists each amino acid sequence as a separate sequence in the Sequence View.Protein Splits out all protein chain substructures into separate objects in the Hierarchy View and lists each amino acid sequence as a separate sequence in the Sequence View.Non-Protein Splits out ligands and other non-protein substructures such as waters into separate objects in the Hierarchy View and lists any non-protein polypeptide sequences as separate sequences in the Sequence View.6. Remove the waterFor this exercise, we will remove the crystallographic water molecules. There are several ways that the waters could be removed. In this case, as we split the system and developed a new hierarchy, we will use the Hierarchy View.In the Hierarchy View, select the entry 1t64_Water. The entry should be selected in both the Hierarchy View and the 3D Window.Click the Delete key on the keyboard.The water molecules are removed from both the Hierarchy View and the 3D Window.7. Remove the ligand and ionsNeither the ligand nor the ions are required for our homology modeling experiment. So we may remove them.In the Hierarchy View, select the entry 1t64_NonProtein.Click the Delete key on the keyboard.The ligand and ions molecules are removed from both the Hierarchy View and the 3D Window.8. Remove one of the protein unitsTwo protein chains are shown in this unit cell. However, only one will be needed as a template. Which one to keep will be dependent upon the quality of the individual chains. In this case, we saw in the Protein Report that chain A has more residues with problems (missing atoms and alternate conformations) than chain B. Therefore, we will retain only the B chain.In the Hierarchy View, select the entry 1t64_A.Click the Delete key on the keyboard.Only the B chain remains visible.9. Clean the proteinDiscovery Studio can automate many of the tasks required to properly prepare a protein for an energy calculation. Before performing the clean operation, we can specify what operations to conduct through the Preferences dialog.From the Edit menu, select the Preferences… command.In the Preferences dialog, expand the Protein Utilities page. Select the Clean Protein page.At this point, we have several options that can be set. These options will address common problems that may be present in PDB files. For example, X-ray crystal structures will typically not have hydrogen atoms, so these must be added. Also, the chain ends must be set with the correct chemistry and any missing atoms in residues must be placed. The options are described below.NonStandard Names Checks whether atom names conform to the standardnames and corrects them if necessary.Disorder (Retain One Set) Checks for disordered atoms and retains only the first set.CorrectProblemsIncomplete Residues Adds missing side chain atoms to amino acids. Thisoperation will not fill in missing loop regions.Desired pH Allows the protonation state of the ionizable amino acids and the termini to be controlled using the standard pK a values. The protonation state is adjusted after any modifications of the hydrogens and termini by the following options.Hydrogens If the Modify Hydrogensoption is checked,hydrogens will be addedas needed.All Hydrogens: All hydrogen atoms are added.Polar Hydrogens: Only those hydrogen atoms thatcould be involved in hydrogen bonds will be added.No Hydrogens: No hydrogen atoms are added.Termini If the Modify Termini option is checked, then termini will be added or removed as indicated.Fix Connectivity and Bond Orders Ensures that amino acids have the correct bond order. This option will have no effect on nonstandard amino acids or ligands.We will set the Clean Protein preferences now.Turn on preferences as shown in Figure 1 (on the next page). Click the OK button in the Preferences dialog and return to the 3D window.Now, we may actually clean the protein.In the Hierarchy View, select the entry 1t64_A.Access the Tools Explorer. Then access the Protein Reports and Utilities tools.Click the Clean command.After a few moments, the protein structure that is present in the 3D Window changes. Most notably hydrogen atoms are now added to the structure. Other operations have also been performed also such as completing a missing residues and correcting atom names.10. Saving the new complexWe will save this protein for later use. Ensure the 3D Window is active.Click the Fit to Screen button.From the File pulldown menu, select the Save As… command.For Object Name enter the name 1T64. Ensure the File of type: parameter is set toViewer (*.msv).Click the Save button.11. Complete the lessonClose all the windows in Discovery Studio.From the Window menu, select the Close All command.Alternatively, you could simply exit Discovery Studio.Figure 1: Clean Protein preferences panelIf asked to save any data, select No.With this lesson, we have taken a PDB file composed of various molecular entities. We have broken apart these molecular components and regrouped them as needed. Then we saved the structure. With homology modeling using Discovery Studio, we do need to be as rigorous as we do when performing an energy calculation. Thus, it is not even necessary to type the molecule – just so long as we do not do an energy calculation. Homology modeling only needs a valid protein structure as a template, and that is what we have made here.References:1. Berman HM, Westbrook J, Feng Z, Gilliland G, Bhat TN, et al. 2000. The Protein DataBank. Nucleic Acids Res 28: 2352. Yoshida M, Kijima M, Akita M, Beppu T. 1990. Potent and specific inhibition ofmammalian histone deacetylase both in vivo and in vitro by trichostatin A. J Biol Chem 265: 17174Hands-On Exercises: Sequence SearchingLesson 1: BLAST SearchesThe acetylation at the ε-amino group of specific lysines in histones play a crucial role in transcription and gene regulation (11). The removal of the acetyl group is accomplished through, histone deacetylases (HDACs) which deactylate histones in nucleosomes. Recently, inhibitors of histone deacetylases have been identified to induce growth arrest, differentiation, and apoptotic cell death of cancerous cells (9), thus having some pharmaceutical potential. However, there are several classes of HDACs; and, each has a distinct role in gene expression (7). Developing class specific inhibitors of HDACs is a strategy being employed for the development of anticancer drugs.To aid in designing these specific inhibitors, the structures of the different target HDACs will be needed. However, rather than waiting for crystal structures, work has been underway to create homology models of HDACs (15). In the study from Wang and co-workers, homology models were built for four class I histone deacetylases to investigate binding modes of inhibitors. We use that work as a basis for exercises in this workshop.Before beginning any homology modeling experiment, it is imperative that you have a homologous protein upon which to build your model. Discovery Studio offers access to BLAST and PSI-BLAST searches of protein sequence databases. BLAST searches are used to identify close homologues of the target sequence (1). Gapped BLAST and PSI-BLAST searches are useful for identifying more distant homologues (2).In this tutorial, you will run a BLAST search with a sequence of a human histone deacetylase (HDAC1) to find homologous sequences in the PDB database. We will use the hits to help determine a suitable template to build a homology model of HDAC1.After completing this lesson, you will be familiar with:•Reading a sequence into Discovery Studio from an external source,•Using the BLAST protocol for performing a search, and•Loading and analyzing the hits obtained.1. Obtain the target sequenceNote: Check with you instructor if an Internet connection and a browser are available at your training site. If not, a prepared file is available for the exercise.We will start by obtaining the sequence of our target or the unknown structure.Start your Internet browser on your computer.Enter the URL /Database/ to go to the NCBI database.In the Search box, change Entrez to Protein.Then enter the Genbank accession number Q13547. Click Go to conduct the search.You will see an entry for human histone deacetylase HDAC1 (14). The entry is in a format that cannot be loaded into Discovery Studio. We must change the format.Change the Display setting to FASTA.The sequence of the HDAC is now displayed in a FASTA or Pearson format (12) that can be read by Discovery Studio. The FASTA format is a simple ASCII text file commonly used for transferring sequences. But, we need to get the sequence into a file for importing.Next to the Display setting is a pulldown menu marked Send to. Change the Send to parameter to File.The next step is dependent upon your specific browser and settings. Thus, the instructions are rather general.A dialog box should appear asking what you want to do with the file. Select Save. If prompted for a file name, enter sequences.fasta. If prompted for a location, choose Desktop. Save the file.The file will be saved on your Desktop. If you have trouble locating or downloading the file, do not be concerned. The sequence is available in the workshop data files, usually in the DataFiles folder on the Desktop.Also, there are a myriad of places where we could have obtained the sequence. For example, we could have used Accelrys GCG (commonly known as the Wisconsin Package) and searched the databases there. Or we could have gone to other databases available on the Internet such as SWISS-PROT (URL /sprot/). Wherever we obtain the sequence it must be obtained in a file format readable by Discovery Studio. The list of suitable formats was presented in the lecture.2. Start Discovery StudioWe must have Discovery Studio running to start the exercise.Launch the Discovery Studio client if it not already running.If Discovery Studio is already running, from the Window menu, select the Close All command. If you are prompted to save any molecules or data, select No.3. Load the HDAC1 sequenceWe will load a sequence file of the human histone deacteylase.From the File pulldown, select the Open… command.In the Files of type: pulldown, select Sequence Formats to filter out non-sequence files.Click the Desktop icon to jump to the Desktop. Select the sequence file you just downloaded, sequences.fasta or whatever you have named the file. If you are unable to locate the file, you can browse to the Desktop/DataFiles directory and use the file HDAC1.fasta.Click the Open button.The Sequence Window will appear presenting the amino acid sequence of our unknown. Discovery Studio gives the sequence a name derived from the NCBI index number. We will rename it to something more understandable.In the Sequence Window, double-click on the sequence or the name of the sequence. Ensure the entire sequence is highlighted.Right click and choose the Rename Sequence… command. In the dialog that opens enter the name HDAC1. Click OK. Deselect everything.3. Run a BLAST searchYou access the BLAST program through the protocols.From the Protocol Explorer, open the Protein Modeling protocol group.Select the BLAST protocol.The parameter explorer will appear with settings available for a BLAST search.For the Sequence parameter, enter the sequence window and name sequences:HDAC1.In a similar manner as specifying structures, the specific sequence is appended to the name of the sequence window. You may only select one sequence at a time to use in the search.Ensure the Database parameter is set to PDB_nr95.The default database is a high quality, non-redundant set derived from the PDB (3). Other supported databases are nrdb from NCBI, nrdb90 from EBI, PDB, and Swiss-Prot as described in the lecture. If you add a new BLAST formatted database to the database directory, it is also listed.Ensure the Matrix parameter is set to BLOSUM62.You have the options to use the BLOSUM (6) or PAM (4) matrices. The BLOSUM62 matrix is a reasonable start in most searches.Ensure the Gapped Alignment is set to True.This option allows you to select whether the calculation is carried out using a gapped BLAST or BLAST searches can be run. Gapped BLAST is the equivalent of one iteration of PSI-BLAST (2).We will leave the remaining options set to their default values as below:Gap costs Existence: 11 Extension: 1Expectation Value10Filter Low complexity TrueNumber of Sequences in Output250These four parameters allow you to specify how the search will be continued. It is beyond the scope of this workshop to explain all the options possible. A more through discussion of BLAST searches is available in the Accelrys GCG Workshop. BLAST options are also thoroughly discussed in a recent book (8).Click the Run button.The run will start and complete in a few seconds.4. Examine the output in the Map ViewWhen the run completes, the Job Completion dialog appears. Click the OK button.When the run completes the BLAST Window appears as the Map View (Figure 1).Make the BLAST Window active.Figure 1: BLAST Window with the Map ViewThe Map View gives a graphical representation of the hits found, displayed as one line per sequence. The bars are colored according to the bit score of the hits. A legend for the coloring is displayed at the top of the Map View. The higher the bit scores are better.The query sequence is displayed on top of the view as a ruler with residue index. The view can be zoomed in and out using the View | Transform commands, the scroll button on the mouse, or the control key and + or – keys in the keypad. When the view is scrolled out to its full size, the Ruler is changed to display individual residues.You may hover the mouse over any hit on the Map View and information about the hit is displayed.Place the mouse over the first hit and wait for the popup to appear.The popup text box presents the description of the sequence, the sequence accession number, the start and end position of the query sequence and the start and end of the hit sequence, and the scores of the hit.Note that the first hit is for histone deacetylase 8 represented by PDB file 1T64 (13).This is reassuring as we want to build a model of a histone deacetylase. In the original paper by Wang et al., the structure 1T64 was not available.Move the mouse to the second hit. Note that this hit is a histone deacetylase-like protein (HDLP) represented by PDB file 1C3P (5).The HDLP found here is virtually identical to the protein used in the original modeling study by Wang and co-workers, 1C3R (5). So, we may say that we have found the same template as used in their study. We do not get the exact same hit 1C3R due to the use of the nonredundant database.Move the mouse to the third hit. Note that this hit is also a histone deacetylase-like protein but a bacterial homologue histone deacetylase-like amidohydrolase. It is represented by PDB file 1ZZ1 (10).This hit, as was 1T64, was not available at the time of the original Wang et al. study.Hits may be selected by left clicking on the bars with the mouse. To add a specific hit to the current selection, hold down the shift or control key while clicking with the mouse.Figure 2: BLAST search results displayed in the Table View5. Examine the hits in the Table ViewAnother view of the data is available as the Table View (Figure 2). The Table View shows the hits one line per sequence with additional information.Ensure nothing is selected in the Map View.At the bottom of the Map View are tabs. Click the Table View tab. The Table View now is displayed.The data reported is essentially the same as what was found in the Map View except in tabular form.The hits in the table can be sorted by each column by left-clicking on the column header. When the table is sorted, the order of the hits in the Map View is changed according to the order in the Table View.Hits in the Table View can be selected by left-mouse clicking on the row. These hits are also selected in the Map View. The reverse is also true; selecting a hit in the Map View also selects the hit in the Table View.Examine the top two hits in the Table View. In the E-value columns, the expectation value for the hit may be found. For both 1T64 and 1C3P, the very low expectation values indicate these are good hits. The hit 1ZZ1 also has a low expectation value but it not as low as the first two. Notice also the wide difference between the E-values for the first three hits and the remainder in the table.The E-value is the expectation of getting a hit with the same bit score by chance. A low value indicates a real hit. However, the E-value alone may not be sufficient. You also should consider the alignment length.In the Table View, examine the columns Sequence Length and Alignment Length. Note that the first two hits (1T64 and 1C3P) are aligned with HDAC1 over a significant portion of their lengths. The third hit 1ZZ1 is aligned over a shorter length. Finally, the remaining entries in the table cover much smaller portions of HDAC1.The last tab is for the Text View. It is the raw BLAST output as an ASCII text file.6. Load hit alignmentHits may be loaded into Discovery Studio in several ways.Return to the Map View.While holding down the shift key, left click on the top three hits.With the hits selected right-click in the Map View area.Select the command Load Sequence and Alignment.Also note the five load commands available.After a few moments, a new Sequence Window opens with the three hits and the original HDAC1 sequence (with the original name).From either the Map View or Table View, five loading options are available to load the sequences, alignments, and structures into the Sequence Window and 3D Window. These options are briefly described.Load Selected Sequences Loads the sequences of the selected hits into one SequenceWindowLoad Selected Structures Loads the protein structures of the selected hits into one 3DWindow. The sequences are extracted into one SequenceWindow if the Sequence Window preference optionAutomatically create sequence window is checked; it is offby default.Load Sequence and Alignment Loads the sequences of the selected hits and aligns them tothe query sequence according to BLAST or PSI-BLASTalignment. Sequence regions outside of the hit alignmentreported by BLAST or PSI-BLAST are de-aligned by theaddition of gaps to the sequence.Load Structure and Alignment Loads the protein structures of the selected hits, extracts theirsequences into one Sequence Window, and aligns thesequences to the query sequence according to BLAST orPSI-BLAST alignment.Load Aligned Regions Loads the alignments of the selected hits from BLAST orPSI-BLAST output.Load Sequence and Alignment and Load Structure and Alignment commands load the query sequence in its entirety into the Sequence Window. Gaps are added to align the query sequence to the selected hits when the hits are loaded.Any commands that load structures are only valid when the database searched is PDB_nr95 or PDB, as we have here. For other databases, executing the two commands will bring up an error message stating that the PDB identification code is missing. The location of the PDB files is specified by Edit | Preferences... | Files Explorer | PDB Location.7. Save the sequence alignmentWe will save this alignment for future use.From the File menu, select the Save As… command.Set the Files of type: parameter to Sequence Files.Set the File Name to BLAST_search.Click the Save button.In normal work, you would probably want to save the three PDB files as well as they could be the templates we wish to use.8. Examine the sequence alignmentTake a moment to examine the sequence alignment.Activate the Sequence Window named Sequence Structure Alignment – Sequence Window.If you scroll down the sequence window, you will notice that a substantial number of residues are not matched. You will need to scroll past 1500 on the sequence ruler before you see any substantial alignment. The alignment will be found by looking for background color of the sequences.The Sequence Window displays the alignment of the hits with the unknown. The coloring is based on the sequence similarity among the hits and the target.9. Preparing for the next exerciseBefore proceeding with the next exercise we will close all the windows.From the Window menu, select the Close All command.If asked to save any data, select No.The BLAST algorithm is a useful algorithm to find templates for our unknown. It is a sensitive method to find close homologues from a database of sequences. If the sequence database was taken from a structural database such as the PDB, we may have template structures to use to build the homology modeling. For identifying more remote homologues, PSI-BLAST may be used and is described in the next exercise.References:1. Altschul SF, Gish W, Miller W, Myers EW, Lipman DJ. 1990. Basic local alignmentsearch tool. J Mol Biol 215: 4032. Altschul SF, Madden TL, Schaffer AA, Zhang J, Zhang Z, et al. 1997. Gapped BLASTand PSI-BLAST: a new generation of protein database search programs. Nucleic Acids Res 25: 33893. Berman HM, Westbrook J, Feng Z, Gilliland G, Bhat TN, et al. 2000. The Protein DataBank. Nucleic Acids Res 28: 2354. Dayhoff MO, Schwartz RM, Orcutt BC. 1978. A model of evolutionary change inproteins. In Atlas of Protein Sequence and Structure, ed. MO Dayhoff, pp. 345.Washington, DC: National Biomedical Research Foundation5. Finnin MS, Donigian JR, Cohen A, Richon VM, Rifkind RA, et al. 1999. Structures of ahistone deacetylase homologue bound to the TSA and SAHA inhibitors. Nature 401: 188 6. Henikoff S, Henikoff JG. 1992. Amino acid substitution matrices from protein blocks.Proc Natl Acad Sci USA 89: 109157. Khochbin S, Verdel A, Lemercier C, Seigneurin-Berny D. 2001. Functional significanceof histone deacetylase diversity. Curr Opin Genet Dev 11: 1628. Korf I, Yandell M, Bedell J. 2003. BLAST. Sebastopol: O'Reilly & Associates, Inc. 339pp.。
Discovery-Studio-讲义中文

Discovery-Studio-讲义中文附录:准备一个PDB文件作为同源性建模模板同源建模的基本原理是,你映射的一个未知的蛋白质序列一种已知蛋白质的结构。
因此,如果你没有已知的蛋白质,或模板,你将无法建立模型。
模板的共同来源是蛋白质在结构生物信息学研究的实验室数据银行(目标)。
该网站RCSB是HTTP:/ /www.rcsb。
org /。
蛋白质数据库(PDB)可能是世界上领先的公共源三维生物分子数据(1)。
截至七月2006,超过37000项可在PDB。
每个月都有更多的人加入。
X射线衍射仪和其它固态技术占大多数的结构。
然而,超过5500的核磁共振结构还可用。
这些沉积的结构包括蛋白质,肽,核酸,碳水化合物,这些分子的配合物。
在发现工作室环境中工作的这些分子是一个关键的过程给你的建模工作。
这个练习如何准备一个PDB文件作为一个模板同源建模项目。
你将在课程中学习如何:•加载PDB文件直接从蛋白质数据银行,•生产和检验蛋白质报告,•清除晶体单元电池,•分裂分子,•删除不需要的组件,和保存已完成的文件。
1、开始发现工作室推出发现工作室客户端,如果它没有运行。
如果发现工作室已经在运行,从窗口菜单,选择关闭所有命令如果提示保存任何分子或数据,请选择“不”。
2注意:文件|打开网址…命令只会获得文件通过网络连接一个数据库服务器。
如果连接不可能返回错误。
检查你的导师或系统管理员,如果一个连接是可从您的车间位置。
从文件下拉菜单,选择命令打开网址。
在对话框中,网址应该是指目标网站。
更换与1t64 URL的最后四个字。
点击打开按钮。
如果一个PDB不能连接,所需的文件中的数据文件是可用的目录1t64_original.pdb。
在3D窗口中显示的结构是两人HDAC8蛋白的晶体结构在复杂的抑制剂,684个晶体的水,和几个离子。
抑制剂是曲古抑菌素A,一个很从“视图”菜单中选择“层次”命令。
的结构。
3、检查蛋白质报告在深入了解蛋白质,我们应该花一点时间来看看有什么。
Discovery Studio官方教程(Help-Tutorials) 分子对接前的准备受体和配体
Discovery Studio基本操作介绍在使用软件进行课题研究前,我们首先应该了解并掌握该软件使用的一些基本操作。
为后续的体系处理做好准备工作。
这个教程包括:●小分子配体准备●蛋白文件的处理小分子配体准备在Discovery Studio(DS)中,可以直接构建分子结构,也可以将在其它画图软件中画好的结构直接拷贝到DS中,本教程演示如何在DS中构建小分子结构。
1. 调用Sketching功能从View菜单下,打开Toolbars,选择Sketching。
Toolbars中将显示各种Sketching的工具,这些工具可以用来构建化合物的初始结构。
2. 利用Sketching构建化合物的3D空间构象打开一个分子显示窗口(Molecule Window),菜单栏File|New|Molecule Window。
注:DS中有四种窗口模式,包括Molecule window(显示分子结构),Protein Sequence Window (显示蛋白序列),Nucleotide Sequence Window(显示核酸序列),Script Window(显示脚本语言),因此我们需要根据载入的文件类型选择窗口。
DS中构建化合物的3D空间构象非常容易,也非常灵活。
本教程以以下化合物为示例,以图示的方法演示如何构建化合物的结构。
NHCl OOSOHNNH选择,在窗口中画出结构1。
点击(可以通过菜单栏View|Toolbars|Sketching调出)将其选中,然后选择菜单栏Chemistry|Bond|Aromatic得到结构2。
选择,鼠标指于芳环单键处并单击,构建稠环结构3。
选择,构建连接单键,再选择,鼠标指于C原子处并单击构建环状结构,最后得到结构4。
选择和构建单键和环状结构,选择再次点击相应的键就可以构建双键结构,最终可得到结构5。
更换元素类型,选中某个碳原子,选择菜单栏Chemistry|Element更换相应元素即可,最后得结构6。
Discovery Studio官方教程--拉伸动力学计算结合自由能

拉伸动力学计算结合自由能介绍拉伸分子动力学模拟可以使原来在微妙至秒时间范围内发生的生物物理过程在纳秒尺度内进行模拟,从而动态再现目前实验所无法提供的一些过程,如蛋白去折叠、配体解离和构象变化等过程。
上述这些过程可以通过在拉伸动力学模拟中让事件按照指定方向主动发生,而不像在标准分子动力学模拟中需要被动等待事件的发生。
本教程中,我们使用T4溶菌酶蛋白作为研究目标,模拟配体2-丙基苯酚从活性口袋的解离的过程。
具体见参考文献(J. Mol. Biol.2009, 394, 747-763). 本教程假定你已经熟悉建立和运行标准分子动力学模拟的过程。
对于该体系的SMD模拟比较复杂,因为配体的位置位于结合口袋的深处,而且将配体从结合口袋里拉出来的同时伴随着蛋白的散开,退出配体和蛋白的复原等过程。
1.准备蛋白配体模拟体系从菜单File | Open URL,在ID框中填入3HTB之后点击Open。
选择Macromolecules | Protein Report工具栏,点击Protein Report工具栏下方的Protein Report,通过蛋白报告可以检查出该蛋白是否有缺失残疾或其它需要校正的地方。
然后点击Prepare Protein工具栏下方的Clean Protein按钮,对蛋白质进行简单清理,该过程主要是包括删除蛋白文件中多余的构象,为蛋白加上N端和C端等过程。
接下来我们将手动删除蛋白中的晶体水分子和盐。
通过Ctrl+H打开Hierarchy View窗口,见下图,选择Water点击键盘上的Delete删除水分子。
另外第二个A链是磷酸根基团、BME残基和JZ4配体。
删除磷酸根基团和BME残基,保留JZ4配体和蛋白。
到这里,体系已经准备好了,接下来是给体系加入立场参数和水盒子,然后准备动力学模拟。
在做拉伸动力学之前需要使用标准动力学方法将复合物进行能量最小化,短的平衡过程和动力学模拟过程。
选择Simulation | Change Forcefield工具栏,在其下方的Forcefield中选择CHARMm力场,Partial Charge中选择Momany-Rone电荷,之后点击Apply Forcefield应用所选的力场和电荷。
Discovery Studio 2.5操作教程
蛋白质结构预测技术简介简介蛋白质结构的解析对其功能的理解至关重要。
然而,由于技术手段的限制,利用实验方法(主要为X-ray,NMR)解析蛋白质结构投入大、周期长、风险大。
对于某些膜蛋白,只利用现有技术条件,其结构甚至无法解析。
另一方面,随着分子生物学技术的成熟及高通量测序技术的发展,越来越多的基因序列可以轻松被找到。
这造成了现代蛋白质科学中一个奇怪的现象:蛋白质序列数据的累积量及积累速度远远超过蛋白质结构。
这种序列与结构间不平衡的现象极大地限制了我们对蛋白质功能及其相关作用机理的理解。
所以我们需要一种能够简单、快速且相对准确的技术来确定蛋白质的空间结构。
蛋白质建模技术可以很好的解决上面的问题。
该方法利用信息技术的手段,可以直接从蛋白的一级结构(氨基酸序列)预测蛋白质的高级结构(主要为三级结构)。
根据最新一届国际建模大赛(CASP)的分类,目前主要的蛋白质建模方法包括两种:基于模板的建模(Template-based Modeling)和自由建模(Free Modeling)。
前者又包括两种方法:同源建模法(Homology Modeling)和“穿线法”(Threading)。
后者主要以从头计算法(ab initio)为主。
所有的建模方法中,以同源建模法(Homology Modeling)使用最为广泛,预测结果的准确性最大。
同源建模的理论基础为蛋白质三级结构的保守性远远超过一级序列的保守性。
因此,人们可以通过使用一个或多个已知结构的蛋白(模板蛋白,template)来构建未知结构蛋白(目标蛋白,target)的空间结构。
其主要的步骤包括:1.搜索用于建模的template(s)2.将target与templates进行比较3.将步骤(2)中的比较信息用于建模Discovery Studio为用户提供了一整套利用Homology Modeling方法自动预测蛋白质空间结构的工具。
用户只需要提供蛋白质的氨基酸序列就可以轻松完成模型构建及模型可信度评估的工作。
DS_CDOCKER原理
培训内容
• DS中的分子对接简介 • DS CDOCKER概述
• DS单C击DO此CK处ER编原理辑简母介版标题样式
• DS CDOCKER参数设置技巧 • DS CD单O击CK此E处R编应辑用母实版例副标题样式 • DS CDOCKER hands-on练习 • Q&A
Copyright ©2010, Neotrident Technology Ltd. All rights reserved.
辅酶NAD+结合
Copyright ©2010, Neotrident Technology Ltd. All rights reserved.
应用实例——脱氢酶与底物及辅酶的结合作用(六)
分子对接研究底物、辅酶、Zn离子与受体的结合——结合模式(2D图) 底物(L-阿拉伯糖醇)、Zn离子结合
单击此处编辑母版标题样式
应用实例——脱氢酶与底物及辅酶的结合作用(二)
单击此处编辑母版标题样式
单击此处编辑母版副标题样式
Copyright ©2010, Neotrident Technology Ltd. All righ脱氢酶与底物及辅酶的结合作用(三)
构建脱氢酶同源模型
单击此处编辑母版标题样式
• DS单C击DO此CK处ER编原理辑简母介版标题样式
• DS CDOCKER参数设置技巧 • DS CD单O击CK此E处R编应辑用母实版例副标题样式 • DS CDOCKER hands-on练习 • Q&A
Copyright ©2010, Neotrident Technology Ltd. All rights reserved.
Copyright ©2010, Neotrident Technology Ltd. All rights reserved.
DiscoveryStudio2.1中文教程

DiscoveryStudio2.1中⽂教程DS2.1教程介绍●⽤户界⾯和⿏标UI and mouse●打开并游览数据opening and viewing a data组合库设计●枚举组合库enumerate library●Pareto optimization of a combinatorial subset library药效团Pharmacophore●创建药效团(基于结构)creating pharmacophores (structure-based)●配体分析器ligand profiler●通⽤特征药效团⽣成common feature pharmacophore generation●创建和使⽤基于⽚段的药效团creating and using fragment-based pharmacophores●创建特定特征creating custom features蛋⽩质同源模建protein modeling●同源模建细胞外淀粉酶●Loop 构建Looper with antibodies●ZDOCK定量构效关系QSAR●建⽴⼀个QSAR⽅程building a QSAR equation受体配体相互作⽤Receptor-ligand interaction●使⽤libdock完成⼩分⼦对接Docking small molecules with libdock模拟Simulation●带有限制体⼩肽的模拟simulation of a small peptide with restraints (protein simulation)●在最⼩化之前之后,使⽤能量计算协议(QM-MM)计算能量去测定活⼒,rank order pose和⽐较energies using the calculate energy (QM-MM)protocol to determine energies,rank order poses and compare energies before and after minimization静电势计算Electrostatics●泊松玻尔兹曼——有限差分●计算蛋⽩质离⼦化和残基的pK●计算电势●计算溶剂化能开发客户端Developer Client⽤户界⾯和⿏标教程需要数据⽂件:1TPO.pdb 和1BVN.pdb背景可视化和基本的结构分析⼯具在⽣物和⽣化系统中是很重要的。
Discovery Studio官方教程--预测蛋白质聚集、水溶性、粘度、可开发性等性质
预测蛋白聚集位点(Protein Aggregation)教程介绍抗体等具有治疗功能的蛋白,如果处于比较高的浓度下,会有发生聚集的趋势。
这会导致抗体的活性下降,并引起免疫反应。
抗体的聚集趋势计算是一种衡量蛋白表面氨基酸聚集倾向性的指标。
具有比较高的聚集趋势得分的位点表明了该区域的氨基酸倾向于发生聚集。
因此这些位点的预测,使得我们可以通过氨基酸定点突变的方法来改造蛋白,增强其稳定性。
本教程使用Calculate Aggregation Scores对一个全长IgG1抗体分子(PDB号为1h2h)进行蛋白聚集位点的预测计算,并分析预测的结果。
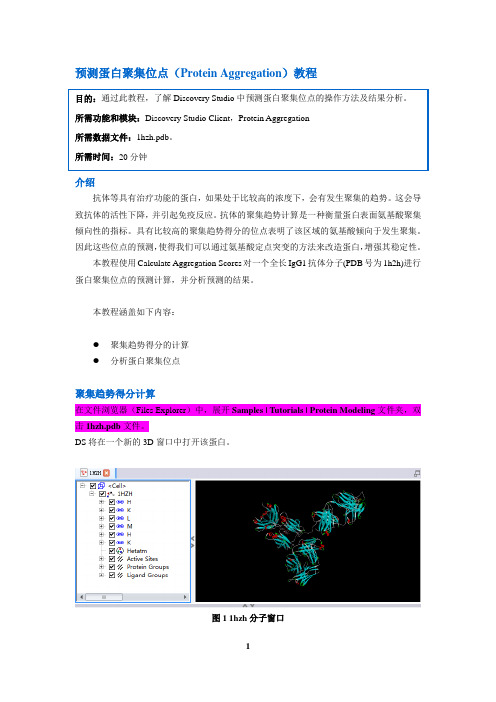
本教程涵盖如下内容:●聚集趋势得分的计算●分析蛋白聚集位点聚集趋势得分计算在文件浏览器(Files Explorer)中,展开Samples | Tutorials | Protein Modeling文件夹,双击1hzh.pdb文件。
DS将在一个新的3D窗口中打开该蛋白。
图1 1hzh分子窗口Ctrl+H打开Hierarchy窗口,然后选中Water,点击Delete删除蛋白结构中的结晶水分子。
在工具浏览器(Tools Explorer)中,展开Simulation | Change Forcefield,将Forcefield设为CHARMm Polar H,然后点击Apply Forcefield,这将为蛋白赋上CHARMm Polar H力场。
图2 Apply Forcefield设置界面在工具浏览器(Tools Explorer)中,展开Macromolecules | Predict Protein Aggregation工具面板,点击Calculate Aggregation Scores。
在弹出的参数设置界面中,将Input Typed Protein设为1hzh:1HZH,将Cutoff Radius设为5,7,10。
点击Run运行该任务。
该任务在奔腾4,2Gb内存和2.8GHz的计算机平台上运行大约需要3分钟。
- 1、下载文档前请自行甄别文档内容的完整性,平台不提供额外的编辑、内容补充、找答案等附加服务。
- 2、"仅部分预览"的文档,不可在线预览部分如存在完整性等问题,可反馈申请退款(可完整预览的文档不适用该条件!)。
- 3、如文档侵犯您的权益,请联系客服反馈,我们会尽快为您处理(人工客服工作时间:9:00-18:30)。
附录:准备一个PDB文件作为同源性建模模板同源建模的基本原理是,你映射的一个未知的蛋白质序列一种已知蛋白质的结构。
因此,如果你没有已知的蛋白质,或模板,你将无法建立模型。
模板的共同来源是蛋白质在结构生物信息学研究的实验室数据银行(目标)。
该网站RCSB是HTTP:/ /www.rcsb。
org /。
蛋白质数据库(PDB)可能是世界上领先的公共源三维生物分子数据(1)。
截至七月2006,超过37000项可在PDB。
每个月都有更多的人加入。
X射线衍射仪和其它固态技术占大多数的结构。
然而,超过5500的核磁共振结构还可用。
这些沉积的结构包括蛋白质,肽,核酸,碳水化合物,这些分子的配合物。
在发现工作室环境中工作的这些分子是一个关键的过程给你的建模工作。
这个练习如何准备一个PDB文件作为一个模板同源建模项目。
你将在课程中学习如何:•加载PDB文件直接从蛋白质数据银行,•生产和检验蛋白质报告,•清除晶体单元电池,•分裂分子,•删除不需要的组件,和保存已完成的文件。
1、开始发现工作室我们必须有发现工作室开始行使。
推出发现工作室客户端,如果它没有运行。
如果发现工作室已经在运行,从窗口菜单,选择关闭所有命令如果提示保存任何分子或数据,请选择“不”。
2、加载PDB文件现在,我们将直接从目标通过Discovery Studio界面加载PDB文件。
注意:文件|打开网址…命令只会获得文件通过网络连接一个数据库服务器。
如果连接不可能返回错误。
检查你的导师或系统管理员,如果一个连接是可从您的车间位置。
从文件下拉菜单,选择命令打开网址。
在对话框中,网址应该是指目标网站。
更换与1t64 URL的最后四个字。
点击打开按钮。
如果一个PDB不能连接,所需的文件中的数据文件是可用的目录1t64_original.pdb。
在3D窗口中显示的结构是两人HDAC8蛋白的晶体结构在复杂的抑制剂,684个晶体的水,和几个离子。
抑制剂是曲古抑菌素A,一个很好的研究组蛋白去乙酰化酶抑制剂(2)。
从“视图”菜单中选择“层次”命令。
注意层次视图中组件的分布。
我们将重新安排组件为了方便工作的结构。
3、检查蛋白质报告在深入了解蛋白质,我们应该花一点时间来看看有什么。
一种快速的方法完成这项任务是使用蛋白质报告。
在蛋白质报告和公用事业工具面板,去蛋白质信息部分,然后点击蛋白质报告命令。
这将一个文本文档总结关键信息的HTML窗口打开1t64蛋白结构。
正如我们有多个分子在视图中,该报告从一个分子列表。
滚动下来的报告,你会注意到,首先有2条链,一个和B。
此外,还有其他的构象和缺失的残基,这两个链。
还有更多链中的问题的残留量比在乙链。
进一步向下滚动,你会看到有几个配体和离子包括在结构和晶体的水。
根据数据的报告,我们可以得出结论,乙链是一个更好的模板比连锁。
但我们要清楚我们几个非原子以及。
4、删除单元电池晶体单元单元在分子力学计算中的意义不大。
有时它只是更容易删除单元电池。
从结构的菜单,选择水晶细胞pullright菜单。
选择删除单元格命令。
请注意,在层次视图中的更改为单元单元格信息被删除。
扩大对象1t64验证蛋白质和水分子仍然存在。
5、拆分分子系统的组成部分这个文件是由多个部分组成的。
我们可以通过层次结构查看组件其他练习窗口。
然而,我们实际上可以分开的组件的PDB文件更快的分割命令。
访问工具浏览器。
然后访问蛋白质报告和公用事业工具。
找分裂工具组。
列出了三个选项,并将在一个瞬间描述。
单击所有命令。
注意在层次视图中的更改。
PDB文件的四个组成部分已隔离到单独的对象四的成分是蛋白质(1t64_a和1t64_b),配体(1t64_nonprotein),和结晶水(1t64_water)。
拆分命令的三个选项允许在如何处理对象的操作中有一定的灵活性。
所有打出的层次结构视图中所有链和非蛋白结构为独立的对象,并列出每个氨基酸序列为序列单独序列。
蛋白打出所有的蛋白链结构为独立的对象层次结构中的每个视图和列表的氨基酸序列为序列单独序列。
非蛋白打出配体,如为单独的对象的水域在层次视图其他非蛋白结构和列表的任何非蛋白多肽序列在序列视图分离的序列。
6、除去水对于这次演习,我们将删除晶体的水分子。
有几种方法水可以被移除。
在这种情况下,当我们拆分系统和开发新的层次,我们将使用层次视图。
在层次视图中,选择进入1t64_water。
输入应选择在两个层次视图和三维窗口。
点击键盘上的删除键。
从两个层次视图和三维窗口中的水分子被删除。
7、除去配位体和离子无论是配位体,也没有离子所需的我们的同源性建模实验。
所以我们可以删除它们。
在层次视图中,选择进入1t64_nonprotein。
点击键盘上的删除键。
从两个层次视图和三维窗口中除去的配位体和离子分子。
8、删除一个蛋白质单位双蛋白链在本单位细胞中显示。
然而,只有一个将需要作为模板。
一个人的意志,将取决于个体链的质量。
在这种情况下,我们在蛋白质报告中看到,有更多的残留物与问题(缺少的原子和替代的构象),因此,我们将保留只有乙链。
在层次视图中,选择进入1t64_a。
点击键盘上的删除键。
只有乙链仍然可见。
9、清洁蛋白质发现工作室可以自动完成所需的任务,以适当的准备一个蛋白质能量计算。
在进行清洁操作之前,我们可以指定操作通过偏好对话框进行。
从“编辑”菜单中选择“首选项”命令。
在“首选项”对话框中,展开“蛋白质公用事业”页。
选择干净的蛋白质页面。
在这一点上,我们有几个可供选择的选项。
这些选项将共同解决可能在PDB文件存在的问题。
例如,X射线晶体结构通常会没有氢原子,所以必须添加。
此外,链端必须设置正确的化学物质和残留的残留的原子必须放置。
描述的选项下面。
对的问题非标准名称检查原子名称是否符合标准如果需要的话,他们的名字和改正。
障碍(保留一个设置)检查无序原子和保留第一套。
不完整的残基增加了缺失的侧链原子的氨基酸。
这操作不会填充缺少的循环区域。
所需的PH值允许的可离子化的氨基的质子化状态酸和末端被控制使用标准的pKa值。
质子化状态之后的任何修改的氢调通过下列选项总站。
氢如果修改氢选检查,氢会增加按需要。
所有的氢原子:添加所有氢原子。
只有那些极性氢:氢原子可能会参与氢键将加入。
无氢:没有添加氢原子。
总站如果修改总站选项被选中,然后总站将被添加或删除,如。
固定连接和键订单确保氨基酸有正确的键秩序。
此选项将不会影响非标准氨基酸或配体。
现在我们将设置干净的蛋白质偏好。
打开喜好如图1所示(在下一页)。
单击“确定”按钮偏好对话框并返回到三维窗口。
现在,我们实际上可以把蛋白质清洗干净。
在层次视图中,选择进入1t64_A图1:清洁蛋白偏好板访问工具浏览器。
然后访问蛋白质报告和公用事业工具。
单击“干净”命令。
几分钟后,蛋白质结构,是目前在三维窗口的变化。
最值得注意的是氢原子现在加入到结构中。
其他操作也已执行也如完成一个缺失的残基和校正原子名。
10、拯救新的复杂我们将保存这种蛋白质用于以后的使用。
确保三维窗口是活动的。
点击“适合屏幕”按钮。
从文件下拉菜单,选择“另存为…”命令。
对象名称输入名称1t64。
确保类型的文件:参数设置为查看(*。
MSV)。
单击“保存”按钮。
11、完成课程关上发现工作室的所有窗口。
从“窗口”菜单中选择“关闭”命令。
或者,你可以简单地退出发现工作室。
如果要求保存任何数据,请选择No。
有了这个教训,我们采取了由各种分子实体PDB文件。
我们有打破这些分子组成和重组他们的需要。
然后我们保存结构。
使用发现工作室的同源建模,我们需要尽我们的严格进行能量计算时。
因此,它是没有必要的类型的分子,以只要我们不做一个能量计算。
同源建模只需要一个有效的蛋白质结构为模板,这就是我们在这里所做的。
References:1. Berman HM,Westbrook J, Feng Z, Gilliland G, Bhat TN, et al. 2000. The Protein Data Bank. Nucleic Acids Res 28: 2352. Yoshida M, Kijima M, Akita M, Beppu T. 1990. Potent and specific inhibition of mammalian histone deacetylase both in vivo and in vitro by trichostatin A. J Biol Chem 265: 17174 265:17174手在练习:序列搜索课程1:爆炸搜索在ε-组蛋白赖氨酸的氨基乙酰化具体发挥关键作转录和基因调控(11)。
乙酰基的去除是通过,组蛋白去乙酰化酶(HDAC),deactylate 核小体组蛋白。
最近,抑制剂组蛋白去乙酰化酶已确定诱导生长抑制、分化和凋亡癌细胞死亡(9),因此具有一定的药物潜力。
然而,有HDACs的几类;和,在每个基因的表达有显著作用(7)。
开发类HDAC 抑制剂是一种策略被用于抗癌的发展药物。
为了设计这些特异性抑制剂,对不同的目标酶的结构将所需。
然而,而不是等待晶体结构,工作已经开始创造HDACs同源模型(15)。
在王和同事的研究中,同源模型建立了四个I类组蛋白去乙酰化酶抑制剂的结合模式探讨。
我们在这个工作坊中使用这项工作作为练习的基础。
在开始任何同源建模实验之前,你必须要有一个同源蛋白建立您的模型。
发现工作室提供访问爆炸和PSI-BLAST搜索蛋白质序列数据库。
爆炸搜索被用来识别目标序列的近同源序列(1)。
重复BLAST搜索用于识别更遥远的同系物(2)。
在本教程中,您将运行一个序列的BLAST搜索人类组蛋白去乙酰化酶(HDAC1)在PDB数据库中找到同源序列。
我们会用点击来帮助确定一个合适的模板建立HDAC1同源模型。
完成这门课之后,你会很熟悉:•从外部来源阅读到发现工作室的序列,•使用爆炸协议进行搜索,并•加载和分析所获得的点击量。
1、获得目标序列注意:如果你的互联网连接和浏览器可在您的指导,请检查训练场地。
如果没有,一个准备好的文件可供行使。
我们将开始获得我们的目标或未知结构的序列。
在你的电脑上启动您的互联网浏览器。
输入网址/database/去NCBI数据库。
在搜索框中,改变Entrez蛋白质。
然后输入GenBank登录号q13547。
点击去进行搜索。
你会看到人类组蛋白去乙酰化酶HDAC1的入口(14)。
该项的格式为无法装入发现工作室。
我们必须改变格式。
更改显示设置FASTA。
HDAC的序列是现在显示在FASTA格式或皮尔森(12),可阅读发现工作室。
FASTA格式是一种常用的简单的ASCII文本文件转移序列。
但是,我们需要把这个序列插入一个文件中。
接下来的显示设置下拉菜单标记发送到。
更改发送到参数文件。