捷宇高拍仪使用说明-ABCE系列通常
高拍仪CH200中性英文版使用说明书
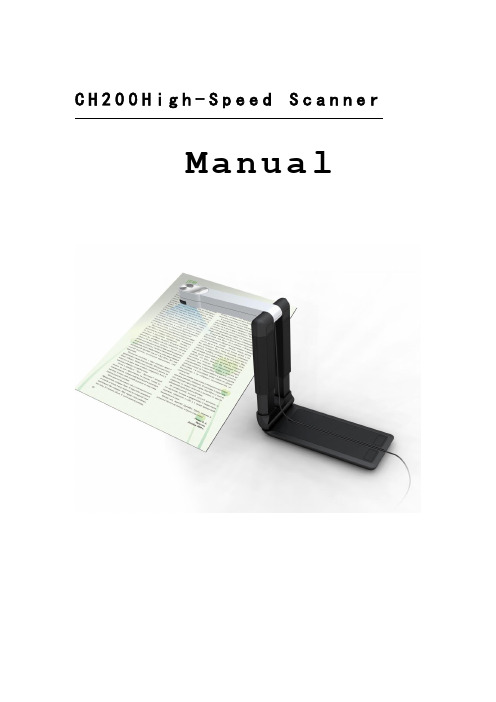
C H200H i g h-S p e e d S c a n n e rManualCONTENTSService information (2)Chapter I Introduction (3)1.1 Package contents (3)1.2 Appearance (3)1.3 Recommended configuration (3)1.4 Product functions, parameters and application (4)1.4.1 Functions (4)1.4.2 Parameters (5)1.4.3 Applications (5)Chapter II Installation (6)2.1 Structural drawing (6)2.2 Software CD (6)2.3 Driver Installation (7)2.4 Software Installation (13)Chapter III Software Interface Instruction (17)3.1 Application (17)3.2 Menu (18)3.2.1 File (18)3.2.2 Edit (20)3.2.3 View (21)3.2.4 Snapshot (22)3.2.5 Image (23)3.2.6 Effect (25)3.2.7 Tool (27)3.2.8 Help (28)3.3 Tool Information (28)Service informationNetwork servicesYou can get technique support and related information though our company website and telephone.After-sales insurance notes1、All the after-sales policy complies with the stipulation of "three packages".2、Maintenance service is non-freight, charge retails and overhauling programs by nextyear.3、When the products are sent to repaired, total package is demanded to ensure the qualityof maintenance.4、Non-warranty scope●The damage is made by irresistible disease such as natural disease.●Personal factors.●Improper use.●Problems and error made by other software of installation and design.●Computer virus.●One that tear original warranty serial number card or non-serial number card willcancel his rights of maintenance and not provide maintenance.5、If the adverse products are generated by factors of non-warranty scope, we'll chargeunder the standard required by company, which has nothing to do with warranty years.6、The warranty scope is only for the product itself without joint maintenance responsibilityfor supplies.7、During repairing, our company is not responsible for the interests of purchaser andpotential damage in foreseeing circumstances.Suggestion for useThe effect is better under the environment of adequate lighting.Chapter I Introduction1.1 Package contents(1)High-Speed Scanner(2)High-Speed Scanner Special manuscript desk(3)CD-ROM(including driver programs, operation instructions and application procedure)(4)Cable for USB 2.0(5)Instruction for user(6)YardstickIf above package accessories are incomplete, please contact with your dealer or company to ensure your interests.1.2 AppearanceFold Open1.3 Recommended configuration(1)Hardware:Pentium 4 or the level of CPU or higher, 512MB or higher memory, CD-ROM.(2)USB 2.0 connector.(3)Operation system: Windows 2003、Windows XP、Windows 7.1.4 Product functions, parameters and applicationHigh-Speed scanner is portable document photography facility. Whatever, such as paper files, color picture or three-dimensional objects, it can scan and store easily. It adopts special folding design, the appearance is simple, noble, generous and stable. When scanning, documents and objects will not touch with it, so that cardboard phenomenon found in traditional scanner is avoided, the high-definition display and storage of video files will meet the demand for document management. With it, you can get access to valuable video data at your own will. It provides more functions and has wider application than usual traditional scanner.1.4.1 Functions(1)D uplicatorIt can get quickly access to paper files, video files,etc,and can print at real time through black and white or colored duplicator, provide files video photocopy simultaneously .It's free to set the size and angle of rotation ,which can also copy books.(2)P hysical objects projectorDocuments photography is a vertical scanning design ,which can take place under lens, capture graphics at real time, and project to screen directly if harmony with software.(3)p hysical objects scannerScanning induct components with mechanical design, it’s convenient to scan objects, which can preserve data. At the same time, it can scan continuously, and time and space will be free.(4)V ideoBesides providing the function of scanning papers files and objects, it provide video at random, operate simply and time of video is free.(5)S canning and preserving for A4 filesDocuments photography adopt interface in USB2.0,transmission speed comes to 480Mbps,2 million pixels HD lens, provide high quality of scanning ,maximum size comes to A4,and provide cropping in dealing with pictures ,this way could save space of documents reserving.(6)E-mailThe video files scanned and reserved by documents photography are able to be sent anywhere.(7)I mage processingIt attaches powerful image processing software arbitrarily. which can add words to video files ,cut pictures, tilt correction ,rotate pictures at arbitrary angle, filtering can eliminate the stain and impurity, etc. It is able to make OCR identification to words and form, which can transform picture file into edited text file.1.4.2 Parameters1.4.3 Applications(1)As portable photography, it proceeds daftly digital scanning of paper file or other objects everywhere.(2)As camera, it proceeds video scanning.(3)Realize photocopying by combining computer and printer.(4)object scan function concert with projector to show videoChapter II Installation2.1 Structural drawing2.2 Software CDPut High-speed scanner software CD into the drive, it will read automatically, pop-up installation window with six buttons: Driver, Software, Fax, Infor, Scan, Exit, with Chinese and English language choices.2.3 Driver InstallationChoose “Driver”button to install driver for High-Speed Scanner, please confirm that High-Speed Scanner is connected with the computer before installing.Choose “next”:If appear with the follow form, please insert High-Speed Scanner to USB interface, and then choose “Yes”.If appear with the follow form, please choose “continue anyway”.If appear with the follow form, please choose “continue anyway”.Choose “finish” to finish installation. After installation, please remove the facility before pull in it again.Windows XP driver updateAfter driver installation, the follow hardware update form will pop up automatically.Choose “Install from a list or specific location (Advanced)”, choose “next”.Choose “Don’t search, I will choose the driver to install”, choose “next”.Choose “CH200” and “next”.If appear with the follow form, please choose “continue anyway”.The drive is update automatically.Choose “finish” to finish update driver.2.4 Software InstallationPress “Software” button to install software.Choose “next”.Input user information or with the default information, choose “next”.Choose install path or with the default path, choose “next”.Choose “next”.Prepare to install, “next” to continue.It is installing, please wait…Choose “finish” to finish installation.Chapter III Software Interface Instruction3.1 Application(1)Open application form,double-click the shortcut “CH200” on desktop, or click "Start-All programs- CH200- CH200 ".(2)Display the interface of software.This software interface are mainly divided into: the title bar, the menu , toolbar, image list view, video preview view, photo editing view, text views, the status bar, popup menu and view splitter.MenuAll the functions of the software can be found in the menuToolbarIt is the shortcut of the menu , user can enhance operational efficiency through using the icons displayed on the toolbar.Information clewClew the real-time operation and relative information.Image list viewDisplay all the pictures of the current Settings folder and user can open, or delete the pictures displayed in the image list view. The number of list can be operated by user.Video preview viewsPreview the video capture from the business scanner.Display the actual effect after editing the picture.Popup menuDisplayed partial menus witch can be used currentlyView splitterIt can adjust the size of the view.3.2 Menu3.2.1 FileFile menu usually use for existing file operations, including: new, open, save, save as, Send Email, print setup, print preview, printing (1:1), print and exit these functions.NewNew a blank document, in it image can be pasted and operated.OpenOpen the picture file existing in computer; it can precede several of format picture files which support this system, while others can not make it.SaveSave the image displayed on image view after editing, the filename, file formats, and the file path are same as the original ones.Save asSave the image displayed on image view after editing, the filename, file formats, and the file path can be modified.Send EmailOpen the web site which user use to send an E-mail. Remember to write the web site in the setting dialog.Print SetupChoose the printer that has been installed in the computer, it should be set up before printing or printing preview.Print previewLook over the image before printing. Different printers with different preview results, it has to print setup before preview. And the picture got from scanning needing to rotate 90 before preview and print.Print (1:1)Check the Print (1:1) menu item, and then print the image, the size that printed on the paper will be same as the object. This menu has up, mid and down three choices according to three scan heights. So to get the right print result, you must choose right menu and the print picture must be got with our facility.PrintPrint the image displayed on image view by the printer on the computer.ExitExit when user finishes using the software.3.2.2 EditIt includes Undo, Redo, Cut, Copy, Paste, Eraser, Text, Font, Cut Out, Delete, etc.UndoBack to the last step of edit operation.RedoGo to the next step of edit operation.CutRemove selected part of the picture.Copy a part or the whole picture.PastePaste the clipboard data.EraserRemove picture information with width 1, 5, 10 or 50.TextAdd text in the picture. At the location wanting text, press left-button to get one edit-box to input text. Press left-button out of the edit-box to finish this operation.FontSet text font for adding text to the picture.Cut OutRemove unselected part of the picture.DeleteDelete the opened picture.3.2.3 ViewIt includes Full Screen, Actual Size, Frame Size, Move, Dynamic or Static, Rearrangement, etc.Full ScreenOnly show Video preview views without menu, toolbar, status bar, information clew and image list view.Actual SizeShow the video and picture with their actual size.Frame SizeShow the video and picture with frame size and at the same time the proportion of image height and width is changeless.Move the image if user want to see the different part of the image.Dynamic or StaticShow the image view and hide the video view, or show the video view and hide the image view.RearrangementRestitute window to default state.3.2.4 SnapshotIt includes Snapshot Setting, Snapshot, Time Snapshot, Stop Snapshot, Digital Zoom, Video Capture, Stop Capture, etc.Snapshot SettingIt provides settings of picture size, picture state, picture format, picture naming, auto threshold, auto ground color removal, auto add snapshot time, auto gray scale, time internal of time snapshot, JPG quality, and save path, etc. And also auto threshold and auto ground color removal can be previewed. Choose this menu item, you will get the follow dialog.SnapshotScan an image for the video preview.Time SnapshotScan automatically according to the interval.Stop SnapshotStop the scan which make by the "Start Scan".Digital ZoomWith this, the video can be zoomed in, it has six steps.Video CaptureStart recording the video.Stop CaptureStop recording the video.3.2.5 ImageIt includes Rotate left 90, Rotate Right 90, Rotate, Larger, Smaller, Resample, Rect Select, Free Select, Reverse Select and Correction.Rotate Left 90Rotate the image for counter-clockwise with 90 degrees.Rotate Right 90Rotate the image for in clockwise with 90 degrees.RotateRotate the image for in clockwise or counter-clockwise with any degree.LargerDisplay the image with a smaller scale.SmallerDisplay the image with a bigger scale.ResampleChange the actual size of the image. Click the menu item, the resample dialog will be shown.User can choose to change the image size factor or change directly the image height or width, and choose different interpolation approach.Rect SelectSelect one rectangle area in the image.Free SelectSelect one un-regular area in the image.Reverse selectReverse select the unselected area by rect select or free select.GammaThough the gamma values may differ for input and output devices to accommodate the difference between scene lighting and lighting of the viewing environment.ColorizeAdds color to a grayscale image converted to RGB, or adds color to an RGB image-for example, to make it look like a duotone image by reducing its color values to one hue.3.2.6 EffectIt includes some operation to picture.NegativeImage displays dark areas as light and light areas as dark.EmbossMake increasing pattern on the surface of image.EdgeReserve the edge of the image.ThresholdThe Threshold effect converts grayscale or color images to high-contrast, black-and-white images. Specify a certain level as a threshold; all pixels lighter than the threshold convert to white and all pixels darker convert to black.Gray scaleMake the image into colors which mix the black and white, like the colors of ash.Ground Color RemovalRemove the ground color.Noise RemovalRemove the noise of image.Remove Red EyeRemove the red eye of the people in the image after select the eye.DilateTo make the edges in the image become bigger than before.ErodeTo make the edges in the image become smaller than before.BlurMake the image less clear in different part.SharpenEnhanced image edge effect, so it will has more obvious edges.SoftenTo make the whole image more gentle.LightenIncrease the value of a pixel in the image.DarkenReduce the value of a pixel in the image.More ContrastIncrease the contrast of the image.Less ContrastReduce the contrast of the image.More SaturationIncrease the saturation of the image.Less SaturationReduce the saturation of the image.3.2.7 ToolIt includes video format, video attribute, audio format, make PDF, make signature, insert signature and optical character recognition, etc.Video FormatTo choose the color space compress format,output image size and frame frequency.Video AttributeSet video light, contrast, saturation, etc.Audio FormatSet parameters of microphone.Make PDFConvert pictures to PDF document.Make SignatureMake signature picture and encode it.Insert SignatureDecode signature file and insert it to the right location.OCROptical Character Recognition, recognize the text in the image. Note: you must install OCR software to use the function.3.2.8 HelpAbout CH200Show information about this software.Troubleshootingopen the help file about troubleshooting,tips and othersUser ManualShow the user manual document.3.3 Tool Information1->Open 2->Save 3->Cut4->Copy 5->Paste 6->Undo7->Redo 8->Picture Size 9->Actual Size10->Actual Size 11->Frame Size 12->Full screen13->Rotate 14->Rotate Left 90 15->Rotate Right 90 16->Ground Color Removal 17->Gray Scale 18->Threshold19->Lighten 20->Darken 21->More Contrast 22->Less Contrast 23->OCR 24->Restoring default 25->Make PDF 26-> Insert Signature 27->Video Capture 28->Snapshot 29->Time Snapshot 30->Stop Capture31->Dynamic or Static 32->Rect Select 33->Free Select34->Cut Out 35->Text 36->Larger37->Smaller 38->Move 39->Eraser40->pen。
捷易拍高拍仪的应用

更小,便于携带
更低,没有噪音
无需外接电源,USB供电,安全节能
软件操作简单,更智能化
高效
1秒钟扫描与保存
还在排队扫描吗?给客户的资料还没有准 备好?捷易拍了解您的需求!即拍即存, 还可以扫描立体实物,让办公效率瞬间提 升!同时所拍文件存储量小(彩色A4在500KB 以下,黑白A4在50KB以下) 智能拍摄 复印 拍摄书籍 视频录制 OCR PDF制作
福建省公安厅
…………
捷易拍
●超便携 ●操作非常方便,一键OK,一秒 钟快速拍摄与保存 ●可拍各类装订书籍、立体实物 ●USB直接供电,安全节能 ●可轻易拍摄各种尺寸,最大拍 摄尺寸为A3幅面 ●一般文件书籍字体都很清晰, 小字部份可用近拍模式会很清楚。 ●翻拍轻松绝不卡纸,无耗材, 结构简单不易故障。
数码相机
捷易拍
●双手操作,极不方便 ●不支持黑白拍摄 ●记忆卡容量限制 ●没有任何档案处理功能 ●须转存电脑才能处理
三个月包换,一年保修; 软件终身免费升级!
另注:行业客户,可根据 行业需要,可以提供二次开发。
我们的客户有: 中国太平洋财产保险(福建省公司,东北三省分公司) 国泰君安证券股份有限公司
天津市民政局
浙江移动 九江银行
江西省水土保持勘测规划研究所
江西省电子信息管理中心 浙江省车辆管理中心
山西省大同市房地产管理中心
A 4 系 列
Z 系 列 A4-200(D)
像素
200万
拍摄范围
最大A4幅面
外观特点
折叠直立式
A4-300(D)
A4-500(D) A4-T200 A4-200Z(D) A4-300Z(D) A4-500Z(D)
高拍仪软件使用说明书_高拍仪怎么使用?
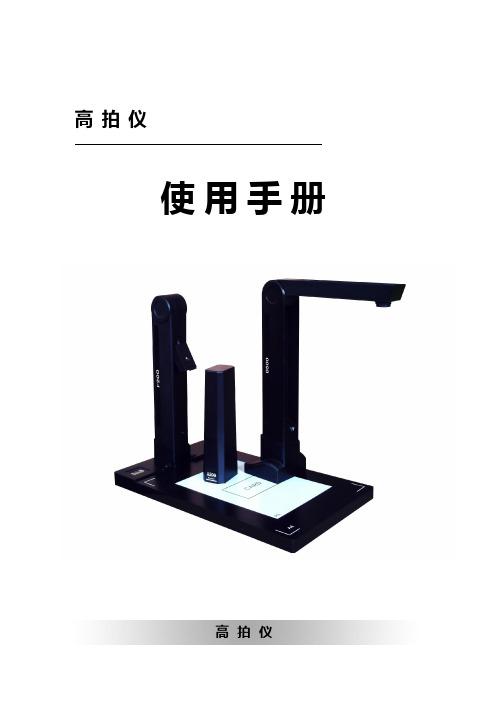
捷宇高拍仪使用手册目录第一章产品简介1.1 包装内容------------------------------------21.2 产品外观及结构图----------------------------21.3 推荐配置------------------------------------151.4 产品主要功能、特点和用途--------------------15第二章应用软件安装与卸载2.1 应用软件安装--------------------------------182.2 应用软件卸载--------------------------------21第三章应用软件操作界面操作说明3.1 主窗口--------------------------------------223.2 菜单键说明----------------------------------22 第四章捷宇高拍仪常见问题及使用技巧-----------------32 第五章故障及解决方法、注意事项---------------------35第一章产品简介1.1 包装内容(1)捷宇高拍仪产品(2)文件垫(折叠式)(3)产品光盘(内容含操作说明和应用程序)(4)USB2.0 连接线(5)产品使用说明书(6)保修卡、合格证(7)副摄像头(选配件)1.2 产品外观及结构1.2.1折叠式1.2.2 台式系列1.2.2.1组装后的产品外观及部品名称如下示:1、USB线2、文件拍摄台 3 、支杆4 、拉杆5 、旋转轴6 、锁紧旋钮7 、摄像头 8、对焦环1.2.2.2组装产品在初次使用前需要进行组装,步骤如下示:步骤1:将文件拍摄仪的USB电缆穿过文件拍摄台的安装孔。
步骤2:将支柱底端插入文件拍摄台安装孔,直到顶到底板。
1.2.2.3拍摄范围设置产品安装完成后,旋臂应处于水平位置,摄像头在A5高度的位置拍摄到的文件拍摄台图像应将充满PC软件取景框。
CZUR 高拍仪系列 使用手册说明书
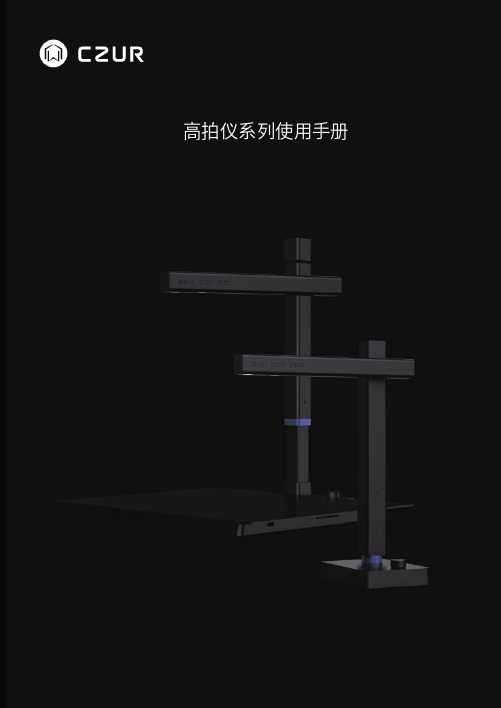
高拍仪系列使用手册目录第一章产品简介1.1产品概述 (1)1.2产品尺寸图 (2)1.3产品示意图 (4)1.4产品参数 (12)1.5包装及配件 (13)第二章操作指引2.1软件安装 (13)2.2扫描前准备 (13)2.3操作方法 (15)第三章常见故障对策 (15)第四章服务与声明4.1售后服务与保证 (16)4.2联系方式 (17)第一章产品简介1.1产品概述C Z U R高拍仪是一款采用C M O S数字成像技术的新型高拍仪,结合丰富的图像算法,为用户呈现高清、绚丽的图像质量。
全球顶级的O C R文字识别技术可以快速将图片转换成W o r d、Ex ce l、双层PD F等文档。
C Z U R高拍仪具有体积小、无预热时间、扫描速度快、图片质量高、节能环保等特点。
同时它可以灵活集成与扩展行业定制模块,如二代证阅读模块、I C卡阅读模块、签名板等。
C Z U R高拍仪应用领域包括金融、证券、保险、教育、通讯行业、政府机关、企业、个人等,实现了文件、档案、表单、票据、证件等快速扫描,基于系统集成需求实现图片尺寸定制、实时上传、电子审批、电子授权、电子存档等功能,大幅提升了用户的工作效率与质量,为各行各业节省了大量的资源,积极响应了国家提倡的低碳、节能、环保的无纸化办公战略。
121.2 产品尺寸图高拍仪(500万像素)A4系列单位:mm高拍仪(800万及以上像素)A4系列高拍仪(800万及以上像素)A3系列单位:mm31.3产品示意图A4单机版124说明:上图为高拍仪系列 - A4单机版最完整配置,用户可根据需求选择配置,各机型的差异配置以实物为准。
旋钮键,短按开/关灯,左旋变暗,右旋变亮。
电源指示灯,USB 线连接电脑后蓝色灯亮起,即插即用,无开关机。
副摄像头(选配),可对场景预览、录像、拍摄等,与主摄像配合支持画中画功能。
双目摄像头(选配),可实现人证对比与活体检测。
副摄像头指示灯,蓝灯亮起代表副头开启, 蓝灯熄灭代表副头关闭。
高拍仪软件操作手册

厦门哲林软件科技有限公司哲林高拍仪说明书简易使用手册2013-51.软件安装 (3)2.软件启动 (3)3.功能设置 (4)3.1系统参数 (4)3.2视频参数 (6)3.3视频方向设置 (7)3.4存储设置 (7)3.5浏览图像 (8)3.6图像切边 (9)3.7图像类型 (10)3.8合并图像 (11)3.9条码识别 (12)3.10存储为多页TIF (13)3.11存储为多页PDF文件 (14)3.12文字识别 (15)3.13复印 (15)3.14定时连拍 (15)4.常见问题与解决方案 (16)1.软件安装1)获取方式①随拍摄仪附带的安装光盘②网络获取。
下载地址:2)安装方式①打开光盘,双击厦门哲林高拍仪安装程序②进入程序安装向导,单击【下一步】按钮,进入个人信息设置③下一步选择功能安装,单击下一步,进入使用说明描述④开始安装文件2.软件启动1)点击任务栏【开始】菜单,选择所有程序,打开哲林高拍仪,单击高拍仪图标如图1所示:图12)识别硬件后启动并连接到哲林高清拍摄仪上,进入软件主界面如图2所示:图2技巧与提示:软件的启动需依赖于哲林高清拍摄仪设备,若设备未连接,则软件在启动过程中会出现如下提示:此时需要将哲林高清拍摄仪连接到电脑上,再次打开软件方能连接成功并进入软件主界面。
3.功能设置参数设置分为2类。
一类为【系统参数】另一类为【视频参数】。
下面就对这两种设置进行阐述3.1系统参数单击系统参数设置按钮,出现如图3所示对话框图3a)图像参数DPI设置:用于设置图片DPI,在打印或者复印的时候需要此值(建议使用系统默认值)JPG图像质量:滑块值越高,图片质量越高,图像色彩越明显(可根据需要调节)图像分辨率:设置此值可影响到图片的质量(建议使用默认值)切割范围:当成像区域出现无法通过摄像头调节的区域时,可以设置此值。
其效果相当于把摄像头视野调小如图4、5切割前:图4切割后:图5b)存储设置图6存储设置用于设置图片文件名,软件提供2种命名方式:自定义文件名和当前时间来命名自定义文件名自定义文件名分为2部分,前面一部分为文本内容,后一部分必须为数字。
高拍仪使用说明书
2. 软件启动
1) 点击任务栏【开始】菜单,选择所有程序,打开高清拍摄仪,图标如图 1 所示: 或者在桌面找到高清拍摄仪图标,双击打开桌面图标
第4页
图1 2) 将高清拍摄仪用 USB 线连接到电脑上,进入软件主界面如图 2 所
图2
技巧与提示:
技巧与提示:
软件提供将所有值还原为默认值按钮,用户可以点击该按钮还原
b) 照相机控制
曝光度设置
图8 曝光度的设置对拍摄图像的清晰度至关重要,过度的曝光和曝光不充分都影响到拍摄 的图像;软件默认摄像头是自动曝光,因此当使用深色底板时可能会产生过度曝光, 此时需要用户手动去调节。
第8页
操作方法:
① 去掉自动曝光选项 ② 调节滑块,看成像区域内的预览效果,效果不佳可以继续调节滑块直至可视区
矫正预览效果
矫正影像采集效果图 第 12 页
自定义预览效果
自定义影像采集效果图
技巧与提示:
1.图像矫正中的自动矫正功能使用黑底板效果最佳。
2.不能过度曝光,否则矫正不准确。
4.7 拍摄类型
图像类型有 3 种,分别为彩色、灰度和黑白,此设置影响到拍摄出来的图片效果
图像类型说明: 【彩色】:拍摄出来的图片是彩色的
操作方法:
① 对不矫正和矫正只需勾选即设置成功,点击拍摄即可 ② 对自定义勾选后,在视频预览区内点击鼠标并拖拽至目标区域被框选。若对截选
区域不满意,仍可点击某一边框,拖拽移动该边框线上的蓝色小矩形即可对截选 区域进行细微调整,如图 14
第 11 页
各类矫正效果如下:
图 14
不矫正预览效果
、 不矫正影像采集效果
捷宇高拍仪使用说明-ABCE系列通常
高拍仪使用手册(A、B、C、E系列,版本号:V1.1)生产商:福建捷宇电脑科技有限公司地址:福建省福州市仓山区浦上工业区鼓楼园9号楼全国统一服务热线: 400-667-6755网址: 邮编:350008目录第一章产品简介1.1 包装内容-------------------------------------21.2 产品外观及结构图-----------------------------21.3 推荐配置------------------------------------151.4 产品主要功能、特点和用途--------------------15第二章应用软件安装与卸载2.1 应用软件安装--------------------------------182.2 应用软件卸载--------------------------------21第三章应用软件操作界面操作说明3.1 主窗口--------------------------------------223.2 菜单键说明----------------------------------22 第四章捷宇高拍仪常见问题及使用技巧-----------------32 第五章故障及解决方法、注意事项---------------------35第一章产品简介1.1 包装内容(1)捷宇高拍仪产品(2)文件垫(折叠式)(3)产品光盘(内容含操作说明和应用程序)(4)USB2.0 连接线(5)产品使用说明书(6)保修卡、合格证(7)副摄像头(选配件)1.2 产品外观及结构1.2.1折叠式1.2.2 台式系列1.2.2.1组装后的产品外观及部品名称如下示:1、USB线2、文件拍摄台 3 、支杆4 、拉杆5 、旋转轴6 、锁紧旋钮7 、摄像头 8、对焦环1.2.2.2组装产品在初次使用前需要进行组装,步骤如下示:步骤1:将文件拍摄仪的USB电缆穿过文件拍摄台的安装孔。
高拍仪使用说明书
第四章 高拍仪常见问题及使用技巧.............................................................................................................. 29 第五章 故障及解决方法、注意事项.............................................................................................................. 31 附 OCR 文字识别安装方式 ................................................................................................................................. 35
1.4.1 主要功能
(1) A4 文件扫描与存盘 高拍仪采用 USB2.0 接口,传输速度可达到 480Mbps,硬件 200\300\500 万像素传感器配备高 解析镜头,提供高质量扫描,最大扫描尺寸可达 A3 幅面(幅面根据型号而定),图片处理中提供裁 剪、100KB 限制功能,节省档案储存空间。 (2) 扫描身份证 最新软件增加了扫描身份证,同时扫描正反 2 页在一张 A4 纸上。具体操作方法为:点击“身份 证”,此时工作在身份证扫描模式,然后按照正常程序扫描正面再扫描反面,第二页扫描结束后,软 件会自动将刚才扫描的 2 页合成到一张 A4 纸上,在右侧缩略图中亦可以看到。 (3) 实物扫描功能 高拍仪的扫描感应组件部分,配合机械设计,能方便进行实体对象扫描,并可以将其数据存盘。 可实现连续扫描,时间间隔自行设定。 (4) 实物投影机功能 高拍仪为一直立式扫描设计,实体对象可置于扫描镜头下,实时捕捉实物图像,配合软件可直接 投影到屏幕上。 (5) 传真机功能 通过高拍仪所扫描的图像文件,可由网络传真实时传真至目的地。扫描文件后,请登录网页 注册用户名后登录传真平台加载扫描附件,填写传真号码,即可进行网络无纸传真。 (6) 影像录像功能 高拍仪除了提供纸张文件和实物的扫描功能外,还随机提供了实时录像功能,操作简单,录像时 间长短可随意控制。 (7) 复印机功能 能快速地获取纸张、物体等的影像图片文件,并可由黑白或彩色打印机实时打印,同时提供文件 影像影印功能。可自由设定图像的大小及旋转角度等,并可以进行书本翻拍等工作。 (8) 电子邮件功能 经高拍仪扫描存盘的图像文件可通过邮箱以电子邮件的方式发送。
- 1、下载文档前请自行甄别文档内容的完整性,平台不提供额外的编辑、内容补充、找答案等附加服务。
- 2、"仅部分预览"的文档,不可在线预览部分如存在完整性等问题,可反馈申请退款(可完整预览的文档不适用该条件!)。
- 3、如文档侵犯您的权益,请联系客服反馈,我们会尽快为您处理(人工客服工作时间:9:00-18:30)。
高拍仪使用手册(A、B、C、E系列,版本号:V1.1)生产商:福建捷宇电脑科技有限公司地址:福建省福州市仓山区浦上工业区鼓楼园9号楼全国统一服务热线: 400-667-6755网址: 邮编:350008目录第一章产品简介1.1 包装内容-------------------------------------21.2 产品外观及结构图-----------------------------21.3 推荐配置------------------------------------151.4 产品主要功能、特点和用途--------------------15第二章应用软件安装与卸载2.1 应用软件安装--------------------------------182.2 应用软件卸载--------------------------------21第三章应用软件操作界面操作说明3.1 主窗口--------------------------------------223.2 菜单键说明----------------------------------22 第四章捷宇高拍仪常见问题及使用技巧-----------------32 第五章故障及解决方法、注意事项---------------------35第一章产品简介1.1 包装内容(1)捷宇高拍仪产品(2)文件垫(折叠式)(3)产品光盘(内容含操作说明和应用程序)(4)USB2.0 连接线(5)产品使用说明书(6)保修卡、合格证(7)副摄像头(选配件)1.2 产品外观及结构1.2.1折叠式1.2.2 台式系列1.2.2.1组装后的产品外观及部品名称如下示:1、USB线2、文件拍摄台 3 、支杆4 、拉杆5 、旋转轴6 、锁紧旋钮7 、摄像头 8、对焦环1.2.2.2组装产品在初次使用前需要进行组装,步骤如下示:步骤1:将文件拍摄仪的USB电缆穿过文件拍摄台的安装孔。
步骤2:将支柱底端插入文件拍摄台安装孔,直到顶到底板。
1.2.2.3拍摄范围设置产品安装完成后,旋臂应处于水平位置,摄像头在A5高度的位置拍摄到的文件拍摄台图像应将充满PC软件取景框。
如果拍摄到的文件拍摄台图像位置有偏差,可按下面的操作对拍摄范围进行调整。
1.2.2.4调整前的准备工作设备安装成功后,启动电脑上的拍摄软件,当屏幕出现拍摄画面后可以进行拍摄范围调整。
1.2.2.5拍摄中心点的前后校准如图所示松下锁紧旋钮,拍摄仪的旋臂可以上下旋转一定角度(旋转范围:以水平位置为基准同下3度,向上3度)调整旋臂的角度,可以实现拍摄中心点前后移动,确认校准完成后,应旋紧锁紧旋钮。
注意:在调整旋臂位置前必而先松开锁紧旋钮,而且旋臂的调整角度不得大于上述允许的旋转范围,否则会导致旋臂损坏。
1.2.2.6拍摄中心点的左右校准1.2.2.7拍摄中心点的左右校准如图所示,握住位于摄像头头部,使其以旋臂为轴心旋转(旋转范围:以水平位置为基准±3度),可以实现拍摄中心点左右的校准。
注意:摄像头旋柄的旋转角度不得大于上述允许的旋转范围,否则会导致摄像头旋柄损坏。
1.2.2.8通过应用软件调整拍摄效果用户根据实际使用环境中的光源情况,过通过调整PC端应用软件中的拍摄参数,以达到佳拍摄效果。
例如,在拍摄银行卡、代身份证等小尺寸证件时,因文件拍摄台为黑色,背景与被摄物形成高反差,可能出现被摄物曝光过度的情况,此时可调整应用软件拍摄参数的“背光对比”(或“逆光对比”)以使拍摄效果达到最佳;或降低拉杆高度,使被拍摄物尽量充满取景框,从而降低被摄物与背景的反差,即可顺利实现拍摄。
1.2.2.9调节拍摄高度拉杆高度与纸张幅而的对应关系如图,上下拉动支杆,可调节拍摄高度,以使摄像头所要拍摄的幅面充满PC软件的取景框。
根据被拍摄文件纸张的幅面大小,拉杆有以下三个档位可供选择:最低档位(A6 幅面):将拉杆向下推至最低位置,可用于拍摄A6 或小于A6 幅面的文件和卡证,如身份证、银行卡等。
中间档位(A5幅画):将拉杆由最低档位向上提升一档,可用于拍摄A5或小于A5的文稿,如大多数银行票据。
最高档位(A4 幅面):将拉杆向上提升到最高位置,用于拍摄A4 或小于A4 幅面的文件和票据。
1.2.2.10调节对焦环使拍摄内容清晰如图:拍摄A5幅面对焦示例将拉杆高度调整到与拍摄幅面一致后,调整摄像头下部的对焦环,使对焦刻线与对应幅面A4 、A5或身份证下的刻线对齐,可使拍摄内容清晰。
如图所示,如果拉杆置于A5位置,此时将对焦环上的“A5 ”标识下的刻度线与摄像头的刻度线对齐,即可使拍摄文稿清晰.1.2.3带底座折叠式1.2.3.1组装后的产品外观及部品名称如下示:1、文件台2、推钮 3 、支杆4 、拉杆 5、旋转轴 6 、副摄像头USB接口7 、LED灯开关(背面) 8、主摄像头 9、调焦盖1.2.3.2组装产品在初次使用前需要进行如下步骤所示:第一步第二步推钮向底座方向推出,以卡住支架部份。
推钮向底座方向推出,以卡住支架部份。
第三步第四步组装步骤图示1.2.3.3拍摄范围设置:产品安装完成后,旋臂应处于水平位置,摄像头在A5高度的位置拍摄到的文件拍摄台图像应将充满PC软件取景框。
如果拍摄到的文件拍摄台图像位置有偏差,可按下面的操作对拍摄范围进行调整。
1.2.3.4调整前的准备工作:设备安装成功后,启动电脑上的拍摄软件,当屏幕出现拍摄画面后可以进行拍摄范围调整。
1.2.3.5拍摄中心点的左右校准:拍摄中心点的左右校准如图所示,握住位于摄像头头部,使其以旋臂为轴心旋转(旋转范围:以水平位置为基准±3度),可以实现拍摄中心点左右的校准。
注意:摄像头旋柄的旋转角度不得大于上述允许的旋转范围,否则会导致摄像头旋柄损坏。
1.2.3.6通过应用软件调整拍摄效果:用户根据实际使用环境中的光源情况,通过调整PC端应用软件中的拍摄参数,以达到最佳拍摄效果。
1.2.3.7调节拍摄高度:拉杆高度与纸张幅而的对应关系图示如图,上下拉动支杆,可调节拍摄高度,以使摄像头所要拍摄的幅面充满PC软件的取景框。
根据被拍摄文件纸张的幅面大小,拉杆有以下三个档位可供选择:最低档位(A6 幅面):将拉杆向下推至最低位置,可用于拍摄A6 或小于A6 幅面的文件和卡证,如身份证、银行卡等。
中间档位(A5幅画):将拉杆由最低档位向上提升一档,可用于拍摄A5或小于A5的文稿,如大多数银行票据。
最高档位(A4 幅面):将拉杆向上提升到最高位置,用于拍摄A4 或小于A4 幅面的文件和票据。
1.2.3.8调节对焦环使拍摄内容清晰如图:拍摄A4幅面对焦示例将拉杆高度调整到与拍摄幅面一致后,调整摄像头下部的对焦环,使对调焦环刻度LED辅助灯焦刻线与对应幅面A4 、A5或身份证下的刻线对齐,可使拍摄内容清晰。
如图所示,如果拉杆置于A4位置,此时将对焦环上的“A4 ”标识下的刻度线与摄像头的刻度线对齐,即可使拍摄文稿清晰.1.2.3.9辅助灯使用依产品使用实际环境,可开关LED辅助灯,以达到最佳拍摄效果。
1.2.3.10副摄像头使用副摄像头为选配件,使用副摄像头时,直接插入副摄像头接口即可。
1.2.4 A3折叠式1.2.4.1 A3折叠式硬件组装及初始设置参考:JYP系列产品组装及初始设置。
1.2.4.2 A3折叠式特点:A3折叠式无底座,最大拍摄范围为A3幅面。
1.2.4.3产品外形图示如下:包装时外形图示拍摄状态图示1.2.4.4双摄像头如下图所示:1.3 推荐配置(1)硬件:Pentium 4 或同等级CPU 或以上,512MB或以上内存;(2)USB端口:计算机须具有符合USB2.0协议的USB接口;(3)操作系统:Windows XP / Windows VISTA / Win7;1.4 产品主要功能、特点和用途捷宇高拍仪是一款便捷式高速多功能拍摄仪,无论是纸张文件、彩色图片还是立体物件,都能够轻松完成拍摄并将拍摄的图片即时存储,不但比传统扫描仪更高效,而且具备更多功能与用途。
捷宇高拍仪采用独特的可折叠式设计,外观简洁、大方、高贵、稳重。
在进行文件或物体的拍摄时,文件或物体不需要与捷宇高拍仪进行接触,故不会出现传统扫描仪的卡纸现象。
拥有了捷宇高拍仪,能随心所欲的获取影像数据。
快速高品质的文件影像采集能够满足您对文档数字化的需求。
主要功能●文件拍摄与存储捷宇高拍仪和传统扫描仪一样,可以采集文档影像;但是捷宇高拍仪比传统的扫描仪具备更多的功能,因为它不但可以拍摄纸张文档,还可以对实物进行拍摄,采集速度远远高于传统的扫描仪。
●复印机功能所见即所得,快速复印真实影像。
捷宇高拍仪软件提供了快速打印预览视频中的影像的功能,可选择存储或不存储复印资料,节省空间与时间,无需再购买一台价格昂贵的复印机,大大节省了办公成本,并提高您的办公效率。
●传真机功能通过捷宇高拍仪所拍摄的图像文件,可通过网络传真快速地传真至目的地,无需再购买价格昂贵的传真机,或者您也可以通过传统的传真机进行传真。
●实物投影机功能捷宇高拍仪可以作为实物视频展示台,配合投影仪,无论是授课、开会、展示产品等等场合,都会给你带来方便,节省您的成本和时间。
●实物拍摄功能捷宇高拍仪为您提供了实物拍摄功能,无需再购买价格昂贵的数码相机。
无论是手动拍摄,还是定时间隔连拍,都能出色、稳定的拍摄到高质量的数码照片。
● OCR 功能将所拍摄文件中的文字转化为WORD 可编辑格式。
●书籍翻拍使用捷宇高拍仪可轻松将装订好的书籍、合同、书刊杂志等进行拍摄存储,克服传统扫描仪速度慢并且不易处理装订好书籍的缺点。
产品特点(1)高像素图像实时显示与采集(2)图像存储存储格式:JPG,TIF,PNG,BMP,PDF等。
(3)图像文件管理可以按日期时间命名文件或序号递增的方式命名文件。
(4)固定的拍摄距离与角度,保障清晰成像。
(5)产品可以折叠,体积小、重量轻,携带方便。
(6)USB 供电,无需专用电源。
(7)作为一款便捷式的拍摄仪,配合笔记本电脑可随处进行纸制文件或其它实物的快速数字化扫描。
(8)作为摄像头,可进行视频摄像。
(9)配合电脑与打印机实现复印功能。
第二章应用软件安装与卸载2.1应用软件安装安装光盘主界面:点击:点击【下一步】点击【下一步】点击【下一步】请选择安装路径:点击【下一步】点击【下一步】点击【下一步】点击【安装】点击【完成】完成安装退出安装盘,完成捷宇高拍仪文件拍摄仪的安装。
2.2应用软件卸载(1)卸载捷宇高拍仪软件(2)进入windows控制面板,点击【安装和卸载程序】选项(3)在控制面板,添加删除程序中找到点击删除或选择安装程序中『』,按『下一步』按钮,并按照提示完成步骤。