CA型静音无油空气泵使用说明书模板
无油空气压缩机安全操作规程范本(2篇)
无油空气压缩机安全操作规程范本一、前言为了确保无油空气压缩机的安全运行,防止事故的发生,保护人员的生命财产安全,制定本安全操作规程。
二、适用范围本规程适用于无油空气压缩机的日常操作与维护。
三、安全操作规程1. 操作前的准备1.1 熟悉无油空气压缩机的结构、原理、工作流程和安全操作规程。
1.2 穿戴必要的个人防护装备,如护目镜、防护手套、防滑鞋等。
1.3 检查无油空气压缩机的工作环境是否符合操作要求,确保通风良好。
1.4 检查无油空气压缩机的电源是否接地可靠,电器设备是否正常运行。
2. 启动与停止操作2.1 启动操作2.1.1 打开压缩机的电源开关。
2.1.2 仔细观察电器设备的运行状态,确保压缩机正常启动。
2.1.3 检查压缩机出口的压力表是否正常工作。
2.1.4 将操作面板上的压力开关调至所需压力值。
2.2 停止操作2.2.1 将操作面板上的压力开关调至最低值。
2.2.2 关闭压缩机的电源开关。
2.2.3 等待压缩机内的气体完全排放干净后,才能进行维护操作。
3. 维护操作3.1 定期清洁压缩机的进气口和出气口,防止灰尘、杂物进入。
3.2 定期检查油滤器和空气滤清器的工作状态,如有损坏及时更换。
3.3 定期检查压力表和温度表的准确性,如有不正常情况及时修理或更换。
3.4 定期检查压缩机的润滑情况,如需加油或更换润滑剂应按说明书要求进行操作。
3.5 维修和更换压缩机的零部件时,应按照相关技术标准进行操作,严禁私自拆卸和更换零部件。
4. 应急处理4.1 如出现压缩机异常声音、温度升高或震动等异常情况,应立即停机检查原因,并采取相应措施。
4.2 如发生压缩机漏气、泄漏润滑油或者其他异常情况,应立即采取紧急停机并进行处理。
4.3 如压缩机发生火灾、爆炸等危险情况,应迅速撤离人员,及时通知有关部门,并采取安全措施进行扑救。
4.4 如压缩机发生电气故障,应立即切断电源,并进行修复或报修。
五、总结本安全操作规程是无油空气压缩机的操作和维护的基本要求,所有操作人员必须严格遵守。
加州空气工具Ultra静音无油气压机20040C说明书

ULTRA QUIET & OIL FREEAIR COMPRESSOROwnER'S MAnUALCALIFORnIA AIR TOOLS20040C4.0 HP20 gAL. Customer Support 1-866-409-45812TAbLe OF CONTeNTSIntroductIon __________________________________2Important Safety InStructIonS _______________5aIr compreSSor componentS__________________6pre-operatIon checklISt ______________________7package contents & assembly____________________7Inspect for damage _____________________________7Save packaging ________________________________7compressor location ___________________________7electrical power ________________________________8operatIng the aIr compreSSor ________________8Introduction ___________________________________8assembly _____________________________________8test run & Break-in period_______________________9daily operation_________________________________9maIntenance _________________________________10draining the air tank & air dryer _________________10changing the air filter__________________________10testing for leaks ______________________________10cleaning _____________________________________10Storage ______________________________________10trouBleShootIng ____________________________11SpecIfIcatIonS________________________________12electrical circuit _______________________________12air passage drawing ___________________________12Warranty ____________________________________13product regIStratIon________________________15thank you for purchasing a california air tools, Inc.air compressor.record the model and serial numbers indicated on your air compressor’s nameplate:model no.________________________________________Serial no.________________________________________date of purchase:_________________________________Store/dealer:_____________________________________3Customer Support: 1-866-409-4581how to find a local service center:even quality built equipment might need service or repair parts.Contact the California Air T ools Customer Service department:Phone: 1-866-409-4581Online: please provide the information below:Model number and Serial number and specifications shown on the Model number/Serial number plate.Part number or numbers shown in the parts list section of the owner’s manual for your air compressor model.A brief description of the trouble with the air compressor.do not return your air compressor for service or parts to the store/dealer where purchased.IMPORTANT SAFeTy INSTRuCTIONSSafety messages & Signal Words:4Customer Support: 1-866-409-45815Customer Support: 1-866-409-45816Customer Support: 1-866-409-4581pre-operatIon checklISt package contentsmodel: 20040cpackage contents:*Air Compressor* Air Filters (4)*Owner's Manualassembly:Install the air filters.1. Screw the four air filters into the 4 ports located onthe top left and right sides of the motor heads.Inspect for damagebefore using the air compressor, make sure the air tank is not damaged, inspect all parts for damage, and check that all pipes are firmly connected.do not use the air compressor if any damage is found. If damaged, have an authorized service center inspect and test the air compressor to ensure that is working properly.Save packagingSave all outside packaging in case you ever need to return the product for service or repair.compressor locationuse on flat SurfaceFor proper operation, the air compressor must be placed on a flat surface with an incline no greater than 15 degrees.maintain a clear areaIt is very important that the air compressor is positioned so that there is adequate airflow around the machine. There must be at least 2 feet of obstacle-free space surrounding and above the air compressor.use in areas with clean airFor proper operation and to maximize the longevity of the air compressor, it is very important that the air drawn into the air compressor is clean. The air compressor should not be used in areas where dust or particulates are in the air. This will damage the motor and impair proper operation.Important:Always use the air filter, properly installed.7 Customer Support: 1-866-409-45818Customer Support: 1-866-409-4581electrical powerelectrical power requirementsbefore using the air compressor, refer to the serial label for voltage and amperage requirements. Make sure you have asufficient electrical supply for supporting the motor's requirements. use a dedicated circuit for the best results.Low voltage and/or an overload circuit can cause the motor's overload protection system circuit breaker to trip.electrical extension cordInspect all electrical extension cords to ensure that they are free ofInspect all electrical extension cords to ensure that they are free of damage.When using an extension cord, use a heavy-duty cord that is no more than 25 feet long and at least 14 gauge.use only a 3-wire extension cord that has a 3-blade grounding plug.OPeRATINg The AIR COMPReSSORSave this manual for future reference.IntroductionThis air compressor features a compact structure, stable,performance, a high airflow rate, easy operation and lowmaintenance. because the air compressor produces no oil in the airflow, it can be used for air supplies that need oil-free air.. The motor directly drives the pistons and does not need any lubrication or oil to function for a long period of time.assembly1.Attach the air hose to the 1/4” (universal / Industrial) coupler.2.Make sure the drain valve is off and that the power switch is in the OFF position.3. ensure that the power supply you are going to use is operating normally.4.Insert the power supply cord into the power supply socket.9Customer Support: 1-866-409-4581AIR COMPRESSORtest runbefore using the air compressor for the first time, complete a test run as follows:1.Turn the power switch to the OFF position. Plug the power supply cord into a power supply socket. Start the aircompressor by turning the power switch to the ON position.The pressure gauge reading will slowly rise as pressureincreases inside the air tank. When the gauge reading reaches 120 -125 PSI, the pressure switch will automatically turn the power off. This indicates the compressor is working normally. 2.Starting the compressor:1.Turn the power switch to the OFF position.2.Attach the air hose to the 1/4” (universal / Industrial) coupler.3.Close the drain valve.4.Plug the power supply cord into a power supply socket.5.Turn the power switch to the ON position.6.Let the motor run and tank fill until motor turns off.7. Operate air tool normally.8.T o regulate the air to the air hose. have the air compressor and air tool both turned on and running. Turn the regulator knob to the right to increase the pressure and to left to decrease the air pressure to the hose and air tool..Shutting down the compressor:1.Turn the power switch to the OFF position.2.unplug the power supply cord.3.Reduce the pressure in the air tank through the air supply hose.note: If the Air Compressor is not working properly, the pressure gauge will indicate that there is a decrease in pressure in the air tank. If there is an air leak from the compressor the pressure in the air tank decreases, the pressure switch resets and the motor automatically turns back on.If you detect an air leakage, turn the power switch to the Off position, release the air from the tank by pulling on the safety valve. unplug the power supply cord and contact Customer Support for Assistance.Turn the power switch to the Off position, unplug the power supply cord and release the air from the drain valve.At this point proceed to the next step (daily operations)starting the air compressor to continue to use.AIR COMPRESSOR MAINTeNANCedraining the air tankThe frequency at which you should drain the air tank depends on the environmental conditions and the amount of operating time logged.daily draining is recommended to not damage the air compressor motor, tank and other components.1.Place the air compressor above a container capable of holdingwater. A pan with a dry towel would be advised.Locate the drain valve at the bottom of the air tank.2.Without compressed air in the air tank, slowly turn the drain valveknob to the forward (open) or straight down position.The water in the air tank will drain out.3.After all of the accumulated water has drained out, turn the drainvalve knob to the closed or left position in order to avoid leakage.*** draining the air tank protects parts from rust and corrosion***changing the air filterThe air filters are designed to reduce noise and help prevent particulates in the air from entering and damaging the air compressor.After being used for a period of time, the air filter will become clogged. This will reduce the air intake capabilities of the air compressor, reducing performance. Therefore, the air filter must be replaced regularly.1.Open the lid of the air filter and remove the old air filter element.2.Replace with a new air filter element and close the lid.testing for leaksMake sure all connections are tight. do not overtighten.A small leak in any hose or pipe connection will reduce the air compressor's performance.T o test for small leaks, spray a small amount of soapy water on the area suspected of leaking. If the soap bubbles, replace the broken part.cleaningClean items with a soft brush, or wipe with a moistened cloth using a biodegradable solvent.do not use flammable liquids such as gasoline or alcohol. Always keep parts clean from dirt and dust for better performance.STORAgebefore storing for a prolonged period of time:1.Turn off the power supply.2.disconnect the power cord from the power supply.3.Pull the relief valve and release all the pressure from the air tank.4.Clean the air compressor to remove all dirt and dust.5.Cover the air compressor with a cover to protect the unit fromdust and moisture.6.do not stack or store any items on top of or around the aircompressor. damage could occur.10AIR COMPRESSOR TROubLeShOOTINg11Customer Support: 1-866-409-458112Customer Support: 1-866-409-4581SPeCIFICATIONSelectrical circuitair passage drawingAIR COMPRESSORMotorEarth wire (Green)Red cords for CapacitorElectric cord for motorSolenoid valveElectric cord for motor Pressure switchOverload protector (MAX temperature 135°C)Pressure switchSafety valvePressure gaugeRegulatorPressure gaugeBall valveFilterDrain valveAir intakeCheck valveSolenoid valveCompressorTankAIR COMPRESSOR CALIFORNIA AIR TOOLS INC. LIMITed WARRANTyThis warranty is limited to Air Compressors distributed by:California Air Tools, Inc.8560 Sieper Viva Road, unit 3San diego, CA 92154limited WarrantyCalifornia Air T ools Inc. will repair or replace, free of charge, to the original retail customer who purchased a California Air T ools, Inc.Air Compressor from an authorized dealer, distributor or distributor’s dealer in North America.This warranty does not transfer to subsequent owners.California Air T ools Inc. will repair or replace, at its option, any parts of the portable air compressor that are proven by an authorized service center to be defective in material or workmanship under normal use during the applicable warranty time period as stated below. This limited warranty covers the cost of the replacement parts and labor for all defects when installed by an authorized service center. Transportation charges are the responsibility of the customer. Any part replaced under warranty becomes the property of California AirT ools Inc.All parts replaced under warranty will be considered as part of original product, and any warranty on those parts will expire coincident with the original product warranty.limited Warranty periodsNon-commercial / Non-rental (personal use by a retail customer): 12 months parts and laborCommercial / Rental (usage for income, business use):12 months parts and laborThe limited warranty period begins on the date of retail purchase by the original purchaser.disclaimers, limitations of remedies & exclusionsThis warranty gives you specific legal rights, and you may also have other rights which may vary from state to state.disclaimer of other WarrantiesT o the fullest extent permitted by applicable law, this limited warranty is exclusive and expressly in lieu of any and all other warranties, including, without limitation, any implied warranties of merchantability or fitness for a particular purpose or any other implied warranties that may arise from the course of dealing or usage of the trade. California Air T ools Inc. hereby declaims and excludes all other warranties. T o the extent that California Air T ools Inc. products are consumer products under applicable federal and state law with respect to any customer, the duration of any implied warranties (including but not limited to implied warranties of merchantability or fitness for a particular purpose) are limited to the shortest duration permitted by applicable law or the Limited Warranty period provided herein, whichever is longer.limitations of remediesCalifornia Air T ools Inc. shall not be liable to customer, or anyone claiming under customer, for any other obligations or liabilities, including but not limited to, obligations or liabilities airing out of breach of contract or warranty, negligence or other tort or any theory of strict liability, with respect to the air compressor or California Air T ools Inc. acts or omissions or otherwise. T o the fullest extent permitted by applicable law, California Air T ools Inc. shall not in any event be liable for incidental, compensatory, punitive, consequential, indirect, special or other damages, including but not limited to loss of use, loss of income, loss of time, loss of sales, injury to personal property, or liability customer incurs with respect to any other person, or any other type or form of consequential damage or economic loss.13exclusionsIn addition to the foregoing disclaimers, limitations and terms, this limited warranty shall not apply to and does not cover accessories, nor does it cover products that are in any way subject to any of the following:1.Improper setup, installation or storage.ck of proper maintenance and service.3.Accident, damage, abuse or misuse.4.Abnormal operating conditions or applications.5.Repair or modification by customer or any third party without written consent of California Air T ools Inc.e under operating conditions or in applications not recommended by California Air T ools Inc.7.Normal wear.8.The use of accessories or attachments not recommended by California Air T ools Inc.9.Acts of god.The application of these exclusions will be determined at the sole discretion of California Air T ools Inc.registrationWarranty registration with California Air T ools Inc. is required on all products.you can mail the enclosed registration form.Warranty is also available by keeping and showing your original receipt from the date of purchase to an Authorized California Air T ools Service Center.Servicedo not return your air compressor to the place of purchase.For all customer service inquiries.Contact California Air T ools Customer Service1-866-409-4581 (8am - 4pm) M - F Pacific Timego to customer Service tabclick on parts and Service tab14PROduCT RegISTRATIONT o register your product, please complete the information below and mail to the mailing address at the end of this page.1.personal Information:Full Name (Include Middle Initial):_______________________________________________________________Mailing Address:_____________________________________________________________________________City:___________________________________ State:_______________ Zip Code:_______________________Phone Number:_____________________________________________________________________________e-mail Address:_____________________________________________________________________________(Check here to receive product information and offers via e-mail)(Check here to receive product information from other companies via e-mail)2. product Information:date of Purchase:_____________________________________________________________(MM / dd / yyyy)Model Number:______________________________________________________________________________Serial Number:___________________________________________________________(Found on name plate)Purchased Location:__________________________________________________________________________Purchase Price:_____________________________________________________________________________Type of Primary use for this Product: home Recreation emergency Rental CommercialOther______________________________________________________________________________________Features Influencing Product Purchase: brand Portability Power Rating Price WarrantyOther Features (describe)_____________________________________________________________________What other Power equipment are you interested in purchasing in the future?_____________________________Thank you for registering your product.Mail to:California Air Tools8560 Sieper Viva Road, unit 3San diego, CA 9215415。
无油式空气压缩机【操作规程】
无油式空气压缩机【操作规程】一、概述1、目的:本规程指导操作人员正确使用无油式空气压缩机2、使用设备:无油润滑空气压缩机6立方3台,10立方1台3、引用文件:二、操作步骤:1、开机前的准备工作1.1电器设备应单独调整,清理试验好,电机旋转方向正确,电压不低于340伏。
1.2各连接部位的紧固装置和安全防护装置良好。
1.3打开排污阀门,打开冷却水阀门。
1.4打开总管道阀门,检查水、油的压力和存量,确保空压机无负荷启动。
2、开机程序2.1先将电机启动,有异常声音后关闭电机。
2.2电机启动后,空压机先空载运行2~4分钟,然后关闭排污阀门,再使压缩机达到规定参数2.3开车后应注意压缩机运行是否正常,有无异常声音,安全阀是否正常,各连接部位有无漏油、漏气、漏水现象。
3、关闭程序3.1打开排污阀门,将积水和压缩空气放尽。
3.2关闭电源,空压机将停止工作。
3.3如全部空压机关闭,则关闭水泵和冷却风机,关闭进总管道的阀门。
4、故障停车程序4.1以下情况,将紧急停车,开其它备用机:1)当油压低于0.1Mpa经调节无效时2)压缩机有异常声响时3)安全阀打开压力过高4)压缩机任何部分温度超过允许值时5)电器设备出现异常声响时4.2压力容器严重漏气时;冷却水系统故障,将关闭所有压缩机。
4.3冷却水故障时,应及时打开补充水(消防水)。
发生意外故障时,应及时通知汇报组长和设施科。
三、运行参数1.油位应在两油标线的2/3高度上,油压为0.1~0.5Mpa,油温低于60度。
2.排气压力一级为0.18~0.22Mpa,二级为0.6~0.8Mpa,排气温度低于160度3.水压在0.2~0.4Mpa四、维修1.操作人员应做好设备的润滑保养。
2.设备维修、保养有动力维修工负责。
五、巡视检查1.操作人员至少每小时巡视抄表一次。
2.巡视时,注意冷却水和油位的情况是否正常。
3.如发生意外情况应及时采取措施,做好记录并马上告之组长。
4.储气罐每两小时排污一次排污时,排污缓慢开启不得快速开启,潮湿天气时视情况而定,多放为佳。
牧田 AC001G充电式空气压缩机 使用说明书
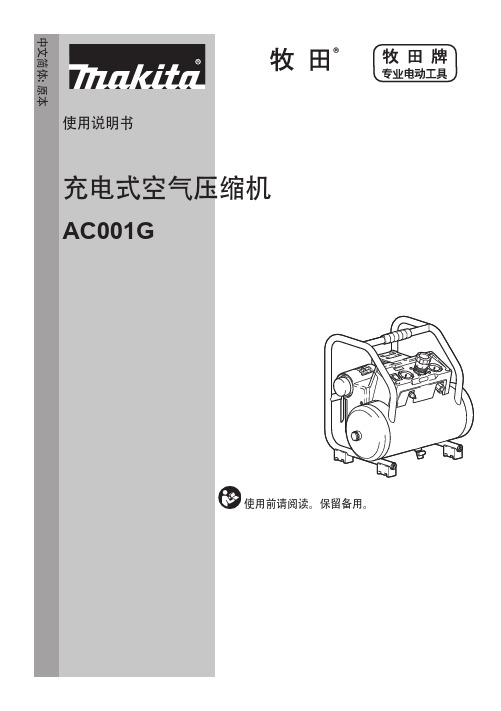
使用说明书充电式空气压缩机AC001G中文简体: 原本使用前请阅读。
保留备用。
中文简体 (原本)型号:AC001G L/***********(L/**********)34 L/min启动压力0.72 MPa (7.2 bar)停止压力0.93 MPa (9.3 bar)出口最大压力0.93 MPa (9.3 bar)罐径 x 行程 x 数量36 mm x 30 mm x 1电机RPM 6,000 r/min 罐尺寸7.6 L 润滑无油额定电压D.C. 36 V - 40 V 最大尺寸(长 x 宽 x 高)302 mm x 434 mm x 382 mm净重11.6 - 12.2 kg• 生产者保留变更规格不另行通知之权利。
• 规格和电池组可能因销往国家之不同而异。
适用电池组和充电器电池组BL4020 / BL4025 / BL4040* / BL4050F**:建议使用的电池充电器DC40RA / DC40RB / DC40RC注:不包括电池组和充电器。
符号以下显示本设备可能会使用的符号。
在使用工具之前,请务必理解其含义。
阅读使用说明书。
小心:在对本压缩机进行任何 工作前,必须取出电池组。
高温危险。
小心:本压缩机含有部分可能达到高温的部件。
意外启动危险。
注意,在断电而后重置的情况下,本压缩机可能自动启动。
Ni-MH Li-ion 仅用于欧洲国家由于本设备中包含有害成分,因此废弃的电气和电子设备、蓄电池和普通电池可能会对环境和人体健康产生负面影响。
请勿将电气和电子工具或电池与家庭普通废弃物放在一起处置!根据欧洲关于废弃电气电子设备、蓄电池和普通电池、废弃的蓄电池和普通电池的指令及其国家层面的修订法案,废弃的电气设备、普通电池和蓄电池应当单独存放并递送至城市垃圾收集点,根据环保法规进行处置。
此规定由标有叉形标志的带轮垃圾桶符号表示。
保证声功率级别符合欧盟室外噪音指令。
保证声功率级别符合UKCA室外噪音指令。
无油空气压缩机静音箱机组操作说明
AEON-QP13-D11无油空气压缩机静音箱机组操作说明
一. 工作原理简介
设备通电后,空气压缩机运转,空气由滤清器吸入,经汽缸活塞压缩后,压缩空气通过管路单向阀储存在储气罐中。
调整调压阀打开球阀,便获得稳定压力的压缩空气。
机组开启、停止、运转由压力开关控制,压力表分别显示储气罐和排出空气压力数值。
二. 操作说明及注意事项
1.本设备机组使用电源为220V;开机前必须首先核实电源电压无误后,才能通电运行。
2.空气压缩机仅勇于抽取自然状态空气,不能抽吸其他带压或含污染、腐蚀有害气体。
3.空气压缩机、气缸体、缸盖、排气管路均有较高温度,操作者应小心,不得靠近和触摸以免烫伤,空气压缩机排出压缩气流均有较高温度和压力,应防止高压气流损伤。
4.本机为无润滑油空气压缩机,在使用过程中严禁加注任何润滑油。
5.空气压缩机有热保护器,当其电流过高时,热保护器会处于保护状态,空气压缩机突然停机,待温度下降后,按动保护器往复按钮,可恢复正常启动。
6.严禁空气压缩机正常工作时,带压、带电拆卸、紧固、维修空气压缩机零部件。
7.空气压缩机发现漏气,异常声响时,应立即断电停止运转,故障排除后才能通电运行。
8.空气压缩机严禁带压启动。
9.非指定人员不得拆卸、维修、调整一面造成空气压缩机零件损坏。
10.空气压缩机组应定期由放水阀排除储气罐中的水份。
11.干燥塔中的干燥剂使用寿命为4000小时,应按时更换干燥剂。
编制:审核:。
无油低噪音空气压缩机说明书

ZW 500D 无油低噪音空气压缩机说明书前言:一、多谢阁下赏识。
此机能提供稳定的无油气源。
避免油渍进入人体,影响粘固质量和工作环境,又能避免终端机器的非耐油管因有油和气压过高引发故障。
二、需水平安放在室内干燥、清洁、通风场所,特别注意远离粉尘之类的范围,如无法达到要求,必须增加过滤。
三、此机组额定电压110±5%V AC60Hz500W 5.0A,电流所经过的电源线、保护装置等必须接触良好和能承受电动机起动时约10安培的电流。
四、每季度清洁过滤器海绵的粉尘一次,每月查看电磁阀是否正常排空和每星期排水一次,排水方法:打开底部排水堵头,污水由排污口排出。
五、机组编号在500A 后面有七位数,前二位是生产年份、第三位是月份(按英文字母顺序排列)、最后四位数是当月生产第几台的序号。
如无购机凭证,保修期以出厂编号日期算起,一年内为保修期。
试机:插上电源插座,机组运行,关闭各气开关,充气至8.0bar 时自动关机并自动排空,静听无漏气现象,放气至4.0bar 时机组自动开机充气至8.0bar 自动停机 ,拉出插头,移致固定处水平放好,接好气管,插好插头,机组充满气停机,打开供气开关,观察压力表应无降压,确认终端机器无漏气现象,即可投入使用。
电路图:气路解剖侧面图:机组工作时,空气由进气消声过滤器进入泵头,经泵头压缩为高压,由铜管流到气罐,再由气罐流到单向阀,因机组通电工作,电磁阀线圈通电,把电磁阀芯吸上,封闭电磁阀的常开气孔,高压只有经单向阀充入储气罐。
当储气罐的压力达到8.0bar 时,气控开关自动跳开,切断电源,泵头停机、电磁阀失去磁吸,阀芯被弹簧弹出,打开常开孔,把铜管、气罐和泵头的高压排泄到空气中,而储气罐内的高压因单向阀反向不通而储存气源,放气开关输出。
(压力表的压力指示是储气罐内的气体压力)。
维修:1、机组保修一年,半年内因质量问题可换免费维修(如雷击、电压超高、进水、泵头吸入沙粉错成气压打不起、人为等现象除外)。
实验室用静音空压机无油无水气泵安全操作规定

实验室用静音空压机无油无水气泵安全操作规定引言静音空压机无油无水气泵是实验室中常见的工具,可以用于压缩空气,驱动实验设备,也可以用于排气。
然而,使用气泵的时候,要注意安全使用,避免财产损失或人身伤害,因此本文主要介绍实验室使用静音空压机无油无水气泵的安全操作规定,以确保实验室工作的顺利进行。
使用前的准备工作在使用静音空压机无油无水气泵前,必须进行准备工作和安全检查。
如下:1.检查气泵是否正常运行。
检查过程包括检查压缩机,调整空压机和排气管道的清洁和安装,并检查气泵的使用说明书。
2.检查气泵的相关设施。
检查过程包括检查压缩机空气滤清器的清洁和安装,以及调整设备的气体压力,以确保其符合实验需求。
3.安装必要的安全装置。
在安装气泵时,必须配备必要的安全阀门和压力控制器,以确保安全。
4.设定安全控制模式。
在使用气泵时,必须在合适的机器设定模式下进行,以确保使机器更加安全和经济。
操作规定在使用静音空压机无油无水气泵时,应当遵守下列操作规定:1.操作前,必须进行查看,并确认气泵的使用条件和要求是否符合。
如果使用条件不符,应立即停止使用。
2.在使用气泵时,必须用于设计压力范围内,任何超过压力范围的行为都会导致机器损坏或更严重的后果。
3.在使用气泵时,必须永远遵循工作人员的安全操作规程,不要开启机器保护机制或关闭任何安全装置,也不应在机器上加装不属于正常配置的附件和部件,以确保安全稳定。
4.在气泵进入待机模式时,应停止排气活动,避免产生过多噪声和震动,并让气泵处于真正的冷却状态,以避免气泵因过热而受损。
5.在气泵的清洁上,应当严格按照使用说明书上规定的方法进行,不要用刻意更改等方式进行气泵的清洁,以免机器的本身设计规则受到破坏。
6.静音空压机无油无水气泵不应在高温、潮湿、易着火或易爆炸的地方使用,不应佩戴任何玩具、手表、项链等人造物品。
7.在维护气泵时,必须根据气泵使用须知进行清洁和运维,不得离开现场,避免危险情况发生。
纯无油空气泵安全操作及保养规程
纯无油空气泵安全操作及保养规程前言纯无油空气泵是一种常用的气源设备,广泛应用于医疗、食品、化工等领域,其性能优良、使用方便。
但是在使用过程中,必须要遵守安全规定和正确的保养方法,以确保设备的长时间稳定运行和人员的生命财产安全。
操作规程1.放置位置:设备放置要平坦,通风透气,干燥清洁,远离热源、火源及易燃易爆物品。
2.启动前的准备:–检查电源及电缆是否正常。
–查看压缩机外观是否有损坏或变形。
–检查进、出口管道密封是否良好。
–查看油位是否处于正常范围,并保持清洁。
3.启动:–插上电源。
–观察运行灯是否亮起,运行灯亮后,按启动按钮。
–关注气体压力表的变化情况,当气体压力达到工作压力时,设备进入正常工作状态。
4.关闭:–操作前,应先停掉气体进口,待停止运行后,关闭气泵电路开关,拔出电源插头,停用。
–关闭之前,应等待气泵完全停止运行,并确保气泵内无气体残留。
保养规程1.定期更换油:根据设备工作时间,定期清洗滤芯,并更换必要的密封件和油。
2.维护气泵进出口,防止管道和气阀堵塞。
3.检查气泵是否过热:当气泵工作时间超过工作时间时,注意检查设备是否过热,若发现过热现象,应立即联系维修人员进行检查维修操作。
4.严格执行泵腔保持清洁操作,防止污物和杂质进入设备内部。
5.根据设备使用要求进行定期检查和保养,及时维护保养设备,以确保设备长时间、稳定、安全地工作。
注意事项1.操作人员应通过学习相应的操作规程和安全措施后,才能上岗操作。
2.设备应由合格的维修人员进行维护、修理和保养,并定期进行检修和维护工作。
3.禁止未经安全培训和资格认证的人员进行操作和维护。
4.禁止对设备进行改装和拆卸,否则会影响设备的稳定性和使用寿命,严重者会造成设备的报废。
5.设备使用过程中,如出现异常或意外情况时,应立即停止设备运行,并及时联系维修人员进行维修处理。
结语本文介绍了纯无油空气泵的安全操作及保养规程,方法简单易行,但能让设备稳定运转、安全、长寿命。
- 1、下载文档前请自行甄别文档内容的完整性,平台不提供额外的编辑、内容补充、找答案等附加服务。
- 2、"仅部分预览"的文档,不可在线预览部分如存在完整性等问题,可反馈申请退款(可完整预览的文档不适用该条件!)。
- 3、如文档侵犯您的权益,请联系客服反馈,我们会尽快为您处理(人工客服工作时间:9:00-18:30)。
9.仪器质量:约15Kg
四、仪器使用前的准备工作:
1.开箱检查
( 1)开箱后按装箱单清点验收。
( 2)检验仪器外观,是否因运输造成损坏。
( 3)若发现异常现象,请速与我公司联系,以便及时解决。
2.开机前的准备工作
(1)仪器应平稳放置,电源开关呈”OFF”状态
1. 空气纯度:无油3级
2. 输出流量:0-1000ml/min
3. 输出压力:0-0.4MPa(压力可调)
4. 工作条件:电源电压:220V±10%,50Hz±5%
环境温度:10-43 °C
相对湿度:<85%
环境无大量粉尘污染及腐蚀性气体
5.工作噪声:<Biblioteka 0分贝6.仪器功率:<100W
7.安全阀开启压力:0.820±.01MPa
5.用户不得随意拆装仪器,发现问题应及时与我公司联系,否则,由此造成的损失由用户负责。
七、仪器保养
1变色硅胶及活性炭的更换
注意:更换变色硅胶及活性炭必须关掉电源开关、 并在没有气压 的条件下进行
拧下干燥管后,先取下干燥管内导气管上的黑色O形圈、 塑料压片和脱脂棉,用大拇指按住导气管出口,将变色硅 胶倒出。
填装新变色硅胶(活性炭)时,应用大拇指按住导气管出 口,以防硅胶颗粒落入导气管堵塞气路。
变色硅胶(活性炭)装填高度以略低于导气管外层套管高 度为宜,超过此高度会导致干燥管与干燥管盖密封不严而 漏气。
硅胶装填完毕后,应检查干燥管底部是否有硅胶颗粒,有 则需取出重装,以防止硅胶颗粒进入气路造成堵塞。
更换活性炭时,需将已失效的活性炭(不可再生)全部倒 出,并用清水冲洗净化管、 不锈钢导管和塑料压片,干燥 后再重新填装。填装时须注意用干净的脱脂棉将净化管的 顶部和底部压实,防止颗粒物进入气路造成故障。
感谢您选用武汉科林普丰仪器有限公司生产的气源产品
本公司客户服务电话,
CA—1型
静音无油空气泵
使
用
说
明
书
武汉科林普丰仪器有限公司
一、概述:
CA-1型静音无油空气泵采用全封闭式压缩机为动力,将自然 空气经过三级净化,除去空气中的水份、 油污和杂质,经稳压装置 输出稳定、 洁净的空气。
CA-1型静音无油空气泵具有输出压力稳定、 噪音低、 净化 能力强的特点,是替代高压空气钢瓶的理想空气源。 该产品不但能 够满足各种型号国产和进口色谱仪及各类分析实验室的使用,而 且也能够做为高纯氮气发生器的空气源。
2.干燥室和脱油净化室气密性的检测方法
接通电源开关,待压力开始上升时,用皂沫不断检查干燥室 和脱油净化室下端接口处是否有气泡,直至压力达到设定压 力0.4MPa,如有气泡,将压力降至0Mpa,重新将干燥室和脱油 净化室拧紧,重复检验,直至不漏气为止。
3、压缩机油的补充
压缩机在工作过程中,润滑剂会逐步挥发,为了保证压缩机的 正常工作,建议用户按期( 3-6个月)添加润滑油,规格可参考当地 汽车发动机润滑油,每次约50-80毫升。添加压缩机油前,先将空气 泵背后的红色进气管从接头中拔出(压住接头上蓝色的圆环,向外 拔出进气管) ,然后将进气管插入盛有润滑油的油杯中,开启电源 开关,很快压缩机油被吸入压缩机中。
(2)使用前检查电路接线是否正确,应有可靠地线。
(3)将仪器后面红色进气管上的封口段剪去,将进气管插入干燥 管上的快速接头。 插好电源插头,接通电源开关,观察仪器是否起 动(手扶仪器有振动感为起动) ,观察有无异常噪音,有异常噪音 请勿操作,与我公司联系解决。 空气泵起动约4-5分钟后,进入压 力控制范围,此时压力表指示在出厂设定的0.4Mpa左右(此压力 能够经过面板上的稳压阀来调节)。
2. 使用完毕后关闭电源(空气泵内的空气自然排放干净)。
六、注意事项:
1.仪器须平稳放置,切勿倾斜,否则压缩机内液体容易外泄。2.仪器连续工作一段时间后,需检查干燥室中的变色硅胶是否由 蓝色变为淡粉色或白色,如果变色则应取出更换,更换硅胶应在无 压力状态进行(压力表指示在0MPa时) ,重新装配的干燥室需检 查气密性,以不漏气为原则。
注意:不可使颗粒状杂质进入压缩机,否则会对压缩机造成严 重损害
加油完毕,将进气口重新插入空气干燥管的快速接头中
八、常见故障及排除方法
3.脱油净化室中的活性炭在仪器工作1000小时后应予更换(活性
炭规格为20~40目),更换活性炭应在无压力状态进行(压力表指示 在0MPa时)重新装配的脱油净化室需检查气密性,以不漏气为原
则。
4.仪器正面左下脚安装有排水开关阀门,用来排出储气罐中的积 水和油污。 建议用户每个星期手动排水一次。 手动排水在关机后打 开排水阀排水,待压力降为0后,再关闭阀门。勤放水有利于保持 输出空气的洁净度。用户必须注意要及时倒掉后面瓶子里的废液。
二、仪器特点:
1. 替代高压钢瓶,使实验室仪器化。
2. 体积小,重量轻,结构合理,操作简单,使用方便。
3. 振动小,噪音低,输出压力稳定,气压波动不大于±
0.003MPa
4. 安全可靠,配有过压,过流二级保护装置。
5. 使用寿命长,可连续使用也可间断使用,性能稳定,流量、 纯 度不衰减。
三、主要技术参数:
(5)关闭电源开关,拧下”空气出口”压帽,然后将”空气出口”与 所使用仪器的”空气入口”相连接。
五、操作方法:
1.接通电源,打开电源开关(仪器内有电磁阀吸合的声音,属正常 现象),空气泵开始工作,约4-5分钟后,根据实际工作需要调节 输出压力,但不得超过0.45Mpa,右旋稳压调节阀为增压,左旋为 降压。
