维迈通头盔蓝牙耳机说明书用户手册简化版
Viking TM 自动遮光头盔操作手册说明书

LOS GRÁFICOS PUEDEN V ARIARManual del OperadorRegistre su máquina:/registerLocalizador de Servicio y Distribuidores Autorizados: /locatorIMS10286| Fecha de Publicación 07/15© Lincoln Global, Inc. All Rights Reserved.Guardar para referencia futuraFecha de Compra Código (ejem: 10859)No. de Serie: (ex: U1060512345)TABLA DE CONTENIDO Página ADVERTENCIAS DE SEGURIDAD – LEA ANTES DE USAR 1 INFORMACIÓN DE LA CARETA 2 ESPECIFICACIONES 3 INSTRUCCIONES DE OPERACIÓN 4 OPERACIÓN/CARACTERÍSTICAS DEL CARTUCHO 5 MANTENIMIENTO Y CUIDADO DE LA CARETA6 CONFIGURACIONES DE LA GUÍA DE OBSCURECIMIENTO 6 REEMPLAZO DEL LENTE Y CARTUCHO 7 LOCALIZACIÓN DE AVERÍAS 8 INFORMACIÓN DE GARANTÍA 9 PARTES DE REEMPLAZO 9ADVERTENCIAS DE SEGURIDAD – LEA ANTES DE USARLos Rayos del ARCO pueden lesionar los ojos y quemar la piel• Antes de soldar, inspeccione siempre la careta y lente de filtro para asegurarse de que están ajustados adecuadamente, están en buenas condiciones y sin dañar.• Revise para ver que el lente transparente está limpio y montado en forma segura en la careta .• Siempre utilice lentes o lentillas de seguridad bajo la careta de soldadura y ropa protectora para proteger su piel contra la radiación, quemaduras y salpicaduras .• Asegúrese de que la radicación óptica de los demás arcos de soldadura en el área que le rodea no entren delante o detrás de la careta y el filtro de auto-obscurecimeinto . .Nota: Los Filtros de Auto-Obscurecimiento en las caretas de Lincoln están diseñados para proteger al usuario contra los rayos ultravioleta e infrarrojos tanto en un estado claro como oscuro. No importa en quésombra esté configurado el lente, la protección UV/IR siempre está presente .contenedor o la MSDS (Hoja de datos de material de seguridad)) o en un cable o acero cadmium plated y otros metales o revestimientos que producen gases altamente tóxicos, expóngase lo menos posible y dentro de los límites de las normas OSHA PEL y ACGIH TLV aplicables utilizando un escape local o ventilación mecánica. Es posible que se requiera un respirador bajo algunas circunstacias o en espacios confinados. Asimismo, e requieren precauciones adicionales al soldar en acero galvanizado.1Visite /safety para concoer información adicional de seguridad.INFORMACIÓN DE LA CARETAEsta Careta de Soldadura de Auto-Oscurecimiento cambiará de un estado claro (sombra 4) a uno oscuro (sombra 5-13) cuando inicia la soldadura de arco.El filtro regresa automáticamente a un estado claro cuando se detiene el arco.Iguale su aplicación de soldadura a la sombra indicada en la tabla de som-bras. (Vea la Página 8)• Temperatura de operación: -10°C ~ 55°C(14°F ~ 131°F). • No utilice o abra el filtro de auto-oscurecimiento si se dañó debido a un impacto, vibración o presión.• Mantenga los sensores y celdas solares limpios. Limpie el cartucho del filtro utilizando una solución de agua jabonosa y trapo suave que deberáestar húmedo pero no saturadoEsta Careta de Auto-Oscurecimiento está diseñada para usarse con la sol-dadura GMAW, GTAW, MMAW o Arco de Plasma y corte de arco de aire car-bón. Esta careta también cuenta con modos de corte y pulido.El cartucho proporciona protección contra la radiación dañina UV e IR, en ambos estados claro y oscuro.El cartucho contiene cuatro sensores para detectar la luz del arco de sol-dadura, dando como resultado que el lente se oscurezca a una sombra de soldadura seleccionada.• No utilice solventes o un detergente de limpieza abrasivo.• Si el lente protector se salpica o cubre con suciedad, deberá reem-plazarse inmediatamente.• Utilice sólo las partes de reemplazo especificadas en este manual.• No utilice la careta sin haber instalado adecuadamente los lentes protec-tores interno y externo.• No utilice la careta si el lente no funciona como se describe.2ESPECIFICACIONES(1)El cumplimiento del casco con ANSI Z87.1 es sin la badana instalada3Clase ÓpticaÁrea de Visión LCDTamaño del Cartucho Protección UV/IR:Sensores del Arco Sombra de Estado ClaroSombras de Soldadura V ariables Control del OscurecimientoFuente de EnergíaAdvertencia de Baja BateríaBateríaEncendido/ApagadoTiempo de Claro a OscuroTiempo de Oscuro a Claro Control de Sensibilidad Clasificación TIG Temperatura de OperaciónTemperatura de Almacenamiento Peso TotalCumplimiento (1)1/1/1/197 x 62mm (3.82 x 2.44in.)114 x 133mm (4.50 x 5.25in.)Hasta la Sombra DIN 16 en todo momento4DIN 3.5DIN 5 a 13Perilla de Marcación – ajuste totalCelda solar con asistencia de batería Luz RojaBaterías de litio CR2450 (se requieren 2)Totalmente Automáticos0.00004 seg. (1/25,000 seg.)0.1 sec. (Short) to 1.0 sec. (Long)Variable y Pulido DC≥ 2 amps; AC≥ 2 amps 14°F ~ 131°F (-10°C ~ 55°C)-4° ~ 158°F (-20°C ~ 70°C)Negro 595g (18.8 Oz.) Gráfico 602g (19.5 Oz.)ANSI Z87.1-2010, CSA Z94.3, CE EN379,AS/NZS 1338.1INSTRUCCIONES DE OPERACIÓNajusta oprimiendo la perilla del trinquete y girando para ajustar al tamaño de cabeza deseado. Esta perilla se localiza en la parte posterior de la careta. El AJUSTE DE LA CORONILLA DEL CASCO se logra ajustando la cinta hasta estar cómodo e introduciendo los pines en los orificios para asegurar. INCLINACIÓN:El ajuste de inclinación se localiza en el lado derecho de la careta. Afloje la perilla de tensión derecha del casco y empuje hacia fuera el extremo superior de la palanca de ajuste hasta que la lengüeta de paro de la palanca se libere de las muescas. Entonces gire la palanca hacia arriba y abajo a la posición de inclinación deseada. La lengüeta de paro se encajaráde nuevo automáticamente al soltarla, asegurando la careta en su lugar. AJUSTE HACIA ADELANTE / ATRÁS:Ajusta la distancia entre la cara del usuario y el lente. A fin de ajustar, afloje las perillas de tensión externas y deslice hacia delante o atrás a la posición deseada, y vuelva a apretar. NOTA:Asegúrese de que ambos lados estén igualmente posicionados para una operación adecuada.4OPERACIÓN/CARACTERÍSTICAS DEL CARTUCHOControl de Sombra VariableLa sombra puede ajustarse de la 5 a la 8 y de la 9 a la 13 con base en elproceso o aplicación de soldadura (consulte la tabla de selección de Sombras en la página 6). El oscurecimiento se ajusta estableciendo el interruptor de rango de sombra en el rango adecuado, y después se utiliza la perilla dual de oscurecimiento para establecer la sombra deseada. El interruptor de rango de sombra y perilla dual de oscurecimiento se localizan en el cartucho ADF como se muestra a continuación.Botón de Prueba (Test)Oprima y mantenga así al botón de prueba para ver previamente la selección de la sombra antes de soldar. Cuando se suelta, la ventana de visión regresaráautomáticamente al estado claro (Sombra 3.5)Perilla de SensibilidadEs posible ajustar la sensibilidad a la luz girando la perilla de SENSIBILIDAD (SENSITIVITY)a la izquierda o derecha como se muestra en la siguiente figura.Girar la perilla a la izquierda aumenta la sensibilidad lo que hace que el cartucho ADF sea más sensible a la luz. Cuando la careta se utiliza en presencia de exceso de luz ambiente o con otra máquina de soldadura cerca, se puede obtener un desempeño mejorado de la careta con una configuración más baja, girando la perilla a la derecha para reducir la sensibilidad. El modo de Pulido (Grind) sepuede seleccionar girando la perilla de sensibilidad totalmente a la izquierda hasta escuchar un clic audible. El modo de pulido está destinado únicamente al pulido,no a la soldadura.Perilla de Tiempo de DemoraEste control está diseñado para proteger los ojos del soldador contra rayos fuertes residuales después de soldar. Cambiar la perilla de Tiempo de DEMORA (DELAY)variará el tiempo de oscuro a claro entre 0.1segundos (S ) a 1.0 segundos (L ). Laconfuración L se recomienda para aplicaciones de alto amperaje donde el charco de soldadura es todavía muy brillante después de que el arco de soldadura ha cesado y para situaciones donde el filtro se puede bloquear tempo-ralmente por ver el arco de soldadura.AlimentaciónEste cartucho ADF se alimenta a través de una batería reemplazable y energía solar. La batería se localiza en la parte inferior delcartucho ADF. Reemplace la batería cuando la luz de BAJA BATERÍA (LOW BATTERY)caciones en la página 3 para el tipo de batería requerida.55Perilla deRango deCUIDADO Y MANTENIMIENTO DE LA CARETALimpieza:limpie la careta con un trapo suave. Limpie regularmente las su-perficie del cartucho. No utilice soluciones de limpieza fuertes. Limpie los sensores y celdas solares con una solución de agua jabonosa y un trapo limpio, y seque con otro trapo libre de pelusa.NO sumerja el cartucho de oscurecimiento en agua u otra solución. Almacenamiento: almacene en un lugar limpio y seco.8REEMPLAZO DEL LENTE Y CARTUCHO Reemplazo del Lente Transparente de la Cubierta Frontal: Reemplace este lente si está dañado. Remueva el ensamble del sujetador ADF según la Figura 1. Remueva el lente de la cubierta frontal del ensamble de la careta. Retire cuida-dosamente el empaque del lente de la cubierta. Instale el nuevo lente en el empaque y ensamble en el armazón de la careta. Asegúrese de ensamblar el lente de la cubierta y el empaque en el armazón de la careta en la misma forma que los removió.Reemplazo del Lente Transparente Interno: Reemplace este lente si estádañado. Coloque una uña bajo la ventana de visión del cartucho y flexione el lente hacia arriba hasta que se libere de los bordes de esta ventana. Cambio del Cartucho de Oscurecimiento: Remueva el ensamble del sujetador ADF del armazón de la careta. Vea la figura 1 para su remoción. Flexione la parte superior del sujetador ADF para permitir que el cartucho ADF salga del armazón. Instale el nuevo cartucho ADF conforme a la Figura 2 a continuación. Asegúrese de insertar el cartucho ADF en el sujetador ADF correctamente, tal y como se muestra. Instale el ensamble del sujetador ADF en el armazón de la careta.INSTALACIÓN DE UN LENTE DE AUMENTO DEL MERCADO DEREFACCIONES:Simplemente deslice el lente de aumento en el riel corto localizado a los ladosGUÍA DE LOCALIZACIÓN DE AVERÍAS Pruebe su cartucho de oscurecimiento antes de soldar direccionando el frente del cartucho hacia una fuente brillante de luz. Después, utilizando sus dedos, cubra y descubra rápidamente los sensores. El cartucho deberá oscurecerse momentáneamente a medida que el sensor se expone. También se puedeINFORMACIÓN DE GARANTÍAINFORMACIÓN DE GARANTÍA: Consulte IMWS1 incluido en la documentació GARANTÍA NO CUBRE DAÑOS POR SALPICADURA:No utilice este producto sin los lentes transparentes protectores correctos instalados a ambos lados del cartucho del Filtro de Auto-Oscurecimiento (ADF). El lente trans-parente proporcionado con esta careta es del tamaño adecuado para trabajar con este producto y deberán evitarse substitutos de otros proveedores.*No se ilustra 9ART.12345*678CANT .11111111PARTE NÚM.KP2898-1KP2932-3KP2931-1KP3908-1KP2930-1S27978-31S27978-32S27978-33DESCRIPCIÓN LENTE TRANSPARENTE EXTERNO (P AQ. CANT . 5)CARTUCHO ADF LENTE TRANSP ARENTE INTERNO (P AQ. CANT . 5)ENSAMBLE DEL CASCO (INCLUYENDO BADANA )BADANA (PAQ. CANT. 2)ARMAZÓN DE REEMPLAZO SELLO DEL LENTE TRANSP ARENTE EXTERNO SUJETADOR ADF CANT .11111111PARTE NÚM .KP3046-100KP3046-125KP3046-150KP3046-175KP3046-200KP3046-225KP3046-250KP3047-1DESCRIPCION LENTE DE AUMENTO, AMPLIFICACIÓN DEL 1.00LENTE DE AUMENTO, AMPLIFICACIÓN DEL 1.25 LENTE DE AUMENTO, AMPLIFICACIÓN DEL 1.50LENTE DE AUMENTO, AMPLIFICACIÓN DEL 1.75 LENTE DE AUMENTO, AMPLIFICACIÓN DEL 2.00LENTE DE AUMENTO, AMPLIFICACIÓN DEL 2.25 LENTE DE AUMENTO, AMPLIFICACIÓN DEL 2.50ADAPTADOR DE CASCO PROTECTOR ACCESORIOS OPCION ALESPOLÍTICA DE ASISTENCIA AL CLIENTEEl negocio de The Lincoln Electric Company es fabricar y vender equipo de soldadura, consumibles y equipo de corte. Nuestro reto es satisfacer las necesidades de nuestros clientes y exceder sus expectativas. A veces, los compradores pueden solicitar consejo o información a Lincoln Electric sobre el uso de nuestros productos. Respondemos a nuestros clientes con base en la mejor información en nuestras manos en ese momento. Lincoln Electric no esta en posición de garantizar o certificar dicha asesoría, y no asume responsabilidad alguna con respecto a dicha información o guía. Renunciamos expresamente a cualquier garantía de cualquier tipo, incluyendo cualquier garantía de aptitud para el propósito particular de cualquier cliente con respecto a dicha información o consejo. Como un asunto de consideración práctica, tampoco podemos asumir ninguna responsabilidad por actualizar o corregir dicha información o asesoría una vez que se ha brindado, y el hecho de proporcionar datos y guía tampoco crea, amplía o altera ninguna garantía con respecto a la venta de nuestros productos.Lincoln Electric es un fabricante receptivo pero la selección y uso de los productos específicos vendidos por Lincoln Electric está únicamente dentro del control del cliente y su responsabilidad exclusiva. Muchas variables más allá del control de Lincoln Electric afectan los resultados obtenidos en aplicar estos tipos de métodos de fabricación y requerimientos de servicio.Sujeta a Cambio – Esta información es precisa según nuestro leal saber y entender al momento de la impresión. Sírvase consultar para cualquier dato actualizado.。
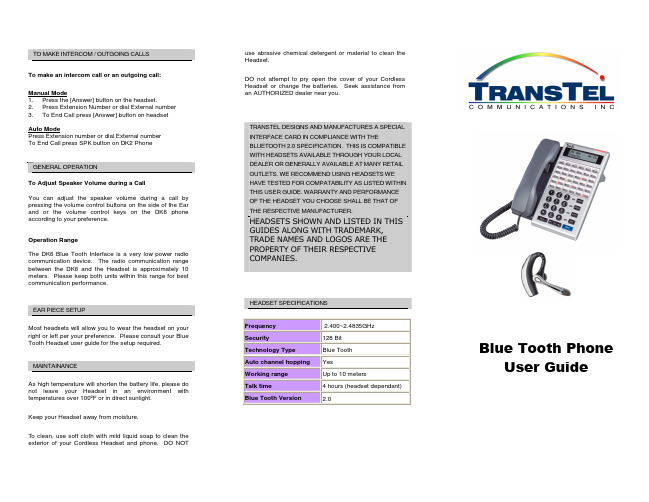
transtel DK6 蓝牙耳机用户指南说明书
• The Headset will then answer call
To end the conversation of a call: • Press the SPK key on the DK6 phone
Note: •
If you press [SPK] button on the DK6 telephone will also end the call directly. But the Blue Tooth Headset will be left in Auto Answer Mode”. If left in this state the next incoming call will be answered automatically by the Headset.
EAR PIECE SETUP
Most headsets will allow you to wear the headset on your right or left per your preference. Please consult your Blue Tooth Headset user guide for the setup required.
To cancel the headset mode on DK6 phone: • Press [SPK][775] to cancel the headset mode.
TO ANSWER INCOMING CALLS
Manual Mode
To answer incoming call: • When DK6 phones rings the Blue Tooth Headset will
TO MAKE INTERCOM / OUTGOING CALLS
sena-3s-plus-使用说明书

3S PLUS摩托车用蓝牙® 通讯系统说明书© 1998–2020 Sena Technologies, Inc. All rights reserved.Sena Technologies, Inc. reserves the right to make any changes and improvements to its product without providing prior notice.Sena™ is a trademark of Sena Technologies, Inc. or its subsidiaries in the USA and other countries. SF1™, SF2™, SF4™, SFR™, SRL™, Momentum™, Momentum INC™, Momentum Lite™, Momentum Pro™, Momentum INC Pro™, Momentum EVO™, Cavalry™, Latitude SR™, Latitude SX™, Latitude S1™, 30K™, 50S™, 50R™, 5S™, 20S EVO™, 20S™, 10S™, 10C™, 10C PRO™, 10C EVO™, 10U™, 10Upad™, 10R™, 3S™, 3S PLUS™, SMH5™, SMH5-FM™, SMH5 MultiCom™, SMH10™, SMH10R™, SPH10™, SPH10H-FM™, Savage™, Prism Tube WiFi™, Prism™, Bluetooth Audio Pack for GoPro®, R1™, R1 EVO™, R1 EVO CS™, M1™, M1 EVO™, RC1™, RC3™, RC4™, Handlebar Remote™, Wristband Remote™, PowerPro Mount™, Powerbank™, FreeWire™, WiFi Docking Station™, WiFi Sync Cable™, WiFi Adapter™,+mesh™, +Mesh Universal™, MeshPort Blue™, MeshPort Red™, Econo™, OUTRUSH™, OUTSTAR™, EcoCom™, Parani M10™, Snowtalk™, Snowtalk2™, SR10™, SR10i™, SM10™, X1™, X1 Pro™, X1S™, Expand™, Expand Boom™, Bluetooth Mic & Intercom™, Tufftalk™, Tufftalk Lite™, Tufftalk M™ are trademarks of Sena Technologies, Inc. or its subsidiaries. These trademarks may not be used without the express permission of Sena.GoPro® is a registered trademark of Woodman Labs of San Mateo, California. Sena Technologies, Inc. (“Sena”) is not affiliated with Woodman Labs, Inc. The Sena Bluetooth Pack for GoPro® is an aftermarket accessory specially designed and manufactured by Sena Technologies, Inc. for the GoPro® Hero3 and Hero4 allowing for Bluetooth capabilities.The Bluetooth® word mark and logos are owned by the Bluetooth SIG, Inc. and any use of such marks by Sena is under license. iPhone® and iPod® touch are registered trademarks of Apple Inc.3S PLUS3.2.1 3.2.24.1.1 4.1.2 4.1.3目录Sena Utility App...............................................................................................................10 Sena 设备管理器..............................................................................................................103.3开启和关闭电源.............................................................................................................................103.4充电...............................................................................................................................................10 3.5检查电池电量.. (11)3.6音量调整 (11)4与其他蓝牙设备配对耳机....................................................................................114.1电话配对.. (11)最初配对耳机................................................................................................................11 耳机关闭时配对 .............................................................................................................12开机状态下耳机配对 .......................................................................................................124.2第二部手机配对,第二部手机和 sr10..........................................................................................124.3GPS 配对.. (12)5行动电话法.................................................................................................................135.1通话与接听.. (13)6立体声音乐 (14)6.1蓝牙立体声 (14)7.1.17.2.17蓝牙对讲......................................................................................................................147.1对讲配对.. (14)与其他耳机配对以进行内部通话...............................................................................143.2Sena 软件.. (10)开始和结束双向对讲 (15)7.2双向对讲 (15)8通用对讲机....................................................................................................................159功能优先.......................................................................................................................1610配置菜单 (16)10.1耳机配置设置 (16)10.1.1 删除所有配对...............................................................................................................1710.1.2恢复出厂设置.. (17)10.2软件配置设置 (17)10.2.1单位语言 (17)10.2.2VOX 电话(默认:启用)..............................................................................................1710.2.3高清对讲机(默认:启用)...........................................................................................1710.2.4高清语音(默认:启用)..........................................................................................17 1包装内容........................................................................................................................42在您的头盔上安装耳机..............................................................................................62.1硬管麦克风型.. (6)2.2通用麦克风型 (7)3入门.................................................................................................................................93.1按键操作. (9)10.2.5语音提示(默认:启用) (18)10.2.6高级降噪系统(默认值:启用) (18)11固件升级.....................................................................................................................1812故障排除. (19)12.1故障复位....................................................................................................................................1912.2恢复出厂设置.. (19)41包装内容3S PLUS•麦克风海绵套硬管麦克风型•USB 数据线•扬声器用3M 贴3S PLUS5通用麦克风类型•USB 数据线•扬声器用3M 贴•麦克风用3M 贴•耳机主机用3M 贴•软线麦克风•麦克风支架勾垫•硬管麦克风固定件•麦克风海绵罩•细线麦克风用勾垫•麦克风63.安装完成后,将连接线隐藏在头盔衬垫下面。
Philips SmartSleep 头盔说明书

Philips SmartSleepLarge Headband30 day money back guaranteeIncludes 30 sensorsPairs with SleepMapper appHH1600/03Put your sleep to work.Improve quality of the deep sleep you already getFeel more rested and refreshed. Increase your energy with better sleep at night. Basedon proven sleep studies, this wearable is effective and easy to use. Designed for peoplewho consistently get <7 hours of sleep.Easy to experience•Will SmartSleep work for you?•What does SmartSleep not do?•Get started with 30 sensors (replenishments available)•Adjustable sliders to help you find the most comfortable fitClinically proven•Clinically proven to improve the quality of your sleepMobile app & boost score track your sleep benefit•Track your sleep improvement with SleepMapper30 day moneyback•Money back guaranteeIssue date 2018-09-17Version: 9.1.1© 2018 Koninklijke Philips N.V.All Rights reserved.Specifications are subject to change without notice. Trademarks are the property of Koninklijke Philips N.V. or their respective HighlightsLarge Headband30% of people choose a large 30 day money back guarantee, Includes 30 sensors, Pairs with SleepMapper appSpecificationsMoney back guaranteeThe Philips Store offers a 30 day hassle-free return policy. If you are not fully satisfied with Philips SmartSleep within 30 days, you may contact 1-866-309-3263 for a full refund. https:///a-w/terms-of-use.htmlSmartSleep benefitsSmartSleep is for people who are between the ages of 18 and 50**, sleep less than 7 hours per night due to lifestyle, have no issues falling asleep or staying asleep, and sleep well when they are asleep. By opting-in and registering today, you will receive nurturing emails to help you get started with SmartSleep.SmartSleep improper useSmartSleep does not help you fall asleep and stay asleep or prolong your deep sleep. SmartSleep will not help with existing sleep conditions such as insomnia, restless legs or sleep apnea.30 sensors includedSmartSleep uses dual sensors for highly accurate tracking that is critical to the technology. Anadhesive, disposable sensor is used due to the unique placement behind the ear. Each self-adhesiveSmartSleep Sensor lasts between 1 and 3 nights ofuse, depending on factors such as skin conditions and time between usages, when properly applied and stored. Experience the sleep sensing technology of SmartSleep. Headband comes with 30 sensors, replenishments sold separately.Clinically provenSmartSleep is clinically proven to help users improve their sleep quality, increase energy, boost alertness, and reduce daytime sleepiness. 70% of users reported feeling less tired durign the day.*SleepMapper mobile appThe SleepMapper mobile app tracks your sleep patterns over time, measures key metrics and shows the slow wave boost you get from SmartSleep each night. Sync the app to your headband each morning to see the enhancement given each night. Please consult the Google Play Store or Apple App Store to check the compatibility of your operating system before purchase.Adjustable slidersApproximately 70% of users choose size Medium headband, while 30% choose a Large headband. Size Medium headband fits a head circumference of 21-23.5 inches (54-60cm). Size Large headband fits a head circumference of 23.5-26 inches (60-66cm).Package contents•Include: SmartSleep headband, 90-days ofSmartSleep Sensors, Charger, Quickstart Guide, User ManualTechnical specifications•Voltage: 120V AC •Warranty: 2 yearsMaterial•Made with: SIlver•Not made with: DEHP or latex**When used for 2 weeks in people who do not get enough sleep due to lifestyle***Note: Sensing accuracy and product performane is lower in people over age 50 due to natural reduction in slow wave amplitude. Volume does not exceed 80dB. People with hearing impairment unable to hear 80dB will not benefit from SmartSleep.。
藍牙立體聲耳機使用指南-Novero说明

藍牙立體聲耳機使用指南目錄歡迎使用安全使用前產品一覽產品包裝內容使用方式為充電配戴將與藍牙裝置配對開啟/關閉使用進行音樂播放使用撥打電話指示燈指示聲維護及保養常見問題技術規格詞彙表附錄棄置說明保固認證與安全規範商標歡迎使用感謝您購買由所製造的通用藍牙立體聲耳機。
本產品具備可摺疊及伸縮的設計,非常適宜配戴和隨身攜帶。
使用前請詳閱本使用指南。
藍牙是一種短距離無線電通訊技術標準,適用於行動電話、電腦、印表機、及其他裝置間的高傳輸速率。
另請參閱第章〈藍牙詞彙表〉。
使用本可利用無線傳輸的方式,享受您的音樂及撥打電話。
本產品擁有下列功能:與藍牙行動電話或支援協定的配對。
接聽電話、結束通話及拒接電話。
重撥上一次的撥號。
語音撥號,若行動電話支援。
調整音量。
在耳機與藍牙行動電話間進行通話傳輸。
麥克風靜音。
與支援協定的藍牙音樂裝置配對。
利用無線傳輸方式享受音樂。
調整音量。
遙控暫停/播放。
遙控上一首/下一首曲目。
可輕鬆於通話與音樂間切換,讓您在聆聽音樂時不會漏接任何來電。
開啟耳機時,會自動連接上次連接的裝置。
備註即使已配對的裝置和耳機皆支援相同的藍牙協定,由於配對裝置規格及版本的差異,可用的功能會有所不同。
安全使用請將音量調至最低。
然後開啟耳機,再慢慢調整至舒適的音量。
請儘可能保持最低音量,並避免在嘈雜的環境中使用耳機,否則您可能需要調高音量。
若需要調整音量,請慢慢操作,避免突然出現非預期的高音量。
若您感覺不適或產生耳鳴,請立即停止使用耳機並諮詢醫師。
持續以高音量使用耳機,會使您的聽覺習慣於該音量,而在不知不覺間造成聽覺的永久性損害。
在參加任何需要您全神貫注的活動時,使用耳機須特別小心。
請取下或關閉耳機,避免因分心而導致意外發生。
在駕駛汽車、機車、船艇或騎乘自行車時使用立體聲耳機,可能會釀成危險,在某些司法管轄區屬於違法行為,請務必遵守當地法律。
若您使用心律調節器、助聽器或其他電子醫療裝置,在使用本產品前請向醫師洽詢。
Voyager Legend CS Bluetooth 无线头戴话筒系统用户指南说明书

Voyager Legend® CS Bluetooth Headset SystemUser guideWelcomeCongratulations on purchasing your new Plantronics product. This guide contains instructionsfor setting up and using your Voyager Legend CS Wireless Headset System.Please refer to the separate safety instructions for important product safety information priorto installation or use of the product.BaseHeadsetTelephone interface cablePower supplyEar tipsSome models may also include:HL10 lifter USB Charge cableWhat's in the boxBase81Call/mute LED6Handset lifter/EHS cable jack2Power on/pairing LED7Telephone interface cable3Charging LED8Listening volume dial*4Pairing button9Speaking volume dial*5Power jack10Configuration switch**For installation setupHeadset1Volume +/- button4Call button2Power button5Mute microphone/voice command button3Snap-fit magnetic charge connectionBase and headset basicsSold separately.2571Portable charge case 2Desktop charge stand 3AC charger 4USB charge cable*5Car charge adapter 6Micro USB charge adapter 7Ear tip kit (available in S, M, L)8HL10 lifter* Automatically lifts handset and returns it to the cradle. Enables remote callcontrol with your headset.9Electronic hookswitch cable (EHS cable) Electronically and automatically takes your deskphone handset off the hook. Enables remote call control with your headset.*Included with some models.AccessoriesReplace the ear tip for a better fit.To wear the headset on your other ear, rotate the boom upwards then twist it around so the ear tip is on the other side before lowering the boom.FitChange the ear tipWear on the left or rightPlug one end of the power supply into the power jack on the back of the base and the other endinto a working power outlet. The Power On LED will be solid white.Place the headset in the charging cradle. The charging LED on the base will flash blue whencharging and turn solid blue when the headset is fully charged. Charge for at least 20 minutesprior to the first use. A full charge takes 90 minutes.=There are three setup options for connecting the Voyager Legend CS to your desk phone.Select one of the following and continue.•Desk phone (standard)•Desk phone + HL10 Lifter (sold separately)•Desk phone + EHS cable (sold separately)Connect Your Desk PhoneConnect the powerCharge the headsetConnect and configureyour desk phoneNOTE If you will be using a standard desk phone setup or a desk phone with an HL10 lifter, see below.If you will be using the desk phone with an EHS cable, refer to Desk phone plus EHS cable section in this guide. For further installation information refer to the EHS Getting Started guide that came with your EHS cable or go to /accessories.1Connect one end of the telephone interface cable to the back of the base.2Disconnect the handset coil cord from the desk phone and re-connect it to the telephone interface cable junction box.3Connect the remaining end of the telephone interface cable into the open handset port on thedesk phone.NOTE Your desk phone handset will continue to work; it's just hooked up differently.NOTE If your phone has a built-in headset port, you should only use the headset port if you will not beusing the HL10 lifter. In this configuration, you must first press both the headset button on your phone and the call control button on the headset to answer or end calls.1If your desk phone has a volume control, set it to mid-range.2Look at the bottom of your base and make sure the default settings are correct. Set your desk phone's volume as well.Set the listening volume dialand the speaking volume dial to 2.Set the configuration switch to A.Set the desk phone volume to mid-range.Desk phone (standard)Check configuration andmake a test call3Remove the handset from the desk phone cradle.4While wearing your headset, press the call button on the headset.5If you do not hear a dial tone, adjust the configuration switch (A-G) until you do.NOTE For most phones, these factory settings will sound best.6Dial a test call from the desk phone. If needed, fine-tune the volume with the headset volume controls. You can also adjust the desk phone speaking and listening volumes on the bottom of the base.First follow the steps above for Desk phone (standard).1Firmly press the handset lifter power cord into the handset lifter jack.2While wearing your headset, slide the handset lifter arm under the handset until the lifter base touches the side of the phone.Desk phone plus HL103Slide the lifter up to where it nearly touches the handset earpiece.4Press the call button on your headset to activate the lifter.5If you hear a dial tone the lifter is set correctly and needs no adjustment.6Remove the protective strips from the 3 mounting tapes on the underside of the lifter.7Gently place the lifter on the desk phone in the pre-determined position.8Press firmly to adhere.Connect the end of the EHS cable to the base and the other end of the desk phone as described in the EHS Quick Start Guide.NOTE For further installation information refer to the EHS Quick Start Guide that came with your EHS cable or at /accessories.Desk phone plus EHScableThe minimum recommended separation between your desk phone and the base is 6 inches.The minimum recommended separation between the base and computer is 12 inches. Incorrectposition can cause noise and interference problems.Position your baseHeadset controlsvoiceCall buttonVolume buttonHeadset LED (indicator light)Power buttonMagnetic charge portMute buttonVoice button(mobile phone use only)Play/Pause button(mobile phone use only)With a single full charge, the Voyager Legend CS will provide up to 7 hours of talk time and upto 11 days of standby time.Toggle the Volume button (show icon) up (+) or down (-) during a call to adjust the volume.While not on a call you can toggle the Volume button (show icon) to adjust the volume level forvoice prompts and notifications.The wireless range for the Voyager Legend headset is 10 m from the desktop base or yourmobile phone. Audio quality can be expected to deteriorate after 10 m and wirelessconnectivity eventually stop when range limits are exceeded.When you leave the operating range of the base or mobile phone, a voice prompt willannounce:•"Phone 1 Disconnected"; any audio is terminatedNOTE Note: If both desk phone and mobile phone are connected to the headset, "Phone 1Disconnected" and "Phone 2 Disconnected" will be announced as connections are lost Headset OverviewTalk timeAdjust the volumeOut of range indicationsWhen you return to the operating range of the base or mobile phone, a voice prompt will announce:•"Phone 1 Connected"; audio restored if activeNOTE Note: If both desk phone and mobile phone are connected to the headset, "Phone 1 Connected" and "Phone 2 Connected" will be announced as connections are restored.30 minutes of talk time remaining (this alert only occurs during an active call)Double high tone every 15minutes"Battery Low" repeats every 30minutes10 minutes of talk time remaining Triple high tone every 30seconds"Recharge Headset" every 3minutesLow battery warningsBase LEDs1 Call Status LED Idle = UnlitIncoming call = fast blue flashOn call = solid blueCall (headset mic) muted = slow blue flash2 Power On/Pairing LED Power off = unlitPowered = solid blue (headset paired/connected)Powered = solid red (headset not paired ordisconnected)In pairing mode = red/blue flashingPairing successful = solid blue3 Headset Battery LED (when docked)Full battery, charging stopped = solid blueHigh, charging = 3 blue flashes every 10 secondsMedium, charging = 2 blue flashes every 10secondsLow, charging = 2 red flashes every 10 secondsCritical, charging = 3 red flashes every 10 secondsThe headset and base that came in the box are already paired to each other. However, if you wish to use a new headset or need to restore subscription to your current headset, the units can be paired to each other by doing the following.1Press and hold the Bluetooth pairing button until the power LED (middle) flashes RED/BLUE.2Switch on your headset and do either of the following:•Tap the Voice button and say "Pairing Mode"•Press and hold the call button until you hear "Pairing"The power LED will turn solid blue once paired.Pair your headset to your phone or another device, such as a tablet.1Switch on your headset then choose:•Tap the Voice button •2While the headset LEDs are flashing red and blue, activate Bluetooth ® on your phone and set itto search for new devices.3Select "PLT_Legend".4If your phone asks for a passcode, enter four zeros (0000) for the passcode or accept the connection.Pairing your base to yourheadsetBluetooth pairing buttonPairing headsetPair phone or tablet5Once successfully paired, LEDs stop flashing red and blue. The LED will remain solid blue and you will hear "pairing successful".NOTE To enable caller name announcement, allow access to your contacts if your phone prompts you.12Remove the handset from the cradle; you will hear the dial tone.This step will be automatic if you install a handset lifer or EHS cable accessory. For a complete list of accessories, visit /accessories 3Dial the number using your desk phone.412If not wearing the headset, place the headset on your ear; the call will be answered automatically.3Remove the handset from the cradle. Your call is now active.This step will be automatic if you install a handset lifer or EHS cable accessory. For a complete list of accessories, visit /accessoriesUse the Call Reject function on your desk phone, if supported.1MUTE ON: During a call, press the Mute button and you will hear the "mute on" voice prompt which indicates that the headset microphone is muted. The mute reminder is repeated every 15minutes alternating between the voice prompt and a tone.2MUTE OFF: During a call while muted, press the Mute button and you will hear "mute off",which unmutes the headset microphone.12Note: Your desk phone may also have second call management features which are better suited to specific second call management needs.Call Controls - Desk PhonePlace a callAnswer a callReject a call (desk phone)End a call Mute a callAnswer a second incoming call12Dial the number using mobile phone.312If wearing the headset and prompted, "Incoming call, answer or Ignore", say "Answer", or 3If not wearing your headset, place the headset on your ear; the call will be answered automatically.12Say "Ignore" when prompted, or3Use the Call Reject function of your mobile phone, if supported.1MUTE ON: During a call, press the Mute button and you will hear the "mute on" voice prompt which indicates that the headset microphone is muted. The mute reminder is repeated every 15minutes alternating between the voice prompt and a tone.2MUTE OFF: During a call while muted, press the Mute button and you will hear "mute off",which unmutes the headset microphone.12call, then say "answer" when prompted to answer the second call.NOTE Your mobile phone may also have second call management features.Call Controls - Mobile PhonePlace a callAnswer a callReject a callEnd a call Mute a callAnswer a second incoming callCustomise your headsetYour headset understands and speaks in English. You can change the language and othersettings online.MyHeadset™ Updater tool enables you to:•Receive firmware updates•Change language for voice alerts and commands (English U.K., French, German and Spanish.Voice alerts are also available in Cantonese and Mandarin.)•Change regional phone number for Vocalyst service•Turn voice commands on/off•Turn Smart Sensors™on/off•Turn high quality audio (A2DP) streaming on/off•Turn "mute off" voice alert on/offYour Voyager Legend headset can play media files (music, podcasts, navigation, etc.) from any A2DP (Advanced Audio Distribution Profile for Bluetooth)-enabled mobile device.Your Voyager Legend Bluetooth headset has a 10 meter effective range. Voice prompts from your headset will alert you if you lose connection with your base or mobile phone.You can be on a call using a computer softphone application and receive a mobile phone call.The ringtone for the mobile phone call is heard in the headset. Tapping the call button on the headset will end the computer softphone call. Tapping the call button again will answer the mobile phone call.NOTE Answering the call on your mobile phone sends the audio to the mobile phone and leaves the computer softphone call active on the headset.You can be on a mobile phone and receive a call on your computer softphone. The ringtone for the computer softphone call is heard in the headset during the call.Tapping the call button on the headset ends the mobile phone call. Tapping the call button again answers the computer softphone call.If you receive a computer softphone call and mobile call at the same time, tapping the call button will pick up the call that came in first.Your headset speaks English.•"Battery low/medium/high"•"Connection switched"•"Headset connected"•"Not connected"•"Mute on/off"•"Pairing"•"Pairing successful"•"Power on/off"•"Recharge headset"•"Redial"Tap the Voice button can I say?” tells you the full list of available commands. You can change the voice command language by visiting and downloading the MyHeadset ™ Updater tool. The available languages are English (US and UK), French, German, Italian, Japanese, Korean, Mandarin, Russian, Spanish and Swedish. Voice commands for Cantonese, Danish and Norwegian must be spoken in English.•"Am I connected?"•"Answer"•"Call information"•"Call Vocalyst"FeaturesListen to audio via A2DPTransmission rangeSimultaneous call handling behaviour (PCMobile)Voice alerts Voice alerts listVoice commandsVoice commands list•"Cancel"•"Check battery"•"Ignore"•"Pair mode"•"Redial"•"What can I say"NOTEThe voice-dial feature is not a headset voice command and only works with supporting phones.To disable the "answer/ignore" voice commands:1Switch on the headset.2Press and hold the Voice button until you hear a double tone.3Repeat to reactivate the voice answer commands.Disable the answer/ignorevoice commandsTalk time performance is significantly degraded even after a full recharge.Battery is wearing out. Contact us at / support .I can’t hear a dial tone in the headset.Make sure your headset is charged.Make sure your headset is subscribed to base. See Subscription button.Press the call control button on your headset.If using a lifter, make sure the lifter is lifting the handset high enough to operate the hookswitch; set to a higher setting if necessary.Adjust the configuration switch on the base until a dial tone is heard. operate the hookswitch; set to a higher setting if necessary.Fine-tune the listening volume on the headset.If the volume is still too low, adjust the listening volume dial on the base.I hear static.Make sure there are at least 12 inches between your base andyour computer, and 6 inches between your base and yourtelephone. You may hear static as your headset is going out ofrange; move closer to the base.The sound is distorted.Lower the speaking volume dial or listening volume dial on thebase. For most telephones, the correct setting is position 2.If your desk phone has a volume control, lower until thedistortion disappears.If the distortion is still present, adjust the headset volume controlto lower the headset speaker volume. If the distortion persists,lower the listening volume dial on the base.Make sure there is at least 12 inches between your base and yourcomputer, and at least 6 inches between your base and yourtelephone.I hear echo in the headset.Lower the listening volume dial and speaking volume dial on thebase. For most telephones, the correct setting is position 2.If the audio level is too low in this position, adjust the headsetvolume control to increase the headset speaker volume.If your speaking volume is too low for your listener in thisposition, adjust the position of the headset to make sure themicrophone is a finger’s width from the corner of your mouth.Adjust the configuration switch. The most commonly usedposition is “A”.People I talk to can hear a buzz in the background.Move the base further away from your phone.If the base power supply is plugged into a power strip, plug it into the wall directly.The handset lifter is installed but does not lift the handset.Ensure the handset lifter power cord is firmly pushed into the handset lifter jack on the base.TroubleshootingHeadsetDesk phoneNEED MORE HELP?/support Plantronics, Inc.Plantronics BV345 Encinal Street Santa Cruz, CA 95060 United States South Point Building C Scorpius 1402132 LR Hoofddorp© 2013 © 2013 Plantronics, Inc. All rights reserved. Plantronics and Voyager Legend are trademarks or registered trademarks of Plantronics, Inc. The Bluetooth® word mark and logos are owned by the Bluetooth SIG, Inc. and any use of such marks by Plantronics, Inc. is under licence. All other trademarks are the property of their respective owners.Patents: US 8,208,673; D617,316; D681,003; 681,014; D681,002; D662,089; BR 3020120011493; CN ZL201230489876.9; ZL201230059196.3; EM 002109637-0001; 002109637-0002; 002109637-0003; 001315261-0001; IN 243252; TW D151481; Patents Pending201137-07 (09.13)。
UCLEAR Commander 車用藍牙耳機使用說明書说明书
Bluetooth Headset使用說明書1目錄目錄包裝內容物主機按鍵功能接聽來電配對操作One Touch語音快速撥號簡介One Touch─AndroidOne Touch─iOS支架安裝支架與充電座使用方式充電方式123456 7~9 10~12131415歡迎使用U CLEAR Commander感謝您購買UCLEAR Commander車用藍牙耳機,此耳機專為全球駕駛人士開發的車用藍牙耳機,配合UCLEAR全球獨創「One Touch」藍牙語音播號和快速連接功能,實現免觸碰手機播號通話,準確率可達99.5%以上,使您在駕駛時能完全釋放雙手,專注於路況的同時,也能繼續保持聯繫通話。
車用12V充電器USB充電線耳塞套(L、M、S)Commander主機車用遮陽板專用支架多功能充電插座掛繩透明耳勾說明書2包裝內容物U CLEAR Commander 簡介開/關機接聽/掛斷多功能按鍵LED指示燈降低音量音量增大3主機按鍵功能開機如耳機在車用遮陽板支架或充電插座上時,取出後便自動開機 多功能按鍵長按5秒即可開機關機耳機放回車用遮陽板支架或充電插座上時,置入後便自動關機 多功能按鍵長按5秒即可關機接聽來電4接聽來電如耳機放置於車用遮陽板支架或多功能充電插座上時,將耳機取下 即可接聽電話。
如耳機於關機狀態下,須先長按 2 秒多功能按鍵開機後即可接聽來 電。
如耳機呈現開機狀態,只需輕按多功能按鍵即可接聽來電。
結束通話通話過程中短按多功能按鍵即掛斷電話對方掛斷電話即可掛斷電話保留通話接聽新來電當在通話中有新來電時,短按多功能鍵便可接聽新的來電通話,同時保留原有的通話在等待狀態下,在通話當中短按多功能按鍵 便可在兩通話之間轉換。
在等待狀態下,連續短按兩次多功能鍵便會把當前的通話掛斷。
多功能配掛方式配對操作5配對連結為保證Commander藍牙耳機和手機正常連接,請先與手機進行配對程序。
當第一次配對成功後,往後開啟Commander藍牙耳機時,會自動與手機連線。
蓝牙耳机说明书
X9 蓝牙耳机使用说明书感谢您选购蓝牙耳机X9, 希望您在使用过程中有愉快的体验,使用前请阅读使用手册,以便更好了解此款耳机的各种功能。
安全须知开车时拨打电话会导致交通事故的可能性增大。
开车时接听或拨打电话,请尽量缩减通话时间,更不要从事记录或阅读等活动,请视具体环境考虑接听电话。
如遇恶劣天气、交通堵塞、车内有小孩或手机信号不好,请将车减速或停在路边,再接听或拨打电话。
检查耳机的兼容性此款耳机与大多数支持蓝牙耳机协议的蓝牙手机等设备兼容。
请通过登录您所使用的手机生产商网站确认手机兼容性。
按键功能多功能键: 开机/ 关机/ 配对/ 接听/ 挂机/ 语音拨号/ 拒听来电/ 切换通话/末位重拨充电插口检查耳机附件购买时,请确认您的耳机配有以下附件:USB充电座、说明书、耳挂、耳套。
本耳机内嵌可充电式聚合物锂电池,第一次使用时请先将电池充满电。
请使用USB充电座连接蓝牙耳机和PC或者USB(5V/500mA)旅行充电器进行充电。
警告:请不要用其他非指定的充电器进行充电。
非指定的充电器可能会损坏该蓝牙耳机。
提示:在充电时,请不要使用该蓝牙耳机。
耳机的基本操作开/关机1. 开机按住多功能键3秒钟,蓝色指示灯快速闪烁3次,完成开机。
2. 关机按住多功能键3秒钟,红色指示灯快速闪烁5次,完成关机。
3. 在待机状态下,如果蓝色指示灯变红色,表示耳机电量不足,请及时充电。
4. 配对配对是在两台蓝牙设备,如您的蓝牙手机和蓝牙耳机之间建立独立且加密的无线连接的过程:1. 配对开始时必须先关闭耳机(见“关机”部份)。
2. 按住多功能键6秒钟,耳机的红蓝色指示灯将会交替闪烁。
3. 启动您的蓝牙手机配对程序,详细步骤请参照手机使用手册。
通常步骤为进入“搜索”菜单,选择“连接”或者“蓝牙”后选“搜索蓝牙设备”。
4. 您的手机将会搜索到“X9”耳机并询问是否与其配对,选择“是”或“确定”选项。
5. 输入验证码“0000”(四个零)后,选择“是”或者“OK”确认。
Voyager 3200 系列蓝牙耳机用户指南说明书
Voyager 3200 系列蓝牙耳机用户指南内容耳机概述3请注意安全3可选充电盒概览4充电5检查耳机电池状态5使用充电盒6调整7调节佩戴方式7配对8蓝牙配对8NFC 配对8配对模式8加载软件9基础知识10拨打/接听/结束通话10语音控制11调整音量11播放或暂停音频流11使用传感器11更多功能13选择语言13修改接听/忽略语音命令13使用两部电话13更改耳机设置13更新固件15耳机恢复15故障诊断16支持17蓝牙配对近距离无线通讯 (NFC) 配对呼叫播放/暂停音量迷你 USB充电端口耳机 LED(指示灯)语音控制 (Siri, Google Now, Cortana)静音电源使用新耳机前,请阅读关于安全、充电、电池和管制等重要信息的安全指南。
耳机概述请注意安全充电盒:轻触图标可显示充电盒电池状态耳机:轻触图标可显示耳机电池状态迷你 USB 充电端口充电盒充满电需要 90 分钟。
充满电后,充电盒可为耳机提供额外最多 10 小时通话时间的电量。
耳机充满电需要 90 分钟。
充电完成后,指示灯将熄灭。
提示要重置通话时间提示的精确度,请在耳机电池耗尽后完全充满。
提示要检查耳机电池状态,佩戴耳机时轻触通话按钮 ,或轻触语音按钮 并说“check battery ”(检查电量)。
有数种方式可检查耳机电池的状态。
1戴上耳机,轻触通话 按钮,然后收听语音提示。
2未佩戴耳机时,轻触通话 控制,然后观察耳机LED 。
3检查 Plantronics Hub 主屏幕充电检查耳机电池状态使用充电盒充满电的充电盒可以提供额外最多 10 小时的耳机通话时间。
充电盒充满电需要 90 分钟。
耳机和充电盒一起充满电需要 2 小时。
重要充电盒在出厂时处于深度睡眠模式,以节能和保护电池。
要唤醒充电盒,请将其插入电源至少 1 分钟。
充电时,LED 闪烁。
指示电池状态。
轻触/按压充电盒或耳机图标,检查充电盒或耳机电池状态。
LED注*使用夹扣耳挂可能会降低传感器灵敏度。
Sennheiser PRESENCE UC ML 头戴式通信耳机说明书
PRESENCE TM UC MLheardWhereverHear and bePRESENCE™ UC MLPRESENCE™ UC ML is a premium headsetfor mobile Unified Communications pro-fessionals using Skype for Business, whorequire consistently excellent sound andvoice clarity around the office, in the carand outdoors.Sound leadershipFeaturing best-in-class Sennheiser VoiceClarity due to 3 digital microphone system,PRESENCE™ UC ML ensures speech intelligi-bility in challenging environments.Building on Sennheiser’s 70 year legacyof sound leadership, sound enhancementfeatures include SpeakFocus™, WindSafe™and own-voice detection technologiesto optimize communication in noisyenvironments – both indoors and out.ActiveGard® provides protection fromacoustic shock. The headset also provideshigh-quality audio for multimedia.Quality designWith a focus on quality materials andwearability, PRESENCE™ UC ML’s slim iconicdesign and subtle aluminum microphoneboom arm, represent the ultimate indiscretion for business professionals. Anoptional streamlined charger provides aconvenient stand for office users.User focusCertified for Skype for Business, PRESENCE™UC ML enables multi-connectivity and au-tomatic switching between softphone andmobile calls from a single headset. A choiceof wearing styles increases user comfort.Features include a unique sliding microphonewith integrated on/off power slide and up to10 hours’ narrowband and 8 hours’ widebandcall time between charges.Benefits and features:B est-in-class sound – Legendary SennheiserVoice Clarity ensures a clearer and morenatural audio experienceO ptimized speech clarity – UniqueSpeakFocus™ technology with three digitalmicrophones enhances voice clarity in allsound environments and provides the userwith consistently clear soundW i nd noise reduction – WindSafe™technology reduces wind noise inoutdoor situationsB ackground noise reduction – Own-voice-detector optimizes speech intelligibility andreduces distracting background noisesH e aring protection – ActiveGard® tech-nology protects you from acoustic shockI ncreased range – Up to 25 meters withdongle, dependent on environment.C ertified for Skype for Business – Formaximized UC performance and plug andplay experienceM ulti-connectivity – Seamlessly switchbetween softphone and mobile callsE xtended talk time – Up to 10 hours’narrowband and 8 hours’ wideband call timebetween chargesI ncreased comfort – A flexible choice ofwearing styles and optional headbandincrease user comfortS imple to use – Intuitive user interfaceI nstant status – Status update via voicepromptR eal-time battery monitoring – Via iPhone®battery meterL ightweight iconic design – Looks and feelsas good as it soundsO ptional charger stand – Keeps your headsethandy and chargedP rotective carry case – For easy storage ortransportP eace of mind – Two-year internationalwarrantyCharger standand headband areoptional accessoriesProduct InformationPRESENCE™ UC ML50457540 44155 08415 361 5104 239135General DataMicrophoneSpeakerPackagingContent of deliverySpare parts50457840 44155 08418 4 6 15104 23919 750458040 44155 08420 7 6 15104 23924 150458140 44155 08421 4 6 15104 23927 250459140 44155 08863 261 5104 24799 450457040 44155 08393 461 5104 23846 650647640 44155 20373 861 5104 23609 750603940 44155 09032 161 5104 25059 850604040 44155 09033 861 5104 25060 450647540 44155 20351 661 5104 19142 6protection./ccoas possible.environments.Please visit us at:/cco。
- 1、下载文档前请自行甄别文档内容的完整性,平台不提供额外的编辑、内容补充、找答案等附加服务。
- 2、"仅部分预览"的文档,不可在线预览部分如存在完整性等问题,可反馈申请退款(可完整预览的文档不适用该条件!)。
- 3、如文档侵犯您的权益,请联系客服反馈,我们会尽快为您处理(人工客服工作时间:9:00-18:30)。
维迈通头盔蓝牙耳机说明书、用户手册、简介、售后、安装相关问题
适用范围:
这是一款针对摩托车车手在骑车过程中不方便接听电话而设计的产品,适用于一切摩托车手,可以实现来电话即可不停车接听,以免耽误接听电话,错过重要的事情。
无论是市区骑行、郊游,还是长途旅行,尤其对于车队出游来说,是一款必不可少的装备。
具备防雨、抗风噪、电话优先等功能,很多摩旅车友都配备了这款耳机。
主要功能:
1、可以同时蓝牙方式连接手机和有线方式连接对讲机、GPS、MP3等设备,实现电话优先,无论何时不会耽误接听电话;
2、与手机蓝牙连接,实现接打电话;
3、与对讲机,gps,mp3等通过有线方式连接,实现语音输入(注:将来可以实现蓝牙方式),有线输入不需要耗费蓝牙耳机的电量,即使蓝牙耳机关机仍然可用;
4、两个耳机之间通话(前后座对讲、同车对讲),适用于V5。
技术参数:
1、防雨设计,抗风噪(DSP芯片抗噪技术,正常情况下时速80左右通话没问题);
2、电池容量200-300mah(v5,200mah;v1098a,300mah),支持蓝牙方式连续播放音乐4-7个小时;
3、大按键设计,方便骑行过程中戴着厚手套操作。
蓝牙耳机使用方法(请牢记开机、关机、进入配对状态的方法!):
开机方法:
按功能键4s左右,指示灯变蓝,即可松手(耳机里面会有提示音)。
关机方法:
开机状态下,长按功能键,指示灯变红,即可松手(耳机里面也会有提示音)。
进入配对状态方法:
关机状态下(这个一定要注意,只有在关机状态下才能进入配对模式),长按功能键,一直不松手,大概8s左右,看到指示灯红蓝闪烁了,再松手,此时就是配对状态。
接打电话使用方法:
1、首先与手机配对:
耳机要先进入配对状态(关机状态下,长按蓝牙耳机功能键,不要松手,大概8s左右,状态灯红蓝交替闪烁的时候再松开按键,此时蓝牙耳机进入配对状态);
然后手机的蓝牙设置里面,打开蓝牙,搜寻设备,……,搜到vimoto v5或者vimoto v1098a,选择它,配对,一般手机都不需要输入密码了,如果比较老一些的手机提示输入密码(输入0000即可);指示灯变成蓝色闪烁,手机界面出现耳机符号,即完成配对。
配对之后,以后每次使用就不需要再配对了,在手机的蓝牙打开的情况下,打开蓝牙耳机即可自动与手机连接。
2、接听与挂断电话:
来电话会有提示音,左手按一下主机上面的大按键即可接听电话,再按一下即可挂断电话。
3、重拨电话:
连续按两下功能按键,即可实现重拨功能(将已拨电话最新拨出电话号码重拨)。
对讲机使用方法:
对讲机需要配备对讲机连接线(属于选购配件),目前厂家生产了3种线:
1、大部分对讲机使用的K头连接线,建伍插头,40元一根;
2、部分摩托罗拉对讲机适用的M头对讲线,80元一根;
3、八重洲6R 7R等适用的R头对讲线,带防水塞,80元一根。
对讲机连接线插入对讲机,用魔术贴(配套)将PTT按键粘在车把等骑行过程中方便按的地方,2.5mm 音频插头插入主机的音频输入插口,即可正常使用。
更高级的功能:
1、v5同车对讲(前后座对讲)功能
方便前后座同车对讲,避免在骑车过程中讲话,驾驶员回头讲话时发生危险情况。
首先需要两台V5,或者一台v5与一台v1098a;
其次需要两个耳机配对:两个耳机都进入配对状态,按v5的通话按键,主面板上面小一些那个按键,两个耳机即可自动完成配对;
需要通话时候,按一下v5的通话按键即可;不需要通过了,按一下通话按键,即可关闭同车对讲。
所以使用两台v5进行同车对讲的话,双方都可以发起或者关闭同车对讲功能;如果是一台v5与一台v1098a的话,只能由v5发起或者关闭对讲。
2、V1098a同时连接两部手机
按照前面讲述的配对方法,将v1098a分别与两部手机配对(与第一部手机配对后,关闭蓝牙耳机;重新进入配对状态,与第二部手机配对),然后关闭v1098a,再开机,即可自动与两部手机连接。
3、拒接电话
来电时,长按功能键2s以上,听到“嘟”的一声提示音即可拒绝来电。
4、接听第二个来电
在与第一个来电通话的时候,如来第二个电话需要接听,短按功能键一下,进入接听第二个来电;
如果不需要接听,长按功能键2s以上听到“嘟”的一声即可挂断第二部电话。
以上内容由维迈通头盔蓝牙耳机专营店提供淘宝:
电话:150******** QQ 924356377 旺旺:jia2563422。