平板一体机说明书
交互平板液晶一体机基本操作---精品资料

的下面会多出一个保存的图标
会弹出二级菜单,请选择点击
进入U盘分层存储画面,选
进行背景和书写字合成存储,同样可以保持电脑的批注
8、如何进行电脑的鼠标操作
点击右侧菜单的鼠标图标 , 桌面上单击表示左键, 双击同一位置表示打开,长按某点 3S 后抬起手指会出现右 键,多指快速向上或向下代表滚珠或上下滑动的功能。
11.U盘的使用:
A.电脑开启的情况下,老师将自带的U盘插入前置 任选一接口上,即可在内置电脑中打开,点击windows下的“双击我 的电脑-点击对应U盘打开。 B.安全退出U盘:点击电脑界面右下角的三角图标 号,选择“弹出”。 在点击 符
END
以用手掌或状态物进行擦除。
页面的智能换片功能 要切换鼠标,通过点击可以进行ppt的下翻页,通过多手指快速上下滑动 可进行ppt的上下翻页。 F. WORD的文字编辑:点击到要编辑的位置会出现小键盘,点击打 开键盘就和我们平时一样操作,还可以点击键盘左上角选择手写输入。
10.视频、音频文件的播放:
A.视频文件:直接打开进行播放,不能打开时,需安装相应的播放器。 B.音频文件:打开提示无法打开时,可以选择提示窗里的“从已安装程 序中选择程序打开”点击确认会默认选择视频播放器,在点击确定就可以 进行播放文件。
(轻按一下 开机,开机 后轻按一下 休眠,长按 3-4秒关机)
触 控 接 口
音 频 输 出
插 有 线 话 筒
常用端口介绍:
一体机电源开关(按下1通电,按 下0断电)
电源线接口
3
2.一体机开关机:
A.开机:首先打开空开总电源,指示灯为红色 ,轻按 开关机键 一下,一体机指示灯会红蓝闪烁,十几秒钟后一体机开机成功,MINI电脑也 会接着自动开机,指示灯蓝色长亮。(注意:开机先观察指示灯颜色,“红 蓝闪烁”为自动开机就无需再按开机键) B.MINI电脑开机:如果MINI电脑没有自动开机,可以选择硬件菜单里的信号 源,先任选一个信号源(除开 MINI 信号源)再重新选择 MINI 信号源,这时 MINI电脑就会开机。或者用手直接按一体机右侧后方的MINI电脑开关机按钮 开机。 C.关机:长按 开关机键3-4秒,一体机指示灯会红蓝闪烁,屏幕出现关机 画面,松开按键,等待完成关机后,指示灯变红色 ,屏幕变黑。就 可以关闭电源空开。(注意:轻按一下是休眠不是关机)
ITD智慧交互平板使用手册说明书

ITD智慧交互平板使用手册ITD-65CG/65CG-C/75CG/75CG-C/ 85CG/85CG-C/98CG/98CG-C本文所有信息最终解释权归本公司,所有未经授权和允许的复制都是不被认可和被禁止的【本份文档上有可能没有完全反映产品的所有最新更改,以实际产品为准】目录第 1 章产品简介 (2)第 2 章装箱清单 (3)第 3 章规格型号 (4)第 4 章遥控器及功能参数描述 (5)4.1智能一体机各部位名称和功能说明 (5)4.2遥控器按键功能图及按键说明 (7)第 5 章系统功能介绍 (8)5.1系统launcher (8)5.2主页面功能介绍 (8)5.3通知面板 (10)5.4系统设置 (11)5.5软件说明 (19)5.6其他 (36)5.7设备使用 (37)5.8外部设备连接 (37)第 6 章维护与保养 (38)6.1设备保养和环保说明 (38)6.2良好的用机习惯 (38)第7 章常见问题排除 (39)第8 章安全指示 (40)免责声明 (40)第 1 章产品简介欢迎使用智慧交互平板。
本产品专为现代化会议室而设计,提供流畅书写,便捷擦除,和投屏功能。
内嵌的多屏互动功能将能为你的会议工作带来乐趣和便捷。
本产品目标之一是要取代会议室中的普通白板,随机附送一只书写笔,黑板擦(选配),在安卓的书写程序下,拿起你手中的笔即可书写,无需其他切换操作,拿起你的黑板擦即可擦除。
若一时半会找不到笔和橡皮擦了,也可用手指和手背临时代替。
本产品目标之二是要取代会议室中的投影机。
机器有多种输入端口方便你接入你的计算机,如HDMI, VGA将你的计算机输出连接本机系统会自动切换信号。
在投影的同时,我们可以在投影内容上自由的批注,保存。
本产品能够配置USB无线传屏器,只需将其插入计算机USB端口,稍等片刻,按下按钮即可轻松传屏,并且可以反向触控。
本产品能够内置安装OPS 计算机主机(选配),提供更多灵活性选择给客户。
电子平板设备使用说明书

电子平板设备使用说明书使用说明书电子平板设备使用说明书尊敬的用户:感谢您购买我们的电子平板设备。
为了更好地帮助您使用该设备,我们特别为您准备了以下使用说明。
一、产品概述1. 设备外观:本电子平板设备采用精致的设计,外观简洁、美观大方。
2. 设备功能:该设备通过触控屏幕操作,具有多种应用和功能,如浏览网页、查看图片、播放音频和视频等。
3. 主要配件:设备主体、电源适配器、充电线等。
二、使用前准备1. 开箱验货:请仔细检查包装是否完好,并确认配件是否齐全。
2. 充电:初次使用前,请使用附带的充电器将设备充满电。
三、开机与关机1. 开机:长按电源按钮,待设备屏幕亮起后即可松开。
2. 关机:长按电源按钮,直到屏幕显示关机选项,再点击确认关机。
四、设备操作1. 屏幕操作:通过手指在屏幕上的点击、滑动等手势进行操作。
2. 主界面:开机后,将看到主界面,您可以通过滑动屏幕切换页面。
3. 应用打开:点击应用图标即可打开对应应用程序。
4. 音量控制:设备侧面通常带有音量调节键,您可以调节音量大小。
五、网络连接1. Wi-Fi连接:请在设备设置中打开Wi-Fi功能,搜索并选择您要连接的无线网络,输入密码后即可连接。
2. 蓝牙连接:在设备设置中打开蓝牙功能,搜索并选择要连接的蓝牙设备,按照操作提示完成连接。
六、系统设置1. 语言设置:在设置中选择语言选项,找到您使用的语言并点击确认。
2. 屏幕亮度:在设置-显示中,您可以调节屏幕亮度。
3. 导航栏设置:您可以在设置-导航栏中自定义导航栏的样式和功能。
七、常见问题解答1. 电池续航问题:请合理使用设备,避免长时间的大负荷运行。
2. 设备卡顿:可能是因为设备内存不足,您可以关闭不使用的后台应用程序或清理缓存。
3. 触摸屏失灵:请先尝试重启设备,若问题仍存在,请联系售后服务中心。
八、注意事项1. 请勿将设备暴露在高温、高湿度或尘土较多的环境中。
2. 请注意防止设备摔落或受到挤压,以免造成设备损坏。
平板电脑产品说明书快速掌握平板电脑的各项功能和特点

平板电脑产品说明书快速掌握平板电脑的各项功能和特点平板电脑产品说明书尊敬的用户:感谢您选择我们的平板电脑产品。
本说明书将为您详细介绍我们平板电脑的各项功能和特点,帮助您快速掌握和使用该产品。
在使用前,请仔细阅读本说明书,以确保能够更好地使用我们的平板电脑。
一、外观与结构我们平板电脑外观精美,采用轻薄设计,便于携带。
机身采用高质量材料制造,手感舒适,具有抗摔、防刮等特性,同时具备一定的防水功能。
屏幕采用技术先进的触摸屏,操作流畅灵敏,画面清晰。
机身正面为触摸屏,底部配备了操作按钮,包括主页、返回、音量控制等,方便用户进行各项操作。
机身背面为平整设计,配备了摄像头和喇叭,以满足用户对于摄影和音频播放的需求。
侧面为接口和按键设计,提供了充电口、耳机孔、SD卡插槽等接口,以及电源键、音量键等按键。
二、核心功能1. 操作系统我们的平板电脑采用最新版本的操作系统,具有友好的用户界面和更强大的功能。
您可以通过触摸屏进行各项操作,包括浏览网页、阅读电子书、观看视频等。
操作系统支持多任务处理,您可以同时进行多项操作,提高工作效率。
2. 网络连接平板电脑支持多种无线网络连接方式,包括Wi-Fi和蓝牙。
您可以通过Wi-Fi连接到互联网,浏览网页、收发电子邮件等。
同时,蓝牙功能可以实现设备之间的数据传输和文件共享,方便您与其他设备进行连接。
3. 娱乐功能平板电脑提供了丰富的娱乐功能,您可以通过应用商店下载各类应用程序,包括游戏、音乐、影视等。
摄像头支持拍照和录像功能,您可以随时记录生活中的美好瞬间。
喇叭质量出色,音质清晰,为您带来更好的音频体验。
4. 办公功能我们的平板电脑支持办公软件,包括文档编辑、电子表格、演示文稿等。
您可以随时处理办公事务,提高工作效率。
同时,我们还提供云存储服务,您可以将文件存储在云端,随时随地进行访问和编辑。
三、注意事项在使用平板电脑时,请注意以下事项:1. 请避免使用过于尖锐的物体对屏幕进行敲击,以免导致屏幕损坏。
惠普(HP)平板电脑用户指南说明书
User Guide© Copyright 2013 Hewlett-Packard Development Company, L.P.Bluetooth is a trademark owned by its proprietor and used by Hewlett-Packard Company under license. Google is a trademark of Google Inc. Windows is a U.S. registered trademark of Microsoft Corporation.The information contained herein is subject to change without notice. The only warranties for HP products and services are set forth in the express warranty statements accompanying such products and services. Nothing herein should be construed as constituting an additional warranty. HP shall not be liable for technical or editorial errors or omissions contained herein.First Edition: September 2013Document Part Number: 743472-001Product noticeThis guide describes features that arecommon to most models. Some featuresmay not be available on your tablet.Software termsBy installing, copying, downloading, orotherwise using any software productpreinstalled on this tablet, you agree to bebound by the terms of the HP End UserLicense Agreement (EULA). If you do notaccept these license terms, your soleremedy is to return the entire unusedproduct (hardware and software) within 14days for a refund subject to the refundpolicy of your place of purchase.For any further information or to request afull refund of the tablet, please contact yourlocal point of sale (the seller).Table of contents1 The basics (1)Lock and unlock the screen (1)2 Using the Home screen (2)3 Using apps and widgets (3)Using the on-screen keyboard (3)Using Gmail (3)Using the calendar (4)Using Google Now (4)Using the clock (4)Downloading apps (4)Uninstalling apps (4)4 Using the cameras (5)Taking your own photo (5)Recording a video (5)Taking a screenshot (5)Viewing photos or videos (5)Printing photos (5)5 Connecting to networks (7)Connect to a wireless network (7)Connect to Bluetooth (select models only) (7)Connect to a mobile network (select models only) (8)Activate data transfer (8)Activate tethering or a portable hotspot (select models only) (8)Connect to a Miracast-compatible wireless display (select models only) (8)Connect to a Windows computer (select models only) (9)6 Using Settings (10)WIRELESS & NETWORKS (10)DEVICE (10)PERSONAL (10)ACCOUNTS (11)iiiSYSTEM (11)7 Securing your tablet (12)8 Backing up and recovering your data (13)Updating apps, widgets, and the operating system (13)Back up and reset (13)Factory data reset (13)9 More HP resources (14)Index (15)iv1The basicsBefore using the tablet for the first time, connect it to external power, and thenTo start using your tablet, follow these instructions:1.After charging the battery, and while the battery image is displayed on the screen, turn on thetablet by pressing and holding the power button about 5 seconds until the HP logo is displayed.The first time you turn on the tablet, you will see a Welcome screen.displayed.2.Follow the on-screen instructions to select a language, connect to a wireless network, and signinto your Google™ account.synchronized with your tablet. If you have additional Google accounts, you can add them later. Lock and unlock the screenLock—Press the power button.Unlock—Press the power button to turn on the tablet, then place your finger on the lock icon andslide the icon to the unlock position.Lock and unlock the screen12Using the Home screenThe Home screen provides a central location where you can access information and email, browsethe Web, stream videos, view photos, and access social media websites.●Swipe down from the top to display notifications.●Swipe up from the bottom to display Google Now cards.●Touch an icon to perform the action described in the table.Icon DescriptionSearch—Allows you to type one or more keywords to search with Google.Voice search—Allows you to touch , and then speak one or more keywords to search withGoogle.Back—Opens the previous screen.Home—Opens the central Home screen.●To see a left or right Home screen, swipe to the left or right.●To quickly return to the Home screen, touch .Recent apps—Opens a list of apps that you have used recently.●Touch an app to open it.●To remove an app from the list, swipe it to the left or right.All apps—Displays a list of all apps.To see all widgets, touch the Widgets tab.2Chapter 2 Using the Home screen3Using apps and widgetsApps are shortcuts placed on the Home screen and used to open applications installed on yourtablet.Widgets are apps with special functionality that displays content that is updated frequently. You canview the updated content without opening the widget.To see all apps, touch .●To open an app, touch the icon. To return to the Home screen, touch .●To add an app to the Home screen, touch and hold the app icon until the Home screen appears,and then slide it to the location where you want it to be.●To remove an app from the Home screen, touch and hold the app icon, and then drag it to theicon at the top of the screen.To see all widgets, touch , and then touch the Widgets tab.●To open a widget, touch the icon. To return to the Home screen, touch .●To add a widget to the Home screen, touch and hold the widget icon until the Home screenappears, and then slide it to the location where you want it to be.●To remove a widget from the Home screen, touch and hold the widget icon, and then drag it tothe icon at the top of the screen.Using the on-screen keyboard●To open the on-screen keyboard, touch the text field at the top of the screen, type one or morekeywords, and then touch or .●To use voice search, touch at the top of the screen, and then speak one or more keywords.Using Gmail1.Touch , and then touch .2.Under ACCOUNTS, touch Add account.3.Touch Google, and then follow the on-screen instructions.4.To access your Gmail account, touch the Gmail icon.Using the on-screen keyboard3Using the calendar●Touch the Calendar icon, and then follow the on-screen instructions.●To add the Calendar to the Home screen, touch and hold the Calendar icon until it appears onthe Home screen.Using Google NowGoogle Now uses time of day, your current location, and your location history to display informationon your commute. Information from other Google products, such as your Web history or yourcalendar, is used to display appointment reminders, maps, sports scores, and flight status.●To opt into Google Now, swipe up from the bottom of the screen, and then follow the on-screeninstructions.●To display Google Now cards, swipe up from the bottom of the screen.Using the clock●Touch , and then touch the Clock icon.●To add the Clock to the Home screen, touch and hold the Clock icon until it appears on theHome screen.●To add an alarm, touch the Clock icon, touch Set alarm, and then follow the on-screeninstructions.Downloading appsDownload apps, music, books, games, and more from the Google Play Store.●Touch , and then touch a category.– or –Touch , and then type a keyword in the search field.●To download and install an app, follow the on-screen instructions.Uninstalling apps1.Touch , and then touch .2.Under DEVICE, touch Storage, and then touch Apps.3.Touch the app that you want to uninstall, and then touch Uninstall.4.Touch OK, and then touch OK again.4Chapter 3 Using apps and widgets4Using the camerasTake your own photo or take screenshots with the front camera.Taking your own photo●Touch , and then touch .●To take a photo, touch the rotating camera icon above the blue circle, and then touch the bluecircle.The photo is saved in the Gallery.Recording a video●Touch , and then touch .●To record a video, touch the video camera icon.The blue circle turns red.●To begin recording, touch the red circle.●To stop recording, touch and hold the red circle.The video is saved in the Gallery.Taking a screenshotPress the power button and the volume down button at the same time for about 1 second.A message is displayed when the screenshot is saved in the Gallery.Viewing photos or videos●To view the photos or videos in your Gallery, touch , and then touch the Gallery icon.●To delete a photo or video, touch the photo or video, and then touch in the upper-right cornerof the screen.Printing photos1.Touch , and then touch the Gallery icon.2.Touch the photo to select it.3.Touch in the upper-right corner of the screen, and then touch Print.4.The first time that you use the printing function, follow the on-screen instructions to select aprinter.Taking your own photo55.Select the number of copies.6.To select options, touch the down arrow, and then follow the on-screen instructions.7.Touch Print.A message is displayed to indicate the print status.– or –Activate HP ePrint (select models only), which allows you to print directly to an HP ePrint-enabledprinter. For more information, go to /go/2eprint.1.Touch , and then touch the HP ePrint icon.2.Follow the on-screen instructions, and then touch Activate Now.3.Enter your email address, and then touch Activate.An activation code is sent to the email address that you entered.4.Touch, and then touch the HP ePrint icon.5.Enter the activation code, and then touch Activate.6Chapter 4 Using the cameras5Connecting to networksYou can connect the tablet to a wireless network, Bluetooth® devices (select models only), a mobilenetwork (select models only), a Miracast-compatible wireless display (select models only), or aWindows® computer.Connect to a wireless networkBrowse the Web, read your email, or perform other online activities.To connect to a wireless network:1.Touch , and then touch .2.Under WIRELESS & NETWORKS, be sure that Wi-Fi is turned on.3.Touch Wi-Fi, and then touch one of the available networks that is displayed.4.Type the security key if required, and then touch Connect.Connect to Bluetooth (select models only)Pair a Bluetooth device, such as a headset, keyboard, or mouse with your tablet.To connect to a Bluetooth device:1.Turn on the Bluetooth device.2.Touch , and then touch .3.Under WIRELESS & NETWORKS, turn on Bluetooth, and then touch Bluetooth.4.Touch your device name to make it Visible to all nearby Bluetooth devices.5.To find available Bluetooth devices, touch SEARCH FOR DEVICES.6.When the device name appears, touch it to pair the device to your tablet.Connect to a wireless network7Connect to a mobile network (select models only)If a SIM card is not preinstalled, a SIM card can be purchased from a mobile carrier. To insert the SIMcard, see the Quick Start guide included with your product.1.Touch , and then touch .2.Under WIRELESS & NETWORKS, touch Mobile Networks, and then touch Access PointNames.3.Touch the , touch Select New APN, and then follow the on-screen instructions.Activate data transferTo enable data transfer over a mobile network:1.Touch , and then touch .2.Under WIRELESS & NETWORKS, touch Mobile Networks, and then touch Mobile data. Activate tethering or a portable hotspot (select models only)To share your product's mobile data connection via USB or as a portable Wi-Fi hotspot:1.Touch , and then touch .2.Under WIRELESS & NETWORKS, touch Mobile Networks, and then touch Tethering andportable hotspot.3.To set up a portable Wi-Fi hotspot, touch Mobile Hotspot.4.To share your product's mobile data connection, touch USB tethering.USB tethering works with Windows 7, Vista, or Linux.Connect to a Miracast-compatible wireless display (select models only)To connect to a Miracast-compatible wireless display:1.Touch , and then touch .2.Under WIRELESS & NETWORKS, touch Miracast, and then touch Miracast wireless display.3.Follow the on-screen instructions.8Chapter 5 Connecting to networksConnect to a Windows computer (select models only)1.Connect the micro USB cable to your tablet and to a Windows computer.The USB storage appears as a drive on the computer. You can copy files back and forth as youwould with any other external device.2.When you are finished, disconnect the USB cable.Connect to a Windows computer (select models only)96Using SettingsUse Settings for connecting to networks, setting preferences, and finding information about yourtablet.●Touch , and then touch .– or –●Swipe down from the top, and then touch .WIRELESS & NETWORKS●Wi-Fi—Enable or disable Wi-Fi, and connect to a wireless network so that you check email,search the Web, or access social media websites.●Bluetooth—Enable or disable Bluetooth, and pair a Bluetooth device, such as a headset orkeyboard, with your tablet.●Data usage—View a graph of the data used during the selected period. The data usage by eachinstalled app is also displayed.●More...—Enable or disable Airplane mode or VPN.DEVICE●Sound—Select Volumes, Default notification, and enable or disable Touch sounds andScreen lock sound.●Display—Select Brightness, Wallpaper, Sleep, and Font size.●Storage—View available space in tablet memory and SD™ card memory (if installed).●Battery—View battery charge percentage and battery usage by various features.●Apps—View downloaded apps and running apps. To view information or uninstall an app, touchthe app.PERSONAL●Location access—Enable or disable Access to my location and Wi-Fi network location.●Security—Set preferences for SCREEN SECURITY, PASSWORDS, DEVICEADMINISTRATION, and CREDENTIAL STORAGE.●Language & input—Set preferences for Language, KEYBOARD & INPUT METHODS,SPEECH, and MOUSE/TRACKPAD.●Backup & reset—Set preferences for BACKUP & RESTORE, and PERSONAL DATA.10Chapter 6 Using SettingsACCOUNTSExisting accounts are displayed.●Add an email account or another type of account—Under ACCOUNTS, touch + Addaccount, and then follow the on-screen instructions.●Sync an account—Under ACCOUNTS, touch the name of the account. Touch the name of theaccount again, touch in the upper-right corner of the screen, and then touch Sync now.●Remove an account—Under ACCOUNTS, touch the name of the account. Touch the name ofthe account again, touch in the upper-right corner of the screen, and then touch Removeaccount.SYSTEM●Date & time—Enable or disable Automatic date & time, and select preferences for time zone,time format, and date format.●Accessibility—Enable or disable TalkBack, Large text, Auto-rotate screen, Speakpasswords, Text-to-speech output, Touch & hold delay, and Enhance web accessibility.●Developer options—Enable or disable various Developer options.●About tablet—Display the software version and legal information for your tablet.You can also check for software updates.ACCOUNTS117Securing your tabletTo prevent others from accessing the data on your tablet, select a screen lock method.Set a screen lock1.Touch , and then touch .2.Under PERSONAL, touch Security, and then under SCREEN SECURITY, touch Screen lock.3.Under Choose screen lock, select one of the following types of screen locks, and then followthe on-screen instructions.●Slide—Unlock the screen by swiping to the right.●Face Unlock (select models only)—Unlock the screen by looking at the screen.●Pattern—Draw a simple pattern to unlock the screen.●Pin—Enter four or more numbers to unlock the screen.●Password—Enter four or more letters or numbers. This option provides the mostprotection, if a strong password is selected.12Chapter 7 Securing your tablet8Backing up and recovering your dataUpdating apps, widgets, and the operating system HP recommends that you update your apps, widgets, and the operating system on a regular basis tothe latest versions. Updates can resolve issues and bring new features and options to your tablet.Technology is always changing, and updating apps, widgets, and the operating system allows yourtablet to run the latest technology available. For example, older apps and widgets might not work wellwith the most recent operating system.Go to the Google Play store to download the latest versions of HP and third-party apps and widgets.The operating system will download system updates automatically and notify you when it is ready toinstall these updates. If you want to update the operating system manually, go to /support.Back up and resetYou can set preferences for backing up and restoring your data in case of loss.1.Touch , and then touch .2.Under PERSONAL, touch Back up & reset.3.Under BACKUP & RESTORE, select one or more of the following:●Back up my data—Select the check box to enable backing up app data, Wi-Fi passwords,and other settings to Google servers.●Backup account—Select a Google account for backing up data.●Automatic restore—Select the check box to enable backed up settings and data to berestored when an app is reinstalled.Factory data resetTo reset all settings and delete all data on the device:1.Touch , and then touch .2.Under PERSONAL, touch Back up & reset.3.Under PERSONAL DATA, select Factory data reset, and then follow the on-screeninstructions.Updating apps, widgets, and the operating system139More HP resourcesTo locate product details, how-to information, and more, use this table.Resource ContentsHP supportFor U.S. support, go to /go/ contactHP.For worldwide support, go to / country/us/en/.html.●Online chat with an HP technician.●Email support.●Find telephone numbers.●Locate HP service center locations.GoogleFor Google support, go to /mobile/android.●Access Google online help and support.Quick StartThe Quick Start document is located in the documentfolder of the tablet box.●Important regulatory notices.Product NoticesThe Product Notices document is located in thedocument folder of the tablet box.●Important regulatory notices.Limited WarrantyThe warranty is located in the document folder of thetablet box. You can also go to /go/orderdocuments.●Warranty information about this tablet. 14Chapter 9 More HP resourcesIndexAaccounts10all apps icon2apps3Bback icon2backup and recovery13 battery10Beats Audio10 Bluetooth7, 10Ccalendar3camera5clock3computer7Ddate & time10display10download3FFace Unlock12factory data reset13GGmail3Hhome icon2Iicons2Llanguage10Nnetwork7Ppassword12photos5PIN12printing5Product Notices14QQuick Start14Rrecent apps icon2Sscreen lock12screenshot5search icon2settings10sound10storage10Vvoice search icon2Wwarranty14wi-fi7, 10widgets3Windows7Index15。
讯鹏工业平板电脑 SP-MES156X 使用说明说明书
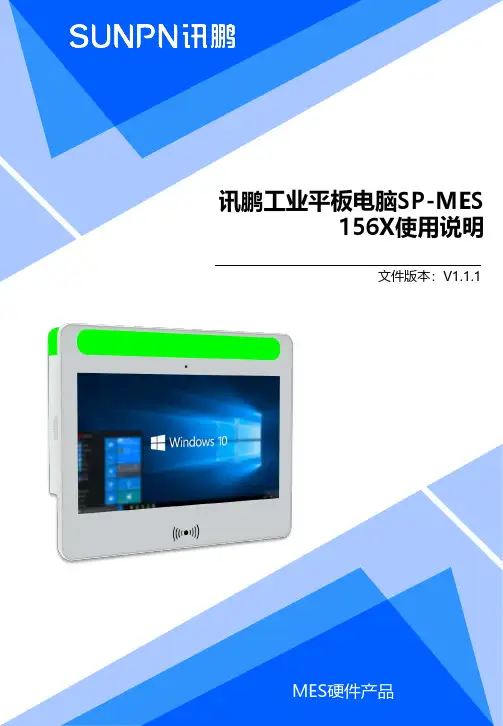
讯鹏工业平板电脑SP-MES156X使用说明文件版本:V1.1.1MES硬件产品一、讯鹏工业平板电脑SP-MES156X硬件规格 (3)1、产品概述 (4)2、产品特点 (5)3、产品外观 (6)4、产品工程图 (8)5、规格参数 (11)6、系统架构 (14)7、安装说明 (15)8、安全指示 (16)9、应用场景 (17)10、选型指南 (18)二、企业简介 (21)1、公司简介 (22)2、资质荣誉 (23)3、联系我们 (24)SP-MES156X是针对MES现场应用开发的一款15.6寸电容触摸一体机。
它结合MES业务流,将声光报警、无线通讯、RFID/人脸识别、开关量等功能,高度集成在一起,并通过便捷的API实现MES实施的快速应用。
它通过精美外观设计,将多色灯源与整机完美结合,与钢化玻璃表面的10点电容触摸屏贴合一起,使前面板具有更佳的视觉比例和纯平表面,能达IP65防护等级。
它支持Android 和Windows(x86)双平台操作系统,支持最新的人脸识别功能。
高品质LED低功耗背光的16:9的宽屏液晶显示,和业界高兼容性的EETI触控芯片相组合,保障了图像的长寿命稳定输岀和优秀操作体验性。
多种通讯方式与强固的机身设计,能让MES的现场实施、数据采集与交互变得轻松简单。
✓集成1路千兆网络✓2串口,支持1路RS485✓顶部四周可见GRB三色报警灯✓支持WiFi/3G、4G的无线扩展✓支持RFID刷卡✓可选高清动态人脸识别✓投射式电容触摸屏,面板钢化玻璃✓可选8路GPIO或4路继电器开关量输出✓低功耗/无风扇工业级设计集成3色指示灯/RFID/人脸识别Windows版接口展示Android版接口展示Windows版接口说明Android版接口说明模块项目规格主机参数型号SP-MES156W SP-MES156ACPUIntel® Celeron® J1900,Quad-core, clockspeed 2.00G, TDP 10W瑞芯微RK3288四核Cortex-A17+四核GPUMail-T764 1.8G芯片组soC内存板载DDR3L-1333 MHz,4G/8GB 板载DDR3 2GB(最高支持4G)存储 1 * SATA 2.0 +1 * mSATA1 * NAND FLASH 8G/16G/32G (8G,支持EMMC) + 1 * TF Card(最大64G)显示Intel® HD Graphics,1*HDMI(最大分辨率支持:1920*1200,@30Hz)1 *HDMI 7“-108” 4K*2K显示屏(支持双屏异显功能)网络1*Intel® Ethernet Connection1*RJ45千兆网口,支持Ethernet1*Mini-PCIE(支持WiFi,3G/4G,选配)1*SIM卡槽板载wifi模块,支持2.4G WiFi,支持Wi-Fi802.11b/g/n协议具备蓝牙功能,V2.1+EDR/Bluetooth 3.0/3.0+HS/4.0 具备4G功能,LTE-TDD/LTE-FDD/TD-SCDMA/EDGE/GPRS/GS无GPS内置GPS模块,灵敏度:-159dBm,接收频率:1575.42MHz ,卫星通道:20通道,定位精度:<10m(选配)音频1*Mic-in + 1*Audio-outRealtek ALC662VD内置喇叭,2个6W1*Mic-in + 1*Audio-outRealtek ALC662内置喇叭,2个6WUSB1*USB 3.0+4*USB 2.02*USB2.0串口2*DB9,COM1,可选配1路RS485扩展支持8路GPIO或4路GPIO继电器开关量输出(选配)支持4路继电器开关量输出,4路隔离电平输入(RS232)注:选配与GPIO不能同时并存支持4路继电器开关量输出,4路隔离电平输入(RS232)(选配)1*RFID模块,工作频率13.56MHz,前面板(选配)1*3色报警灯LED高亮,通过串口指令控制(选配)支持高清动态人脸识别(选配)1*500W前置摄像头(选配)看门狗中断、系统重启/255 级定时间隔电源12VDC 输入,2 芯航插φ12 供电口LED/按钮1*开机按钮(船型后置)OSWindows7/8/10,Windows Embedded,LinuxAndroid5.1,Android7.1模块项目规格液晶参数显示屏156” WSXGA+TFT LCD 分辨率1920(H)*1080(V)最大色位16.7M (6-bit + Hi-FRC)显示区域(mm)344.16×193.59响应时间(ms)8背光WLED背光MTBF (H)50,000亮度(cd/m2)260对比度500:1像素距离(mm)0.252×0.252可视角度170(H)/160(V)长宽比16:9触控参数触控投射式电容10点触摸分辨率4096*4096表面硬度7H透光率>90%触控通讯USB输入方式手指/触摸笔点击寿命250 克力度,3500 万次笔画寿命250 克力度,500 万次响应时间<5ms静电等级接触4KV,空气8KV机构参数颜色工业灰表明处理喷塑散热系统机箱被动散热外形尺寸407.5(L) x 260.5(W) x 82.5(H) mm安装选项VESA安装(100 * 100mm)或挂壁式安装重量不含安装:3.8 kg;含安装:4.6 kg工业平板电脑硬件参数模块项目规格环境参数工作温度0~60°C储存温度-10~60°C相对湿度10%~90%@40°C(非凝霜)振动“SSD:3Grms@5~500Hz,random,1 hr/axis;HDD:1Grms@5~500Hz,random,1 hr/axis”冲击10G,11秒间隔,半正弦波机构参数颜色工业灰表明处理喷塑散热系统机箱被动散热外形尺寸407.5(L) x 260.5(W) x 82.5(H) mm安装选项VESA安装(100 * 100mm)或挂壁式安装重量不含安装:3.8 kg;含安装:4.6 kg6系统架构安装说明7●挂臂安装●挂墙安装✓安装孔距100*100mm ✓适配M4螺杆*4安全指示8● A. 请仔细阅读此安全操作说明。
7寸工业平板电脑使用说明.
WLT_TFT800一体化电脑使用说明书目录目录 (11. 概述 (31.1. 功能概述 (31.2. 硬件概述 (31.3. 选型 (41.4. 应用领域 (41.5. 工作条件 (42. 端口介绍 (52.1. 端口位置图 (52.2. RS-232接口 (62.3. RS-485接口 (72.4. CAN Bus接口 (72.5. 电源接口 (73. PC机上开发WinCE应用程序 (8 3.1. 准备步骤 (83.1.1. 安装USB驱动程序 (83.1.2. 安装工具软件步骤 (83.1.3. 重点提示 (83.2. eVC++开发 (93.2.1. 新建应用程序 (113.2.2. 应用程序测试和发布 (133.2.3. .Net开发 (154. 重新安装wince内核 (204.1. 安装USB驱动程序 (204.2. 利用SysUpdata.exe重装内核 (204.3. 用户定制开机界面 (205. 附录A (215.1. 修改注册表 (215.2. 上电开机后自动运行自己的应用程序 (21 5.3. 每次有效按下触摸屏,蜂鸣器鸣叫一声 (21 5.4. 恢复出厂设置(恢复注册表 (225.5. 注意事项 (23外观尺寸 (241.概述1.1.功能概述Ø集成以太网控制器,串口,SD卡控制器,USB Host 控制器,四线电阻触摸屏驱动;Ø完美支持WindowsCE .NET 6.0操作系统;Ø新增Flash掉电保护功能;Ø用户可将精力集中在应用程序相关的技术开发上,而无须关心复杂的硬件平台和底层软件上;Ø支持Visual Studio 2005或(.net 2.0 Compact、LabView开发;Ø内带高精度4线电阻触摸屏;Ø物理分辨率:800×480,6.5万色或26万色(由用户设定。
支持屏幕旋转(0°、90°、180°、270°;Ø用户可方便设定开机界面;1.2.硬件概述Ø采用Cortex-A8架构的三星S5PV210CPU(主频:1GHz,512MB的DDRⅡ,256MB 的NandFlash;Ø显示屏:7 inch(英寸,800×480 TFT LCD,宽温型,64K色或26万色;Ø三路带隔离的3线RS-232串口(COM1,COM2,COM3,其中二路(COM1、COM2可以作为RS-485总线接口;Ø一路带隔离的CAN总线接口(WinCE系统内已集成驱动。
一体机说明书
1548*973*99.5mm
7) 频 道+ / - :频 道 选 择 键 , 按 此 键 可 以 选 择 电 台 向 上 和 向 下 的 节 目 。
8) 缩 放 : 画 面 显 示 比 例 键 , 按 此 键 可 以 切 换 不 同 的 画 面 显 示 比 例 模 式 。
静止:图像冻Βιβλιοθήκη 键,按此键后电视机的画面变为静止。再按一次解除画面静止。
液晶电视后面
或
有线电视网
为了正常地收看电视频道节目,必须正确的从 下 列信号源的一个获得信号:
户外天线 有线电视网 卫星广播网 在 三 种 情 况 中,首 先 要 把 天 线 或 电 视 网 的 输 入 电缆插入到TV后面的75欧姆同轴电缆插孔。
注意事项
注意
有触电危险, 请勿打开
三角形里的闪电形状的箭头 警告此处“电压危险”。
13) :多媒体播放暂停键。 :停 止 功 能 键 。 :快 退 。 :快 进 。
14) :上一曲。 :下 一 曲 。
重复:重复功能键。 A - B :设 置A - B点 重 复 播 放 。
1 5) 喜 爱 : 喜 爱 频 道 编 辑/打 开 喜 爱 频 道 列 表 。 喜 爱+ /喜 欢-: 喜 爱 频 道 上 下 选 择 。 选时:多媒体下设定跳转播放时间。
1 6) 颜 色 键 : 节 目 编 辑 功 能 键 。(红 色 : 删 除 频 道 ; 绿 色 : 更 改 频 道 名 字 ; 黄 色 : 可 以 移 动 频 道 到 其 他 位 置 ; 蓝 色 : 可 以 跳 过 这 个 节 目 。) 1 7) 显 示 : 显 示 通 道 信 息 。
21.5寸安卓触摸一体机平板电脑产品说明书
PCPAD全家互动其乐融融修正记录1.产品简介概述随着科技的进步,消费者需求的增加,单一的电脑、、平板已经无法知足消费者。
结合了电脑和平板一路优势的安卓触摸一体机平板电脑就应运而生。
闪卓科技的寸安卓触摸一体机平板电脑又名PCPAD,它既拥有电脑的办公处置能力,又兼备平板的简单操作,同时还具有二者都没有的优越体验。
PCPAD采用开放的安卓系统,拥有4核、2G的内存,无边框10点电容触摸,寸高清屏。
目前它被普遍应用于家庭、教育、商业等众多领域。
外观描述前视图图1-1-1 PCPAD前视图后视图图1-1-2 PCPAD后视图细节图图1-1-3 PCPAD右视图表1-1-1 右视图描述图1-1-4 PCPAD左视图表1-1-2 左视图描述图1-1-5 PCPAD后视图表1-1-3 后视图描述电源接口电压19V,电流网线接口1*RJ45产品特性寸,1080P高清屏10点无边框电容触摸四核/2G内存/16G闪存有线无线网络、蓝牙全支持720P高清摄像头USB*2/TF卡接口超薄设计待机电池防数据丢失多角度自由调节支架无风扇超静音低功耗*2音效2.PCPAD主要参数3.主要应用PCPAD上的主要应用有视听、游戏、购物、办公、资讯和沟通。
PCPAD除继续延续安卓系统本身简单趣味的优势外,将所有的应用都移植到寸的大屏幕上,再配合10点电容触摸屏,让用户的体验变得更好。
4.应用途景书房卧室、客厅茶几5.客户需求家庭娱乐,酒店客房一体机,学校教学机,影楼、休闲茶餐厅商业用机,企业办公等等。
平板电脑操作手册
平板电脑操作手册一、简介:平板电脑是一种轻薄便携的移动设备,具有触摸屏、无物理键盘的特点。
本操作手册旨在向用户提供有关如何正确操作平板电脑的指导与建议。
二、开机与关机:1. 开机:长按电源按钮,待屏幕亮起后松开按钮即可进入系统。
2. 关机:长按电源按钮,选择“关机”选项,确认关闭即可。
三、主界面操作:1. 解锁屏幕:在待机界面,滑动屏幕上的解锁图标或者输入密码、指纹等解锁方式进行解锁。
2. 导航栏:通常位于屏幕底部,用于快速切换应用、调整音量、控制屏幕方向等操作。
3. 应用图标:点击应用图标即可启动对应的应用程序。
4. 多任务切换:在导航栏或屏幕底部向上滑动,可以进入多任务界面,在不同的应用程序间进行切换。
四、常见操作手势:1. 触摸:用手指点击屏幕上的图标、按钮等实现操作。
2. 滑动:用手指在屏幕上从左向右、从上向下等方向滑动,用于浏览页面、滚动列表等。
3. 缩放:用手指捏合或展开,在图片、网页等应用中可以实现放大或缩小的操作。
4. 滑动返回:在应用中从屏幕左侧或右侧边缘向中间滑动,可以返回上一级页面。
五、连接与设置:1. Wi-Fi网络:在设置中找到Wi-Fi选项,点击开启并选择可用的Wi-Fi网络进行连接。
2. 蓝牙设备:在设置中找到蓝牙选项,点击开启并搜索附近的蓝牙设备进行配对连接。
3. 电池管理:在设置中找到电池管理选项,可以查看电池使用情况并进行相应的节能设置。
4. 声音设置:在设置中找到声音选项,可调整音量大小、选择铃声等。
六、常用应用操作:1. 浏览器:点击浏览器图标进入应用,可以输入网址访问网页、收藏页面、清除浏览记录等。
2. 邮箱:点击邮箱图标进入应用,可以设置账户、收发邮件、管理邮件标签等。
3. 文件管理:点击文件管理图标进入应用,可以查看、复制、移动、删除文件和文件夹等。
4. 照相机:点击照相机图标进入应用,可以拍照、录像、调整相机设置等。
七、安全与隐私:1. 屏幕锁定:在设置中找到安全选项,设置屏幕锁定密码、图案或指纹等,增加设备的安全性。
- 1、下载文档前请自行甄别文档内容的完整性,平台不提供额外的编辑、内容补充、找答案等附加服务。
- 2、"仅部分预览"的文档,不可在线预览部分如存在完整性等问题,可反馈申请退款(可完整预览的文档不适用该条件!)。
- 3、如文档侵犯您的权益,请联系客服反馈,我们会尽快为您处理(人工客服工作时间:9:00-18:30)。
非承压100L平板一体机一注意事项我们真诚的感谢您选用本公司生产的热水器产品,为了使您最大限度的享受热水器为您提供的服务,请您抽出宝贵时间仔细阅读本说明书。
本说明书旨在告诉您如何正确使用和维护您的设备,如果您在阅读了本说明书之后,对热水器的操作还有任何问题,请您与本公司授权的专业技术人员或本公司客服联系,以便我公司及时为您解答问题。
请务必保管好此说明书以备将来参考使用。
◎对于本热水器的非正确安装,本公司恕不承担任何责任。
只有取得本公司承认的专业人员才可以为您安装我公司的太阳能热水器。
◎热水器安装使用后,用户应根据实际使用情况经常进行检查和进行必要的维护,如有异常,应向本公司售后服务部门保修,以确保热水器正常、安全、可靠的运行。
◎热水器标配的防冻介质使用一年后需经过检测合格后才能继续使用,否则需要更换防冻介质。
◎对热水器进行任何维护保养和维修前,请务必断开电源。
非专业人员不得调整和维修热水器。
◎热水器输出热水可能导致烫伤,务必将热水与冷水混合后再进行使用。
◎热水器使用前必须保证热水器水箱满水,如发生干烧应由专业人员检查或修理后才能使用。
◎热水器配有泄压安全阀,为了使用安全,不可私下改动其安装位置,严禁堵塞其出口。
泄压安全阀必须安装导流管且须连续向下,中间不得打结,导流管应直接与地漏相连。
◎如家中长期无人,请勿关闭热水器进水阀门,入户总阀;并将安装在南立面的太阳能集热器使用雨布或其它遮阳物将其遮挡,避免长期无负荷运行。
◎太阳能热水器中热水不能直接饮用。
◎在正常使用时,集热器前方必须无遮挡,保证每日六小时及以上光照。
注意:如不完全遵守此说明书,可能会引起烫伤、失火、财产损失,甚至人身伤害或死亡。
电源插座必须有可靠接地才能通电使用,严禁在无可靠接地的情况下使用热水器!热水器附近必须有良好的排水设施或地漏,在热水器安装区域应保证,万一出现热水器或接头漏水时不会对相邻区域物品或建筑物的下层造成破坏。
本说明书涉及到热水系统的安装和使用两个部分,热水器的安装必须由我公司指定的专业安装人员进行安装,用户使用时可参照使用说明书进行使用。
您在使用过程中出现问题,请与当地经销商联系,我们将及时为您解决。
由于产品改进,您所使用的产品可能与说明书中不完全一致,请以实际产品为准。
二产品简介2-1产品效果图2-2产品原理图水流经平板集热器板芯中的流道管,高吸收比选择性吸收层的吸热板接收的太阳能量传递给流道管,从而加热管中的水。
由于冷水密度大,热水密度小,在这些管中形成冷水自上而下,热水自下而上的自然循环。
循环过程中,热量通过连接管把传递到储热水箱。
如此循环往复,水箱中水温逐渐升高。
技术参数产品型号平板规格/长×宽×高平板数量/块倾斜角/度重量外型尺寸备注净重总重长×宽×高1000×1800m×801 30°1990×1225×1580有副水箱三产品安装说明支架安装3-1产品支架示意图打开支架包装箱,对照支架装箱单,查看各零部件是否齐全。
在零部件齐全情况下,安装图3-1所示热水器支架组装说明图组装支架,零部件序号如图3-1所示。
安装步骤如下:1、装左、右侧支架:先将左、右前后腿与对应的左、右桶托连接;再将侧斜撑连接前后腿,组成左侧和右侧支架;并装上各自铁鞋,如图3-1所示。
2、水箱容积大于100L时,支架需加中后腿,中后腿的组装如图3-1所示,铁鞋和桶托位于左后中腿和右后中腿中间位置。
3、安装连接件、下横撑和上横撑:分别上下横撑固定在左、右侧支架的对应位置。
4、安装前斜撑和剪刀撑:将前斜撑连接在上横撑和连接件的安装孔中,如图5-1所示;剪刀撑的如图3-1叠放,而后安装在后腿间的合适位置。
5、支架所有部件均组合如图3-2所示,调整支架均衡对称,拧紧各螺母。
集热器的安装将集热器平铺在支架前腿上,压块压住(见图3-4(a)示意图)。
用波纹管将集热器和水箱连接,用波纹管螺母连接集热器和水箱的进出水口,如图3-4(b)。
注意,波纹管管头必须内置聚四氟乙烯垫片,用力适当,拧紧即可。
调整,检查,拧紧全部螺栓。
当平板为两块以上时,平板集热器间的连接采用卡套直通(见配件箱),按图3-4(c)所示顺序进行,在使用活动板手或开口板手锁紧螺纹时,请务必小心操作,卡套与管壁必须对齐同心,上紧时用力适中即可,避免强劲旋扭,以免损坏卡套及集管热水器的固定1 当安装位置有与建筑结合的安装基础时,可以直接把热水器支架安装在基础上,且把地脚和基础上的钢结构焊接在一起。
当安装位置没有结合基础时,可以使用混凝土预制件作安装基础,并在混凝土预制件上埋设膨胀螺栓,把热水器地脚固定在膨胀螺栓上。
2 地脚固定基础如图3-5所示,具体尺寸见表3-1图3-5 地脚固定示意图 表3-1 地脚固定尺寸图热水器的固定与安装的注意事项1、集热体主体朝向以正南偏西(10°~20°)至正南偏东(10°~20°)为宜,集热器前不得有遮挡物。
2、热水器安装调整好后,除基面的固定外,还须用不得少于4根钢丝绳(Φ6mm 以上)固定牢固,以防被大风掀翻而造成事故(不能破坏建筑物的防水措施),如图5-6所示。
图3-6 热水器固定示意图(无预置墩)3、按西高东低坡度大于5‰的要求检查支架坡度,如不符合坡度要求,可在前后铁鞋处加垫片调整到合适为止,且确保热水器所有地脚与支撑面(地面、地脚基础或水泥砖)紧密接触,受力均匀。
产品系列平板规格 倾斜角 支架长度(L )支架宽度(B )备注1000×1800m ×8030°2000两条腿四、管路安装与使用方法管路安装示意图图4-1管路安装示意图产品使用方法上水:打开V1阀,热水器处于上水状态。
溢流管排水,表明水箱已满,关闭V1阀。
用水:开启混水阀v3,微调冷热水,直至水温水量适宜为止。
加热:若连续阴雨天气造成热水器水温不高,可以使用电辅助加热装置,但用水前必须切断电源。
无论热水器支架安装在什么位置,都必须保证热水器稳定牢靠,且支架地脚和建筑物接触部位不能破坏建筑物的防水保护措施。
管线布置示意图图42是热水器安装时室内、外管线布置的通用示意图,实际安装时根据安装位置和空间的具体情况进行适当调整,尽量做到实用美观。
图4-2 管线布置示意图Jiangsu Sunrain Solar Energy Co.,Ltd热水器管路安装和使用注意事项1 热水器水箱在管道施工中,要分清进出水管、溢流管和排气管。
热水器所有管路上的管道、接头、阀门等,均应无漏水现象,溢流管避免“U”字型和逆坡走向而形成管内积水。
2 对热水器结构进行任何形式的改动都可能造成使用中的问题。
3 热水器水管进入室内的形式有5种:烟风道、排气管、穿墙孔、专用太阳能管道井、预埋套管,其中前3种形式较为普遍。
管路安装前,安装人员会与您充分协商管路入室的形式及安装位置,以方便您的使用。
安装时,布管过程中的穿墙孔必须保证有倒坡,且做好密封,以防雨水、异味等进入。
4 溢流管户内开口应保持向下,并保证溢流管固定牢固,排出液体可直接排入通畅的下水道,溢流管口与下水道口距离不大于150mm。
严禁任意悬挂,以防大量溢水飞溅,损坏室内物品。
5 严禁在溢流管路中安装阀门,确保满水信号迅速、准确传递。
6 热水器管路不可直接与全自动洗衣机相连,以免造成损坏。
7 上下水管与自来水对接干路上应加装单向阀,避免停水时,水箱内的水回流。
8 使用本系列产品进行多台组合时,安装方案应经有关技术人员确认。
9当太阳能热水器与其他形式热水器并存时,要做好相互间的保护措施,要求太阳能热水器冷热水管都需要加装单向阀,防止互相窜水,给用户带来不必要的损失。
10 热水器水箱上的通气孔应确保通畅、严禁堵塞。
11 室外管道均需保温防冻处理。
严寒的地区还应加热带,以达到上下水管防冻、化冻要求,水箱中的水温低于5℃时,排空方式防冻用户需及时排空。
12 平板集热器安装后,应避免长期空晒;如安装后不能立即使用,则应加以遮挡。
13 使用热水时,先不要将喷头出水口朝向人体,并注意调试水温,以免烫伤。
14 如自来水压力不足,可能导致无法正常上水,请加装上水增压装置。
15 本产品属于非承压落水式热水器,依靠水箱到用水点的高度差自然流出热水,出水的压力和高度差成正比。
若落差过小,可能导致无法正常使用,应加装出水增压装置。
16 本热水器能量来源为太阳能,在阴、雨、雪天气由于太阳辐照量不足,产生的热水温度可能达不到您的需要,如无电加热作为辅助能源,可能无法正常使用。
17 入冬前有条件的用户可以清洁平板集热器,保持其表面洁净,以免影响集热效率。
18如果冬季不使用,应在冬季结冰前将水箱、平板集热器及管路中的水排空,防止结冰造成损坏。
第二年春季温度回升后再上水恢复使用。
19冷热水管路应有有效的保温措施,保证管路不冻堵;冬季室外结冰地区,管路还应加装电伴热带,在冬季还要接通电源,防止管路冻损。
20 热水器如不处于建筑物上避雷系统的保护范围时,用户应增设避雷设施。
五、电加热器原理图和接线图本公司标配电加热器如图5-1所示,相关技术指标见表5-1。
表5-1公司标配电加热器的相关技术参数电加热原理图见图5-2,当水箱中有双电加热时,其接线方法如图7-3所示图5-2 电加热原理图技术指标类别 Ⅰ类最高温度 80±5℃额定电流 6.75A 额定电压 ~220V额定功率 1500W防水等级 IPX4连接方式 螺纹式(1”) 注意:超过50℃的热水会引起烫伤,为了您的家人尤其是小孩的安全,当热水器温度超过50℃时,使用时请特别小心。
图5-1 公司标配电加热器图5-3 双电加热接线示意图六保养和常见故障的排除方法保养维护1)视水质状况定期排污,一般一月一次,打开集热器下部泄水阀污水自动流出。
2)两月左右冲洗一次水箱,污水从泄水阀流出。
3)定期清除集热器透明盖层上的灰尘,以免影响热效率。
4)防冻本产品在冬季结冰地区使用,如系统没有安装防冻装置,应在环境温度降低至零上2°时,通过集热器下集管上的泄水口把热水器内部的水全部排空,以防结冰时冻裂板芯。
5)如天气预报有冰雹时,应在集热器玻璃上加盖保护。
6)如长时期外出无人使用,请断开漏电保护插头;排空水箱及集热器内水液,集热器玻璃盖板上加遮挡物以防空晒。
常见故障的排除方法故障原因处理方法水箱口溢水1、水箱水已满还在上水2、取水管冷水倒流1、关掉上水阀2、在取水管加装止回阀热水出水不畅1、倒坡2、管路有局部高点3、管路有杂物堵塞4、管径小于本说明书要求1、消除倒坡2、消除局高点或于该处加自动排汽阀3、清除杂物4、增大管径水温低1、日照低2、水压不足,水箱内的水没有及时加满,不能循环。