Protools SYNC HD中文使用手册
pro tools教程
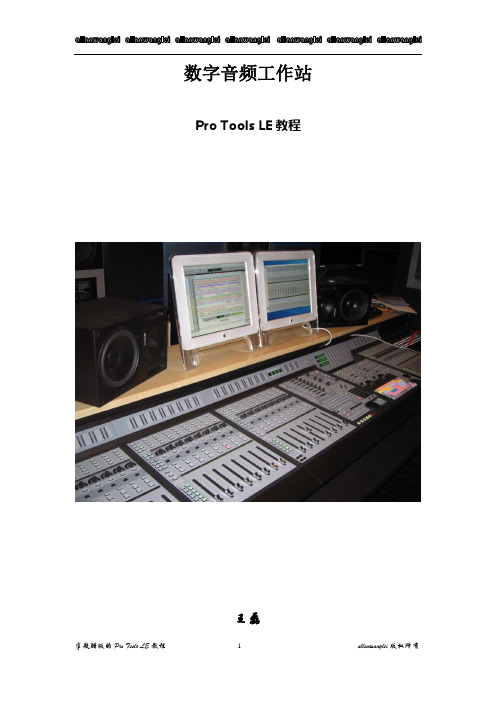
数字音频工作站Pro Tools LE教程王磊PRO TOOLS 初级教程说明:本教程只适用于刚刚接触或正要学习PRO TOOLS的同学使用。
今天要给同学说一下在数字音频工作站领域中,最为流行并享有盛誉的音频软件Pro Tools(当然PRO TOOLS的高端产品视频功能也很强大,但我们这里只说音频这方面)。
由Digidesign公司出品的Pro Tools一直是录音行业所推崇的音频处理系统,专业版的TDM系统一般有Pro Tools 24 MIX Plus;Pro Tools 24 MIX;Pro Tools 24等;以及刚刚推出的Pro Tools HD系统。
Pro Tools的软件至今也已升级到6.9的版本。
还有最近出的两个小玩意MBOX和DIGI002。
我们所说的DIGI001系统是这些中最简单的一个,就是由简化版的PRO TOOLS LE软件加上硬件DIGI001组成。
简化版的Pro Tools我们称它为Pro Tools LE,由于绝大多数人都拿不出几十万人民币来购置一套带有硬件DSP功能的Pro Tools 的专业级系统,因此在这里我们就以简化版的Pro Tools 来详细介绍一下,几乎具备TDM系统的大部分重要功能的软件Pro Tools LE与硬件DiGi 001的具体使用。
首先我们先来认识它们:第一节Digi 001这个就是它了,(当然图中少了一块PCI的插卡,因为我没搞到它的图)Digi 001主要由外置接线箱(AD/DA转换器)和PCI插卡组成,中间用电缆连接,是一套真正的“即插即用”系统。
先看前面,在它的前面板上有两个Neutrik复合式(卡侬或大三芯通用)的Mic/LINE前级放大器,有独立的增益控制(GAIN),带有-26db的固定哀减(PAD)按钮,是专门为输入线路信号时使用的。
此外这两个接口还配有48V幻相供电(PHANTOM POWER),可直接接入需48V的电容话筒进行工作。
汉邦高科操作

HDVR 软件V1.3用户手册(版本V1.3)目录重要提示 (3)第一章硬件及软件安装 (4)1.1 硬件安装 (4)1.1.1 硬件驱动安装 (4)1.1.2 连接向导 (10)1.2 软件安装 (12)第二章系统控制 (15)2.1 概述 (15)2.2 系统控制面板 (20)2.3 摄像机设置 (21)2.3.1 预览修改 (22)2.3.2 录像设置 (24)2.3.3 报警设置(内含智能操作讲解) (25)2.3.4 色彩调整 (31)2.3.5 自动工作计划设置 (33)2.3.6 云台设置 (36)2.4 系统设置 (37)2.4.1 短信服务器 (38)2.4.2 E-Mail 服务器 (38)2.4.3 手机监控服务配置 (39)2.4.4 系统设置 (41)第三章回放 (43)3.1 概述 (43)3.2 主菜单 (44)3.2.1 浏览抓帧 (44)3.2.2 局部放大 (45)3.2.3 回放模式 (47)3.2.4 刻录 (49)3.3 回放控制 (50)3.4 智能搜索 (51)3.5 即时回放 (53)第四章其他功能 (54)4.1 概述 (54)4.2 用户管理 (55)4.2.1 本地用户管理 (55)4.2.2 远程用户管理 (56)4.3 工具 (58)4.3.1 电子地图编辑器 (58)4.3.2 电子地图浏览器 (60)4.3.3 本地报警输出控制 (60)4.3.4 报警触发自动全屏 (61)4.4 磁盘管理 (61)4.4.6 清盘及写盘故障信息 (61)4.4.7 本地磁盘信息 (62)4.5 日志管理 (63)4.6 数字矩阵 (63)4.6.1 设置 (64)4.6.2 使用数字矩阵 (66)4.7 矩阵控制 (66)4.8 通讯 (66)4.8.1 语音对讲 (66)4.8.2 发送手机短信 (68)4.9 网路设备管理 (68)4.10 视频输出 (69)4.10.1 设置视频输出 (69)4.10.2 设置视频输出轮巡 (70)4.11自动域名解析工具 (70)第五章HDVR 客户端 (71)5.1 运行客户端 (71)5.2 分控设置 (72)5.3 远程预览 (74)5.4 远程系统设置 (74)5.5 存储设置 (76)5.6 HDVR 客户端回放 (76)5.6.1 本地回放 (76)5.6.2 远程回放 (77)第六章IE 远程访问 (80)6.1 启用IE 浏览器中A CTIVE X 选项 (80)6.2 IE 分控设置 (80)6.3 IE 远程预览 (80)附录一菜单结构 (82)重要提示为了您的系统能够稳定运行,请您务必按下面指示操作:1.至少将磁盘分为两个区,第一个分区用来装windows 操作系统和应用程序,其他分区用来储存录像资料。
Pro Tools教程及指南合集说明书

#THPTVFM
$2995
THOMSON DELMAR BOOK:
PRO TOOLS FOR VIDEO, FILM AND MULTIMEDIA
Designed for independent filmmakers, music engineers, and musicians composing and/or producing for film, video and multimedia. This extensive guide gives in-depth coverage and tips of all aspects of syncing, editing and mixing, various film file formats, and the equipment needed for producing professional film and multi-media projects.
BOOKS / TUTORIAL CD-ROMs & DVDs
COOL-BREEZE CD-ROM:
PRO TOOLS 7 CSI STARTER, BY COLIN MACQUEEN
For anyone beginning to use Pro Tools for production, this interactive CD-ROM gives you the hands-on tips you need to be up and running quickly. Tutorials not only include functionality, but also production techniques, special shortcuts, and before and after audio examples.
pro tools HD native

包括新的HD Omni, HD I/O, HD MADI音频接口,老的192 I/O, 192 Digital I/O, 96 I/O音频接口,
Pro Tools HD Native的价格和无法运行TDM插件的现实有点不给力,不过起码这表明Avid在想尽一切办法冲破之前的旧观念,在往HD Native的方向转变,只是这第一次的转变还不够大──你依然需要花3500美元来购买一个可以让Pro Tools HD用CPU来运算的许可,而且你还是必须购买Avid旗下的音频接口而没有其它的选择。
•支持Mac OS X 10.6和Windows 7系统
只要你对你的电脑性能有足够的自信,就不必再购买HD Core或HD Accel DSP卡了,完全用CPU来混音,用RTAS或外部效果器来进行音频处理。
Pro Tools HD Native这块卡不便宜啊,要3500美元。这个价格等于给了你一个串接I/O音频接口到电脑的中转,还有运行Pro Tools HD软件的合法授权──仅此而已,看起来有点“一块超大Pro Toools HD Native更像是Avid对Pro Tools HD被破解(可使用电脑CPU和任何音频接口来运行Pro Tools HD软件)的一个回应,但Avid还需要把步子迈得再大一些,才能在Native时代取得胜利。
10月6日22:45更新:之前说错了,用Pro Tools HD Native卡连接I/O音频接口之后,它会支持Core Audio和ASIO,你也可以不使用Pro Tools HD软件,而让Cubase、Logic、SONAR等任何DAW软件配合HD I/O音频接口来工作。
Protools SYNC HD中文使用手册

時間碼偏置補償 . . . . . . . . . . . . . . . . . . . . . . . . . . . . . . . . . . . . . . . . . . . . . . . . . . . . . . . . . . . . . . . . . . . 40 生成與再生成時間碼 . . . . . . . . . . . . . . . . . . . . . . . . . . . . . . . . . . . . . . . . . . . . . . . . . . . . . . . . . . . . . . . 40 生成 Window Dub. . . . . . . . . . . . . . . . . . . . . . . . . . . . . . . . . . . . . . . . . . . . . . . . . . . . . . . . . . . . . . . . . . 45
SYNC 週邊裝置特性. . . . . . . . . . . . . . . . . . . . . . . . . . . . . . . . . . . . . . . . . . . . . . . . . . . . . . . . . . . . . . . . . . 2 系統要求和相容性 . . . . . . . . . . . . . . . . . . . . . . . . . . . . . . . . . . . . . . . . . . . . . . . . . . . . . . . . . . . . . . . . . . . 3 註冊 . . . . . . . . . . . . . . . . . . . . . . . . . . . . . . . . . . . . . . . . . . . . . . . . . . . . . . . . . . . . . . . . . . . . . . . . . . . . . . . 3 關於本手冊 . . . . . . . . . . . . . . . . . . . . . . . . . . . . . . . . . . . . . . . . . . . . . . . . . . . . . . . . . . . . . . . . . . . . . . . . . 4 關於 . . . . . . . . . . . . . . . . . . . . . . . . . . . . . . . . . . . . . . . . . . . . . . . . . . . . . . . . . . . . . . . . . . 4
protools手册第二章

第二章:Protools系统集成TDM系统设备ProTools TDM系统有以下几种集成方式:ProTools 24 MIXplus核心系统包括:Mix Core卡Mix Farm卡ProTools软件Digidesign音频接口ProTools24MIX核心系统包括:Mix Core卡ProTools软件Digidesign音频接口ProTools24核心系统包括:D24音频卡DSP Farm卡ProTools软件Digidesign音频接口ProTools III PCI核心系统包括:Disk 输入/输出音频卡DSP Farm卡ProTools软件Digidesign音频接口TDM系统的播放、编辑和Voice限制下面的表格列出了每种TDM系统的音频播放、录制及V oice 限制,术语<VirtualV oice>是指音频轨可以共享系统中可用V oice的最大值。
ProTools TDM系统可以打开一个最多含有128轨音频的Session,但任何超出该系统VirtualV oice限制的音频轨将自动关闭。
所有ProTools TDM系统都提供总数达32路的内部混合总线,TDM系统的音频接口ProTools TDM系统可以采用以下几种音频接口:♦888/24和888/20输入/输出接口,应用在ProTools24MIX/ MIXplus、ProTools24或ProToolsIII PCI系统上。
♦1622输入/输出接口,应用在ProTools24MIX/MIXplus或ProTools24系统上。
♦ADAT桥输入/输出接口,应用在ProTools24MIX/ MIXplus、ProTools24或ProToolsIII PCI系统上。
下面的表格列出了ProTools TDM系统连接的各种音频接口的输入/输出能力,在扩展的ProTools TDM系统中,音频接口最。
Pro Tools H 操作指南说明书
Contents1Introduction31.1Main Applications (3)2Operation42.1Ratio (5)2.2Overshoot (5)2.3Recovery (6)2.4Rise Time (6)2.5Deadband (7)2.6Threshold (7)2.7Level Control and Overdrive (8)2.7.1Overdrive Processing (8)2.7.2Loudness Enhancement (8)3Description of Controls94Specifications114.1Pro Tools | HDX– Instances per chip (11)5Preset Manager Toolbar12 6Supported Platforms13 7System Requirements13 8Copyright and Acknowledgements141INTRODUCTION 1IntroductionThe Sonnox Oxford TransMod is an application that allows the dynamic level of signals to be modified,over time,by transients in the programme material.The effect is to bring transient events in the programme forward,or push them to the background,such that the attack of instruments can be accentuated or softened depending on the settings provided.The application was developed to address a common situation where there is a need to selectively tighten up percussive instruments or soften the unwanted percussive effects of acoustic musical instruments.Such effects are easily achieved with the TransMod because its purpose designed adaptive processing acts on differential information in the programme,so that the overall long-term programme level is minimally affected,and sensitivity to control parameters is drastically reduced.1.1Main Applications•Radically change the dynamics of instruments•Accentuate or flatten attacks and transients•Bring sounds forward or push them back•Increase or reduce the effects of ambience•Produce rounded and dynamic percussive effects•Harden up and give life to dull or flat-sounding recordings and mixes,without the unwanted changes in overall timbre associated with multi-band compressiontechniques•Increase overall modulation potential by the reduction of very short peaks2OPERATION 2OperationThe Sonnox TransMod functions by producing a continuous value that is proportional to the dynamic level encountered at its input (ie.the programme level envelope).This value is then subjected to processing that extracts the rate of change of the programme level envelope,which is used to modify the forward gain of the output signal during periods of dynamic activity in the programme.In this way the resulting level envelope at the output of the TransMod can be modified dramatically to accentuate or attenuate aspects of the dynamic profile of the sound,whilst drawing from the natural characteristics of the original programme signal.2.1Ratio2OPERATION 2.1RatioThe ratio value represents the lineardB ratio by which the output gain will be modifiedby instantaneous changes in the input level.Positive values will increase the gain of the signalduring transients.So,for example,when the ratiocontrol is set at +1,a drum ‘thwack’ that has a peakof 10dB above the average level will produce a levelincrease of twice that (20dB)at the output,becausethe gain during the transient will be increasedby the same amount as its level difference.For negative ratios the reverse is true,and for a negative ratio of -1 the drum attack transient would be reduced to the corresponding average level of the signal,and will therefore be removed.With the ratio control in its central position (0),the TransMod process does not affect the signal at all.2.2OvershootThe overshoot time sets the period over which the dynamic changes occur,depending on the input programme dynamics.A short overshoot period will enhance (or reduce) transients for a very short time and cause only the leading edges of the transients to be modified.For example,a small overshoot time can accentuate short-term events in the programme for small percussion instruments such as bells,whilst largely ignoring large and softer transients from instruments such a drums etc.Increasing the overshoot period allows transient enhancement to occur over longer periods,therefore providing a method to tune the action to suit the programme material and produce the required effect.The adaptive nature of the processing,over both level and time,allows optimal settings of the timing value to be achieved for complete tracks and even complex final mixes. Because the TransMod process is so rapid,low settings may not be heard because the duration of the transients being affected are too short.Generally the most audible effects occur from the mid position of the overshoot control upwards.2.3Recovery2OPERATION 2.3RecoveryThe recovery control modifies the long-term timingof the envelope processing.Small recovery valueswill allow action to almost each and every transient,even if they repeated very rapidly in the programmematerial.Longer recovery values will gentlyand progressively reduce the action depending onthe rate at which transients occur in the programme.So,for example,setting a long recovery value canprevent excessive action on small rapid transientsin the signal (ie.hi-hat spill),which directly followlarge transients (ie.a bass or snare drum).The recovery time is adaptive such that after a period of absence for large transients,small transients in quieter sections of the programme will be progressively included once more into the process,in the normal way. The effects of changing the recovery are usually quite subtle,and for the most part small to midrange settings will work best for most typical material.2.4Rise TimeThe rise time value modifies the response of the envelope detector to fast transients and provides a method to decrease the sensitivity of the process to short term events in the programme.With the control set at minimum,all transients,however short,will be processed.Increasing the rise time value reduces the overall speed of the envelope detector,such that short-term transients will be progressively ignored as they fall beneath the value of the rise time setting.This control can be used to prevent unwanted action from fast,largely inaudible transients, or it can be used as a sound effect.For example,a rise time value can be set such that the initial attack of an instrument is excluded during an overall transient reduction or increase. This allows you to ‘model’ the sound of the overshoot to soften or harden the effect.2.5Deadband2OPERATION 2.5DeadbandThe deadband value provides a method to excludeless significant transient modifications from thefinal processing output.For example,if a deadbandof 3dB is set,changes resulting from the TransModprocessing below a total differential gain changeof 3dB are excluded from the process,and thesignal is unaffected under these conditions.The deadband control can be used to preventaction from small level changes or insignificanttransients,which may otherwise adversely affectthe programme.In this case,it is best to start with the deadband set to zero and increase it only if unwanted action becomes evident,particularly during quiet sustained passages.The deadband control may also be used to produce dramatic effects by focussing the TransMod action on only the loudest transients in the programme.In this case,it’s best to set low thresholds and high ratios to get the maximum action,before progressively increasing the deadband to exclude smaller events from the effect.2.6ThresholdThe threshold control causes the process to operate only on programme material above the set level,ignoring all signals below that value.Unlike all the other TransMod processing,the threshold is related to absolute input levels,and therefore care must be taken to set a low enough threshold value to allow action on the required range of programme.Careful threshold setting may be used to focus only on the louder events in the programme.This may be particularly useful when aiming for compression sounds with negative ratio settings.To generate increased attack with positive ratios,the TransMod process works most effectively when operating on the majority of the programme range, i.e.the lower the threshold the greater the possible effect may be.Note:Care must be taken with very low threshold settings since programme material starting2.7Level Control and Overdrive2OPERATION from silence may produce a large initial overshoot.2.7Level Control and OverdriveAlthough the TransMod process works to maintain constant average signal levels in the programme,the process can produce significantly larger peak levels if positive ratio values are used.With highly percussive sounds and long overshoot settings,the peak levels can potentially increase up to +24dB greater than in the original programme.This effect will be seen on the peak meters provided in the output section of the plug-in.Since most workstation applications provide no headroom above the peak level operating target that most users aim for,the extra transient information provided by the TransMod is highly susceptible to clipping in the application environment.If this occurs,the transients are lost forever and cannot be recovered in the mix by level control further down line (ie. your mix faders etc.).Therefore care must be taken to set appropriate gain settings to avoid clipping.2.7.1Overdrive ProcessingThe overdrive process is included to allow a degree of relief from premature clipping if high modulation levels are required,by providing a method for the harmonic content of peak information above digital max to be included in the final output of the TransMod process.When set to maximum (100%) the overdrive process will allow peak information up to 6dB greater than max to be included without the sound of hard clipping,whilst avoiding digital overloads entirely.Overdrive processing will also change the harmonic content of the programme to provide warmth and richness to many programme types.2.7.2Loudness EnhancementWhen used with negative ratios,the TransMod can provide an efficient method to increase the loudness of programme by reducing very short transients that may otherwise cause overloads.In many cases,very short transients may not be a prominent part of the programme sound,and can be reduced without damaging the sonic character of the results.If very short-term peaks are reduced,more modulation gain can be achieved without overloads.Since the look-ahead process timing can act on the signal before itappears at the output of the plug-in,short-term peaks can be effectively reduced without apparent loss of overall sonic character.To achieve this effectively,very small overshoot and recovery values should be used with a minimum rise time setting,in order to catch the fastest transients only.A negative ratio coupled with a suitable dead band setting can be obtained that reduces transients by the required amount,allowing the overall level of the programme to be increased before limiting occurs.Note:Since the TransMod is an adaptive process that constantly changes witprogramme content,the peak limiting function will not be as predictable and accurate as that provided by a programme limit.3Description of ControlsNote that the parameter settings provide continuous feedback of settings values,and have type-in fields so you can change values directly from your keyboard.Input SectionINPUT meterDisplays Input drive levels.GAINProvides adjustment of gain from –24 to +24dB.THRESHOLDAdjusts the level threshold for the onset of processing.DEADBANDControls the range of transient programme change that is ignored by the TransMod process,from 0dB to 6dB.Effect SectionRATIOControls the overall effect of the TransMod process.Positive settings producetransient enhancement and negative settings cause reduction.EFFECT meterabove the IN button Displays the peak overall gain and loss of transients in theprogramme material resulting from the TransMod process between + 24dB and-24dB.IN button Switches effect in and out,maintaining constant delay and gain forcomparison purposes.OVERSHOOTControls the timing profile of the transient modification.Output SectionRECOVERYControls the response of the TransMod process to long-term programme levelchanges,from 3 to 200mS.OVERDRIVEProvides additional harmonic and overload enhancement effects to the TransMod output signal,from 0% to 100%.RISE TIMEControls the response speed of the TransMod process to short duration envelope transients,from 100µS to 30mS.4SPECIFICATIONSOUTPUT meterDisplays output drive levels.Output SectionClicking the Sonnox button produces a drop-down options menu.4Specifications4.1Pro Tools | HDX– Instances per chip48 kHz96 kHz192 kHzMono1573Stereo14635PRESET MANAGER TOOLBAR 5Preset Manager ToolbarThe Oxford TransMod plug-in comes equipped with its own onboard Preset Manager, which is displayed as a toolbar at the top of the plug-in window,just as if the host created it (see above).The reasoning behind this is to allow increased portability of your presets across all the host applications,while also providing a consistent and versatile interface. Although most host platforms allow the creation and loading of presets,thosehost-created preset files are not portable between different host applications.With the Oxford plug-ins’ preset manager,you can create a named preset in one host application and load it when using an alternative application.The Preset Manager ToolBar is enabled via the Sonnox button Options Menu (see Description of Controls).The Sonnox Preset Manager is fully described in a companion document —Sonnox Toolbar and Preset Manager Operation Manual— available for download on the Support Documentation page of .7SYSTEM REQUIREMENTS 6Supported Platforms•Avid Pro Tools (AAX Native and DSP32/64-bit)•VST hosts (32/64-bit)•AU hosts (32/64-bit)•Mac Intel OSX10.6 or higher•Windows 7 and 8 (32/64-bit)7System RequirementsFor latest System requirements,please visit .All versions•Free iLok account•Appropriate product licence•iLok2Pro Tools•Approved Digidesign/Avid CPU and hardware configuration•Pro Tools 10.3.5 (Native or HD), or higherVST Native•VST compliant host application (e.g.Cubase,Nuendo,etc.)Audio Units•Approved Apple CPU and OSX10.6 or higher•Audio Unit Host application (e.g.Logic,Digital Performer,etc.)8COPYRIGHT AND ACKNOWLEDGEMENTS 8Copyright and AcknowledgementsTrademarks and content copyright©2007-present Sonnox®Ltd.All rights reserved.Sonnox®and the five dots logo are registered trademarks of Sonnox Ltd.This product is manufactured and supplied by Sonnox Ltd.This product is protected by one or more European and/or US patents.DIGIDESIGN, AVID and PRO TOOLS are trademarks or registered trademarks of Avid Technology Inc.VST is a trademark of Steinberg AG.All other product and Company names are trademarks or registered trademarks of their respective holders.。
展光紫锐下载工具中文说明
Download tool 用户手册版本8.03.14目录1 概述 (3)2 硬件配置 (4)2.1 硬件需求 (4)2.2 硬件设置 (4)3 软件配置 (7)3.1 软件需求 (7)3.2 软件设置 (8)3.2.1 端口设置 (8)3.2.2 下载内容设置 (8)3.2.3 Flash设置 (9)3.2.4 标志位设置 (10)3.2.5 SN设置 (11)3.2.6 蓝牙设置 (12)4 使用下载工具 (13)4.1 启动程序 (13)4.2 启动下载 (13)4.3 下载Lod (14)4.5 单独开始、停止下载 (15)4.6 取下设备 (15)5故障处理 (15)1 概述文档介绍download tool 的基本功能与使用说明,包括硬件配置,软件配置,故障处理等。
Download tool 主要用于向手机导入相关程序、用户数据等,还可以擦除Flash中的内容,如用户数据、校准数据、出厂设置,并能同时写入手机SN和主板SN等。
2 硬件配置2.1 硬件需求1.带PCI插槽或多个USB接口的PC。
2.MOXA CARD 1-8(或1-16)或USB hub,支持波特率为921600(bps)的传输速度。
3.下载线.4.下载专用尾插或夹具。
5.直流电源2.2 硬件设置目前Download tool支持8个串口同时下载。
连接方式见下图1图1如果使用MOXA CARD ,只须将MOXA CARD 插入PC内某一口空闲的PCI槽,接上1-8口线,安装MOXA 驱动即可。
安装完成后,在设备管理器中看到它映射出的8个串行端口(图2所示),即表示安装成功。
安装MOXA CARD驱动之前,可以将PC自带的COM口的端口调整,以便使MOXA卡映射出8个连续的端口号,如图2中MOCA CARD 的8个端口使用的COM口依次是1到8,便于识别。
使用USB hub 下载也十分简单,只需把专用USB下载线接入PC的USB接口或USB hub的接口,然后再对映射出来的串行端口按MOXA卡类似的方法设置好即可。
pro tools教程
数字音频工作站Pro Tools LE教程王磊PRO TOOLS 初级教程说明:本教程只适用于刚刚接触或正要学习PRO TOOLS的同学使用。
今天要给同学说一下在数字音频工作站领域中,最为流行并享有盛誉的音频软件Pro Tools(当然PRO TOOLS的高端产品视频功能也很强大,但我们这里只说音频这方面)。
由Digidesign公司出品的Pro Tools一直是录音行业所推崇的音频处理系统,专业版的TDM系统一般有Pro Tools 24 MIX Plus;Pro Tools 24 MIX;Pro Tools 24等;以及刚刚推出的Pro Tools HD系统。
Pro Tools的软件至今也已升级到6.9的版本。
还有最近出的两个小玩意MBOX和DIGI002。
我们所说的DIGI001系统是这些中最简单的一个,就是由简化版的PRO TOOLS LE软件加上硬件DIGI001组成。
简化版的Pro Tools我们称它为Pro Tools LE,由于绝大多数人都拿不出几十万人民币来购置一套带有硬件DSP功能的Pro Tools 的专业级系统,因此在这里我们就以简化版的Pro Tools 来详细介绍一下,几乎具备TDM系统的大部分重要功能的软件Pro Tools LE与硬件DiGi 001的具体使用。
首先我们先来认识它们:第一节Digi 001这个就是它了,(当然图中少了一块PCI的插卡,因为我没搞到它的图)Digi 001主要由外置接线箱(AD/DA转换器)和PCI插卡组成,中间用电缆连接,是一套真正的“即插即用”系统。
先看前面,在它的前面板上有两个Neutrik复合式(卡侬或大三芯通用)的Mic/LINE前级放大器,有独立的增益控制(GAIN),带有-26db的固定哀减(PAD)按钮,是专门为输入线路信号时使用的。
此外这两个接口还配有48V幻相供电(PHANTOM POWER),可直接接入需48V的电容话筒进行工作。
如何使用ProTools进行音频录制和混音制作
如何使用ProTools进行音频录制和混音制作第一章:ProTools简介ProTools是一款专业的音频录制和混音制作软件,被广泛应用于音乐制作、电影制作和广播电视等领域。
它具有强大的功能和灵活的操作界面,可以实现高质量的音频处理和编辑。
本章将介绍ProTools的基本概念和界面布局,给读者一个全面的了解。
1.1 ProTools的基本概念ProTools是由Avid Technology公司开发的一款数字音频工作站软件,它可以实现多轨录音、混音、编辑和效果处理。
它支持多种音频接口和音频文件格式,可以与各种音频设备进行兼容和交互。
1.2 ProTools的界面布局ProTools的界面分为编辑窗口、混音窗口和传送窗口等几个部分。
编辑窗口主要用于录音和编辑音频,混音窗口用于将录制好的音轨进行混音处理,传送窗口用于传输和接收音频信号。
第二章:音频录制音频录制是音频制作的基础,良好的录音质量对于后期的处理和制作至关重要。
本章将介绍如何使用ProTools进行音频录制,包括设置录音设备、调整参数和监控录音过程。
2.1 设置录音设备在ProTools中,首先需要将录音设备连接到计算机,并通过软件设置进行识别和配置。
具体步骤如下:(1)打开ProTools软件,选择“设置”菜单中的“音频设备设置”选项;(2)在音频设备设置对话框中,选择正确的音频接口和输入输出设备,并设置采样率和缓冲区大小;(3)点击“应用”按钮保存设置。
2.2 调整录音参数在进行音频录制之前,需要根据实际情况进行参数调整,以获得最佳的录音效果。
具体步骤如下:(1)在编辑窗口中选择要录制的音轨;(2)点击“属性”按钮,进入音轨属性对话框;(3)在音轨属性对话框中,设置音轨的输入通道和音量,选择录音格式和分辨率;(4)点击“确认”按钮保存设置。
2.3 监控录音过程在录制音频时,需要及时监控录音过程,以确保录音质量。
ProTools提供了多种监控方式,包括实时录音波形显示、音频信号监视和耳机监控等。
- 1、下载文档前请自行甄别文档内容的完整性,平台不提供额外的编辑、内容补充、找答案等附加服务。
- 2、"仅部分预览"的文档,不可在线预览部分如存在完整性等问题,可反馈申请退款(可完整预览的文档不适用该条件!)。
- 3、如文档侵犯您的权益,请联系客服反馈,我们会尽快为您处理(人工客服工作时间:9:00-18:30)。
SYNC 週邊裝置前面板. . . . . . . . . . . . . . . . . . . . . . . . . . . . . . . . . . . . . . . . . . . . . . . . . . . . . . . . . . . . . . . 19 SYNC 週邊裝置後面板. . . . . . . . . . . . . . . . . . . . . . . . . . . . . . . . . . . . . . . . . . . . . . . . . . . . . . . . . . . . . . . 22 SYNC Setup 軟體應用程式 . . . . . . . . . . . . . . . . . . . . . . . . . . . . . . . . . . . . . . . . . . . . . . . . . . . . . . . . . . . 24
SYNC™ HD 使用手冊
版本 8.1
法律聲明 本手冊的 2010 年著作權歸 Avid Technology, Inc.(以下簡稱 「Avid」)所有,並保留所有權利。根據著作權法,未獲得 Avid 的
6 I/O、96i I/O、192 Digital I/O、192 I/O、888|24 I/O、 882|20 I/O、1622 I/O、24-Bit ADAT Bridge I/O、AudioSuite、 Avid、Avid DNA、Avid Mojo、Avid Unity、Avid Unity ISIS、Avid Xpress、 AVoption、Axiom、Beat Detective、Bomb Factory、Bruno、C|24、 Command|8、Control|24、D-Command、D-Contro、l D-F、i D-fx、 D-Show、D-Verb、DAE、Digi 002、DigiBase、DigiDelivery、Digidesign、 Digidesign Audio Engine、Digidesign Intelligent Noise Reduction、 Digidesign TDM Bus、DigiDrive、DigiRack、DigiTest、DigiTranslator、 DINR、D-Show、DV Toolkit、EditPack、Eleven、HD Core、HD Process、 Hybrid、Impact、Interplay、LoF、i M-Audio、MachineContro、l Maxim、 Mbox、MediaComposer、MIDI I/O、MIX、MultiShel、l Nitris、OMF、 OMF Interchange、PRE、ProContro、l Pro Tools M-Powered、 Pro Tools、Pro Tools|HD、Pro Tools LE、QuickPunch、Recti-F、i Reel Tape、Reso、Reverb One、ReVibe、RTAS、Sibelius、Smack!、 SoundReplacer、Sound Designer I、I Strike、Structure、SYNC HD、 SYNC I/O、Synchronic、TL Aggro、TL AutoPan、TL Drum Rehab、 TL Everyphase、TL Fauxlder、TL In Tune、TL MasterMeter、 TL Metro、TL Space、TL Utilities、Transfuser、Trillium Lane Labs、 Vari-Fi Velvet、X-Form 與 XMON 均為 Avid Technology, Inc. 的商 標或註冊商標。Xpand! 在美國專利商標局註冊。所有其他商標 是其個別擁有者的財產。
硬體連接 . . . . . . . . . . . . . . . . . . . . . . . . . . . . . . . . . . . . . . . . . . . . . . . . . . . . . . . . . . . . . . . . . . . . . . . . . . . 5 MachineControl . . . . . . . . . . . . . . . . . . . . . . . . . . . . . . . . . . . . . . . . . . . . . . . . . . . . . . . . . . . . . . . . . . . . . 7 同步及連接時間碼至設備、平臺或其他裝置 . . . . . . . . . . . . . . . . . . . . . . . . . . . . . . . . . . . . . . . . . . . . . . 8 安裝軟體 . . . . . . . . . . . . . . . . . . . . . . . . . . . . . . . . . . . . . . . . . . . . . . . . . . . . . . . . . . . . . . . . . . . . . . . . . . . 9 模擬 SYNC I/O . . . . . . . . . . . . . . . . . . . . . . . . . . . . . . . . . . . . . . . . . . . . . . . . . . . . . . . . . . . . . . . . . . . . . 10 從 Pro Tools HD 設定 SYNC 週邊裝置. . . . . . . . . . . . . . . . . . . . . . . . . . . . . . . . . . . . . . . . . . . . . . . . . . 11 MachineControl 設定 . . . . . . . . . . . . . . . . . . . . . . . . . . . . . . . . . . . . . . . . . . . . . . . . . . . . . . . . . . . . . . . 16 SYNC Setup 軟體應用程式中的軟體設定 . . . . . . . . . . . . . . . . . . . . . . . . . . . . . . . . . . . . . . . . . . . . . . . 16 疑難排解 . . . . . . . . . . . . . . . . . . . . . . . . . . . . . . . . . . . . . . . . . . . . . . . . . . . . . . . . . . . . . . . . . . . . . . . . . . 17
目錄 iii
時間碼偏置補償 . . . . . . . . . . . . . . . . . . . . . . . . . . . . . . . . . . . . . . . . . . . . . . . . . . . . . . . . . . . . . . . . . . . 40 生成與再生成時間碼 . . . . . . . . . . . . . . . . . . . . . . . . . . . . . . . . . . . . . . . . . . . . . . . . . . . . . . . . . . . . . . . 40 生成 Window Dub. . . . . . . . . . . . . . . . . . . . . . . . . . . . . . . . . . . . . . . . . . . . . . . . . . . . . . . . . . . . . . . . . . 45
SYNC 週邊裝置特性. . . . . . . . . . . . . . . . . . . . . . . . . . . . . . . . . . . . . . . . . . . . . . . . . . . . . . . . . . . . . . . . . . 2 系統要求和相容性 . . . . . . . . . . . . . . . . . . . . . . . . . . . . . . . . . . . . . . . . . . . . . . . . . . . . . . . . . . . . . . . . . . . 3 註冊 . . . . . . . . . . . . . . . . . . . . . . . . . . . . . . . . . . . . . . . . . . . . . . . . . . . . . . . . . . . . . . . . . . . . . . . . . . . . . . . 3 關於本手冊 . . . . . . . . . . . . . . . . . . . . . . . . . . . . . . . . . . . . . . . . . . . . . . . . . . . . . . . . . . . . . . . . . . . . . . . . . 4 關於 . . . . . . . . . . . . . . . . . . . . . . . . . . . . . . . . . . . . . . . . . . . . . . . . . . . . . . . . . . . . . . . . . . 4
第 2 章。安裝及配置 . . . . . . . . . . . . . . . . . . . . . . . . . . . . . . . . . . . . . . . . . . . . . . . . . . . . . . . . . . . . . . . . . . . . . . 5