GP条码打印机驱动安装及使用教程
GP条码打印机驱动安装及使用教程
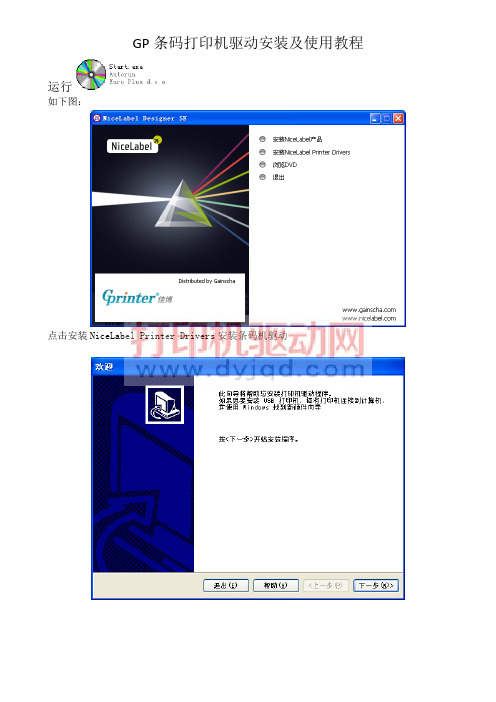
GP条码打印机驱动安装及使用教程运行如下图:点击安装NiceLabel Printer Drivers安装条码机驱动点击下一步,查看许可协议。
选择对应型号的打印机驱动,以GP-9035T为例。
选择通讯端口,根据数据连接线不同选择不同的端口。
并口线连接请选择LPT,根据机器有否扩展选择端口。
串口线连接请选择COM,根据机器有否扩展选择端口。
USB线连接请选择USB,请注意因为USB接口为系统虚拟打印端口,实际操作过程中需要确保打印机USB线连接上并打开打印机电源。
如果一台电脑在安装多台连接USB线的打印机时,有可能出现多个USB端口,如USB001,USB002……USB005……等,如果在完成驱动安装后不能打印需要进行端口调整。
若使用网络端口请选择添加TCP/IP端口,如下步骤:输入打印机的“IP 地址”,如下图所示。
然后选择“自定义”‐‐‐‐‐‐‐‐“设置”,如下图所示,确认以下图示信息并选择“确定”。
然后选择“下一步”,如下图所示。
最后选择“完成”即成功添加了以太网通迅端口。
并可供选择,如下图:如选择串口(COM 口),需要在已安装完成的驱动属性页里选择端口选项卡,然后“配置端口”。
选择串口通讯“每秒位数”、“数据位”、“奇偶校验”、“停止位”、“数据流控制”等。
出厂默认参数如下图所示,可通过打印机开机自检页上查看到串口通讯参数信息,如“SERIAL 9600,N,8,1”。
如果使用USB连接时驱动端口内存在多个USB虚拟端口时,如下图:请遵循以下步骤尝试连接打印机:首先,在打印机属性的“常规”选项卡中点击“打印测试页”然后,查看打印任务状态,如果正常测试页会在短时间内消失并且打印机会有打印动作,如果端口不正确,则状态一定会出现“错误-正在打印”的字样。
如下图:回到打印机属性的“端口”选项卡中,勾选另外一个USB虚拟端口,点击右下角“应用”,等待一下,测试页任务会重新启动,如果端口对应上,则任务会消失并且打印机会有打印动作,如果仍然是错误则重复上述勾选操作直到打印任务完成。
GP无线WIFI打印机安装使用设置手册V最新版
GP无线WIFI打印机安装使用手册GP无线WIFI打印机参数功能介绍:可用Web 浏览器进行参数设定。
支持点对点(TCP、UDP) 和broadcast (仅UDP)。
支持WLAN 基础网(Infra)、自组网(Ad-Hoc)。
支持WLAN 安全(WEP64、WEP128、WPA-Personal、WPA2-Personal、TKIP、AES)。
内置AP、Ad-Hoc 搜索功能(site survey 功能)。
支持2.4G 无线网络(1-13信道可选)IEEE802.11b(11Mbps),IEEE802.11g(54Mbps),IEEE802.11n(72Mbps)。
接收信号强度大于-35db(72Mbps)。
支持AP(Access Point)路由和STA(Station)两种模式,用户可以通过网页选择不同模式。
AP模式:笔记本,手机,平板等无线终端可以直接搜索并连接到打印机。
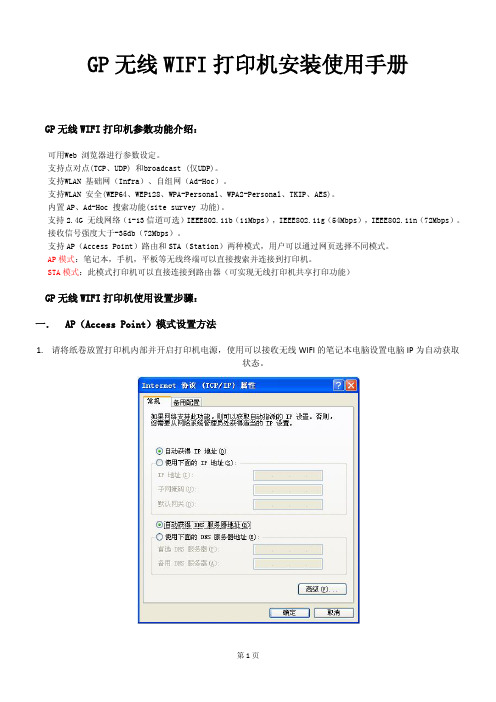
STA模式:此模式打印机可以直接连接到路由器(可实现无线打印机共享打印功能)GP无线WIFI打印机使用设置步骤:一.AP(Access Point)模式设置方法1.请将纸卷放置打印机内部并开启打印机电源,使用可以接收无线WIFI的笔记本电脑设置电脑IP为自动获取状态。
2.搜索当前无线网络,查找到“Printer”打印机设备,点击“连接”连接到打印机。
3.我的电脑-》控制面板-》打印机和传真,找到已经安装好GP-80160II打印机驱动程序,右击选择“属性”。
4.选择“端口”,然后点击“添加端口”。
5. 选择“Standard TCP/IP Port”,并点击“新端口”。
6. 输入打印机默认IP地址,并点击下一步。
7.点击“常规”,然后点击“打印测试页”完成打印机安装,如果打印机能打印出测试页,表示已经可以正常使用。
二.STA(Station)模式设置方法1. 在AP模式下使用笔记本连接到打印机,如下图:2. 在IE浏览器输入:http://192.168.0.1,进入后输入用户名:admin,用户密码:admin 登陆到设置页面。
GP-H80250系列USB接口打印机安装及使用说明
GP-H80250系列USB接口打印机安装及使用说明打印机USB使用介绍:打印机USB接口总体来说可分为真正的USB接口、并口转USB接口、串口转USB接口和USB虚拟串口等5种。
真正的USB接口和并口转USB接口:数据传输速度和打印速度都有保障,但应用软件接入联接打印不能直接兼容传统上的并口或串口;串口转USB接口:虽然说应用软件接入联接打印可以直接兼容传统上的串口,但数据传输速度和打印速度都是传统的串口速度,数据传输速度和打印速度都很慢,无法体现出打印机高速高效的特性;USB虚拟串口:既能够直接兼容传统上的串口,又能实现真正的USB接口的高速的数据传输和高速打印。
USB虚拟串口可以说是USB接口设计的最佳应用方案,盛源票据打印机公司出品的GP-H80250系列打印机正是采用了这种先进的技术,既采用USB接口与计算机相联接,又可以对应用软件的良好的兼容传统的串口,使应用软件只要支持串口打印,应用软件不须要做任何修改,就可以使用GP-H80250系列打印机的USB端口通讯轻松实现票据打印。
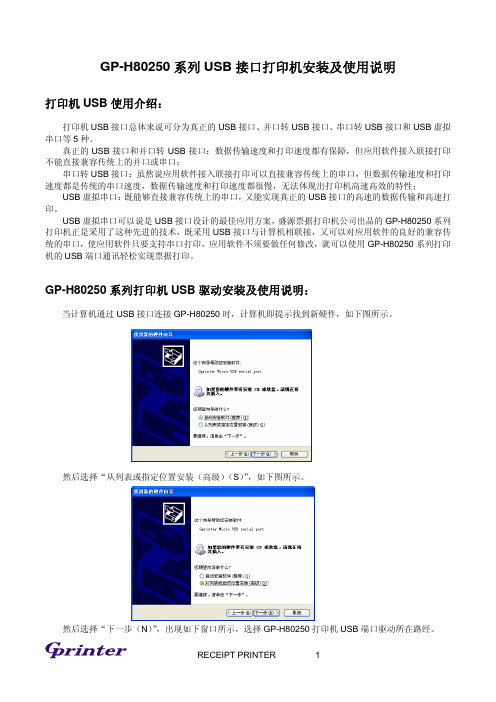
GP-H80250系列打印机USB驱动安装及使用说明:当计算机通过USB接口连接GP-H80250时,计算机即提示找到新硬件,如下图所示。
然后选择“从列表或指定位置安装(高级)(S)”,如下图所示。
然后选择“下一步(N)”,出现如下窗口所示,选择GP-H80250打印机USB端口驱动所在路经。
然后选择“下一步(N)”继续安装USB端口驱动。
当弹出如下所示窗口。
选择“仍然继续(C)”,即提示驱动安装“完成”,然后选择“完成”确认,如下图所示。
然后在“控制面版”——>“系统”——>“硬件”——>“设备管理器”——>“端口(COM和LPT)”——>“Gprinter Micro USB serial port (COM3)”,通过这里可以查看到打印机打USB虚拟的端口号,如COM3,这样打印机时,应用软件或是驱动里的通迅端口就要选择这个端口号,如COM3。
佳博GP-76XX针式打印机安装使用手册

钱箱控制:6 线 RJ-11 插座,输出 DC 24V/1A 电源信号驱动钱箱动作 ● 打印字符:
ASCII 码字符集: Font A,9×9 点,1.6(宽)×3.1(高)毫米 Font B,7×9 点,1.2(宽)×3.1(高)毫米
国标一、二级汉字库:16×16 点,2.7(宽)×2.7(高)毫米 国际代码页:PC437、Katakana、PC850、PC860、PC863、PC865、WPC1252、
PC866、PC852、PC858 等 10 种国际语言 ● 打印纸指标:
打印纸类型:优质 1 联普通连续纸或 2 至 3 联自复印纸 纸宽:76.0±0.5 毫米 纸卷外径(最大):Φ75 毫米 纸卷内径(最小):Φ12 毫米 单层纸厚:0.06~0.085 毫米 多层纸厚:0.05~0.08 毫米,总厚度≤0.20 毫米 ● 色带型号:盒式色带 ERC-39(紫色或黑色) ● 打印机可靠性:1000 万行(MCBF) ● 黑标检测:黑标印在票据正面靠右边,黑标长度(沿走纸方向)5 毫米,
IMPACT DOT-MATRIX RECEIPT PRINTER
6
GP-7645、GP-7645II:
在纸感应器检测到无纸时,打印机错误(ERROR)指示灯和缺纸(PAPER) 指示灯同时亮,等待装纸。上纸操作过程中,当纸感应器重新检测到有纸时, 缺纸(PAPER)指示灯灭并启动进纸马达,打印机自动进纸。纸上好后,在GS z t1 t2 所设定的时间(t1×500)ms内错误(ERROR)指示灯亮,缺纸(PAPER) 指示灯灭,可通过按进纸(FEED)按键进纸,等待(t1×500)ms时间后(ERROR) 指示灯亮同时缺纸(PAPER)指示灯闪烁,可通过按进纸(FEED)按键使打印机 回到连线状态,准备打印。若当前为黑标定位有效时,会自动进纸并检测黑标, 自动进纸至GS ( F 设置的页首位置,否则,自动进纸约310毫米,可通过按 进纸(FEED)按键使打印机回到连线状态,准备打印。
打印机驱动添加方法
打印机驱动安装方法及常见问题解决(1)选择左下角“开始→设置→打印机和传真”命令,打开“打印机”文件夹,利用“打印机”文件夹可以管理和设置现有的打印机,也可以添加新的打印机。
(2)双击“添加打印机”图标,启动“添加打印机”向导。
在“添加打印机”向导的提示和帮助下,用户一般可以正确地安装打印机。
启动“添加打印机”向导之后,系统会打开“添加打印机”向导的第一个对话框,提示用户开始安装打印机。
(3)点击“下一步”按钮,进入“选择本地或网络打印机”对话框。
在此对话框中,用户可选择添加本地打印机或者是网络打印机。
选择“本地打印机”选项,并把自动检测打印机方框内的“对号”点击取消掉,可添加本机打印机。
(4)点击“下一步”按钮,弹出“选择打印机端口”对话框,选择要添加打印机所在的端口。
如果要使用计算机原有的端口,可以选择“使用以下端口”单选项。
一般情况下,用户的打印机都安装在计算机的LTP1打印机端口上。
(5)点击“下一步”按钮,弹出“选择打印机型号”对话框,选择打印机的生产厂商和型号。
其中,“制造商”列表列出了Windows xp支持的打印机的制造商。
如果在“打印机”列表框中没有列出所使用的打印机,说明Windows xp不支持该型号的打印机。
一般情况下,打印机都带附带有支持Windows xp的打印驱动程序。
例如:添加EPSON 1600K 在制作商内找到EPSON 点击,在“打印机”列表框中找到打印机的型号1600K 点击。
(6)点击“下一步”按钮,弹出“命名您的打印机”对话框。
在该对话框中可为打印机提交名称。
在“是”“否”把打印机设为默认项上选择“是”。
(7)点击“下一步”按钮,在弹出的对话框中用户可以选择“是·否”对打印机进行测试,看是否已经正确安装了打印机。
选择“是”. 打印机上添加纸张。
(8)点击“下一步”按钮,如果确认设置无误,点击“完成”按钮,驱动会自动添加上去。
安装完毕。
添加打印机出现的问题及解决方法:1.添加到最后一步时,添加进程表走到一定位置电脑提示:无法安装·缺少文件·插入系统盘等等提示,是由于电脑的系统不完整造成的。
GP-9025T 9026T系列热转印条码打印机用户手册说明书
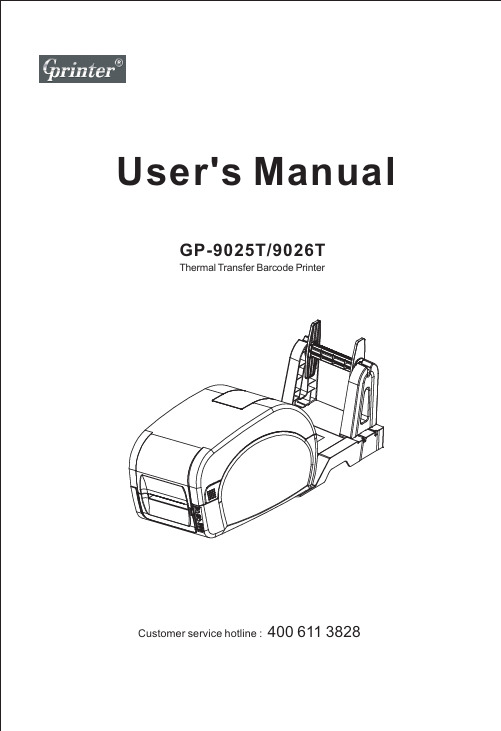
User's Manual GP-9025T/9026TThermal Transfer Barcode PrinterCustomer service hotline : 400 611 3828CONTENTSThe printerOptional accessoriesThe paper sizeProduct introductionAppearanceInternalThe bottomInstallationLED indicator functionTroubleshootingMaintenanceInstallation of paperButton FunctionCommon problem1313 6.1.Printer Cleaning1515The printerIntroductionThanks for choosing GP-9025T, GP-9026T series direct thermal and thermal transfer label printer.This series printer is built with 2 sets of gear to drive motor, with capability of handling 300meters long ribbon and large label roll. Printer inner volume is fit for 5" OD (Outer Diameter) paper roll, if using external paper holder, you can install 8.4"OD industrial grade label roll.This printer is designed for real-time and batch label printing, with standard serial, parallel, USB and Ethernet connection port. Direct thermal printing and thermal transfer printing modes are all in one printer body, so you can choose various kinds of printing materials, for example: thermal paper, plain paper, coated paper, silver paper, plastic paper etc.Common 1D barcode and 2D barcode fonts are built inside printer, also it support 4 direction printing, characters can be enlarged from 1 to 10 times. Besides, it supports 5 different size bitmap fonts, OCR-A and OCR-B fonts, together with 203dpi higher print resolution, this series printer are your best choice among the same class.Declaration : This is a class A product , fit for Non Tropic regions installation . This product may cause radio interference in life environment , users may need to take adequate preven -tive measures.Application FieldManufacturing & Warehousing logistic industryHealthcareParcel PostOffice & Studio RetailProduct labeling and marking Warehouse management label Category marking labelOperation instruction marking label Distributing instruction marking labelPatients marking Medicine marking Specimen markingMailing labelPrice Label marking Product item marking Jewelry product markingProduct featuresOptional accessoriesSpecificationsExternal support optional GP-9025T, GP-9026T standard.Print specificationsThe paper sizeProduct introductionOpen and checkThis series printer is with special package to prevent damage in transportation. If there is any unexpected damage occurred, please put in clean and stable surface and carefully open the package to check, inform local distributor with damage details, and keep packing mate -rials well in case you need to mail the printer.Packing list:◆ One Label printer◆ CD ( Driver, Nice label software, User Manual )◆ Power Adapter◆ Power Cord◆ USB cable ( Parallel cable, serial cable optional)◆ Ribbon roller & Ribbon◆ Label roller & Label paper◆ External paper holder (Standard for GP-9026T)<Picture 1>Please pack equipment and materials needed for safekeeping printer for subsequent handling; if the above items, any lost or missing, please Customer Service Department of your purchase contact.Printer componentsAppearanceLED lights indicate:★ ON LINE electric lamp ★ ERROR error lamp ★ RIBBON ribbon status light<Picture 2><Picture 3>Internal<Picture 5> The bottomNote: Picture showing printer port is for GP-9026T.InstallationInstall the printer1. Please put the printer on the stable surface.2. Make sure printer power is turned off, please do not plug the power cable when the printer power is turned on.3. Connect serial or USB or Parallel or Ethernet cable to printer and PC.4. Connect power plug to power supply socket.Be careful:※※ Transmission interface in the picture will vary depending on your printerpurchased aircraft type, the actual transmission interface, please refer tothe corresponding product specificationspower line is inserted into the printer.<Picture 6>Ribbon installation1. Press two press buttons on left and right side to open printer top cover.2. Put empty paper tube into ribbon take-up hub if you buy new ribbon which one side is no contact with paper tube.After that, install ribbon take-up hub left side and right side onto printer.Remark: Factory standard ribbon two sides already fixed well on paper tube. Go ahead to step 3 instead of step 2.3. Press the Push button to open print head.Ribbon installation diagram<Picture 7> Installation of paperInstallation of paper1.Open printer top cover;Insert blue label supply hub into label rolland fix onto printer.2.Press Push button to open print head toinstall label paper same as pictureshowing.4.Close printer top cover.3.Close the print head by pressing two arrowlocations. Confirm print head two sides areclosed correctly to ensure you get printingin good quality.LED Indicator and FunctionThere’re two buttons and three LED indicators, many functions can be realized through using different button, indicator and power on/off switch.LED indicatorDirect thermal printing methodLED Indicator status DescriptionsPower indicator is on,Error indicator is off Printer is powered on and in normal printing statusPower indicator flashes every 640ms,Error indicator is off Printer is pausedPower indicator is off, Error indicator goes for 80ms, then goes off for 160ms, printer start beeping.※on Printer cover is openedPower indicator is off for 500ms, then goes off for 6s , Error indicator goes on Label gap detection errorPower indicator is off Error indicator flashes every 160ms, after two times flashing, Error indicator goes off for 320ms, printer start beeping. ※, Paper outPower indicator is off Error indicator flashes every 160ms,after three times flashing,Error indicator goes off for 320ms, printer start beeping. ※, Black mark detection errorError indicator flashes every160ms.Printer overheated protection mode is act-ivated. After 1 minute, the printer CPU will check print head temperature again. When temperature return normal, printer will work normally.※ Beeper function can be enabled through setting DIP switch.※ Beeper function can be enabled through setting DIP switch.Thermal transfer printingLED Indicator status DescriptionRibbon indicator is on Ribbon is installed successfullyRibbon indicator flashes every 300ms, beeper sounds every 2.4s ※Ribbon improperly installed: no ribbon, or ribbon end, or ribbon brokenButton FunctionFeedWhen the printer is ready (LED blue fixed), click the button, label paper into the front end of a paper label. Print job timeoutThe printer in the print, click the PAUSE button to print suspended. At this time power indicator is blue flashing. Just click the button, the print job resume normal.Start functionThe printer has six kinds of power function can be used to set or test the printer hardware. In the boot and press the button with lamp signal release key can start these functions.Six Power-up Functions:Skip AUTO.BAS program User can use TSPL2command to save a code auto--ing file (AUTO.BAS)into flash. When turn on printer, prin-ter will run the program automatically. runnIf you want to skip AUO.BAS program on power-up, then follow below steps:Press and hold PAUSE and FEED button, then turn on theprinter. When Power indicator (blue) is off and Error indi -cator(red)is on, release PAUSE and FEED button, printerwill skip running AUTO.BAS program, and then Power indicator will be on.Printer Initialization A.Turn off the printer.B.Press and hold PAUSE and FEED button, then turn on theprinter. When Power indicator(blue)is on and Error indi-cator (red) is off, release PAUSE and FEED button, all data in printer DRAM will be cleared and printer setting will be restored to factory default setting. Then power indicator will be on and printer goes to ready status.* Factory default settings do not include ribbon setting.Ribbon Detection When printer power turn on, or it is in thermal transferprinting mode, printer will automatically detect ribbonstatus, to check if ribbon installed, or ribbon end, or work normally. After ribbon detecting, printer will be set tothermal transfer printing mode or direct thermal printing mode. If no ribbon,system will go to direct thermal printing mode and close ribbon rolling motor function.The printer configuration after the initialization will revert to the default values are as follows:Parameter Default settingSpeed Density Gap Direction 4inch/sec (101.6mm/sec), 203dpi100mmONONOFFOFFONONCLEARNOT CLEARTop left corner from printing direction Printing content are placed on page from top to bottomReference SHIFT OFFSET SET TEAR SET HEAD(Cover open detect)Set PRINTKEY SET REPRINT SET KEY1(FEED)SET KEY2(PAUSE) CLEAR RAMCLEAR FLASHProblems Possible Reasons Solution and Suggestion Power indicatornot "ON”TroubleshootingCommon problemBelow the table of contents is generally the common problems and solutions; if you have been in our proposed methods of eliminating the fault, and the printer is not normal operation, so check with your purchase customer service department, so as to get more help.Plug to AC outlet and plug toprinter not well connectedCheck power connector and AC outlsetif plugs are correctly connectedPrinter power not turned on Turn on power switchPrint head not well closed Close print head by pressing whole printhead mechanism (or 2 arrow locations)Ribbon endLabel paper jamed inside printerChange new ribbonRibbon improperly installed Refer to Ribbon Installation steps in UserManual to re-install ribbonLabel paper end Change new label paperLabel paper improperly installed Refer to Paper Installation steps in UserManual to re-install paperGap sensor detection error Adjust paper specification and print againClear jamed paperNot printingSerial cable improperlyconnected1. Check if Pin configuration in cable twosides are matching each other;2. Check if baud rate setting on PC andprinter are the same, If in TPSL comma-nd mode, We suggest 9600, n, 8, 1 toensure higher reliability.3. Change a new cable.Ethernet cable improperlyconnected1.Check if RJ-45 green/orange LEDindicator is on. When printer receiveand process printing data, LED will beorange color;2.Check if printer IP is assigned inDHCP mode.3.Check if fixed IP address is correctlyset in printer property. Wait for someminutes to make sure printer is connect-ed server and printing a selftest pageto confirm printer IP address.4.Change a new ethernet cable.USB cable improperlyconnectedCheck if USB cable connected well orchange a new cableRibbon non standard Check if ribbon model andspecificationNot printing Ribbon printing side wrong installed Check and re-install ribbon to make sure printing side touch label paperPrint head not clean Clean print head and print againPrint density setting wrong Suggest density set to be 7Print head cable not well connected Re-connect print head cableStep Motor cable not well connected Re-connect step motor cableCommand setting wrong Check if there is PRINT command at the end of printing file; or if there is CRLF command at the end of every line.Not goodprinting quality Ribbon and label improperly installed Too much dust or adhesive on print head Re-install ribbon and/or labelClean print head and print againPrint head damaged Take selftest page to check if printing are completely to confirm if necessary to change new print headData miss printing in one or two sides Label paper size wrong setting Check if label size set correctly and same as your label paperRibbon wrinkle Printing not stable Printer in HEX Dump mode or RS-232 setting wrong Print head unbalanced stress;ribbon & label improperly installed; Label feeding not smoothly Reset the label print density andadjust paper width fixing stand tofit your label paper size.Restart your printer and leave Dump Mode or reset RS-232 PARAMETERMaintenance6.6.1.Printer CleaningTo ensure the printing quality, please proceed this maintenance section to keep your printer in good conditions and extend its life as well.Please use one of following material to clean the printer.★ Cotton swab★ Lint-free cloth★ Vacuum / Blower brush★ 100% ethanol2.The cleaning process is described as following:Note:※Always turn off the printer power before cleaning the printer.※ Do not touch print head by figure.※ Please use 100% ethanol, Do not use medical alcohol to aviod damage to print head.。
佳博条码打印机驱动安装向导
佳博条码打印机驱动安装向导内容•注意事项•安装驱动程序•升级驱动程序•卸载驱动重新•常见问题Q&A注意事项1. 该驱动仅支持windows操作系统(windows XP,windows 2003,windows Vista,windows7,windows 8).2. 安装驱动前务必连接好数据线,并打开打印机电源,接通后打印机指示灯会亮起,点击查看安装视频.3. 该打印机兼容TSC TDP-245指令,安装驱动时打印机型号选择TSC TDP-245.安装windows驱动程序1. 连接打印机电源线、数据线,打开电源,若弹出找到新的硬件向导,请关闭向导2. 选择安装打印机驱动程序3. 指定打印机型号,型号选择TSC TDP-2454. 指定打印端口,选择USB开头,后面数字最大的端口5. 打印机名称无需更改,如果向导提示需要重启,按提示重启计算机系统6. 提示已安装打印机'TSC TDP-245'即成功安装好打印机,如果提示安装不成功或没有提示已安装打印机'TSC TDP-245',请参照手动安装打印机驱动,点击查看手动安装驱动方法7. 修改默认标签间距,进入系统控制面板→设备和打印机(或打印机和传真)→右击TSCTDP-245→打印首选项→卷,类型(T)改为有间距的标签,间距高度(H)改为2.00mm升级windows驱动程序升级驱动针对已安装打印机驱动程序系统,升级驱动程序可能导致驱动错误或者发生意外1. 选择升级打印机驱动程序2. 选择可以升级的打印机型号3. 如向导提示需要重启,按提示重启计算机系统卸载windows驱动卸载windows驱动向导将会把TSC驱动从系统中移除,请谨慎操作1. 选择删除打印机驱动程序.2. 选择删除方式:删除打印机可以指定删除需要删除的打印机驱动;自动删除所有Seagull驱动会自动删除系统中所有的Seagull驱动程序;高级删除选项为手动指定删除3. 选择要删除的打印驱动4. 如向导提示需要重启,按提示重启计算机系统常见问题1. 打开驱动安装程序无任何反应:系统打印服务未打开,点击查看打印服务开启方法2. 安装驱动提示RPC服务不可用:系统打印服务未开启,点击查看打印服务开启方法3. 没有打印机型号可选:佳博全系列条码打印机兼容TSC TDP-245指令集,打印机型号选择TSC TDP-2454. 没有端口可以指定:打印服务未开启,点击查看打印服务开启方法5. 没有USB端口:检查数据线为好的且已连接好数据线,并已打开打印机6. 安装完成后已成功完成以下操作中没有内容:使用手动安装,点击查看手动安装驱动方法。
如何安装和设置电脑的打印机
如何安装和设置电脑的打印机电脑打印机的安装和设置是非常重要的任务,它们决定了我们是否能够顺利将电子文档或图片转化为纸质文件。
本文将为您介绍如何正确安装和设置电脑的打印机。
一、安装打印机驱动程序要正常使用打印机,首先需要安装打印机驱动程序。
打印机驱动程序是连接电脑和打印机的桥梁,它们使得电脑能够与打印机进行通信。
一般来说,新购买的打印机会附带安装光盘或USB驱动程序,您只需要按照以下步骤进行操作:1. 插入安装光盘或USB驱动程序,打开驱动程序安装界面。
2. 根据提示选择语言和操作系统版本。
3. 点击“安装驱动程序”或类似按钮,开始安装过程。
4. 完成安装后,重启电脑以使驱动程序生效。
如果您没有安装光盘或USB驱动程序,您可以访问打印机制造商的官方网站,在其支持页面下载适合您打印机型号和操作系统的最新驱动程序。
二、连接打印机和电脑安装驱动程序之后,您需要将打印机与电脑正确连接。
根据打印机的类型和您所拥有的接口,具体连接步骤可能会有所不同。
1. USB连接:大多数家用打印机都支持USB连接。
您只需要使用一个USB数据线将打印机的USB接口与电脑的USB接口连接即可。
2. 无线连接:某些打印机支持Wi-Fi或蓝牙无线连接。
您需要确保打印机和电脑处于同一个Wi-Fi网络中,或者在电脑的蓝牙设置中搜索并连接打印机。
3. 以太网连接:一些打印机支持以太网连接。
您需要将打印机的以太网接口与电脑所连接的路由器或交换机相连。
连接打印机和电脑后,打印机的电源和电源适配器也需要正确连接和供电。
三、设置打印机为默认打印设备安装驱动程序和连接打印机后,您需要将打印机设置为默认打印设备,以便电脑自动将打印任务发送到该设备。
1. 打开“控制面板”或“设置”。
2. 在控制面板或设置窗口中,找到和点击“设备和打印机”或类似选项。
3. 找到安装的打印机,右键点击该打印机的图标,选择“设为默认打印机”。
四、进行打印机测试完成以上步骤后,您可以进行简单的打印机测试,以确保打印机的正常工作。
GP条码打印机软件安装及使用说明
GP条码打印机软件安装及使用说明运行如下图:点击“安装NiceLabel产品”安装条码机软件选择安装软件使用语言点击下一步点击下一步,查看许可协议。
接受协议并继续下一步自行调整安装路径和附加图标,并点击安装,等待安装过程完成点击完成运行软件,至此安装过程全部完成。
软件运行后点击介绍界面的继续进入欢迎向导软件提供了三个不同大小和内容的标签样式供参考,用户可以参照示例来进行编辑,下面介绍新建标签的步骤,选择“创建新标签”,然后点击完成标签设置向导中第一步定义标签的尺寸,如40 mm X 30 mm就在“标签宽度”里输入4,“标签高度”里输入3,可以根据需要调整度量单位,尺寸输入时自行转换,点击下一步打印机选择中软件会扫描驱动列表并筛选出GP系列驱动供使用,其余驱动会自动屏蔽,可以选择打印方向为纵向或横向,点击完成,进入软件编辑界面左侧工具栏中可以选择使用所有可编辑对象,如“文本”,“条码”,“图片”,“矩形”,“直线”,“椭圆”,“反白”点击“文本”,鼠标出现大写“A”字母后点击标签编辑界面中想放置的位置,出现文本向导,选择固定文本则可以在下方输入框内输入需要的文字内容,字体可以点击“选择”来改动,如下图:确认改动后点击完成则字体会出现在刚才点击的位置菜单栏中的文本一栏可以继续调整字体样式和大小若文本选择“变量文字”时,确认好字体样式后点击下一步这里有两个方式选择,“键盘输入”是在向打印机下发打印任务时软件会给客户一个相应提示,在此文本内打印什么字符由用户通过键盘输入,而不是固定文本。
“计数器”则可以使用软件的累加功能达到让数字累加的效果键盘输入向导需要填写提示文本,比如要提示输入“产品名”则在文本内写入“产品名”,可以设置“最大字符数”和“格式”“字首”“字尾”可以根据需要填写,也可不填,完成后在标签编辑界面会出现“?????”的字样,在点击“打印”后会新增可以输入的文本框,并可以勾选“清除变量”,如下图:计数器方式的设置,点击下一步在这里可以设置“起始值”,如果勾选了“打印前提示数值”则可以像键盘输入文本一样在打印时输入初始值,“设置最大位数”表示数字最多的位数,可以选择“递增”或者“递减”方式,“预览”一栏可以看到数值变化的效果,点击下一步“每隔”填入每次递增或者递减的数量,“每几张标签更改一次值”填入每一个数值需要重复的标签数量,“到达极限值时重新计数”一栏可以勾选后输入一个极限值,每次到达极限值就会循环重新计数,更改好参数后可以从“预览”中看到数字是如何变化的,下一步中的字首字尾跟键盘输入的一致,完成后在标签界面同样会出现“?????”的字样,点击打印并打印多张就可以看到实际的效果了点击左侧“条码”,鼠标会变成带有条码标示的形状,点击标签编辑界面中需要放置的位置,出现条码向导。
条码打印机安装说明-Tpp-244
TSC TTP-244 Pro条码打印机安装使用方法及常见问题1.安装驱动1.1 打开光盘内Driver目录,运行安装驱动程序:1.2安装驱动要选择USB端口。
{ 产品说明书里有详细的安装步骤}标签纸:50 x 20mm 双排铜板不干胶标签纸碳带:110mm热转印碳带2.安装碳带2.1 将碳带回卷轴插入空的碳带纸轴中。
并将其安装入碳带回收轴的位置。
2.2 请注意碳带回收轴较大的那边是装在碳带机构的右边位置。
2.3 依相同方法将碳带卷轴插入碳带轴中。
并将其安装入碳带供应轴的位置。
2.4 将印字头座架释放杆往上拉,打开印字头座架。
2.5 拉住碳带前端向后拉,经由印字头座架下方( ↓RIBBON贴纸处)往前拉到碳带回卷轴上方。
用胶带将碳带前端的透明部份平整地贴附于碳带回卷轴上的纸轴上。
2.6 以顺时针方向卷动碳带回滚动条,使碳带前端的透明部份平整地依附在回滚动条上,直到看见黑色碳带为止。
2.7 卷紧碳带使碳带上没有任何皱折(否则打印出的条码不清晰)。
3.标签纸的安装3.1 打开打印机的上盖。
3.2 按下印字头座架释放杆打开印字头座架。
3.3 将卷标滚动条插入卷标卷﹝印字面向外卷﹞之中心孔内。
将固定片接到标签滚动条上。
将卷标卷平稳地放置于标签架的凹槽中。
3.4 依底座印有的Label↓的箭头指示方向,将标签卷之前端从印字头座架下,经由压杆上方,再向前经过标签出口拉出。
3.5 标签纸从电路板下方穿过;依照纸卷之宽度调整导纸器,使其与标签卷宽度相符并保证居中位置。
3.6 压下印字头座架。
3.7 将卷标卷往反方向卷紧,使标签纸保持张紧的状态。
3.8 关闭打印机上盖。
4.机器初始化操作机器初始化(恢复机器出厂设置)步骤:4.1将机器关机;4.2 在关机状态下,同时按住4.3 然后开启机器电源,观察机器上的指示灯,当绿色指示灯和红色指示灯依次闪烁 2遍之后,同时松开这两个按键,然后看到机器上两个绿色指示灯正常亮起,此过程中打印机是不走纸和碳带,即完成初始化操作。
- 1、下载文档前请自行甄别文档内容的完整性,平台不提供额外的编辑、内容补充、找答案等附加服务。
- 2、"仅部分预览"的文档,不可在线预览部分如存在完整性等问题,可反馈申请退款(可完整预览的文档不适用该条件!)。
- 3、如文档侵犯您的权益,请联系客服反馈,我们会尽快为您处理(人工客服工作时间:9:00-18:30)。
GP条码打印机驱动安装及使用教程
运行
如下图:
点击安装NiceLabel Printer Drivers安装条码机驱动
点击下一步,查看许可协议。
选择对应型号的打印机驱动,以GP-9035T为例。
选择通讯端口,根据数据连接线不同选择不同的端口。
并口线连接请选择LPT,根据机器有否扩展选择端口。
串口线连接请选择COM,根据机器有否扩展选择端口。
USB线连接请选择USB,请注意因为USB接口为系统虚拟打印端口,实际操作过程中需要确保打印机USB线连接上并打开打印机电源。
如果一台电脑在安装多台连接USB线的打印机时,有可能出现多个USB端口,如USB001,USB002……USB005……等,如果在完成驱动安装后不能打印需要进行端口调整。
若使用网络端口请选择添加TCP/IP端口,如下步骤:
输入打印机的“IP 地址”,如下图所示。
然后选择“自定义”‐‐‐‐‐‐‐‐“设置”,如下图所示,确认以下图示信息并选择“确定”。
然后选择“下一步”,如下图所示。
最后选择“完成”即成功添加了以太网通迅端口。
并可供选择,如下图:
如选择串口(COM 口),需要在已安装完成的驱动属性页里选择端口选项卡,然后“配置端口”。
选择串口通讯“每秒位数”、“数据位”、“奇偶校验”、“停止位”、“数据流控制”等。
出厂默认参数如下图所示,可通过打印机开机自检页上查看到串口通讯参数信息,如“SERIAL 9600,N,8,1”。
如果使用USB连接时驱动端口内存在多个USB虚拟端口时,如下图:
请遵循以下步骤尝试连接打印机:
首先,在打印机属性的“常规”选项卡中点击“打印测试页”
然后,查看打印任务状态,如果正常测试页会在短时间内消失并且打印机会有打印动作,如果端口不正确,则状态一定会出现“错误-正在打印”的字样。
如下图:
回到打印机属性的“端口”选项卡中,勾选另外一个USB虚拟端口,点击右下角“应用”,等待一下,测试页任务会重新启动,如果端口对应上,则任务会消失并且打印机会有打印动作,如果仍然是错误则重复上述勾选操作直到打印任务完成。
经过以上这些步骤,驱动安装完成。
若安装完成后不能在打印机和传真内找到对应的图标则使用添加打印机方式:
点击从磁盘安装
点击浏览:找到驱动文件夹内.inf格式文件,如下:
指定一个打印机名并打印测试页:
打印机驱动安装完成,图标会出现在打印机和传真当中。
关于驱动的使用详解。
设置正确的纸张参数和打印方式:
打开打印机的“属性”窗口,如下图所示。
点击“打印首选项”
“打印速度”和“打印浓度”根据实际使用的纸张和耗材调整,尤其是使用热转打印方式时,速度和浓度的配对使用对打印效果有影响。
在“大小”一栏输入实际使用纸张或者打印范围的尺寸,如果是标签纸则只表示可打印幅面的大小而不包括衬纸。
点击“高级设置”选项卡
根据实际使用的纸张类型选择,如果是有间距的标签纸则选择“间距”,背面有黑标的纸张则选择“黑标”,连续的纸张则选择“连续”。
介质设置这一栏最好保持缺省设置,因为打印机开启后会自动检测使用何种介质,后续打印会根据当前介质继续打印。
如果需要可以手动指定一种方式。
选项一栏中指定任务完成后纸张停留位置的设置,“无”表示打印完成后即停留,不作任何操作。
“剥纸”会开启前端纸存在传感器,每次打印一张后都会停止,直到用户干预取走打印好的标签后再进行下一张打印,此设置适用于有剥离装置的打印机,如GP-3150TN。
剪切,整批和部分剪切功能GP打印机暂不支持。
点击“其他”
“间距/黑色标记”一栏中调整“长度”参数,根据用户使用的标签纸上标签和标签间的间隙高度来调整此参数。
完成上述设置后点确定离开首选项设置,在驱动属性的“常规”选项卡中点击打印测试页观察上述设置后的打印质量,判断是否符合纸张材质和尺寸。
标签内容偏移的调整:
经过上述设置正确参数后打印可能会因为标签过小或者标签规格不准确导致标签内容发生偏移,而且用户在编辑界面中已经没有可以移动的余量时,可以通过下述参数进行准确修正:
如果仅仅是标签偏上或者偏下时,选择打印机“属性”‐‐‐‐‐‐‐“打印首选项”‐‐‐‐‐‐‐‐“高级设置”,里面“选项”一栏中有标签偏移量的参数设置,此参数可以填入正值,也可填入负值。
以机器出纸方向为参考,正值为反向偏移,负值为正向偏移,调整过后可以连续打印多张观察偏移是否正确。
如果标签内容除了上下偏外还存在左右偏可以选择打印机“属性”‐‐‐‐‐‐‐“打印首选项”‐‐‐‐‐‐‐‐“高级设置”‐‐‐‐‐‐‐‐“其他”,设置坐标参考点偏移。
如果标签方向只选择了纵向,则坐标原点在出纸方向的左上角,如果纵向旋转了180度则原点在出纸方向的右下角,同理如果只选择横向,则原点在出纸方向的右上角,横向180度则在出纸方向的左下角。
此参数只接受正值,所以调整时请谨慎选择方向和偏移量,尽量和上述标签偏移配合使用,达到理想的效果。
标签上有不想打印的区域:
用户在使用定制的标签纸时可能有部分,一般是外围区域有印制内容或者不想打印有任何内容的区域,可以通过设置以下参数实现:
选择打印机“属性”‐‐‐‐‐‐‐“打印首选项”‐‐‐‐‐‐‐‐“选项”,有非打印区域参数,参照区域尺寸来填入相应参数即可。
图形效果的调整:
选择打印机“属性”‐‐‐‐‐‐‐“打印首选项”‐‐‐‐‐‐‐‐“抖动”
当选择不同类型时打印出来的图形有不同的打印质量。
可以根据实际效果自行调整。
条码字体和命令字体的设置:
此设置主要是在应用程序中指定对应字体时可以在打印机中转换为条码或者直接命令的方
式。
选择打印机“属性”‐‐‐‐‐‐‐“打印首选项”‐‐‐‐‐‐‐‐“条码字体”
可以新建或者变更删除定义的条码字体,参数包括了条码的类型,方向,尺寸,识别码,宽窄比等。
命令字体也有类似调整。
如下图:
自订命令的设置:
选择打印机“属性”‐‐‐‐‐‐‐“打印首选项”‐‐‐‐‐‐‐‐“自订命令”
此设置页面是用于在驱动打印任务的不同位置插入自定义的指令或者指令文件,可以根据自己需要在文档或者页面的前后加入需要的指令,可以从文件获取指令或者直接在输入框输入指令。
如下图:。