
升技 NF-M2S主板说明书
BIOS 設定
硬體設定
簡介
NF-M2 nView 使用手冊 繁體中文.第一版 2006 年 8 月
版權及保證注意事項
本手冊受到國際版權法律的保護,本公司將保留所有權利,未經本公司書面同意,不得擅 自複製、傳送、改編本手冊的內容。未經授權而使用本手冊之相關資料,會導致民事訴訟 或刑事處分。
本公司若對使用手冊內容進行修改,恕不另行通知使用者。內容如有謬誤,懇請見諒,本 公司恕不負責。
4. 驅動程式與公用程式光碟支援 ............................................... 4-1 4.1 nVidia nForce 晶片組驅動程式 ......................................................4-2 4.2 nVidia 顯示驅動程式 ....................................................................4-3 4.3 Realtek 高品質音效驅動程式.........................................................4-4 4.4 安裝 Cool 'n' Quiet 驅動程式.........................................................4-5 4.5 USB 2.0 驅動程式 ........................................................................4-6 4.6 ABIT EQ(硬體醫師應用程式).....................................................4-7 4.7 製作 NVRaid 磁片 ........................................................................4-9
NF-M2 nView
主機板 AMD Socket AM2
使用手冊
NVIDIA 6150/NF430 2GHz HT 雙通道 DDR2 800 NV nView GeForce 6150 圖形埠 DVI/VGA 輸出 NV GbE 4x SATA 3Gb/s 7.1 聲道高品質音效
附錄
驅動程式與公用程式
3. BIOS 設定.......................................................................... 3-1 3.1 SoftMenu Setup(CPU 設定) .......................................................3-2 3.2 Standard CMOS Features(標準 CMOS 參數設定) .........................3-4
如果是因為您設定及使用不當而造成主機板損壞或是功能失常的話,我們將不提供任何保 證服務。
ii
NF-M2 nView
簡介
硬體設定
BIOS 設定
目錄
1. 簡介 .................................................................................. 1-1 1.1 特色與規格 .................................................................................1-1 1.2 主機板配置圖..............................................................................1-3
2. 硬體設定............................................................................ 2-1 2.1 選擇電腦機殼..............................................................................2-1 2.2 安裝主機板到機殼上....................................................................2-1 2.3 檢查接頭設定..............................................................................2-2 2.3.1 CMOS 記憶體清除接頭以及備用電池 .....................................2-3 2.4 連接機殼元件..............................................................................2-5 2.4.1 ATX 電源輸入插座 ...............................................................2-5 2.4.2 前面板開關與指示燈連接頭 .................................................2-6 2.4.3 風扇電源連接頭..................................................................2-7 2.5 安裝硬體 ....................................................................................2-8 2.5.1 CPU Socket AM2 .................................................................2-8 2.5.2 DDR2 記憶體插槽.............................................................. 2-10 2.5.3 PCI Express X16 擴充插槽 (用以安裝顯示卡) ...................... 2-11 2.6 連接週邊裝置............................................................................ 2-12 2.6.1 軟碟機與 IDE 硬碟機接頭 .................................................. 2-12 2.6.2 SATA 連接器 ..................................................................... 2-13 2.6.3 附加的 USB 2.0 連接埠接頭 ............................................... 2-14 2.6.4 附加的 IEEE 1394 連接埠接頭............................................ 2-14 2.6.5 內接式聲音訊號連接頭 ...................................................... 2-15 2.6.6 前面板音效連接頭 ............................................................ 2-15 2.6.7 PCI Express X1 擴充插槽 ................................................... 2-17 2.6.8 PCI 擴充插槽 .................................................................... 2-17 2.7 內建狀態顯示............................................................................ 2-18 2.7.1 電源指示燈 ...................................................................... 2-18 2.8 連接 I/O 裝置............................................................................ 2-19
本公司恕不對手冊品質、精確性及適用性進行保證。因本手冊內容謬誤所引起的損害,無 論是直接或間接損失,無論是單一或連續事件,本公司將不負任何責任,且不提供補償。
本手冊內容所出現的所有商標及產品名稱,其版權均為該合法註冊公司所有。
手冊內容將會因需要而更新,您可隨時至我們的網站下載最新版本的使用手冊,我們的網 址為:/
5. 附錄 .................................................................................. 5-1 5.1 疑難問題排除(如何取得技術支援?) .........................................5-1 5.1.1 問與答 ...............................................................................5-1 5.1.2 技術支援表格 ....................................................................5-4 5.1.3 Universal ABIT 連絡方式 ......................................................5-5
富士康 N5VM2AA N5M2AA 系列主板 中文说明书V1.0

(equipment input current <= 16A per phase)
þ EN 61000-3-3/A1:2001 Electromagnetic compatibility (EMC)
Part 3: Limits
Section 2: Limits of voltage fluctuations and flicker in low-voltage
Address:
FCC Class B Subassembly Motherboard HON HAI PRECISION INDUSTRY COMPANY LTD 66 , CHUNG SHAN RD., TU-CHENG INDUSTRIAL DISTRICT, TAIPEI HSIEN, TAIWAN, R.O.C.
1 第
章
感谢您购买富士康公司的 N5VM2AA/N5M2AA 系列主板。该系列主 板是一款性能卓越,质量可靠,价格合理的新产品。该主板采用 先进的 NVIDIA nForce 500 芯片,为用户提供了一个集成度高, 兼容性强,性价比优的电脑平台。
本章提供以下信息: v 主要性能 v 主板布局图 v 背板
注意:
本手册中所使用的实物图片,仅供参考,请以实物为准。
本使用手册适用于 N5VM2AA/N5M2AA 系列主板。按照电脑用户对 电脑的性能需求,本公司为用户精心设计了具有不同特性的主 板。
-6 带有 6 声道音效功能(默认省略) -8 带有 8 声道音效功能 -E 带有 1394 接口 -L 带有板载 10 /100M LAN (默认省略) -K 带有板载 Gigabit LAN -R 带有 RAID -S 带有 SATA 接口 -2 带有 DDR2 插槽 -H 符合 RoHS 指令
昂达 NF3S 主板说明书

-主板尺寸:采用 ATX 板型
5
NF3S 主板
第三章 主板位图
用户手册
昂达 NF3S 主板位图
6
N F3S 主板
第四章 安装与设置
☺ 如何辨认跳线的 1 脚位置?
用户手册
请仔细查看主板,凡有标明“1”或是白色粗线标记的接脚均为 1 脚位置。 F_USB1/USB2 接口
CD-IN1:CD 输入接脚:
-CPU 频率识别: 自动识别 CPU 主频(免跳线方式); 亦可手动设置。
-内存支持: 2 个 184PIN DDR DIMM 插槽,支持内存容量最大可达 2GB; 支持 non-ECC DDR 400/333/266/200 SDRAM。
-BIOS 支持: 支持即插即用; 采用 Flash ROM,可由软件直接更新;
本手册中出现的其他商标均已注册。
1
NF3S 主板
目录
用户手册
第一章 第二章 第三章 第四章 第五章
包装说明 ..............................………………………………………. 3 综述 ......................................………………………………………. 4 主板位图 ......................................………………………………… 6 安装与设置置 ......................................…………………………… 7 BIOS 设置 .....................................……………………………… 12 6-1 进入 BIOS 主界面 ............................…………………… 12 6-2 控制键位 ....................................…………………………… 13 6-3 主题帮助 .....................................………………………… 14 6-4 BOIS 主界面 .................................………………………… 14 6-5 标准 COMS 功能设置 ...............................……………… 15 6-6 高级 BIOS 功能设置 ..............................………………… 17 6-7 高级芯片组功能设置 ..............................………………… 20 6-8 集成周边设备 ..............................………………………… 22 6-9 即插即用配置 .................................……………………… 27 6-10 电源管理设置 ................................………………………… 29 6-11 PC 硬件监控 ...............................…………………………… 31 6-12 频率/电压控制 ...............................………………………… 33 6-13 载入默认安全/优化值 ........................…………………… 34 6-14 设定管理员/用户密码 ........................…………………… 34
刺绣机电脑B E C S – 0252系列操作手册

工作过程中,不要翻开机箱盖板。机箱内某些部位带有高电压,应防止引发意外伤害。
警告
确有必要需翻开机箱盖板时,首先要切断电源并从电源插座上拔掉本机的电源插头。即使电源已切断,箱内的电容器仍然存有电能,因此在电源切断1分钟后才允许接触内部件。
禁止
在机器运转时,禁止接触任何运动部件。否那么可能会造成人员伤害。
(2)在运行模式〔“ 〞图标动画显示〕,向左拉一下刺绣操作杆,机器停止刺绣,进入确定模式〔再向右拉一下刺绣操作杆,又可进入运行模式〕。
(3)在确定模式〔“ 〞 图标出现〕,先按“ 〞键,然后按“ 〞键确认,可解除确定模式,进入准备模式〔“ 〞图标闪烁〕。
3.1.2当前的刺绣运行状态说明
主画面的屏幕左侧从上到下有6个图标表示系统当前的状态,其意义按位置序号说明如下:
14.把戏起绣点记忆功能
该功能可记忆每个把戏的起绣点,以免除使用者每次选择同一把戏刺绣时,手动移框找起绣点的繁琐劳动。
15.边框绣、十字绣及开位绣功能
边框绣可用于对当前把戏的边框进行绣作,方便定位。
十字绣可用于在当前位置绣一个十字,方便定位。
开位绣可在当前位置绣一条或多条直线,方便开位。
16.各种机器的维护及调试功能
2.一般考前须知
注意
本产品电源开关有过流保护功能。假设过流保护开关动作,须在三分钟后才能再次闭合。
注意
磁盘驱动器是一种精密装置。插入磁盘时要认明方向。正在读盘〔驱动器上提示灯亮〕时千万不要取出磁盘,这将会严重损坏磁盘及驱动器。
注意
应使用有品质保证的磁盘。使用劣质磁盘将会严重损坏磁盘驱动器。
注意
磁盘是磁性材料产品,存放时要远离磁铁、电视机等物品,防止引起磁盘的损坏和数据丧失。
Sun Fire X4470 M2 服务器产品说明(版本1.0)说明书

Sun Fire X4470 M2 服务器产品说明,软件发行版 1.0文件号码:E23477-012011 年 6 月版权所有 © 2011,Oracle 和/或其附属公司。
保留所有权利。
本软件和相关文档是根据许可证协议提供的,该许可证协议中规定了关于使用和公开本软件和相关文档的各种限制,并受知识产权法的保护。
除非在许可证协议中明确许可或适用法律明确授权,否则不得以任何形式、任何方式使用、拷贝、复制、翻译、广播、修改、授权、传播、分发、展示、执行、发布或显示本软件和相关文档的任何部分。
除非法律要求实现互操作,否则严禁对本软件进行逆向工程设计、反汇编或反编译。
此文档所含信息可能随时被修改,恕不另行通知,我们不保证该信息没有错误。
如果贵方发现任何问题,请书面通知我们。
如果将本软件或相关文档交付给美国政府,或者交付给以美国政府名义获得许可证的任何机构,必须符合以下规定:U.S. GOVERNMENT RIGHTS. Programs, software, databases, and related documentation and technical data delivered to U.S. Government customers are "commercial computer software" or "commercial technical data" pursuant to the applicable Federal Acquisition Regulation and agency-specific supplemental regulations. As such, the use, duplication, disclosure, modification, and adaptation shall be subject to the restrictions and license terms set forth in the applicable Government contract, and, to the extent applicable by the terms of the Government contract, the additional rights set forth in FAR 52.227-19, Commercial Computer Software License (December 2007). Oracle America, Inc., 500 Oracle Parkway, Redwood City, CA 94065.本软件或硬件是为了在各种信息管理应用领域内的一般使用而开发的。
蒂森轿内控制主板MF3-S中文说明书【新技术】

版本:A 更改码:00 蒂森克虏伯电梯(上海)有限公司MF3-S 技术说明书TE036-SM生效日期:6/13/20061 概述参考MA12/6510/70 TCM Single-Board Lift Control MC2等相关文档;MF3为TCM-MC2系统中的轿厢控制板。
根据我工厂实际情况及市场实际需求,MF3-S 为在MF3的基础上,本地化设计的产品。
2 特性描述2.1 电源输入:典型使用 24VDC ;2.2 工作电压范围DC 9~40V;2.3使用功耗:不包括输入/输出,24VDC 电压输入时,小于等于50mA;3 功能描述3.1CAN BUS 通信:MF3-S 与TCM 主板(如MC2)进行实时的CAN BUS 串行通信,以交互轿厢控制与电梯控制主板(如TCM-MC2)之间的数据;3.2 内召按钮控制:MF3-S 已设计1-8层站的召唤按钮控制,如电梯高于8层站的情况,需MF4-S 板进行扩展;3.3 轿内显示控制:MF3-S 板解码来自主板的CAN BUS 数据包,再通过特定的数据接口,以向轿内显示板(如GMA9-S )提供正确的显示信息;3.4 轿内输入/输出信号:MF3-S 板上提供一些基本的输入信号,MF3-S 处理后发送给电梯控制主板,以如轿内基本操作信号:轿内优先、检修上/下、开关门到位等;同时MF3-S 也设计了一些基本的输出信号,MF3-S 通过CAN-BUS 接收控制主板信息,并正确输出,如超载运行、开/关门信号、上/下到站钟等等。
版本:A 更改码:00 蒂森克虏伯电梯(上海)有限公司MF3-S 技术说明书TE036-SM生效日期:6/13/20064 线路板安装及布局图版本:A 更改码:00 蒂森克虏伯电梯(上海)有限公司MF3-S 技术说明书TE036-SM生效日期:6/13/2006版本:A 更改码:00 蒂森克虏伯电梯(上海)有限公司MF3-S 技术说明书TE036-SM生效日期:6/13/20065 MF3-S 软件配置MF3-S 软件配置与MF3板完全兼容,即配用27C256存储芯片,工作程序根据最新释放版本,其中前后门由软件来定义,于我工厂电气车间进行烧录;版本:A 更改码:00 蒂森克虏伯电梯(上海)有限公司MF3-S 技术说明书TE036-SM生效日期:6/13/20066MF3-S 接口定义列表6.1接口类型中,表示方法:“I ”- 输入;“O ”-输出;“C ”- CAN BUS ;“M ”- 综合;“P ”- 电源信号功能信号名称端口定义接插件类型接口类型备注1-8层召唤按钮控制Car call button1-8层按钮输入0V +24 V1-8按钮灯输出X51:3-X58:3 X51:4-X58:4 X51:1-X58:1 X51:2-X58:2 CH2.54 × 4I轿内优先控制Preference V 0V +24V X34:3 X34:4 X34:1 CH2.54 × 4 I满载信号Occupied B 0V X15:1 X15:2 CH3.96 × 2 I 超载OverloadUB 0V X9:2 CH3.96 × 2 I开门按钮Door opening Button OT 0V +24V X59:3 X59:4 X60:1 CH2.54 × 4 I关门按钮Door closing buttonUT 0V +24V X60:3 X60:4 X60:1 CH2.54 × 4 I再平层传感器Re-leveling Sensor LN +24V 0V X42:2 X42:1 X42:3 CH3.96 × 3 I检修上/下Insp. op UP Insp, op DOWN IF IFO IFU 0V X40.1 X40.2 X40.3 CH3.96 × 3 I安全触板/光幕Articulated Light barrier d. KK 0V L T X5:1 X5:2 X5:3 CH3.96 × 3 I光电选层器Selector Sensor LK +24V 0V X2:2 X2:1 X2:3 CH3.96 × 3 I后门安全触板/光幕Articul. lever Rear Light barrierKKD 0V L TDX6:1 X6:2 X6:3CH3.96 × 3I版本:A 更改码:00 蒂森克虏伯电梯(上海)有限公司MF3-S 技术说明书TE036-SM生效日期:6/13/2006MF3-S 接口定义列表(续一)信号功能信号名称端口定义接插件类型接口类型备注根据工作程序指定的备用输入EBS10V ZTK X41:1 X41:2 X41:1 CH3.96 × 2 I前门开门到位Door open switch (Front)TSO 0V X3:1 X3:2 CH3.96 × 2 I后门开门到位Door open switch RearTSOD 0V X4:1 X4:2 CH3.96 × 2 I备用输入EES2 0V X47:1 X47:2 CH3.96 × 2 I召唤屏蔽使能Coding of calls AT 0V+24VX49;3 X49:4 X49:1 CH2.54 × 4I轿内显示板数据端Dataindicator MA/3TSData to MA X35M前门开/关门信号Door open/close .sig. (m.door)TU TO X43:1 X43:2 CH3.96 × 2 O后门开/关门信号Door open/cLose signal, rear side TUD TOD X45:1 X45:2 CH3.96 × 2 O前门强迫关门信号Nudging main side ZTZ +24V X44:2 X44:1 CH3.96 × 2 O 后门强迫关门信号Nudging rear side ZTZD + 24V X46:2 X46:1 CH3.96 × 2 O下到站钟输出Gong, BOTTOM I < 600 mA GU +24V X22:2 X22:1 CH3.96 × 2 O上到站钟输出Gong, top I < 600 mAGO + 24VX19:2 X19:1 CH3.96 × 2 O消防警示钟Fireman’s horn I < 600 mAFEH + 24V X21:2 X21:1CH3.96 × 2O版本:A 更改码:00 蒂森克虏伯电梯(上海)有限公司MF3-S 技术说明书TE036-SM生效日期:6/13/2006MF3-S 接口定义列表(续二)信号功能信号名称端口定义接插件类型接口类型备注紧急呼叫信号Call alarm I < 600 mA RW + 24V X20:2 X20:1 CH3.96 × 2 O备用3 RES3 I < 40 mA RES3X62:2 X62:1 CH3.96 × 2 O备用4 RES4 I < 40 mA RES4 +24VX63:2 X63:1 CH3.96 × 2OCAN BUS 总线CAN bus HIGH CAN bus LOW Front + rear coding CAN-H CAN-L 0V COD X64:4 X64:3 X64:2 X64:1 CH2.54 × 4C信号同X65CAN BUS 总线CAN bus HIGH CAN bus LOW Front + rear coding CAN-H CAN-L 0V CODX65:1 X65:2 X65:3 X65:4CH3.96 × 4C信号同X64电源电压Voltage supply Voltage supply+24V 0VX1:1X1: 2 CH3.96 × 2 P Voltage supply Command accept + 24V 0V X31:1 X31:2 CH3.96 × 2P。
RAIDON SR2600-2-S2 SR2600-2S-S2 说明书
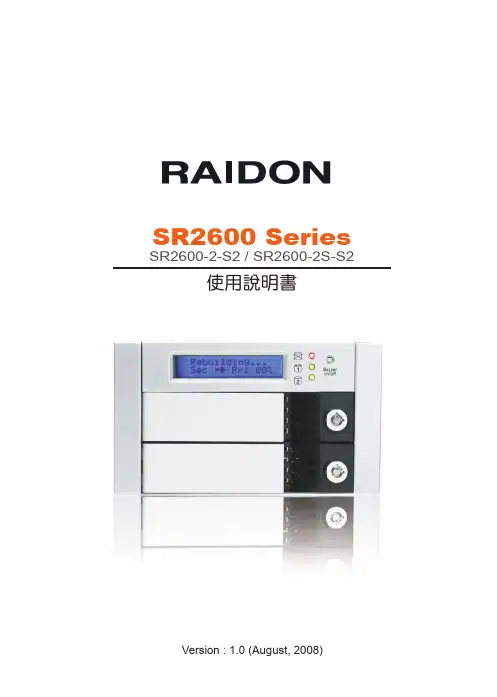
Version : 1.0 (August, 2008)SR2600 SeriesSR2600-2-S2 / SR2600-2S-S2使用說明書目 錄1簡介 (3)1.1 功能與特色 (3)1.2 產品規格 (4)2硬體安裝 (4)2.1 產品包裝內容物 (4)2.2 系統需求 (硬體) (5)2.3 環境需求與警告事項 (5)2.4 細部介紹 (6)2.4.1 前置面板 (6)2.4.2 背板 (6)2.5 如何將硬碟裝入抽取盒並裝上SR2600 (6)3 如何使用SR2600 Series (10)3.1 磁碟陣列的模式設定 (10)3.2 設定鏡射模式(RAID 1) (10)3.2.1 要安裝兩顆新的硬碟 (10)3.2.2. 一顆新的硬碟,一顆有資料的舊硬碟 (10)3.2.3 設定同步儲存資料模式(RAID 0) (10)3.3 電腦設定 (11)3.4 開機後,LCD上顯示的訊息 (11)4 系統維護 (12)4.1 硬碟熱抽拔及資料自動重建 (12)4.2 離線備份 (12)4.2.1 硬碟損毀時 (12)4.2.2 硬碟熱抽拔與資料自動重建時,LCD顯示的訊息 (12)4.3 RAIDGuide 安裝 (13)4.3.1 軟體介紹 (13)4.3.2 功能和特色 (13)4.3.3 如何安裝 (13)5 Firmware 更新 (14)5.1 升級前的準備與系統需求 (14)6 附錄:問與答 (19)1. 簡介1.1 功能與特色當您需要擴充容量、並且要確保資料安全及減少系統所受的影響, SR2600 Series憑著獨立運作的硬體式磁碟陣列微處理晶片, 將成為您最有經濟效益的最佳選擇 。
‧免驅動程式適用各種作業系統同時擁有SATA及IDE的標準連接介面,SR2600 Series除了具有高傳輸速 率之外,而且免驅動程式,不論任何 作業系統,都可輕易連接使用,完全不需擔憂系統升 級的問題。
INFINITY NF-ULTRA-M2 NF-M2 主机板 说明书
靜電預防措施
靜電極易在無任何征兆的情況下造成PC,主機板以及其他元件的 損傷,因此,必須采取相應的預防措施防止靜電的結集。 1. 在主機板安裝之前,請不要將其從防靜電包裝中取出。 2. 安裝時,請帶上防靜電手環。 3. 請在無靜電工作台上從事安裝准備工作。 4. 請用手握住主機板邊緣,小心不要踫到任何元件以及相關連
第三章 BIOS 設定
Award BIOS 設定程式 ................................................................. 59 NVRAID BIOS .............................................................................. 99 更新 BIOS ................................................................................... 100
第四章 軟體支援
驅動程式與軟體程安裝 ............................................................ 102 程式安裝注意事項 .................................................................... 114
第一章 簡介
規格 ................................................................. ...............................9 功能/特色 ............................................................................ ...........12
M2 用户手册说明书
M2文件编号:RGB-RD-UM-M2C003版本:V1.3用户手册目录目录 (1)声明 (3)声明/担保与赔偿 (3)安全操作概要 (3)安装安全概要 (4)第1章产品简介 (1)1.1随附配件 (1)1.2产品概述 (2)1.2.1后面板 (3)1.2.2前面板 (5)1.2.3外形尺寸图 (11)第2章产品安装 (12)2.1插入信号源 (12)2.2插入电源 (12)2.3设备上电 (12)第3章产品使用 (13)3.1使用菜单键 (13)3.2菜单结构 (14)3.3使用菜单 (15)3.3.1默认菜单 (15)3.3.2主菜单 (15)3.3.3输入 (16)3.3.4输出 (17)3.3.5背景 (18)3.3.6高级 (18)3.3.7Language/语言 (21)3.3.8系统设置 (21)3.3.9出厂复位 (22)3.4PST预编辑 (23)3.4.1信号源选择 (23)3.4.2开关或更换图层 (23)3.4.3冻结图层 (23)3.4.4多画面编辑 (24)3.4.5位置设置 (24)3.4.6缩放及裁剪设置 (25)3.4.7图文叠加设置 (25)3.4.8羽化设置 (27)3.4.9特效图形设置 (28)3.4.10特效模式切换 (30)3.4.11SDI、VGA、CVBS、USB输入画质调节 (31)3.5系统模式 (32)3.5.1普通模式 (32)3.5.24K1K (33)3.5.34K2K (36)3.5.4矩阵模式 (37)3.5.5演示模式 (38)3.6画面切换 (40)3.7背景图片 (42)3.7.1输入信号 (42)3.7.2抓取背景图片 (42)3.7.3从U盘加载图片 (43)3.8输出分辨率设置 (46)3.8.1选择输出分辨率 (46)3.8.2自定义输出分辨率 (46)3.9使用黑场 (48)3.10保存 (49)3.11调保存 (50)第4章订购编码 (51)4.1产品 (51)4.2选配模块 (51)4.2.1输入模块 (51)4.2.2配件 (51)第5章技术支持 (52)5.1联系我们 (52)第6章附录 (53)6.1规格 (53)6.2软件升级 (58)6.3XTOOL的其他使用 (65)6.3.1自定义OSD (65)6.3.2自定义EFFECT转换 (67)6.3.3自定义LOGO (69)6.3.4自定义台标 (71)6.4术语和定义 (74)6.5修订记录 (77)首先感谢您选购我们的产品!为了让您迅速掌握如何使用这款视频处理器,我们为您送上详细的产品使用手册。
主板插针图解
电脑相关一、机箱上我们需要完成的控制按钮开关键、重启键是机箱前面板上不可缺少的按钮,电源工作指示灯、硬盘工作指示灯、前置蜂鸣器需要我们正确的连接。
另外,前置的USB接口、音频接口以及一些高端机箱上带有的IEEE1394接口,也需要我们按照正确的方法与主板进行连接。
机箱前面板上的开关与重启按钮和各种扩展接口首先,我们来介绍一下开关键、重启键、电源工作指示灯、硬盘工作指示灯与前置蜂鸣器的连接方法,请看下图。
机箱前面板上的开关、重启按钮与指示灯的连线方法上图为主板说明书中自带的前置控制按钮的连接方法,图中我们可以非常清楚的看到不同插针的连接方法。
其中PLED即机箱前置电源工作指示灯插针,有“+”“-”两个针脚,对应机箱上的PLED接口;IDE_LED即硬盘工作指示灯,同样有“+”“-”两个针脚,对应机箱上的IDE_LED接口;PWRSW为机箱面板上的开关按钮,同样有两个针脚,由于开关键是通过两针短路实现的,因此没有“+”“-”之分,只要将机箱上对应的PWRSW接入正确的插针即可。
RESET是重启按钮,同样没有“+”“-”之分,以短路方式实现。
SPEAKER是前置的蜂鸣器,分为“+”“-”相位;普通的扬声器无论如何接都是可以发生的,但这里比较特殊。
由于“+”相上提供了+5V的电压值,因此我们必须正确安装,以确保蜂鸣器发声。
这是机箱上提供了插头上图为机箱是提供的三种接头。
其中HDD LED是硬盘指示灯,对应主板上的IDE_LED;POWER SW是电源开关,对应主板上的PWRSW;RESET SW是重启开关,对应主板上的RESET。
除了HDD LED硬盘指示灯有“+”“-”之分外,其它两个没有正负之分,HDD LED硬盘指示灯“+”“-”插反了机箱上的硬盘指示灯不会亮。
当然,为了方便消费者安装,“+”采用了红、棕与蓝进行了标识,而“-”绝一为白色线缆,这一点在任何的机箱当中是通用的,大家可以仔细观察一下。
苏宁腾士 HyperStore H370-I 优童高效主板用户指南说明书
Seagate Lyve Mobile Shuttle User ManualClick here to access an up-to-date online versionof this document. You will also find the most recent content as well as expandable illustrations, easiernavigation, and search capability.. . . . . . . . . . . . . . . . . . . . . . . . . . . . . . . . . . . . . . . . . . . . . . . . . . . . . . . . . . . . . . . . . . . . . . . . . . . . . . . . . . . . . . . .. . . . . . . . . . . . . . . . . . . . . . . . . . . . . . . . . . . . . . . . . . . . . . . . . . . . . . . . . . . . . . . . . . . . . . . . . . . . . . . . . . . . . . . . . . . . . . . . . . . . . . . . . . . . . . . . . . . . . . . . . .. . . . . . . . . . . . . . . . . . . . . . . . . . . . . . . . . . . . . . . . . . . . . . . . . . . . . . . . . . . . . . . . . . . . . . . . . . . . . . . . . . . . . . . . . . . . . . . . . . . . . . . . . . . . . . . . . . . . . . . . . .. . . . . . . . . . . . . . . . . . . . . . . . . . . . . . . . . . . . . . . . . . . . . . . . . . . . . . . . . . . . . . . . . . . . . . . . . . . . . . . . . . . . . . . . . . . . . . . . . . . . . . . . . . . . . . . . . . . . . . . . . .. . . . . . . . . . . . . . . . . . . . . . . . . . . . . . . . . . . . . . . . . . . . . . . . . . . . . . . . . . . . . . . . . . . . . . . . . . . . . . . . . . . . . . . . . . . . . . . . . . . . . . . . . . . . . . . . . . . . . . . . . .. . . . . . . . . . . . . . . . . . . . . . . . . . . . . . . . . . . . . . . . . . . . . . . . . . . . . . . . . . . . . . . . . . . . . . . . . . . . . . . . . . . . . . . . . . . . . . . . . . . . . . . . . . . . . . . . . . . . . . . . . .. . . . . . . . . . . . . . . . . . . . . . . . . . . . . . . . . . . . . . . . . . . . . . . . . . . . . . . . . . . . . . . . . . . . . . . . . . . . . . . . . . . . . . . . . . . . . . . . . . . . . . . . . . . . . . . . . . . . . . . . . .. . . . . . . . . . . . . . . . . . . . . . . . . . . . . . . . . . . . . . . . . . . . . . . . . . . . . . . . . . . . . . . . . . . . . . . . . . . . . . . . . . . . . . . . . . . . . . . . . . . . . . . . . . . . . . . . . . . . . . . . . .. . . . . . . . . . . . . . . . . . . . . . . . . . . . . . . . . . . . . . . . . . . . . . . . . . . . . . . . . . . . . . . . . . . . . . . . . . . . . . . . . . . . . . . . . . . . . . . . . . . . . . . . . . . . . . . . . . . . . . . . . .. . . . . . . . . . . . . . . . . . . . . . . . . . . . . . . . . . . . . . . . . . . . . . . . . . . . . . . . . . . . . . . . . . . . . . . . . . . . . . . . . . . . . . . . . . . . . . . . . . . . . . . . . . . . . . . . . . . . . . . . . . . . . . . . . . . . . . . . . . . . . . . . . . . . . . . . . . . . . . . . . . . . . . . . . . . . . . . . . . . . . . . . . . . . . . . . . . . . . . . . . . . . . . . . . . . . .. . . . . . . . . . . . . . . . . . . . . . . . . . . . . . . . . . . . . . . . . . . . . . . . . . . . . . . . . . . . . . . . . . . . . . . . . . . . . . . . . . . . . . . . . . . . . . . . . . . . . . . . . . . . . . . . . . . . . . . . . .. . . . . . . . . . . . . . . . . . . . . . . . . . . . . . . . . . . . . . . . . . . . . . . . . . . . . . . . . . . . . . . . . . . . . . . . . . . . . . . . . . . . . . . . . . . . . . . . . . . . . . . . . . . . . . . . . . . . . . . . . .. . . . . . . . . . . . . . . . . . . . . . . . . . . . . . . . . . . . . . . . . . . . . . . . . . . . . . . . . . . . . . . . . . . . . . . . . . . . . . . . . . . . . . . . . . . . . . . . . . . . . . . . . . . . . . . . . . . . . . . . . .. . . . . . . . . . . . . . . . . . . . . . . . . . . . . . . . . . . . . . . . . . . . . . . . . . . . . . . . . . . . . . . . . . . . . . . . . . . . . . . . . . . . . . . . . . . . . . . . . . . . . . . . . . . . . . . . . . . . . . . . . .. . . . . . . . . . . . . . . . . . . . . . . . . . . . . . . . . . . . . . . . . . . . . . . . . . . . . . . . . . . . . . . . . . . . . . . . . . . . . . . . . . . . . . . . . . . . . . . . . . . . . . . . . . . . . . . . . . . . . . . . . . . . . . . . . . . . . . . . . . . . . . . . . . . . . . . . . . . . . . . . . . . . . . . . . . . . . . . . . . . . . . . . . . . . . . . . . . . . . . . . . . . . . . . . . . . . .. . . . . . . . . . . . . . . . . . . . . . . . . . . . . . . . . . . . . . . . . . . . . . . . . . . . . . . . . . . . . . . . . . . . . . . . . . . . . . . . . . . . . . . . . . . . . . . . . . . . . . . . . . . . . . . . . . . . . . . . . .. . . . . . . . . . . . . . . . . . . . . . . . . . . . . . . . . . . . . . . . . . . . . . . . . . . . . . . . . . . . . . . . . . . . . . . . . . . . . . . . . . . . . . . . . . . . . . . . . . . . . . . . . . . . . . . . . . . . . . . . . .. . . . . . . . . . . . . . . . . . . . . . . . . . . . . . . . . . . . . . . . . . . . . . . . . . . . . . . . . . . . . . . . . . . . . . . . . . . . . . . . . . . . . . . . . . . . . . . . . . . . . . . . . . . . . . . . . . . . . . . . . .. . . . . . . . . . . . . . . . . . . . . . . . . . . . . . . . . . . . . . . . . . . . . . . . . . . . . . . . . . . . . . . . . . . . . . . . . . . . . . . . . . . . . . . . . . . . . . . . . . . . . . . . . . . . . . . . . . . . . . . . . . . . . . . . . . . . . . . . . . . . . . . . . . . . . . . . . . . . . . . . . . . . . . . . . . . . . . . . . . . . . . . . . . . . . . . . . . . . . . . . . . . . . . . . . . . . .. . . . . . . . . . . . . . . . . . . . . . . . . . . . . . . . . . . . . . . . . . . . . . . . . . . . . . . . . . . . . . . . . . . . . . . . . . . . . . . . . . . . . . . . . . . . . . . . . . . . . . . . . . . . . . . . . . . . . . . . . .. . . . . . . . . . . . . . . . . . . . . . . . . . . . . . . . . . . . . . . . . . . . . . . . . . . . . . . . . . . . . . . . . . . . . . . . . . . . . . . . . . . . . . . . . . . . . . . . . . . . . . . . . . . . . . . . . . . . . . . . . .. . . . . . . . . . . . . . . . . . . . . . . . . . . . . . . . . . . . . . . . . . . . . . . . . . . . . . . . . . . . . . . . . . . . . . . . . . . . . . . . . . . . . . . . . . . . . . . . . . . . . . . . . . . . . . . . . . . . . . . . . . . . . . . . . . . . . . . . . . . . . . . . . . . . . . . . . . . . . . . . . . . . . . . . . . . . . . . . . . . . . . . . . . . . . . . . . . . . . . . . . . . . . . . . . . . . .. . . . . . . . . . . . . . . . . . . . . . . . . . . . . . . . . . . . . . . . . . . . . . . . . . . . . . . . . . . . . . . . . . . . . . . . . . . . . . . . . . . . . . . . . . . . . . . . . . . . . . . . . . . . . . . . . . . . . . . . . .Contents1Introduction Box content Minimum system requirements Specifications Ports E-Ink screen Carrying handle Status LED Shipping case 2Getting Started Connect the power cable View the E-Ink display Lyve Drive Shuttle is ready Register Lyve Drive Shuttle Power off/on Lyve Drive Shuttle 3Security Create a password Change a password Unlock device Lock device 4Desktop Operations Connect a computer Copy files Eject drive and disconnect computer 5Network Configuration Choose a network service Configure sites . . . . . . . . . . . . . . . . . . . . . . . . . . . . . . . . . . . . . . . . . . . . . . . . . . . . . . . . . . . . . . . . . . . . . . . . . . . . . . . . . . . . . . . . . . . . . . . . . . . . . . . . . . . . . . . . . . Computer port . . . . . . . . . . . . . . . . . . . . . . . . . . . . . . . . . . . . . . . . . . . . . . . . . . . . . . . . . . . . . . . . . . . . . . . . . . . . . . . . . . . . . . . . . . . . . . . . . . . . . . . . . . . . . . . . . . Operating system . . . . . . . . . . . . . . . . . . . . . . . . . . . . . . . . . . . . . . . . . . . . . . . . . . . . . . . . . . . . . . . . . . . . . . . . . . . . . . . . . . . . . . . . . . . . . . . . . . . . . . . . . . . . . . . . . . Minimum free disk space . . . . . . . . . . . . . . . . . . . . . . . . . . . . . . . . . . . . . . . . . . . . . . . . . . . . . . . . . . . . . . . . . . . . . . . . . . . . . . . . . . . . . . . . . . . . . . . . . . . . . . . . . . . . . . . . . . Dimensions . . . . . . . . . . . . . . . . . . . . . . . . . . . . . . . . . . . . . . . . . . . . . . . . . . . . . . . . . . . . . . . . . . . . . . . . . . . . . . . . . . . . . . . . . . . . . . . . . . . . . . . . . . . . . . . . . . Weight . . . . . . . . . . . . . . . . . . . . . . . . . . . . . . . . . . . . . . . . . . . . . . . . . . . . . . . . . . . . . . . . . . . . . . . . . . . . . . . . . . . . . . . . . . . . . . . . . . . . . . . . . . . . . . . . . . Electrical . . . . . . . . . . . . . . . . . . . . . . . . . . . . . . . . . . . . . . . . . . . . . . . . . . . . . . . . . . . . . . . . . . . . . . . . . . . . . . . . . . . . . . . . . . . . . . . . . . . . . . . . . . . . . . . . . . Temperature ranges . . . . . . . . . . . . . . . . . . . . . . . . . . . . . . . . . . . . . . . . . . . . . . . . . . . . . . . . . . . . . . . . . . . . . . . . . . . . . . . . . . . . . . . . . . . . . . . . . . . . . . . . . . . . . . . . . . Initial configuration . . . . . . . . . . . . . . . . . . . . . . . . . . . . . . . . . . . . . . . . . . . . . . . . . . . . . . . . . . . . . . . . . . . . . . . . . . . . . . . . . . . . . . . . . . . . . . . . . . . . . . . . . . . . . . . . . . Site credentials 555555666666777899101011111112131313131415151616181819. . . . . . . . . . . . . . . . . . . . . . . . . . . . . . . . . . . . . . . . . . . . . . . . . . . . . . . . . . . . . . . . . . . . . . . . . . . . . . . . . . . . . . . . . . . . . . . . . . . . . . . . . . . . . . . . . . . . . . . . . .. . . . . . . . . . . . . . . . . . . . . . . . . . . . . . . . . . . . . . . . . . . . . . . . . . . . . . . . . . . . . . . . . . . . . . . . . . . . . . . . . . . . . . . . . . . . . . . . . . . . . . . . . . . . . . . . . . . . . . . . . . . . . . . . . . . . . . . . . . . . . . . . . . . . . . . . . . . . . . . . . . . . . . . . . . . . . . . . . . . . . . . . . . . . . . . . . . . . . . . . . . . . . . . . . . . . .. . . . . . . . . . . . . . . . . . . . . . . . . . . . . . . . . . . . . . . . . . . . . . . . . . . . . . . . . . . . . . . . . . . . . . . . . . . . . . . . . . . . . . . . . . . . . . . . . . . . . . . . . . . . . . . . . . . . . . . . . .. . . . . . . . . . . . . . . . . . . . . . . . . . . . . . . . . . . . . . . . . . . . . . . . . . . . . . . . . . . . . . . . . . . . . . . . . . . . . . . . . . . . . . . . . . . . . . . . . . . . . . . . . . . . . . . . . . . . . . . . . . . . . . . . . . . . . . . . . . . . . . . . . . . . . . . . . . . . . . . . . . . . . . . . . . . . . . . . . . . . . . . . . . . . . . . . . . . . . . . . . . . . . . . . . . . . .. . . . . . . . . . . . . . . . . . . . . . . . . . . . . . . . . . . . . . . . . . . . . . . . . . . . . . . . . . . . . . . . . . . . . . . . . . . . . . . . . . . . . . . . . . . . . . . . . . . . . . . . . . . . . . . . . . . . . . . . . .. . . . . . . . . . . . . . . . . . . . . . . . . . . . . . . . . . . . . . . . . . . . . . . . . . . . . . . . . . . . . . . . . . . . . . . . . . . . . . . . . . . . . . . . . . . . . . . . . . . . . . . . . . . . . . . . . . . . . . . . . .. . . . . . . . . . . . . . . . . . . . . . . . . . . . . . . . . . . . . . . . . . . . . . . . . . . . . . . . . . . . . . . . . . . . . . . . . . . . . . . . . . . . . . . . . . . . . . . . . . . . . . . . . . . . . . . . . . . . . . . . . . . . . . . . . . . . . . . . . . . . . . . . . . . . . . . . . . . . . . . . . . . . . . . . . . . . . . . . . . . . . . . . . . . . . . . . . . . . . . . . . . . . . . . . . . . . . . . . . . . . . . . . . . . . . . . . . . . . . . . . . . . . . . . . . . . . . . . . . . . . . . . . . . . . . . . . . . . . . . . . . . . . . . . . . . . . . . . . . . . . . . . .. . . . . . . . . . . . . . . . . . . . . . . . . . . . . . . . . . . . . . . . . . . . . . . . . . . . . . . . . . . . . . . . . . . . . . . . . . . . . . . . . . . . . . . . . . . . . . . . . . . . . . . . . . . . . . . . . . . . . . . . . . . . . . . . . . . . . . . . . . . . . . . . . . . . . . . . . . . . . . . . . . . . . . . . . . . . . . . . . . . . . . . . . . . . . . . . . . . . . . . . . . . . . . . . . . . . .. . . . . . . . . . . . . . . . . . . . . . . . . . . . . . . . . . . . . . . . . . . . . . . . . . . . . . . . . . . . . . . . . . . . . . . . . . . . . . . . . . . . . . . . . . . . . . . . . . . . . . . . . . . . . . . . . . . . . . . . . .. . . . . . . . . . . . . . . . . . . . . . . . . . . . . . . . . . . . . . . . . . . . . . . . . . . . . . . . . . . . . . . . . . . . . . . . . . . . . . . . . . . . . . . . . . . . . . . . . . . . . . . . . . . . . . . . . . . . . . . . . .. . . . . . . . . . . . . . . . . . . . . . . . . . . . . . . . . . . . . . . . . . . . . . . . . . . . . . . . . . . . . . . . . . . . . . . . . . . . . . . . . . . . . . . . . . . . . . . . . . . . . . . . . . . . . . . . . . . . . . . . . .. . . . . . . . . . . . . . . . . . . . . . . . . . . . . . . . . . . . . . . . . . . . . . . . . . . . . . . . . . . . . . . . . . . . . . . . . . . . . . . . . . . . . . . . . . . . . . . . . . . . . . . . . . . . . . . . . . . . . . . . . . . . . . . . . . . . . . . . . . . . . . . . . . . . . . . . . . . . . . . . . . . . . . . . . . . . . . . . . . . . . . . . . . . . . . . . . . . . . . . . . . . . . . . . . . . . .. . . . . . . . . . . . . . . . . . . . . . . . . . . . . . . . . . . . . . . . . . . . . . . . . . . . . . . . . . . . . . . . . . . . . . . . . . . . . . . . . . . . . . . . . . . . . . . . . . . . . . . . . . . . . . . . . . . . . . . . . .. . . . . . . . . . . . . . . . . . . . . . . . . . . . . . . . . . . . . . . . . . . . . . . . . . . . . . . . . . . . . . . . . . . . . . . . . . . . . . . . . . . . . . . . . . . . . . . . . . . . . . . . . . . . . . . . . . . . . . . . . .. . . . . . . . . . . . . . . . . . . . . . . . . . . . . . . . . . . . . . . . . . . . . . . . . . . . . . . . . . . . . . . . . . . . . . . . . . . . . . . . . . . . . . . . . . . . . . . . . . . . . . . . . . . . . . . . . . . . . . . . . .. . . . . . . . . . . . . . . . . . . . . . . . . . . . . . . . . . . . . . . . . . . . . . . . . . . . . . . . . . . . . . . . . . . . . . . . . . . . . . . . . . . . . . . . . . . . . . . . . . . . . . . . . . . . . . . . . . . . . . . . . .. . . . . . . . . . . . . . . . . . . . . . . . . . . . . . . . . . . . . . . . . . . . . . . . . . . . . . . . . . . . . . . . . . . . . . . . . . . . . . . . . . . . . . . . . . . . . . . . . . . . . . . . . . . . . . . . . . . . . . . . . .. . . . . . . . . . . . . . . . . . . . . . . . . . . . . . . . . . . . . . . . . . . . . . . . . . . . . . . . . . . . . . . . . . . . . . . . . . . . . . . . . . . . . . . . . . . . . . . . . . . . . . . . . . . . . . . . . . . . . . . . . . . . . . . . . . . . . . . . . . . . . . . . . . . . . . . . . . . . . . . . . . . . . . . . . . . . . . . . . . . . . . . . . . . . . . . . . . . . . . . . . . . . . . . . . . . . .. . . . . . . . . . . . . . . . . . . . . . . . . . . . . . . . . . . . . . . . . . . . . . . . . . . . . . . . . . . . . . . . . . . . . . . . . . . . . . . . . . . . . . . . . . . . . . . . . . . . . . . . . . . . . . . . . . . . . . . . . .. . . . . . . . . . . . . . . . . . . . . . . . . . . . . . . . . . . . . . . . . . . . . . . . . . . . . . . . . . . . . . . . . . . . . . . . . . . . . . . . . . . . . . . . . . . . . . . . . . . . . . . . . . . . . . . . . . . . . . . . . .. . . . . . . . . . . . . . . . . . . . . . . . . . . . . . . . . . . . . . . . . . . . . . . . . . . . . . . . . . . . . . . . . . . . . . . . . . . . . . . . . . . . . . . . . . . . . . . . . . . . . . . . . . . . . . . . . . . . . . . . . .View network configuration 6Network Operations No sites configured Sites configured 7Copy Storage Devices Copy naming conventions Performing incremental copies Performing verifications 8Crypto Erase 9Recovery Manual recovery 10Settings Network Copy storage device Clock Change password 11Support Update Generate diagnostic Help Recovery Register About 12Regulatory Compliance FCC DECLARATION OF CONFORMANCE CLASS B VCCI-B China RoHS . . . . . . . . . . . . . . . . . . . . . . . . . . . . . . . . . . . . . . . . . . . . . . . . . . . . . . . . . . . . . . . . . . . . . . . . . . . . . . . . . . . . . . . . . . . . . . . . . . . . . . . . . . . . . . . . . . Folder naming conventions . . . . . . . . . . . . . . . . . . . . . . . . . . . . . . . . . . . . . . . . . . . . . . . . . . . . . . . . . . . . . . . . . . . . . . . . . . . . . . . . . . . . . . . . . . . . . . . . . . . . . . . . . . . . . . . . . . Enabling incremental copies . . . . . . . . . . . . . . . . . . . . . . . . . . . . . . . . . . . . . . . . . . . . . . . . . . . . . . . . . . . . . . . . . . . . . . . . . . . . . . . . . . . . . . . . . . . . . . . . . . . . . . . . . . . . . . . . . . Enabling copy verifications . . . . . . . . . . . . . . . . . . . . . . . . . . . . . . . . . . . . . . . . . . . . . . . . . . . . . . . . . . . . . . . . . . . . . . . . . . . . . . . . . . . . . . . . . . . . . . . . . . . . . . . . . . . . . . . . . . Manual . . . . . . . . . . . . . . . . . . . . . . . . . . . . . . . . . . . . . . . . . . . . . . . . . . . . . . . . . . . . . . . . . . . . . . . . . . . . . . . . . . . . . . . . . . . . . . . . . . . . . . . . . . . . . . . . . . Automatic 202121212222232324242425262728282828293030303131313131323333333333Introduc onTake control of your data transfer and transport costs when moving data around your enterprise. The Seagate Lyve Drive™ Shuttle is available in storage options that are simple and affordable for emerging edge environments, regardless of cloud service provider. This shuttle supports most industry-standard file systems and network protocols for easy ingestion from direct-attached, network-attached, and other external storage devices.For common questions and answers about your Seagate Lyve Drive Shuttle, visit Seagate customer support .Box contentSeagate Lyve Drive Shuttle USB 3.1- USB C cable USB 3.1 - USB Type A cable Type C PD 3.0 power adapterShipping caseMinimum system requirements Computer port USB Type A port (USB 3.0 or 2.0).USB Type C port (USB 3.1 or higher or Thunderbolt)Opera ng systemWindows 7 or highermacOS 10.12 or higher Minimum free disk space600MB recommended®®™Important—Save your packaging. If you experience problems with your device and want to exchange it, the device must be returned in its original packaging.®®Specifica onsDimensionsSideDimensions (in/mm)Length12.717 in/323 mm Width7.087 in/180 mm Depth 3.543 in/90 mmWeightModelWeight (lb/kg)2 x 4TB SATA SSD8.774 lb/3.98 kg 16TB SATA HDD 9.921 lb/4.5 kgElectricalType C PD 3.0 power adapter (15V@3A)T emperature rangesAmbient environmentTemperature range Standard (operating)0-35 °CPorts Flip down the port door to reveal the input/output ports.When charging the device using the power supply port, use only the power supply providedwith your device. Power supplies from other Seagate and third-party devices can damage your Lyve Drive Shuttle.Host port (USB 3.1 Gen 2 Type C)—Connect to Windows and macOS computers.1Ethernet port (10 GbE)—Connect to a network.Power port (Type C PD 3.0)—Connect the power adapter (15V@3A).E-Ink screenTo open the cover on the E-Ink screen, push the button and slide the button away from the screen. Carrying handlePress the two handle release buttons on each side of the handle. Once the handle is released, gently pull it open until it's fully extended.To retract, push the handle back in until the latch catches.Status LEDThe status LED is located above the handle. It is steady green when inactive and blinks during activity.Shipping caseA shipping case is included with Lyve Drive Shuttle. Always use the case when transporting and shipping the device. Lyve Drive Shuttle is well protected in its hard enclosure but is not manufactured to withstand the potentially damaging impacts that can occur with transport.1Performance up to 5GbE.Ge ng StartedConnect the power cableConnect the included power supply in the following order:A. Connect the power supply to Lyve Drive Shuttle's power input.B. Connect the power cord to the power supply.C. Connect the power cord to a live power outlet.Use only the power supply provided with your device. Power supplies from other Seagate andthird-party devices can damage your Lyve Drive Shuttle.View the E-Ink displayFollow the onscreen instructions to complete the setup.Lyve Drive Shu le is ready After setup is complete, tap an action to get started.When completing the setup, a popup prompts you to set the clock for Lyve Drive Shuttle. To make certain that your device has the correct date, time, and time zone, follow the prompt tothe clock setting. You can also set the clock at any time by tapping on the Menu icon () and selecting Settings > Clock .Ini al configura onStorage FormatexFAT for compatibility with Windows and macOS.Internet ProtocolDHCP for easy network work Protocol SMB to share and password-protect the network volume.Site creden alsIn addition to DHCP, you can set up unique network credentials for all your sites. Go to network settings to manage the device’s credentials for quick connections when shuttling between sites. See Network Configuration .Register Lyve Drive Shu leFor advanced network features such as NFS, site configurations, and volume password-protection, tap on the Menu icon () and select Settings > Network .Get the most from Lyve Drive Shuttle with easy access to information and support.To register your device:On the Home screen, tap the Menu icon ().1.2. Tap Support.3. Tap Register.4. Tap on the Name field and enter your name.5. Tap on the Email field and enter your email address.6. Tap Register.Power off/on Lyve Drive Shu leTo power off Lyve Drive Shuttle:1.On the Home screen, tap the Menu icon ().2. Tap Shut Down.Lyve Drive Shuttle does not have a power button. To power on the device, disconnect and reconnect the power cable.In the event Lyve Drive Shuttle is abruptly disconnected from power, it will restart automaticallywhen the power cable is reconnected. The E-ink screen may display random pixels during thereboot sequence. This behavior is normal.SecuritySecurely encrypt stored data on Lyve Drive Shuttle with Seagate Secure™, which protects data via industry standard AES-based hardware encryption. Lyve Drive Shuttle's enhanced encryption keeps your data safe should someone attempt to remove the storage device. The storage device can only be unlocked when it is safely housed within Lyve Drive Shuttle and will not work if it is removed.Create a passwordLyve Drive Shuttle can only be unlocked by the device password. During the initial setup, you are prompted to create a password. A minimum of 6 characters are required.Some tips for creating a strong password:Combine numbers, special characters, and upper and lower case e more than the minimum 6 characters.Avoid predictable number sequences such as 123456.Avoid predictable keyboard sequences such as QWERTY.Avoid repeated characters such as 111111 or AAAAAA.Change a passwordTo change your current password:1.On the Home screen, tap the Menu icon ().2.Tap Settings .3.Tap Change Password .4.Enter your current password and tap Next .5.Enter your new password and tap Next .6. Re-enter your new password and tap Change .Unlock device Lyve Drive Shuttle can only be accessed with your password.Create a password that is easy to remember, and store it in a safe place. Similar to mobilephones, your password cannot be recovered, not even by Seagate.To unlock the device:1. Connect the power cable to power on the device.2. Enter your password.3. Tap Unlock.Lock deviceTo lock the device:1. On the Home screen, tap the Menu icon ().2. Tap Lock.Desktop Opera onsYou can connect a computer to Lyve Drive Shuttle's USB host port. Once connected, you can copy files to Lyve Drive Shuttle.Connect a computerTo connect a computer:1. On the Home screen, tap Connect to Computer.2. Connect a computer to Lyve Drive Shuttle's USB host port.3. Wait for Lyve Drive Shuttle to detect and connect to your computer.Copy filesTo copy files to Lyve Drive Shuttle:1. With your computer connected to Lyve Drive Shuttle, open a computer file browser window and navigate to the location on Lyve Drive Shuttle where you want to locate your copied files.2. Open a second file browser window and select files to copy.3. Drag the files to the target location on Lyve Drive Shuttle.4. Wait for the copy operation to complete.Eject drive and disconnect computerTo eject and disconnect Lyve Drive Shuttle:1. Confirm that all copy operations are complete, and then use your computer's operating system to safely eject Lyve Drive Shuttle.2. Using the E-ink screen, tap Disconnect .Always safely eject Lyve Drive Shuttle from your computer before physicallydisconnecting it. Your computer must perform filing and housekeeping operations on the drive before it is removed. If you unplug the drive without using the operating system’s software, your files can become corrupt or damaged.3. At the prompt, confirm by tapping Disconnect.Network Configura onUse the Network Settings screen to select a network service, configure sites, and create user credentials for accessing Lyve Drive Shuttle's volume.To navigate to the Network Settings screen:1.On the Home screen, tap the Menu icon ().2. Tap Settings.3. Tap Network.Choose a network serviceLyve Drive Shuttle supports two communication protocols used for sharing access to network resources: SMB (Default)SMB supports any storage format.SMB supports network volume credentials.NFS Only works with Lyve Drive Shuttle formatted asEXT4.EXT4 is not native to macOS and Windows, whichcan conflict with USB connectivity.Does not support network volume credentials.After applying NFS, the device is crypto-erased andthe storage formatted as EXT4. All items stored onthe device will be deleted.To choose a service:1. On the Network screen, tap Choose Service.2. Tap SMB or NFS.3. Tap Apply.If you choose NFS, Lyve Drive Shuttle will be crypto erased and the storage formatted as EXT4. All items stored on the device will be deleted.Configure sitesSome of the sites you connect to may require static IP addresses rather than Dynamic Host Configuration Protocol (DHCP). Lyve Drive Shuttle walks you through adding network information for sites using static IP addresses. Once a site is configured, you can choose it when selecting a network connection from the Home screen.To add a site:1. On the Network screen, tap Configure Sites.2. Tap Add site.3. Follow the onscreen prompts to create the following:Site nameFixed IP addressSubnet maskRouter addressHostname4. Tap Create to complete the site configuration.To edit an existing site:1. On the Network screen, tap Configure Sites.2. Tap on the name of an existing site.3. Follow the onscreen prompts to revise data.4. Tap Create to complete the site configuration.Set creden als (Volume password)Add an extra layer of security by creating a username and password to access the Lyve Drive Shuttle volume on the network. This is only available with SMB as the service and cannot be used with NFS. The default name of the volume is Lyve Drive Shuttle.To add or edit credentials:1. On the Network screen, tap Set Credentials.2. The device password is required to edit network credentials for Lyve Drive Shuttle's volume. Enter thedevice password and tap Next.3. Tap on the Username field and then use the keyboard to enter a username.4. Tap on the Password field and use the keyboard to enter a password.5. Tap Create.6. Review the newly created credentials on the Network Credentials screen. You can also edit or deleteusers on this screen.。