监视器使用说明书
尊正AM系列监视器使用说明书

尊正AM系列监视器使用说明书AM SeriesAM210AM211AM250AM420AM550本说明书基于监视器固件版本2.0.00-2317若您使用的版本为更旧或更新系统版本则本说明书中提到的某些功能可能不存在或操作方式不同深圳市尊正数字视频有限公司网址:地址:深圳市南山区南海大道以西美年广场2栋6楼邮箱:******************/*******************电话:133********邮编:518067目录 (8)1.1.1SDI1 (8)1.1.2SDI2 (8)1.1.3YPbPr (8)1.1.4VIDEO (8)1.1.5DVI (8)1.1.6F1 (8)1.1.7F2 (8)1.1.8F3 (9)1.1.9F4 (9)1.1.10F5 (9)1.1.11MENU (9)1.1.12UP (9)1.1.13DOWN (9)1.1.14LEFT (9)1.1.15RIGHT/ENTER (9)1.1.16POWER (9)1.1.17PHASE(A1) (9)1.1.18CHROMA(A2) (9)1.1.19BRIGHT(A3) (9)1.1.20CONTRAST(A4) (9)1.1.21APERTURE(A5) (9)1.1.22VOL+、VOL-与Mute (10)1.1.23Tally灯 (10) (10)2.1.1LAN (10)2.1.2GPI (10)2.1.3RS-485 (10)2.1.4DVI-I (10)2.1.5Video (11)2.1.6Component (11)2.1.7Ext.Sync (11)2.1.8SDI1&SDI2 (11)2.1.9Audio (11) (11) (11)3.1.1功能键1/2/3/4/5 (12)3.1.2功能显示 (12) (12)3.2.1波形监视1/2/3 (12)3.2.2交叉影线 (12)3.2.3Blue Only (12)3.2.4Blue Only as Mono (12)3.2.5Red Only (12)3.2.6Red Only as Mono (12)3.2.7Green Only (13)3.2.8Green Only as Mono (13)3.2.9标记1/2/3 (13)3.2.10过扫描 (13)3.2.11子窗口 (14)3.2.12像素到像素 (14)3.2.13H/V Delay(行场延时功能) (14)3.2.14黑白模式 (14)3.2.15放大(Zoom) (14)3.2.16标清比例 (15)3.2.17全屏 (15)3.2.18黑色细节模式 (15)3.2.19像素放大 (15)3.2.20亮度着色 (15)3.2.21测光表 (16)3.2.22CIE测光表 (17)3.2.23辅助聚焦 (18)3.2.24静帧 (19)3.2.25DSLR Zoom (19)3.2.26安全播出 (19)3.2.27AFD (20)3.2.28Anamorphic Desqueeze (20)3.2.29CX Scale (21)3.2.30C-log Standard (21)3.2.31C-log Full (21)3.2.32S-log Standard (21)3.2.33S-log Full (21)3.2.34BMD-log Standard (21)3.2.35BMD-log Full (21)3.2.36S-log2Standard (22)3.2.37S-log2Full (22)3.2.38S-log3Standard (22)3.2.39S-log3Full (22)3.2.40Rec.Status Tally (22)3.2.41On-Screen Tally (22)3.2.42最大锐利度 (22)3.2.43Time Code (22) (23)3.3.1波形监视 (23)3.3.2窗口1 (23)3.3.3窗口2 (23)3.3.4波形位置 (23)3.3.5波形窗口排列方式 (24)3.3.6刻度显示 (24)3.3.7音频显示 (24)3.3.8音频测试电平 (24)3.3.9音频峰值电平 (24)3.3.10音频显示通道 (24)3.3.11冲击式电平表 (24)3.3.12峰值保持时间 (24)Scopes&Audio Meters (25) (26)3.4.1SDI格式 (26)3.4.23G Level B (26)3.4.3DVI选择和DVI像素格式 (27)3.4.4复合设定 (27)3.4.5分量输入 (27)3.4.6分量像素格式 (27)3.4.7分量设定 (27)3.4.8Checkerboard Size (28)3.4.9标清增强模式 (28)3.4.10Anamorphic Desqueeze (28)3.4.11视频制式 (28)3.4.12视频处理 (28)3.4.13psF显示模式 (28)3.4.14锐利度 (28)3.4.15Flicker Free Mode(闪烁消除模式,仅在OLED型号上可用) (28)3.4.16部分显示 (28) (29)3.5.1SDI1音频 (29)3.5.2SDI2音频 (29)3.5.3分量音频 (29)3.5.4复合音频 (29)3.5.5DVI-D音频 (30)3.5.6DVI-A音频 (30)3.5.7音频同步 (30)3.5.8音频锁 (30) (30)3.6.1标记选择 (30)3.6.2自定义标记 (31)3.6.3自定义标记信息 (31)3.6.4区域标记 (31)3.6.5安全标记 (31)3.6.6标记背景 (31)3.6.7中心标记 (31)3.6.8标记颜色 (31)3.6.7安全在区域内 (31)3.6.8有效图像边界 (31) (32)3.7.1报警 (32)3.7.2报警监视 (33)3.7.3远程报警监视 (33)3.7.4IRE报警触发值 (33)3.7.5音频报警触发时间 (33)3.7.6音频相位指示 (33)3.7.7UMD显示 (33)3.7.8UMD颜色 (34)3.7.9UMD显示位置 (34)3.7.10音频表显示 (34)3.7.11报警区域选择 (34) (34)3.8.1状态显示 (35)3.8.2菜单位置 (35)3.8.3状态位置 (35)3.8.4调节位置 (35)3.8.5源名信息 (35)3.8.6Source ID位置 (35)3.8.7Source ID字符 (35)3.8.8Time Code (35)3.8.9Time Code大小 (35)3.8.10Time Code位置 (35)3.8.11Time Code背景 (35) (36) (37)3.10.1色彩空间 (37)3.10.2Gamma选择 (37)3.10.3色温 (37)3.10.4Color Matching(OLED监视器可用配色函数选择) (37)3.10.5亮度模式 (38)3.10.6LUT Bypass (38)3.10.7三维查找表升级 (38)3.10.8Red/Green/Blue Gain&Bias(红/绿/蓝Gain&Bias) (39)3.10.9Log模式(可通过快捷功能键设置) (39)3.10.10Video Clipping (39)3.10.11SDI色调调节 (39)3.10.12GaiaColor AutoCal (39)3.10.13恢复出厂校正 (39) (40)3.11.1载入用户设置 (40)3.11.2保存用户设置 (40)3.11.3系统升级 (40)3.11.4按键Led (40)3.11.5颜色/亮度/对比度 (40)3.11.6亮度时间 (40)3.11.7U盘模式 (41)3.11.8语言 (41)3.11.9DHCP (41)3.11.10IP地址 (41)3.11.11子网掩码 (41)3.11.12RS422地址 (41)3.11.13波特率 (41)3.11.14奇偶校验 (41) (42)3.12.1输入 (42)3.12.2输入模式 (42)3.12.3音量 (42)3.12.4对比度 (42)3.12.5亮度 (42)3.12.6颜色 (42)3.12.7色调 (42)3.12.9型号 (42)3.12.10系统版本 (42)3.12.11产品序号 (42) (43) (44) (46)自定义校正LUT ...................................................................................................................46尊正监视器体积自动校正功能.. (47) (47)网线直连..............................................................................................................................47远程控制(IP Remote Utility).. (48)1.1.1SDI1选择SDI1视频通道输入。
索尼 LMD-1530W LCM-2030W 专业液晶监视器 说明书
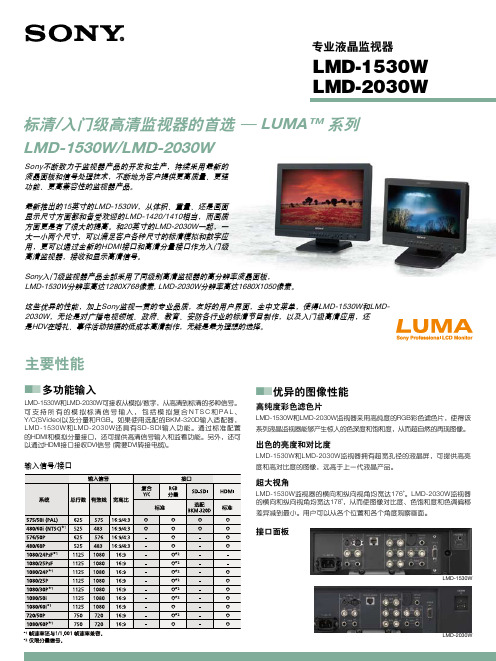
Sony 不断致力于监视器产品的开发和生产,持续采用最新的液晶面板和信号处理技术,不断地为客户提供更高质量、更强功能、更高兼容性的监视器产品。
最新推出的15英寸的LMD-1530W ,从体积、重量、还是画面显示尺寸方面都和备受欢迎的LMD-1420/1410相当,而画质方面更是有了很大的提高。
和20英寸的LMD-2030W 一起,一大一小两个尺寸,可以满足客户各种尺寸的标清模拟和数字应用,更可以通过全新的HDMI 接口和高清分量接口作为入门级高清监视器,接收和显示高清信号。
Sony 入门级监视器产品全部采用了同级别高清监视器的高分辨率液晶面板,LMD-1530W 分辨率高达1280X768像素, LMD-2030W 分辨率高达1680X1050像素。
这些优异的性能,加上Sony 监视一贯的专业品质,友好的用户界面,全中文菜单,使得LMD-1530W 和LMD-2030W ,无论是对广播电视领域、政府、教育、安防各行业的标清节目制作,以及入门级高清应用,还是HDV 在婚礼、事件活动拍摄的低成本高清制作,无疑是最为理想的选择。
专业液晶监视器LMD-1530W LMD-2030W■■ 优异的图像性能高纯度彩色滤色片LMD-1530W 和LMD-2030W 监视器采用高纯度的RGB 彩色滤色片,使得该系列液晶监视器能够产生惊人的色深度和饱和度,从而超自然的再现图像。
出色的亮度和对比度LMD-1530W 和LMD-2030W 监视器拥有超宽孔径的液晶屏,可提供高亮度和高对比度的图像,远高于上一代液晶产品。
超大视角LMD-1530W 监视器的横向和纵向视角均宽达176˚。
LMD-2030W 监视器的横向和纵向视角均宽达178˚,从而使图像对比度、色饱和度和色调偏移差异减到最小。
用户可以从各个位置和各个角度观察画面。
接口面板主要性能■■ 多功能输入LMD-1530W 和LMD-2030W 可接收从模拟/数字,从高清到标清的多种信号。
松下 BT-LH1700W MC彩色液晶视频监视器 说明书

这些余像即会消失。) • 液晶的响应速度和亮度因环境温度而异。 • 请向授权服务人员咨询安装事宜。
务必向服务人员咨询安装事宜。确认墙壁或天花板的强度能足够承受本装置以及其安装配件的重量。如果强度不 够,可导致诸如装置掉落和人员受伤等意外事故。 • 请勿将本装置安装于阳光直射处。否则将导致机壳老化或液晶屏幕损坏。
以输出。
当使用 SDI 活动直通型菊链式连接 * 多个监视器时,取决于原来信号的质量、电缆长度或连接的监视器数目, 屏幕上可能出现闪烁或噪点。
* 菊链式连接:
这是一种连接方式,它通过将第一台设备的输出端子连接到第二台设备的输入端子,将第二台设备的输出端 子连接到第三台设备的输入端子,依以类推,为两台或更多设备分发信号。
号连接到 SYNC/HD 端子,垂直同步信号连接到 VD 端子。
VD IN 输入端子 这是连接 PC 的 RGB 信号时使用的垂直同步信号 (VD) 输入端子。
IN1
:这是 SDI 输入端子 ( 与 HD/SD 自动切换兼容 )。
IN2
:这是 SDI 输入端子 ( 与 HD/SD 自动切换兼容 )。
SWITCHED OUT :这是活动端子,可以在画面上显示 SDI 输入信号。
* 只有在使用 [INPUT SELECT] 按钮选择 [SDI1] 或 [SDI2] 时才会输出 SDI 活动直通型。只有选择 SDI 时才可
标准附件
电源线 x 1 电源线钩 x 1
螺丝 x 1
选配件
支架安装适配件 BT-MA1710G ( 安装指示 J 第 26 页 ) 嵌入音频单元 BT-YAE1700G ( 安装指示 J 含安装指南 )
海康威视22英寸监视器用户手册说明书
Hikvision 22-inch MonitorUser ManualLegal Information© 2021 Hangzhou Hikvision Digital Technology Co., Ltd. All rights reserved.About this ManualThe Manual includes instructions for using and managing the Product. Pictures, charts, images and all other information hereinafter are for description and explanation only. The information contained in the Manual is subject to change, without notice, due to firmware updates or other reasons. Please find the latest version of this Manual at the Hikvision Website (https:///).Please use this Manual with the guidance and assistance of professionals trained in supporting the Product.Trademarksand other Hikvision trademarks and logos are the properties of Hikvision in various jurisdictions.Other trademarks and logos mentioned are the properties of their respective owners.r egistered trademarks of HDMI Licensing Administrator, Inc., in the United States and other countries.DisclaimerTO THE MAXIMUM EXTENT PERMITTED BY APPLICABLE LAW, THIS MANUAL AND THE PRODUCT DESCRIBED, WITH ITS HARDWARE, SOFTWARE AND FIRMWARE, ARE PROVIDED “AS IS” AND “WITH ALL FAULTS AND ERRORS.” HIKVISION MAKES NO WARRANTIES, EXPRESS OR IMPLIED, INCLUDING WITHOUT LIMITATION, MERCHANTABILITY, SATISFACTORY QUALITY, OR FITNESS FOR A PARTICULAR PURPOSE. THE USE OF THE PRODUCT BY YOU IS AT YOUR OWN RISK. IN NO EVENT WILL HIKVISION BE LIABLE TO YOU FOR ANY SPECIAL, CONSEQUENTIAL, INCIDENTAL, OR INDIRECT DAMAGES, INCLUDING, AMONG OTHERS, DAMAGES FOR LOSS OF BUSINESS PROFITS, BUSINESS INTERRUPTION, OR LOSS OF DATA, CORRUPTION OF SYSTEMS, OR LOSS OF DOCUMENTATION, WHETHER BASED ON BREACH OF CONTRACT, TORT (INCLUDING NEGLIGENCE), PRODUCT LIABILITY, OR OTHERWISE, IN CONNECTION WITH THE USE OF THE PRODUCT, EVEN IF HIKVISION HAS BEEN ADVISED OF THE POSSIBILITY OF SUCH DAMAGES OR LOSS.YOU ACKNOWLEDGE THAT THE NATURE OF THE INTERNET PROVIDES FOR INHERENT SECURITY RISKS, AND HIKVISION SHALL NOT TAKE ANY RESPONSIBILITIES FOR ABNORMAL OPERATION, PRIVACY LEAKAGE OR OTHER DAMAGES RESULTING FROM CYBER-ATTACK, HACKER ATTACK, VIRUS INFECTION, OR OTHER INTERNET SECURITY RISKS; HOWEVER, HIKVISION WILL PROVIDE TIMELY TECHNICAL SUPPORT IF REQUIRED.YOU AGREE TO USE THIS PRODUCT IN COMPLIANCE WITH ALL APPLICABLE LAWS, AND YOU ARE SOLELY RESPONSIBLE FOR ENSURING THAT YOUR USE CONFORMS TO THE APPLICABLE LAW. ESPECIALLY, YOU ARE RESPONSIBLE, FOR USING THIS PRODUCT IN A MANNER THAT DOES NOT INFRINGE ON THE RIGHTS OF THIRD PARTIES, INCLUDING WITHOUT LIMITATION, RIGHTS OF PUBLICITY, INTELLECTUAL PROPERTY RIGHTS, OR DATA PROTECTION AND OTHER PRIVACY RIGHTS. YOU SHALL NOT USE THIS PRODUCT FOR ANY PROHIBITED END-USES, INCLUDING THE DEVELOPMENT OR PRODUCTION OF WEAPONS OF MASS DESTRUCTION, THE DEVELOPMENT OR PRODUCTION OF CHEMICAL OR BIOLOGICAL WEAPONS, ANY ACTIVITIES IN THE CONTEXT RELATED TO ANY NUCLEAR EXPLOSIVE OR UNSAFE NUCLEAR FUEL-CYCLE, OR IN SUPPORT OF HUMAN RIGHTS ABUSES.IN THE EVENT OF ANY CONFLICTS BETWEEN THIS MANUAL AND THE APPLICABLE LAW, THE LATTER PREVAILS.Regulatory InformationFCC InformationPlease take attention that changes or modification not expressly approved by the party responsible for compliance could void the user’s authority to operate the equipment.FCC Compliance: This equipment has been tested and found to comply with the limits for a Class B digital device, pursuant to part 15 of the FCC Rules. These limits are designed to provide reasonable protection against harmful interference in a residential installation. This equipment generates, uses and can radiate radio frequency energy and, if not installed and used in accordance with the instructions, may cause harmful interference to radio communications.However, there is no guarantee that interference will not occur in a particular installation. If this equipment does cause harmful interference to radio or television reception, which can be determined by turning the equipment off and on, the user is encouraged to try to correct the interference by one or more of the following measures:•Reorient or relocate the receiving antenna.•Increase the separation between the equipment and receiver.•Connect the equipment into an outlet on a circuit different from that to which the receiver is connected.•Consult the dealer or an experienced radio/TV technician for help.This equipment should be installed and operated with a minimum distance 20 cm between the radiator and your body.FCC ConditionsThis device complies with part 15 of the FCC Rules. Operation is subject to the following conditions: •This device may not cause harmful interference.•This device must accept any interference received, including interference that may cause undesired operation.EU Conformity StatementThis product and, if applicable, the supplied accessories too are marked with “CE” a nd complytherefore with the applicable harmonized European standards listed under the EMC Directive2014/30/EU, the LVD Directive 2014/35/EU, the RoHS Directive 2011/65/EU.2012/19/EU (WEEE Directive): Products marked with this symbol cannot be disposed o f asunsorted municipal waste in the European Union. For proper recycling, return this product toyour local supplier upon the purchase of equivalent new equipment, or dispose of it atdesignated collection points. For more information see: : This product contains a battery that cannot be disposed of asyour supplier or to a designated collection point. For more information see:Applicable ModelsThis manual is applicable to Hikvision’s 22-inch monitor.Symbol ConventionsThe symbols that may be found in this document are defined as follows.Safety Instructions•In the use of the product, you must be in strict compliance with the electrical safety regulations of the nation and region.•The equipment shall not be exposed to dripping or splashing and no objects filled with liquids such as vases shall be placed on the equipment.•CAUTION: To reduce the risk of fire, replace only with the same fuse type and rating.•The equipment must be connected to an earthed mains socket-outlet.•Ensure correct wiring of the terminals for connection to an AC mains supply.•The equipment has been designed, when required, modified for connection to an IT power distribution system.•Do not ingest battery. Chemical burn hazard!•This product contains a coin/button cell battery. If the coin/button cell battery is swallowed, it can cause severe internal burns in just two hours and can lead to death.•Keep new and used batteries away from children.•If the battery compartment does not close securely, stop using the product and keep it away from children.•If you think batteries might have been swallowed or placed inside any part of the body, seek immediate medical attention.•CAUTION: Risk of explosion if the battery is replaced by an incorrect type.•Improper replacement of the battery with an incorrect type may defeat a safeguard (for example, in the case of some lithium battery types).•Do not dispose of the battery in fire or a hot oven, or mechanically crush or cut the battery, which may result in an explosion.•Do not leave the battery in an extremely high temperature surrounding environment, which mayresult in an explosion or the leakage of flammable liquid or gas.•Do not subject the battery to extremely low air pressure, which may result in an explosion or the leakage of flammable liquid or gas.•Dispose of used batteries according to the instructions.• identifies the battery holder itself and identifies the positioning of the cell(s) inside thebattery holder.•+ identifies the positive terminal(s) of equipment the battery is used with, or generates direct current.•- identifies the negative terminal(s) of equipment the battery is used with, or generates direct current.•No naked flame sources such as lighted candles should be placed on the equipment.•The ventilation should not be impeded by covering the ventilation openings with items such as newspapers, tablecloths, curtains, etc. The openings shall never be blocked by placing theequipment on a bed, sofa, rug, or other similar surface.•The USB port of the equipment is used for connecting to a mouse, a keyboard, or a USB flash drive only.•NEVER place items that might tempt children to climb such as toys and remote controls on the top of the equipment.•Install the equipment according to the instructions in this manual.•To prevent injury, this equipment must be securely attached to the floor/wall in accordance with the installation instructions.•Keep equipment upright when moving or using it.•CAUTION: This equipment is for use only with a specified bracket (Hikvision’s monitor stand). •To prevent possible hearing damage, do not listen at high volume levels for long periods.Table of Contents1.Introduction (7)1.1.Key Features (7)1.2.Packing List (7)1.3.Power On (7)AC Device (7)DC Device (7)2.Rear Panel Interface (8)2.1.Type A (8)2.2.Type B (8)2.3.Type C (8)3.Panel Buttons (9)4.Basic Operation (10)4.1.Switch Signal Source (10)4.2.Menu Operation (10)Image Settings (10)VGA Settings (11)System Settings (12)OSD Settings (13)Software Version (13)1.Introduction1.1.Key Features•8-bit/10-bit dual channel LVDS (1920×1080) HD display•3D digital comb filter and 3D noise reduction technology•Hi-Fi color OSD and user-friendly menu for operation•Programmable 12-bit RGB gamma correction•Complete factory setting mode• 1 × HDMI 1.4 input interface, and HDCP 1.1 available•Software spread spectrum technology reduces EMI radiationNOTE:The specific features may vary by model. Refer to Rear Panel Interface for details.1.2.Packing ListPacking ListName QuantityMonitor 1Power cable (AC device)/Power adapter (DC device) 1HDMI cable (Optional) 1Base set 1User manual 1Quick start guide 11.3.Power OnAC DeviceConnect the device to an earthed mains socket-outlet, and press the power button.CAUTION:Power supply: 220 VAC, 50/60 HzPower off the device and disconnect the plug if it is not in use for a long timeThe device cannot be connected to a DC power supplyDC DeviceConnect the power adapter to the device, and plug the other end of the adapter to an earthed mains socket-outlet, then press the power button.CAUTION:Power supply for the adapter: 12 VDC, 2 APower off the device and disconnect the plug if it is not in use for an extendedperiod.2.Rear Panel InterfaceThe panel appearance and interface vary by model. The devices can be classified as follows.2.1.Type AFigure 1, Type A Interface2.2.Type BFigure 2, Type B Interface2.3.Type CFigure 3, Interface of Type CInterface DescriptionInterface Description Interface DescriptionHDMI HDMI digital signal input interface AUDIO Audio input interfaceVGA VGA analog signal input interface POWER AC power supplyDC 12V Power adapter interface -- --NOTE:Audio input interface is only available for type A, and power adapter interface for type C.3.Panel ButtonsThe buttons at the bottom-right corner of the front panel are shown as follows.Figure 4, Panel ButtonsButton DescriptionButton DescriptionPower On/Off•Menu page, source page, and volume page: Exit the current page•Other pages: Display main menu page•Display the current input source•All the menu pages: OK•Second-level page: add/reduce•Volume page: volume up/down•Display all the input sources•All the menu pages: Switch to next one4.Basic OperationThe display interface varies by model. The figures followed are for illustration purpose only. 4.1.Switch Signal SourceConnect the device to a mains socket-outlet and signal source, and power the device on.Press to enter the signal source page.Figure 5, Signal SourcePress to switch input sources, and press to confirm.4.2.Menu OperationBasic OperationOperation DescriptionEnter main menu page PressCheck first-level menu On the main menu page, press to switch.Check parameters On the first-level menu page, press to enter and check differentparametersConfigure parameters •Press or to adjust the value of the selected parameter, and press to confirm•Press to switch to other parametersReturn to the upper menu Press on any pageImage SettingsYou can switch picture modes and adjust image parameters including contrast, brightness, color, sharpness, and hue. The adjustable parameters will change when you switch from one picture mode to another.Figure 6, Image SettingsImage ParametersParameter DescriptionPicture Mode •Standard (default): Suitable for a normal environment•Soft: Suitable for a dark room•Dynamic: Suitable for a bright room•Custom: Set brightness, contrast, color, sharpness, or hue to adjust display effectBrightness Ranges from 0 to 100. The higher the value, the brighter the displayContrast Ranges from 0 to 100. Determines the difference between bright and dark sections Color Ranges from 0 to 100. The higher the value, the more colorful the image Sharpness Ranges from 0 to 30. Raise the value to make the image sharperHue Ranges from 0 to 100. Changes the color cast of the imageEye Protect Off/Weak/Medium/StrongNOTE:Under custom mode, brightness, contrast, color, sharpness, and hue areadjustable.Under other modes, only brightness and contrast are adjustable.Parameters in white bar are adjustable. If the parameter bar is gray, it indicatesthat the parameter is not adjustable under the current mode or input source.Eye protection mode is available only for type C.VGA SettingsWhen you select VGA as the input source, you can adjust VGA parameters to make the picture show in the correct position.Figure 7, VGA SettingsV GA ParametersParameter DescriptionManual Adjust Adjust. Press or to enable or disableH-Position Ranges from 0 to 100V-Position Ranges from 0 to 100Phase Ranges from 0 to 100Clock Ranges from 0 to 100Auto Adjust Off/OnNOTE:Adjusting the value of H-Position and V-Position will change the image position greatly and Phase and Clock slightly.Changing the Clock value will stretch or narrow the image.If Auto Adjust is enabled, the related parameters will self-adjust under thefollowing circumstances: The device is restarted, a VGA input source is accessed,or the input source is switched to VGA.VGA parameters cannot be changed when Auto Adjust is disabled.System SettingsYou can change the language, screen saver, volume, and other parameters on the system setting page. Volume settings is available only in select models.Figure 8, System SettingsSystem ParametersParameter DescriptionVolume Ranges from 0 to 100Mute Off/OnLanguage EnglishUser Restore No/YesScreen Saver Black Screen/Blue ScreenAuto Sleep Off/1 Min/5 Min/10 Min/30 Min/1 HScaling Mode 16:9/4:3NOTE:Volume settings and mute switch are supported only for type A.OSD SettingsOSD parameters concern the display effect of OSD such as position, transparency, and rotation.Figure 9, OSD SettingsO SD ParametersParameter DescriptionHorizontal Ranges from 0 to 100Vertical Ranges from 0 to 100Transparency Off/Weak/Medium/StrongOSD Time Out Off/5 S/15 S/30 S/1 MinOSD Rotation Off/OnNOTE:If OSD Rotation is enable, the OSD will rotate 270 degrees clockwise, and the point (0, 0) is at the bottom-left corner.Software VersionFigure 10, Version。
尊正DM系列监视器使用说明书

尊正DM系列监视器使用说明书DM SeriesDM170DM240DM241DM250本说明书基于监视器固件版本2.0.00-2326若您使用的版本为更旧或更新系统版本则本说明书中提到的某些功能可能不存在或操作方式不同深圳市尊正数字视频有限公司网址:地址:深圳市南山区南海大道以西美年广场2栋6楼邮箱:******************/*******************电话:133********邮编:518067SDI BNC线缆连接与断连为防止漏电对监视器组件造成毁坏,请遵循以下步骤:•首先连接所有设备电源。
•所有设备打开电源。
•连接BNC线缆。
断开连接:•断开BNC线缆连接。
•关闭电源并断开设备电源。
安全保护措施•请认真阅读并理解所有操作规程再进行产品操作。
•请妥善保存安全与操作规程以备将来参考。
•须严格遵守监视器上与规程当中的警告信息。
•须遵守所有操作规程。
•请勿使用非制造商推荐的附属装置或配件。
使用不达标附属装置可能导致严重意外。
•请勿在电源线上放置重物。
妥善放置电源线避免人员踩踏或在电源线上放置物品。
检查确认电源插座与产品连接点妥善稳固连接。
•此监视器必须在规格标签或产品筛选所规定的电源上进行操作。
注意:切勿在超出规定的电压范围中操作本产品。
•交流电源或延长电线切勿超负荷。
超负荷可能会导致起火或严重的触电。
•切忌将任何物品通过通风孔或其他开口插入监视器,这会导致严重触电或破坏。
•监视器切勿接触水或其他液体,会导致触电或永久性损坏。
•请勿尝试自行对产品进行检修。
移除监视器外壳有接触高压电和其他不安全状况的危险。
如有任何服务需求,请寻求厂家技术人员的帮助。
•若发生以下情况,须从交流电插座拔出电源线,并咨询专业服务人员进行维修:•电源线或插头损坏。
•任何液体洒入或洒在监视器上。
•监视器淋雨或接触到水。
•未按照使用说明书进行正确操作。
•监视器掉落或损坏。
•若监视器需要替换部件,请确保服务人员使用了制造商规定的替换部件,或与原部件拥有相同特性和性能规格的部件。
模具监视器操作说明书

Thanks for selecting Decheng请在使用仪器前仔细阅读用户手册Please read the User’s Manual carefullybefore using the instrument.●请将用户手册作为仪器的一部分妥善保管,便于操作人员随时参阅。
Please take this users’manual as important part of the instrument and keep it near the instrument for reference at any time.●本用户手册虽经认真审阅,但纰漏在所难免,如有不明之处,请联系德诚公司客服中心或代理商。
Although the use rs’manual is checked very carefully,there will still remain some mistake.Any questions,please contant Decheng Comtomer Service Center or our agents.●德诚公司一直致力于产品的不断改进,本用户手册内容如有更新,恕不另行通知。
声明:版权归德诚公司所有,未经许可不得翻印、抄袭、修改本用户手册内容。
Copyright:Decheng Co.,Ltd.We reserve the right to accuse anyone copy all orpart of this User’s Manual without permission.目录第一章智能相机DC-500简介.............. ............ .. (1)第二章软件运行主界面 (2)第三章算法功能 (3)3.1定位 (3)3.2对比 (5)3.3有无 (7)3.4测量 (8)3.5计数 (9)3.6控制信号 (10)3.6高级选项 (10)第四章常用菜单功能 (11)4.1系统设置 (11)1)基本参数 (11)2)密码设置 (12)3)高级参数 (13)4)配置存取 (13)5)本机信息 (14)4.2高级设置 (14)1)相机设置 (15)2)光源设置 (16)3)IO设置 (15)4)分屏设置 (16)5)界面风格设置 (17)4.3常用操作 (18)1)IO状态 (18)2)当前报表显示 (18)3)计数清零 (18)4)报告 (18)5)日记 (19)6)升级 (20)7)远程 (21)第五章产品规格及配件 (22)第六章注意事项 (23)第一章智能相机DC-500简介1.1主要用途1、产品装配过程中正反的确认;2、载带包装时有无确认;3、装配前产品对比确认;4、产品规格尺寸快速测量确认;5、线序颜色快速识别;6、注塑产品多胶,缺胶等缺陷确认;1.3产品特点1、内嵌德诚自主研发的视觉软件,可实现有无、正反、测量、缺陷检测、颜色识别等功能;2、采用13.3英寸的触摸显示屏,支持鼠标键盘;3、外壳采用铝合金压铸成型,全密封设计,防护等级IP65;4、内置4路数字光源,可直接在显示屏上调整亮度;5、支持8路数字输入,8路数字输出,带光耦隔离;6、相机接口采用工业航空插头,接触性能好,插拔方便;7、支持1-4个千兆以太网工业相机;8、内置WIFI,可在线升级/远程调试;第二章软件运行主界面第三章算法功能设置算法功能,需要先停止监控,然后点击主界面菜单算法设置,进入算法功能菜单界面;我们根据产品大小以及检测要求,调整光源、相机和镜头,使成像特征清晰可见;点击取基准,进入基准图像,选择需要的功能进行设置。
索尼监视器LMD-2110说明书
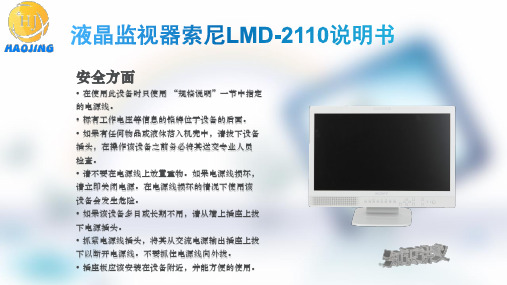
1、演播指示灯 可以用 PARALLEL REMOTE 连接器打开或关闭此灯。 2、(备用)开关和指示灯 本设备处于待机模式时,按此开关打开电源。 指示灯变亮。 再按一下可将监视器设为待机模式。 指示灯熄灭。 3、(锁定键)指示灯 当锁定键功能工作时,此指示灯变亮。风扇出现故障时,指示灯闪烁。
HDMI IN 连接器 HDMI (High-Definition Multimedia Interface,高清晰度多媒体接口)是一种在单个数字连接上同时支 持视频和音频的接口,它可以让您欣赏到高质量的画面和声音。 HDMI 规格支持 HDCP (High-bandwidth Digital Content Protection,高带宽数字内容保护),它是一种采用数字视频信号编码技术的版权保护技术。
安全方面
• 在使用此设备时只使用 “规格说明”一节中指定 的电源线。 • 标有工作电压等信息的铭牌位于设备的后面。 • 如果有任何物品或液体落入机壳中,请拔下设备 插头,在操作该设备之前务必将其送交专业人员 检查。 • 请不要在电源线上放置重物。如果电源线损坏, 请立即关闭电源。在电源线损坏的情况下使用该 设备会发生危险。 • 如果该设备多日或长期不用,请从墙上插座上拔 下电源插头。 • 抓紧电源线插头,将其从交流电源输出插座上拔 下以断开电源线。不要抓住电源线向外拔。 • 插座板应该安装在设备附近,并能方便的使用。
湿环境下或空调出风口处反复使用本设备。 为避免以上情况发生,建议稍稍降低亮度,并在不 使用本设备时关闭电源。
清洁方面
清洁前 确保从 AC 插座上拔下 AC 电源线。 清洁监视器 医用 LCD 监视器采用了一种抗消毒材料。当使用苯或稀 释剂、或者酸性、碱性清洁剂或洗擦剂以及化学清洁布来 清洁监视器表面时,会导致监视器性能的下降或将监视器 表面损坏。请注意以下几点: • 使用 50 到 70 v/v% 浓度的异丙醇或 76.9 到81.4 v/v% 浓度的乙醇,通过擦拭的方式来清洁监 视器表面。轻轻擦拭监视器表面 (用力小于1 N)。 • 使用浸过中性清洁剂的软布如清洁布可以擦掉顽固的污 渍,然后再使用上面的化学溶剂清洁。千万不要使用溶剂, 例如苯或稀释剂,或者酸性、碱性清洁剂或洗擦剂以及化 学清洁布来清洁或消毒,这样会损坏监视器表面。 • 请不要使用脏布用力擦拭监视器表面,否则会将监视器 表面划伤。
LCD监视器用户手册说明书
LCD MonitorUser ManualLegal InformationUser Manual©2018 Hangzhou Hikvision Digital Technology Co., Ltd.About this ManualThis Manual is subject to domestic and international copyright protection. Hangzhou Hikvision Digital Technology Co., Ltd. ("Hikvision") reserves all rights to this manual. This manual cannot be reproduced, changed, translated, or distributed, partially or wholly, by any means, without the prior written permission of Hikvision.Please use this user manual under the guidance of professionals.Trademarksand other Hikvision marks are the property of Hikvision and are registered trademarks or the subject of applications for the same by Hikvision and/or its affiliates. Other trademarks mentioned in this manual are the properties of their respective owners. No right of license is given to use such trademarks without express permission.DisclaimerTO THE MAXIMUM EXTENT PERMITTED BY APPLICABLE LAW, HIKVISION MAKES NO WARRANTIES, EXPRESS OR IMPLIED, INCLUDING WITHOUT LIMITATION THE IMPLIED WARRANTIES OF MERCHANTABILITY AND FITNESS FOR A PARTICULAR PURPOSE, REGARDING THIS MANUAL. HIKVISION DOES NOT WARRANT, GUARANTEE, OR MAKE ANY REPRESENTATIONS REGARDING THE USE OF THE MANUAL, OR THE CORRECTNESS, ACCURACY, OR RELIABILITY OF INFORMATION CONTAINED HEREIN. YOUR USE OF THIS MANUAL AND ANY RELIANCE ON THIS MANUAL SHALL BE WHOLLY AT YOUR OWN RISK AND RESPONSIBILITY.REGARDING TO THE PRODUCT WITH INTERNET ACCESS, THE USE OF PRODUCT SHALL BE WHOLLY AT YOUR OWN RISKS. HIKVISION SHALL NOT TAKE ANY RESPONSIBILITIES FOR ABNORMAL OPERATION, PRIVACY LEAKAGE OR OTHER DAMAGES RESULTING FROM CYBER ATTACK, HACKER ATTACK, VIRUS INSPECTION, OR OTHER INTERNET SECURITY RISKS; HOWEVER, HIKVISION WILL PROVIDE TIMELY TECHNICAL SUPPORT IF REQUIRED.SURVEILLANCE LAWS VARY BY JURISDICTION. PLEASE CHECK ALL RELEVANT LAWS IN YOUR JURISDICTION BEFORE USING THIS PRODUCT IN ORDER TO ENSURE THAT YOUR USE CONFORMS THE APPLICABLE LAW. HIKVISION SHALL NOT BE LIABLE IN THE EVENT THAT THIS PRODUCT IS USED WITH ILLEGITIMATE PURPOSES.IN THE EVENT OF ANY CONFLICTS BETWEEN THIS MANUAL AND THE APPLICABLE LAW, THE LATER PREVAILS.PerfaceSymbol ConventionsThe symbols that may be found in this document are defined as follows.Applicable ModelsThis manual is applicable to monitors of the following sizes: 22 inch, 32 inch, 43 inch, and 55 inch.ContentsChapter 1 Introduction (1)1.1 Overview (1)1.2 Key Features (1)1.3 Panel Buttons (1)1.4 Interfaces (2)1.5 Power Supply Connections (3)1.6 Remote Control (3)Chapter 2 Terminal Operations (5)2.1 Switch Input Source (5)2.2 Menu Descriptions (5)2.3 Configure Image Parameters (7)2.4 Configure Audio Settings (10)2.5 Enable/Disable keypad lock (11)2.6 System Maintenance (12)2.6.1 Upgrade the Device (12)2.6.2 Restore the Defaults (12)2.6.3 Configure Temperature Monitoring (13)2.6.4 View System Information (14)2.6.5 Enable/Disable Auto Sleep (15)2.6.6 Enable/Disable Power Saving Mode (15)2.6.7 Configure Screen Saver (15)2.6.8 Check Energy Diagram (15)Chapter 3 Client Operation (17)3.1 Log in to Client (17)3.2 Configure Serial Port (17)3.3 Startup/Shutdown (17)3.4 Switch Input Source (18)Chapter 1 Introduction1.1 OverviewThe LCD monitor is a reliable surveillance display with excellent color reduction, image processing, and true display of video details. Multiple interfaces can meet various surveillance environments, and build-in speaker is convenient for audio play. The monitor is an ideal choice for security and surveillance application.1.2 Key Features•8-bit 2-ch LVDS (1920 × 1080) HD display.•3D digital comb filter.•True color OSD and user-friendly operating menu.•Mstar ACE-5 auto color and image enhancement engine, improving the image contrast, details, color of skin and edges, etc.•Programmable 12-bit RGB gamma correction.•1-ch HDMI 1.3 input interface, supporting HDCP 1.2.•Software spread-spectrum technology to reduce EMI radiation.•3D noise reduction.•HD JPEG decoding.•Multimedia playing of text, image, audio, video, etc.1.3 Panel ButtonsTouch buttons place on the left side of the monitor. See details in the following figure and table.Table 1-1 Buttons Description1.4 InterfacesTable 1-2 Description of Rear Panel1.5 Power Supply ConnectionsInsert the 3-pin power plug (100 to 240 VAC, 2A) into well-grounded power socket.NoteDisconnect the power of the monitor if it will not be used for a long time.1.6 Remote ControlRefer to the following table for the remote controller descriptions.Figure 1-3 Remote ControlNoteThe following keys are only used under the USB signal source: , , , , , .Table 1-3 Description of Remote Control Buttons /Chapter 2 Terminal Operations2.1 Switch Input SourceThe monitor supports 5 signal sources: HDMI, DVI, VGA, CVBS , USB.Steps1.Press SOURCE to enter Input Source page.Figure 2-1 Input Source2.Press ▼ or ▲ to select the input source.3.Press OK to accomplish the input source selection.2.2 Menu DescriptionsMenu OperationsNoteConfiguration steps vary depending on the menu you choose.Table 2-1 Description of Menu Operations1Press MENU and the main menu appears on the screen, such as image mode, audio settings, VGA parameters, etc.2Press ▲/▼/◄/► to select a submenu.3Press OK to confirm the submenu.4Press ▲/▼ to select parameters.5Press ◄/► to set the parameters.6Press MENU to complete the settings and back to the main menu interface. OSD SettingsYou can set the language and OSD duration on the menu.Enter Menu Settings page: Menu→ Menu Settings , and then set language, OSD duration, and OSD blending.Figure 2-2 OSD SettingsLanguageSupports Chinese & English menu switch.OSD DurationRefers to the display time of the menu after it is not used. Press ◄ or ► to adjust the OSD duration to: Always On/5 Sec/15 Sec/30 Sec.OSD BlendingRefers to the OSD transparency. You can adjust the blending value to: High/Middle/Low/Off.2.3 Configure Image ParametersImage ModeYou can switch image modes and adjust image parameters including contrast, brightness, color, sharpness, and hue.Enter Image Mode page: MENU→ Image Mode , and then press ▲or▼to select Image Mode.Figure 2-3 Image ModeStandardSuitable for a normal environment.GentleSuitable for a dark room.DynamicSuitable for a bright room.UserWhen you select the User mode, press ◄ or ► to set the brightness, contrast, color, or sharpness to adjust display effect.NoteAdjustable parameters vary depending on the input source you choose. If the parameter bar is gray, it indicates that the parameter is unadjustable under the current input source.Backlight SettingsYou can adjust the screen brightness. The higher the backlight value, the brighter the screen.Enter Backlight Settings page: MENU→ Backlight Settings , and then press ▲ or ▼to select Backlight.Figure 2-4 Backlight SettingsVGA ParameterWhen you select VGA as the input source, you can adjust VGA parameters to make the picture show in the correct position.Enter VGA Parameter page: MENU→ VGA Parameter , and then press ▲ or ▼to adjust VGA parameters according to your needs.Figure 2-5 VGA ParameterOverscan SettingsWhen there is black border, you can shield the borders for better image quality.Enter Overscan Settings page: MENU→ Overscan Settings , and then press◄ or ► to disable Overscan. You can set Left Edge, Right Edge, Top Edge and Bottom Edge from 0 to 100.Figure 2-6 Oversan SettingsNoteThe value of overscan is the pixel value of certain edge.AspectYou can set the aspect ratio as 16:9, 4:3, and P-to-P to zoom pictures.Enter Aspect page: MENU→ Aspect , and then press ◄ or ► to set the aspect ratio.Figure 2-7 AspectImage FreezeImage freeze refers to freezing the current image on the monitor.Enter Image Freeze page: MENU→ Other Settings→ Image Freeze , and then press ◄ or ►to setImage Freeze as Yes or No to enable or disable the image freeze.After switching the input source, the image freeze is automatically disabled by default. LightingYou can set the lighting parameters to adopt different surrounding lighting conditions.Enter Lighting page: MENU→ Other Settings→ Lighting , and then press ◄ or ► to switch lighting modes.Normal ModeSuitable for normal light conditions.Daylight ModeSuitable for daylight conditions.Night ModeSuitable for night light conditions.2.4 Configure Audio SettingsYou can switch the mute on/off, and adjust the volume/balance.Enter Audio Mode page: Menu→ Audio Mode , and then press ◄ or ► to set the mute, volume, and balance.Figure 2-8 Audio Settings2.5 Enable/Disable keypad lockYou can disable keypad lock to avoid the misoperation of control panel buttons.Enter Lock Keypad page: MENU→ Lock Keypad , and then press ◄ or ► to turn on/off Lock Keypad.Figure 2-9 Lock KeypadNoteWhen the lock keypad keypad lock is enabled, the control panel buttons are invalid.2.6 System MaintenanceThe device supports functions such as viewing system information, upgrading software, high temperature protection, no signal screensaver.2.6.1 Upgrade the DevicePlease use the latest update package to get all the possible updates.Before You StartInsert the USB flash drive with the update package to the device.Steps1.Enter Upgrade(USB) page: MENU→ Maintenance→ Upgrade(USB) .2.Press ►to to start upgrading.3.Press ◄ to continue the upgrading process or ► to cancel the operation and back to the menu.2.6.2 Restore the DefaultsAll parameters of the device can be restored to default settings.Steps1.Enter Restore Defaults page: MENU→ Restore Defaults .Figure 2-10 Restore Defaults2.Press ►to start restoration.A dialog box pops up.3.Press ◄ to continue restoring the defaults or ► to cancel the operation and back to the menu.2.6.3 Configure Temperature MonitoringYou can enable Overheat Alarm and once the board temperature is too high, an alarm prompt appears on the screen.Steps1.Enter Alarm Settings page: MENU→ Alarm Settings .2.Press ◄or ► to enable/disable Overheat Alarm.Figure 2-11 Alarm Settings3.Select Alarm Temp (°C) and press ◄ or ► to adjust the alarm temperature.4.Press MENU again to complete the settings and back to the main menu interface.2.6.4 View System InformationView the system information for maintenance.Enter System Info page: MENU→ System Info , and check current software version, working hours,current temperature, device ID.Figure 2-12 System Information2.6.5 Enable/Disable Auto SleepWhen the monitor does not have signal input in a preset interval, it goes to sleep automatically. Steps1.Enter Auto Sleep page: MENU→ Backlight Settings→ Auto Sleep .2.Press ◄ or ► to set Auto Sleep value or turn off Auto Sleep.3.Press MENU again to complete the settings and back to the main menu interface.2.6.6 Enable/Disable Power Saving ModeThe Power Saving Mode can reduce screen brightness and power consumption.Steps1.Enter Power Saving Mode page: MENU→ Other Settings→ Power Saving Mode .2.Press◄ or ►to enable/disable Power Saving Mode.3.Press MENU again to complete the settings and back to the main menu interface.2.6.7 Configure Screen SaverThe screen saver allows you to set the screen mode when the monitor has no signal input. Steps1.Enter No Signal Screensaver page: MENU→ Other Settings→ No Signal Screensaver .2.Press ◄ or ► to set Blue or Black or LOGO when there is no signal input.3.Press MENU again to complete the settings and back to the main menu interface.2.6.8 Check Energy DiagramYou can confirm the working condition of power saving mode and check current power, the power ratio, the sum power of the monitor.Steps1.Enter Energy Diagram page: MENU→ Other Settings→ Energy Diagram .2.Press ► to enable Energy Diagram.3.Press MENU again to complete the settings and back to the main menu interface.Figure 2-13 Energy DiagramThe Energy Diagram appears on the top left of the screen.Current PowerThe current power of the device.Power RatioThe ratio of the current power to the maximum power.Sum PowerThe total power accumulated from the factory to the present.4.Optional:Turn off Energy Diagram.1)Repeat step 1, and press ► to disable Energy Diagram.2)Press MENU again to complete the settings and back to the main menu interface.Chapter 3 Client OperationYou can turn on/off the monitor, switch the input signal through the ScreenControl client.3.1 Log in to ClientIf you use the client software for the first time, set Control Mode and Screen Type. Before You StartObtain the ScreenControl software from the CD-ROM and install it.Steps1.Double-click the client software shortcut to open the client.2.Select Control Mode to serial port.3.Select Screen Type to LCD-D50.4.Select User Name to guest.5.Click Login to log in to the client software.3.2 Configure Serial PortThe client controls the screen by connecting the serial port.Steps1.Click System Configuration→ Serial Port Configuration .2.Select Serial Port.3.Set Buad Rate to 9600.4.Click Open to connect the serial port.5.Optional:Click Close to disconnect the serial port.3.3 Startup/ShutdownYou can turn on/off the monitors via the client.Before You StartConfigure the serial port, and see Configure Serial Port for details.Steps1.Open the Screen Control page.2.Hold the mouse to draw a rectangle to select one or multiple virtual screens.3.Turn on/off the monitors.-Right click to select Startup/Shutdown.-Click to turn off the monitors. Or click to turn on the monitors.3.4 Switch Input SourceYou can switch the input source via the client.Before You StartConfigure the serial port, and see Configure Serial Port for details.Steps1.Open the Screen Control page.2.Hold the mouse to draw a rectangle to select one or multiple virtual screens.3.Right click and select Switch Signal.4.Select the source according to your needs.。
- 1、下载文档前请自行甄别文档内容的完整性,平台不提供额外的编辑、内容补充、找答案等附加服务。
- 2、"仅部分预览"的文档,不可在线预览部分如存在完整性等问题,可反馈申请退款(可完整预览的文档不适用该条件!)。
- 3、如文档侵犯您的权益,请联系客服反馈,我们会尽快为您处理(人工客服工作时间:9:00-18:30)。
使用说明书
彩色监视器
ST-CM1450
SANTACHI
操作本装置之前,请熟读这些说明
主要操作控制器及其功能
■正面视图
⑴电源开关(POWER)
按下一次此开关,开关处于低位,即接通了监视器的电
源,同时电源指示灯点亮;再次按下此开关,开关恢复高
位,即断开了监视器的电源。
⑵电源(POWER)指示灯
⑶输入信号选择键A Vl/A V2
此键用于视频以及音频输入信号通道选择。
按此键,如右图1屏幕上出现A Vl,即可以监视来自,IN—PUTl视频信号和音频信号;再按一下此键,屏幕上出现
A V2,即可以监视来自INPUT2的视频信号和音频信号。
⑷画面状态菜单键MENU
按此键可分别邀出彩度、亮度,对比度调节画面。
按此键
屏幕出现如右图2(PICTURE)的画面调整菜单,(BRIGHT) 亮度、(CONTRAST)对比度、(COLOUR)彩度、(SHARP)锐度以及状态模拟量大小刻度显示。
⑸画面状态选择键▼或▲
按此键▼或▲→至上而下或至下而上移动选择画面状
态,→指向状态其中一项,这一项字符由绿变红,也就锁
定这一项,右边数字表示这一状态模拟量大小。
右图2状
态选择彩度。
⑹音量调节及画面状态模拟量控制键▼VOLUME▲
VOLUME键有两种功能:
●连续操作上面④⑤两项,如右图2状态选择彩度
(COLOUR),按VOLUME▼,下边模拟量数字与COLOUR 右边数字会由大到小变化,减弱图像的色浓度。
按
VOLUME▲,下边模拟量数字与COLOUR右边数字会
由小到大变化,增强图像的色浓度。
操作⑤如依此选择亮
度、对比度,再按▼VOLUME▲键,可以减低和增加
图像的亮度与减低和增加图像的对比度。
●音量控制开关,仅按VOLUME键,屏幕上会显示如图
3画面,按▼或▲可使音量减小或增大,数字越大声
音越大。
曰正面视图
⑺电源输入插座(ACIN)
该插座应同产品提供附件电源线相连接,输入220V AC、50Hz电压。
⑻视频1高阻低阻选择开关(VIDEO1-HI,LO)
把开关拨向左边(LO),即选择了A路视频低阻输入,此时VIDE01输入输出阻抗为75Ω,与其环通监视器及其类似产品须设置为高阻。
把开关拨向右边(HI),即选择了1路视频高阻输入,环通监视器及其类似产品须有一设置为低阻。
⑼1路的视频输入插座(VIDE01IN)
此BNC型插座接收来自摄录像机之类外部视频源输出给监视器的视频信号。
在此插座与外部设备的VID EO OUT插座之间连接一条同轴电缆。
⑽1路的视频输出插座(VIDE01 OUT)
在VIDE01IN插座所接收的视频输入信号环通于此插座,在此插座与外部设备的VIDEO IN插座之间连接一条同轴电缆。
⑾2路的视频输入插座(VIDEO 2IN)
⑿2路的视频输出插座(VIDEO2 OUT)
⒀AUDIOIN1、2路的音频输入插座
此RCA型插口接收来自例如录像机之类外部音源输出给监视器内置扬声器的音频信号(0.5Vrms),在此插口与外部设备的AUDIO OUT座之间连接一条带有R CA插头的音频电缆。
⒁AUDIO OUTl、2路的音频输出插座
在AUDIO IN插座所接收的音频信号环通于此插口,在此插口与外部设备的AUDIO IN插头之间连接一条带有RCA插头的音频电缆。
安全说明
在正三角形中闪烁的箭头
符号,用以提醒用户在本
产品附近出现较大的非绝
缘“危险电压”足以对人
体产生触电
在正三角形中的注意号,用以提醒用
户参考有关该机的重要操作与维修的文
字说明
规格
所列重量与尺寸均为概述.规格如有变更时,恕不另行通知。