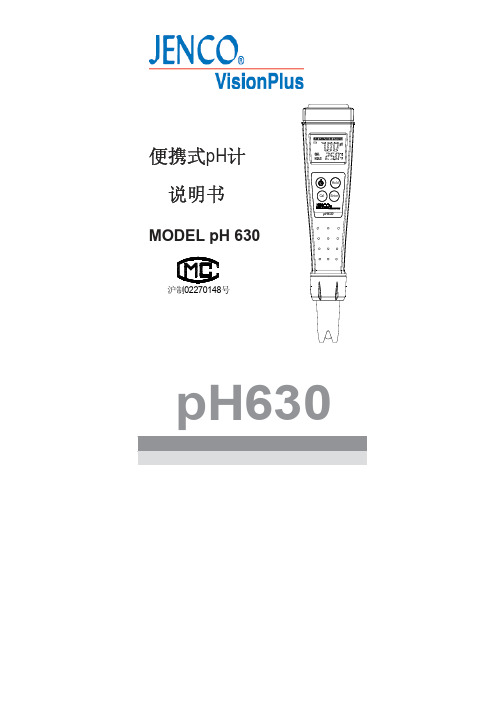
pH计说明书
简介:PH计使用说明书

PH计使用说明书警告:第一次使用的电极或长期停用的PH电极,在使用前必须在3mol/L氯化钾溶液中浸泡24h。
一、开机前准备:1、将PH复合电极下端的保护套拔下,并拉下电极上端的橡皮套使其露出上端小孔。
2、用蒸馏水清洗电极。
二、操作步骤:1、开启电源开关,按“模式”键一次,使仪器进入pH测量状态。
2、把用蒸馏水或去离子水清洗过的电极插入pH=6.86pH(或pH=4.00;或pH=9.18)的标准缓冲溶液中,按“模式”键一次。
(液晶显示器下方显示“定位”,表明仪器在定位标定状态,仪器显示该温度下标准缓冲溶液所产生的mV值)3、待读数稳定后按“确认”键,仪器显示该温度下标准缓冲溶液的标称值。
4、再按“确认”键。
仪器完成自动定位标定并直接进入斜率标定状态。
5、更换溶液。
把用蒸馏水或去离子水清洗过的电极插入pH=4.00(或pH=9.18;或pH=6.86pH,但不能和定位采用相同pH的标准缓冲溶液)的标准缓冲溶液中,此时液晶显示器下方显示“斜率”,表明仪器在斜率标定状态,仪器显示该温度下标准缓冲溶液所产生的mV值。
6、待读数稳定后按“确认”键,仪器显示该温度下标准缓冲溶液的标称值。
7、再按“确认”键,仪器完成自动斜率标定并回到pH测量状态;8、用蒸馏水及被测溶液清洗电极后即可对被测溶液进行测量。
注意:1、如果在标定过程中操作失误或按键按错而使仪器测量不正常,可关闭电源,然后按住“确认”键后再开启电源,使仪器恢复初始状态。
然后重新标定。
2、经标定后,就不要再按“模式”键,进入“定位”、“斜率”标定,如果误触动此键,此时仪器℃闪烁或定位显示或斜率显示,此时请不要按“确认”键,而是连续按“模式”键,使仪器重新进入pH测量即可,而无须再进行标定。
3、标定的缓冲溶液一般第一次用pH=6.86的溶液,第二次用接近被测溶液pH值的缓冲液,如被测溶液为酸性时,缓冲溶液应选pH=4.00;如被测溶液为碱性时则选pH=9.18的缓冲溶液。
便携式pH计 MODEL pH 630 说明书

说明书MODEL pH 630pH630目录产品检视 (2)使用前准备 (2)A. 安装电池 (2)B. 电极浸泡 (2)C. 设定和校正电极头和整机 (2)pH630外观 (3)A. 机器外观说明 (3)B. 液晶显示说明 (3)操作模式和按键操作 (4)A. 操作模式 (4)B. 按键操作 (4)pH630使用说明 (5)A. 开机/关机 (5)B. 选择标准溶液 (5)C. 校正 (5)D. 测量 (6)E. 锁定资料 (6)更换电极 (7)错误显示与排除方法 (7)规格 (8)质量保证 (9)12小心地打开包装,检视仪器及配件是否有因运输而损坏,如有发现,请立即通知JENCO 的代理商。
A. 安装电池当 “ ” 符号显示在LCD 的左上角时,请更换电池。
此符号显示后,整机大约还可以正常工作2-3个小时。
1. 请看右侧更换电池的分解图。
2.先按“1”的箭头,用左手拇指压住电池盖,再用右手食指按“2”的箭头,掰起电池盖。
3.取出旧电池,换上四颗新电池,注意正负极不可装错,再将电池盖盖回,以确保正常的防水功能。
B. 电极的浸泡1. 取下pH 630的电极保护帽。
2. 在第一次使用之前,请把电极头浸泡在3M 氯化钾的浸泡液中活化,浸泡时间2小时以上。
C. 设定和校正电极头和整机pH 630 在第一次使用前必须设定和校正。
P5A. 机器外观说明1.标准溶液和校正点显示2.低电显示3.校正模式显示4.锁定模式显示5.pH读值6.温度读值( ℃ )*7.温度读值( ℉ )** ℃或者℉的显示方式由工厂设定。
3A. 操作模式pH630有4种模式:1.测量模式:用于测量pH值和温度值的。
2.校正模式:用于校正1,2或3点。
3.锁定模式:用于锁定测量的数值。
4.标准溶液选择模式:用于选择标准溶液组。
(7.00/4.01/10.01) 或 6.86(6.86/4.00/9.18).B. 按键操作按键运作模式持续时间功能测量模式0 秒锁定测量数值,再按一次退回测量模式。
大连力得ph计说明书

大连力得ph计说明书一、产品概述二、产品特点1. 高精度测量:大连力得ph计采用了先进的电极技术,能够实现高精度的ph值测量,误差小于0.012.快速响应:该仪器响应速度快,能够在短时间内完成测量,提高工作效率。
3. 易于使用:大连力得ph计操作简单,一键式测量,即使是没有经验的用户也可以轻松上手。
4. 多功能显示:该仪器配备了大屏幕液晶显示屏,能够同时显示ph 值、温度、电池电量等信息。
5. 数据存储功能:大连力得ph计内置存储芯片,可以存储多组数据,方便用户查阅和分析。
6.电池供电:该仪器采用电池供电,无需外接电源,方便携带和使用。
三、使用方法1. 打开仪器:按下电源开关,大连力得ph计即可开机,液晶屏将显示当前ph值和温度。
2. 标定ph电极:使用标定液溶液,将ph电极插入溶液中,按下标定键,等待一段时间后,液晶屏将显示标定成功。
3. 测量溶液ph值:将ph电极插入待测溶液中,待读数稳定后,液晶屏将显示溶液的ph值。
4.存储数据:按下存储键,当前测量结果将被保存到存储芯片中,用户可通过浏览键查看已保存的数据。
四、注意事项1. 大连力得ph计仅适用于测量溶液的酸碱度,不得用于其他用途。
2.在使用前,请确保电极和仪器的接触部分清洁干净,以免影响测量精度。
3.使用标定液时,请根据实际需要选择合适的指标进行标定,以获得准确的测量结果。
4. 使用完毕后,请将ph电极清洗干净,并将仪器关机,以节省电池电量。
5.如需更换电池,请按照说明书上的步骤进行操作,注意正负极的正确安装。
6. 大连力得ph计应远离高温和潮湿环境,以免损坏仪器。
五、维护保养1. 每次使用完毕后,应将ph电极清洗干净,避免溶液残留导致测量误差。
2. 若发现ph电极表面有脏污,可以使用去离子水或特殊清洁液进行清洁。
3.仪器长时间不用时,应存放在干燥通风的地方,避免潮湿环境导致仪器故障。
六、故障排除七、售后服务。
PH计使用说明书

PH计使用说明书一、产品概述PH计是一种用于测量水溶液酸碱度的仪器,广泛应用于实验室、生产工艺控制和环境监测等领域。
本使用说明书旨在帮助用户正确操作和维护PH计,以确保准确的测量结果和延长仪器的寿命。
二、产品组成1. PH计主机:包括显示屏、按键和测量电路等部分;2. 探头:用于测量水溶液中的PH值;3. 电极夹:用于固定探头,并与主机连接;4. 标准缓冲溶液:用于校准PH计的酸碱度。
三、操作步骤1. 准备工作a. 确保PH计已连接电源,并处于正常工作状态;b. 检查探头是否清洁,如有需要,请使用去离子水轻轻擦拭;c. 将标准缓冲溶液置于温度适宜的容器中,并摇匀。
2. 校准PH计a. 将探头浸入标准缓冲溶液中,确保电极部分完全浸入,并等待数分钟稳定;b. 按下菜单键,在菜单中选择“校准”选项;c. 按照屏幕提示,先选择第一个缓冲液的PH值,再选择第二个缓冲液的PH值;d. 校准完成后,按下确认键保存。
3. 测量样品a. 将探头浸入待测样品中,确保电极部分完全浸入,并等待数分钟稳定;b. 在主机上读取并记录显示屏上的PH值。
4. 清洁和维护a. 测量结束后,及时清洁探头,避免样品残留导致测量误差;b. 定期检查探头的使用情况,如发现损坏或老化,请及时更换;c. 注意保护电极部分,避免刮擦或碰撞;d. 长时间不使用时,请将探头置于盖子中,并存放在干燥、避光的地方。
四、注意事项1. 在使用PH计时,应注意保护仪器免受强烈的振动或电磁干扰;2. 避免探头与金属物质直接接触,以免影响测量结果的准确性;3. 操作过程中,切勿用力过猛,以免损坏仪器;4. 校准时应使用准确的标准缓冲溶液,并在不同测量范围内进行多点校准;5. 如遇到故障或操作不当引起的异常情况,请及时联系售后服务人员。
结束语:本使用说明书简要介绍了PH计的使用方法和维护注意事项,希望能够帮助用户正确使用该仪器,并取得准确的测量结果。
如有任何疑问或问题,请随时联系我们的售后服务部门,我们将竭诚为您提供支持和帮助。
PH计操作说明书

1 开机、关机1.1 按电源键打开PH计,测试完毕按电源键关机.2 仪器的校正2.1 PH计的校正(两点校正法)2.1.1 开机后按“M”键使仪器转换到PH档位.2.1.2 按“CAL”键,此时屏幕上显示“Ct1”2.1.3 把PH探头插入PH=7.00的标准溶液中,按“RUN”键进入自动校正程序.2.1.4 当屏幕上显示“Ct2”时,说明第一点校正完毕.(如果按M键退出,即为单点校正)2.1.5把电极冲洗干净,擦干后放入PH=4.01(如果需测溶液显酸性)或PH=10.01(如果需测溶液显碱性)的标准液中.2.1.6 按“RUN”键,待稳定后显示“-59.4mu/PH”(-59.4mu/PH是一个举例值.一般在这个数值左右.可能高.可能低)2.1.7按“RUN”键,此时显示“PH2mv”,2.1.8 按“M”键校正完毕.2.1.9如果校正失败,则需要重复以上步骤..2.2 电导率仪的校正2.2.1按“M”键转换到电导档位,当屏幕显示“0us/cm”时.2.2.2 按“CAL”键,此时屏幕显示“CELL”.2.2.3 按“RUN”键屏幕显示“CAL”.2.2.4把电导探头放入0.01mol/lKCL标准溶液中,2.2.5 按“RUN”键等到稳定后(即AR停止闪动),屏幕上显示标准液的电导率值,如果显示值与标准值不符,则需重复以上步骤.2.2.6 校正完毕,按M键开始测量.3 测量方法3.1 PH值的测量3.1.1把校正好的PH电极用DI水清洗擦干后放入被测样品中.3.1.2 按“AR”键和“RUN”键,直至“AR”停止闪动时读数.3.1.3 记录该样品的PH值.3.1.4测量完毕后必须用DI水清洗并擦干探头放入饱和的氯化钾溶液中.3.2 电导率的测量3.2.1把校正好的用来测电导的探头用DI水清洗擦干后放入被测样品中.3.2.2 记录屏幕上所显示的数值为该溶液的电导率.3.2.3测量完毕后必须用DI水清洗探头.4 注意事项4.1 测PH值的电极不使用时浸入饱和的氯化钾溶液中.4.2 测电导率的电极不使用时保存在空气中.4.3 使用探头时,要轻拿轻放,不可当搅拌器使用.。
PH计说明书

仪器操作流程连接电源线,并打开仪器开关,仪器首先显示“PHS—3C”字样。
稍等,会显示上次标定后的斜率以及EO值,然后进入测量状态,显示当前的电位值或者PH值,其中显示屏上方为当前的电位值或者PH值,下方为设定的温度值。
在测量状态下,按“mV/pH”键可以切换显示电位以及pH值:按“温度”键设置当前的温度值;按“定位”或“斜率”键标定电极斜率。
标定步骤:1、清洗电极,将电极插入标准缓冲溶液中;2、用温度计测出被测溶液的温度,按“温度”键,是温度显示为被测溶液的温度;3、待读数稳定后按“定位”键,仪器提示“Std YES”字样,按“确认”键进入标定状态,仪器自动识别并显示当前温度下的标准pH值;4、按“确认”键完成一点标定(斜率为100.0%)。
5、如果需要二点标定,则继续下面操作:6、再次清洗电极,将电极插入标准缓冲溶液中;7、用温度计测出被测溶液的温度,按“温度”键,使温度显示为被测溶液的温度;8、待读数稳定后按“斜率”键,仪器提示“Std YES”字样,按“确认”键进入标定状态,仪器自动识别并显示当前温度下的标准pH值;9、按“确认”键完成二点标定。
电极使用、维护的注意事项⑴电极在测量前必须用已知pH值的标准缓冲溶液进行定位校准,其pH值愈接近被测pH 值愈好。
⑵取下电极护套后,应避免电极的敏感玻璃泡与硬物接触,因为任何破损或擦毛都是、使电极失效。
⑶测量结束,计时将电极保护套套上,电极套内应放少量外参比补充液,以保持电极球泡的湿润,切忌浸泡在蒸馏水中。
⑷复合电极的外参比补充液为3mol/L氯化钾溶液,补充液可以从电极上端小孔加入,复合电极不使用时,拉上橡皮套,放置补充液干涸。
⑸电极的引出端必须保持清洁干燥,绝对防止输出两端短路,否则将导致测量失准或失效。
⑹电极应与输入阻抗较高的pH计(≥1012Ω)配套,以使其保持良好的特性。
⑺电极应避免长期浸在蒸馏水、蛋白质溶液和酸性氟化物溶液中。
⑻电极避免与有机硅油接触。
上海仪电科学仪器股份有限公司PHS-3C型pH计说明书
友情提示●请在使用本仪器前,详细阅读本说明书。
●仪器超过一年必须送计量部门或有资格的单位复检,合格后方可使用。
●玻璃电极的保质期为一年,出厂一年以后,不管是否使用,其性能都会受到影响,应及时更换。
●第一次使用的pH电极或长期停用的pH电极,在使用前必须在3mol/L氯化钾溶液中浸泡24h。
“雷磁”pH电极在出厂时,pH电极保护瓶中有保护液,正常情况下pH电极可直接使用。
●如果本说明书中有关pH电极的使用说明与pH电极说明书上的表述有所不同,请以pH电极说明书上的说明为准。
`0目录1PHS-3C 型pH 计的安装.......................................................1.1开箱...................................................................................1.2PHS-3C 型pH 计安装...................................................1.2.1多功能电极支架安装...............................................1.2.2E-201F 型pH 复合电极的安装...........................2PHS-3C 型pH 计操作指南.......................................................2.1简介...............................................................................2.1.1术语解释..............................................................2.1.2PHS-3C 型pH 计的特点........................................2.1.3PHS-3C 型pH 计的主要技术性能........................2.1.4PHS-3C 型pH 计图示...............................................2.1.5使用pH 计的方法...................................................2.2操作基本知识..............................................................2.2.1开机......................................................................2.2.2功能设置..............................................................2.2.3pH 电极的标定.........................................................2.2.4pH 值的测量........................................................2.2.5电极电位(mV 值)的测量.....................................2.2.6关闭PHS-3C 型pH 计. (3)PHS-3C 型pH 计仪器维护 (22244555668101111131419192021)13.1仪器的维护....................................................................3.2电极的使用、维护.......................................................3.2.1污染物质和清洗剂参考表...................................3.3常见故障排除 (4)PHS-3C 型pH 计的附件信息..............................................5附录............................................................................................附录1:缓冲溶液的pH 值与温度关系对照表................附录2:仪器显示信息对照表..................................................附录3:术语解释..................................................................附录4:缓冲溶液的配制方法...........................................附录5:仪器简要操作流程...............................................附录6:本系列产品订购信息.. (212123232425252628282930)21PHS-3C 型pH 计的安装1.1开箱在pH 计装运包装箱中可找到以下部件:1.多功能电极支架1只2.PHS-3C 型pH 计l 台3.E-201F 型pH 复合电极1支1.2PHS-3C 型pH 计安装打开PHS-3C 型pH 计(套装)包装,取出pH 计、多功能电极支架以及相关附件。
pH计操作说明书
pH计操作说明书一、简介pH计是一种用于测量溶液酸碱性的仪器,通过测量溶液中氢离子的浓度指标pH值来反映其酸碱程度。
本操作说明书将介绍pH计的基本结构、操作步骤以及注意事项,以便用户正确并安全地进行pH值的测量。
二、基本结构1. pH计主机:包括显示屏、功能按键和电源开关等,用于设置仪器参数并显示测量结果。
2. pH电极:通过与溶液接触,感应出氢离子的浓度,一般由称为玻璃电极和参比电极两部分组成。
3. 温度补偿电极:用于校正溶液温度对pH值的影响,并提供更加准确的测量结果。
4. 连接线:将pH电极和温度补偿电极与主机连接,传输信号和数据。
三、操作步骤1. 准备工作a. 将pH计主机插入电源,并打开电源开关。
b. 等待主机初始化完成,确保显示屏没有异常提示。
c. 将pH电极和温度补偿电极插入待测溶液中,确保电极质量良好及清洁。
2. 进行校准a. 将pH电极浸入标准缓冲液(例如标准酸性溶液pH 4.0),等待数分钟稳定。
b. 在主机上选择校准功能,并设置对应的缓冲液pH值。
c. 按照屏幕提示,将pH电极浸入缓冲液中,并等待数秒,直到主机显示出稳定的pH值。
d. 确认校准结果无误后,重复以上步骤进行第二次校准,使用标准碱性溶液(例如pH 7.0)。
3. 进行测量a. 将pH电极和温度补偿电极插入待测溶液中,并等待数秒,直到主机显示出稳定的pH值。
b. 记录并记录主机上显示的pH值,确保测量结果准确。
c. 如需测量其他溶液,请在每次测量前用纯净水彻底清洗电极并进行重新校准。
四、注意事项1. 避免强烈震动或振动pH计,以免损坏电极和影响测量准确性。
2. 需要测量的溶液应覆盖住pH电极的玻璃球部分,以确保测量的准确性。
3. 如果pH电极长时间未使用,请将其浸入存储液中,避免干燥和损坏。
4. 在校准和测量过程中,确保电极的接触头保持清洁和干燥,以免影响测量结果。
5. 当电极老化或损坏时,及时更换新的电极,以确保测量的准确性和可靠性。
PH 计操作使用说明书
PH 计操作使用说明书感谢您选购本公司笔式PH 计.在使用前请详细阅读使用说明书,并妥善保存它。
功能简介1、按键自动关机PH 计在20 分钟内无任何按键操作时,PH 计将自动关机。
2、数据保持功能在正常的测量模式下,有一个小数点在不停的闪烁。
当按下“HOLD”键时,显示屏保持当前数值且小数点停止闪烁;再次按下“HOLD”键时PH 计恢复到正常测量模式,小数点开始闪烁。
3、自动温度补偿(ATC)和℃/℉转换在显示屏上“CAL”的左下方有一个“ATC”符号显示,表示PH 计处于自动温度补偿状态。
℃/℉转换:PH 计默认温度单位为“℃”。
如果需要把温度单位转换为“℉”时,可在PH 计关机后,同时按住“CAL”和“ON/OFF”键,直到显示屏上只显示“℃或者℉”时,再按“HOLD”进行选择,选择完成后按下“CAL”键,显示屏上会显示“SA”符号1 秒后自动返回正常测量模式,说明设置成功。
4、仪器标定:此PH 计为3 点标定,三个标定点为:4.0,7.0 和10.0打开PH 计电源,将PH 电极放入到PH7.0 的缓冲液中,轻轻搅拌缓冲液,待PH 计显示数据稳定后,按“CAL”键进入标定模式。
当显示屏上显示“CAL”1S 后,“CAL”符号和缓冲液所测的数值会同时显示在显示屏上。
如果缓冲液的测的数值在6.5-7.5 之间,PH 计默认此缓冲液的PH值为7.0,此时显示屏会显示7.0,如果你确认缓冲液是7.0,请等待5-10秒钟,显示屏会显示“SA”符号。
表示PH计正在保存标定结果,之后显示“END”,7.0 标定结束。
如果你使用的缓冲液不是7.0,按“HOLD”键选择正确数值。
例如你使用的是PH=6.86 的缓冲液,请用下列方法进行标定。
将PH电极放入到6.86的缓冲液中,轻轻搅拌缓冲液,待PH计显示数据稳定后,按“CAL”键进入标定模式。
当显示屏上显示“CAL”1 秒后,“CAL”符号和缓冲液所测的数值会同时显示在显示屏上。
pH计的简易使用说明书
pH计的简易使用说明书本简易使用说明书旨在为用户提供关于pH计的基本操作细节和使用方法。
请在使用pH计之前仔细阅读此说明书,并按照指示正确操作。
以下是详细的操作步骤:1. 前言pH计是一种用于测量溶液酸碱度的仪器。
常用于实验室、工业生产、环境监测等多个领域。
它通过测量溶液中的氢离子浓度来确定溶液的酸碱性,pH值的范围从0至14。
2. 检查和准备工作在开始使用pH计之前,请确保已经完成以下检查和准备工作:- 确保pH计电极干净,如有污垢可使用适当的清洁剂进行清洗,并用纯水冲洗干净。
- 检查电极是否完好无损,如发现损坏,请更换电极。
- 检查电极是否有足够的电解质溶液,如果不够,请及时添加。
- 准备所需溶液和标准缓冲液,确保其浓度和温度符合实验要求。
3. 测量操作步骤按照以下步骤进行pH值的测量:步骤1:打开pH计电源,确保电源充足并连接稳定。
步骤2:将pH计电极放入待测溶液中,确保电极的质量和锐度不接触固体物体。
步骤3:稳定电极在溶液中的位置,等待pH值稳定。
步骤4:读取并记录pH值。
步骤5:操作完成后,将电极彻底清洗并放入存储液中,以延长电极寿命。
4. 存储和维护- 使用完成后,将电极彻底清洗,并使用干净纸巾或柔软布擦干。
- 将电极存放在存储液中,以保持电极的良好状态。
- 定期校准pH计,以确保准确性和可靠性。
- 避免电极受到冲击或摔落,以免损坏。
5. 注意事项- 使用pH计前,请确保对其正确操作方法有一定的了解,必要时请查阅更详细的说明书。
- 避免将电极长时间暴露在干燥的空气中,以免影响测量准确性。
- 避免使用含有刺激性、腐蚀性或有害物质的溶液。
- 避免将电极暴露在极高或极低温度环境中,以免损坏电极。
结语本简易使用说明书介绍了pH计的基本操作步骤和使用方法。
希望能对用户正确定使用pH计提供一定的帮助。
使用pH计时,请遵守操作规程,并注意安全事项,以确保测试结果的准确性和操作人员的安全。
如有疑问,请随时咨询相关专业人员。
- 1、下载文档前请自行甄别文档内容的完整性,平台不提供额外的编辑、内容补充、找答案等附加服务。
- 2、"仅部分预览"的文档,不可在线预览部分如存在完整性等问题,可反馈申请退款(可完整预览的文档不适用该条件!)。
- 3、如文档侵犯您的权益,请联系客服反馈,我们会尽快为您处理(人工客服工作时间:9:00-18:30)。
Power Stirrer USB RS232BNCATC/CONDO/RDOGroundRef.Push down on tab and lift the battery coverOrion Star A211 BenchtopShown when an alarm is set and the alarm value is reached.Indicates the meter is set to be interfaced with a printer or computer viaIndicates the meter is set to be interfaced with a printer or computer via the USB port.Displays the current temperature based on the temperature probe reading orentered temperature value. Shows the origin of the temperature as MAN23Keypad1. Press to power the meter on. When the meter is on, press and quickly release to turn thebacklight on or off or press and hold for about three seconds to power the meter off.3. The f1, f2, and f3 function keys perform a variety of meter operations. The menu-specific operation isf1 in the measurement mode to start a calibration.menu, change the measurement mode, manually log or print a measurement and hold (freeze) a displayed 5Press the f1, f2 and f3 function keys to perform the action shown above each key on the display.Press to turn the meter on.When the meter is on, press and quickly release to turn the display backlight on or off or hold down to turn the meter off.In the measurement mode, press to take a measurement.In the setup, calibration and other menus, press to escape the current menu andreturn to the measurement mode.In the measurement mode, press to enter the setup menu.In the setup, calibration and other menus, press to scroll up through a list of options.In the continuous measurement mode, press to freeze the displayed measurement and press again to unfreeze the measurement.In the setup, calibration and other menus, press to scroll left through a list of options. In the measurement mode, press to change the displayed measurement mode. Options are pH, mV, RmV (relative mV) and ORP.In the setup, calibration and other menus, press to scroll right through a list of options.Press to view the data log and calibration log.Press to start or stop the stirrer probe.Keypad Display InformationpH CalibrationOne to five pH buffers can be used for calibration. Always use fresh pH buffers and select buffers that bracket the sample pH and are one to four pH units apart. Prepare the pH electrode according to the instructions in the electrode use guide. Connect the pH electrode and any other electrodes to be used (ATC probe, stirrer probe, reference electrode) to the meter. Power on the meter and set the measurement mode to pH.1. In the measurement mode, press f1 (cal).2. Rinse the pH electrode and any other electrodes in use with distilled water, blot dry with a lint-free tissueand place into the pH buffer.3. When the electrode and buffer are ready, press f3 (start).4. Wait for the pH value on the meter to stabilize and stop flashing and perform one of the following actions:a. Press f2 (accept) to accept the displayed pH value.b. Press f3 (edit)temperature is shown above the numeric entry screen.ii. Press f2 (done) to exit the numeric entry screen.iii. Press f2 (accept) to accept the entered pH value.5. Press f2 (next)to proceed to the next buffer and repeat steps 2 through 4 or press f3 (cal done) to saveand end the calibration. If five buffers are used, the calibration will save and end once the fifth buffer value is accepted.a. If a one point calibration is performed, press f2 (accept) to accept the displayed slope value or pressf3 (edit) to access the numeric entry screen, enter the slope value and press f2 (accept).6. The meter will display the calibration summary including the average slope. Press f1 (meas) to exportthe data to the calibration log or press f2 (print)to export the data to the calibration log and a printer orcomputer. The meter will automatically proceed to the measurement mode.45Measurementsetup menu.1. Rinse the pH electrode and any other electrodes in use with distilled water, blot dry with a lint-free tissue and place into the sample.2.3. Start the measurement and wait for it to stabilize.a. If the meter is in AUTO-READ theicon stops flashing, record the pH and temperature of the sample. Press a new measurement.b. If the meter is in continuous mode, the meter will immediately start taking a measurement and update the display whenever the measurement changes. Wait for the display to show ready and record the pH and temperature of the sample.c. If the meter is in timed mode, the meter will log measurements at the preselected time interval, regardless of the measurement stability. The meter will update the display whenever themeasurement changes, so the pH and temperature of the sample can be recorded when the display shows ready .4. 5. Remove the electrode from the sample, rinse with distilled water, blot dry and place into the next sample.6. Repeat steps 2 through 5 for all samples.7. When all samples have been measured, store the electrode according to its user guide.Setup MenuNavigating the Setup Menu1.f3 (select) tof3 (select) to select a setup4.a.f3 (select) to set the value.b. To enter a numeric value, use the numeric entry screen.i. Select the value to be entered by pressing f3 (select) or f3 (edit). The numeric entry screen willpopup on the display.of the numeric entry screen.iii. Press5. Press f1 (back)Setup Menu Overview67pH Buffer Group SelectionThe selected buffer group allows for the automatic recognition of certain pH buffers during a pH calibration. The USA buffer group includes pH 1.68, 4.01, 7.00, 10.01 and 12.46 buffers and the DIN buffer group includes pH 1.68, 4.01, 6.86, and 9.18 buffers.1.pH Channel and press f3 (select).Mode and Settings and press f3 (select).Buffer Group and press f3 (select).5USA or DINand press f3 (select).Read Type Selection1.pH Channel and press f3 (select).Mode and Settings and press f3 (select).Read Type and press f3 (select).5Auto , Continuous or Timed and press f3 (select).a. If Timed is selected and the time interval needs to be changed – highlight Timed highlight hours (HH), minutes (MM) or seconds (SS); press f3 (edit) screen; use the numeric entry screen to change the values and press f1 (back) when the time©2011 Thermo Fisher Scientific Inc. All rights reserved. All trademarks are the property of Thermo Fisher Scientific Inc. & its subsidiaries.Water Analysis Instruments www.thermoscientifi/water 68X576501 RevA 0811Viewing the Calibration Log1.Calibration Log and press f2 (accept).pH – Channel and press f2 (select).pH , RmV , ORP or Temperature as the calibration type and 5. The meter will display a list of calibrations for the selected channel and calibration type. The list shows the sequential number of the calibration and the date and time it was saved (07/01/2011 12:45).6.f2 (select). Pressf2 (print)f3 (info) to view the electrode slope between calibration points or press f1 (back) to return to the list of calibrations.Viewing the Data Log1. Data Log and press (accept).3. The meter will display a list of the data points. The list shows the sequential number of the data point and the date and time the data point was saved (07/01/2011 12:45).4.point and press f2 (select). Press f2 (print) data points.5。
