Redhat linux下安装gcc
Linux本地yum源配置以及使用yum源安装gcc编译环境
Linux本地yum源配置以及使⽤yum源安装gcc编译环境本⽂档是图⽂安装本地yum源的教程,以安装gcc编译环境为例。
适⽤范围:所有的cetos,红帽,fedroa版本适⽤⼈群:有⼀点linux基础的⼩⽩范例系统版本:CentOS Linux release 7.3.1611 (Core)范例环境:vmware 虚拟机安装所需准备⼯作:对应linux系统版本镜像⼀份(iso⽂件)下⾯是详细的安装流程:1 检查系统版本,下载对应的系统镜像[root@localhost ~]# cat /etc/redhat-release ##查看系统版本查看到系统版本之后,需要下载对应版本镜像下载完镜像之后,使⽤xshell或者是winscp将镜像拷贝到对应的服务器按截图点击后会弹出如下截图的会话框,按截图操作即可。
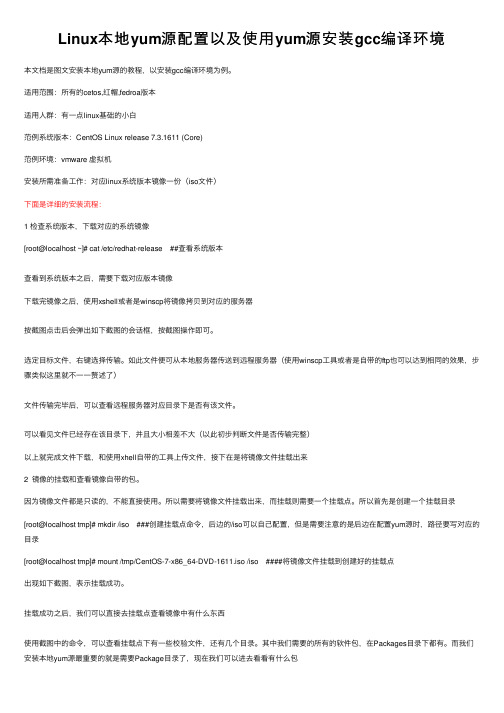
选定⽬标⽂件,右键选择传输。
如此⽂件便可从本地服务器传送到远程服务器(使⽤winscp⼯具或者是⾃带的ftp也可以达到相同的效果,步骤类似这⾥就不⼀⼀赘述了)⽂件传输完毕后,可以查看远程服务器对应⽬录下是否有该⽂件。
可以看见⽂件已经存在该⽬录下,并且⼤⼩相差不⼤(以此初步判断⽂件是否传输完整)以上就完成⽂件下载,和使⽤xhell⾃带的⼯具上传⽂件,接下在是将镜像⽂件挂载出来2 镜像的挂载和查看镜像⾃带的包。
因为镜像⽂件都是只读的,不能直接使⽤。
所以需要将镜像⽂件挂载出来,⽽挂载则需要⼀个挂载点。
所以⾸先是创建⼀个挂载⽬录[root@localhost tmp]# mkdir /iso ###创建挂载点命令,后边的/iso可以⾃⼰配置,但是需要注意的是后边在配置yum源时,路径要写对应的⽬录[root@localhost tmp]# mount /tmp/CentOS-7-x86_64-DVD-1611.iso /iso ####将镜像⽂件挂载到创建好的挂载点出现如下截图,表⽰挂载成功。
挂载成功之后,我们可以直接去挂载点查看镜像中有什么东西使⽤截图中的命令,可以查看挂载点下有⼀些校验⽂件,还有⼏个⽬录。
Linux超详细gcc升级全过程

Linux超详细gcc升级全过程⽬录前⾔1.当前gcc版本2.安装gcc3.gmp安装4.MPFR编译5.MPC编译6.GCC 配置7.GCC版本更新前⾔c c++ 等等需要这个编译器gcc,最近有DBA的朋友咨询RHEL7.6操作系统安装Mysql数据库时需要⾼版本的GCC,研究了下发现坑不少,总结本⽂分享给⼤家1.当前gcc版本[root@rhel76 ~]# gcc -vUsing built-in specs.COLLECT_GCC=gccCOLLECT_LTO_WRAPPER=/usr/libexec/gcc/x86_64-redhat-linux/4.8.5/lto-wrapperTarget: x86_64-redhat-linuxConfigured with: ../configure --prefix=/usr --mandir=/usr/share/man --infodir=/usr/share/info --with-bugurl=/bugzilla --enable-bootstrap --enable-shared --enable-threads=posix --enable-checking=release --with-system-zlib --enable-__cxa_at Thread model: posixgcc version 4.8.5 20150623 (Red Hat 4.8.5-36) (GCC)从以上可以看出当前版本为4.8.5,本次我们升级到10.1.02.安装gcc--下载地址:https:///gnu/gcc/gcc-10.1.0/[root@rhel76 ~]# tar -vxf gcc-10.1.0.tar.gz[root@rhel76 gcc-10.1.0]# mkdir build[root@rhel76 gcc-10.1.0]# cd build/[root@rhel76 build]# ../configure --prefix=/usr/local/gcc-10.1.0/ --enable-checking=release --enable-languages=c,c++ --disable-multilibchecking build system type... x86_64-pc-linux-gnuchecking host system type... x86_64-pc-linux-gnuchecking target system type... x86_64-pc-linux-gnuchecking for a BSD-compatible install... /usr/bin/install -cchecking whether ln works... yeschecking whether ln -s works... yeschecking for a sed that does not truncate output... /usr/bin/sedchecking for gawk... gawkchecking for libatomic support... yeschecking for libitm support... yeschecking for libsanitizer support... yeschecking for libvtv support... yeschecking for libhsail-rt support... yeschecking for libphobos support... yeschecking for gcc... gccchecking whether the C compiler works... yeschecking for C compiler default output file name... a.outchecking for suffix of executables...checking whether we are cross compiling... nochecking for suffix of object files... ochecking whether we are using the GNU C compiler... yeschecking whether gcc accepts -g... yeschecking for gcc option to accept ISO C89... none neededchecking for g++... g++checking whether we are using the GNU C++ compiler... yeschecking whether g++ accepts -g... yeschecking whether g++ accepts -static-libstdc++ -static-libgcc... nochecking for gnatbind... nochecking for gnatmake... nochecking whether compiler driver understands Ada... nochecking how to compare bootstrapped objects... cmp --ignore-initial=16 $$f1 $$f2checking for objdir... .libschecking for the correct version of gmp.h... noconfigure: error: Building GCC requires GMP 4.2+, MPFR 3.1.0+ and MPC 0.8.0+.Try the --with-gmp, --with-mpfr and/or --with-mpc options to specifytheir locations. Source code for these libraries can be found attheir respective hosting sites as well as athttps:///pub/gcc/infrastructure/. See also/install/prerequisites.html for additional info. Ifyou obtained GMP, MPFR and/or MPC from a vendor distribution package,make sure that you have installed both the libraries and the headerfiles. They may be located in separate packages.从⽇志总可以看出有如下报错,故下⾯每个都安装configure: error: Building GCC requires GMP 4.2+, MPFR 3.1.0+ and MPC 0.8.0+.3.gmp安装[root@jeames007 ~]# tar -vxf gmp-5.0.1.tar.bz2[root@jeames007 ~]# cd gmp-5.0.1/[root@jeames007 gmp-5.0.1]# ./configure --prefix=/usr/local/gmp-5.0.1[root@jeames007 gmp-5.0.1]# make[root@jeames007 gmp-5.0.1]# make installmake[4]: Leaving directory `/root/gmp-5.0.1'make[3]: Leaving directory `/root/gmp-5.0.1'make[2]: Leaving directory `/root/gmp-5.0.1'make[1]: Leaving directory `/root/gmp-5.0.1'4.MPFR编译[root@jeames007 ~]# tar -vxf mpfr-3.1.5.tar.xz[root@jeames007 ~]# cd mpfr-3.1.5/[root@jeames007 ~]#./configure --prefix=/usr/local/mpfr-3.1.5 --with-gmp=/usr/local/gmp-5.0.1[root@jeames007 mpfr-3.1.5]# make[root@jeames007 mpfr-3.1.5]# make install5.MPC编译[root@jeames007 ~]# tar -vxf mpc-1.0.1.tar.gz[root@jeames007 ~]# cd mpc-1.0.1[root@jeames007 ~]# ./configure --prefix=/usr/local/mpc-1.0.1 --with-gmp=/usr/local/gmp-5.0.1 --with-mpfr=/usr/local/mpfr-3.1.5[root@jeames007 mpc-1.0.1]# make[root@jeames007 mpc-1.0.1]# make install6.GCC 配置[root@rhel76 ~]# cd gcc-10.1.0[root@rhel76 gcc-10.1.0]# cd build/../configure --prefix=/usr/local/gcc-10.1.0/ --enable-checking=release --enable-languages=c,c++ --disable-multilib --with-gmp=/usr/local/gmp-5.0.1 --with-mpfr=/usr/local/mpfr-3.1.5 --with-mpc=/usr/local/mpc-1.0.1 checking build system type... x86_64-pc-linux-gnuchecking host system type... x86_64-pc-linux-gnuchecking target system type... x86_64-pc-linux-gnuchecking for a BSD-compatible install... /usr/bin/install -cchecking whether ln works... yeschecking whether ln -s works... yeschecking for a sed that does not truncate output... /usr/bin/sedchecking for gawk... gawkchecking for libatomic support... yeschecking for libitm support... yeschecking for libsanitizer support... yeschecking for libvtv support... yeschecking for libhsail-rt support... yeschecking for libphobos support... yeschecking for gcc... gccchecking whether the C compiler works... yeschecking for C compiler default output file name... a.outchecking for suffix of executables...checking whether we are cross compiling... nochecking for suffix of object files... ochecking whether we are using the GNU C compiler... yeschecking whether gcc accepts -g... yeschecking for gcc option to accept ISO C89... none neededchecking for g++... g++checking whether we are using the GNU C++ compiler... yeschecking whether g++ accepts -g... yeschecking whether g++ accepts -static-libstdc++ -static-libgcc... nochecking for gnatbind... nochecking for gnatmake... nochecking whether compiler driver understands Ada... nochecking how to compare bootstrapped objects... cmp --ignore-initial=16 $$f1 $$f2checking for objdir... .libschecking for the correct version of gmp.h... yeschecking for the correct version of mpfr.h... buggy but acceptablechecking for the correct version of mpc.h... yeschecking for the correct version of the gmp/mpfr/mpc libraries... yeschecking for isl 0.15 or later... norequired isl version is 0.15 or later*** This configuration is not supported in the following subdirectories:gnattools gotools target-libada target-libhsail-rt target-libphobos target-zlib target-libbacktrace target-libgfortran target-libgo target-libffi target-libobjc target-liboffloadmic(Any other directories should still work fine.)checking for default BUILD_CONFIG... bootstrap-debugchecking for --enable-vtable-verify... nochecking for bison... bison -ychecking for bison... bisonchecking for gm4... nochecking for gnum4... nochecking for m4... m4checking for flex... flexchecking for flex... flexchecking for makeinfo... no/root/gcc-10.1.0/missing: line 81: makeinfo: command not foundchecking for expect... nochecking for runtest... nochecking for ar... archecking for as... aschecking for dlltool... nochecking for ld... ldchecking for lipo... nochecking for nm... nmchecking for ranlib... ranlibchecking for strip... stripchecking for windres... nochecking for windmc... nochecking for objcopy... objcopychecking for objdump... objdumpchecking for otool... nochecking for readelf... readelfchecking for cc... ccchecking for c++... c++checking for gcc... gccchecking for gfortran... gfortranchecking for gccgo... nochecking for gdc... nochecking for ar... nochecking for ar... archecking for as... nochecking for as... aschecking for dlltool... nochecking for dlltool... nochecking for ld... nochecking for ld... ldchecking for lipo... nochecking for lipo... nochecking for nm... nochecking for nm... nmchecking for objcopy... nochecking for objcopy... objcopychecking for objdump... nochecking for objdump... objdumpchecking for otool... nochecking for otool... nochecking for ranlib... nochecking for ranlib... ranlibchecking for readelf... nochecking for readelf... readelfchecking for strip... nochecking for strip... stripchecking for windres... nochecking for windres... nochecking for windmc... nochecking for windmc... nochecking where to find the target ar... host toolchecking where to find the target as... host toolchecking where to find the target cc... just compiledchecking where to find the target c++... just compiledchecking where to find the target c++ for libstdc++... just compiledchecking where to find the target dlltool... host toolchecking where to find the target gcc... just compiledchecking where to find the target gfortran... host toolchecking where to find the target gccgo... host toolchecking where to find the target gdc... host toolchecking where to find the target ld... host toolchecking where to find the target lipo... host toolchecking where to find the target nm... host toolchecking where to find the target objcopy... host toolchecking where to find the target objdump... host toolchecking where to find the target otool... host toolchecking where to find the target ranlib... host toolchecking where to find the target readelf... host toolchecking where to find the target strip... host toolchecking where to find the target windres... host toolchecking where to find the target windmc... host toolchecking whether to enable maintainer-specific portions of Makefiles... noconfigure: creating ./config.statusconfig.status: creating Makefile[root@jeames007 ~]# make -j4make 时间很长,很长,耐⼼等待,本⼈编译了1个⼩时。
RedHat RHEL 6安装gcc的方法
RedHat RHEL 6.4安装gcc的方法[zhoucanji@zhoucanji-pc 桌面]$ su root密码:[root@zhoucanji-pc 桌面]# mount -t iso9660 /dev/cdrom /mnt/cdrom/mount: block device /dev/sr0 is write-protected, mounting read-onlymount: /dev/sr0 already mounted or /mnt/cdrom/ busymount: according to mtab, /dev/sr0 is already mounted on /mnt/cdrom[root@zhoucanji-pc 桌面]# cd /mnt/cdrom/Packages/[root@zhoucanji-pc Packages]# rpm -ivh glibc-common-2.12-1.47.el6.i686.rpmwarning: glibc-common-2.12-1.47.el6.i686.rpm: Header V3 RSA/SHA256 Signature, key ID fd431d51: NOKEYPreparing... ########################################### [100%] package glibc-common-2.12-1.47.el6.i686 is already installed[root@zhoucanji-pc Packages]# rpm -ivh kernel-headers-2.6.32-220.el6.i686.rpmwarning: kernel-headers-2.6.32-220.el6.i686.rpm: Header V3 RSA/SHA256 Signature, key ID fd431d51: NOKEYPreparing... ########################################### [100%] 1:kernel-headers ########################################### [100%] [root@zhoucanji-pc Packages]# rpm -ivh libgcc-4.4.6-3.el6.i686.rpmwarning: libgcc-4.4.6-3.el6.i686.rpm: Header V3 RSA/SHA256 Signature, key ID fd431d51: NOKEYPreparing... ########################################### [100%] package libgcc-4.4.6-3.el6.i686 is already installed[root@zhoucanji-pc Packages]# rpm -ivh glibc-2.12-1.47.el6.i686.rpmwarning: glibc-2.12-1.47.el6.i686.rpm: Header V3 RSA/SHA256 Signature, key ID fd431d51: NOKEYPreparing... ########################################### [100%] package glibc-2.12-1.47.el6.i686 is already installed[root@zhoucanji-pc Packages]# rpm ivh libgomp-4.4.6-3.el6.i686.rpmRPM version 4.8.0Copyright (C) 1998-2002 - Red Hat, Inc.This program may be freely redistributed under the terms of the GNU GPL用法: rpm [-aKfgpWHqVcdilsKiv?] [-a|--all] [-f|--file] [-g|--group][-p|--package] [-W|--ftswalk] [--pkgid] [--hdrid] [--fileid][--specfile] [--triggeredby] [--whatrequires] [--whatprovides][--nomanifest] [-c|--configfiles] [-d|--docfiles] [--dump] [-l|--list][--queryformat=QUERYFORMA T] [-s|--state] [--nofiledigest] [--nomd5][--nofiles] [--nodeps] [--noscript] [--comfollow] [--logical][--nochdir] [--nostat] [--physical] [--seedot] [--xdev][--whiteout] [--addsign] [-K|--checksig] [--delsign] [--import][--resign] [--nodigest] [--nosignature] [--initdb] [--rebuilddb][--aid] [--allfiles] [--allmatches] [--badreloc][-e|--erase <package>+] [--excludedocs] [--excludepath=<path>][--fileconflicts] [--force] [-F|--freshen <packagefile>+] [-h|--hash][--ignorearch] [--ignoreos] [--ignoresize] [-i|--install] [--justdb][--nodeps] [--nofiledigest] [--nomd5] [--nocontexts] [--noorder][--nosuggest] [--noscripts] [--notriggers] [--oldpackage][--percent] [--prefix=<dir>] [--relocate=<old>=<new>][--replacefiles] [--replacepkgs] [--test][-U|--upgrade <packagefile>+] [--quiet] [-D|--define 'MACRO EXPR'][-E|--eval 'EXPR'] [--macros=<FILE:...>] [--nodigest] [--nosignature][--rcfile=<FILE:...>] [-r|--root ROOT] [--querytags] [--showrc][--quiet] [-v|--verbose] [--version] [-?|--help] [--usage][--scripts] [--setperms] [--setugids] [--conflicts] [--obsoletes][--provides] [--requires] [--info] [--changelog] [--xml][--triggers] [--last] [--dupes] [--filesbypkg] [--fileclass][--filecolor] [--fscontext] [--fileprovide] [--filerequire][--filecaps][root@zhoucanji-pc Packages]# rpm -ivh nscd-2.12-1.47.el6.i686.rpmwarning: nscd-2.12-1.47.el6.i686.rpm: Header V3 RSA/SHA256 Signature, key ID fd431d51: NOKEYPreparing... ########################################### [100%] 1:nscd ########################################### [100%] [root@zhoucanji-pc Packages]# rpm -ivh glibc-headers-2.12-1.47.el6.i686.rpmwarning: glibc-headers-2.12-1.47.el6.i686.rpm: Header V3 RSA/SHA256 Signature, key ID fd431d51: NOKEYPreparing... ########################################### [100%] 1:glibc-headers ########################################### [100%] [root@zhoucanji-pc Packages]# rpm -ivh glibc-devel-2.12-1.47.el6.i686.rpmwarning: glibc-devel-2.12-1.47.el6.i686.rpm: Header V3 RSA/SHA256 Signature, key ID fd431d51: NOKEYPreparing... ########################################### [100%] 1:glibc-devel ########################################### [100%] [root@zhoucanji-pc Packages]# rpm -ivh mpfr-2.4.1-6.el6.i686.rpmwarning: mpfr-2.4.1-6.el6.i686.rpm: Header V3 RSA/SHA256 Signature, key ID fd431d51: NOKEYPreparing... ########################################### [100%] 1:mpfr ########################################### [100%] [root@zhoucanji-pc Packages]# rpm -ivh ppl-0.10.2-11.el6.i686.rpmwarning: ppl-0.10.2-11.el6.i686.rpm: Header V3 RSA/SHA256 Signature, key ID fd431d51: NOKEYPreparing... ########################################### [100%] 1:ppl ########################################### [100%] [root@zhoucanji-pc Packages]# rpm -ivh cloog-ppl-0.15.7-1.2.el6.i686.rpmwarning: cloog-ppl-0.15.7-1.2.el6.i686.rpm: Header V3 RSA/SHA256 Signature, key ID fd431d51: NOKEYPreparing... ########################################### [100%] 1:cloog-ppl ########################################### [100%] [root@zhoucanji-pc Packages]# rpm -ivh cpp-4.4.6-3.el6.i686.rpmwarning: cpp-4.4.6-3.el6.i686.rpm: Header V3 RSA/SHA256 Signature, key ID fd431d51: NOKEYPreparing... ########################################### [100%] 1:cpp ########################################### [100%] [root@zhoucanji-pc Packages]# rpm -ivh gcc-4.4.6-3.el6.i686.rpmwarning: gcc-4.4.6-3.el6.i686.rpm: Header V3 RSA/SHA256 Signature, key ID fd431d51: NOKEYPreparing... ########################################### [100%] 1:gcc ########################################### [100%] [root@zhoucanji-pc Packages]# which gcc/usr/bin/gcc[root@zhoucanji-pc Packages]#注:以上是安装gcc,软件安装顺序不能错.[root@zhoucanji-pc Packages]# rpm -ivh libstdc++-4.4.6-3.el6.i686.rpmwarning: libstdc++-4.4.6-3.el6.i686.rpm: Header V3 RSA/SHA256 Signature, key ID fd431d51: NOKEYPreparing... ########################################### [100%] package libstdc++-4.4.6-3.el6.i686 is already installed[root@zhoucanji-pc Packages]# rpm -ivh libstdc++-devel-4.4.6-3.el6.i686.rpm warning: libstdc++-devel-4.4.6-3.el6.i686.rpm: Header V3 RSA/SHA256 Signature, key ID fd431d51: NOKEYPreparing... ########################################### [100%] 1:libstdc++-devel ########################################### [100%] [root@zhoucanji-pc Packages]# rpm -ivh gcc-c++-4.4.6-3.el6.i686.rpmwarning: gcc-c++-4.4.6-3.el6.i686.rpm: Header V3 RSA/SHA256 Signature, key ID fd431d51: NOKEYPreparing... ########################################### [100%] 1:gcc-c++ ########################################### [100%]注:以上是安装gcc-c++。
gcc的使用方法

gcc的使用方法GCC(GNU Compiler Collection)是一款由GNU开发的编程语言编译器集合,支持多种编程语言,如C、C++、Fortran等。
它被广泛用于各种操作系统和硬件平台上的软件开发,提供了强大的功能和灵活的配置选项。
本文将介绍GCC的基本使用方法,帮助读者快速上手。
一、安装GCC要使用GCC,首先需要在您的计算机上安装它。
GCC可以在多个操作系统上运行,包括Linux、Windows和Mac OS。
具体的安装方法因操作系统而异,下面将分别介绍。
1. 在Linux上安装GCC:在大多数Linux发行版中,GCC已经默认安装。
如果您的系统中没有安装GCC,您可以通过包管理器来安装它。
例如,在Debian或Ubuntu系统上,可以使用以下命令安装GCC:```sudo apt-get install gcc```其他Linux发行版的安装方法请参考相应的文档。
2. 在Windows上安装GCC:在Windows上,可以通过MinGW或MSYS2来安装GCC。
这两个工具集提供了一种在Windows环境中使用GCC的方式。
您可以从官方网站上下载并按照安装向导进行安装。
3. 在Mac OS上安装GCC:在Mac OS上,可以使用Homebrew或MacPorts来安装GCC。
这两个软件包管理系统可以让您以与Linux相似的方式在Mac OS上安装软件。
例如,使用Homebrew安装GCC的命令如下:```brew install gcc```其他安装方法请参考相应文档。
二、编写源代码安装好GCC后,我们就可以开始编写源代码了。
GCC支持多种编程语言,但本文以C语言为例进行介绍。
打开任何文本编辑器,创建一个后缀名为.c的文件,并编写您的C 源代码。
例如,创建一个名为`hello.c`的文件,其中包含以下代码:```c#include <stdio.h>int main() {printf("Hello, world!\n");return 0;}```三、编译和运行代码一旦您编写好了源代码,接下来就可以使用GCC将其编译成可执行文件。
RedHat LINUX安装全步骤(附图)
LINUX软件安装步骤1.在Vmware 中创建一个Linux 的虚拟机版本是Red Hat Linux ,其中硬盘最少要有2GB 的空间(建议分4GB 其他硬盘,网卡的配置和Windows 虚拟机一样即可)。
2.把Vmware 的光驱制定到对应的镜像文件上,我们这里是linux iso 文件中的第一张盘。
3.启动虚拟机,由光盘进入。
在这个界面中输入linux text 后回车才能进入文本安装界面。
4.提示检测介质。
因为我们使用的是镜像文件,所以可以直接单击Skip 如果使用的是光盘最好还是检测一下比较好。
(在LINUX 文本模式中基本都是使用键盘进行操作,鼠标也支持但是不像在Windos 中那样好用。
用户可以通过Tab键和方向键来切换选项,空格和回车来确定)如果上面选择的是Skip就会直接跳到第8步。
5.开始检测。
如果是使用的光盘CD 需要先插入CD 后在Test 因为我们使用的是镜像文件所以就可以直接Test6.检测完毕。
选择OK7.提示是否检测其他的盘。
如果你为了保险起见可以继续检测,但是时间可能会长一些。
8.选择语言安装过程,在这里选择英语。
(如果选择的不是英语的话,在以后的一些提示显示中会出现乱码看不懂)9.选择键盘类型,在这里选择us 即可。
10.选择鼠标类型,在Linux 这类操作系统中,经常用到三键鼠标,因此,除了选择鼠标类型外,一般还选中下面的“Emulate 3 Buttons?”,这样同时点击鼠标左右键,代表点击中键。
11.选择安装类型。
在这里我们选择第4个Custom(定制)。
12.准备分区。
在这里选择Autopartition 。
13.这里会让用户选择如何处理硬盘上的原始分区。
因为我们是新建的所以选那个都无所谓,但是如果在已经安装好Windows 的系统上进行安装,一般选择第三项。
意思就是使用硬盘当中没有使用的空间来创建相应的分区。
在下面会让用户选择。
要安装到那个硬盘中,在这里只有一个硬盘sda ,所以直接选择即可。
linux的gcc使用方法

linux的gcc使用方法Linux是一种开源的操作系统,广泛应用于服务器和嵌入式系统中。
而GCC(GNU Compiler Collection)是Linux下最常用的编译器套件之一,用于将源代码编译成可执行文件。
本文将介绍GCC的使用方法,帮助读者快速上手。
一、安装GCC在Linux系统中,默认情况下已经安装了GCC。
可以通过运行以下命令来验证是否已经安装了GCC:```gcc --version```如果GCC已经安装,则会显示GCC的版本信息;如果没有安装,则可以通过运行以下命令来安装GCC:```sudo apt-get install gcc```二、编写源代码在使用GCC之前,我们需要先编写源代码。
可以使用任何文本编辑器创建一个以.c为后缀的源文件,例如hello.c。
下面是一个示例的源代码:```c#include <stdio.h>int main() {printf("Hello, world!\n");return 0;}```三、编译源代码编写完源代码后,我们可以使用GCC来将其编译成可执行文件。
在终端中运行以下命令:```gcc -o hello hello.c```其中,-o参数用于指定编译后生成的可执行文件的名称,hello为示例的可执行文件名,hello.c为源代码文件名。
如果编译成功,GCC将会生成一个名为hello的可执行文件。
四、运行可执行文件在编译成功后,我们可以通过以下命令来运行可执行文件:```./hello```如果一切顺利,终端将会输出"Hello, world!"的字符串。
五、GCC的其他常用选项除了上述基本的使用方法外,GCC还提供了许多其他的选项,用于控制编译过程的行为。
以下是一些常用的选项:- -Wall:开启所有警告信息的显示。
- -g:生成供调试器使用的调试信息。
- -O2:进行优化处理,提高程序执行效率。
实验1-1 虚拟机下redhat配置安装mpich过程
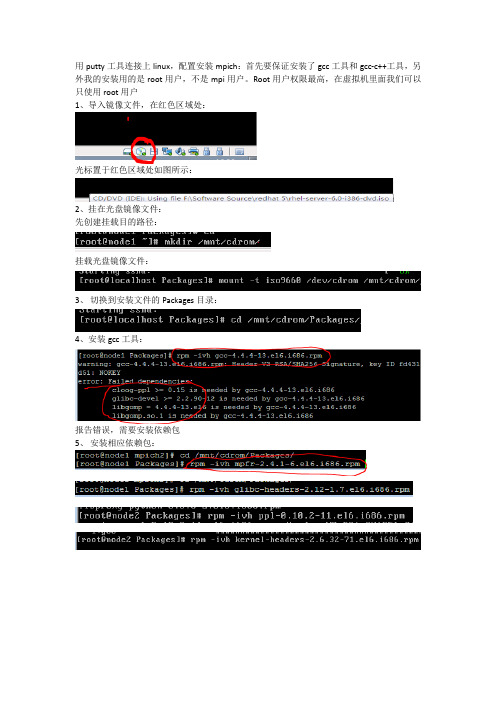
用putty工具连接上linux,配置安装mpich:首先要保证安装了gcc工具和gcc-c++工具,另外我的安装用的是root用户,不是mpi用户。
Root用户权限最高,在虚拟机里面我们可以只使用root用户1、导入镜像文件,在红色区域处:光标置于红色区域处如图所示:2、挂在光盘镜像文件:先创建挂载目的路径:挂载光盘镜像文件:3、切换到安装文件的Packages目录:4、安装gcc工具:报告错误,需要安装依赖包5、安装相应依赖包:6、安装gcc-c++工具:7、创建/usr/mpich2目录进入mpich2目录,生成配置文件:8、编译安装mpich2:(未安装make工具)9、安装make工具:10、重新编译安装mpich2:如果make不成功的话,执行下面操作进行重新配置:然后再执行make命令进行重新编译。
11、安装mpich2:12、配置环境变量,编辑.bashrc文件,在文件末尾添加如红色区域内容,命令为:vi ~/.bashrc12、使配置文件生效:13、创建mpich的配置文件,并修改其属性:14、编辑mpich配置文件,添加如下内容:15、为mpich的master节点创建一个包含集群机器名的文件,并添加入主机名:16、单机模式下启动守护进程,进行本地测试(加上&表示在后台启动)(数字为进程号)17、查看启动节点:18、运行测试本地示例:19、单机关闭守护进程(两种方法):方法一:指定mpd的ID号(通过mpdtrace -l命令查看)方法二:直接执行mpdallexit命令20、参照上面步骤,在另一台linux机器里面配置安装mpich21、启动mpich集群,检测如下报407号错误:22、source一下.bashrc文件,再次启动报告415号错误:23、关闭防火墙:24、启动mpich集群,成功:25、查看启动节点:26、在集群上运行测试示例:(可以看出集群上计算所得的PI值误差<Error值大小>比单机计算所得的PI值误差小)三、若要编译fortran程序,还需安装fortran编译器(redhat linux 6自带的fortran编译器为gfortran编译器),安装步骤如下:1、进入挂载上的光盘目录,进入软件安装包目录,用下面的命令查看gfortran安装包:2、选择gfortran的两个安装包进行安装,如下:3、查看mpich目录,存在了fortran编译器:4、但gfortran编译器默认支持fortran90,因此修改fortran程序:(注意fortran90与fortran77不同的地方,如红色区域)5、编译fortran程序:6、运行fortran程序:。
gcc安装教程

详解Linux安装GCC方法下载:/gnu/gcc/gcc-4.5.1/gcc-4.5.1.tar.bz2浏览:/gnu/gcc/gcc-4.5.1/查看Changes:/gcc-4.5/changes.htm现在很多程序员都应用GCC,怎样才能更好的应用GCC。
目前,GCC可以用来编译C/C++、FORTRAN、JAVA、OBJC、ADA等语言的程序,可根据需要选择安装支持的语言。
本文以在Redhat Linux安装GCC4.1.2为例(因在项目开发过程中要求使用,没有用最新的GCC 版本),介绍Linux安装GCC过程。
安装之前,系统中必须要有cc或者gcc等编译器,并且是可用的,或者用环境变量CC指定系统上的编译器。
如果系统上没有编译器,不能安装源代码形式的GCC 4.1.2。
如果是这种情况,可以在网上找一个与你系统相适应的如RPM等二进制形式的GCC软件包来安装使用。
本文介绍的是以源代码形式提供的GCC软件包的安装过程,软件包本身和其安装过程同样适用于其它Linux和Unix系统。
系统上原来的GCC编译器可能是把gcc等命令文件、库文件、头文件等分别存放到系统中的不同目录下的。
与此不同,现在GCC建议我们将一个版本的GCC安装在一个单独的目录下。
这样做的好处是将来不需要它的时候可以方便地删除整个目录即可(因为GCC没有uninstall功能);缺点是在安装完成后要做一些设置工作才能使编译器工作正常。
在本文中采用这个方案安装GCC 4.1.2,并且在安装完成后,仍然能够使用原来低版本的GCC编译器,即一个系统上可以同时存在并使用多个版本的GCC编译器。
按照本文提供的步骤和设置选项,即使以前没有安装过GCC,也可以在系统上安装上一个可工作的新版本的GCC编译器。
1 下载在GCC网站上()或者通过网上搜索可以查找到下载资源。
目前GCC的最新版本为4.2.1。
可供下载的文件一般有两种形式:gcc-4.1.2.tar.gz和gcc-4.1.2.tar.bz2,只是压缩格式不一样,内容完全一致,下载其中一种即可。