Roland MP-100 中文说明书
M-100 用户手册说明书
M-100 USER’S MANUALRESEARCH, INNOVATE, CREATE“Whenever I speak about my company I speak with the passion we have. Located in the Paris region of France, I have ensured that Micromega has the best ele-ments of my industrial group at their availability. In an age where music is dematerializing, we are committed to staying at the forefront of technology and growing under our ‘made in France’ banner.The M-one programme, with its incredible audio quality, technical capacity and sleek design represents a major advance in the history of our company. The result of three years of research by our team, we are proud to introduce to you what we believe is the most effective and complete integrated stereo amplifier of its kind.Micromega is synonymous with technological advances, expertise, reliability and sound clarity. All of our products reflect these demands.”Didier HAMDI, CEO MicromegaThe advantages of the M-One amplifier series :• High quality, A/B class amplification• Resonant power supply• Symmetrical design• Asahi Kasei AK4490 DAC converter• Acoustic correction in situ using Room EQ1 and EQ2 (included or as an op-tion)• Binaural processing of the headphone output (included or as an option)• Cover and remote control machined from aluminium block• Android and iOS compatible control app (October 2016)1 - OVERVIEW (4)1.1 Front and top (4)1.2 Back (5)1.3 Sides (ventilation) (6)1.4 Bottom (7)1.5 Infrared remote control (8)2 - CONNECTIONS (9)2.1 Phono input for a vinly turntable (9)2.2 RCA line input (10)2.3 Balanced XLR analogue input (11)2.4 Coaxial digital input (12)2.5 Optical digital input (13)2.6 AES-EBU input (14)2.7 USB input (Type B) (15)2.8 Bluetooth aptX connection (16)2.9 I²S input ..................................................................................................182.10 LAN connection .. (19)2.11 Speaker connections (20)2.12 Connecting headphones (21)2.13 Subwoofer output (22)2.14 Pre-out (23)2.15 Trigger sockets (24)2.16 Mains power supply (25)2.17 Fuse (26)3 - USER GUIDE (27)3.1 Starting up (27)3.2 Choosing your source (28)3.3 Ajusting the balance (29)3.4 A justing sensitivity (30)3.5 Renaming the sources (31)3.6 Updating the M-100 (32)3.7 Updating the network module .................................................... (33)4 - SPECIFICATIONS (34)1.1 Front and topThe M-100 amplifier has two displays so that it can be controlled from any position. The displays will automatically adjust to whichever position the amplifier is in (e.g. flat, attached to wall).There is a headphone socket on the front so that you can listen to your music in complete peace. A “Binaural” process (as an option) allows you to re-create the 3D sound scene through the headphones which is lost in classic stereophonic recordings.On the top of the device are 4 buttons which you can use to adjust the reactions of your amplifier (see section 3.1 for more information).Carefully check that the packaging is intact. If you feel it may have been tampered with or damaged please contact your vendor.Carefully remove your device from the packaging. Store the packaging in a secure, dry place: if you need to return your device to the vendor you will require the original packaging.1. Overview1.2 BACKLine level inputa n a l o gi n p u t s d i g i t a li n pu t s a n a l o gi n p u t s tri g g e rTurntableinput ROOM EQ mic plugBalanced inputCoaxial input AES - EBU inputOptical inputUSB inputI²S inputsLAN input USB update inputLeft binding postPre-outSub-outRight binding postFuseMains power supply Trigger1.3 Sides (ventilation)The M-100 amplifier should be positioned so that it can receive sufficient ventilation. Do not obstruct the air vents on the side of your amplifier. You should leave at least 10cm of space around the air vents.We advise against placing the M-100 inside a closed furniture or space1.4 BottomYou will find a connection guide under your M-100 amplifier which illustrates all of the input and ouput terminals available. Do not try to open the M-100It contains potentiallylife-threatening high voltageTake note that the M-100 has spiked feets. It can harm your furniture. Use the included rubber pads to avoid damage.1.5Infrared remote controlON / OFF MuteChange display sizeAjust volumeInput selector« Bluetooth Connect »- Press and release : pairing will start- Press and hold (for 10 seconds then release) : clear Bluetooth memory2.1 Phono input for a vinyl turntableThe « PHONO » input on the M-100 amplifier is compatible with MM and MC cartridges.You can select the correct cartridge for your turntable using the switch located on the back of the amplifier.• If your turntable has an MM cartridge, you should place the switch in the MM position •If your turntable has an MC cartridge, you should place the switch in the MC positionThere is a ‘GND’ grounding terminal near the Phono plugs so that you can connect the grounding terminal of your record player if necessary.Phono input2. CONNECTIONSMM MC2.2 RCA line inputThe M-100’s « LINE » input can be used to connect any device with RCA analogue output.RCA lineinput2.3 Balanced XLR analogue inputThe M-100’s « BALANCED» input can be used to connect any device with symmetrical analogue output.Balanced XLRanalogue input2.4 Coaxial digital inputThe M-100’s « COAX » input can be used to connect any device with an SPDIF coaxial output.The signal should be a PCM stereo signal up to 32bit/768kHz.Coaxial Digital inputYOUR BLU-RAY OR DVD PLAYER MUST BE CONFIGURED IN PCM ON THE AUDIO OUTPUTOTHERWISE IT COULD PRODUCE AN INTENSE NOISE IN YOUR SPEAKERS AND DAMAGE THEM2.5 Optical digital inputThe M-100’s « OPTO » input can be used to connect any device with a TOSlink digital connection.The signal should be a PCM stereo signal up to 24bit/192kHzOptical digital inputYOUR BLU-RAY OR DVD PLAYER MUST BE CONFIGURED IN PCM ON THE AUDIO OUTPUTOTHERWISE IT COULD PRODUCE AN INTENSE NOISE IN YOUR SPEAKERS AND DAMAGE THEM2.6 AES-EBU InputThe M-100’s « AES » input can be used to connect any device with an AES-EBU connection on XLR. The signal should be a PCM stereo signal up to 32bit/768kHz.AES - EBU input2.7 USB Input (Type B)The M-100’s « USB » input can be used to connect any computer with a USB port.The signal should be a PCM stereo signal up to 32bit/768kHz or DSD/DSD-DoP up to 11.2MHz.A USB driver will be required for any computer using Windows. You can download the driver from the M-One page on the Microme-ga website.For computers using OS X or macOS you will not need an additional driver.USB input2.8 Bluetooth® aptX® connectionThe M-100’s « BT » connection can be used to wirelessly connect smartphones, tablets, computers or MP3 players with Bluetooth®. The Bluetooth® link is compatible with aptX® for the best sound quality. To make this manual easier to read, the term « Smartphone » will be used in this section to mean smartphones, tablets, computers and MP3 players. To connect via Bluetooth® for the first time:• Ensure that the Bluetooth® function on your smartphone is turned on.• Use the remote control to click on the ‘BT’ button.• You should see the « M-ONE » appear on the list of Bluetooth® connections available on your smartphone. To establish a connection select the « M-ONE ».• Launch music on your smartphone.To connect via Bluetooth® with a different smartphone, tablet etc.• Ensure that the Bluetooth® function on your smartphone is turned on.• Use the remote control to click on the ‘BT’ button.• Then press release the « BTC » button on the remote control.• You should see the « M-ONE » appear on the list of Bluetooth® connections available on your smartphone. To establish a connection select the « M-ONE ».• Launch play on your smartphone.The following time you select the BT input :• If the Bluetooth® on your smartphone is turned on, the connection will work automatically once you select the ‘BT’ button on the amplifier using the remote.NB : Bluetooth® is a « point to point » connection. This means that if a tablet is already connected to the amplifier, you will not be able to connect your smartphone at the same time. You will need to disconnect your tablet from the amplifier before connecting your smartphone.2.9 I²S InputThe M-100’s « I²S » inputs are ONLY TO BE USED with future Micromega products.Only for use with MICROMEGA productsI²S input2.10 LAN ConnectionThe M-100 can receive music via its network socket (LAN). In order to do this you must connect an Ethernet cable between your modem/router (Internet box) and the M-ONE.You should use DLNA/UPnP compatible software (e.g. JRiver) on your computer to send music to the M-One.LAN input2.11 Speaker connectionsThe amplifier’s terminal block is compatible with naked cables, banana plugs and fork plugs.Naked cables : reveal approx. 10mm of naked cable. Unscrew the terminal block until there is a gap and insert the cable. Screw the block back into placeBanana plugs : once you have attached the banana plugs to the cable, insert the plug into the centre of the terminal.Fork plugs : once you have attached the fork plugs to the cable, unscrew the terminal block until there is space to insert each fork plug. Screw the block back into placeRight speakerLeft speaker2.12 Connecting headphones at the front of the amplifierYou can connect headphones at the front of the amplifier using a 3.5mm mini-jack. If your headphones have a 6.35mm jack then you will need to use an adapter.Once headphones are connected to the front the speakers are rendered inactive. The headphone and speaker volume controls are separate and memorised independently.This headphone terminal is compatible with the « binaural » process which is available as an option. Micromega has researched HTRF (Head Related Transfer Function) in order to reproduce the original sound scene (in front of you).2.13 Subwoofer outputSortie sub-outYou can connect a Subwoofer to the RCA Sub-Out input. This input has a low pass filter with a limiting frequency of 400 Hz.You should control the cutoff frequency and the volume using the control panel on your subwoofer.2.14 Pre-out line outIf you are using an external power amplifier, please use XLR cables to connect it to the Pre-out terminals. The volume of the Pre-Out terminals is variable and follows the volume indicated on your M-100 amplifier.Pre-out2.15 Trigger socketsTrigger sockets enable the use of the amplifier as part of a home automation system.Trigger IN : Can be used with control voltages from 5 to 12V. The amplifier turns on when this voltage is running through it and off when it isn’t.Trigger OUT : When the amplifier is turned on there are 5V running through the Trigger OUT terminal.TriggerINTriggerOUTUse 3.5 mm mono mini-jack sockets2.16 Mains power supplyMain power supplyWe recommend you connect all of your music sources and speakers before connecting the power e the power cable supplied with your amplifier.Check that the mains supply on the label (packaging or underneath the device)matches the mains supply in situ.2.17 FuseIf you are having electrical problems you may need to change the fuse. Please replace it with an identical fuse to the one originally supplied.Use a flat screwdriver to unscrew the fuse holder.If after changing the fuse, it blows again, please contact your vendor.Fuse3. User Guide3.1 Starting upOnce you have attached all of your music sources, spea-kers and the power supply you can turn it on:• Press and release the red ‘STBY’ button on theremote whilst aiming it at the amplifier.• Press the button on the top left of the amplifier.• Red light will turn off on the productAfter a few seconds you should see the ‘Micromega’logo appear on the displays.To turn off your amplifier, use the same process.ON / Standby3.2 Choosing your sourceUSBAES<OKThe main display (fig. 1) shows which input is active (USB), the volume (20) and any specifications of the input signal (only for digital signals).To change the input source, press on the button at the bottom left.A list of sources will now appear in place of the volume (fig. 2).By using the up and down arrows you can select the desired source and confirm using the « OK » button.If you change your mind and don’t want to change the source, press the top left button ( « < » ) to return to the main display.Fig. 1Fig. 2Point the infrared remote control at the device and use it to select your music source.You can use the buttons at the top of the amplifier to do this if you prefer.USB20192 kHz3.3 Adjusting the balanceUSBBAL<OKFig. 1Fig. 2Adjusting the balance enables you to compensate for any dissymmetry in the two speakers related to your listening position. The volume can be adjusted to be louder on one side than the other (6dB on each side).Adjusting the balance effects all sources.From the main display (fig. 1), press on the button at the bottom left.Scroll through the list until ‘BAL ’ (fig. 2) appears and confirm with ‘OK’A balance screen appears where you can make adjustments. You can confirm any adjustments by selecting ‘OK’ or cancel them using ‘<’.symbolise there is an active balance setting (here to the right)3.4 Adjusting sensitivityFig. 1Fig. 2Adjusting sensitivity enables you to compensate for a signal level difference between your sources (+ or - 6 dB).This adjustment is particular to each input. You should be connected to the source you wish to adjust before starting (in this example we are adjusting the LINE terminal).From the main display (fig. 1), press on the button at the bottom left.Scroll through the list until ‘SENS’ (fig. 2) appears and confirm with ‘OK’A sensitivity screen appears where you can make adjust-ments. You can confirm any adjustments by selecting ‘OK’ or cancel them using ‘<’.SENS<OKsymbolise there is an active sensitivity setting (here, sensitivity is lowered)LINE3.5 Renaming the sources20Fig. 1Fig. 2For certain terminals (AES, OPTO, COAX, LINE, XLR) you can select from a predefined list of names.From the main display (fig. 1), press on the button at the bottom left.Scroll through the list until ‘NAME’ (fig. 2) appears and confirm with ‘OK’Scroll through the list of predefined names and choose the name which you feel suits your source best.You can confirm any adjustments by selecting ‘OK’ or cancel them using ‘<’.NAME<OKLINELINENB: Renaming of all inputs can be done through the Micromega app3.6 Updating the M-100Fig. 1Fig. 2Download the .zip folder which contains updates files on the M-One page of our website: Instructions for updates :- Extract the downloaded .zip on your computer- Copy « M-ONE-Vxx.img » onto a USB key (formatted in FAT)- Turn off your M-100 and disconnect it from the mains. - Insert the USB key 1 into port 1 at the back of the M-100- Reconnect the mains, the update will start (fig.1)- A few moments later, an ‘update completed’ message will appear (fig.2)-Disconnect the mains, take out the USB key and reconnect the mains.Micromega M-one software update USB drive found update file found Update completed.Switch off M-one and remove USB drive.NB : If a update is available, you should update to get the most out of your device.3.7 Updating the network module Download the .zip folder which contains updates files on theM-One page of our website: Instructions for updates :- Extract the downloaded .zip on your computer- On your M-One : go to INFO menu (fig. 1) and take note ofthe IP adress written on the second page (fig. 2)If the IP adress is shown as « 000.000.000.000 », download the mobile application (available on Google Play & App Store). This app will list all the connected devices on your network. You must look the IP adress for « Audio Renderer» or «Micromega M-One». - On your computer : write your IP adress in your browser navigation bar- Follow the instructions to update the network module. Select the « NMR-Vxx.bin » file and validate- The network module may take several minutes before rebootingFig. 1Fig. 2<OKINFO MCU FW 0023Serial number<OKINFO nmrs-eng-efs-v1.11.1.8IP 001 .000 .000 .2034. SpecificationsAmplifier sizeWidth : 430 mm Depth : 350 mmHeight (with spikes) : 56 mmAmplifier weight Net weight : 9 kgGross weight : 10,7 kgPackaging (overbox)Width : 735 mm Depth : 600 mm Height : 150 mmPackaging (box)Width : 685 mm Depth : 542 mm Height : 85 mmPower Consumption Standby : 1W 2 channels -1/8 Pmax under 8 Ohms : 140WRated output power P RMS under 8 Ohms : 2*100W P RMS under 4 Ohms : 2*200WSignal to noise ratio Digital input : 106 dB(A)Balanced analog input : 103 dB(A)Unbalanced analog input : 100 dB(A)Phono MM input : Higher than 75 dB(A)Speaker output residual noise, open inputµV160 : under8OhmsµV200 4: under OhmsOutput impedance @250Hz under 8 Ohms 15mΩ500à Damping factor Sup.Total harmony distorsionTHD, 8 Ohms, 63 Hz : under 0,001% THD, 8 Ohms, 1 kHz : under 0,005% THD, 8 Ohms, 10 kHz : under 0,05% THD, 4 Ohms, 63 Hz : under 0,001% THD, 4 Ohms, 1 kHz : under 0,01% THD, 4 Ohms, 10 kHz : under 0,07%Intermodulation distorsion - SMPTEIMD, from 1W to P NOM, 8 Ohms under 0,01% IMD, from 1W to P NOM, 4 Ohms under 0,02%Intermodulation distorsion - DynamicDIM 30, 50W, 8 Ohms under 0,02% DIM 30, 100W, 4 Ohms under 0,05%Channels separation96dBH z under Crosstalk,1k80dBH z under10kCrosstalk,Analog input sensitivityPhono MM, 47 kOhms 12 mVRMS Phono MC, 110 Ohms 1,2 mVRMSVRMS 1,4 Analogue:VRMS 1,7 :BalancedSub-out outputH z400:frequencyCut-offAUDIS MICROMEGA13-15 rue du 8 Mai 194594470 Boissy-Saint-LégerFRANCE parisFRANCE01.02.03.04.05*********************/micromegahifi。
MP100中文说明书110928
一.简介1.1 优玛集团优玛集团创建于1983年,由留美华人组成,主要从事精密电源设备的研究与制造,提供不间断电源自300VA到3600KVA,已有单机500KVA UPS的安装经验。
为适应中国广大用户的需要,自1995年起在东莞市成立中国的售后服务中心,并陆续成立32个全资单位、办事处及代理。
优玛集团是少数具有全系列不间断电源、直流电源、逆变电源、稳压电源、EPS消防应急电源、数控(IDC)机房工程、节能工程及防雷工程的专业公司之一,已通过ISO9001(2000版)国际质量体系认证和国内相关行业的入网认证。
1.2 产品标准本产品的生产管理符合ISO9001(2000版)品质认证,该产品技术要求符合GB/T1475-93《信息技术设备用不间断电源通用技术条件》、GB4943-1995《信息技术设备(包括电气事务设备)的安全》、GB9254-1998《信息技术设备的无线电骚扰限值和测量方法》等,并依照国家电源标准、企业标准、广电入网、电信入网、信息产业等相关行业的文件规定生产。
目录内容页数内容页数一、简介八、产品安装8.1 外观尺寸12二、目录 1 8.2 拆卸与检视128.3 产品定位13三、安全与概述8.4 产品接线143.1 应用环境 23.2 工作环境 2 九、操作步骤3.3 安全守则 2 9.1 开机前准备工作169.2 冷开机顺序16四、工作原理9.3 电池放电测试184.1 系统方块图 3 9.4 日常开关机18 4.2 正常供电 3 9.5 长时间不用开关机18 4.3 市电断电 34.4 旁路供电 3 十、维护4.5 电池及充电 4 10.1 预防性维护1810.2 电池维护18五、产品特点10.3 异常处理195 10.4 报警说明19六、规格及型号6.1技术规格 6 十一、保修条款20 6.2其他指标7十二、附录七、产品部件12.1 装箱清单7.1 前面板7 12.2 合格证7.2 后面板9 12.3 保修卡7.3 智能通讯接口117.4干接点信号接口117.5并机接口DB25(选件) 12三.安全与概述本手册包括UPS和电池在安装和维护过程中应遵守的重要指令,本手册内容对UPS的正确安装及长期可靠运行至关重要,在安装UPS前,请详细阅读本手册。
MPD100使用技术说明书-0911

感谢您选择MPD100系列产品,为了人身和设备的安全,对本设备进行连 接之前,请务必仔细阅读本说明书并务必注意以下几点。 ² 装置电源为85~265Vac(50/60Hz),或100~280Vdc ² 装置的引出线端子和显示界面按照最大功能设定, 但您的产品可能因 为订货的原因而不具备某些功能 ² 注意电流互感器一次电缆引线方向 ² 电压电流额定值是否和实际互感器一致 ² 电机起动方式、开关量输入输出设置是否和电动机一、二次接线一致 ² 禁止带电通断通讯线 打开包装,请检查以下几项 : ² 运输中产品未被损坏 ² 产品编号与订货相符 ² 按照本说明书附录A核对随机附件
INT 6.2 6.3 6.4 6.5 6.6 6.7 6.8 6.9 6.10 6.11 6.12 7 7.1 7.2 7.3 7.4 7.5 7.6 7.7 7.8 7.9 7.10 8 9
MPD100 电动机保护控制器 热过载保护 ............................................................................................................35 电流速断保护.........................................................................................................36 过流(定子绕组过负荷)保护.............................................................................36 堵转保护 ................................................................................................................36 欠流保护 ................................................................................................................36 不平衡(负序)电流保护.....................................................................................36 接地保护/漏电保护 ...............................................................................................36 过电压保护 ............................................................................................................37 低电压保护 ............................................................................................................37 欠功率保护 ............................................................................................................37 电机预埋热敏电阻检测保护.................................................................................37 显示页面结构与基本操作.....................................................................................38 测量数据的显示.....................................................................................................38 电机状态 ................................................................................................................39 事件记录 ................................................................................................................40 单元型号 ................................................................................................................40 系统自检 ................................................................................................................41 控制器设置 ............................................................................................................41 保护整定 ................................................................................................................47 历史记录 ................................................................................................................51 时间日期 ................................................................................................................51
罗兰 HPi 系列数字钢琴说明书

Become a better player while having fun!The new Roland HPi series has arrived.Roland’s award-winning pianos are renowned for their supremeSuperNA TURAL Piano sound engine and PHA I I / PHA I I I Ivory Feelkeyboards with Escapement. The new HPi-series digital pianos combinethese features with a large DigiScore display and interactive learningprogram that lets you practice efficiently while having fun.The LCD built into the music rest instantly shows notation for the onboardsongs as well as your own recorded performances.The program will evaluate your performance and even check your fingerstrength. The new HPi pianos fully realize the dreams of piano students,teachers, and performers.Practice by yourself or enjoy a one-on-one lesson.Whether you already know how to play or are an aspiring musician, theHPi series makes playing the piano a new experience. Improve whileyou’re having fun!The music appears before your eyes! DigiScore is large and easy to view.DigiScore displays digital sheet music for all of the built-in songs, as well as for recordings of your performances, on the large LCD built into its music rest. On the HPi-7F , the display can show up to 16 bars of music at a time for both hands. Play along as the bouncing ball moves rhythmically with the music, improving your sense of time in a natural way. You can also display fi nger numbers, note names, chord names, and musical symbols/notation marks, and you can switch easily between expanded displays and displays of parts for only one hand. Notation with note-name displays will be a great help for those learning to read music. You can view a graphical metronome and keyboard along with your music.15.8cm6-1/4"21.1cm8-5/16"DigiScoreWhether you’ve never played a piano before or you have played in the past, you can improve with HPi’s interactive features.These programs allow everyone from children to adults to get familiar with music in a fun and natural setting.Check the “fi nger power” in both hands Identify areas that you need to improveFirst, get to know your soundsDevelop your sense of tone while you have funFinger Training You can visually check to see whether the force of each of your fi ngers is the same while playing popular Hanon exercises.Visual LessonWhat you play appears asdigital sheet music. Youcan check, with your eyesand ears, the areas that youneed to work on.WonderlandChildren can learn the onboard sounds andsound effects using the HPi’s fun, friendlyanimation.Flash CardThis is like a game of “pick a card” where youcan develop your music-dictation skills in anatural and fun way.Play a song from top to bottom as if you were playing a game!Scroll Game Follow the piano roll on the display and play with one hand. The sense of achievement you get when you fi nish is very gratifying. Even adults will get hooked on this!Master the basics of music reading and fi ngering DoReMi Course This is a no-pressure review on music reading and fi ngering techniques. It’s recommended even if you already have piano experience.NOTATION-BASED PROGRAMSGRAPHICAL PROGRAMSI I I I I lighter. The PHA I I and PHA I I Iwhen you play more forcefully.Perfect touch and response in every keyTrue to the player’s touchSeamless note decay1 between 2. It even replicates34pp p mp mf fff Variation in tone color produced bythe SuperNATURAL Piano soundengine with heavier touch.*The graph and drawings are artistic illustrationsNatural variations in tonal qualityVariation in tone color produced by the SuperNATURAL Piano sound engine as the tone decays.*The graph and drawings are artistic illustrationsexpressivity of Roland pianos.on how strong your fiobjectives.* The HPi-7F offers 100 levels of touch sensitivity.details such as these back on the keys.This reduces the difference in touch response from the front to the rear of the keys, replicating the longer keys and superior response of a grand piano.lo r to p is oficlear, uncluttered o peratio nt panel. Frequently used co nnectio ns are lo cated at the fro nt.*The graph and drawings are artistic illustrations Natural touch Fulcrum LongKey is the optimum length (PHA II / PHA III ) Unnaturally heavyFulcrumShort Key is too shortRelationship between key length and touch weight Keyboard Finger moistureMoisture absorption Moisture absorption A comfortable texture has been achieved thanks tonew materials with moisture-absorbing characteristics.le (BMP). You can* HPi-7F onlynd a more During playback of audio files with lyrics, youthe fi les stored onles from a USBDamper pedal, right-key range Damper pedal, left-key range Same key “C”The HPi-7F’s interactive DigiScore display can show up to 16 bars of music at a time forboth hands. Improve your skill, play along with accompaniment, burn CDs, and discover unmatched enjoyment with a single instrument.Equipped with a wide-screen DigiScore display, top-grade sound and touch, this entry model lets the novice experience the joy of pro-level performance combined with fun,interactive learning.*The DigiScore display of the HPi-6F can show up to 6 bars of music at a time for both hands. 10.4" TFT color LCD SuperNA TURAL PianoPHA III Keyboard / Ivory Feel / Escapement4-speaker Sound System(16cm x 2 (with Speaker Box), 5cm x 2) Piano DesignerMetronome / 4-track Composer / 16-track Sequencer7" TFT color LCDSuperNA TURAL PianoPHA II Keyboard / Ivory Feel / Escapement Piano Designer Metronome / 4-track ComposerEquipped with a large-screen DigiScore display — experience a new world of education and entertainment DigiScore, great tone, and great touch in a compact body HPi-6F-RWRosewood fi nishHPi-7F- SBSatin black fi nishHPi-6F-SB Satin black fi nish HPi-7F-RW Rosewood fi nish CD Writing (Option) 2 x Phones Out 15.8cm 8.7cm 21.1cm15.4cm10.4"7"H S CD Drive (Option) 2 x Phones OutThe wood used to make our digital-piano cabinets is from Indonesia. In 2008, Roland designated a 100-hectare area for tree planting, where the company has been planting trees for environmental purposes. The area contains a mixture of protected forest and trees designated for digital-piano-cabinet production. This forestation project is expected to offset approximately 10,000 tons of CO2 over aperiod of 20 years.Visit us online at Roland, DigiScore, and V-Piano are either registered trademarks or trademarks ofRoland Corporation in the United States and/or other countries.All specifications and appearances are subject to change without notice.All trademarks used in this catalog are the property of their respective companies.Ensuring high quality while protecting the environment:Roland is ISO9001 and ISO14001 certifiedAt Roland, several group companies have obtained ISO9001 certification. In addition, in January 1999,Roland also received ISO14001 international environmental management system certification. We’reactively seeking ways to maintain harmony with the environment.(ISO=International Standardization Organization: an organization forthe promotion of standardization of international units and terms. Theyprovide different categories of certification: ISO9001 Series certification isa product quality certification for products that undergo a certain level ofquality control from the design stage to the after service stage; ISO14001Series certification is for environment-related standards. Each member of the Roland Group is striving to obtain certification.)ISO9001ISO14001Tree-planting project in Indonesia OptionsUSB Flash Memory M-UF2G USB CD Drive CD-01A Headphones RH-A30Headphones RH-L20Headphones RH-5 Headphones RH-300HPi-7F HPi-6FKeyboardKeyboard88 keys (PHA III Ivory Feel Keyboard with Escapement)88 keys (PHA II Ivory Feel Keyboard with Escapement)Touch SensitivityTouch: 100 levels/Fixed Touch Touch: 5 levels/Fixed Touch Hammer ResponseOff, 1–10———Keyboard ModesWhole, Dual (volume balance adjustable), Split (Split Point Adjustable), Twin Piano Sound Generator (Conforms to GM2 / GS / XG Lite)Piano SoundSuperNATURAL Piano Sound Max. Polyphony128 voices Tones337 tones (including 8 drum sets, 1 SFX set)Temperaments8 types, selectable temperament key Stretched TuningOff, Preset, User Tuning (Adjustable in Individual Notes: -50.0 –+50.0 cent)On, Off Master T uning415.3 Hz – 466.2 Hz (adjustable in Increments of 0.1 Hz)TransposeKey Transpose: -6 – +5 (in semitones), Playback Transpose (with Audio CD/Audio File): -6 – +5 (in semitones)EffectsReverb (Off, 1 – 10) [Only for Piano Tones] Open/Close Lid (0 – 6), Cabinet Resonance (Off, 1 – 10), Hammer Noise (5 levels), Damper Noise (Off, 1 – 10), Duplex Scale (Off, 1 – 10), Damper Resonance (Off, 1 – 10), String Resonance (Off, 1 – 10), Key Off Resonance (Off, 1 – 10) [Only for Organ Tones] Rotary Speaker Effect (Slow, Fast) [Vocal Effects] Harmony (3 types), Reverb (Off, 1 – 10)Reverb (Off, 1 – 10) [Only for Piano Tones] Damper Resonance (Off, 1 – 10), String Resonance (Off, 1 – 10), Key Off Resonance (Off, 1 – 10) [Only for Organ Tones] Rotary Speaker Effect (Slow, Fast)Equalizer 4-band Digital Equalizer ———Composer Tracks 4 tracks/16 tracks4 tracks Songs Recorder Section: 1 songNote Storage Approx. 30,000 notesControls Song Select, Play/Stop, Rec, Rewinding, Fast-forwarding, Beginning of the Song, End of the Song,Track Mute, Mute Volume, Tempo, Tempo Mute, All Songs Play, Count-in, Balance, Marker, Repeat,Center Cancel (Audio Data only)Song Select, Play/Stop, Rec, Rewinding, Fast-forwarding, Beginning of the Song, End of the Song, Track Mute, Mute Volume, Tempo, Tempo Mute, All Songs Play, Count-in, Balance,Center Cancel (Audio Data only)Tempo Quarter Note=10 to 500Resolution 120 ticks per quarter noteEdit Copy, Quantize, Delete, Insert, Erase, Transpose, Part Exchange, Note Edit, PC Edit, Notation Mark———Recording Method Replace, MixRealtime Audio Recording WAV 16-bit linear format———Metronome Tempo Quarter note=10 to 500Beat 2/2, 0/4, 2/4, 3/4, 4/4, 5/4, 6/4, 7/4, 3/8, 6/8, 9/8, 12/8Volume Off, 1 – 10Metronome Pattern 11 patternsSound 8 typesRhythm Control Start/Stop, Intro/Ending, Sync Start, Fill-in, Leading Bass———Internal Memory Songs Max. 200 songsSong Save Format Standard MIDI Files (Format 0)External Memory External Storage USB Flash Memory (sold separately)Songs Max. 200 songsPlayable Song Format Standard MIDI Files (Format 0/1), Roland Original Format (i-Format), Audio File (WAV 44.1 kHz/16-bit linear format), Audio CDs (CD-DA) * when using an optional USB CD drive Song Save Format Standard MIDI Files (Format 0)Internal Songs Internal Songs Over 200 songsDisplay Display TFT Color LCD 640 x 480 dots (with a Music Rest), Beat IndicatorTFT Color LCD 480 x 234 dots (with a Music Rest), Beat Indicator Score Display Grand Staff/G Clef/F Clef, Notation Mark/Pitch Name/Lyrics/Chord/Finger NumberLanguageEnglish, German, French, Spanish, Japanese Other FunctionsUser Programs40Audio PlaybackCenter Cancel, Audio Playback Speed: 75 – 125 %, Playback Transpose: -6 – +5 (in semitones)Other Panel Lock, V-LINK, Classic Position, Piano Designer, Wonderland/Game, Visual Lesson, Doremi Course, Finger Training, Scroll Game, Flash Card, Tone Demo, BMP Export CD Writing (when using an optional USB CD drive CD-01A) Other Connectors Ext. Memory connector, USB connector, Output jacks (L/Mono, R): 1/4-inch phone type, Input jacks (L/Mono, R): RCA phono type, Phones jack x 2: Stereo 1/4-inch phone type, MIDI connectors (In, Out), Mic Input jack (phone type), Analog RGB connector (HD DB-15 type), Backlight Connector, AC Inlet Ext. Memory connector, USB connector, Output jacks (L/Mono, R): 1/4-inch phone type, Input jacks (L/Mono, R): RCA phono type, Phones jack x 2: Stereo 1/4-inch phone type, MIDI connectors (In, Out), Analog RGB connector (HD DB-15 type), Backlight Connector, AC Inlet Rated Power Output60 W x 230 W x 2Volume Level (SPL)110 dB * This value was measured according to the method that is based on Roland’s technical standard.107 dB * This value was measured according to the method that is based on Roland’s technical standard.Speakers 16 cm x 2 (with Speaker Box), 5 cm x 212 cm x 2, 5 cm x 2ControlsVolume, Mic Volume Volume PedalsDamper pedal (Capable of Continuous Detection), Soft pedal (Capable of Continuous Detection, Function Assignable), Sostenuto pedal (Function Assignable)Power Consumption120 W 95 W Dimensions(including piano stand)[With Music Rest] 1,417 (W) x 529 (D) x 1,105 (H) mm / 55-13/16 (W) x 20-7/8 (D) x 43-9/16 (H) inches [Without Music Rest] 1,417 (W) x 529 (D) x 914 (H) mm / 55-13/16 (W) x 20-7/8 (D) x 36 (H) inches [With Music Rest] 1,387 (W) x 424 (D) x 1,036 (H) mm / 54-5/8 (W) x 16-3/4 (D) x 40-13/16 (H) inches [Without Music Rest] 1,387 (W) x 424 (D) x 867 (H) mm / 54-5/8 (W) x 16-3/4 (D) x 34-3/16 (H) inches Weight (Including Piano Stand)80.0 kg / 176 lbs 6 oz 58.0 kg / 127 lbs 14 oz Accessories Owner’s Manual, Power Cord, Headphone Hook, Wing nut, Music Rest, Attachment ScrewsSpecifications。
Roland MP-100 中文说明书

演绎 . . . . . . . . . . . . . . . . . . . . . . . . . . . . . . . . . . . . . . . . . . . . . . 9 演绎各种音色 . . . . . . . . . . . . . . . . . . . . . . . . . . . . . . . . . . . . 9 切换音色. . . . . . . . . . . . . . . . . . . . . . . . . . . . . . . . . . . . 9 演绎双重音色 . . . . . . . . . . . . . . . . . . . . . . . . . . . . . . . . . . . . . . . . . . . . 9 左右手演奏不同音色 . . . . . . . . . . . . . . . . . . . . . . . . . . . . . . . . . . . . . 9 双钢琴演奏 . . . . . . . . . . . . . . . . . . . . . . . . . . . . . . . . . . . . . . . . . . . . . . . . . . . 10 和节拍器一起演奏. . . . . . . . . . . . . . . . . . . . . . . . . . . . . . . . 10 改变节拍器的速度. . . . . . . . . . . . . . . . . . . . . . . . . . . . 10 改变节拍器的时值. . . . . . . . . . . . . . . . . . . . . . . . . . . . 10 改变节拍器的音量. . . . . . . . . . . . . . . . . . . . . . . . . . . . 10 调节音色. . . . . . . . . . . . . . . . . . . . . . . . . . . . . . . . . . . . . . . 10 添加混响. . . . . . . . . . . . . . . . . . . . . . . . . . . . . . . . . . . 10 添加合唱效果. . . . . . . . . . . . . . . . . . . . . . . . . . . . . . . 11 使用踏板. . . . . . . . . . . . . . . . . . . . . . . . . . . . . . . . . . . . . . . 11 移调 . . . . . . . . . . . . . . . . . . . . . . . . . . . . . . . . . . . . . . . . . . . . . . . . . . . . . . . . . . 11
Roland SuperNATURAL Piano Power 三款数字钢琴说明书
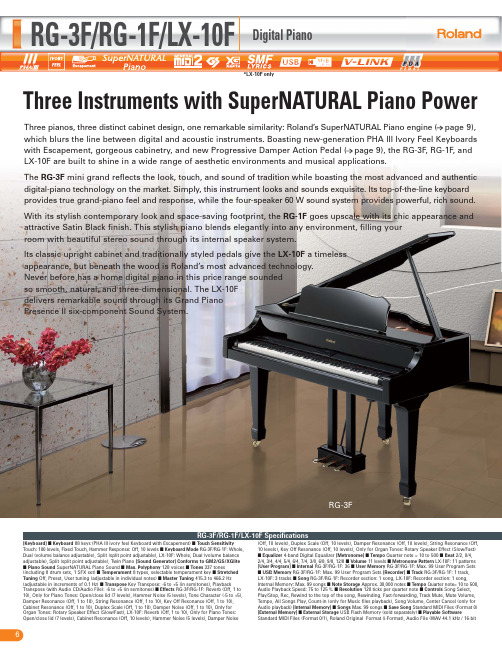
Three Instruments with SuperNATURAL Piano PowerRG-3F/RG-1F/LX-10FDigital Piano*LX-10F onlyRG-3F/RG-1F/LX-10F Specifications[Keyboard] ■ Keyboard 88 keys (PHA III ivory feel Keyboard with Escapement) ■ Touch SensitivityTouch: 100 levels, Fixed Touch, Hammer Response: Off, 10 levels ■ Keyboard Mode RG-3F/RG-1F: Whole, Dual (volume balance adjustable), Split (split point adjustable), LX-10F: Whole, Dual (volume balance adjustable), Split (split point adjustable), Twin Piano [Sound Generator] Conforms to GM2/GS/XGlite ■ Piano Sound SuperNATURAL Piano Sound ■ Max. Polyphony 128 voices ■ Tones 337 tones(including 8 drum sets, 1 SFX set) ■ Temperament 8 types, selectable temperament key ■ Stretched Tuning Off, Preset, User tuning (adjustable in individual notes) ■ Master Tuning 415.3 to 466.2 Hz (adjustable in increments of 0.1 Hz) ■ Transpose Key Transpose: -6 to +5 (in semitones), PlaybackTranspose (with Audio CD/Audio File): -6 to +5 (in semitones) ■ Effects RG-3F/RG-1F: Reverb (Off, 1 to 10), Only for Piano Tones: Open/close lid (7 levels), Hammer Noise (5 levels), Tone Character (-5 to +5), Damper Resonance (Off, 1 to 10), String Resonance (Off, 1 to 10), Key Off Resonance (Off, 1 to 10), Cabinet Resonance (Off, 1 to 10), Duplex Scale (Off, 1 to 10), Damper Noise (Off, 1 to 10), Only for Organ Tones: Rotary Speaker Effect (Slow/Fast), LX-10F: Reverb (Off, 1 to 10), Only for Piano Tones: Open/close lid (7 levels), Cabinet Resonance (Off, 10 levels), Hammer Noise (5 levels), Damper Noise(Off, 10 levels), Duplex Scale (Off, 10 levels), Damper Resonance (Off, 10 levels), String Resonance (Off, 10 levels), Key Off Resonance (Off, 10 levels), Only for Organ Tones: Rotary Speaker Effect (Slow/Fast) ■ Equalizer 4-band Digital Equalizer [Metronome] ■ Tempo Quarter note = 10 to 500 ■ Beat 2/2, 0/4, 2/4, 3/4, 4/4, 5/4, 6/4, 7/4, 3/8, 6/8, 9/8, 12/8 ■ Volume 11 levels ■ Metronome Pattern LX-10F: 11 patterns [User Program] ■ Internal RG-3F/RG-1F: 36 ■ User Memory RG-3F/RG-1F: Max. 99 User Program Sets ■ USB Memory RG-3F/RG-1F: Max. 99 User Program Sets [Recorder] ■ Track RG-3F/RG-1F: 1 track, LX-10F: 3 tracks ■ Song RG-3F/RG-1F: Recorder section: 1 song, LX-10F: Recorder section: 1 song,Internal Memory: Max. 99 songs ■ Note Storage Approx. 30,000 notes ■ Tempo Quarter note= 10 to 500, Audio Playback Speed: 75 to 125 % ■ Resolution 120 ticks per quarter note ■ Controls Song Select, Play/Stop, Rec, Rewind to the top of the song, Rewinding, Fast-forwarding, Track Mute, Mute Volume, Tempo, All Songs Play, Count-in (only for Music files playback), Song Volume, Center Cancel (only for Audio playback) [Internal Memory] ■ Songs Max. 99 songs ■ Save Song Standard MIDI Files (Format 0) [External Memory] ■ External Storage USB Flash Memory (sold separately) ■ Playable SoftwareStandard MIDI Files (Format 0/1), Roland Original Format (i-Format), Audio File (WAV 44.1 kHz / 16-bitThree pianos, three distinct cabinet design, one remarkable similarity: Roland’s SuperNATURAL Piano engine (page 9), which blurs the line between digital and acoustic instruments. Boasting new-generation PHA III Ivory Feel Keyboards with Escapement, gorgeous cabinetry, and new Progressive Damper Action Pedal (page 9), the RG-3F , RG-1F , and LX-10F are built to shine in a wide range of aesthetic environments and musical applications.The RG-3F mini grand reflects the look, touch, and sound of tradition while boasting the most advanced and authentic digital-piano technology on the market. Simply, this instrument looks and sounds exquisite. Its top-of-the-line keyboard provides true grand-piano feel and response, while the four-speaker 60 W sound system provides powerful, rich sound.With its stylish contemporary look and space-saving footprint, the RG-1F goes upscale with its chic appearance and attractive Satin Black finish. This stylish piano blends elegantly into any environment, filling your room with beautiful stereo sound through its internal speaker system.Its classic upright cabinet and traditionally styled pedals give the LX-10F a timeless appearance, but beneath the wood is Roland’s most advanced technology. Never before has a home digital piano in this price range sounded so smooth, natural, and three-dimensional. The LX-10F delivers remarkable sound through its Grand Piano Presence II six-component Sound System.linear format), Audio CDs (CD-DA) (when using a USB CD drive) ■ Save Song Standard MIDI Files (Format 0) [Other] ■ Internal Songs RG-3F/RG-1F: 60 songs, LX-10F: 74 songs ■ Rated Power Output RG-3F: 60 W x 2, RG-1F: 40 W x 2, LX-10F: 60 W x 2 ■ Speakers RG-3F/RG-1F: 20 cm x 2, 5 cm x 2,LX-10F: 16 cm x 2 (with Speaker box), (8 cm x 12 cm) x 2, 5 cm x 2 ■ Display RG-3F/RG-1F: 20 characters, 2 lines LCD, LX-10F: 128 x 64 dots Graphic monochrome LCD (with backlit) ■ Language LX-10F: English, Japanese ■ Lyrics LX-10F: Yes (Built-in Display) ■ Controls RG-3F/RG-1F: Volume, Brilliance, LCD Contrast, LX-10F: Volume, LCD Contrast ■ Pedals Damper (Progressive Damper Action Pedal, capable of continuous detection), Soft (capable of continuous detection, function assignable), Sostenuto (function assignable) ■ Other Functions RG-3F/RG-1F: Panel Lock, Playback Lock, V-LINK, LX-10F: Panel Lock, V-LINK ■ Connectors RG-3F/RG-1F: AC inlet, Pedal Connector, Input jacks (1/4 inch phone type) (L/Mono, R), Input jacks (RCA phono type) (L/Mono, R), Output jacks (1/4 inch phone type) (L/Mono, R), USB (MIDI) connector, MIDI connectors (IN, OUT), Headphone jack (Stereo) x 2, External memory connector (USB), LX-10F: AC inlet, Pedal connector, Input jacks (L/Mono, R), Output jacks (L/Mono, R), USB connector, MIDI connectors (In, Out), Phones jack (Stereo) x 2, External Memory connector ■ Power Supply AC 117 V, AC 220 V, AC 230 V, AC 240 V (50 / 60 Hz) ■ Power Consumption RG-3F/LX-10F: 140 W, RG-1F: 95 W ■ Dimensions <top opened> RG-3F: 1,490 (W) x 950 (D) x 1,540 (H) mm/58-11/16 (W) x 37-7/16 (D) x 60-11/16 (H) inches, RG-1F: 1,420 (W) x 730 (D) x 1,270 (H) mm/56 (W) x 29 (D) x 50 (H) inches, LX-10F: 1,410 (W) x 453 (D) x 1,124 (H) mm/55-9/16 (W) x 17-7/8 (D) x 44-1/4 (H) inches (including piano stand) <top closed> RG-3F: 1,490 (W) x 950 (D) x 920 (H) mm/58-11/16 (W) x 37-7/16 (D) x 36-1/4 (H) inches, RG-1F: 1,420 (W) x 730 (D) x 890 (H) mm/56 (W) x 29 (D) x 36 (H) inches, LX-10F: 1,410 (W) x 446 (D) x 1,070 (H) mm/55-9/16 (W) x 17-9/16 (D) x 42-1/8 (H) inches (including piano stand) ■ Weight RG-3F: 110 kg/243 lbs, RG-1F: 75 kg/166 lbs, LX-10F: 93.6 kg/206 lbs 6 oz (including piano stand) ■ AccessoriesRG-3F: Owner’s Manual, Power Cord, Headphone Hook, Maintenance Kit, Key Cover, Caster Caps,RG-1F: Owner’s Manual, Power Cord, Headphone Hook, Brackets, LX-10F: Owner’s Manual, Power Cord, Roland 60 Classical Piano Masterpieces, Headphones Hook, Cord Clamps*, Stabilizer*, Felt*,*Supplied with the stand. ■ Options Headphones (RH-A30, RH-300, RH-L20, RH-5), USB Flash Memory (M-UF2G), USB CD Drive (CD-01A)RG-3F/RG-1F/LX-10F SpecificationsRG-1F LX-10F。
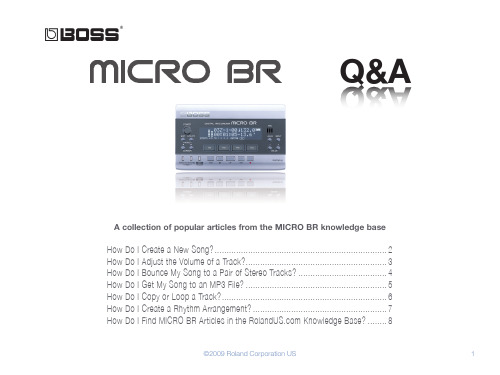
Roland MICRO BR 音乐创作器用户指南说明书
How Do I Copy or Loop a Track?
6
B® MICRO BR How Do I Create a Rhythm Arrangement?
1 Press the RHYTHM button. 2 Press TR2 a few times until you see “AR” in the upper-left corner of the display. 3 Press TR1 until “RHYTHM” appears at the bottom of the screen. 4 Cursor to the letter “P” to the right of the colon in the upper-left corner of the display. 5 Press the + VALUE button to change the “P” to an “S.” 6 Press TR4 (EDT), and then TR1 (STP). 7 Cursor to the pattern number. (The default pattern is P314 Metro.) 8 Use the VALUE buttons to select one of the 327 rhythm patterns.
©2009 Roland Corporation US
1
B® MICRO BR How Do I Create a New Song?
Note: To create a new song, you must be in Normal mode. If “MP3” appears in the lower-right corner of the display, press the MP3/TRAINER button to exit MP3 mode. If “BOUNCE” or “MASTERING” are visible on the left side of the display, simultaneously press the EXIT and UTILITY buttons a few times until these words go away.
PM100使用手册

PAM100系列功能比较
PAM122 PAM132
PAM123 PAM133
单相
单相
PAM124 PAM134
单相
PAM125 PAM135
单相
可选配1路 可选配2路 可选配1路或2路
1路
PAM12X数码显示/PAM13X液晶显示
PAM115
一路 PAM126 PAM136
单相
南京国高电子有限公司
前面板开孔尺寸
................................................5
接线方法
................................................5
施工注意事项
................................................6
信号开出 • 脉冲输出,遥控脉冲宽度为 1 秒 • C 型继电器:5A/250VAC,5A/30VDC
外形尺寸和重量 • 48×96×112mm • 0.45KG
电源 • AC/DC 60~265V • 功耗小于 6W •
南京国高电子有限公司
3
过电流保护
PAM100 使用操作指南
CAUTION
安装CT: 建议 使用接线排,不要直接接CT,以便与拆装。
通信接线 配电分析仪表提供串行异步半双工 RS-485 通信接口,采用 MODBUS-RTU 协议,各种数据信息均 可在通信线路上传送。在一条线路上可以同时连接多达 128 个配电分析仪表,每个配电分析仪 表均可设定其通信地址。
2 为数码显示 3 为液晶显示
2
南京国高电子有限公司
技术参数规格
- 1、下载文档前请自行甄别文档内容的完整性,平台不提供额外的编辑、内容补充、找答案等附加服务。
- 2、"仅部分预览"的文档,不可在线预览部分如存在完整性等问题,可反馈申请退款(可完整预览的文档不适用该条件!)。
- 3、如文档侵犯您的权益,请联系客服反馈,我们会尽快为您处理(人工客服工作时间:9:00-18:30)。
音色列表. . . . . . . . . . . . . . . . . . . . . . . . . . . . . . . . . . . . . . . . . . 17 内置乐曲列表 . . . . . . . . . . . . . . . . . . . . . . . . . . . . . . . . . . . . . . 18 伴奏列表. . . . . . . . . . . . . . . . . . . . . . . . . . . . . . . . . . . . . . . . . . 20 和弦指法列表 . . . . . . . . . . . . . . . . . . . . . . . . . . . . . . . . . . . . . . 21 技术规格. . . . . . . . . . . . . . . . . . . . . . . . . . . . . . . . . . . . . . . . . . 22 安全使用本设备. . . . . . . . . . . . . . . . . . . . . . . . . . . . . . . . . . . . . 23 注意事项. . . . . . . . . . . . . . . . . . . . . . . . . . . . . . . . . . . . . . . . . . 25
为您的演奏添加伴奏 . . . . . . . . . . . . . . . . . . . . . . . . . . . . . . . . . 12 与节奏一起演奏. . . . . . . . . . . . . . . . . . . . . . . . . . . . . . . . . . 12 选择和播放节奏 . . . . . . . . . . . . . . . . . . . . . . . . . . . . . 12 与和弦一起演奏. . . . . . . . . . . . . . . . . . . . . . . . . . . . . . . . . . 12 选择和播放自动和弦伴奏. . . . . . . . . . . . . . . . . . . . . . . 12 和弦伴奏的指法 . . . . . . . . . . . . . . . . . . . . . . . . . . . . . 12
准备工作. . . . . . . . . . . . . . . . . . . . . . . . . . . . . . . . . . . . . . . . . . . 7 安装谱架. . . . . . . . . . . . . . . . . . . . . . . . . . . . . . . . . . . . . . . . 7 使用支架. . . . . . . . . . . . . . . . . . . . . . . . . . . . . . . . . . . . . . . . 7 开启和关闭电源. . . . . . . . . . . . . . . . . . . . . . . . . . . . . . . . . . . 8 开启电源. . . . . . . . . . . . . . . . . . . . . . . . . . . . . . . . . . . . 8 关闭电源. . . . . . . . . . . . . . . . . . . . . . . . . . . . . . . . . . . . 8 聆听演示乐曲 . . . . . . . . . . . . . . . . . . . . . . . . . . . . . . . . . . . . 8
演绎 . . . . . . . . . . . . . . . . . . . . . . . . . . . . . . . . . . . . . . . . . . . . . . 9 演绎各种音色 . . . . . . . . . . . . . . . . . . . . . . . . . . . . . . . . . . . . 9 切换音色. . . . . . . . . . . . . . . . . . . . . . . . . . . . . . . . . . . . 9 演绎双重音色 . . . . . . . . . . . . . . . . . . . . . . . . . . . . . . . . . . . . . . . . . . . . 9 左右手演奏不同音色 . . . . . . . . . . . . . . . . . . . . . . . . . . . . . . . . . . . . . 9 双钢琴演奏 . . . . . . . . . . . . . . . . . . . . . . . . . . . . . . . . . . . . . . . . . . . . . . . . . . . 10 和节拍器一起演奏. . . . . . . . . . . . . . . . . . . . . . . . . . . . . . . . 10 改变节拍器的速度. . . . . . . . . . . . . . . . . . . . . . . . . . . . 10 改变节拍器的时值. . . . . . . . . . . . . . . . . . . . . . . . . . . . 10 改变节拍器的音量. . . . . . . . . . . . . . . . . . . . . . . . . . . . 10 调节音色. . . . . . . . . . . . . . . . . . . . . . . . . . . . . . . . . . . . . . . 10 添加混响. . . . . . . . . . . . . . . . . . . . . . . . . . . . . . . . . . . 10 添加合唱效果. . . . . . . . . . . . . . . . . . . . . . . . . . . . . . . 11 使用踏板. . . . . . . . . . . . . . . . . . . . . . . . . . . . . . . . . . . . . . . 11 移调 . . . . . . . . . . . . . . . . . . . . . . . . . . . . . . . . . . . . . . . . . . . . . . .文说明书
目录
各项特点. . . . . . . . . . . . . . . . . . . . . . . . . . . . . . . . . . . . . . . . . . . 4
面板说明. . . . . . . . . . . . . . . . . . . . . . . . . . . . . . . . . . . . . . . . . . . 6
设置功能. . . . . . . . . . . . . . . . . . . . . . . . . . . . . . . . . . . . . . . . . . . . . . . . . . . . . . . 16 如何设置功能. . . . . . . . . . . . . . . . . . . . . . . . . . . . . . . . . . . 16 可以进行设置的项目. . . . . . . . . . . . . . . . . . . . . . . . . . . . . . 16
内置乐曲. . . . . . . . . . . . . . . . . . . . . . . . . . . . . . . . . . . . . . . . . . 15 播放乐曲 . . . . . . . . . . . . . . . . . . . . . . . . . . . . . . . . . . . . . . 15 随着乐曲在键盘上演奏. . . . . . . . . . . . . . . . . . . . . . . . . . . . . 15