star36050说明书
沃尔玛360电动牙刷说明书

9 This product is designed to clean your teeth, gums and tongue only. Use this product only for itklet. Discontinue use of this product and contact a physician/dentist if discomfort or pain is experienced.
English 7
,, When the handle is placed incorrectly in the charger, the charge indicator light may still illuminate, but charging will not take place.
Handles of other Sonicare models do not fit in this charger and will therefore not charge effectively. Do not attempt to force a handle into this charger as this will cause damage.
星际 实景放样 RTK 使用手册 第一版说明书

星际实景放样RTK使用手册第一版广东科力达仪器有限公司二○二二年十二月目录§1.1引言 (2)第二章星际实景放样RTK介绍 (2)§2.1整体介绍 (2)§2.2星际主机介绍 (3)§2.2.1主机外型 (3)§2.2.2结构与接口 (3)§2.2.3按键和指示灯 (3)§2.3星际按键功能介绍 (4)§2.4主机配件介绍 (6)第三章仪器架设与配置 (6)§3.1静态作业 (6)§3.2RTK作业(外置电台1+1模式) (8)§3.2.1外置电台基准站架设 (8)§3.2.2启动基准站 (9)§3.2.3架设移动站 (11)§3.2.4设置移动站 (12)§3.3RTK作业(网络CORS模式) (13)§3.3.1移动站的架设 (13)§3.3.2移动站设置 (14)第四章常见功能使用 (15)§4.1点测量 (15)§4.2点放样 (17)§4.3成果数据导出 (19)§4.4惯导功能使用 (20)§4.5实景放样功能使用 (21)§4.6WebUI网页配置 (23)§4.7固件升级 (24)§4.9天线高量取方式 (27)附录A星际实景放样RTK技术指标 (27)附录B H6手簿技术指标 (30)附录C联系方式 (31)-1-第一章概述阅读本章,您可以简单了解星际实景放样RTK。
§1.1引言欢迎使用广东科力达仪器有限公司产品,我司一直致力于把国际先进的GPS测绘勘测技术与产品普及到国内测量用户手中。
如果您想对科力达了解更多,欢迎访问科力达官方网站/本说明书是以星际实景放样RTK为例,针对如何安装、设置、配件的使用和如何使用RTK系统作业进行讲解。
LG ENERGY STAR 电器说明书
ContentsBefore you start . . . . . . . . . . . . . . . . . . . . . . . . . . . . . . . . . . . .5-6 Remote control . . . . . . . . . . . . . . . . . . . . . . . . . . . . . . . . . . . . . .7 Main Unit . . . . . . . . . . . . . . . . . . . . . . . . . . . . . . . . . . . . . . . . . . .8 Hooking up the unit . . . . . . . . . . . . . . . . . . . . . . . . . . . . . . .9-11 Operating USB Flash Drive . . . . . . . . . . . . . . . . . . . . . . . . . . . .11 Auto setup . . . . . . . . . . . . . . . . . . . . . . . . . . . . . . . . . . . . . . . . .12 Using the Home Menu . . . . . . . . . . . . . . . . . . . . . . . . . . . . .12-13 Adjust the SETUP settings . . . . . . . . . . . . . . . . . . . . . . . . .13-16 Displaying disc Information . . . . . . . . . . . . . . . . . . . . . . . .17-18 Play a disc . . . . . . . . . . . . . . . . . . . . . . . . . . . . . . . . . . . . . .18-19 Playing a DivX®movie files . . . . . . . . . . . . . . . . . . . . . . . . . . .20 Listening to a music . . . . . . . . . . . . . . . . . . . . . . . . . . . . . . . .21 Viewing a photo . . . . . . . . . . . . . . . . . . . . . . . . . . . . . . . . . . . .22 Recording . . . . . . . . . . . . . . . . . . . . . . . . . . . . . . . . . . . . . .23-24 Editing a title . . . . . . . . . . . . . . . . . . . . . . . . . . . . . . . . . . . .24-27 Language Codes . . . . . . . . . . . . . . . . . . . . . . . . . . . . . . . . . . .28 Area Codes . . . . . . . . . . . . . . . . . . . . . . . . . . . . . . . . . . . . . . . .28 Troubleshooting . . . . . . . . . . . . . . . . . . . . . . . . . . . . . . . . . . . .29 Specifications . . . . . . . . . . . . . . . . . . . . . . . . . . . . . . . . . . . . . .30Before connecting, operating or adjusting this product,please read this instruction booklet carefully and completely.4[PR]: Indicates the selected channel position.[Seek]: Searches for a channel automatically. Searching stops when the unit [Ch.] Changes the channel number.First levelSecond levelThird levelAuto Programming –This option automatically scans and sets the available[Start]: Start the channel scanning.This option allows you to add channels and edit preset [Edit]: Displays the screen which show preset channel list and channelediting options. (page 12)The clock must be set in order to use [Timer record].Selects the aspects ratio of the connected TV.[4:3 Letter Box]: Select this when connecting to a standard 4:3 screen TV and prefer the wide picture with bands on the upper and lower portions of the [4:3 Pan Scan]: Select this when connecting to a standard 4:3 screen TV and prefer the wide picture on the entire screen cuts off the portions that do not[16:9 Wide]: Select this when connecting to a wide-screen TV.Select a language for the Setup menu and on-screen display. Disc Menu/Audio/Subtitle –Select a language for the Menu/Audio/Subtitle.[Original]: Refers to the original language in which the disc was recorded.[Others]: To select another language, press number buttons to enter the cor-responding 4-digit number according to the language code list on page 28. If you make a mistake while entering number, press CLEAR repeatedly to delete numbers one by one then correct it.[OFF] (for Disc Subtitle): Turn off Subtitle.Adjust the audio settingsDolby Digital / DTS / MPEG –Selects the type of digital audio signal whenAUDIO OUTPUT jack.[Bitstream] – Select this when you connect this unit’s DIGITALjack to an audio component with a built-in Dolby Digital, DTS or [PCM] (for Dolby Digital / MPEG) – Select this when you connect this unit’s AUDIO OUTPUT jack to an audio component without a built-in Dolby Digital or MPEG decoder.[Off] (for DTS) – Select this when you connect this unit’s DIGITALjack to an audio component without a built-in DTS decoder.To access the Rating, Password or Area Code options, you must enter the 4-digit password. If you have not yet entered a password you are prompted to do so. Enter a 4-digit password. Enter it again to verify. If you make a mistake while entering number, press CLEAR repeatedly to delete numbers one by one If you forget your password, you can reset it. Display the SETUPand select [OK] to confirm. The password has now been cleared.Select a rating level. The lower the level, the stricter the rating. Select [No Limit] to deactivate the rating.Changes or deletes the password.[Change]: Enter the new password twice after entering the current password.[Delete]: Delete the current password after entering the current password.Select a code for a geographic area as the playback rating level. This determines which area’s standards are used to rate DVDs controlled by the parental lock. See the Area Codes on page 28.Select the picture quality for recording from XP. See recording time of each mode on page 30.[XP]: Highest picture quality.[SP]: Standard picture quality.[LP]: Slightly lower picture quality than [SP] mode.[EP]: Low picture quality.[MLP]: The longest recording time with the lowest picture quality.– You need to set this if you have a camcorder using32kHz/12-bit sound connected to the front panel DV IN jack.Some digital camcorders have two stereo tracks for audio. One is recorded at the time of shooting; the other is for overdubbing after shooting.On the Audio 1 setting, the sound that was recorded while shooting is used. On the Audio 2 setting, the overdubbed sound is used.When DVD recording, chapter markers are added automatical-ly in every specified interval (5 or 10 min.).If you select None, switch off automatic chapter marking altogether with the NoYou can Initialize a DVD by pressing ENTER while [Start] is select-ed. The [Initialize] menu appears. The unit starts formatting after confirmation. You can select a mode between VR and Video for DVD-RW discs. The everything recorded on the DVD will be erased after formatting.The disc format for DVD-R, DVD+R, DVD+RW, discs is always “Video” format -the same as pro-recorded DVD-Video discs.(You can play a DVD-R, DVD+R, DVD+RW, discs in a regular player).If you load a completely blank disc, the unit will initialize the disc automatically. See “Formatting mode (new disc)” on page 5 for more information.Finalizing is necessary when you play disc recorded with this unit on other DVD equipment. How long finalization takes depends on the disc condi-tion, recorded length and number of titles.[Finalize]: The [Finalize] menu appears. The unit starts finalizing after[Unfinalize]: The finalized DVD-RW discs can be unfinalized after confirming on the [Unfinalize] menu. After unfinalizing, the disc can be edited and re-d eIndicates disc name and format.Indicates the record mode, free space, and elapsed time progress bar. Indicates channel number, station name, and audio signal (STEREO, MONO) received by the tuner.Indicates current audio channel.Indicates current date and time.menu appear on the left side of the screen.[Play]: Starts playback the selected file.[Open]: Opens the folder and a list of files in the folder appears.Audio CD MP3/WMA [Play]: Starts playback of the selected file/track. [Random]: Starts or stops random playback.[Open]: Opens the folder and a list of files in the folder appears.[Full Screen]: Shows the selected file in full screen.[Open]: Opens the folder and a list of files in the folder appears.[Slide Show]: Displays the [Slide Show] menu.Skip to the next/previous photoor >) to view the previous/next photo while displayed in full to rotate the photo while displayed in full screen.When the REC is first pressed, recording starts. Press REC repeatedly to selectThe clock must be set correctly before setting a timer record.Cancelling a timer recordingYou can cancel a timer recording before the timer recording actually starts. Select a timer recording that you want to cancel on the [Timer Record List] menu and press CLEAR to confirm.Indicates the record mode, free space, and elapsed time progress bar.Menu options: To display menu option, select a title or chapter then pressENTER. The options displayed differ depending on the disc type.Currently selected title.Shows the title name, recorded date, and recording length.a b cd e fSelect an Original title or chapter that you want to put into the PlayList then press ENTER. Select the [Playlist Add] option and then press ENTER to display the [Select PlayList] menu. Choose a PlayList-title that you want to put the selected Original title or chapter or select the [New PlayList] to create a new Moving a PlayList chapter-RW VRUse this function to re-arrange the playing order of a PlayList title on the [Chapter List-Playlist] menu. Select [Move] option from the menu on the left of the [Chapter List-Playlist] screen and press ENTER. Usethe place you want to move the chapter then press ENTER. The updated menuto find the time you want to start. Each press ofminute and press and hold b B to moves 5 minutes. Press ENTER to watch a title from a selected time.Hiding a chapter or titleYou can skip through playing chapters or titles without actually deleting them. Select a chapter or title you want to hide and press ENTER. Select [Hide] in the [Edit] option then press ENTER.If you want to recover the hidden title or chapter, select the hidden title or chap-ter and press ENTER. Select [Show] in the [Edit] option then press ENTER to Select a title that you want to delete part of and press ENTER. Select [Delete Part] in the [Edit] option from the menu on the left of the screen and press ENTER to display the [Delete part] menu. You can find the point using PLAY SCAN, PAUSE/STEP buttons.[Start Point]: Select the starting point of a part that you want to delete then press ENTER.[End Point]: Select the end point of a part that you want to delete then press [Cancel]: Press ENTER to cancel the selected part.[Done]: Press ENTER to delete the selected part.Dividing a titleUse this function to split a title up into two titles. Select a title that you want to divide and press ENTER. Select [Divide] in the [Edit] option from the menu on the left of the screen and press ENTER to display the [Divide] menu. Find the point you want to divide the title using PLAY, SCAN, PAUSE/STEPpress ENTER while [Divide] option is selected. The playback screen shows the divided point. Select [Done] option and press ENTER+RW+R +RWSelect the title that you want to rename and press ENTER. Select [Title Name]option from the menu on the left of the screen and press ENTER to display the keyboard menu. Use v V b B to select a character then press ENTER firm your selection on the keyboard menu.[OK]: Finish the naming.[Cancel]: Cancels all entered characters.[Space]: Inserts a space at the cursor position.[Delete]: Deletes the previous character at the cursor position.You can use the remote control buttons for entering a name ): Inserts a space at the cursor position.(PAUSE/STEP): Deletes the after character at the cursor position.(STOP), CLEAR: Deletes the previous character at the cursor position.: Moves cursor to left or right.MENU/LIST, DISPLAY: Changes the character set on the keyborard menu.Numbers (0-9): Enters the corresponding character at the cursor position.Combining chapters Use this function to merge the selected chapter with an adjacent chapter. Select a chapter and press ENTER. Select [Combine] option to view combine indicator between chapter thumbnails. Press ENTER to combine indicated two chapters.+R+RW -RW VR。
星特朗3.5寸液晶触摸屏数码显微镜说明书(中文)
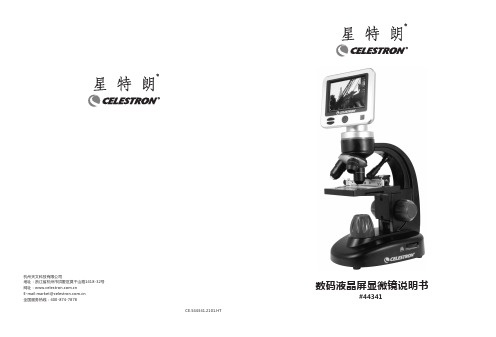
杭州天文科技有限公司地址:浙江省杭州市拱墅区莫干山路1418-32号网址:E-mail:********************.cn全国服务热线:400-874-7878数码液晶屏显微镜说明书#44341杭州天文科技有限公司地址:浙江省杭州市拱墅区莫干山路1418-32号网址:E-mail:********************.cn全国服务热线:400-874-7878数码液晶屏显微镜说明书#44341感谢您购买星特朗3.5寸液晶触摸屏数码显微镜。
这款数码显微镜使用了500万像素的感光芯片和3.5寸彩色液晶显示屏。
此显微镜属于精密光学仪器,使用高级材料精心制造,确保长期可靠的使用,只需要很少的维护就可以长久而愉快的使用。
在使用本款显微镜之前,请仔细阅读本说明书,熟悉产品的功能和操作,以便让您更顺心和更方便地使用本产品。
本手册中所涉及的各部件请参见显微镜图示。
本款显微镜支持40倍至400倍(数码变焦可高达1600倍)的高放大率。
非常适合霉菌、酵母菌、微生物、动植物组织、纤维以及细菌等标本载片的观察。
通过LCD显示屏,你可以轻松观测目标,也可以多人同时观测。
你还可以用内置的数码相机拍摄图片或视频。
12345678915图114131211101AV OUT 视频输出9上照明亮度调节钮2SD卡槽10下照明3MINI USB接口11机械载物台4支撑臂12物镜5上照明13物镜转换器6载物台控制钮14控制面板7调焦旋钮15LCD显示屏8基座内置500万像素数码相机内置6孔位滤镜轮3.5寸彩色LCD 液晶显示屏标配电源适配器4倍物镜标配USB 线10倍物镜附送5个成品切片40倍物镜防尘罩亮度可调上/下照明光源便携箱1G SD 卡物镜4x 10x 40x 数码成像—标准模式40x 100x 400x 最大4倍数码变焦160x400x1600x载物台机械式载物台3.5” x 3.5” (88 mm x 88 mm)数码相机500万像素CMOS,10倍放大率(代替目镜)液晶显示器 3.5" 4倍数码变焦—高清数码TFT 显示屏,分辨率--320 x 240像素调焦器单速调焦存储器SD 卡插槽,最大支持32G SD 卡。
EasyTouch 350 操作说明书

EasyTouch350 Operating ManualRevision 1.4ContentsInstalling the thermostat (3)Removing the old thermostat (3)Wiring the thermostat (3)Mounting the thermostat (4)Initial setup instructions (5)Available modes (5)Connecting remotely (5)Operating the thermostat (5)Main screen (5)Away screen (Heat and cool set points) (7)Schedule screen (8)Setting a change event (8)12- or 24-hour format (8)Setting the time (8)Enabling the schedule (8)Settings Screen (9)Gas Heat Override (10)Smart device application only features (10)Reset device (10)Calibrate Touchscreen (10)Check for updates (10)Notifications (10)Installation Troubleshooting (11)WIFI Troubleshooting (11)No WIFI Icon (11)Red WIFI Icon (11)Appendix A: Connecting remotely (12)First connection steps (12)Adding a control (12)Connecting to a new WIFI network (12)Updating the thermostat (12)The EasyTouch 350 model thermostat was designed to replace certain Dometic™ multi-zone capable thermostats. Original thermostats replaced by this model are a landscape format rectangular design with a circular center display and 10 to 12 buttons. If your thermostat is not of this style, please contact Micro-Air https:///SupportRequest to verify the thermostat you received is correct for your application.Installing the thermostatThere are three steps to installing the thermostat. First remove your old thermostat. Next disconnect and reconnect the wiring. Finally install the mounting pins to the wall and mount your new thermostat.Removing the old thermostatDepress the rectangular locking tab on the bottom of the thermostat with a small screw driver. Pull the thermostat away from the wall from the bottom. Unplug the connector by depressing the locking tab. Remove the back plate mounting screws and remove the back plate.Wiring the thermostatAll models feature a simple telephone style modular jack. This is a six-pin version of a common Ethernet connector with a press tab for removing the connector. Press the tab to remove the connector from the old thermostat and insert it into the new thermostat.Mounting the thermostatStep 1: Locate the mounting buttonshorizontally across the hole with the smaller diameter against the wall.Step 2: Screw in one screw and level the buttons so the display will be straight when installed.Step 3: Screw in second screw making sure the two buttons remain level.Step 4: Remove mounting tab before mounting on the wall.Step 5: Aligning the buttons with the holes in the back of the display. Press the display against the wall and gently slide the display down to lock it in place.Initial setup instructionsAvailable modesSwitches on the control boards typically located in the air conditioners are used to configure the system. These switches determine if the system has a furnace, heat pump, electric heat strip, generator or other features. Operating modes available will reflect the setting of these switches. No thermostat setup is required.Connecting remotelyThis thermostat may be operated remotely using either Bluetooth or WIFI. Apps may be loaded from the Google Play store or Apple App store. The first time the app is opened, it will ask to create an account. A WIFI connection on your smart device is necessary for this step. Create your account and follow the prompts to connect your thermostat.If a second user is going to use the thermostat remotely, they can use the same account and password as the first user. Each thermostat can only be assigned to a single account.Operating the thermostatMain screen1.Inside temperature shows the ambient temperature ofthe room.2.WIFI indicator shows the state of the WIFI connection.Green indicates WIFI is connected properly, Redindicates connection to router only, bars indicate signalstrength, and no symbol indicates no connection.3.Raise and lower the temperature set point using thered and blue arrows.e the power button to turn the system on or off.Button is red for off and green for on.5.Pressing the mode icon changes from cooling orheating modes depending on what is available in your system. See table 2 for a list of all possible modes.Table 1Fan onlyAutomatic Heat pumpCool Only Aqua Heat mode Furnace Zone offHeat strip Zone on6.Pressing the fan icon selects between manual (always on) fan speeds and automatic fan speeds. Automatic will turn the fan off after the heating or cooling cycle is completed. See table 3 for available fan speeds.Table 2Note (1): Auto fan changes fan speed with temperature. It also turns off the fan when a cycle is complete.7. Home-away-schedule icon. Pressing this button selects between these modes. Home mode isthe normal operating mode using a single setpoint for temperature control. Schedule mode allows changing set points throughout the day programmatically. Away mode allows setting a heating and a cooling set point and automatically changing from heating to cooling.8. The zone selection button will show a zone in green when it is turned on. The zone number willshow in gray if the zone is not available and in red if there is a fault with the zone. 9. Pressing the gear will change the settings screen to allow additional setup functions.10. Pressing the set point will change the system units from °F to °C and back. The setpoint is alsoused as an indicator of system operation. A red set point indicates a heating cycle is in process. A blue set point indicates a cooling cycle is in process. A white icon indicates no cycle is in process. The hourglass symbol indicates that a delay is in process and operation will resume once the delay is complete. The control board sends this information to the thermostat so it is just an indication the control board is handling the requested operation.Away screen (Heat and cool set points)Away operation allows setting upper and lower limits for temperature with a non-operating area or “dead band” in the middle. This can be useful when setting a higher daytime cooling temperature and lower night time heating temperature. It can also be used to control the temperature extremes when you are away from the RV. The mode selected must be an automatic mode to allow both heating and cooling operation.1. Press the setpoints area to toggle between the selected value. A blue square will show around the value you are changing. The upper value changes the cooling set point and the lower value changes the heating set point.2. Use the up and down arrows to change the selected temperature value.Schedule screenSet points may be changed on a time-based schedule. The mode used will be the heating orcooling mode set on the main screen.Setting a change event1. Events will show --:-- when the event is disabled. Press the hours position to set the hours. A flashing bar will appear under the hours along with up and down adjustment selectors. Use the adjustment selectors to change the hours.Press the minutes to move the flashing bar under the minutes and allow ¼ hour adjustments. Use the up and down adjustment selectors to make changes.Press the temperature to change the desired temperature set point. This is the temperature the system will try to achieve after the time that was set.12- or 24-hour format2. Press the time in the upper right to change 12 and 24-hour time formats.Setting the time3. Time zone is set and saved whenever the thermostat connects using Bluetooth. Time is set on power up through the internet connection, or whenever a connection is made on either Bluetooth or WIFI.Enabling the schedule4. Press the enabled/disabled button to enable the schedule. The schedule will be active and make set point changes anytime the schedule is selected on the main screen. The Home/Schedule/Away button will only toggle between schedule and away when the schedule is enabled. The button will only select between home and away if the schedule is disabled. Away mode is not configurable on a schedule.5. Press the round arrow to return to the regular settings screen.Settings Screen1.Day/Night mode. Day mode (shown above) will dim the display down to the screen saver setpoint after 30 seconds. Night mode (moon icon) will turn off the back light after 30 seconds. The display will brighten again once the touch screen is pressed. See (7) to set brightness.2.The DIP switches icon is used to view the modes set on the control board dip switches.3.WIFI is used to view your WIFI settings and MAC address. Changes to the WIFI connection mustbe made using the smart device application.4.Temperature adjustment is used to adjust the inside temperature with an offset. This will onlyapply to zone 1.5.The temperature delta icon allows adjustment for one- or two-degree temperature changesbefore a cycle begins.6.Bluetooth is used to reset the Bluetooth password. This password is saved from your accountpassword. Only one account at a time may access the thermostat. Reset the password whenever you change your account password.7.The furnace/Aqua icon selects between a furnace system and an aqua type system for the heatsource. A heat pump or heat strip is still available when set on the dip switches.8.Brightness settings allow dimming the normal brightness and setting the screen saverbrightness.9.The back icon will return the display to the operating screen.10.Reset all will reset the thermostat to factory settings including all set points, schedule events,and other settings.11.The QR code will bring you to the Micro-Air EasyTouch page when selected using a QRcompatible phone app. Below the QR code is the serial number for the thermostat and thefirmware revision for the thermostat. Firmware updates can be checked for in the smart device application.12.Schedule is used to change the set point automatically at a pre-determined time. See Scheduleoperation for more details.Gas Heat OverrideThis function is handled by the control board and not the thermostat. It will activate when the outside temperature falls below the minimum heat pump operating temperature.Smart device application only featuresReset deviceThis Bluetooth only feature allows resetting the display just as if you removed and restored power.Calibrate TouchscreenIt is normally not necessary to recalibrate the touchscreen. This selection prompts the user to press the four corners of the display then test the calibration using three diagonal marks. This feature is only available from Bluetooth since being at the thermostat is required.Check for updatesChecks to see if any updates are available for the thermostat. The smart device application must have internet and the thermostat must be connected to WIFI with a green WIFI symbol. Tap Check for Updates and follow the prompts.NotificationsNotifications provide a way for the thermostat to communicate back to a smart device like a tablet or phone. These notifications are indications of the temperature exceeding a set limit. Limits are set by connecting to the thermostat in the app, selecting the settings gear, and then selecting notifications. A minimum and maximum allowed temperature can be set. Table 4 shows an example of operation with an 80°F maximum temperature set. Notification will be sent for each degree it rises above the maximum temperature. If temperature drops, no notification will be sent unless the temperature exceeds the last maximum temperature again (82 in the example). If the temperature drops two degrees below the set maximum, (78 in the example) it will again alert for each degree above the set maximum. This behavior helps avoids nuisance notifications to your smart device.Table 3Installation TroubleshootingThe most common problem is not knowing the thermostat operation. If the system is running a heating or cooling cycle, the set point will turn red for heating and blue for cooling. When the thermostat turns white, the heat pump, heat strip and furnace should all be off. The fan may continue to run for a while after the cycle completes. If a fan is left in a manual mode, it will not shut off.WIFI TroubleshootingNo WIFI Icon•SSID (Network name) and password are both case sensitive.•Be sure you are connecting to a 2.4 GHz network and not a 5GHz or 6GHz network.•Set the security to WPA2 and TKIP+AES if you are having trouble.•The thermostat has a limit of 31 characters for the SSID and 50 for the password.•The number of devices limit for the network is not full.•The WIFI source is not out of range or metal partitions blocking the signal•Reset the router to renew the DHCP lease.•If you are in a metal enclosure, try moving the router or thermostat a few inches (even if temporary) and trying again.•If using MAC filtering, add the thermostat to the allowed devices list.•Be sure the router SSID is not set for “Hidden”.Red WIFI Icon•The router must have an internet connection•Server may be down, check back at a later time•Be sure there is no firewall in the router blocking the incoming messages (port 443, HTTPS).Appendix A: Connecting remotelyFirst connection steps1.This thermostat uses BLE which is a special implementation of Bluetooth. It is not necessary to“Pair” the thermostat with the phone but an account must be created for operation.2.Start the app on your smart device. The app will open and if you have not entered your accountinformation, it will ask you to create an account. Enter your name, email and a password at the prompts. The system will send a confirmation email to your inbox. Enter the number in theconfirmation email when asked.3.Once the account is created, the application may ask to add a device. If your device is poweredit will show in the list to be added to your account. Select the control and enter a name orlocation for the control.4.If you added a control, the app will ask if you want to connect to WIFI now. Enter your SSID(network name) and password in the boxes.Adding a controlFollow the next steps if the account process does not add a control or a second thermostat is to be added.1.Press “Add” on the top of the selection screen (Apple) or press the settings gear and “AddDevice” (Android).2.The second thermostat should be listed in the new selection window. Select the device andenter a name for the device.3.Press OK and the screen will return to the settings menu (Android) or the selection screen(Apple). Android users should press the back button to get to the selection screen.4.Select the device name to open the thermostat screen.Connecting to a new WIFI network1.Connect to the thermostat in Bluetooth (Apple) and press the settings gear.2.Select WIFI Setup from the settings window.3.Enter the SSID (network name) and password (Both case sensitive).4.Press OK and the screen will return to the selection screen. The thermostat will reset and agreen WIFI symbol will appear on the thermostat screen if the connection was successful. Updating the thermostatEnsuring you have the latest thermostat software is key to having all the latest features.1.Ensure the thermostat is connected to WIFI with a green WIFI symbol.2.Connect to the thermostat and press the settings gear, then tap Check for Updates.3.Follow the prompts to update the thermostat or ensure that you already have the latestsoftware.。
360°会议录音机产品说明说明书
360° meeting recordingwith a light, portable and easy-to-use solutionCapture every meeting in excellent, noise-free audio quality. Simply place the 360° meeting microphone on the table, press record on the remote control and capture all speakers, from every angle.Superior audio quality• 360° recording for perfectly documented meetings• Motion sensor for automatic microphone sensitivity adjustment • Pre-recording function for never missing a single word • MP3 recording for clear playback and easy file sharing Easy and intuitive experience• Large color display for clear recording status information • Wireless remote control included for convenient recording • Rechargeable li-polymer battery for extra-long recording • Plug and play in Windows, macOS and Linux Designed around you• 8 GB memory built-in for up to 88 days of recording • MicroSD memory card slot for virtually unlimited recording • Robust and ergonomic metal design for extra durability • Convenient wire storage for adjusting cable lengthVoice TracerAudio recorderDigitalMeeting recording 8 GBPC connectionDVT1110DVT8010360° recordingThe innovative full radius meeting recorder captures everyone’s ideas in excellent audio quality no matter where they are seated at the table. The meeting microphone’s boundary layer design uses dynamic acoustic pressure to provide excellent sound and recording quality with a full 360° sound pick-up.Motion sensorThe built-in motion sensor detects the recorder when it is placed on a desk or held and selects the microphone sensitivity to suit the recording situation preventing you from accidently blocking the audio you want to record.Pre-recording functionThe pre-recording function allows you to record the last five seconds before you press the record key. The device switches into a standby mode and records a five-second loop without saving it. Press the record key to save the five-second loop. This feature allows you to spontaneously record important parts of a conversation.MP3 recordingCapture your recordings in MP3. The popular file format allows you to play back your files virtually anywhere and simply share them with rge color displayThe large color display offers sharp images, making it easier to see and read everything at first glance. The clear user interface supports eight languages and is optimized for easy,intuitive operation.Wireless remote control The included wireless remote control enables convenient placement of the recorder to best meet the needs of the audio environment while maintaining ease of operation. Start, pause, and stop recording, without havingto clumsily reach over things even from a distance.Extra long battery lifeThe high-capacity Li-polymer battery can be easily charged through a standard micro USB jack. This guarantees extended battery life for extra-long recording ensuring that your recorder will always be ready to work when you are.Plug and playThanks to Plug and Play in Windows, macOS and Linux, you can quickly access your recordings without installing any additional software. The recorder is automatically displayed as a removable drive once connected to your computer via USB. It can also be used as a convenient way to store, back up and share files.8 GB internal memoryCapture and store up to 88 days of continuous recording thanks to the 8 GB of internal memory.MicroSD memory card slotVirtually unlimited recording and storage capacity thanks to a microSD memory card slot supporting up to 32 GB of additional memory.Robust metal designIts robust and lightweight design maximizes comfort and the metal surface creates a robust shell around the device. With the integrated fold-out stand you can conveniently position the recorder towards the sound source. Two ergonomically placed soft keys allow for convenient, quick and direct access to the most important functions.Convenient wire storageThe wire storage in the meeting microphone allows you to adjust the length of the cable to make sure your desk always looks tidy and professional.Connectivity Headphones: 3.5 mmMicrophone: 3.5 mm, Built-in microphone, Microphone stereo socket Micro-SD card socket USB: High-speed USB 2.0DisplayType: LCD color display BacklightDiagonal screen size: 1.77"/4.5 cm Resolution: 128 × 160 pixels Audio recordingBuilt-in microphone: 3 Mic System, high-sensitivity, HQ Stereo, low-noise microphone Recording formats: MPEG1 layer 3 (MP3), PCM (WAV)Recording modes: PCM 1411 kbps, SHQ 192 kbps, HQ 96 kbps, SP 64 kbps, LP 8 kbps Sample rate: 44,1 kHz (PCM/SHQ), 32 kHz (HQ), 22 kHz (SP), 16 kHz (LP)Bit rate: 8, 64, 96, 192, 1411 kbps File overwrite and append mode Record monitor functionRecording time: 2280 h (LP), 284 h (SP), 190 h (HQ), 90 h (SHQ), 12 h (PCM)Silent recording mode Prerecording mode SoundSound enhancement: ClearVoice Frequency response: 50–20,000 Hz Signal-to-noise ratio: > 60 dB Speaker output power: 110 mW Speaker diameter: 28 mm Storage mediaBuilt-in memory capacity: 8 GB Built-in memory type: NAND Flash Mass storage class compliant TunerFrequency range: 87.5–108 MHz Station presets: 20Auto digital tuning Tuner bands: FM stereoSpecificationsMusic playbackCompression format: MP3, WMA Equalizer settings: Jazz, Pop, Classic ID3 tag supportMP3 bit rates: 8–320 kbpsWMA bit rates: 48–320 kbps (44 kHz), 64–192 (48 kHz), stereoMeeting microphone Cable length: 2 m/6.5 ft.Connector: 3.5 mmDesign: boundary layer microphone Frequency response: 30–18,000 Hz Impedance: approx. 2.2 kOhm @ 1 kHz Net weight: 108 g/3.8 oz.Phantom supply voltage: 1.5 to 5 V/0.5 mA Product dimensions (W × D × H): 13 × 13 × 1.8 cm/5.1 × 5.1 × 0.7 inch Sensitivity: -38 dBVType: electret condenser microphoneConvenienceFirmware upgradeable Keypad lockMulti language: English, French, German, Spanish, Italian, Russian, Polish, Simplified ChineseVariable playback speed Voice volume indicator Voice-activated recording AutoAdjust+ recordingAutoZoom+ recording: 15 m zoom Calendar searchInstant one-touch recordingOptimized for notes, conversations, lectures and interviews, meetings PowerLi-polymer built-in batteryBattery lifetime: up to 50/25 hours in LP record mode (built-in memory / microSD memory card)System requirements Free USB portOperating system: Windows 10/8/7, macOS 10, Linux Design and finishingColour(s): Champagne/silver shadow Issue date 2016-12-22Version 1.0/dictation© 2016 Speech Processing Solutions GmbH. All rights reserved.Specifications are subject to change without notice. Philips and the Philips shield emblem are registered trademarks of Koninklijke Philips N.V. and are used by Speech Processing Solutions GmbH underlicense from Koninklijke Philips N.V. All trademarks are the property of their respective owners.Green specifications Lead-free soldered productPackage contents RecorderMeeting microphone Stereo headphones Wireless remote control Carry case USB cable Quick start guide Product dimensionsProduct dimensions (W × H × D): 4.5 × 12.5 × 1.8 cm / 1.75 × 4.9 × 0.71 inch Weight: 85 g / 3.0 oz.EAN: 0855971006243。
春季旅行车型号:R350说明书

SPRING ASSIST RAMP DOORSTEPSSTEPSO H CO H CREFERMICROOHC S H O W E RS T E PS T E P P A N T R YP A T I O D O O R13’L C D T V M O U N TPASS-THRU STORAGEPASS-THRU STORAGEO H CNIGHT STANDWARDKING BEDOPTIONAL ELECTRIC BEDAND PASS-THRU DINETTEDINETTEOPT.CHAIRPASS-THRU STORAGEPASS-THRU STORAGEREFERMICROOHCO H COHCS H O W E RS T E PS T E P S T O R A G EL C D T V M O U N TO H CNIGHT STANDWARDKING BEDOPT. ROLL-OVERSOFAOHC CLOSETSPRING ASSIST RAMP DOORSTEPS16’OPTIONAL ELECTRIC BEDAND PASS-THRU DINETTEOPT.CHAIROUTSIDE STORAGESTEPSSTEPSREFERQUEEN BEDWARDWARDO H COHCL C D T V M O U N TL C D T V M O U N TDINETTE3SPRING ASSIST RAMP DOORFREE STANDING TABLESTANDARD ROLL-OVER SOFASTANDARD ROLL-OVER SOFA12’6”TUB/SHOWERSTEPSMICROOHCREFERE N T . CE N T E R OPT.CHAIROPT.CHAIRS H O W E RQUEEN BEDWARDWARDOUTSIDE STORAGEO H C 7’3”14’6”74”OHCSPRING ASSIST RAMP DOORFREE STANDING TABLESTANDARD ROLL-OVER SOFASTANDARD ROLL-OVER SOFASTEPSFULL BEDSPRING ASSIST RAMP DOOROHCOPT.CHAIRREFERTUBLINENMICRO14’6”7’3”12’6”74”54”OHCFREE STANDING TABLESTANDARD ROLL-OVER SOFASTANDARD ROLL-OVER SOFATRAVEL TRAILERSTUB/SHOWERT V M O U N TE N T . C E N T E RQUEEN BEDOHCWARDWARDREFERO H CT V M O U N TPANTRYOHCSTEPSSTEPS12’6”SPRING ASSIST RAMP DOOROUTSIDE STORAGEOHCOPTIONAL ELECTRIC BEDAND PASS-THRU DINETTEDINETTEFIFTH WHEELS36DSX1327QB29QBS20CB33RZR1631QBThis optional three recliner sofa is available on 29QBS, 31QB and 36DSX133-RECLINER SOFA OPT.INTERIOR STANDARDSn 6 Gallon Gas/Electric DSI Water Heater n USB Charging Stationn Bluetooth Dual Zone AM/FM/CD/DVD Player n 8 Cu. Ft. Gas/Electric Refrigeratorn 35,000 BTU Forced Air Ducted Furnace n Ducted Air Conditioningn Wardrobe Cabinets in Bedroom n Porcelain Foot Flush Toilet n Plywood Decking n Full Height Ceilingn Real Wood Doors and Drawers n Free Standing Dinette Tablen Full Extension Kitchen Drawers (2)n Deep Single Bowl Kitchen Sink n Brushed Nickel Hardware n Skylight Over BathEXTERIOR STANDARDS n 13,500 BTU Air Conditioner n 102" Wide Body Construction n Radius Main Entry Door n Enclosed Tanksn Seamless EPDM Rubber Roof n Powder Coated I-Beam Chassis n Marine Grade External Speakers n Self Adjusting Brakes n Radial TiresREV PACKAGEn Decorative Vinyl Flooringn LED Low Profile Lighting Throughout n LED Lighted Accents n Convection Microwaven Drop-In 3 Burner Cook Top with Glass Covern Wood Blinds (Living area)n 12V Battery Disconnect n 2500# Tie Down Strapsn High Rise Pull-out Kitchen Faucet n Bathroom Fantastic Vent Fan n 30 Amp Service (TT)n 50 Amp Service (FW)n Friction Hinge Entry Doorn Oversized Swing Arm Grab Handle On Entry Door n LED Lighting n LED Ramp Lightn 30 Gallon Fuel Stationn External Fuel Cell with 12V Pump n Adjustable Powered Awning with LED Lighting n Generator Prepn External Shower with Hot & Cold Water n Solar Prep & Wiring n Satellite Prep & Wiring n Rear Back Up Camera Prepn Outdoor Grill Quick Connect n Outdoor TV Bracket & Hook Ups n Power Tongue Jack (TT)nSpare TirePOPULAR OPTIONSn 15,000 BTU Air Conditioner IPO 13,500BTU Air Conditioner n Second Air Conditioner n 4.0 Onan Generator (TT)n 5.5 Onan Generator (FW)n Gas/Oil Resistant Industrial TPO Flooring In Cargo Area n Large LED TV n Euro Chairn Happi-jac Bed Lift System n Ramp Door Patio Systemn Removable Rear Room Edge Carpet n Screen Wall/Tent Wall n 12V Heated Holding Tanksn Glass Neo Angle Shower Enclosure (27QB only)n High Gloss Fiberglass Sidewalls n 15K Air Conditioner n Screen Wall/Tent Walln Electric Bed with Max Clearance Pass-thru Dinette n 100 Gal. Fresh Water n Sofa Slide IPO Dinette (29QBS, 31QB, 36DSX13)STANDARDS & OPTIONSGVWR (Gross Vehicle Weight Rating) -is the maximum permissible weight of the unit when fully loaded. It includes all weights, inclusive of all fluids, cargo, optional equipment and accessories. For safety and product performance do NOT exceed the GVWR.GAWR (Gross Axle Weight Rating) -is the maximum permissible weight, including cargo, fluids, optional equipment and accessories that can be safely supported by a combination of all axles.UVW (Unloaded Vehicle Weight)* -is the typical weight of the unit as manufactured at the factory. It includes all weight at the unit’s axle(s) and tongue or pin and LP Gas. The UVW does not include cargo, fresh potable water, additional optional equipment or dealer installed accessories.CCC (Cargo Carrying Capacity)** -is the amount of weight available for fresh potable water, cargo, additional optional equipment and accessories. CCC is equal to GVWR minus UVW.Available CCC should accommodate fresh potable water (8.3 lbs. per gallon). Before filling the fresh water tank, empty the black and gray tanks to provide for more cargo capacity.*Estimated Average based on standard build optional equipment. **Estimated average based on standard build optional equipment.Each Forest River RV is weighed at the manufacturing facility prior to shipping. A label identifying the unloaded vehicle weight of the actual unit and the cargo carrying capacity is applied to every Forest River RV prior to leaving our facilities.The load capacity of your unit is designated by weight, not by volume, so you cannot necessarily use all available space when loading your unit.XLR Boost by Forest River2421 Century Drive n Goshen, IN 46528n E-mail:**************************Phone: 574-642-0438 n /XLR n #XLRtoyhaulersActual towing capacity is dependent on your particular loading and towing circumstances, which includes GVWR, GAWR and GCWR, as well as adequate trailer brakes. Please refer to the Owners Manual of your vehicle for further information. All information contained in this brochure is believed to be accurate at the time of publication. However, during the model year, it may be necessary to make revisions and Forest River, Inc., reserves the right to make all such changes without notice, including prices, colors, materials, equipment and specifications as well as the addition of new models and the discontinuance of models shown in this brochure. Therefore, please consult with your Forest River dealer and confirm the existence of any materials, design or specificationsthat are material to your purchase decision. ©2016 XLR, a Division of Forest River, Inc., a Berkshire Hathaway company. All Rights Reserved. 1/17BOOST Travel Trailers Fifth WheelsModel 20CB 27QB 29QBS 31QB 33RZR16 36DSX13Dry Hitch Weight 853-lbs. 1082-lbs. 1257-lbs. 1465-lbs. 1951-lbs. 2333-lbs.Unloaded Vehicle Weight 4955-lbs. 6385-lbs. 8100-lbs. 9320-lbs. 8558-lbs. 10046-lbs.Cargo Carrying Capacity 2898-lbs. 3600-lbs. 3317-lbs. 4145-lbs. 4999-lbs. 4287-lbs.Exterior Length 25’-0’’ 31’-0’’ 36’-10’’ 39’-3’’ 33’-2’’ 38’-8’’Exterior Height w/ AC 12’-5’’ 12’-5’’ 12’-5’’ 12’-5’’ 13’-5’’ 13’-5’’Exterior Width 102’’ 102’’ 102’’ 102’’ 102’’ 102’’Garage Length 14’-6” 14’-6” 12’-6” 12’-6” 16’ 13’Grey Capacity 38-Gal. 38-Gal. 38-Gal. 38-Gal. 38-Gal. 38-Gal.Black Capacity 38-Gal. 38-Gal. 38-Gal. 76-Gal. 38-Gal. 76-Gal.Fresh Capacity 50-Gal. 50-Gal. 50-Gal. 50-Gal. 100-Gal. 100-Gal.Awning 15’ 15’ 15’ 15’ 15’ 21’。
Seestar S50 使用说明书
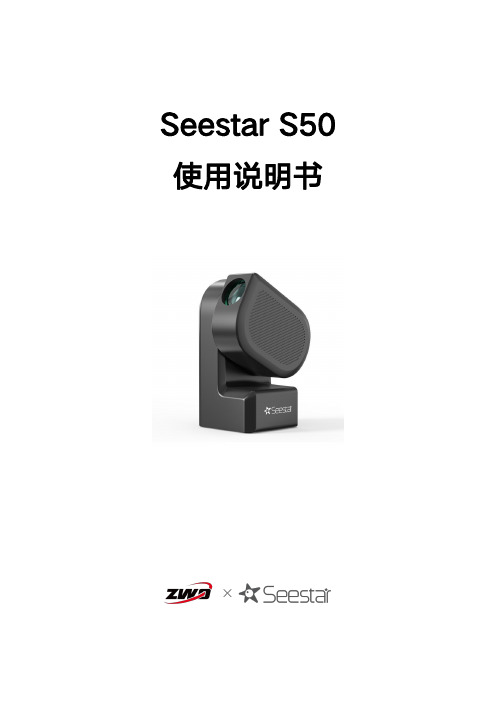
Seestar S50使用说明书目录前言 (2)温馨提示 (3)包装清单 (4)一、产品介绍 (5)二、性能参数 (6)三、使用方法 (8)3.1本体结构名称及功能 (8)3.2安装设备和Seestar App (10)3.3连接Seestar设备 (11)3.4Seestar App介绍 (14)3.5安装和拆卸 (21)3.6观星和观景 (22)3.7关机并收纳 (23)四、观测/拍摄技巧 (24)五、结构尺寸 (24)六、免责声明 (25)七、售后 (26)八、质保 (27)前言感谢您购买智能天文望远镜Seestar S50。
历经5年研发,整合前沿智能化技术及人性化设计,Seestar面向全球天文爱好者推出:集大众化、轻量化、智能化于一体的智能天文望远镜Seestar S50。
Seestar是ZWO旗下智能天文设备品牌,Seestar S50智能天文望远镜是一种一体式集成化智能天文摄影解决方案,将经纬仪、望远镜、相机、主控、图像后期处理等集成于一体,机身仅2.5kg,使用手机APP就能浏览望远镜镜头中的画面,并提供目标的介绍,方便用户快速地开展天文观测和天文科普的活动。
本说明书的编写目的是以文字说明和图例的方式为用户介绍智能天文望远镜的使用方法,提醒可能存在的不当操作或危险情况。
请确保在使用智能天文望远镜前,仔细阅读本说明书,并严格按照说明书的指示谨慎操作。
任何因不当操作而引起的设备损坏以及人身伤害均由使用者本人承担。
本说明书能够指导用户安全高效地使用本设备,在使用设备前,请确保仔细阅读以下温馨提示,并在实际使用过程中严格遵守本说明书的指导。
本说明书的内容可能会有更改。
有关如何使用本产品的最新说明,请参阅https:///提供的在线手册。
1、在未配备专门的太阳滤镜情况下,请勿直接观测太阳,会导致产品不可逆转的损坏。
2、未成年人需在成人监护下使用本产品。
3、请使用正规制造商制造的充电器给产品充电,Seestar不对因电源充电器造成的损坏负责(充电器规格:支持USB BC1.2。
- 1、下载文档前请自行甄别文档内容的完整性,平台不提供额外的编辑、内容补充、找答案等附加服务。
- 2、"仅部分预览"的文档,不可在线预览部分如存在完整性等问题,可反馈申请退款(可完整预览的文档不适用该条件!)。
- 3、如文档侵犯您的权益,请联系客服反馈,我们会尽快为您处理(人工客服工作时间:9:00-18:30)。
star36050说明书
1、星辰鹰(starhawk)F36050N,安装好star36050天文望远镜
2、把目镜接筒上的两个紧固螺钉松开。
取出低倍目镜把它装到目镜接筒上,再把螺钉拧紧。
调节调焦旋钮可以获得对远处某个物体A的模糊影像,再慢慢前后调节调焦旋钮,直到物像清晰为止。
望远镜已精确地调好焦距,现在可以用寻星镜观测了。
如果寻星镜不在焦距上,就转动目镜直到出现清晰的景像。
当您在望远镜上看到的物体A的物像不在寻星镜地十字线中心时,按如下方法调节:拧紧或松开寻星镜支架上的在介螺钉,使寻星镜上下,左右工斜方向移动。
当物体 A的物像出现在十字线的中心时,您的寻星镜就校好了,最后拧紧三个螺钉。
再把低倍目镜换成高倍目镜,重复上述程序。
如果在最高倍率目镜下观察到的像中心,同时也在寻星镜的十字线中心,您的寻星镜就调准了。
现在可以快速寻找您想观察的天体了。
在极特殊的情况下,寻星镜可能还需要调节。
3、任何情况下,先用寻星镜寻找物体,因为寻星镜的视角更大,这样可以极大加快您的粗调的速度。
一般情况下,先装低倍目镜,在逐渐提高您所需要的倍数,当您换目镜时要进行必要的调焦。
不要被您看到的上下、左右颠倒的图像所困扰,对天文望远镜来说这是一个正常情况。
最后,在任何情况下,切忌通过寻星镜或主镜筒直接观察太阳,否则会严重损伤您的眼睛。