struts2.3.20环境搭建详解
Struct2、Hibernate3、Spring3框架搭建实战

Struct2、Hibernate3、Spring3框架搭建实战采⽤⽬前最新的struts-2.3.1.2、hibernate3.6.10.Final、spring-framework-3.1.1.RELEASE开发包,以及eclipse-jee-indigo-SR2-win32、apache-tomcat-7.0.27服务器、JDK6和mysql5做开发环境,参考了前辈的⼀篇相关⽂章,改正了其中的错误和疏漏,克服了公司分配的“新”机器每⼩时⾃动重启三次的困难,终于把环境给搭好了。
整个过程中遵循的⼀个原则是,避免引⼊⽤不到的jar包,以求搭建⼀个最⼩的SSH 运⾏环境。
⾸先创建⼀个Dynamic web project 输⼊任意名字如SSHBase。
第⼀步:加载Spring环境我们需要引⼊的包有:org.springframework.asm-3.1.1.RELEASE.jarorg.springframework.beans-3.1.1.RELEASE.jarorg.springframework.context-3.1.1.RELEASE.jarorg.springframework.core-3.1.1.RELEASE.jarorg.springframework.expression-3.1.1.RELEASE.jarorg.springframework.jdbc-3.1.1.RELEASE.jarorg.springframework.web-3.1.1.RELEASE.jarorg.springframework.orm-3.1.1.RELEASE.jar由于spring默认开启了⽇志,还需要加⼊commons-logging的jar包,否则会报错。
建议不要⼀次性加⼊应该先加最核⼼的运⾏代码看缺少什么加什么,这样就不会加多余的包进来了,spring3已经把包按功能分开,不像以前⼀个包,这样更灵活,只要运⾏我们需要的功能,⽽没⽤到的就不⽤在硬性的添加进来。
struts2环境搭建及详细示例

struts2环境搭建及详细示例suts2环境搭建 1.下载struts2框架下载地址/download.cgistruts223 2.创建web项目,导入用法struts2所必需的jar包。
创建web项目,在lib名目下添加必需的jar包。
所必需的jar包有 commons-upload-1.2.1.jar,commons-io-1.3.2.jar,commons-logging- api-1.1.jar,marker-2.3.16.jar,javassist-3.7.ga.jar,ognl-3.0.jar,struts2-core-2.2.1.1.jar,xwork-core-2.2.1.1.jar 注重:因为struts2版本的差异性,上面提到的包不一定满足全部版本的需求。
配置完struts2后,请部署运行一下。
按照运行时的错误提醒来添加jar 包解决问题。
比如,配置struts-2.2.1.1时需要commons-io-1.3.2.jar包和javassist-3.7.ga.jar包,但是2.1版本就不需要这两个包。
3.编写struts.xml文件 MyEclipse项目中的src 根名目下建立一个struts.xml文件。
(可以打开下载的struts2安装包里的apps名目下的随意一个jar包,在里面的 WEB_INFR/src名目下,寻觅struts.xml文件,将该文件复制进项目的src根名目下,将里面的内容清空(只留下标签和头部标签即可)) 4.在web.xml中加入struts2 MVC框架启动配置在struts2安装包里找到web.xml文件,将里面的和标签及其内容拷贝进项目中的web.config文件即可。
以上就是用Myeclips 搭配struts2的步骤,下边写一个容易的登录示例: struts2示例 1.创建login.jsp页面在body内创建一个fo表单。
form action="login.action" meth="post" username: input type="tt" name="username"/ br/ password: input type="text" name="password"/ br/ input type="bmit" value="submit" / /form 2.编写LoginAction.java package com.test.action;public class LoginAction { private String username; private String password; public String getUsername() { return username; }第1页共2页。
【Struts】Struts框架配置详解
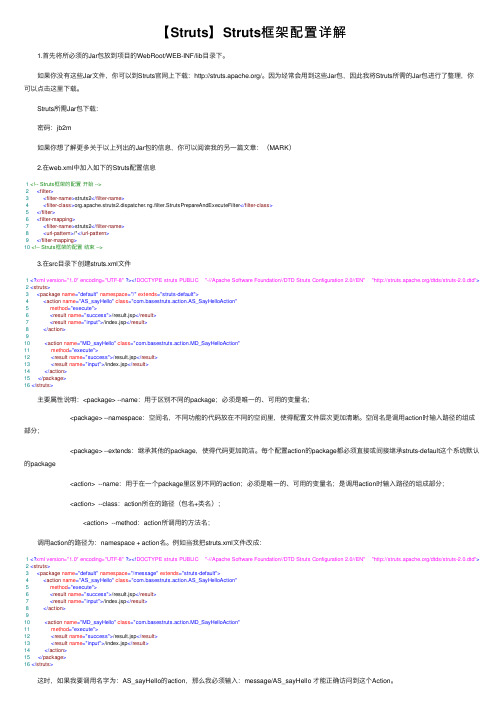
【Struts】Struts框架配置详解1.⾸先将所必须的Jar包放到项⽬的WebRoot/WEB-INF/lib⽬录下。
如果你没有这些Jar⽂件,你可以到Struts官⽹上下载:/。
因为经常会⽤到这些Jar包,因此我将Struts所需的Jar包进⾏了整理,你可以点击这⾥下载。
Struts所需Jar包下载:密码:jb2m如果你想了解更多关于以上列出的Jar包的信息,你可以阅读我的另⼀篇⽂章:(MARK)2.在web.xml中加⼊如下的Struts配置信息1<!-- Struts框架的配置开始 -->2<filter>3<filter-name>struts2</filter-name>4<filter-class>org.apache.struts2.dispatcher.ng.filter.StrutsPrepareAndExecuteFilter</filter-class>5</filter>6<filter-mapping>7<filter-name>struts2</filter-name>8<url-pattern>/*</url-pattern>9</filter-mapping>10<!-- Struts框架的配置结束 -->3.在src⽬录下创建struts.xml⽂件1<?xml version="1.0" encoding="UTF-8" ?><!DOCTYPE struts PUBLIC "-//Apache Software Foundation//DTD Struts Configuration 2.0//EN" "/dtds/struts-2.0.dtd"> 2<struts>3<package name="default" namespace="/" extends="struts-default">4<action name="AS_sayHello" class="com.basestruts.action.AS_SayHelloAction"5 method="execute">6<result name="success">/result.jsp</result>7<result name="input">/index.jsp</result>8</action>910<action name="MD_sayHello" class="com.basestruts.action.MD_SayHelloAction"11 method="execute">12<result name="success">/result.jsp</result>13<result name="input">/index.jsp</result>14</action>15</package>16</struts>主要属性说明:<package> --name:⽤于区别不同的package;必须是唯⼀的、可⽤的变量名;<package> --namespace:空间名,不同功能的代码放在不同的空间⾥,使得配置⽂件层次更加清晰。
STRUTS2入门教程(全新完整版)
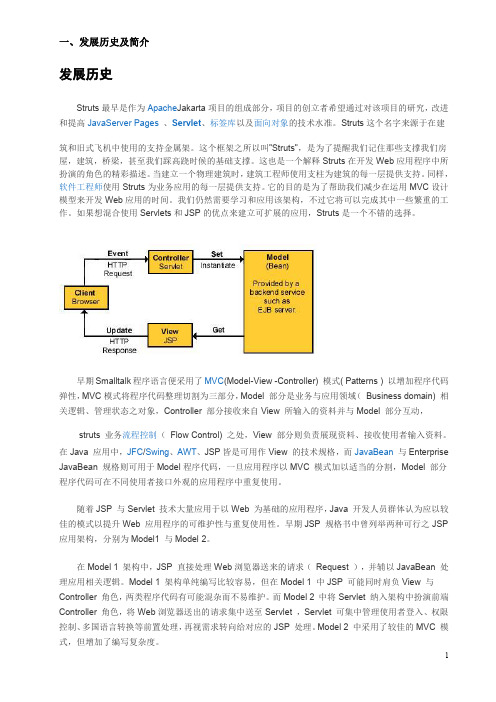
一、发展历史及简介发展历史Struts最早是作为Apache Jakarta项目的组成部分,项目的创立者希望通过对该项目的研究,改进和提高JavaServer Pages、Servlet、标签库以及面向对象的技术水准。
Struts这个名字来源于在建筑和旧式飞机中使用的支持金属架。
这个框架之所以叫"Struts",是为了提醒我们记住那些支撑我们房屋,建筑,桥梁,甚至我们踩高跷时候的基础支撑。
这也是一个解释Struts在开发Web应用程序中所扮演的角色的精彩描述。
当建立一个物理建筑时,建筑工程师使用支柱为建筑的每一层提供支持。
同样,软件工程师使用Struts为业务应用的每一层提供支持。
它的目的是为了帮助我们减少在运用MVC设计模型来开发Web应用的时间。
我们仍然需要学习和应用该架构,不过它将可以完成其中一些繁重的工作。
如果想混合使用Servlets和JSP的优点来建立可扩展的应用,Struts是一个不错的选择。
早期Smalltalk程序语言便采用了MVC(Model-View-Controller)模式(Patterns)以增加程序代码弹性,MVC模式将程序代码整理切割为三部分,Model部分是业务与应用领域(Business domain)相关逻辑、管理状态之对象,Controller部分接收来自View所输入的资料并与Model部分互动,struts业务流程控制(Flow Control)之处,View部分则负责展现资料、接收使用者输入资料。
在Java应用中,JFC/Swing、AWT、JSP皆是可用作View的技术规格,而JavaBean与Enterprise JavaBean规格则可用于Model程序代码,一旦应用程序以MVC模式加以适当的分割,Model部分程序代码可在不同使用者接口外观的应用程序中重复使用。
随着JSP与Servlet技术大量应用于以Web为基础的应用程序,Java开发人员群体认为应以较佳的模式以提升Web应用程序的可维护性与重复使用性。
Struts2学习总结(完整版)
Struts2学习总结(完整版)⼀、搭建struts2环境1、jar包的导⼊主要是到解压其中的⼀个⼯程,得到⾥⾯lib下包含的jar包把这⾥的所有的jar包拷贝到项⽬的WEB-INF⽬录下的lib⽂件夹下⾯。
2、配置struts.xml⽂件注意:必须要放在src⽬录下,因为struts2源码就是这样设计的,只有在src⽬录下才读取得到。
每⼀个package都要extends=”struts-default”,namespace 是访问的路径Action中的name和 package中的namespace组成完整的访问路径3、配置web.xml<filter><filter-name>action2</filter-name><filter-class>org.apache.struts2.dispatcher.ng.filter.StrutsPrepareAndExecuteFilter</filter-class></filter><filter-mapping><filter-name>action2</filter-name><url-pattern>/*</url-pattern></filter-mapping>4、编写的Action类都要继承ActionSupport类或者implements Action接⼝默认action类访问的是⾥⾯的execute⽅法如果要访问特定的⽅法,可以这样:(1)在action 后⾯指定 method=“⽅法名”(2)使⽤通配符 <action name=”example_*” class=”com.XX.YY.ZZ” method=”{1}” />(3)使⽤动态表达式⽐如example!execute(不常⽤)5、接收表单提交的数据(1)属性驱动获取表单参数--在action类中定义与表单的input中 name ⼀样的属性(必须⼀样,否则注⼊不进去)同时还要⽣产属性对应的set ⽅法,因为 action类要调⽤set⽅法把表单中的参数注⼊到属性中(2)模型驱动获取表单参数--模型驱动⾸先action类要实现ModelDrivern,然后重写getModel⽅法--在action类中声明并创建接收表单参数的实体类(Student user = new Student())--原理分析:struts2调⽤action类的getModel⽅法,得到user对象,然后利⽤user对象⾥⾯的set属性的⽅法,设置user对象的属性值--注意,表单的参数name必须要跟Student的属性值⼀致,否则注⼊不进去。
Java的Struts框架简介与环境配置步骤
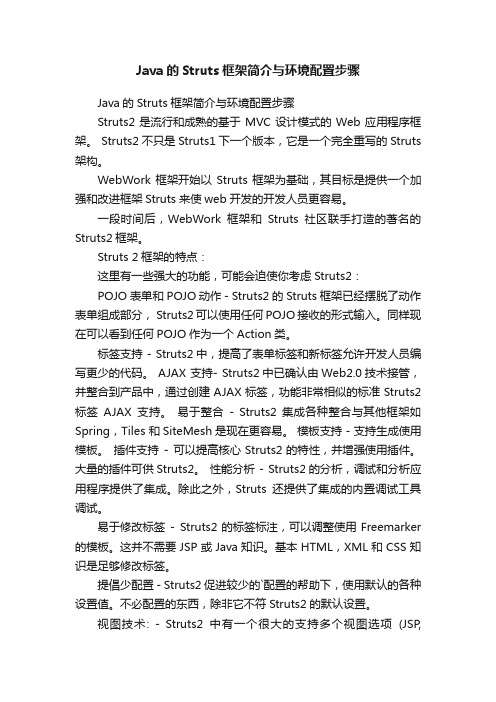
Java的Struts框架简介与环境配置步骤Java的Struts框架简介与环境配置步骤Struts2是流行和成熟的基于MVC设计模式的Web应用程序框架。
Struts2不只是Struts1下一个版本,它是一个完全重写的Struts 架构。
WebWork框架开始以Struts框架为基础,其目标是提供一个加强和改进框架Struts来使web开发的开发人员更容易。
一段时间后,WebWork框架和Struts社区联手打造的著名的Struts2框架。
Struts 2框架的特点:这里有一些强大的功能,可能会迫使你考虑Struts2:POJO表单和POJO动作 - Struts2的Struts框架已经摆脱了动作表单组成部分, Struts2可以使用任何POJO接收的形式输入。
同样现在可以看到任何POJO作为一个Action类。
标签支持 - Struts2中,提高了表单标签和新标签允许开发人员编写更少的代码。
AJAX 支持- Struts2中已确认由Web2.0技术接管,并整合到产品中,通过创建AJAX标签,功能非常相似的标准Struts2 标签AJAX支持。
易于整合- Struts2 集成各种整合与其他框架如Spring,Tiles 和SiteMesh是现在更容易。
模板支持 - 支持生成使用模板。
插件支持- 可以提高核心Struts2的特性,并增强使用插件。
大量的插件可供Struts2。
性能分析 - Struts2的分析,调试和分析应用程序提供了集成。
除此之外,Struts还提供了集成的内置调试工具调试。
易于修改标签- Struts2的标签标注,可以调整使用Freemarker 的模板。
这并不需要JSP或Java知识。
基本HTML,XML和CSS知识是足够修改标签。
提倡少配置 - Struts2 促进较少的`配置的帮助下,使用默认的各种设置值。
不必配置的东西,除非它不符Struts2的默认设置。
视图技术: - Struts2中有一个很大的支持多个视图选项(JSP,Freemarker, Velocity 和 XSLT)以上只是Struts2的十大功能,这使得它是企业公司级应用框架。
Struts2开发指导
Struts2开发指导一.入门例子1.环境搭建新建动态web工程SamplePro,将Struts 2.0 lib下的jar文件加到工程的构建路径(build path)2.简单工程a)新建类包(package)图18 新建菜单"点击“New\Package”,出现如图19所示对话框图19新建Java类包对话框在“Name”键入testAction,点击“Finish”关闭对话框。
b)新建HelloWorld.java文件右键点击SamplePro/src/testAction,点击“New\Class”,出现如图21所示对话框图21 新建Java类对话框在“Name”中键入HelloWorld,在“Superclass”中键入com.opens ymphony.xwork2.ActionSupport,点击“Finish”关闭对话框。
将H elloWorld.java的内容修改为:package testAction;import com.opensymphony.xwork2.ActionSupport;public class HelloWorld extends ActionSupport {private String name;public String getName() {return name;}public void setName(String name) { = name;}public String execute() {name = "Hello, " + name + "!";return SUCCESS;}}c)在struts.xml中添加action映射(mapping)<!DOCTYPE struts PUBLIC"-//Apache Software Foundation//DTD Struts Configuration 2.0//EN""/dtds/struts-2.0.dtd"><struts><include file="struts-default.xml"/><package name="testAction" extends="struts-default"><action name="HelloWorld" class=" testAct ion.HelloWorld"><result>HelloWorld.jsp</result></action></package></struts>d)新建SayHello.jsp参考JSP,弹出如图22所示对话框图22 新建对话框点击“Next”, 进入下一步,如图23所示图23 新建JSP对话框在“File name”键入SayHello.jsp,点击“Next”进入下一步,如图24所示图24 模板选择对话框点击“Finish”关闭对话框,并将SayHello.jsp的内容修改为:<%@ page contentType="text/html; charset=U TF-8" %><%@ taglib prefix="s" uri="/struts-tags" %>01 Transitional//EN"><html><head><title>Say Hello</title></head><body><h3>Say "Hello" to: </h3><s:form action="HelloWorld">Name: <s:textfield name="name"/><s:submit /></s:form></body></html>e)新建HelloWorld.jsp(请参考上一步),HelloWorld.jsp的内容为:<%@ page contentType="text/html; charset=U TF-8" %><%@ taglib prefix="s" uri="/struts-tags" %><!DOCTYPE HTML PUBLIC "-//W3C//DTD HTML 4.01 Transitional//EN"><html><head><title>Hello</title></head><body><h3><s:property value="name"/></h3></body></html>f)发布应用程序运行测试3.Struts2开发中关键内容1)ActionAction是Struts的核心内容,理论上Struts 2.0的Action无须实现任何接口或继承任何类型,但是,我们为了方便实现Action,大多数情况下都会继承com.opensymphony.xwork2.ActionSupport类,并重载(Override)此类里的String execute()方法。
Struts2 入门教程 第一个Struts2程序讲解
其中<package>标签里的namesapce属性指定一个Servlet访问路径, 比如 namespace="/mystruts", 则访问Action的路径为 http://localhost:8080/MyStruct2/mystruts/mycool.action。 <action>标签中的name属性表示动作名,class表示动作类名,动作名就是mycool,相对应的动作
negative.jsp文件:
点击(此处)折叠或打开 1. 2. 3. 4. 5. 6. 7. 8. 9. 10. 11. <%@ page language="java" import="java.util.*" pageEncoding="GBK"%> <%@ taglib prefix="s" uri="/struts-tags" %> <html> <head> <title>显示代数和</title> </head> <body> 代数和为负整数<h1><s:property value="woo" /></h1> </body> </html>
<filter> <filter-name>struts2</filter-name> <filter-class> org.apache.struts2.dispatcher.FilterDispatcher </filter-class> </filter> <filter-mapping> <filter-name>struts2</filter-name> <url-pattern>/*</url-pattern> </filter-mapping>
Struts环境安装配置详解步骤
Eclipse下的Struts开发环境的配置安装java……选择安装路径jdk配置右键我的电脑→属性→高级选项卡→环境变量→新建(上面”新建”配置当前用户,下面的配置所有用户)复制下面变量到相应对话框(“D:”为安装盘符)classpathD:\Program Files\Java\jdk1.6.0\jre\lib\rt.jar;.;java_homeD:\Program Files\Java\jdk1.6.0(注意:没有“;”)pathD:\Program Files\Java\jdk1.6.0\bin;测试运行cmd javac如出现下图画面,证明运行成功安装tomcat……一路下一步修改安装位置tomcat配置(参照java环境配置) tomcat_homeD:\Program Files\Apache Software Foundation\Tomcat 5.0(注意:没有“;”)测试启动Tomcat在浏览器中键入http://localhost:8080/若出现下图则安装成功安装MyEclips e……选择安装位置一路下一步,等待安装完成MyEclipse_5.5配置一、窗口→首选项→java→已安装的jre→添加→浏览(选择jdk根目录)→确定→(选择)jdk1.6.0前的单选框→确定二、窗口→首选项→MyEclipse→Application Servers→Tomcat 5→(选择)Enable→(选择Tomcat Home Directory 后的浏览,选择Tomcat 5.0的跟目录)→应用三、窗口→首选项→MyEclipse→Application Servers→Tomcat 5→jdk→下拉框)选择jdk1.6.0→应用→确定测试一、单击工具栏中的启动Tomcat二、文件→新建→项目→MyEclipse→J2EE Projects→Web Project→(Project Name 内填写项目名称,如Test)→完成三、单击工具栏中的在下拉栏中选择刚刚建立的项目→Add→(下拉栏选择Tomcat 5)→完成四、单击工具栏中的(打开浏览器),在地址栏中键入http://localhost:8080/项目名称/→回车。
Struts2 开发详解
Struts2 开发过程
在 Struts.xml 配置包
<package name="itclass" namespace="/test" extends="struts-default"> <action name="helloworld" class="cn.itclass.action.HelloWorldAction"> <result name="success">/WEB-INF/page/hello.jsp</result> </action> </package> 框架中使用包来管理Action,包的作用和 中的类包是非常类似的, 在struts2框架中使用包来管理 框架中使用包来管理 ,包的作用和java中的类包是非常类似的,它主要用 中的类包是非常类似的 于管理一组业务功能相关的action。在实际应用中,我们应该把一组业务功能相关的 于管理一组业务功能相关的 。在实际应用中,我们应该把一组业务功能相关的Action 放在同一个包下。 放在同一个包下。 配置包时必须指定name属性,如果其他包要继承该包,必须通过该属性进行引用。 属性, 配置包时必须指定 属性 如果其他包要继承该包,必须通过该属性进行引用。 包的namespace属性用于定义该包的命名空间。该属性可以不配置,对本例而言,如果不 属性用于定义该包的命名空间。 包的 属性用于定义该包的命名空间 该属性可以不配置,对本例而言, 指定该属性,默认的命名空间为“”(空字符串) 指定该属性,默认的命名空间为 (空字符串)。 通常每个包都应该继承struts-default包, struts-default包是由 包 包是由struts内置的,它定义了 内置的, 通常每个包都应该继承 包是由 内置的 struts2内部的众多拦截器和 内部的众多拦截器和Result类型。Struts2很多核心的功能都是通过这些内置的拦截 类型。 内部的众多拦截器和 类型 很多核心的功能都是通过这些内置的拦截 器实现的。 从请求中把请求参数封装到action、文件上传和数据验证等等都是通过拦截 器实现的。如:从请求中把请求参数封装到 、 器实现的。当包继承了struts-default包才能使用 包才能使用struts2提供的这些功能。 struts-default 提供的这些功能。 器实现的。当包继承了 包才能使用 提供的这些功能 包是在struts2-core-2.x.x.jar文件中的 文件中的struts-default.xml中定义。 struts-default.xml也是 中定义。 包是在 文件中的 中定义 也是 Struts2默认配置文件。 Struts2每次都会自动加载 struts-default.xml文件。 默认配置文件。 文件。 默认配置文件 每次都会自动加载 文件 包还可以通过abstract=“true”定义为抽象包,抽象包中不能包含 定义为抽象包,抽象包中不能包含action。 包还可以通过 定义为抽象包 。
- 1、下载文档前请自行甄别文档内容的完整性,平台不提供额外的编辑、内容补充、找答案等附加服务。
- 2、"仅部分预览"的文档,不可在线预览部分如存在完整性等问题,可反馈申请退款(可完整预览的文档不适用该条件!)。
- 3、如文档侵犯您的权益,请联系客服反馈,我们会尽快为您处理(人工客服工作时间:9:00-18:30)。
Create Struts 2 Web Application With Artifacts In WEB-INF lib and Use Ant To Build The ApplicationEdit Page Browse Space Add Page Add NewsYou can download this complete example, Basic_Struts2_Ant, from Google Code- /p/struts2-examples/downloads/list. Click on the link forBasic_Struts2_Ant.zip and save the file to your computer. Unzip the file and you should have a folder named Basic_Struts2_Ant. In that folder is a README.txt file with instruction on how to build and run the application.IconThis tutorial assumes you already know how to create a Java web application, use Ant to build the web application archive (war) file, and deploy the war file to a Servlet container such as Tomcat or Jetty.To create a Struts 2 web application with the Struts 2 artifacts added to the the application's class path manually you will need to download the Struts 2 distribution from the Apache Struts website.On the Struts 2 download page, click on the link for the current General Availability release. In that release's section you'll find several links. To get started with a basic Struts 2 web application you need to only download the Essential Dependencies Only zip file, which is approximately 12mb.After downloading this zip file, unzip it. You should have a folder named the same as the current general availability release and in that folder will be a lib folder. The lib folder contains the Struts 2 jar files (e.g. struts2-core-X.X.X.X.jar, where X.X.X.X is the version) and other jar files Struts 2 requires (e.g. xwork-core.X.X.X.jar).As we create our basic Struts 2 web application we will copy from the Struts 2 distribution lib folder just the jar files our application requires. As we add features to our application in future tutorials we will copy other jar files.Step 1 - Create A Basic Java Web ApplicationIn your Java IDE create a web application project named Basic_Struts2_Ant. To follow along with this tutorial your web application should have the following folder structure:Remember Struts 2 requires Servlet API 2.4 or higher, JSP 2.0 or higher, and Java 5 or higher. The example project, Basic_Struts2_Ant, which you can download from Googlecode /p/struts2-examples/downloads/list was created using Eclipse 3.5 with Java 6.Step 2 - Add index.jsp and Ant Build FileOur next step is to add a simple index.jsp to this web application. Create an index.jsp under WebContent with a title of "Basic Struts 2 Application - Welcome" and in the body add an h1 heading of "Welcome to Struts 2!"Next create an Ant build.xml file that will compile any Java classes and create the war file. The code example download, Basic_Struts2_Ant, includes an Ant build.xml.Run the Ant target that creates the war file (in the example downloaded that is the archive target, which places the war file in the dist folder). Copy the war file into your Servlet container so that it will deploy the war file.Start up your Servlet container and in a web browser goto http://localhost:8080/Basic_Struts2_Ant/index.jsp. You should see the following:Step 3 - Add Struts 2 Jar Files To Class PathNow that we know we have a working Java web application, lets add the minimal required Struts 2 framework Jar files to our web application's class path. We'll copy these Jar files from the lib folder of the Struts 2 download to the WEB-INF/lib folder in our web application.Find and copy to WEB-INF\lib these files (note X.X.X.X.jar refers to the version number):1.asm-x.x.jar2.asm-commons-x.x.jar3.asm-tree-x.x.jarmons-io-X.X.X.jarmons-lang3-X.X.X.jarmons-fileupload-X.X.X.jar7.freemarker-X.X.X.jar8.javassist-X.X.X.jar9.ognl-X.X.X.jar10.struts2-core-X.X.X.X.jar11.xwork-core-X.X.X.jarYou can see from the above that the Struts 2 core jar depends on several other artifacts. As we add additional Struts 2 features in future tutorials, we'll need to add additional Struts 2 jar files and other transitive dependencies.Step 4 - Add LoggingTo see what's happening under the hood, the example application for this tutorial uses log4j. You'll need to download the log4j jar file and copy it to WEB-INF/lib. The example application useslog4j-1.2.14.jar /dist/logging/log4j/1.2.14/.Setup a log4j.xml configuration in the src folder. You can copy the one from the example application, which contains the followinglog4j.xml<?xml version="1.0" encoding="UTF-8" ?><!DOCTYPE log4j:configuration PUBLIC "-//log4j/log4j Configuration//EN" "log4j.dtd"><log4j:configuration xmlns:log4j="/log4j/"><appender name="STDOUT" class="org.apache.log4j.ConsoleAppender"><layout class="org.apache.log4j.PatternLayout"><param name="ConversionPattern" value="%d %-5p %c.%M:%L - %m%n"/></layout></appender><!-- specify the logging level for loggers from other libraries --><logger name="com.opensymphony"><level value="DEBUG" /></logger><logger name="org.apache.struts2"><level value="DEBUG" /></logger><!-- for all other loggers log only debug and above log messages --><root><priority value="INFO"/><appender-ref ref="STDOUT" /></root></log4j:configuration>Note the above log4j configuration specifies the console as the log target.Step 5 - Add Struts 2 Servlet FilterTo enable the Struts 2 framework to work with your web application you need to add a Servlet filter class and filter mapping to web.xml. Below is the filter and filter-mapping nodes you should add to web.xml.web.xml Servlet Filter<filter><filter-name>struts2</filter-name><filter-class>org.apache.struts2.dispatcher.ng.filter.StrutsPrepareAndExecuteFilter</filter-class ></filter><filter-mapping><filter-name>struts2</filter-name><url-pattern>/*</url-pattern></filter-mapping>For more information about configuring the deployment descriptor for Struts 2 see web.xml. Note the url-pattern node value is /* meaning the Struts 2 filter will be applied to all URLs for this web application.Step 6 - Create struts.xmlStruts 2 can use either an XML configuration file or annotations (or both) to specify the relationship between a URL, a Java class, and a view page (such as index.jsp). For our basic Struts 2 application, we'll use a minimal xml configuration. Note the file name is struts.xml and it should be in the src folder (struts.xml must be on the web application's root class path).struts.xml<?xml version="1.0" encoding="UTF-8"?><!DOCTYPE struts PUBLIC"-//Apache Software Foundation//DTD Struts Configuration 2.0//EN""/dtds/struts-2.0.dtd"><struts><constant name="struts.devMode" value="true" /><package name="basicstruts2" extends="struts-default"><action name="index"><result>/index.jsp</result></action></package></struts>This minimal Struts 2 configuration file tells the framework that if the URL ends in index.action to redirect the browser to index.jsp.For more information about the struts.xml configuration file see XML.Step 7 - Build and Run the ApplicationWith all of the above in place run the Ant target that creates the war file (in the example download that target is archive). Remove the previously created war file and exploded web application folder from your Servlet container's webapps folder. Copy to your Servlet container's webapps folder the new war you just created.Start up the Servlet container. View the console where you should see numerous debug messages that tell you the Struts 2 framework is being included in the Basic_Struts2_Ant web application.Open a web browser and go to http://localhost:8080/Basic_Struts2_Ant/index.action (note that's index.action not index.jsp at the end of the URL). You should see the same web page as when going to http://localhost:8080/Basic_Struts2_Ant/index.jsp. View the log messages written to the console and you should find several that discuss index.action and index.jsp:Struts 2 Log Messagescom.opensymphony.xwork2.DefaultActionProxy.debug:57 - Creating an DefaultActionProxy for namespace / and action name index...org.apache.struts2.dispatcher.ServletDispatcherResult.debug:57 - Forwarding to location /index.jspNote that the xwork2 artifact is one of the Jar files we copied over to WEB-INF lib and is used heavily by the Struts 2 framework.Getting HelpThe Struts 2 user mailing list is an excellent place to get help. If you are having a problem getting this Basic Struts 2 application to work search the Struts 2 mailing list. If you don't find an answer to your problem, post a question on the mailing list.Next Onward to Hello World Using Struts 2Prev Return to TutorialsChildren Show Children。