虎牌电饭煲JKP-A
电饭煲的介绍说明文

电饭煲的介绍说明文(实用版)编制人:__________________审核人:__________________审批人:__________________编制单位:__________________编制时间:____年____月____日序言下载提示:该文档是本店铺精心编制而成的,希望大家下载后,能够帮助大家解决实际问题。
文档下载后可定制修改,请根据实际需要进行调整和使用,谢谢!并且,本店铺为大家提供各种类型的实用资料,如工作报告、合同协议、条据文书、策划方案、演讲致辞、人物事迹、学习资料、教学资源、作文大全、其他资料等等,想了解不同资料格式和写法,敬请关注!Download tips: This document is carefully compiled by this editor. I hope that after you download it, it can help you solve practical problems. The document can be customized and modified after downloading, please adjust and use it according to actual needs, thank you!Moreover, this store provides various types of practical materials for everyone, such as work reports, contract agreements, policy documents, planning plans, speeches, character stories, learning materials, teaching resources, essay encyclopedias, and other materials. If you want to learn about different data formats and writing methods, please pay attention!电饭煲的介绍说明文2023电饭煲的介绍说明文电饭锅是一种能够进行蒸、煮、炖、煨、焖等多种加工的现代化炊具。
特福 圆形电饭煲 说明书
COOK WARM1782345612b12a12c14151 Steam basket2 Graduation for water and rice3 Removable Non Stick bowl4 Measuring cup5 Rice spoon6 Power cord7 Lid opening button8 Lid Handle9 Micro pressure valve 10 Lid11 Condensation collector12 Control panela Cooking indicator lightb Keep warm indicator lightc Control switch13 Hotplate14 SensorRead and follow the instructions for use. Keep them safe.• This appliance is not intended to be operated by means of an external timer or a separate remote-control system.• This appliance can be used by children aged from 8 years and above if they have been given supervision or instruction concerning use of the appliance in a safe way and if they understand the hazards involved.Cleaning and user maintenance shall not be made by children unless they are older than 8 years and supervised. K eep the appliance and its cord out of reach of children aged less than 8 years.• Appliances can be used by persons with reduced physical, sensory or mental capabilities or lack1of experience and knowledge if they have been given supervision or instruction concerning use of the appliance in a safe way and understand the hazards involved.• Children shall not play with the appliance.• This appliance is not intended for use by persons (including children) with reduced physical, sensory or mental capabilities, or lack of experience and knowledge, unless they have been given supervision or instruction concerning use of the appliance by a person responsible for their safety.• Children should be supervised to ensure that they do not play with the appliance.• As this appliance is for household use only, it is not intended for use in the following applications and the guarantee will not apply for:–Staff kitchen areas in shops, offices and other working environments–Farm houses–By clients in hotels, motels and other residential type environments–Bed and breakfast type environments• If your appliance is fitted with fixed power cord: a if the power supply cord is damage, it must be replaced by the manufacturer, the manufacturer’s after-sales service department2or similarly qualified person in order to avoid any danger.• The appliance must not be immersed in water or any other liquid.• Use a damp cloth or sponge with washing up liquid to clean the accessories and parts in contact with food. Rinse with a damp cloth or sponge. Dry carefully.• I f the symbol is marked on the appliance, this symbol means “ Caution: surfaces may become hot during use ”.• Caution: the surface of heating element is subject to residual heat after use.• Caution: risk of injury due to improper use of the appliance.• Caution: if your appliance has a removable power cord, do not spill liquid on the connector.• Always unplug the appliance:–immediately after use–when moving it–prior to any cleaning or maintenance–if it fails to function correctly• Burns can occur by touching the hot surface of the appliance, the hot water, steam or the food.• D uring cooking, the appliance gives out heat and steam. Keep face and hands away.3• Do not obstruct the steam outlet.• For any problems or queries please contact our Customer Relations Team or consult our web site.• The appliance can be used up to an altitude of 2000 m.• For your safety, this appliance complies with the safety regulations and directives in effect at the time of manufacture (Low-voltage Directive, Electromagnetic Compatibility, Food Contact Materials Regulations, Environment…).• Check that the power supply voltage corresponds to that shown on the appliance (alternating current).• Given the diverse standards in effect, if the appliance is used in a country other than that in which it is purchased, have it checked by an approved service centre.• Do not use the appliance if:–the appliance or the cord is damaged–the appliance has fallen or shows visible damage or does not work properly–In the event of the above, the appliance must be sent to an approved Service Centre. Do not take the appliance apart yourself• Do not leave the cord hanging• Always plug the appliance into an earthed socket.• Do not use an extension lead. If you accept liability for doing so, only use an extension lead which is in good condition, has an earthed plug and is suited to the power of the appliance.• D o not unplug the appliance by pulling on the cord.45• U se a flat, stable, heat-resistant work surface away from any water splashes.• Do not allow the base of the appliance to come into contact with water • Never try to operate the appliance when the pot is empty or without the pot.• The cooking function/knob must be allowed to operate freely. Do not prevent or obstruct the function from automatically changing to the keep warm function.• Do not remove the pot while the appliance is working.• Do not put the appliance directly onto a hot surface, or any other source of heat or flame, as it will cause a failure or danger.• The pot and the heating plate should be in direct contact. Ensure that no food or liquid is inserted between the pot and heating plate.• Do not place the appliance near a heat source or in a hot oven, as serious damage could result.• Do not put any food or water into the appliance until the pot is in place.• Respect the levels indicated in the recipes.• Should any part of your appliance catch fire, do not attempt to put it out with water. To smother the flames use a damp teatowel.• Any intervention should only be made by a service centre with original spare parts.• Always disconnect the appliance from the supply if it is left unattended and before assembling, disassembling or cleaning.• Your appliance has been designed to run for many years. However, when you decide to replace it, remember to think about how you can contribute to protecting the environment.• Before discarding your appliance you should remove the battery from the timer and dispose of it at a local civic waste collection centre (according to model).Environment protection first!Your appliance contains valuable materials which can be recovered or recycled.Leave it at a local civic waste collection point.Unpack the appliance• Remove the appliance from the packaging and unpack all the accessories and printed documents.• Open the lid by pressing the opening button located on the handle - fig. 1.• Install the spoon support: insert the plastic hook of the support in the hole located under product ring, and slide it downwards - fig. 5.Read the instructions and carefully follow the operating method. Clean the appliance• Remove the spherical pot and the micro pressure valve.• Clean the pot and the micro pressure valve with a sponge and washing-up liquid. Wipe the outside of the appliance and the metal parts of the lid with a damp cloth.• Dry carefully.• Make sure the micro pressure valve is correctly placed in position - fig. 2.• Carefully wipe the outside of the bowl (especially the bottom). Make sure that there are no foreign residues or liquid underneath the bowl and on the hotplate- fig. 3.• Place the bowl into the appliance - fig. 4, making sure that it is correctly positioned.• Slightly rotate the bowl in both directions, so as to ensure good contact between the bottom of the bowl and the hotplate.• Check that the condensation collector is correctly placed in position, if not, please install it by pushing firmly into the groove - fig. 5.• Close and lock the lid.• Plug in the appliance.• Do not switch on the appliance until all of the above stages have been completed.• Do not start the appliance with an empty cooking bowl.• Do not touch the heating plate when the product is plugged in.Never place your hand on the steam vent during cooking, as there is a danger of burns. Never use the lid handle to transport the product when it is full.Only use the inner pot provided with the appliance. Do not pour water or put ingredients in the appliance without the bowl inside.6• The graduated markings on the inside of the bowl are given in liters and cups, these are used for measuring the amount of water when cooking rice - fig. 6.• The plastic cup provided with your appliance is for measuring rice and the table states the quantity of rice required for the number of servings.1 level measuring cup of rice weighs about 150 g.• The table below gives a guide to cooking different kinds of rice. For best results, we recommend using ordinary rice rather than ‘easy cook’ type of rice which tends to give a stickier rice and may adhere to the base.With other types of rice, such as brown or wild rice, the quantities of water need adjustment check the table below.• To cook only 1 cup of white rice (serves 2 small or 1 large portion) because there isn’t the mark of 1 cup in the cooking pot, you should use 1 measuring cup of white rice and then add 1 1/2 measuring cup of water. With some types of rice it is normal for a little rice to stick on the base when cooking 1 cup of rice. To cook other quantity of white rice, refer to cooking guide below.• The maximum quantity of water + rice should not exceed the 5.5 or 10 cup mark (depending on model) inside the bowl (depending on model) - fig. 6. Depending on the type of rice, quantities of water may need adjustment. See the table below.Rinse the rice thoroughly before cooking.* The rice cooker will automatically determine the exact cooking time depending on the quantity of water and rice placed in the bowl.7• Place the appliance on a flat, stable, heat-resistant work surface away from water splashes and any other sources of heat.• Pour the required quantity of rice into the bowl using the measuring cup provided. Then fill with cold water up to the corresponding “CUP” mark printed in the bowl (See cooking guide above).• Close the lid.The rice cooker itself determines the exact cooking time depending on the quantity of water and ingredients placed in the bowl (see cooking table above for a guide to timing). When all of the water has been absorbed by the rice, the appliance stops the cooking process automatically and enters into the “KEEP WARM” mode (the green “KEEP WARM” indicator light comes on).Note: Always add the rice first otherwise you will have too much water.• Press downwards on the control switch, the cooking indicator illuminates showing that cooking has begun - fig. 7.• When cooking finished, it will turn to keep warm automatically, the “KEEP WARM” indicator light is on - fig. 8.• After each use empty and clean the condensation collector.Some recommendations for best results when cooking rice• Measure the rice and rinse it thoroughly under running water in a sieve for a long time (except for risotto rice which should not be rinsed). Then place the rice in the bowl together with the corresponding quantity of water.• Make sure that the rice is well distributed in the bowl to allow even cooking.• Add salt to water: depending on personal taste.• Water may be substituted with stock. If using stock, there is risk of rice browning in the bowl.• Do not open the lid during cooking as steam will escape and this will affect the cooking time and the taste.• On completion of cooking, the “KEEP WARM” indicator light is on, stir the rice and then leave it in the rice cooker for a few minutes longer in order to get perfect rice with separate grains.Measuring the ingredients• The maximum quantity of water in the bowl should not exceed the maximum CUP mark shown in “CUP” on the bowl - fig. 6. Exceeding this level may cause overflow during use.• The water level should be lower than the steam basket.Preparation• Pour water into the bowl, never exceed the maximum CUP mark.• Place the steam basket in the bowl - fig. 9.• Add the ingredients in the steam basket.To steam cook• Press downwards on the control switch, the cooking indicator illuminates showing that cooking has begun - fig. 7.• You can end the steam cooking mode by turning the control switch to its top position. The green “KEEP WARM” indicator light comes on and the appliance turns to keep warm function.• When there is no more water in the cooking pot, it will turn to keep warm automatically, the “KEEP WARM” indicator light is on - fig. 8.On completion of cooking, the appliance enters automatically to the “KEEP WARM” function. The control switch comes up to its top position and the green “KEEP WARM” indicator light comes on. The food is thus kept warm until ready to serve. Be aware that long hours of keep warm may affect the quality of the rice. To switch off this function, unplug the appliance - fig. 10.Never remove the bowl after cooking without protective oven gloves.• Open the lid.• Serve the food using the plastic spoon supplied with the appliance and close the lid.• Don’t forget to unplug the appliance after keep warm.• The condensation collector should be emptied and cleaned after each use.• To remove the collector, press on each side of the plastic cover and remove - fig. 11.• To put the collector back, push firmly into the groove.• To clean the micro-pressure valve, remove it from the lid and open it by rotating in the direction of “open” - fig. 12• After cleaning it, wipe dry. Rotate the micro-pressure valve in the direction of “close” until you heard “click”, then put it back in the lid of the rice cooker.• Use hot water, washing up liquid and a sponge to clean the bowl - fig. 13, the condensation collector - fig. 14, the micro pressure valve - fig. 15, the spoons and the cup. Scouring - powders and metal sponges are not recommended.• If food has stuck to the bottom, allow the bowl to soak for a while before washing it.• Dry the bowl carefully.• Do not immerse the appliance in water, nor pour water into it. Taking care of the spherical bowl• To keep the coating quality of the bowl for as long as possible, it is recommended not to cut food in it.• Use plastic or wooden utensils and not metal ones when stirring or serving food to avoid damaging the bowl surface.• To avoid any risk of corrosion, do not pour vinegar into the bowl.• The colour of the bowl surface may change after using for the first time or after long period of use. This change in colour is due to the action of steam and water and does not have any effect on the use of the Rice Cooker, nor is it dangerous for your health. It is perfectly safe to continue using it.Caution: if inner bowl is deformed, do not use it anymore and get a replacement bowl from the authorised service center.Cleaning and care of the other parts of the appliance • Unplug the appliance before cleaning.• Clean the outside of the Rice Cooker, the inside of the lid - fig. 16 and the cord with a damp cloth and wipe dry. Do not use abrasive products.• Do not use water to clean the interior of the appliance body as it could damage the heat sensor.1 Bakul kukusan2 Penanda air dan nasi3 Mangkuk Tidak Melekat yangboleh ditanggalkan4 Cawan penyukat5 Senduk nasi6 Wayar kuasa7 Butang penutup8 Pemegang penutup 9 Injap tekanan mikro10 Penutup11 Pengumpul wap12 Panel kawalana. Lampu penanda memasakb. Lampu penanda kekal panasc. Suis kawalan13. Bekas Panas14. SensorBaca dan ikuti arahan untuk kegunaan. Simpan dengan selamat.• Alat perkakas ini tidak dimaksudkan untuk dikendalikan menggunakan pemasa luaran atau sistem kawalan jauh yang berasingan.• Alat perkakas ini boleh digunakan oleh kanak-kanak berusia 8 tahun ke atas jika mereka diberi penyeliaan atau arahan berkenaan penggunaan alat perkakas dengan cara yang selamat dan jika mereka faham akan bahaya yang terlibat. Penyelenggaraan pembersihan dan penggunaan tidak boleh dilakukan oleh kanak-kanak kecuali mereka berumur 8 tahun ke atas dan diselia. Simpan alat perkakas dan kordnya jauh daripada jangkauan kanak-kanak berumur kurang daripada 8 tahun.• Alat perkakas boleh digunakan oleh seseorang yang kurang upaya secara fizikal, sensori atau keupayaan mental atau kurang berpengalaman jika mereka telah diberi pengawasan atau arahan berkenaan penggunaan alat perkakas dengan cara yang selamat dan jika mereka memahami bahaya yang mungkin berlaku.• K anak-kanak tidak patut bermain dengan alat perkakas.• Alat perkakas ini tidak dimaksudkan untuk digunakan oleh orang (termasuk kanak-kanak) yang kurang upaya dari segi fizikal, deria atau mental, atau kurang berpengalaman dan pengetahuan, kecuali jika mereka telah diberi pengawasan atau arahan berkenaan penggunaan alat perkakas ini oleh orang yang bertanggungjawab atas keselamatan mereka.• K anak-kanak harus diselia bagi memastikan mereka tidak bermain dengan alat perkakas ini.• Kerana alat perkakas ini hanya untuk digunakan dalam rumah sahaja, ia tidak bertujuan untuk digunakan dalam aplikasi berikut dan jaminan tidak diguna pakai:–K awasan dapur kakitangan di kedai, pejabat dan lain-lain persekitaran bekerja–Rumah ladang–Oleh pelanggan di hotel, motel dan lain-lain jenis kediaman–Persekitaran untuk tempat menginap• Jika alat perkakas anda dilengkapi kod kuasa tetap: jika kod bekalan kuasa rosak, ia mesti digantikan oleh pengilang, jabatan khidmat selepas jualan pengilang atau individu yang mempunyai kelayakan yang sama untuk mengelak sebarang bahaya.• Alat perkakas tidak patut direndam dalam air atau sebarang cecair lain.• Guna kain lembap atau span dengan sedikit cecair pembersih untuk membersihkan aksesori dan bahagian yang bersentuhan dengan makanan. Bilas dengan kain lembap atau span. Mengeringkan aksesori dan bahagian yang bersentuhan yang makan menggunakan kain kering.• Jika terdapat simbol bertanda pada alat perkakas, simbol ini bermaksud “ Awas: permukaan mungkin panas ketika digunakan ”.• Awas: permukaan elemen pemanasan tertakluk pada sisa haba selepas digunakan.• Awas: terdapat risiko disebabkan oleh penggunaan alat perkakas.• Awas: jika alat perkakas anda mempunyai kord kuasa boleh tanggal, jangan tumpahkan cecair pada penyambung.• Selalu cabut alat perkakas daripada soket:–selepas digunakan–apabila menggerakkannya–sebelum membasuh atau penyelenggaraan–jika ia gagal untuk berfungsi dengan betul• Lecur mungkin berlaku dengan memegang permukaan panas pada alat perkakas, air panas, stim atau makanan.•K etika memasak, alat perkakas akan mengeluarkan haba dan wap. Jauhi dari muka dan tangan.• Jangan menghalang saluran keluar wap.• Untuk sebarang masalah atau pertanyaan sila hubungi Pasukan Hubungan Pelanggan atau rujuk kepada laman web kami.• Alat perkakas boleh digunakan sehingga altitud 2000 m.• Untuk keselamatan anda, alat perkakas ini mematuhi peraturan keselamatan dan arahan yang berkuatkuasa ketika dikilang (Arahan Voltan-rendah, Kesesuaian Elektromagnet, Peraturan Bahan Sentuhan Makanan, Persekitaran...).• Pastikan bahawa voltan sumber kuasa adalah bersesuaian dengan yang tertera pada alat perkakas (arus ulang-alik).• Disebabkan terdapat pelbagai tahap standard, jika alat perkakas digunakan di negara selain tempat ia dibeli, semak dengan pusat perkhidmatan yang diperakui.• Jangan gunakan alat perkakas jika:–alat perkakas atau kord rosak–alat perkakas telah jatuh atau menunjukkan kerosakan atau tidak berfungsi dengan baik–Jika berlaku perkara di atas, alat perkakas harus dihantar ke Pusat Perkhidmatan yang diperakui. Jangan buka alat perkakas sendiri.• Jangan biar kord tergantung• Selalu pasang alat perkakas ke dalam soket bumi.• Jangan gunakan wayar penyambung. Jika anda menerima tanggungjawab untuk berbuat demikian, hanya gunakan wayar penyambung yang dalam keadaan berfungsi, mempunyai palam yang dibumikan dan sesuai dengan kuasa alat perkakas.• Jangan cabut alat perkakas dengan menarik kord.• Sentiasa memutuskan sambungan alat daripada bekalan kuasa jika ia ditinggalkan tidak berjaga dan sebelum pemasangan atau pembersihan.• G una permukaan yang rata, penebat haba yang jauh dari percikan air.• Jangan biarkan tapak alat perkakas bersentuhan dengan air• Jangan cuba menggunakan alat perkakas apabila periuk kosong atau tanpa periuk.• Alat perkakas anda telah direka untuk penggunaan selama beberapa tahun. Tetapi, apabila anda ingin menggantinya, jangan lupa tentang cara anda boleh menyumbang dalam melindungi alam sekitar.• Sebelum membuang alat perkakas anda keluarkan bateri daripada pemasa dan lupuskan di pusat pengumpulan buangan sivik tempatan (mengikut model).Utamakan perlindungan alam sekitar!Perkakas anda mengandungi bahan bernilai yang boleh didapatkan semula atau dikitar semula.Biarkan ia di pusat kutipan sivik tempatan.• Fungsi/tombol memasak harus dibenarkan untuk beroperasi dengan bebas. Jangan mencegah atau menghalang fungsi daripada bertukar secara automatik kepada fungsi kekal panas.• Jangan keluarkan periuk ketika alat perkakas sedang berfungsi.• Jangan letak alat perkakas terus kepada permukaan panas atau lain-lain sumber haba atau api, ia boleh menyebabkan kegagalan atau bahaya.• Periuk dan plat pemanasan sepatutnya bersentuhan secara langsung. Sebarang objek atau makanan disisipkan di antara dua bahagian ini boleh mengganggu operasi yang betul.• Jangan letak alat perkakas berdekatan sumber haba atau di dalam ketuhar panas, kerana ia boleh menyebabkan kerosakan yang teruk.• Jangan letak sebarang makanan atau air ke dalam alat perkakas sehingga periuk diletakkan dengan betul.• Ikuti tahap yang ditunjukkan dalam resipi.• Jika sebarang bahagian alat perkakas anda terbakar, jangan cuba padamkan dengan air. Untuk mengurangkan api gunakan tuala basah.• Sebarang campur tangan sepatutnya dibuat hanya oleh pusat perkhidmatan dengan alat ganti asal.Keluarkan peralatan• Alihkan peralatan daripada bungkusan dan keluarkan kesemua aksesori dan dokumen.• Buka penutup dengan menekan butang pembuka yang terletak di atas pemegang - fig. 1.• Pasang pemegang senduk: masukkan cangkuk plastik pemegang ke dalam lubang di bawah gegelang produk dan tolak ke bawah - fig. 5. Baca arahan dan ikut kaedah memasang dengan berhati-hati.Cuci peralatan• Keluarkan periuk sfera dan injap tekanan mikro.• Bersihkan periuk dan injap tekanan mikro dengan span dan cecair pembersih. Lap bahagian luar peralatan dan bahagian logam penutup dengan kain lembap.• Keringkan dengan berhati-hati.• Pastikan injap tekanan mikro berada pada kedudukan yang betul - fig. 2.• L ap bahagian luar mangkuk (terutama bahagian bawah) dengan berhati-hati. Pastikan tidak ada bendasing atau cecair di bawah mangkuk dan di atas plat panas - fig. 3.• Letakkan mangkuk ke dalam peralatan -fig. 4, pastikan ia diletakkan pada kedudukan yang betul.• Pusingkan sedikit mangkuk ke kedua-dua belah arah untuk memastikan bahagian bawah mangkuk bersentuhan dengan plat panas.• Periksa sama ada pengumpul wap diletakkan dengan betul, jika tidak sila tekan dengan kemas ke dalam alurnya -fig. 5.• Tutup dan kunci penutup.• Pasangkan plag peralatan.• Jangan buka suis peralatan sehinggalah kesemua langkah di atas telah dilengkapkan.• Elakkan memasang suis peralatan sekiranya mangkuk masakan kosong.• Jangan sentuh plat panas semasa peralatan sedang digunakan.• Penanda bersenggat di dalam mangjuk diberikan dalam liter dan cawan, ia digunakan untuk mengukur jumlah air apabila memasak nasi - fig. 6.• Cawan plastik yang disertakan adalah untuk menyukat beras dan jadual di bawah menyatakan kuantiti beras yang diperlukan untuk jumlah hidangan. 1 paras sukatan beras mempunyai berat lebih kurang 150g.• Jadual di bawah memberi panduan untuk memasak pelbagai jenis beras. Untuk hasil yang terbaik, kami menyarankan penggunaan beras biasa berbanding jenis beras ‘senang masak’ yang biasanya lebih lembik dan mungkin melekat pada dasar mangkuk. Sekiranya menggunakan jenis beras yang lain seperti beras perang atau beras liar, kuantiti air perlu diubahsuai seperti jadual di bawah.• Untuk memasak hanya 1 cawan nasi putih (untuk 2 hidangan kecil atau 1 hidangan besar) disebabkan tiada tanda 1 cawan di dalam mangkuk masakan, anda perlu menggunakan 1 cawan beras putih dan tambahkan 1 ½ cawan air. Bagi sesetengah jenis beras, adalah normal sekiranya sedikit nasi melekat pada dasar mangkuk semasa memasak 1 cawan nasi. Untuk memasak nasi putih dalam kuantiti yang lain, rujuk kepada panduan memasak di bawah.• Sukatan maksimum air+beras tidak boleh melebihi tanda 5,5 atau 10 (bergantung kepada produk) di dalam mangkuk - fig. 6. Bergantung kepada jenis beras, kuantiti air perlu diubahsuaikan. Lihat jadual di bawah.MENYUKAT BERAS DAN AIRJangan sesekali meletakkan tangan di atas corong wap ketika memasak untuk mengelakkan bahaya melecur. Jangan menggunakan pemegang penutup untuk mengangkut produk sewaktu ianya penuh.Pakai mangkuk nasi yang disediakan sahaja. Jangan masukkan air atau bahan makanan ke dalam periuk nasi tanpa mangkuk.* Periuk nasi akan menentukan masa memasak secara automatik bergantung kepada kuantiti air dan beras di dalam mangkuk.Periuk nasi akan menentukan masa memasak bergantung kepada kuantiti air dan bahan-bahan yang dimasukkan ke dalam mangkuk (sila rujuk jadual memasak di atas untuk panduan masa memasak). Apabila beras telah meresap air yang secukupnya, peralatan akan memberhentikan proses memasak secara automatik dan tukar kepada mod “KEKAL PANAS” (lampu penunjuk hijau “KEKAL PANAS” menyala).Nota: Sentiasa masukkan beras terlebih dahulu untuk mengelakkan air yang berlebihan.• Letakkan peralatan di atas permukaan yang rata, stabil, tahan panas dan jauh daripada percikan air dan sumber haba.• Tuangkan kuantiti beras yang dikehendaki ke dalam mangkuk dengan menggunakan cawan penyukat yang disediakan. Kemudian isikan air sejuk sehingga ke tanda “CAWAN” di dalam mangkuk tersebut. (Sila rujuk kepada panduan memasak di atas).• Tutup penutup.• Tekan suis kawalan ke arah bawah, penunjuk memasak menyala menunjukkan pemasakan telah bermula – raj. 7.• Apabila selesai memasak, peralatan akan bertukar ke mod kekal panas secara automatik dan lampu penunjuk kekal panas akan menyala - fig. 8.• Setiap kali selepas penggunaan, kosongkan dan bersihkan pengumpul wap.MEMASAK NASISaranan untuk mendapatkanhasil terbaik apabila memasak nasi• Sukat nasi dan dengan menggunakan penapis, cuci dengan sempurna di bawah air yang mengalir untuk satu jangkamasa (kecuali beras risotto yang tidak perlu dibilas). Kemudian masukkan beras ke dalam mangkuk bersama dengan kuantiti air yang mencukupi.• Pastikan beras diratakan sepenuhnya di atas permukaan mangkuk untuk masakan yang sekata.• Tambah garam mengikut rasa.• Air boleh diganti dengan stok. Jika menggunakan stok, berkemungkinan nasi di bahagian bawah mangkuk akan menjadi sedikit perang.Menyukat bahan-bahan• Kuantiti air yang maksimum di dalam mangkuk tidak boleh melebihi paras maksimum “CAWAN” yang ditanda pada mangkuk - fig. 6. Melebihi paras ini mungkin mengakibatkan limpahan semasa penggunaan.• Paras air sepatutnya lebih rendah daripada bakul kukusan.Penyediaan• Masukkan air ke dalam mangkuk tetapi jangan melebihi paras maksimum “CAWAN”.• Letakkan bakul kukusan ke dalam mangkuk - fig. 9.• Masukkan bahan-bahan ke dalam bakul kukusan.Untuk mengukus• Tekan suis kawalan ke arah bawah, penunjuk memasak menyala menunjukkan pemasakan telah bermula – raj. 7• Anda perlu mengubahsuai masa memasak mengikut keperluan anda, cuma tolak suis kawalan ke atas ke kedudukan teratas untuk menamatkan proses memasak. Lampu penunjuk hijau “KEKAL PANAS” menyala dan peralatan bertukar kepada fungsi kekal panas.• Jikalau air dalam mangkuk sudah habis, ia akan tukar ke “kekal panas” otomatik, lampu penunjuk hijau “kekal Panas” akan menyala - fig. 8.• Jangan buka penutup semasa memasak kerana wap akan keluar dan akan mengganggu masa memasak dan rasa masakan.• Setelah selesai memasak, apabila lampu penunjuk “K EK AL PANAS” menyala, kacau nasi dan biarkan di dalam periuk untuk beberapa minit lagi untuk memperolehi biji-biji nasi yang sempurna.。
松下多功能电饭煲使用说明书
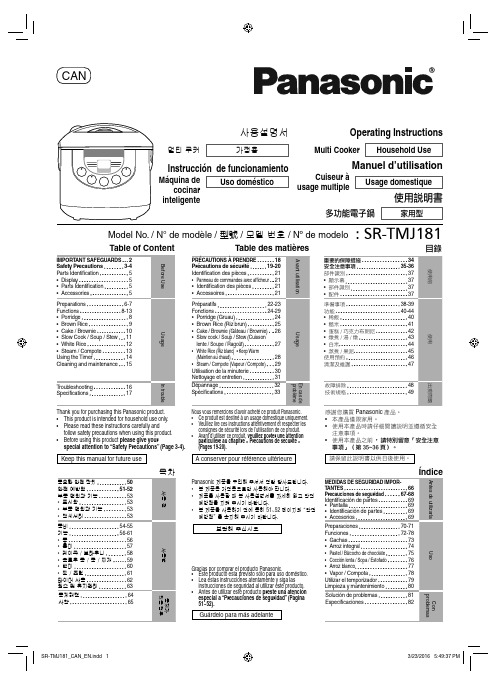
Table des matièresCANOperating InstructionsHousehold UseMulti Cooker 使用說明書家用型多功能電子鍋Manuel d’utilisationUsage domestiqueCuiseur à usage multipleModel No. / N° de modèle / 型號 / 모델 번호 / Nº de modeloThank you for purchasing this Panasonic product.• This product is intended for household use only.• Please read these instructions carefully and follow safety precautions when using this product.• Before using this product please give yourspecial attention to “Safety Precautions” (Page 3-4).Keep this manual for future use感謝您購買 Panasonic 產品。
•本產品僅限家用。
•使用本產品時請仔細閱讀說明並遵循安全注意事項。
•使用本產品之前,請特別留意「安全注意事項」(第 35~36 頁)。
請保留此說明書以供日後使用。
Nous vous remercions d’avoir acheté ce produit Panasonic.• Ce produit est destiné à un usage domestique uniquement.• Veuillez lire ces instructions attentivement et respecter les consignes de sécurité lors de l’utilisation de ce produit.• Avant d’utiliser ce produit, veuillez porter une attention particulière au chapitre « Précautions de sécurité » (Pages 19-20).À conserver pour référence ultérieure:SR-TMJ181Gracias por comprar el producto Panasonic.• Este producto esta previsto sólo para uso doméstico.• Lea estas instrucciones atentamente y siga las instrucciones de seguridad al utilizar este producto.• Antes de utilizar este producto preste una atención especial a “Precauciones de seguridad” (Página 51~52).Guárdelo para más adelanteInstrucción de funcionamientoUso domésticoMáquina decocinar inteligente사용설명서가정용멀티 쿠커Panasonic 제품을 구입해 주셔서 정말 감사드립니다.• 본 제품은 가정용으로만 사용해야 합니다.• 제품을 사용할 때 본 사용설명서를 자세히 읽고 안전 예방책을 지켜 주시기 바랍니다.• 본 제품을 사용하기 전에 특히 51~52 페이지의 “안전 예방책” 을 숙지해 주시기 바랍니다.보관해 주십시오When using electrical appliances, basic safety precautions should always be followed, including the following:1. Read all instructions.2. Do not touch hot surfaces. Use handles or knobs.3. To protect against electrical shock, do not immerse cord, plugs, or appliance in water or other liquid.4. Close supervision is necessary when any appliance is used by or near children.5. Unplug from outlet when not in use and before cleaning. Allow to cool before putting on or taking offparts.6. Do not operate any appliance with a damaged cord or plug or after the appliance malfunctions orhas been damaged in any manner.Return appliance to the nearest authorized service facility for examination, repair, or adjustment. 7. The use of accessory attachments not recommended by the appliance manufacturer may causeinjuries.8. Do not use outdoors.9. Do not let cord hang over edge of table or counter, or touch hot surfaces.10. Do not place on or near a hot gas or electric burner, or in a heated oven.11. Extreme caution must be used when moving an appliance containing hot oil or other hot liquids.12. Always attach plug to appliance fi rst, then plug cord into the wall outlet. To disconnect, turn anycontrol to “off”, then remove plug from wall outlet.13. Do not use appliance for other than intended use.14. This product is intended for household use only.15. SAVE THESE INSTRUCTIONS.CAUTION :a. A short power-supply cord (or detachable power-supply cord) is provided to reduce the riskresulting from becoming entangled in or tripping over a longer cord.b. The cord should be arranged so that it will not drape over the countertop or tabletop where it can bepulled on by children or tripped over unintentionally.c. The use of extension cords is not recommended.This appliance has a polarized plug (one blade is wider than the other). To reduce the risk of electric shock, this plug is intended to fi t into a polarized outlet only one way. If the plug does not fi t fully intothe outlet, reverse the plug. If it still does not fi t, contact a qualifi ed electrician. Do not attempt to modify the plug in any way.23WARNINGIn order to prevent accidents or injuries to the users, other people and damage to property, please follow the instructions below.The following charts indicate the degree of damage caused by wrong operation.CAUTIONPrecaution for UsePlease put in correct amountof rice and water and selectfunctions correctly according tothe operating instructions.(So as to avoid overfl ow of rice water,half-cooked rice or scorched rice.)Before using the appliance, theanti-tarnish paper between theinner pan and the cast heatershould be removed.(So as to avoid poor cooking or fi re.)Do not put ingredients to becooked directly into the appliancein which no inner pan is placed.Do not cook without inner pan.(So as to prevent any impurities fromcausing failure.)Do not cover the outer lid withcloth or other objects when theappliance is in use.(So as to avoid deformation, colorchange of the outer lid or failure.)Avoid using the appliance underdirect sunlight.(So as to avoid color change.)Do not scoop out rice with anymetal object.(So as to avoid scratching the innerpan coating and causing peeling of thecoating.)When there is any overfl owof rice water from thesteam vent, pull out thepower plug immediatelyto disconnect the powersupply. Do not resume theuse until the rice water onthe power plug and theinstrument plug is cleanedwith a dry cloth.The appliance is forhousehold use only. Do notuse it for any commercial orindustrial purposes or anypurposes other than cooking.When power failure occursduring the operation of theappliance, the cooking resultmay be affected.Do not let water spill on thepower plug of the power cord set.(This may result in electric shock.)45DisplayPress this button to:1. Cancel the previous operation orenter Keep Warm function. 2. Preset timer.3. Select cooking menu.4. Select cooking timer.5. Start cooking.Parts Identifi cation61Measure rice with the measuring cup provided.• The volume of the measuring cup is about 180 mL.• For the maximum quantity of rice to be cooked at once, refer to specifi cations in Page 17.Wash the rice till the water turns relatively clear.1Wash the rice quickly with plenty of water and stirring the rice lightly to wash itwhile changing water.2→pour out water), till the water turnsrelatively clear.2ATTENTION• In order to avoid scratching the non-stick coating on the pan surface, do not wash rice in the pan.• Wash the rice thoroughly. Otherwise, rice crust may appear and the residual ricebran may affect the taste of the rice.Add the washed rice or other ingredients into the pan.• Use water line on the pan to measure cooking quantity as follows.31*2 By following water level mark “L” inside the pan.• Wipe the surface of the pan before use. If it is wet, it may cause noise while cooking. Any foreign matters between the pan and the cast heater may damage the unit.• The water level data indicated in above table is only approximation. If rice is too hard or too soft, please adjust water amount according to your personal taste.<LEVEL INDICA TOR> MAXIMUM LEVELDo not cook with more than this levelSR-TMJ1817Put the inner pan into the body and close the outer lid.1In order to closely attach the bottom of inner pan to thecast heater, please rotate the inner pan along the directionindicated by the arrow 2 or 3 times. Please check whether the steam cap is correctly positioned (Page 15).2Close the outer lid until it clicks.4Connect the plugs.1Please insert the instrument plug into the body fi rst.2Connect the power plug. Make sure that both plugsare tightly connected.58Operations(Cooking with the Porridge function.)1Press button.• remaining time reaches 5 minutes.2The cooking is over• Keep Warm function • Keep Warm function as it may become too thick and dry. Pressthe button to exit the Keep Warm function and unplug the power plug.9Operations1• remaining time reaches 13 minutes.2The cooking is overStir and loosen the rice.• • Keep Warm function as it may become affect the taste. Pressthe button to exit the Keep Warm function and unplug the power plug.(Cooking with the Brown Rice function.)10Preparations• Prepare the cake mixture by following your recipe.• Coat the inner pan with butter or margarine to facilitate removing the cake from inner pan.•Pour the cake mixture into the inner pan and level it.Operations(Cooking with the Cake / Brownie function.)Press Menu button to select Cake / Brownie function.40min (40 minutes) will appear on LCD display (as the default baking time for Cake function).1Press button to set the cooking time as your desire.• Y ou can set the cooking time for:Cake function : from 20 to 65 minutes (5 minutes increment).Brownie function : from 1 to 20 minutes (1 minute increment) and 20 to 65 minutes (5 minutes increment).• Keeping the button pressed will make setting faster.2Press button.•3The cooking is over•the Keep Warmlights up automatically).• Keep Warm function as it mayaffect the taste. Press the button to exit the Keep Warm function andunplug the power plug.• Bring out the pan and leave it cool for 2-3 minutes. Then put the pan upsidedown onto a tray or grill.• Decorate the cake surface as your desire.Hand glovePreparations• Place all ingredients into the pan. •Close the lid.Operations(Cooking with the Slow Cook / Soup / Stew function.)PressMenubutton to select Slow Cook / Soup / Stew function.1h (1 hour 0 minute) will appear on LCD display (as the default cookingtime for Slow Cook / Soup / Stew function).1Pressbutton to set the cooking time as your desire.• Y ou can set the cooking time from 1 to 12 hours (30 minutes increment). • Keeping the button pressed will make setting faster.2Press button.• reduce to 1 minute decrement when cooking time is less than 1 hour.3The cooking is over• • Keep Warm function as it may affect the taste. Press the button to exit the Keep Warm function and unplug the power plug.Operations1• The remaining time counter will appear on the LCD display when the remaining time reaches 9 minutes.2The cooking is overStir and loosen the rice.• Keep Warm(Cooking with the White Rice function.)Preparations• Add the required amount of water.• Place foods to be steamed into the steam basket.• Close the outer lid.Operations(Cooking with the Steam / Compote function.)PressMenubutton to select Steam / Compote function.10min (10 minutes) will appear on LCD display (as the default steamingtime for Steam / Compote function).1Pressbutton to set the cooking time as your desire.• Y ou can set the cooking time from 1 to 60 minutes (1 minute increment). • Keeping the button pressed will make setting faster.2Press button.• 3The cooking is over• • Keep Warm function as it may affect the taste. Press the button to exit the Keep Warm function and unplug the power plug.Correspondence between the amount of water andtime of steaming as below serves as a guideline to achieve a satisfactory cooking performance.The presetting time is a countdown timer.• Time can be preset 13 hours in advance.ExampleIf the timer is set for 4H 30min pressed.OperationsPressMenubutton to select function.•1Press button to set the timer as your desire.• The fi• • Keeping the button pressed will make setting faster.23Press button.• •Rice CookingDetailsCooking problems Keep Warm problems No powerStrange sound occursT oo hardUndercookedT oo softWater overfl owBurnt rice at bottomof inner panColor changeBad smellT oo dryWrong rice and water proportion.●●●●●●Pull out plug and check the socket.Sound occurs because of water that has stuck to inner pan.Inadequate washing of rice.●●●●Foreign matters between inner pan and cast heater.●●●●Cooking with a lot of oil.●●●●●The rice has been warmed more than 12 hours.●●●The outer lid is not securely closed.●●●●●The inner pan is not adequately washed.●●The power cord is not connected to the socket securely.●●Cake BakingDetailsBaking Cake problemsNo powerStrange sound occursUndone CakeUndercooked CakeWet CakeThe Cake sticks to the base of panBottom of the Cake burntNot fl uffedCrumblyToo much dough.●●Pull out plug and check the socket.Sound occurs because of water that has stuckto pan.Not enough mixing before baking.●●●Used with incompatible cake mix.●●●●Used with cake mix that contains too much chocolate, sugar or fruit ingredients.●●●●Outer lid not close while cooking.●●●Foreign matters between pan and cast heater.●●●●●Not enough butter or cooking oil applied to the bottom of the pan.●Cake left in the pan too long.●●Inadequate mixing or mixed too long.●●Wrong ingredient quantity.●●●●Model No.SR-TMJ181Power Source 120 V60 HzPowerConsumptionIn the Cooking Function 670 W In the Keep Warm Function 108 W CapacityWhite Rice 3 - 10 cups Sticky Rice 3 - 6 cups Mixed Rice3 - 8 cups Brown Rice 3 - 7 cups Porridge1 -2 cups Slow Cook / Soup / Stew 1,1 - 3,2 L Cake / Brownie1,660 g Dimensions (Width x Length x Height) (approx.)274 x 275 x 276 mmWeight (approx.)3,1 k g Keep Warm12 hours• For power cord replacement and product repair, please contact Panasonic authorized service center.Lors de I’utilisation de tout appareil électrique, il est toujours recommandé de prendre certaines précautions, dont les suivantes:1. Lire toutes les instructions.2. Éviter de toucher aux surfaces chaudes. Toujours utiliser les poignées ou les anses.3. Afi n de prévenir tout risque de choc électrique, ne pas immerger le cordon, les fi chesd’alimentation ou l’appareil dans l’eau ou tout autre liquide.4. Ne jamais laisser des enfants utiliser I’appareil sans surveillance.5. Après usage et avant le nettoyage, toujours débrancher I’appareil. Laisser refroidir avantde retirer des pièces ou de les remettre en place.6. Ne jamais utiliser I’appareil si sa fi che ou son cordon est endommagé ou après avoirconstaté une défectuosité ou des dommages. Le cas échéant, l’appareil doit être retournéau centre de service le plus près pour vérifi cation, réparation ou ajustement.7. L’utilisation d’accessoires non recommandés par le fabricant peut représenter un risquede blessures.8. Ne pas utiliser I’appareil à I’extérieur.9. Ne pas laisser le cordon pendre d’une table ou d’un comptoir, ni le mettre en contact avecune surface chaude.10. Ne pas placer I’appareil sur le dessus ou à proximité d’un brûleur à gaz ou électrique, nidans un four chaud.11. Être extrêmement prudent lors du déplacement d’un appareil contenant de I’huile chaudeou tout autre liquide chaud.12. Toujours brancher le cordon d’alimentation à I’appareil avant d’en brancher la fi che dansune prise secteur. Avant de débrancher, couper le contact, puis retirer la fi che de la prise secteur.13. N’utiliser I’appareil qu’aux fi ns recommandées.14. Cet appareil est conçu seulement pour l’utilisation domestique.15. CONSERVER CE MANUEL.ATTENTION :a. Le cordon d’alimentation (ou le cordon amovible) fourni est court, de manière à prévenirles risques d’emmêlement et d’accidents.b. Le cordon ne doit pas pendre du comptoir ou de la table, afi n d’éviterque des enfants tirent dessus ou trébuchent accidentellement.c. L’utilisation d’un cordon prolongateur n’est pas recommandée.Cet appareil est équipé d’une fi che polarisée (une des broches est plus large que les autres). Afi n de réduire le risque de choc électrique, cette fi che doit être enfi chée dans une prise polarisée dans un seul sens. Si elle ne s’enfi che pas complètement dans la prise, l’inverser.Si elle ne s’enfi che toujours pas, contacter un électricien qualifi é. Ne pas tenter de modifi er la fi che de quelque façon que ce soit.AVERTISSEMENTAfi n d’éviter les accidents ou blessures aux utilisateurs, à d’autres personnes et des dégradations matérielles, veuillez suivre les instructions ci-dessous.Les tableaux suivants indiquent la gravité des dommages provoqués par des mauvaises manoeuvres.A TTENTIONPrécautions d’utilisationVeuillez mettre la bonne quantitéd’eau et de riz et sélectionnerles fonctions correctement etconformément aux instructionsd’utilisation.(Pour éviter un débordement de l’eaudu riz, le riz à moitié cuit ou le riz brûlé.)Avant d’utiliser l’appareil, lepapier anti-ternissure placé entrele panier de cuisson et la plaquechauffante doit être retiré.(Pour éviter une mauvaise cuissonou un incendie.)Ne mettez pas d’ingrédients àcuire directement dans l’appareilsi aucun panier de cuisson nes’y trouve. Ne cuisinez pas sanspanier de cuisson.(Pour empêcher toute impureté deprovoquer une panne.)Ne couvrez pas le couvercle extérieuravec un linge ou d’autres objets lorsquel’appareil est en cours d’utilisation.(Pour éviter la déformation,le changement de couleur ducouvercle extérieur ou une panne.)Évitez d’utiliser l’appareil sous lalumière directe du soleil.(Pour éviter tout changement de couleur.)Ne servez pas le riz avec unobjet en métal.(Pour éviter de rayer lerevêtement du panier de cuissonet de provoquer l’écaillage durevêtement.)En cas de débordement d’eaudu riz par l’évent à vapeur,retirez la fi che d’alimentationimmédiatement pour couperl’alimentation électrique.Ne reprenez pas l’utilisationavant que l’eau du riz sur lafi che d’alimentation et la fi checôté appareil ne soit retiréeavec un chiffon sec.L’appareil est réservé à un usagedomestique. Ne l’utilisez pas à dequelconques fi ns commercialesou industrielles ou à des fi nsautres que la cuisson.Si une panne d’alimentationsurvient pendant le fonctionnementde l’appareil, le résultat de lacuisson peut être affecté.Ne laissez pas de l’eau déverser sur laprise d’alimentation de l’ensemble ducordon d’alimentation.Ceci peut entraîner un choc électrique.Panneau de commandes avec affi cheurIdentification des piècesAppuyez sur ce bouton pour:1. Annuler l’opération précédente oupour activer la fonction Maintien au chaud.2. Prérégler la minuterie.3. Sélectionner le menu de cuisson.4. Régler la minuterie de cuisson.5. Lancer la cuisson.1Mesurez le riz avec le verre mesureur fourni.• Le volume du verre mesureur est d’environ 180 mL.• Référez-vous aux spécifi cations à la page 33 pour connaître la quantité de riz qu’il est possible de cuire en une fois.Rincez le riz jusqu’à ce que l’eau devienne assez claire.1Rincez le riz rapidement à grande eau, en l’agitant légèrement pour le rincertout en changeant l’eau.2→déversez l’eau), jusqu’à ce que l’eau devienne assez claire.2ATTENTION• Pour éviter de rayer le revêtement anti-adhésif de la surface du panier de cuisson,ne rincez pas le riz dans le panier de cuisson.•Rincez le riz avec soin. Sinon, de la croûte de riz risque d’apparaître et le son de riz résiduel peut affecter le goût du riz.Ajoutez le riz rincé ou autres ingrédients dans le panier de cuisson.• Utilisez le repère de niveau d’eau du panier de cuisson pour mesurer la quantité d’eau comme suit.3*1 En respectant la graduation de niveau d’eau “CUP” située à l’intérieur du panier de cuisson.*2 En respectant la graduation de niveau d’eau “L” située à l’intérieur du panier de cuisson.• Séchez la surface extérieure du panier de cuisson avant l’utilisation. Si elle est mouillée, du bruit pourra être généré pendant la cuisson. T out corps étranger entre le panier et la plaque chauffante peut endommager l’appareil.• Les données de niveau d’eau indiquées dans le tableau ci-dessus sont seulement des approximations. Si le riz est trop dur ou trop mou, ajustez la quantité d’eau en fonction de vos goûts personnels.<INDICA TEUR DE NIVEAU>NIVEAU MAXIMUMSR-TMJ181extérieur.1Pour que le fond du panier de cuisson soit bien en contact avec la plaque chauffante, veuillez le faire pivoter dans le sens indiqué par la fl èche 2 ou 3 fois. Veillez à ce que le capuchon d’échappement de la vapeur soit bien positionné ( p. 31).2Fermez le couvercle extérieur jusqu’à ce qu’il s’enclique.4Branchez les fi ches.1Veuillez insérer d’abord la fi che côté appareil dans le boîtier.2Branchez la fi che d’alimentation. Veillez à ce que les deux fi ches soient bien connectées.5OpérationsAppuyez sur le boutonMenupour sélectionner la fonction Porridge (Gruau).• Le 1.• Le • cheur ACL lorsque le temps restant atteint 5 minutes.2La cuisson est terminée• à la fonction Keep Warm (Maintien au chaud)automatiquement).• T Keep Warm (Maintien au chaud) car le riz pourrait Keep Warm (Maintien au chaud) et débranchez la fi che d’alimentation.(Cuisson avec la fonction Porridge (Gruau))Opérations(Cuisson avec la fonction Brown Rice (Riz Brun))Appuyez sur le boutonMenupour sélectionner la fonction Brown Rice (Riz brun).• Le 1.• Le • Un compte à rebours apparaît à l’affi cheur ACL lorsque le temps restant atteint 13 minutes.2La cuisson est terminéeMélangez et aérez le riz.• à la fonction Keep Warm (Maintien au chaud)automatiquement).• T Keep Warm (Maintien au chaud) car elle pourrait Keep Warm (Maintien au chaud) etdébranchez la fi che d’alimentation.Préparatifs• Préparez le mélange à gâteau en suivant les indications de votre recette.• Enduisez le panier de cuisson de beurre ou de margarine pour faciliter le démoulage du gâteau.• Versez le mélange à gâteau dans le panier de cuisson, puis égalisez-en la surface.Operations(Cuisson avec la fonction Cake / Brownie (Gâteau / Brownie))Appuyez sur le bouton Menu pour sélectionner la fonction Cake / Brownie (Gâteau / Brownie).• Le 40min (40 minutes) s’affi che sur l’affi cheur ACL (il s’agit du temps de cuisson par défaut pour la fonction Cake (Gâteau).1Appuyez sur le bouton pour régler le temps de cuisson de votre choix.• Vous pouvez sélectionner le temps de cuisson :Fonction gâteau : de 20 à 65 minutes (par incrément de 5 minutes).Fonction brownie : de 1 à 20 minutes (par incrément d’une minute) et de 20 à 65 minutes (par incrément de 5 minutes).• Maintenez le bouton enfoncé pour faire défi ler les chiffres plus rapidement.2.• Le• L’affi cheur ACL indique le temps restant par incrément d’une minute.3La cuisson est terminée• Lorsque la cuisson est terminée, le cuiseur à usage multiple émet des bips etKeep Warm (Maintien au chaud). (Le•chaud)la fonction Keep Warm (Maintien au chaud) et débranchez la fi• Sortez le panier de cuisson de l’appareil, puis laissez-le refroidir pendant 2 à3 minutes. Retournez ensuite le panier de cuisson sur un plateau ou sur une grille.• Décorez la surface du gâteau selon vos préférences.Gant isolantPréparatifs•Placez tous les ingrédients dans le panier de cuisson.• Fermez le couvercle extérieur.Opérations(Cuisson avec la fonction Slow cook / Soup / Stew (Cuisson lente / Soupe / Ragoût))Appuyez sur le bouton Menupour sélectionner la fonction Slow cook / Soup / Stew (Cuisson lente / Soupe / Ragoût).• Le 1h (1 heure 0 minute) s’affi che sur l’affi cheur ACL (il s’agit dutemps de cuisson par défaut pour la fonction Slow cook / Soup / Stew (Cuisson lente / Soupe / Ragoût).1Appuyez sur le boutonpour régler le temps de cuisson de votre choix.• Vous pouvez régler le temps de cuisson de 1 à 12 heures (par incrément de 30 minutes).• Maintenez la pression sur le bouton pour un défi lement plus rapide.2.• Le • L ’affi cheur ACL affi che le temps restant par incrément de 30 minutes puis par incrément d’une minute lorsque le temps de cuisson est inférieur à 1 heure.3La cuisson est terminée• à la fonction Keep Warm (Maintien au chaud)automatiquement).• T Keep Warm (Maintien au chaud) car elle pourrait Keep Warm (Maintien au chaud) etdébranchez la fi che d’alimentation.Opérations(Cuisson avec la fonction White Rice (Riz blanc))Appuyez sur le boutonMenupour sélectionner la fonction White Rice (Riz blanc).• Le 1.• Le • cheur ACL lorsque le temps restant atteint 9 minutes.2La cuisson est terminéeMélangez et aérez le riz.• à la fonction Keep Warm (Maintien au chaud)automatiquement).Maintien au chaudPréparatifs• Ajoutez la quantité d’eau nécessaire.• Placez les aliments à étuver dans le panier d’étuvage ajustable.• Fermez le couvercle extérieur.EauOpérations(Cuisson avec la fonction Steam / Compote (Vapeur / Compote))Appuyez sur le boutonMenupour sélectionner la fonction Steam / Compote (Vapeur / Compote).• Le 10min (10 minutes) s’affi che sur l’affi cheur ACL (il s’agit dutemps de cuisson par défaut pour la fonction Steam / Compote (Vapeur / Compote).1Appuyez sur le boutonpour régler le temps de cuisson de votre choix.• Vous pouvez régler le temps de cuisson de 1 à 60 minutes (par incrément d’une minute).• Maintenez la pression sur le bouton pour un défi lement plus rapide.2.• Le • Après ébullition de l’eau, l’affi cheur ACL affi che le temps restant par incrément d’une minute.3La cuisson est terminéePanier d’étuvage ajustable Correspondance entre la quantité d’eau et le tempsd’étuvage comme ci-dessous sert de guide pour réaliser une performance de cuisson satisfaisante.• à la fonction Keep Warm (Maintien au chaud)automatiquement).• T Keep Warm (Maintien au chaud) car elle pourrait Keep Warm (Maintien au chaud) etdébranchez la fi che d’alimentation.。
日本电饭煲样式剖析大全

“追求外观设计性”显现新趋势
“外观设计性提高”是最近几年电饭煲进展较快的一个特点。三菱电机2007年推出的“全炭胆IH系列”的第2款产品为本来以银色为主的电饭煲增加了黑色、红色等色彩转变。后来又通过采纳近乎立方体
日本新款电饭煲旗舰样式剖析大全
2021/09/09
在“食欲大开的秋季”来临之际,日本各家电企业的最新款电饭煲纷纷登场。在一直呈增加态势的日本电饭煲市场上,各公司都采取了如何的产品战略?下面,就让咱们以最高端的旗舰样式为中心一探讨竟。
功能和特色的流行趋势转了个遍?
纵观各公司竞相推出的新款电饭煲,笔者的印象是“实现可口的特点和功能大体完成”。固然,各公司关于技术的追求可不能停止,但笔者仍是不免有各类招数已经用完的印象。
以“360°设计”为概念的虎牌热水瓶“压力IH电饭煲‘刚出锅’系列(JPB-A型和B型)”(2013年8月上市)(点击放大)
日立电器2013年8月推出的“嵌入式铁胆松软饱满的御膳RZ-TW3000K”在白色的基础上,增加了适合紫檀系装修的“玉兰色”(点击放大)
东芝2021年10月推出的“真空压力土灶烧饭RC-10VWG”采纳了触摸一下就显示操作面板的“智能触摸面板”。此刻,从客厅和餐厅能够一览无余的“岛式厨房”愈来愈多,这或许带动了其他厨房家电也像冰箱和微波炉那样追求更智能、更高外观设计性的趋势。
三菱电机2013年8月推出的“
无蒸汽IH全炭胆NJ-XW104J”(点击放大)
松下的“W烹饪舞蹈SR-SPX系列”也配备了依照品种选择烧饭方式的功能。W烹饪舞蹈的“烧饭助手”功能能够以最正确的硬度,烹饪11个要紧品种(2020年度耕种量排名前十)的大米。但利用这项功能需要通过支持“松下智能应用”的Android智能电话。
虎牌电饭煲JKP-A

食材(4人份)●寿司饭(圆白米…3杯,海带…3cm宽的1片,酒…1 1/2大匙)●调味醋(醋…4 1/2大匙,白糖…4 1/2大匙,盐…2小匙)●配料(用于拌入米饭中)(牛蒡…1/2根,胡萝卜…30g,小白鱼干…20g,配料的高汤(日式高汤…1杯,酱油…1大匙,白糖…1 1/2大匙),烤星鳗…1条)●配料(用于装饰)对虾…小的8个,干香菇…小的4个干香菇的高汤(香菇浸泡的水…1杯,日式高汤…1/2杯,酱油…1大匙,白糖…1 1/2大匙)莲藕…细的40g莲藕甜醋(醋…1/4杯,白糖…1 1/2大匙,盐…1/2大匙)锦丝蛋(鸡蛋…2个,白糖…1/3小匙,盐…少许)油菜花、煮熟的竹笋、糖醋生姜等,花椒芽…8片配料预先白煮后,放在高汤中冷却。
配料充分沥干水分后,以切的方式拌匀。
食材(4人份)●圆白米…3杯 ●海带…3cm宽的1片●调味料(酱油…2大匙,酒…1大匙,甜料酒…1/2大匙,盐…1/2小匙)●鸡腿肉…60g ●油炸豆腐…1/2块●胡萝卜…40g ●牛蒡…35g●蒟蒻…1/8块 ●干香菇…2个●嫩豌豆荚…8个 ●酒、酱油、盐、醋…各适量●揉碎的紫菜…少许 制作方法1. 鸡肉切成1cm宽,撒上少量酒和酱油。
2. 油炸豆腐焯水去油后纵向切成一半,然后切成细丝。
3. 胡萝卜去皮后切成3cm长的较粗的丝。
食材(4~6人份)●糯米…3杯●酱油…3大匙●猪肉末…50g●猪皮…50g(切碎)●虾米(小)…3大匙(使用前浸到水里泡发,再将水分沥干)●鱿鱼干…25g(在水中浸泡至发软,再将水分沥干后切成丝) ●炸洋葱/红葱……50g(炸得又酥又脆的)●干香菇…3个(在水中浸泡至发软,再将水分沥干后切成丝) ●色拉油…2大匙●芝麻油…1大匙 食材(3~6人份)*1.8L型时食材为2倍●糯米…1杯 食材(1~2人份)●圆白米…0.5杯●鸡汤(鸡骨架汤)…500mL●牛绞肉…15g 食材(4人份) ●糙米…3杯●小沙丁鱼干…30g ●加盐海带…10g ●酒…2大匙蔬菜牛肉浓汤土豆炖肉 食材(4人份)●猪的五花肉或里脊肉(肉块)…300g(切成2.5cm宽) ●洋葱…小的1个(150g)●胡萝卜…中等的1个(100g)●土豆…小的2个(150g)●西芹…1根【A】 食材(4人份)●土豆…400g●牛肉(薄片)…200g●洋葱…300g●青豌豆…4大匙●高汤日式高汤…1 1/2杯(0.27L)白糖…4大匙甜料酒…2大匙。
象印电饭煲使用说明书

Zojirushi rice cooker ns-wac18 manual. Zojirushi rice cooker manual ns-tsc18. Zojirushi rice cooker manual ns-lgc05. Zojirushi rice cooker np-hcc10 manual. Zojirushi rice cooker ns-wsc10 manual. Zojirushi rice cooker manual ns-lac05. Zirushi rice cooker manual ns-tsc10. Zojirushi rice cooker ns-wpc10 manual.
大家都知道,人体每天必需摄入一定量的主食才能保证身体健康,更何况,作为华人的我们,每天不吃米饭,会感觉浑身都没力气,所以电饭煲就显得至关重要。好的电饭煲煮出来的饭香甜可口,吃饭都能多吃两碗。那么,英国市场上的电饭煲品牌繁多,种类也各异,比如像电力压锅、智能电饭煲等等各种各样的,品牌型号大小该怎样去选择呢?这里小编就为大家整理了一篇最新最详细的英国电饭煲选购攻略,包含电 饭煲品牌以及畅销型号推荐,除了大家熟知的象印品牌外,其实还可以有更多选择!另外,更值得为大家一提的是,文中还会为大家附上购买网站,通过提示前去购买的话,还可以获得额外的现金返现,一起来看看吧!! 封面图来自于unsplash,版权属于Pille-Riin Priske丨电饭煲挑选指南选择一款合适的电饭煲,主要根据自己的实际情况去选择,比如你有多少预算?需要买多大容量的?需要的类型是哪种?以及品牌 的选择。那么接下来,小编就从这些方面为大家介绍下。一、电饭煲种类电饭煲的种类一般分为三种:传统电饭煲(Conventional Rice Cookers)、智
虎牌PIA-A300-电热水壶
最近一直在忙家中的装修,再加上本人非常严重的拖延症,导致两个星期前已经送到的电热水瓶到现在才晒单。
其实早在半年前就曾经受亲戚所托从日本出差回来的时候捎回了一个虎牌的热水瓶,当时对这种花个1000多块钱买个电热水瓶的事感到非常不解。
之后陆续去亲戚家做了两次客,越发觉得这玩意的重要性,由于保温性能突出(用过保温杯的同学们一定深有体会),加热时间又短,几乎24小时都能喝到热水,保温效果好就又能省电,比国产的那种烧水壶效率高多了,可谓居家好男人必备之品,哈哈。
TIGER 蒸気レスVE電気まほうびんとく子さん電気ポットブラック 3.有了它还喝什么X大冰泉,农X山泉啊,自己煮出来就是黄金圣水好么。
废话不多,下面详见晒单。
其实拉手这块已经被我拆了,忘了拍照了。
实物挺重的,经过上次帮亲戚带回来的经验教训,我总结了下觉得日本带还不如找家淘宝卖家直接发过来,这么重太占行李了又麻烦,手信都没地方放了,我是在京都小杨家买的,买的时候很便宜,好像淘宝最低发货的包装还是很精致的,日本人这点做的很好,特写一张,tiger 魔法瓶开箱,最上面的说明书以及左边的电源线。
(这玩意是110v的,不用变压器就往插座上插的同学们可别怪我没提醒过你们啊)里面的东西非常简单,本体一只,电源线一根,说明书一本。
另外还有注意书一张,倒水的时候要注意不要弄湿前面的面板。
按键非常简单,从左往右从上往下分别是:节电,保温瓶,锁定解除,再沸腾,保温选项。
面板左侧显示。
温度有98 90 80 70 四档可选。
看到那个若隐若现的push了么,左右都能摁,说明书上说是充分考虑了左右撇子的用手习惯问题。
个人觉得比较扯。
按键相对来说还是比较舒服的,个人推荐不要买那种出水是按钮的,用个半年估计那个键就烂了。
样子还是比较sao的。
插电之后look,水柱有红色led背光,这样晚上的时候也能看到是否水壶中有水了。
整体look,请忽视右边不明物体。
另外昨天没拍进去的是变压器部分,由于之前买了电饭煲,所以两个现在公用一个变压器,热水壶,现在用的是舜红的2000W的变压器,功率比较大,所以变压器的大小也比较惊人。
tefal rk172165 迷你电饭煲 说明书
6a bc54Read and follow the instructions for use. Keep them safe.• This appliance is not intended to be operated by means of an external timer or a separate remote-control system.• This appliance can be used by children aged from 8 years and above if they have been given supervision or instruction concerning use of the appliance in a safe way and if they understand the hazards involved.Cleaning and user maintenance shall not be made by children unless they are older than 8 years and supervised. K eep the appliance and its cord out of reach of children aged less than 8 years.1 Lid2 Lid opening button3 Steam outlet4 Removable Inner lid5 Cooking pot 6Control panela “Cook” Indicatorb “Warm” Indicatorc Cooking Button7 Rice spatula 8 Measuring cup 9 Power cord• Appliances can be used by persons with reduced physical, sensory or mental capabilities or lack of experience and knowledge if they have been given supervision or instruction concerning use of the appliance in a safe way and understand the hazards involved.• Children shall not play with the appliance.• This appliance is not intended for use by persons (including children) with reduced physical, sensory or mental capabilities, or lack of experience and knowledge, unless they have been given supervision or instruction concerning use of the appliance by a person responsible for their safety.• Children should be supervised to ensure that they do not play with the appliance.• This appliance is for household use only. It is not intended for even use in the following applications and the guarantee will not apply for:–Staff pantry areas in shops, offices and other working environments –Farm houses–By clients in hotels, motels and other such kind of residential type environments–Bed and breakfast type environments• If your appliance is fitted with fixed power cord: if the power supply cord is damage, itmust be replaced by the manufacturer, the manufacturer’s after-sales service department or similarly qualified person in order to avoid any danger.• The appliance must not be immersed in water or any other liquid.• Use a damp cloth or sponge with washing up liquid to clean the accessories and parts in contact with food. Rinse with a damp cloth or sponge. Dry carefully.• I f the symbol is marked on the appliance, this symbol means “ Caution: surfaces may become hot during use ”.• Caution: the surface of heating element is subject to residual heat after use.• Caution: risk of injury due to improper use of the appliance.• Caution: if your appliance has a removable power cord, do not spill liquid on the connector.• Always unplug the appliance:–immediately after use–when moving it–prior to any cleaning or maintenance–if it fails to function correctly • Burns can occur by touching the hot surface of the appliance, the hot water, steam or the food.• D uring cooking, the appliance gives out heat and steam. Keep face and hands away.• Do not obstruct the steam outlet.• For any problems or queries please contact our After Sales Care or consult our website.• The appliance can be used up to an altitude of 2000 m.• For your safety, this appliance complies with the safety regulations and directives in effect at the time of manufacture (Low-voltage Directive, Electromagnetic Compatibility, Food Contact Materials Regulations, Environment…).• Check that the power supply voltage corresponds to that shown on the appliance (alternating current).• Given the diverse standards in effect, if the appliance is used in a country other than that in which it is purchased, have it checked by an approved service centre.• Do not use the appliance if:–the appliance or the cord is damaged.–the appliance has fallen or shows visible damage or does not work properly.–In the event of the above, the appliance must be sent to an approved service centre. Do not take the appliance apart yourself.• Do not leave the cord hanging.• Always plug the appliance into an earthed socket.• Do not use an extension lead. If you accept the liability for doing so, use only an extension lead which is in good condition, has an earthed plug and is suited to the power of the appliance.• D o not unplug the appliance by pulling on the cord.76• U se a flat, stable, heat-resistant work surface away from any water splashes.• Do not allow the base of the appliance to come into contact with water.• Never try to operate the appliance when the pot is empty or without the pot.• The cooking function/knob must be allowed to operate freely. Do not prevent or obstruct the function from automatically changing to the keep warm function.• Do not remove the pot while the appliance is working.• Do not put the appliance directly onto a hot surface, or any other source of heat or flame, as it will cause a failure or danger.• The pot and the heating plate should be in direct contact. Ensure that no food or liquid is inserted between the pot and heating plate.• Do not place the appliance near a heat source or in a hot oven, as serious damage could result.• Do not put any food or water into the appliance until the pot is in place.• Respect the levels indicated in the recipes.• Should any part of your appliance catch fire, do not attempt to put it out with water. To smother the flames use a damp tea towel.• Any intervention should only be made by an approved or authorized service centre with original spare parts.• Always disconnect the appliance from the supply if it is left unattended and before assembling, disassembling or cleaning.• Your appliance has been designed to operate for many years. However, when you decide to replace it, remember to think about how you can contribute to protecting the environment.• Before discarding your appliance you should remove the battery from the timer and dispose of it at a local civic waste collection centre (according to model).Environment protection first!Your appliance contains valuable materials which can be recovered or recycled.Leave it at a local civic waste collection point.• Open the lid by pressing the lid opening button on the top lid – fig.1.• Remove the cooking pot and inner lid – fig.2.• Clean the pot and inner lid with a sponge and washing up liquid.- fig.3• Wipe the outside of the appliance and the lid with a damp cloth.• Dry off carefully.• Put all the elements back in their original position. Install the detachable cord into the socket on the cooker base. – fig. 4.• Please make sure to install the inner lid at the right place, with on top - fig 4b.Measuring the ingredients - Max capacity of the bowl• The graduated markings on the inside of the pot are given in cups, these are used for measuring the amount of water when cooking rice and other cereals.• The maximum quantity of water + rice should not exceed the 2 cups mark inside the pot – fig.5.• The plastic cup provided with your appliance is for measuring rice.• To cook 1 cup of rice (serves 2 small or 1 large portion), use 1 measuring cup of rice and then add water to the water level indication inside the pot. To cook other quantity of rice, please refer to relative water level.• The water quantity can be adjusted depending on your taste.981110ENNote: Always add the rice first otherwise you will have too much water.Please do not put too much water above the maximum water level mark, otherwise it will cause overflow.COOKING PROGRAMRice–Press “Cooking Button” to start the cooking Fig 6. The “Cook” indicator is on during the cooking process.–At the end of cooking, the “Cooking Button” will be lifted automatically, and the rice cooker will enter keep warm status with the “Warm” indicator on.–Please maintain “Keep Warm” status for several minutes before serving for good taste of rice.Keep Warm–When the rice cooker is powered on, “Cooking Button” is lifted, it will enter keep warm status automatically with the “Warm” indicator on. –You have to stop the keep warm status manually by pulling off the power cord or cutting off electricity supply.Note: Please do not keep warm for rice for more than 5 hours.CLEANING AND MAINTENANCE• Please ensure the rice cooker is unplugged and completely cooled down before cleaning and maintenance.• It is strongly advised to clean the appliance after each use.Pot• Scouring powders and abrasive sponges are not recommended.• If food has stuck to the bottom, you may put water in the pot to soak for a while before washing.• Dry the pot carefully.Taking care of the potFor the pot, carefully follow the instructions below:• To ensure the maintenance of pot quality, it is recommended not to cut food in it.• Use the plastic spoon provided or a wooden spoon (avoid metal spoon), so as to avoid damaging the pot surface.• To avoid any risk of corrosion, do not pour vinegar into the pot.Cleaning the inner lid• Remove the inner lid by pushing outwards on the edge of the inner lid.• Clean it with a sponge and washing up liquid. Then wipe dry and put it back into position.• You may disassemble the inner lid in case there is residues in the silicon parts for easy cleaning.Cleaning and care of the other parts of the appliance• Clean the outside of the Rice Cooker, the inside of the lid and the cord with a damp cloth and wipe dry. Do not use abrasive products.• Do not use water to clean the interior of the appliance body as it could damage the heat sensor.• Do not open the lid during cooking as steam will escape and this will affect the cooking time and the taste.• On completion of cooking, when the “KEEP WARM” indicate light is on, stir the rice and then leave it in the rice cooker for a few minutes longer in order to get perfect rice with separate grains.• Do not touch the heating element when the product is plugged in. • Carefully wipe the outside of the bowl (especially the bottom). Make sure that there are no foreign residues or liquid underneath the pot and on the heating element.• Never place your hand on the steam vent during cooking, as there is a danger of burns– Fig 7.• Only use the inner pot provided with the appliance.• Do not pour water or put ingredients in the appliance without the pot inside.Remark: if cooking pot is deformed, do not use it anymore and get a replacement from the authorised service center.TEFAL/T-FAL* INTERNATIONAL LIMITED GUARANTEE: This product is repairable by TEFAL/T-FAL*, during and after the guarantee period.Accessories, consumables and end-user replaceable parts can be purchased, if locally available, as described on theTEFAL/T-FAL internet site The Guarantee**TEFAL/T-FAL guarantees this product against any manufacturing defect in materials or workmanship during the guarantee period within those countries*** as stated in the attached country list, starting from the initial date of purchase or delivery date. The international manufacturer’s guarantee covers all costs related to restoring the proven defective product so that it conforms to its original specifications, through the repair or replacement of any defective part and the necessary labour. At TEFAL/T-FAL’s choice, an equivalent or superior replacement product may be provided instead of repairing a defective product. TEFAL/T-FAL’s sole obligation and your exclusive resolution under this guarantee are limited to such repair or replacement.Conditions & ExclusionsTEFAL/T-FAL shall not be obliged to repair or replace any product which is not accompanied by a valid proof of purchase. The product can be taken directly in person or must be adequately packaged and returned, by recorded delivery (or equivalent methodof postage), to a TEFAL/T-FAL authorised service centre. Full address details for each country’s authorised service centres are listedon TEFAL/T-FAL website () or by calling the appropriate consumer Service centre set out in the attached country list. In order to offer the best possible after-sales service and constantly improve customer satisfaction, TEFAL/T-FAL may send a satisfaction survey to all customers who have had their product repaired or exchanged in a TEFAL/T-FAL authorised service centre.This guarantee applies only for products purchased and used for domestic purposes and will not cover any damage which occurs as a result of misuse, negligence, failure to follow TEFAL/T-FAL instructions, or a modification or unauthorised repair of the product, faulty packaging by the owner or mishandling by any carrier. It also does not cover normal wear and tear, maintenance or replacement of consumable parts, or the following:–using the wrong type of water or consumable–ingress of water, dust or insects into the product (excluding appliances with features specifically designed for insects)–damage as a result of lightning or power surges–accidents including fire, flood, etc–professional or commercial use–mechanical damages, overloading–scaling (any de-scaling must be carried out according to the instructions for use)–damage to any glass or porcelain ware in the product–damages or poor results specifically due to wrong voltage or frequency as stamped on the product ID or specificationConsumer Statutory RightsThis international TEFAL/T-FAL guarantee does not affect the Statutory Rights a consumer may have or those rights that cannot be excluded or limited, nor rights against the retailer from which the consumer purchased the product. This guarantee gives a consumer specific legal rights, and the consumer may also have other legal rights which vary from State to State or Country to Country. The consumer may assert any such rights at his sole discretion.***Where a product purchased in a listed country and then used in another listed country, the international TEFAL/T-FAL guarantee duration is the period for the country of usage, even if the product was purchased in a listed country with a longer guarantee duration. The repair process may require a longer time if the product is not locally sold by TEFAL/T-FAL in the country of usage. Ifthe product is not repairable in the new country of usage, the international TEFAL/T-FAL guarantee is limited to a replacement by a similar or alternative product at similar cost, where possible.*TEFAL household appliances appear under the T-FAL brand in some territories like America and Japan. TEFAL/T-FAL are registered trademarks of Groupe SEB.Please keep this document for your reference should you wish to make a claim under the guarantee.**For Australia only:Our goods come with guarantees that cannot be excluded under the Australian Consumer Law. You are entitled to a replacementor refund for a major failure and compensation for any other reasonably foreseeable loss or damage. You are also entitled to havethe goods repaired or replaced if the goods fail to be of acceptable quality and the failure does not amount to a major failure.**For India only: Your Tefal product is guaranteed for 2 years. The guarantee covers exclusively the repair of a defective product,but at TEFAL’s choice, a replacement product may be provided instead of repairing a defective product. It is mandatory that the consumer, to have his product repaired, has to log a service request on the dedicated Smartphone application TEFAL SERVICE APPor by calling TEFAL Consumer Care Center at 1860-200-1232, Opening hours Mon-Sat 09 AM to 06 PM. Products returned by Post will not be covered by the guarantee. As a proof of purchase consumer needs to provide both this stamped guarantee card and tax invoice.13121 蓋子2 開蓋按鈕3 蒸汽出口4 可拆式內蓋5 內鍋6 操控面板a 「Cook」(烹調)指示燈b 「Warm」(保溫)指示燈c 烹調掣7 飯勺8 量杯9 電源線請閱讀並遵循本使用說明書,並妥善保存。
白色家电进化论
【白色家电进化论】(一)美容家电:新品专注于眼周2012/10/23 00:00【日经BP社报道】在日本国内市场上,白色家电依然确保着大额收益。
各大公司都在以创新和技术为武器,实现与竞争对手的差异化。
随着各种举措的实施,新产品纷纷上市。
在“凭借多样化开拓新市场”和“通过新功能激活市场”这两个大目标的带动下,日本的白色家电市场不断扩大,并确保了高收益。
为了孕育出未来的畅销商品,各大公司都在开拓创意,比拼技术(图1)。
图1:凭借创意和技术挑战在日本的白色家电市场上,越来越多的企业在美容家电和小型烹饪家电的领域推出了新品。
在传统白色家电方面则以追求基本性能的动态最为活跃。
2012年夏季过后,市场规模尚小的美容家电和小型烹饪家电成了白色家电领域的焦点,各公司都在积极投放新产品。
在美容家电领域,松下不遗余力,推出了专注于眼周的新产品。
在小型烹饪家电领域,以在家中享受美食的潮流为背景,各公司都在期望市场规模扩大。
例如,虎牌热水瓶与日立电器推出了家用面包机,夏普则推出了榨汁机。
对于市场已经成熟的电饭煲、吸尘器、洗衣机、空调等产品方面,追求基本性能,以此激活市场的行动正在加快——电饭煲追求米饭的香甜,吸尘器追求吸尘性能,机器人吸尘器追求全自动化。
除此之外,各公司还纷纷推出了追求洁净性能的洗衣机,追求制冷效率的空调等产品。
本文将主要介绍哪些凭借创意和技术成功地扩大了市场份额的最新型白色家电。
美容家电:新品专注于眼周自从2004年松下推出纳米粒子蒸气美容器之后,便携式电动牙刷“Pocket Doltz”和头皮清洁器“头皮ESTHE”也先后于2010年和2011年闪亮登场。
松下的美容家电一直新品不断。
2012年9月,该公司又推出了新型美容家电——专门用于眼睛周围的“眼周ESTHE”。
这款产品能够一边对眼睛下侧的眼袋部位直接加温,使其达到大约38℃或40℃的温度,一边向眼睛吹送低温水蒸气,对整个眼周进行保湿。
同时,通过对眼袋部位施加振动,“能够为眼周提供‘绷紧感’”(松下全球消费者营销部门电器营销日本本部商品部门美容及保健组主管山田诗织)。
虎牌 PVP-H30C H40C 无绳型电热水瓶 说明书
让您愉快的节能效果使用节能功能,节能烧水或节能保温。
选择节能功能烧水时,可进行切断蒸汽的节能烧水。
节能保温是指,不插电使用电热水瓶时,自动以低于所设保温温度5度的水温进行保温,所以可以节省电费。
设定记忆功能配合您使用热水的时间段,电热水瓶自动控制加热盘的ON和OFF。
在常用时间段,将水烧开并保温,在不使用的时间段,用真空保温,因此可以节省电费。
睡觉前或外出前设定省电计时可设定6小时或9小时。
定好后加热盘自动转到OFF状态,用真空保温所以可以节省电费。
234891014161820222426303334262727282930303031313235●●●●● ●●●●●●担心氯味时除氯沸腾按场所区别使用 电动&气压出水延长烧水时间,烧出纯净热水。
通电时,手指轻按出水。
(电动出水)即使在无法连接电源的场所,也可以出水。
(气压出水)方便的功能安全注意事项规格各部位名称及附属品初次使用时、有段时间没使用时设定节能功能,进行节能烧水,保温在睡觉前或外出前不使用时倒除开水进行清洗发生故障时记忆功能Q&A关于部品的购买及更换设定省电计时设定记忆功能,自动调整加热盘ON OFF 状态烧水,选择保温,按 给汤 键倒出开水(电动出水)按压板倒出开水(气压出水)要仔细清洗的部位部品弄脏时要清洗的部位长时间不使用时进行内容器的柠檬酸清洗进行本体内部水泵的柠檬酸清洗烧水时有异味时保温过程中本体出现异常出水时请联系虎牌特约服务点再沸腾45警告警告注意不要让婴幼儿含舔电源插头。
在有婴幼儿的家庭或场所使用时请多加注意。
请注意禁止让婴幼儿误含舔电源插头,以免引发触电。
禁止改装。
除维修技术人员外,严禁擅自拆卸和修理。
以免造成火灾、触电、受伤。
请不要使用交流220V 以外的电源。
(中国国内220V 专用)以免造成火灾、触电。
请在额定电流7A 以上的插座上单独使用。
以免因与其它电器同用,造成插座异常发热或着火。
如插头上有灰尘,请及时擦拭干净。
- 1、下载文档前请自行甄别文档内容的完整性,平台不提供额外的编辑、内容补充、找答案等附加服务。
- 2、"仅部分预览"的文档,不可在线预览部分如存在完整性等问题,可反馈申请退款(可完整预览的文档不适用该条件!)。
- 3、如文档侵犯您的权益,请联系客服反馈,我们会尽快为您处理(人工客服工作时间:9:00-18:30)。
食材(4人份)
●寿司饭
(圆白米…3杯,海带…3cm宽的1片,酒…1 1/2大匙)
●调味醋
(醋…4 1/2大匙,白糖…4 1/2大匙,盐…2小匙)
●配料(用于拌入米饭中)
(牛蒡…1/2根,胡萝卜…30g,小白鱼干…20g,配料的高汤(日式高汤…1杯,酱油…1大匙,白糖…1 1/2大匙),烤星鳗…1条)
●配料(用于装饰)
对虾…小的8个,干香菇…小的4个
干香菇的高汤(香菇浸泡的水…1杯,日式高汤…1/2杯,酱油…1大匙,白糖…1 1/2大匙)
莲藕…细的40g
莲藕甜醋(醋…1/4杯,白糖…1 1/2大匙,盐…1/2大匙)锦丝蛋(鸡蛋…2个,白糖…1/3小匙,盐…少许)
油菜花、煮熟的竹笋、糖醋生姜等,花椒芽…8片
配料预先白煮后,放在高汤中冷却。
配料充分沥干水分后,以切的方式拌匀。
食材(4人份)
●圆白米…3杯 ●海带…3cm宽的1片
●调味料(酱油…2大匙,酒…1大匙,甜料酒…1/2大匙,盐…1/2小匙)
●鸡腿肉…60g ●油炸豆腐…1/2块
●胡萝卜…40g ●牛蒡…35g
●蒟蒻…1/8块 ●干香菇…2个
●嫩豌豆荚…8个 ●酒、酱油、盐、醋…各适量
●揉碎的紫菜…少许
制作方法
1. 鸡肉切成1cm宽,撒上少量酒和酱油。
2. 油炸豆腐焯水去油后纵向切成一半,然后切成细丝。
3. 胡萝卜去皮后切成3cm长的较粗的丝。
食材(4~6人份)
●糯米…3杯
●酱油…3大匙
●猪肉末…50g
●猪皮…50g(切碎)
●虾米(小)…3大匙
(使用前浸到水里泡发,再将水分沥干)
●鱿鱼干…25g
(在水中浸泡至发软,再将水分沥干后切成丝) ●炸洋葱/红葱……50g(炸得又酥又脆的)
●干香菇…3个
(在水中浸泡至发软,再将水分沥干后切成丝) ●色拉油…2大匙
●芝麻油…1大匙
食材(3~6人份)*1.8L型时食材为2倍
●糯米…1杯 食材(1~2人份)
●圆白米…0.5杯
●鸡汤(鸡骨架汤)…500mL
●牛绞肉…15g
食材(4人份) ●糙米…3杯
●小沙丁鱼干…30g ●加盐海带…10g ●酒…2大匙
蔬菜牛肉浓汤土豆炖肉
食材(4人份)
●猪的五花肉或里脊肉(肉块)…300g(切成2.5cm宽) ●洋葱…小的1个(150g)
●胡萝卜…中等的1个(100g)
●土豆…小的2个(150g)
●西芹…1根
【A】 食材(4人份)
●土豆…400g
●牛肉(薄片)…200g
●洋葱…300g
●青豌豆…4大匙
●高汤
日式高汤…1 1/2杯(0.27L)白糖…4大匙
甜料酒…2大匙。