real-time pencil rendering
Maya软件所有中英文翻译

Standard标准菜单File文件NewSeene建立新场景OpenSeene打开场景SaveSeene存盘场景SaveSeeneA改名存盘Import导入ExportAll导出所有ExportSeleetion导出选定物体CreateReferenee引入场景文件RefereneeEditor引入场景编辑器Projeet项目New建立新项目EditCurrent编辑当前项目Set指定当前项目Exit退出Edit编辑Undo取消上一次操作Redo恢复上一次操作Repeat重复最后一次操作Keys关键帧CutKeys裁剪关键帧CopyKeys拷贝关键帧PasteKeys粘贴关键帧DeleteKeys删除关键帧ScaleKeys缩放关键帧BakeSimulation模拟复制Delete删除DeletebyType根据类型删除History构造历史Channels通道StaticChannels静帧通道MotionPaths运动路径Expressions表达式Constraints约束RigidBodies刚体DeleteAllbyType根据类型删除所有History构造历史Channels通道StaticChannels静帧通道MotionPaths运动路径Expressions表达式Constraints约束UnusedTransforms未用变形Joints连接IKHandies逆向运动控制柄Lattices车削Clusters族SculptObjects雕刻物体Wires网格Lights灯光Cameras照相机ImagePlanes图像板ShadingGroupsandMaterials阴影组和材质Particles粒子RigidBodies刚体物体RigidConstraints刚体约束SelectAll选择所有SelectAllbyType根据类型选择所有Joints连接IKHandles逆向运动控制柄Lattices车削Clusters族SculptObjects雕刻物体Wires网格Transforms变形Geometry几何体NURBSGeometryNURB几何体PolygonGeometry多边形几何体Lights灯光Cameras照相机ImagePlanes图像板Particles粒子RigidBodies刚体物体RigidConstraints刚体约束QuickSelectSet快速选择集Layers层NewLayers建立新层RenameLayer更改层名称RemoveCurrentLayer移去当前层LayerEditor层编辑器TransfertoLayer转化为层SelectAllonLayer选择层上所有物体HideLayer隐藏层HideAllLayers隐藏所有层ShowLayer显示层ShowAllLayers显示所有层TemplateLayer临时层UntemplateLayer解除临时层HideInactiveLayers隐藏非活动层TemplateInactiveLayers临时非活动层Duplicate复制Group成组Ungroup解成组CreateEmptyGroup建立空成组Parent建立父物体Unparent解除父物体Modify修改TransformationTools变形工具MoveTool移动工具RotateTool旋转工具ScaleTooI缩放工具ShowManipulatorTool显示手动工具DefaultObjectManipulator默认调节器ProportionalModiTool比例修改工具MoveLimitTool移动限制工具RotateLimitTool旋转限制工具ScaleLimitTool缩放限制工具ResetTransformations重新设置变形控制FreezeTransformations冻结变形控制EnableNodes授权动画节点All所有IKsolvers逆向运动连接器Constraints约束Expressions表达式Particles粒子RigidBodies刚体Snapshots快照DisableNode废弃动画节点MakeLive激活构造物CenterPivot置中枢轴点PrefixHierarchyNames定义前缀AddAttribute增加属性Measure测量DistaneeTool距离工具ParameterTool参数工具ArcLengthTool弧度工具AnimatedSnapshot动画快照AnimatedSweep由动画曲线创建几何体曲面Display显示Geometry几何体Backfaces背面LatticePoints车削点LatticeShape车削形LocalRotationAxes局部旋转轴RotatePivots旋转枢轴点ScalePivots缩放枢轴点SelectionHandles选定句柄NURBSComponentsNURB S素CVsCV曲线EditPoints编辑点Hulls可控点Custom定制NURBSSmoothnessNUR Hull物体外壳Rough边框质量Medium中等质量Fine精细质量Custom定制PolygonComponents多边形元素CustomPolygonDisplay定制多边形显示FastInteraction快速交错显示Camera/LightManipulator照相机/灯光操作器Sound声音JointSize关节尺寸IKHandieSizeIK巴手尺寸Window窗口GeneralEditors通用编辑器SetEditor系统设置编辑器AttributeSpreadSheet属性编辑器ToolSettings工具设置FilterActionEditor滤镜动作编辑器ChannelControl通道控制信息ConnectionEditor连接编辑器PerformaneeSettings性能设置ScriptEditorScript编辑器CommandShell命令窗口Plug-inManager滤镜管理器RenderingEditors渲染编辑器RenderingFlagS宣染标记HardwareRenderBuffer硬件渲染缓冲区RenderView渲染视图ShadingGroupsEditor阴影组编辑器TextureView质地视图ShadingGroupAttributes阴影组属性AnimationEditors动画编辑器GraphEditor图形编辑器DopeSheetBlendShape融合形DeviceEditor设备编辑器DynamicRelationships动态关系AttributeEditor属性编辑器Outliner框架Hypergraph超图形Multilister多功能渲染控制ExpressionEditor表达式编辑器RecentCommands当前命令Playblast播放预览ViewArangement视图安排Four E®3Topsp=匚III ®3Leftsp=f 叶III®3Righf s p =f^llI®3Boffomsp=f 旳幾|1|®2sfackedN 瞰®2SideBySid*书®s ing -e #HNexfAirangemenf T^m ^tESavedLayo&s^^^sosing-eperspectiveviewi l si ^H FourView E®®Persp/Graph/Hyper 爾音/H ^/SS H ^pe 「sp/MU_fi/Rende 「爾昔/>洱黑二叫>persp/MU-fi/ouf-iner 爾^/>^黑/^輛pe 「sp/MU_fi 爾首、>洱黑persp/os--iner 瀟音/^輛Persp/Graph 爾音/H ^Persp/Sef Ed ifo r^^/ts >>^EdifLa yo s-s>>^so 0FrameSelectedinAllViews所有视图选定帧FrameAllinAllViews所有视图的所有帧MinimizeApplication最小化应用RaiseApplicationWindows移动窗口向前Options可选项GeneralPreferences—般设置UIPreferences用户界面设置CustomizeUI定制用户界面Hotkeys快捷键Colors颜色MarkingMenus标记菜单Shelves书架Panels面板SavePreferences保存设置StatusLine状态栏Shelf书架FeedbackLine反馈栏ChannelBox通道面板TimeSlider时间滑动棒RangeSlider范围滑动棒CommandLine命令行HelpLine帮助行ShowOnlyViewingPanes仅显示视图面板ShowAllPanes显示所有面板Modeling建模系统Primitives基本物体CreateNURBS创建NURBS物体Sphere球体Cube立方体Cylinder圆柱体Cone圆台(锥)体Plane平面物体Circle圆CreatePolygons创建多边形物体Sphere球体Cube立方体Cylinder圆柱体Cone圆台(锥)体Plane平面物体Torus面包圈CreateText创建文本CreateLocator创建指示器ConstructionPlane构造平面CreateCamera创建照相机Curves创建曲线CVCurveTool CV曲线工具EPCurveToolE曲线工具PencilCurveTool笔曲线工具AddPointsTool加点工具CurveEditingTool曲线编辑工具OffsetCurve曲线移动OffsetCurveOnSurface曲线在表面移动ProjectTangent曲线切线调整FilletCurve带状曲线RebuildCurve重建曲线ExtendCurve扩展曲线InsertKnot插入节点AttachCurves连接曲线DetachCurves断开曲线AlignCurves对齐曲线Open/CloseCurves打开/关闭曲线ReserseCurves反转曲线DuplicateCurves复制曲线CVHardness硬化曲线FitB-spline适配贝塔曲线Surfaces曲面Bevel斜角Extrude凸出Loft放样Planar曲面Revolve旋转Boundary边界Birail1Tool二对一工具Birail2Tool二对二工具Birail3+Tool二对三工具CircularFillet圆边斜角FreeformFillet自由形斜角FilletBlendTool斜角融合工具EditSurfaces编辑曲面IntersectSurfaces曲面交叉ProjectCurve投影曲线TrimTool修整曲线工具UntrimSurfaces撤消修整RebuildSurfaces重建曲面PrepareForStitch准备缝合StitchSurfacePoints点缝合曲面StitchTool缝合工具NURBStoPolygonsNURB转化为多边形InsertIsoparms添加元素AttachSurfaces曲面结合DetachSurfaces曲面分离AlignSurfaces曲面对齐Open/CloseSurfaces打开/关闭曲面ReverseSurfaces反转曲面Polygones多边形CreatePolygonToo创建多边形工具AppendtoPolygonTool追加多边形SplitPolygonTool分离多边形工具MoveComponent移动元素Subdivide多边形细化Collapse面转点Edges边界Soften/Harden柔化/硬化CloseBorder关闭边界MergeTool合并工具Bevel斜角DeleteandClean删除和清除Facets面KeepFacetsTogethe保留边线Extrude凸出Extract破碎Duplicate复制Triangulate三角分裂Quadrangulate四边形合并TrimFacetTool面修整工具Normals法向Reverse倒转法向Propagate传播法向Conform统一法向Texture质地AssignShadertoEachProjection指定投影PlanarMapping平面贴图CylindricalMapping圆柱体贴图SphericalMapping球体贴图DeleteMapping删除贴图CutTexture裁剪纹理SewTexture斜拉纹理Unite联合Separate分离Smooth光滑SelectionConstraints选定限定工具SmartCommandSettings改变显示属性ConvertSelection转化选定UninstallCurrentSettins解除当前设定Animation动画模块Keys关键帧Settings设置关键帧AutoKey自动设置关键帧Spline样条曲线式Linear直线式Clamped夹具式Stepped台阶式Flat平坦式Other其他形式SetDrivenKey设置驱动关键帧Set设置GoToPrevious前移GoToNext后退SetKey设置帧HoldCurrentKeys保留当前帧Paths路径SetPathKey设置路径关键帧AttachtoPath指定路径FlowPathObject物体跟随路径Skeletons骨骼JointTool关节工具IKHandleTool反向动力学句柄工具IKSplineHandleToo反向动力学样条曲线句柄工具InsertJointTool添加关节工具RerootSkeleton重新设置根关节RemoveJoint去除关节DisconnectJoint解除连接关节ConnectJoint连接关节MirrorJoint镜向关节SetPreferredAngle设置参考角AssumePreferredAngle EnableIKSolvers反向动力学解算器有效ElkHandleSnap反向动力学句柄捕捉有效ESelectedIKHandie反向动力学句柄有效DSelectedIKHandleS反向动力学句柄无效Deformations变形EditMenbershipTool编辑成员工具PruneMembership变形成员Cluster簇变形Lattice旋转变形Sculpt造型变形Wire网格化变形Lattice旋转Sculpt造型Cluster簇PointOnCurve线点造型BlendShape混合变形BlendShapeEdit混合变形编辑Add增加Remove删除Swap交换WireTool网格化工具WireEdit网格编辑Add增加Remove删除AddHolder增加定位曲线Reset重置WireDropoffLocator网线定位器WrinkleTool褶绉变形工具EditLattice编辑旋转ResetLattice重置旋转RemoveLatticeTweeks恢复旋转DisplayI-mediateObjects显示中间物体HideIntermediateObjects隐藏中间物体Skinning皮肤BindSkin绑定蒙皮DetachSkin断开蒙皮PreserveSkinGroups保持皮肤组DetachSkeleton分离骨骼DetachSelectedJoints分离选定关节ReattachSkeleton重新连接骨骼ReattachSelectedJoints重新连接关节CreateFlexor创建屈肌ReassignBoneLatticeJoin再指定骨头关节GotoBindPose恢复骨头绑定Point关节Aim目标Orient方向Scale缩放Geometry几何体Normal法向RenderingLighting灯光CreateAmbientLight创建环境光CreateDirectionalLight创建方向灯CreatePointLight创建点光源CreateSpotLight仓【J建聚光灯RelationshipPanel关系面板LightLinkingTool灯光链接工具Shading阴影ShadingGroupAttributes阴影组属性CreateShadingGroup创建阴影组Lambert朗伯材质PhongPhong材质Blinn布林材质Other其他材质AssignShadingGroup指定阴影组InitialParticleSE初始粒子系统InitialShadingGroup初始阴影组ShadingGroupTool阴影组工具TexturePlacementTool纹理位移工具Render渲染RenderintoNewWindow渲染至新窗口RedoPreviousRender重复上次渲染TestResolution测试分辨率CameraPane照相机面板RenderGlobals一般渲染BatchRender批渲染CancelBatchRende取消批渲染ShowBatchRender显示批渲染Dynamics动力学系统Settings设置InitialState初始状态SetForCurrent当前设置SetForAllDynamic设置总体动力学特性RigidBodySolvei刚体解算器DynamicsController动力学控制器ParticleCollisionEvents粒子爆炸ParticleCaching粒子缓冲Run-upandCache执行缓冲CacheCurrentFrame缓冲当前帧SetSelectedParticles设置选定粒子DynamicsOn动力学开DynamicsOff动力学关SetAllParticles设置所有粒子ParticlesAllOnWhenRun执行时粒子系统开AutoCreateRigidBody自动创建刚体Particles粒子ParticleTool粒子工具CreateEmitter创建发射器AddEmitter增加发射器AddCollisions增加碰撞AddGoal增加目标Fields场CreateAir创建空气动力场CreateDrag创建拖动场CreateGravity创建动力场CreateNewton创建牛顿场CreateRadial创建辐射动力场CreateTurbulenee创建震荡场CreateUniform创建统一场CreateVortex创建涡流场AddAir增加空气动力场AddNewton增加牛顿场AddRadial增加辐射场AddTurbulenee增加震荡场AddUniform增加统一场AddVortex增加涡流场Connect连接ConneettoField场连接ConneettoEmitter发射器连接ConneettoCollision碰撞连接Bodies柔体和刚体CreateActiveRigidBody创建正刚体CreatePassiveRigidBod创建负刚体CreateConstraint创建约束物体CreateSoftBody创建柔体CreateSprings仓【J建弹簧SetActiveKey设置正向正SetPassiveKe设置负向正Help帮助ProductInformation产品信息Help帮助27/25。
三维设计英语试题及答案
三维设计英语试题及答案一、选择题(每题2分,共20分)1. Which of the following is NOT a common 3D modeling software?A. AutoCADB. SketchUpC. PhotoshopD. Blender2. The process of creating a 3D model is known as:A. RenderingB. ModelingC. TexturingD. Lighting3. What does UV mapping refer to in 3D design?A. The process of applying colors to a 3D modelB. The process of mapping a 2D image onto a 3D modelC. The process of creating a wireframeD. The process of adding details to a 3D model4. Which of the following is NOT a type of 3D printing material?A. PLAB. ABSC. InkD. Resin5. In 3D animation, what does 'keyframe' mean?A. The starting point of an animationB. A point in time where an object's position is setC. The end point of an animationD. The speed at which an object moves6. What is the term for the process of making a 3D model appear more realistic by adding surface details?A. SmoothingB. SubdivisionC. DisplacementD. Extrusion7. Which of the following is a unit of measurement used in 3D design?A. PixelB. MeterC. KilogramD. Bit8. What does LOD stand for in 3D modeling?A. Level of DetailB. Line of DefenseC. Light of DayD. Long Overdue9. In 3D design, what is the purpose of a 'rig'?A. To create a skeleton for a characterB. To set the lighting of a sceneC. To define the camera's viewD. To apply textures to a model10. What is the term used to describe the process of converting a 3D model into a 2D image?A. ProjectionB. ExtrusionC. TexturingD. Rendering二、填空题(每空2分,共20分)11. The ________ is a tool in 3D modeling software that allows you to move objects around in the workspace.(答案: Move Tool)12. When creating a 3D model, the first step is usually to create a basic shape known as a ________.(答案: Primitive)13. The process of adding color and texture to a 3D model is called ________.(答案: Texturing)14. In animation, the ________ is the main character or object that the story revolves around.(答案: Protagonist)15. The ________ is the process of adjusting the camera angle and position to frame a scene.(答案: Camera Setup)16. To create a 3D model of a complex object, you may need to use a technique called ________.(答案: Boolean Operations)17. The ________ is the process of adding motion to a 3D model.(答案: Animation)18. In 3D printing, the ________ is the layer-by-layer process of building an object.(答案: Additive Manufacturing)19. The ________ is a tool in 3D modeling software that allows you to modify the shape of a model by dragging points. (答案: Sculpt Tool)20. When a 3D model is complete, it is often saved in a file format that ends with the extension ________.(答案: .obj)三、简答题(每题10分,共20分)21. Explain the difference between a 'polygon mesh' and a'NURBS' in 3D modeling.(答案: A polygon mesh is a collection of vertices, edges, and faces that form a 3D shape. It is commonly used in video games and animation. NURBS, on the other hand, stands for Non-Uniform Rational B-Splines and is a mathematical model used to create smooth, curved surfaces. It is often used in industrial design and automotive applications.)22. What are the advantages and disadvantages of using a'real-time rendering' engine in 3D animation?(答案: Advantages of real-time rendering include theability to see the final product as you work, which can save time and provide immediate feedback. It is also computationally less intensive than pre-rendering. Disadvantages include potential limitations in visual quality compared to pre-rendered scenes, and the fact that it may。
十年之后我成为画家也非常的努力英语作文

十年之后我成为画家也非常的努力英语作文全文共3篇示例,供读者参考篇1Ten Years Later: My Journey to Becoming a Dedicated PainterAs I gaze around my studio, surrounded by half-finished canvases, tubes of vibrant oil paints, and the familiar scent of linseed oil lingering in the air, I can hardly believe how far I've come. If you had told me ten years ago that I would be living my dream as a professional painter, I would have laughed in disbelief. Yet here I am, fully immersed in the world of art, pouring my heart and soul onto every canvas.It all began during my final year of high school when I took an elective art class on a whim. Little did I know that this decision would ignite a passion within me that would shape the course of my life. From the moment I picked up a paintbrush, I was hooked. The way the colors blended seamlessly, the way the strokes danced across the canvas, it was as if I had discovered a language that resonated with my very being.Of course, the path to becoming a painter was not an easy one. After graduating, I faced the harsh reality that pursuing a career in the arts was often met with skepticism and doubt. "It's just a hobby," they would say. "You'll never make a living out of it." But I was determined to prove them wrong.I enrolled in an art college, eager to hone my skills and surround myself with like-minded individuals who shared my passion for creativity. Those years were a whirlwind of late nights spent in the studio, critiques that both challenged and inspired me, and an endless pursuit of finding my unique artistic voice.During those formative years, I experimented with various mediums and styles, constantly pushing the boundaries of my abilities. From the precision of pencil sketches to the fluidity of watercolors, I immersed myself in every aspect of the artistic journey. It was a time of growth, frustration, and ultimately,self-discovery.After graduating, the real challenge began. Breaking into the art world as an unknown painter was akin to scaling a towering mountain without any gear. I spent countless hours creating pieces, refining my technique, and searching for opportunities to showcase my work. Rejection was a constant companion, but I refused to let it deter me.I remember my first breakthrough like it was yesterday. A local gallery took a chance on me and offered to display a few of my pieces in a group exhibition. The feeling of seeing my art hanging on those walls, illuminated by the soft gallery lights, was indescribable. It was a validation of all the hard work and sacrifices I had made, and it fueled my determination even further.From that moment on, doors began to open, one by one. I participated in more exhibitions, gained recognition from art critics, and slowly but surely, built a reputation for myself in the local art community. Each sale, each positive review, was a milestone that propelled me forward, reminding me why I had chosen this path in the first place.Along the way, I learned invaluable lessons about perseverance, resilience, and the importance of staying true to my artistic vision. There were times when I was tempted to compromise my style to cater to popular trends, but I always remained steadfast in my beliefs. Art, to me, was a means篇2Ten years ago, if someone had told me that I would become a painter, I would have laughed in their face. Back then, art wasmerely an elective class that I took begrudgingly to fulfill the requirements for graduation. Little did I know, that seemingly insignificant decision would unknowingly set me on a path that would become my life's greatest passion and purpose.In those days, I was a fairly typical teenager – more consumed with fitting in, playing video games, and simply getting through high school than anything artistic or creative. I'll admit, I wasn't the most diligent student either. That all changed when I stepped into Mrs. Peterson's art class my junior year.At first, I picked up a brush and pencils solely because the class seemed like it would be an easy A. But there was something about the way Mrs. Peterson taught that sparked a fire within me I didn't know existed. She had a way of making even the most remedial techniques seem like magic. More importantly, she instilled in me the value of patience, practice, and an insatiable desire to improve.I can still vividly recall the first time I showed her one of my early drawings – a pitiful attempt at rendering a bowl of fruit. Most teachers would have provided some vapid encouragement then moved on. But not Mrs. Peterson. She studied my work intently, pointed out every flaw and shortcoming, and essentially shredded it to pieces with her critique. At the time, I wascrestfallen. In hindsight, her brutal honesty was the greatest gift an art teacher could give.From that day forward, I was determined to improve. I would stay after class, forgoing time with friends, to practice shading, perspective, and proportions. Mrs. Peterson's mantra of "practice makes progress, not perfection" became etched into my being. I started viewing each work not as a finite piece, but part of a continual journey towards growth and development as an artist.What began as mandatory assignments slowly blossomed into a self-directed exploration of materials, techniques, and styles. I discovered an innate thirst to experiment – combining different mediums, adopting unorthodox approaches, and pushing boundaries in unprecedented ways. Some endeavors were colossal failures. But the triumphs made the journey all the more rewarding and furthered my determination to develop a unique creative voice.As my skills progressed, so did the recognition and accolades. In my senior year, I amazingly won a national art competition and received a full scholarship to pursue a Fine Arts degree at a prestigious university. Even with this incredible opportunity, there was still a part of me that doubted whetherthis whole "art thing" was simply a phase that would eventually pass.Those anxieties persisted throughout college as the harsh realities and challenges of pursuing a career as a professional artist came into focus. Few disciplines are as ruthlessly competitive, subjective, and economically unstable. I can't count the number of well-intentioned family members and friends who cautioned me about the impracticalities of this path. "You'll be a starving artist," they would lament. At times, I internalized those doubts and considered more conventional career routes.But through it all, I couldn't quit art – it had become as essential to my identity as breathing. So after graduating, I resolved to give the artist's life a full-hearted attempt before moving on to plan B (though I'm still not quite sure what that was).I spent years bouncing between odd jobs to pay the bills while tirelessly creating new pieces, networking, and applying to exhibitions and galleries.Though the rejections often outnumbered the acceptances tenfold, each success further fueled my passion and perseverance. Scoring my first solo gallery show and media coverage validated the countless evenings and weekends I had sacrificed honing my craft. Landing corporate commissions forinstallations and murals proved I could actually make a decent living as a working artist.In the decade since stumbling into Mrs. Peterson's class as an apathetic, underachieving teenager, I've experienced the tremendous highs and lows that come with forging an artistic career. There have been stretches of feast and famine – scoring dream exhibitions and commissions one year, followed by crippling bouts of creator's block and self-doubt. Through it all, I've grown immensely, not just as a painter, but as a person.I've learned to be comfortable with discomfort and to embrace the unknown. Creating art requires a willingness to take risks, open oneself up to vulnerability, and perpetually operate outside of your comfort zone. It's an inherently frightening process to pour your heart and soul into works that may be critically derided or financially devalued. Yet, doing so has taught me to silence my own harshest critic – that nagging voice of inadequacy we all have lurking within.Perhaps most importantly, I've developed a capacity for diligence, dedication, and perseverance that I lacked in my youth. While natural talent and creativity are vital components of any artist's toolkit, they are practically useless without an unwavering work ethic and commitment to perpetual growth. Maintaining asuccessful career in the arts requires waking up daily ready to put in the painstaking hours toiling over canvases, marketing your works, and pounding the pavement to generate commissions and opportunities. It's a grueling process of sacrifice, rejection, and starting over – often for little tangible reward beyond the sheer joy that comes with creating.Looking back, I'm tremendously grateful that a chance elective on my high school transcript awakened this passion within me. While the artist's journey has been arduous and fraught with challenges, it's imbued my life with purpose, perpetual discovery, and immense personal growth. These days, when I gaze upon my latest piece, I don't simply see a painting. I see a culmination of years of practice, perseverance, risk-taking, and an unwavering dedication to my craft. I see an embodiment of the core tenants Mrs. Peterson imparted upon me: to view art not as a finite destination, but as an infinite voyage of improvement and creative exploration.So while I can't predict where my artistic pursuits will take me over the next decade, I know that I will continue to approach each new work with the same diligence, passion, and openness that has defined this incredible journey thus far. Because in myexperience, that's been the most essential element to cultivating a creatively fulfilling life – not just as an artist, but as a person.篇3Ten Years of Perseverance: My Journey to Becoming a PainterAs I sit in my studio, surrounded by the vibrant canvases that adorn the walls, I can't help but reflect on the arduous path that led me here. It's been a decade since I made the bold decision to pursue my lifelong dream of becoming a professional painter, and the road has been paved with countless challenges, sacrifices, and moments of self-doubt. However, through sheer determination and an unwavering passion for my craft, I've emerged victorious, and the fruits of my labor now grace the walls of esteemed galleries and private collections worldwide.Looking back, it seems almost surreal to recall the pivotal moment when I took the leap of faith. Fresh out of college with a degree in Business Administration, I found myself at a crossroads. The allure of a stable corporate career beckoned, promising financial security and societal validation. Yet, deep within my soul, a burning desire for creative expression smoldered, one that I had suppressed for far too long. It was then that I made thecourageous decision to trade in my tailored suits for a canvas and a palette, embarking on a journey that would test the depths of my resilience and dedication.The initial years were a whirlwind of self-discovery and relentless practice. I spent countless hours honing my skills, experimenting with different techniques, and immersing myself in the works of master painters from bygone eras. Each brushstroke was a testament to my commitment, and every canvas served as a canvas for my emotions, translating the turmoil and triumphs of my inner world into visual masterpieces.Finances were a constant struggle, and I often found myself juggling odd jobs to make ends meet. From waiting tables to tutoring students, no task was too menial if it meant that I could afford the supplies necessary to fuel my artistic endeavors. There were moments when the weight of financial strain threatened to crush my spirit, but the unwavering support of my loved ones and the pure joy I derived from painting kept me afloat.Rejection was an inevitable companion on this arduous path. Gallery after gallery turned me away, their critical eyes scrutinizing my work with a discerning gaze. Each rejection stung, but rather than allowing it to discourage me, I used it as fuel to refine my craft. I spent countless hours analyzing the critiques,dissecting the feedback, and using it to elevate my artistic prowess.Slowly but surely, my perseverance began to bear fruit. A local gallery took a chance on me, offering to display a handful of my pieces. The feeling of validation was indescribable, and it served as a catalyst for my growth. From that moment on, doors began to open, and my name started to gain recognition in the art world.With each exhibition and sale, my confidence soared, and I found myself pushing the boundaries of my creative expression. I experimented with bold color palettes, unconventional techniques, and themes that challenged societal norms. My art became a reflection of my soul, a tapestry woven with threads of emotion, passion, and a relentless pursuit of authenticity.The journey was not without its sacrifices. Long hours in the studio often meant missed social gatherings and strained relationships. However, the unwavering support of my loved ones kept me grounded, reminding me of the profound importance of my artistic endeavors.As the years rolled by, my reputation grew, and my work began to grace the walls of prestigious galleries and museums worldwide. Each accolade and achievement was a testament tothe power of perseverance and the unwavering pursuit of one's dreams.Today, as I stand amidst the vibrant hues and intricate brushstrokes that adorn my studio, I am filled with a profound sense of gratitude. This space, once a mere dream, has become a reality – a living, breathing manifestation of my unwavering dedication and the countless hours poured into honing my craft.To those who aspire to tread a similar path, I offer these words of wisdom: embrace the journey, for it is in the struggles and triumphs that true growth resides. Reject the siren call of complacency, and instead, embrace the discomfort that accompanies growth. Surround yourself with a supportive circle of loved ones who will uplift you during moments of doubt, and draw inspiration from the masters who have paved the way before you.Most importantly, never lose sight of your passion, for it is the fuel that will propel you through the darkest of nights and the most daunting of challenges. Embrace the setbacks as opportunities for growth, and allow each rejection to ignite a fire within you, driving you to greater heights.As I gaze upon the canvases that adorn these walls, I am reminded of the countless hours, the sacrifices, and theunwavering determination that have brought me to this moment. Each brushstroke is a testament to the power of perseverance, a living embodiment of the truth that dreams can indeed be realized through sheer force of will and an unwavering commitment to one's craft.So, to those who dare to dream, I say this: embark on your journey with courage and conviction, for the rewards that await you are beyond measure. The road may be long and treacherous, but with each step, you will grow stronger, wiser, and more resilient. And one day, you too will stand amidst the fruits of your labor, basking in the glory of a dream realized.。
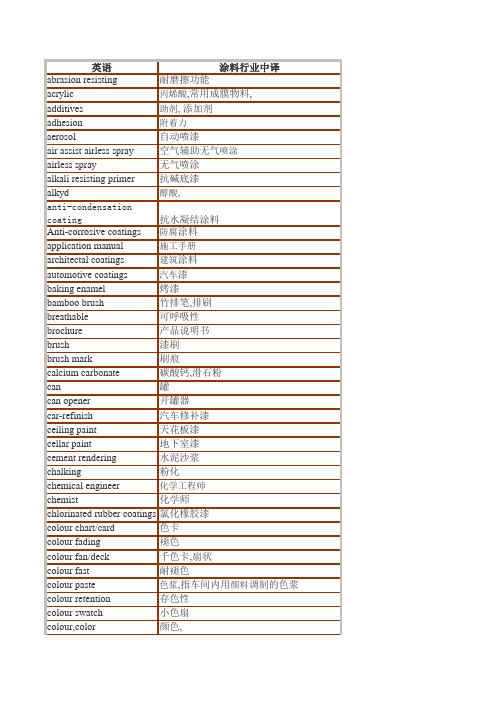
涂料行业专业用词英汉对照表
饱和度 ; saturation
明暗调整色 ; shade
光谱匹配 ; spectral match
标准色浓度 ; standard depth of shade
标准照明体 ; standard illuminant
底色、薄层色 ; undertone
竹排笔,排刷
breathable
可呼吸性
brochure
产品说明书
brush
漆刷
brush mark
刷痕
calcium carbonate
碳酸钙,滑石粉
can
罐
can opener
开罐器
car-refinish
汽车修补漆
ceiling paint
天花板漆
cellar paint
地下室漆
cement rendering
英语
涂料行业中译
abrasion resisting
耐磨擦功能
acrylic
丙烯酸,常用成膜物料,
additives
助剂, 添加剂
adhesion
附着力
aerosol
自动喷漆
air assist airless spray
空气辅助无气喷涂
airless spray
无气喷涂
alkali resisting primer 抗碱底漆
回粘aftertack干燥不发粘的漆膜表面随后又呈现发粘的现象汽车涂料相关术语油漆?paint?面漆?enamel?沥漆区?drainarea?调漆?paintmixing?浸涂?dipcoatng?涂底漆?priming?补漆?paintrepair?喷面漆?topcoating?热喷漆?hotspray?打腻子?puttying?老化?weathering?人工干燥?artificialdrying?自然干燥?airdry?干打磨?drygrinding?去油脱脂?degreasing?碱法脱脂?alkalinedegreasing?蒸气脱脂?vapordegreasing?去离子水?deminwater?除锈?derusting?酸洗?pickling?水洗?rinse?热水清洗?hotwaterrinse?电泳涂层?electophoreticcoating?喷丸处理?shotblasting?磨光抛光0?burnishing?出光?glaring?罩光?glazing?磷化预处理?phosphatingpretreatment?薄膜磷化处理?thinamorphousphosphating?湿碰湿?wettowet?钝化?passivating?结皮现象?skinning?起皱?wrinkling?遮蔽?masking?凉干?flashoff?气幕?airseal?喷漆室?booth?干式喷漆室?dryspraybooth?水过滤式喷漆室?waterwashspraybooth?下吸式喷漆室?downdraftspraybooth?侧抽风喷漆室?sprayboothsideexhaust?油漆调制室?paintmixingroom?打磨间?scuffsandbooth?通过式烘干室?passingthroughtypebakingoven?桥式烘干室?bridgetypebakingoven?辐射对流烘干室?jointradiationconvectionoven?浸漆设备?dipequipment?浸漆槽?diptank?循环槽?recirculatingtank?自动喷漆机?automaticsprayer?热喷漆机?flowcoatingequipment?淋漆设备?flowcoatingequipment?手工浸漆设备?handdipequipment?无空气喷涂设备?airlessspraye
动画专业英语词汇
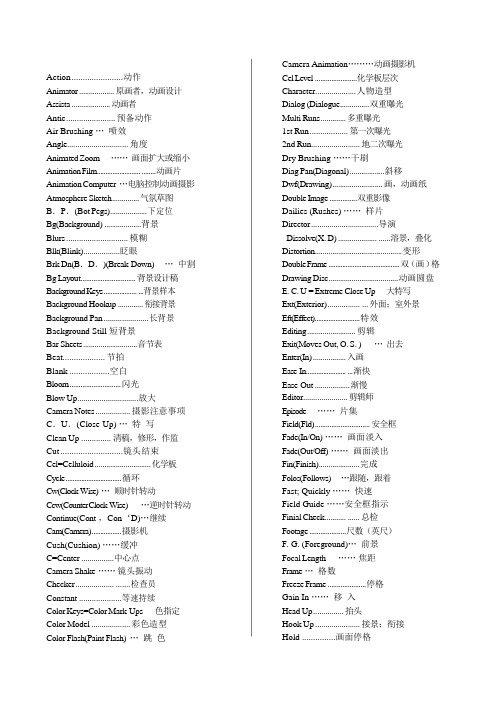
Action ....................... 动作Animator .................. 原画者,动画设计Assista .................... 动画者Antic ....................... 预备动作Air Brushing …喷效Angle .............................. 角度Animated Zoom ……画面扩大或缩小Animation Film......................... ........ 动画片Animation Computer …电脑控制动画摄影Atmosphere Sketch .............. 气氛草图B.P.(Bot Pegs) ................... 下定位Bg(Background) ................... 背景Blurs ............................. 模糊Blk(Blink) ..................眨眼Brk Dn(B.D.)(Break-Down) …中割Bg Layout .............................. 背景设计稿Background Keys ................... ...背景样本Background Hookup ............. 衔接背景Background Pan ...................... 长背景Background Still 短背景Bar Sheets ............................ 音节表Beat................... 节拍Blank ..................空白Bloom ............................ 闪光Blow Up ..............................放大Camera Notes ................. 摄影注意事项C.U.(Close-Up) …特写Clean Up .............. 清稿,修形,作监Cut ............................ 镜头结束Cel=Celluloid ............................. 化学板Cycle ................................ 循环Cw(Clock-Wise) …顺时针转动Ccw(Counter Clock-Wise) …逆时针转动Continue(Cont ,Con‘D)…继续Cam(Camera) ................. 摄影机Cush(Cushion) ……缓冲C=Center ................ 中心点Camera Shake ……镜头振动Checker ................... ....... 检查员Constant .................... 等速持续Color Keys=Color Mark-Ups 色指定Color Model ................... 彩色造型Color Flash(Paint Flash) …跳色Camera Animation………动画摄影机Cel Level .......................化学板层次Character .................... 人物造型Dialog (Dialogue ............... 双重曝光Multi Runs ............. 多重曝光1st Run .................. 第一次曝光2nd Run........................ 地二次曝光Dry Brushing ……干刷Diag Pan(Diagonal) .................. 斜移Dwf(Drawing) .......................... 画,动画纸Double Image ............... 双重影像Dailies (Rushes) ……样片Director ................................. 导演Dissolve(X. D) .................... ......溶景,叠化Distortion ............................................. 变形Double Frame ......................................... 双(画)格Drawing Disc .................................... 动画圆盘E.C. U = Extreme Close Up 大特写Ext(Exterior) ................ ... 外面;室外景Eft(Effect) .......................... 特效Editing ......................... 剪辑Exit(Moves Out, O. S. ) …出去Enter(In) ................. 入画Ease-In....................... ... 渐快Ease-Out .................. 渐慢Editor...................... 剪辑师Episode ……片集Field(Fld) .............................. 安全框Fade(In/On) ……画面淡入Fade(Out/Off) ……画面淡出Fin(Finish) ..................... 完成Folos(Follows) …跟随,跟着Fast; Quickly ……快速Field Guide ……安全框指示Finial Check ........... ...... 总检Footage .................... 尺数(英尺)F.G. (Foreground)…前景Focal Length ……焦距Frame …格数Freeze Frame ..................... 停格Gain In ……移入Head Up ............... 抬头Hook Up ...................... 接景;衔接Hold ...............画面停格Halo ............................... 光圈Int(Interior) ......................... 里面;室内景Inb(In Between) .................................. 动画In-Betweener ……动画员I&P(Ink & Paint) …描线和着色Inking ..................描线In Sync .................... 同步Intermittent ..................... 间歇Iris Out ..................... 画面旋逝Jiggle .................. 摇动Jump …跳Jitter ................ 跳动Lip Sync(Synchronization) 口形Level ........................... 层Look ……看Listen ........................ 听Layout .......................... 设计稿;构图Laughs(Laffs) ……笑L/S(Light Source) ……光源Line Test(Pencil Test) …铅笔稿试拍;线拍M. S. (Medium Shot) ..................... 中景M. C. U. (Mediium Close Up) …近景Moves Out(Exit; O. S. ) ...... ........... 出去Moves In ................................... 进入Match Line ......................... 组合线Multi Runs ................. 多重拍摄Mouth ............................. 嘴Mouth Charts ........................ 口形图Mag T rack(Magnetic S ound T rack) 音轨Multicel Levels …多层次化学板Multiplane ....................... 多层设计N/S Pegs ...................... 南北定位器N.G.(No Good) ..................... 不好的,作废Narration ……旁白叙述Ol(Overlay) ...................... .. 前层景Out Of Scene ................. 到画外面O.S.(Off Stage Off Scene) …出景Off Model .......................... 走型Ol/Ul(Underlay) 前层与中层间的景Overlap Action …重叠动作Ones ...................... 一格;单格Pose ...................... 姿势Pos(Position) ……位置;定点Pan ........................... 移动Pops In /On ..................... 突然出现Pause ....................... 停顿;暂停Perspective ……透视Peg Bar ...................... 定位尺P.T.(Painting) ...... ........... 着色Paint Flashes(Color Flashes) 跳色Papercut ................... ...... 剪纸片Pencil Test ............. 铅笔稿试拍Persistence Of Vision 视觉暂留Post-Synchronized Sound后期同步录音Puppet .......................... ...... 木偶片Ripple Glass ................... 水纹玻璃Re-Peg ............................ 重新定位Ruff(Rough-Drawing) …草稿Run ...................... 跑Reg(Register) ..................... .组合Rpt(Repeat) ................................. 重复Retakes ...................... 重拍;修改Registration Pegs ……定位器Registration Holes ……定位洞Silhouette(Silo) .................... 剪影Speed Line ................... 流线Storm Out ............................. 速转出Sparkle ....................... 火花;闪光Shadow ................ 阴影Smile ....................... 微笑Smoke ……烟Stop .............................. 停止Slow ...................... ..... 慢慢的Sc(Scene) .......................... 镜号S/A(SameAs)............................... 兼用S.S(Screen Shake) …画面振动Size Comparison ……大小比例Storyboard(Sab) …分镜头台本Sfx(Sound Effect) …声效;音效Settle ..................................... 定姿;定置Self-Line(Self-Trace Line) 色线Sound Chart(Bar Sheeets) 音节表Special Effect ....................... 特效Spin ................................. 旋转T.A.(Top Aux) .............. 上辅助定位T.P.(Top Pegs) .............. 上定位Track ........................................................ 声带Turns ........................................................ 转向Take …………拍摄(一般指拍摄顺序) Truck I n................................................ 镜头推人Truck Out ................................ 镜头拉出Tr(Trace) .................同描Tapers ................................. 渐Taper-Up ......................... 渐快Taper-Down .................... 渐慢Tight Field .......................... 小安全框Tap(Beat) ...................节拍Tittle ..................... 片名;字幕Ul(Underlay) ............................ 中景;后景Up .................... 上面Use ....................... 用Vert Up ................... 垂直上移V.O. (V oice Over) …旁白;画外音Value .................................... 明暗度Wipe .........................转(换)景方式Work Print …工作样片X(X-Diss) (X. D. ) ……两景交融Xerox Down ................ .. 缩小Xerox Up(Xerox Paste-Ups) 放大X-Sheet ...................... 摄影表Zoom Out ........................... 拉出Zoon Chart.................镜头推拉轨迹Zoom In ……推进Zoom Lens …变焦距镜头MMagnetic Tape 磁性录音带Makeup A rtist 美容师Manipulation 操纵Markup 固定利润Matte 影像形板Maysles Films 梅思利电影公司Memory-Hook 回马枪Memory-Jogger 回马枪Merrill Lynch 美林动画Metamorphic A nimation 变形动画Metamorphosis 变形Micro-Markets 微众市场Mixer 混音师Modeling 模型制作Montage 蒙太奇Morph 型变Mos 不需要现场收音的无声取景Motion Board 活动脚本或动作脚本Motion Capture 动作资料截取Motion Cintrol 电脑控制拍摄系统Motion Picture Film 动画影片Motion Tests 动作测试Motor Home 移动居住车Mouse 滑鼠Mouthpiece 发言人Multi-City Bidding 多城市竟标Music Bookends 音乐书签Music First 以音乐为优先Musical Instrument Digital Interface Midi电子乐器一的数位介面NNational Association O f Broadc国家广播电子技师协会National Cash Register 国家收银机公司Nbc 国家广播公司Negative Conformer 底片组合员Ng 不好的镜头Nonlinear Editing 非线性剪辑OOfff-Camera 镜外表演Off-Key 走调Offline System 线外系统Offline System 线外剪辑系统One-Stop Operation 一贯作业On Camera 镜内表演On-Camera Sag Rates 演员同业公会规定的上镜费On Location 出外景Online Editing 线上剪辑One-Light 单一光度One-Light Film Print 单光影片洗印One-Stop Operation 一次作业Opaquer 著色人员Open Camera 公开摄影Optical House 视觉效果工作室Optical Printer 光学印片室Original Arrangment 编曲著作Original Recording 录音著作Original Score 总谱制作Out-Of-Pocket 现款支付Outside Props 棚外道具师Outtakes 借用镜头PPacific Data Images 太平洋影像公司Pegs 过场用之画面Pencil Test 铅笔测试稿Perceived Value 知觉价值Personalities 知名人士Personality Testimonials 名人见证Petsuasion 说服Photo Cd 影像光碟Pickup Footage 从旧有的广告借凑而来的影片Pictures First 以画面为优先Pixels 像素Playback 播放Playback Person 录影机播放员Post-Scoring 后制配乐Posttesting 后测Pre-Lite 预先排演Pre-Production Meeting 拍制前会议Pre-Production Stage 制前阶段Prescoring Music 拍摄前配乐Pretesting 前测Price-Quote 报价或喊价Printed Circuiry 印刷电路Producer 广告公司的制片,制作人Product Shot 商品展示镜头Production Assistant P .A 制作助理Production Boutique 制片工作室Production Notes 制作住记Production Package 制作议价组合Production Specification Sheets 制作分工明细表Promotions 促销Prop People 道具师Peoperties 舞台道具Props 道具Public-Domain Music大众共有或版权公有的音乐Publisher's Fee 发行费用Pulldowm 抓片RRanddom A ccess 随机存取Random Access Memory Ra随m机存取记忆体Raster 屏面Read Only Memory Rom 唯读记忆体Real Opinions 真实反应的意见Real People 消费大众或一般人Real People Reactions And Opinions消费大众的真实反应及意见Recordist 录音师Reebok 锐跑Reflections 反光Rendering 算图Rental Facilities 出租公司Residual 后续付款Rhapsody In Blue 《蓝色狂想曲》Rhythm And Hues 莱休电脑动画公司Right-To-Work 自由工作权Ripomatic/Stealomatic Storyboard 借境脚本Roll Camera 开动摄影机Rotoscope 逐格帖合的重覆动画动作Rough Cut 粗剪SSample Reels 作品集Scencs 场景Scenics A rtist 布景设计师Scratch Track 临时音轨Screen Actors Guild Sag 电影演员同业公会Screen Extra's Guild Sag 电影临时演员同业公会Scripts 剧本Script Clerk 场记Set Construction Costs 搭景费用Set Designer 布景设计师Set Dresser 布影装饰师Shadows 阴影Shape Library 清晰对焦Shooting Board 模型资料库Shooting Day 制作脚本拍片日Shooting In Two 一次两画格的方式拍摄Shot List 拍摄程序表Shutter 快门Sides 台词表Silent Scenes 无声场景Silent Takes 无声取景Slate 开拍板Slice-Of-Life Episodes 生活片段式对白Snapshot 快照拍摄Solid State Screensound 数位录音工作站Song-And-Dance 歌舞片Sound People 音效人员Sound Stage 隔音场Sound Take 有声摄影Special Effects Person 特殊效果人员Special-Effects 特效Specification Sheet 职责明细表Speed 运转正常Splice 捻接Sprint斯布林特电话公司Stand-In 替身Stand-Up Presenters 播报员推荐Standing Sets 常备的布景配置Star Personality 知名人物Stereo-Mixing 立体声混音Sticks 排字手托Stills 剧照Still Photos 静态照片Stock Footage 底片材料、库存影片Stop-Motion 单格拍制Story Line 故事情节Storyboard 故事脚本Strobe-Lighe Photography 频闪闪光灯摄影法Subaru Autombile 速霸陆汽车Super 16mm Format 超16 厘米底片规格Sync Sound 同步收音Synchronized 同步TThe Screening Room 试播室Takes 取景镜头Talent Reports 劳务报价单Teamsters 卡车驾驶员Teamsters Union 卡车驾驶员工会Telepromrter 读稿机Test Commercial 测试性广告Testimonial Release Print 电影院放映片Three-Dimensional 3d 三度空间Ight Close-Up 大特写Time-Code 时码Tissue S heets 薄绵纸Top Light 顶光Trim 剪修Trims 修剪下来的片头尾Tracing Paper 扫图纸Track Left 摄影机左移Track R ight 摄影机右移Track Time 音轨时限Trade 通路Tri-X 柯打tri-X 底片Turnarounds 转场Unique Selling Proposition 独特的销售主张VVideo 视觉或影像部分Video Master 影像母带Video Tape Recording Person 录音带录制员Vignetters 集锦式快接画面处理Virtual Reality 虚拟实境Visual Timeline 视觉时间尺Visually Oriented 视觉导向Voiceover Announcer 旁白播音员WWardrobe Attendant 服装师West And Brady 威布广告公司Wild Wall 活动墙板Window Burn-In 叠印框Wire-Frame 立体线稿Words-And-Music 旁白加音乐Words First 以文案为优先Zoom 变焦Zoom In 镜头向前推进。
五年级下册英语作文画一幅自画像
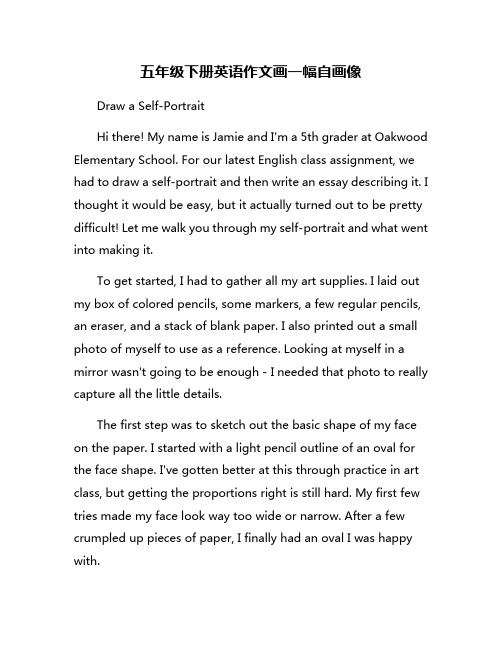
五年级下册英语作文画一幅自画像Draw a Self-PortraitHi there! My name is Jamie and I'm a 5th grader at Oakwood Elementary School. For our latest English class assignment, we had to draw a self-portrait and then write an essay describing it. I thought it would be easy, but it actually turned out to be pretty difficult! Let me walk you through my self-portrait and what went into making it.To get started, I had to gather all my art supplies. I laid out my box of colored pencils, some markers, a few regular pencils, an eraser, and a stack of blank paper. I also printed out a small photo of myself to use as a reference. Looking at myself in a mirror wasn't going to be enough - I needed that photo to really capture all the little details.The first step was to sketch out the basic shape of my face on the paper. I started with a light pencil outline of an oval for the face shape. I've gotten better at this through practice in art class, but getting the proportions right is still hard. My first few tries made my face look way too wide or narrow. After a few crumpled up pieces of paper, I finally had an oval I was happy with.Next, I roughed in where my features would go - two dots for eyes, a curve for the nose, another curve for the mouth. Making sure they were level and evenly spaced was tricky. I had to make a lot of adjustments, erasing and redrawing, until it started looking right. Once I had the face outline and placement of the features mapped out, I could start on the details.The eyes were going to be critically important for capturing my actual appearance and making the portrait look realistic. I spent a long time carefully observing my reference photo, noting the shape and color of my eyes. I have large, round eyes that are a warm brown color. I picked a rich brown colored pencil and did my best to draw the shape, leaving a white spot for the highlight that makes them look alive. Getting the eyes to look evenly sized and properly shaped was one of the hardest parts.While I was working on the eyes, I also roughed in my eyebrows. I have full, thick eyebrows that are a few shades darker than my dirty blonde hair color. I used a darker brown pencil to sketch in the brow shape and individual hair strands. I made sure to give them a slight arc instead of drawing them in as straight lines.The nose was another tricky feature to capture accurately. I don't have a big or particularly distinctive nose, which you'dthink would make it easier. But the slight curves and shading made it deceptively hard to get right. I decided to start by outlining the nose shape with pencil, making sure the nostrils were proportioned properly. Then I experimented with different levels of shading and pencil strokes to define the tip and curves of the nose. It took a few tries to get the natural shadowing right so it didn't look too harsh or fake.While working on the nose, I also started adding shading and definition around the eyes using a regular pencil. Making sure the shading blended smoothly into the skin areas was important so it looked natural.Once I felt good about how the eyes and nose were looking, I turned my attention to the mouth area. I have full lips that are just a bit asymmetrical - the bottom lip is a tiny bit fuller than the top lip. I used a reddish pencil to outline the basic mouth shape, then layered different shades of red to build up the color and shading. Getting the curve and poutiness of the bottom lip took several attempt before I got it right. I also added a few light lines with a pencil to create the creases/definition around the edges of the lips.By this point, the facial features were starting to look pretty recognizable as me! The shading and rendition of my eyes,eyebrows, nose, and mouth were making it look realistic. But there were still some missing pieces to tie it all together into a full self-portrait.I used a light tan colored pencil to fill in the base skin tone on the face and neck/shoulder areas of the sketch. Getting the right shade took some mixing and layering of different tan pencils. Once I had the base skin tone down, I went back over areas that needed more definition or shading using darker tan pencil tones. I added shading under the chin, alongside the nose, under the eyes, and in the creases around the mouth to create more dimension and realism.Another key part of making the portrait look realistic was getting the hairline and hairstyle right. As I mentioned, I have dirty blonde hair that's on the thicker, wavier side. I used a soft brown pencil to outline the shape of my hairline and part, then carefully layered shorter pencil strokes to build up the hair texture. I made sure to create variation in the strokes and areas of lighter/darker shading to capture the natural wave and flow of my hair. It took a good bit of erasing and redoing sections until I felt I had rendered my hairstyle accurately.For the final details, I added color and shading for my shirt and the background scenery. I was wearing a dark teal t-shirt formy reference photo, so I used layers of green and blue pencils to fill that in. I left a strip across the shoulders and chest area untouched to allow the tan skin tone shading to show through and look natural where the shirt would dip a bit lower. For the background, I went with a simple pale blue to create a neutral, flat backdrop color that wouldn't distract from the main focal point of the self-portrait itself.And after probably close to two hours of drawing, erasing, shading, and a mountain of crumpled wasted paper...myself-portrait was complete! I leaned back and looked it over with a huge sense of relief and pride. It's not 100% perfect of course, but it's a pretty darn good drawing that really captures what I look like. The facial features all look proportioned and shaped accurately, and the coloring and shading bring a nice sense of depth and realism. I think the eyes turned out particularly striking and lifelike.Creating a true self-portrait where you have to render an actual likeness of yourself is much harder than doing a generic face drawing or doodle. You really have to concentrate on all the tiny details that make a person's face unique and recognizable as them. Little things like precise eye shape, lip asymmetries, hairline contours, and nuances in shading/coloring make a hugedifference. It was a huge challenge to get all of that right...but one that makes me feel even more accomplished now that it's done!I already knew that art takes a lot of patience and practice. But this self-portrait assignment was a powerful reminder that even something that seems simple requires an incredible amount of careful observation, attention to detail, and refining of techniques. I have a newfound appreciation for how difficult it is to create a true realistic rendering, especially of human faces and portraits. This was an amazing learning experience that helped me improve my drawing and shading skills a ton.More than that though, it was also a journey of building self-awareness and perception. Having to look so intensely at my own face and features made me hyper-aware of what makes me...me. The tiny asymmetries, precise shapes, shading variations, and colors that come together to form my unique appearance. Being able to reproduce that in an artistic format is such an affirming act of expression. This assignment has honestly made me feel more confident in myself and how I look.I'm really proud of how my self-portrait turned out, and I can't wait to do more drawing explorations like this. Maybe next I'll try drawing a self-portrait from a different perspective orexpression. Or maybe I'll move on to trying to draw portraits of other people and capturing their individual quirks and appearances. Whatever it is, this project helped me grow as an artist and an observer in invaluable ways. Not bad for a little 5th grade English class assignment, huh?。
江苏省南京市第一中学2024届高三上学期暑期阶段性测试英语试题
江苏省南京市第一中学2024届高三上学期暑期阶段性测试英语试题一、阅读理解1.Which unique technological feature of the Apple Vision Pro enables an unprecedented mixed reality experience for users?A.Eye-tracking system.B.Dual-chip design.C.Optical sensors.D.High-definition display.2.Which of the following statements accurately compares the capabilities of the four products mentioned?A.Apple Vision Pro is the only one with a dualchip design.B.Meta Quest 3 offers the highest graphics processing performance.C.PS VR2 detects eye movements for online interaction.D.PICO 4 lacks a high-precision tracking system.3.If Simon wanted to buy a product to play a game, which of the following products would be his first choice?A.Apple Vision Pro.B.Meta Quest 3.C.PS VR2.D.PICO 4.“Digital art with iPad and Apple Pencil has helped to expand my creative thinking.”Apichaya "Bim" Wannakit is starting her fourth year in painting, sculpture, and graphic art at Silpakorn University in Bangkok, in the heart of the modern Thai art scene. Growing up in Northeast Thailands creative community in Ubon Ratchatani, Bim developed her passion for art at a young age.She took inspiration from anime like "Dragon Ball Z" cartoons she saw on television and the "Manga" comic books she collected. She put years of hands-on practice into her illustrations using brushes, watercolors, and oil paints. In high school, she discovered even more ways to express herself and expand her creative palette when she started using iPad with Apple Pencil.“I quickly adapted to the precision and flexibility of digital painting using Apple Pencil,” Bim says. “It brought my entire art kit into one magical tool, without sacrificing the natural feel of traditional mediums. It allows me a new way to bring my ideas to life.”When it was time to get ready for university, Bim used iPad to bring her art portfolio together, capturing and storing all her mixed media digitally in iCloud. Bim says, “I initially chose Apple technology because of its cloud service for file management and simple-to-learn design interface — iPad has made my life easier.”Today she uses Procreate on iPad with Apple Pencil for all her creative workflows. Features such as QuickShape and StreamLine with Apple Pencil enable her to quickly add layers, outlines, colors, and shadows in an immersive and playful way. “My love for traditional painting and digital art brings me a new sense of balance. My Apple devices help to make this possible from anywhere.”iPad also supports her daily academic work. Bim uses Apple Pencil with GoodNotes for note-taking, and Microsoft Word on iPad for creating art descriptions. “In class, I use iPad Pro to present my work,” Bim says. “And the 12.9-inch screen is large enough for my professor to view my art comfortably.”“Through my art, I want to tell a story that inspires others and creates a space for experimental ideas.”4.What does Bim Wannakit value most about using Apple devices for her art?A.The cost-effectiveness of the devices.B.The ability to create a balance between traditional and digital art.C.The simplicity of the design interface.D.The ease of file management through cloud services.5.Why did Bim choose to use iPad and Apple Pencil for her artistic work?A.They replicated the feel of traditional art materials exactly.B.They provided a cheaper alternative to professional art tools.C.They allowed her to combine digital flexibility with a natural drawing feel.D.They were the only tools available to her at the time.6.According to the article, how has Bim's artistic practice been enhanced by digital tools?A.She can now create larger artworks than before.B.She has access to a wider range of colors and textures.C.She can share her work instantly with a global audience.D.She can experiment with new techniques and styles more easily.7.Bim mentioned that GoodNotes and Microsoft Word have been helpful in her academic work. What are the main uses of these tools?A.Creating detailed sketches for her art projects.B.Organizing her research and writing academic papers.C.Editing photos for her online art gallery.D.Designing promotional materials for art exhibitions.We explore large-scale training of generative models on video data. Specifically, we train text-conditional diffusion models jointly on videos and images of variable durations, resolutions and aspect ratios. We leverage a transformer architecture that operates on spacetime patches of video and image latent codes. Our largest model, Sora, is capable of generating a minute of high fidelity video. Our results suggest that scaling video generation models is a promising path towards building general purpose simulators of the physical world.We train a network that reduces the dimensionality of visual data. This network takes raw video as input and outputs a latest representation that is compressed both temporally and spatially. Sora is trained on and subsequently generates videos within this compressed latent space. We also train a corresponding decoder model that maps generated latents back to pixel space.All of the results above and in our landing page show text-to-video samples. But Sora can also be prompted with other inputs, such as pre-existing images or video. This capability enables Sora to perform a wide range of image and video editing tasks—creating perfectly looping video, animating static images, extending videos forwards or backwards in time, etc.Sora is also capable of generating images. We do this by arranging patches of Gaussian noise in a spatial grid with a temporal extent of one frame. The model can generate images of variable sizes—up to 2048*2048 resolution.We find that video models exhibit a number of interesting emergent capabilities when trained at scale. These capabilities enable Sora to simulate some aspects of people, animals and environments from the physical world. These properties emerge without any explicit inductivebiases for 3D, objects, etc.—they are purely phenomena of scale.We believe the capabilities Sora has today demonstrate that continued scaling of video models is a promising path towards the development of capable simulators of the physical and digital world, and the objects, animals and people that live within them.8.What is the meaning of the underlined words in the text?A.the original raw video data.B.a compressed version of the video data.C.the process of reducing video quality.D.the spatial and temporal dimensions of a video.9.What is the main content of Paragraph 3?A.Sora's ability to generate high-resolution images.B.The process of training Sora on compressed latent space.C.Sora's various applications in image and video editing.D.The emergence of interesting capabilities in video models.10.Which of the following best describes the overall goal of the research described in the passage?A.To create realistic images and videos using only text prompts.B.To develop a general-purpose simulator capable of simulating various aspects of thephysical world.C.To train a network that can compress video data without losing quality.D.To explore the potential of transformer architectures in video and image generation tasks. 11.What is the author's attitude towards the future development of Sora?A.Skeptical.B.Optimistic.C.Neutral.D.Uncertain.Electric vehicles (EVs) are a strong weapon in the world's efforts against global warming. But the effects of EVs depend on what country you are in. In some nations, electric vehicles lead to the release of more carbon gasses than gasoline cars, new research shows.The Radiant Energy Group (REG) compared gas emissions caused by a gasoline vehicle and from charging an electric vehicle. The study compared the emissions caused by charging a Tesla Model 3 to drive 100 kilometers with the emissions coming from an average gasoline cardriven the same distance.Countries where charging an electric vehicle is cleaner than driving a gasoline-powered car use a lot of hydroelectric, nuclear or solar power.Sales of electric cars are rising the fastest in Europe. Data from REG suggests that EVs in Poland and Kosovo actually create more carbon emissions because their electric systems depend so much on coal.In other European countries, however, EVs result in reduced emissions. The carbon gas reduction depends on what energy supplies electricity systems and the time of day vehicles are charged.The countries with the biggest carbon gas savings from EVs use a lot of nuclear and hydroelectric power. An EV driver in Germany reduces greenhouse gas emissions by 55 percent over a gasoline car. Germany uses a mix of renewable energy and coal to produce electricity.Germany and Spain create a lot of electricity from the sun and wind. But the sun and wind do not add to a country's electricity system equally throughout the day.For this reason, the amount of carbon emissions saved by driving an EV depends on the time of day it is being charged. Charging in the afternoon, when there is more sun and wind, saves 16 to 18 percent more carbon than at night when electricity systems are more likely to be using gas or coal.Automakers including General Motors, Stellantis and V olkswagen have set targets to sell mainly electric vehicles in Europe in the coming years. U.S. car manufacturer General Motors said it will have all new electric cars by 2022.12.Which of the following statements is NOT true according to the passage?A.The amount of carbon emissions saved by EVs depends on the source of electricity used for charging.B.Charging EVs during daylight hours with renewable energy sources can cause more carbon savings.C.The time of day when EVs are charged can significantly affect their carbon footprint.D.General Motors plans to sell only gasoline-powered cars by 2022 in the United States. 13.What can be inferred from the fact that car manufacturers like General Motors, Stellantis, and V olkswagen have set targets to sell mainly electric vehicles in Europe?A.The demand for EVs in Europe is expected to decrease in the near future.B.These manufacturers believe that EVs will become the norm in Europe in the coming years.C.Europe has banned the sale of gasoline-powered cars entirely.D.These manufacturers are not confident in the long-term viability of EVs.14.Based on the information in the passage, which of the following is a potential challenge for the widespread adoption of EVs?A.The limited range of EVs compared to gasoline-powered cars.B.The high initial cost of EVs compared to traditional vehicles.C.The inconsistency of renewable energy sources for EV charging.D.The lack of charging stations in rural areas.15.Which of the following would be the most suitable title for the passage?A.The Environmental Impact of Electric Vehicle Charging.B.The Global Shift to Electric Vehicle Adoption.C.The Economics of Electric Vehicle Ownership.D.The Future of Renewable Energy in Automobiles.In the rapidly advancing world of today, the concept of lifelong learning has become increasingly relevant. 16 Rather, it is essential to continuously adapt and learn throughout one's life. This essay aims to explore the significance of lifelong learning in the modern era, discussing its impact on personal growth, career development, and societal progress.17 As technology and knowledge continue to evolve, it is important to stay updated with new information and ideas. By engaging in lifelong learning, individuals can enhance their cognitive abilities, broaden their horizons, and develop a growth mindset. This, in turn, leads to a more fulfilling and enriching life experience.Lifelong learning is essential for career development. In the modern job market, employers increasingly value candidates who possess the ability to adapt to change and learn new skills quickly. Lifelong learners are more likely to stay relevant and competitive in their field, as they are constantly improving their knowledge and skills. 18Moreover, lifelong learning contributes significantly to societal progress. As individualscontinuously acquire new knowledge and skills, they are able to contribute more effectively to their communities and countries. 19 Lifelong learning also fosters a culture of inclusivity and diversity, as it encourages individuals from different backgrounds and experiences to learn and grow together.In conclusion, lifelong learning is an indispensable aspect of life in the modern era. 20 By committing to lifelong learning, individuals can stay updated with new knowledge and ideas, enhance their cognitive abilities, and contribute more effectively to their communities and countries. Therefore, it is important for us to cultivate a habit of lifelong learning and encourage it among our peers and future generations.A.Additionally, they demonstrate a commitment to personal and professional development. B.With the development of science and technology, humans will continue to be replaced by AI. C.Lifelong learning is crucial for personal growth.D.This can lead to innovations, economic growth, and cultural richness.E.It is essential for personal growth, career development, and societal progress. F.Therefore, only lifelong learning, in order to maintain the leading position.G.It is no longer sufficient to acquire knowledge and skills during one's formal education.二、完形填空Once upon a time, there was a small village hidden deep in the mountains. The villagers led a simple life, depending mostly on farming for their 21 . One day, a young man named Jack arrived in the village. He was 22 and eager to explore the surrounding mountains.Jack quickly 23 with the villagers and became a part of their community. He was fascinated by the 24 tales of the mountains and the mysterious creatures that were said to inhabit them. Determined to find out the truth, Jack decided to embark on a journey of 25 .Before leaving, the villagers warned him of the dangers that awaited him in the mountains. They told him about the 26 weather, the treacherous paths, and the wild animals that roamed the area. But Jack was not 27 . He packed his belongings, bid farewell to the villagers, and started his journey.As he climbed higher and higher, the weather became increasingly 28 . The pathswere slippery and difficult to navigate. But Jack persevered, determined to reach the top of the mountain.After days of 29 , Jack finally reached the summit. The view was breathtaking, with rolling hills and dense forests stretching out as far as the eye could see. But as he was taking in the 30 , he heard a strange sound coming from the bushes nearby.Curious, Jack approached the bushes and peeked inside. To his surprise, he saw a small, 31 creature with big eyes and furry ears. The creature seemed 32 at first, but then it slowly approached Jack, sniffing the air curiously.Jack realized that this was one of the mysterious creatures the villagers had talked about. He felt a sense of 33 and excitement wash over him. He gently reached out his hand and the creature cautiously sniffed it, 34 allowing Jack to pet it.From that day on, Jack and the creature became close friends. They explored the mountains together, 35 each other's company. The villagers were amazed when Jack returned with his newfound friend and shared his adventures with them.The experience taught Jack the value of courage, perseverance, and friendship. It also showed him that there was more to the world than what he had imagined, and that there was always something new and exciting to discover.21.A.income B.entertainment C.inspiration D.experience 22.A.adventurous B.cautious C.lazy D.timid 23.A.argued B.competed C.bonded D.disagreed 24.A.boring B.ordinary C.amazing D.strange 25.A.discovery B.escape C.adventure D.research 26.A.unpredictable B.pleasant C.calm D.mild 27.A.discouraged B.frightened C.delighted D.satisfied 28.A.severe B.comfortable C.warm D.changeable 29.A.hiking B.struggling C.resting D.searching 30.A.scene B.creature C.challenge D.danger 31.A.fierce B.ugly C.cute D.powerful 32.A.aggressive B.nervous C.confident D.happy 33.A.wonder B.relief C.pride D.pity34.A.eventually B.immediately C.suddenly D.frequently 35.A.seeking B.enjoying C.avoiding D.tolerating三、语法填空阅读下面短文,在空白处填入1个适当的单词或括号内单词的正确形式。
如何制作一幅画像的英语作文初中
如何制作一幅画像的英语作文初中全文共3篇示例,供读者参考篇1How to Create a Portrait PaintingPainting portraits is one of my favorite artistic activities. There's something special about capturing the essence and personality of a person through brushstrokes on canvas. While it can be challenging at times, the process of creating a portrait painting is incredibly rewarding. In this essay, I'll walk you through the steps I take to produce a successful portrait painting.First and foremost, you need to gather your materials. The essential supplies include canvas or canvas board, acrylic or oil paints, a variety of brushes (detailed liner brushes as well as larger brushes for broad strokes), a palette for mixing colors, a rag or paper towels for blotting excess paint, and a cup of water for cleaning brushes. Make sure you have a good photo orreal-life subject to work from as well. Having a quality reference is key.Once you have all your supplies ready, the first step is to sketch out the basic shapes and proportions onto the canvas using a pencil or thin brush with paint thinned down. Getting the proportions and placement right from the beginning is crucial, as it's very difficult to make major adjustments later on. I like to lightly sketch an oval shape for the head and then map out the placement of the eyes, nose, mouth and other facial features based on that initial oval guide.With the initial sketch complete, it's time to start blocking in the colors and values. I prefer to use a limited color palette of warm and cool tones, usually starting with a tinted canvas base color that represents the overall skin tone temperature I want to achieve. Using a large brush, I'll block in the basic color shapes of the face - the forehead, cheeks, nose, mouth, etc. Don't worry about blending or details at this stage. The goal is just to get the large color masses established.Once I have those foundational colors laid in, I start working on the finer details and blending areas together. I use smaller brushes to carefully paint in the eyes, being mindful of capturing the subtle highlights, shadows and colors that give eyes their distinctive, lifelike appearance. The same meticulous approachapplies to rendering the nose, lips, hairline and other nuanced facial features.Blending is an essential skill for creating smooth transitions between tones in a portrait. I use a combination of brushwork, color mixing on the palette, and occasionally applying glazes (thin transparent layers of paint) to achieve this. Properly blended skin tones look much more natural and realistic.As the portrait progresses, I continually revisit previous areas, adjusting colors, adding more defining brushstrokes, and pushing the depth of shadows and highlights further. Contrast is key - too little and the painting looks flat and dull, too much and it appears harsh and unnatural. Finding that ideal balance takes practice.The background and clothing are almost as important as the face itself in terms of enhancing the overall portrait. I usually keep the background relatively simple and muted so it doesn't distract from the main subject. But I try to include some contextual elements or setting to give the portrait a sense of environment and narrative.Adding final details like stray hairs, smile lines, textures in clothing, and catchlights in the eyes can really bring a portrait painting to life and give it that polished, realistic feel. But it'simportant not to overwork areas. Sometimes leaving a degree of apparent brush strokes and unfinished quality can create a more lively, expressive portrait.Finally, I like to apply a quick final unifying glaze over the entire painting to harmonize all the colors together. This also helps enhance depth and atmosphere.One of the most difficult aspects of portrait painting for me is attaining a proper likeness of the subject. It takes a keen eye for observation and objective self-critique to realistically capture someone's appearance and expression. Comparing my painting regularly to the reference photo and making adjustments is critical. With practice though, this skill steadily improves.Above all else, the most important element in a successful portrait is being able to convey the innerlife, personality and spirit of your subject through your handling of colors, values, edges and brushwork. A technically accurate portrait that fails to capture the essence and spirit of the person will fall flat. This emotional, intuitive aspect of portraiture is what truly elevates the art form.While creating a portrait painting from start to finish can seem daunting, it's deeply satisfying to go through the entire process. Whenever I compare my finished portrait to the initialblank canvas, I feel an immense sense of pride and accomplishment. If you take it step-by-step, study from life, practice diligently, and most importantly, love what you're doing, you'll be able to produce beautiful, lifelike portrait paintings too.篇2How to Create a Portrait PaintingHave you ever looked at a really amazing portrait painting and wondered how the artist managed to capture the subject's likeness and expression so perfectly? Creating a portrait that truly looks like the person it depicts is one of the biggest challenges in art. But with the right techniques and a lot of practice, it's definitely possible to paint your own striking portraits.As a middle school art student, I've spent a lot of time practicing portraits over the past few years. It's been a long journey of trial and error, but I've picked up some useful tips along the way that I'm excited to share. While I'm certainly no master yet, following these steps has helped me improve my portrait skills immensely. Let me walk you through the full process!Getting StartedBefore you can start painting, you need to gather your materials and choose your subject. For materials, you'll need things like:Canvas or canvas boardAcrylic or oil paints in a variety of colorsBrushes in different shapes and sizesPalette for mixing colorsReference photo(s) of your subjectSpeaking of your subject, you have a few options. You could paint a self-portrait by setting up a mirror, or you could ask a friend or family member if they're willing to model for you. Just make sure you take several reference photos from different angles so you can really study their features.Another great option is using an existing photo as your reference, which is what I prefer to do most of the time. Make sure you have permission to paint from the photo, and try to find one with good lighting that clearly shows the person's face.Once you've got your materials ready, it's time to start the actual painting process! Here are the key steps:Sketching and PlanningThe first stage is all about planning and laying out the basic structure of your portrait. Use a pencil or thin brush to lightly sketch the shape of the head and placement of the facial features on your canvas based on your reference photo.Pay close attention to the proportions at this stage. Notice where the eyes, nose, and mouth line up both horizontally and vertically. Small misalignments can really throw off a portrait's likeness, so take your time getting this right.Once you've mapped out the face, you may also want to sketch in the general shapes and outlines for the hairline, neck, clothing, etc. This will give you an overall guide for your painting.Blocking In ColorsAfter your sketch is complete, you can start blocking in the different color tones and values that you see. This is where you'll begin really defining the different planes and sections of the face.I like to use thin brushes to block in the local color tones for each feature - the basic reddish-brown color on the lips, the purplish-blue color in the eye sockets and nose area, etc. These colors will get refined and blended in later stages, but mappingthem out now gives you a rough idea of where highlights and shadows will be.When painting skin tones, try mixing colors like yellows, reds, greens, and browns to mimic the complexities of real human skin. Subtle variations and undertones make skin look much more vibrant and lifelike.Developing the Lights and DarksWith the overall color map established, you can start refining lights and shadows to make the facial features pop. Observe where the highlights and brightest areas are on each part of the face - the forehead, cheekbones, tip of the nose, etc. Use lighter colors, whites, and even a dab of yellow to paint these illuminated areas.In contrast, use deeper shades and darker colors to define areas like the eye sockets, sides of the nose, shadow under the chin and lips, etc. The contrast between light and dark shapes is what creates the sense of depth and form that gives a portrait its 3D, lifelike appearance.I also like to use a small brush to carefully outline some of the facial features in darker tones to make them stand out even more. Subtle details like the creases at the corners of the eyesand mouth and the definition of the nostrils can really bring out a portrait's realism.Don't be afraid to exaggerate some of the lights and darks - this dramatic contrast and shading is part of what gives portrait paintings their striking, larger-than-life look. Just make sure the placement and proportions still look accurate to your reference.Adding Details and TexturesWith the overall lights, shadows, and facial featureswell-established, you can start layering in finer details and textures to make your portrait look hyper-realistic. This is where you really want to zoom in and closely study things like:Individual strands of hair and how light reflects off them differentlyFine wrinkles, skin texture, and blemishesSubtle catchlights and reflections in the eyesCreases, lines, and variations in skin tones across the faceUse smaller brushes and precision to carefully capture all these minute elements. Building up layers of translucent glazes can also help blend tones smoothly while still retaining visible details and brushstrokes.Don't get overly focused on one area, though - step back frequently to check that all the features and colors are harmonizing together into a cohesive, balanced portrait.The Final TouchesAfter meticulously rendering the face itself, you can start adding final touches and background elements to complete your portrait. This could include things like:Clothing details like folds, patterns, contrastsBackground objects, scenery, etc. to suggest contextDecorative elements or flourishes in an artistic styleTextured brush strokes and visible marks for an expressive lookVarnish or fixative to protect and unify the final paintingMany artists also go back and refine certain areas, punch up contrast, or glaze over sections to enhance harmony. Let your portrait "rest" for a bit and look at it with fresh eyes periodically to see what minor tweaks can take it to the next level.Be Patient and Keep Practicing!Whew, that's a lot of steps - portrait painting is definitely a labor of love! It takes an incredible amount of patience, observation, and practice to capture someone's full essence and likeness on canvas. Even if you don't get it perfect at first, stick with it and keep challenging yourself.Look at portrait paintings you admire, study the features and techniques up close, then try incorporating those methods in your own work. Take advantage of any opportunities to paint portrait models from real life. With time and diligent effort, your skills are bound to progress in leaps and bounds.So don't get discouraged if your first few portraits look a little rough around the edges. Creating a realistic portrait is one of the most difficult yet rewarding pursuits in art. Embrace the journey, learn from your mistakes, and take pride in gradually improving with each new piece you create. Who knows, maybe someday your stunningly lifelike portraits will be the ones hanging in a gallery! All it takes is passion and practice.篇3How to Create a Portrait PaintingAs a middle school student, I have always been fascinated by art and the ability to create something beautiful with just a fewsimple tools. One of my favorite forms of art is portrait painting –the ability to capture the essence of a person on canvas and immortalize them in a work of art. In this essay, I will take you through the step-by-step process of creating a stunning portrait painting, from the initial preparation to the final touches.Gathering the Necessary MaterialsBefore you even pick up a brush, it's important to gather all the necessary materials for your portrait painting. You will need:A canvas or canvas board (I prefer using a stretched canvas for its durability and smooth surface)A set of acrylic or oil paints (I personally prefer acrylics for their quick drying time and easy clean-up)A palette or palette paper to mix your colorsA variety of brushes in different shapes and sizes (flat, round, and filbert brushes are essential for portrait work)A jar or container for water (if using acrylics)A rag or paper towels for blotting and cleaningA pencil and eraser for sketching the initial outlineChoosing Your SubjectThe next step is to decide on the subject of your portrait. You can choose to paint a family member, friend, or even a famous figure whose image you can reference from photographs. It's important to select a subject with interesting features and a good lighting source, as these elements will make your portrait more visually appealing and easier to paint.Sketching the Initial OutlineOnce you have your subject in mind, it's time to start sketching the initial outline on your canvas. Use a pencil to lightly draw the basic shapes of the face, including the eyes, nose, mouth, and overall head shape. Don't worry about getting every detail perfect at this stage – the goal is to establish a basic framework that you can build upon with your paints.Laying the FoundationAfter sketching the outline, it's time to start painting. Begin by blocking in the larger areas of the face using broad strokes and a simple color palette. For example, you might use a burnt sienna for the skin tones, a light blue for the background, and a deep brown for the hair.At this stage, don't worry too much about blending or adding details – the goal is to establish a solid foundation upon which you can build the rest of the portrait.Building Up the DetailsWith the foundation in place, you can now start adding more intricate details to your portrait. Focus on one area at a time, such as the eyes, nose, or mouth, and use smaller brushes to capture the finer details.When painting the eyes, pay close attention to the highlights and shadows to create a sense of depth and realism. For the nose and mouth, carefully observe the shapes and shadows to accurately capture their unique features.As you work on these smaller details, remember to step back occasionally to assess your progress and make any necessary adjustments.Blending and SmoothingAs you continue to build up the details of your portrait, it's important to blend and smooth the colors to create a seamless and natural-looking finish. Use a soft brush or a blending tool (such as a paper stump or your fingers) to gently blend thecolors together, ensuring that there are no harsh lines or abrupt transitions.Additionally, pay attention to the overall values and tones of your portrait, adjusting the highlights and shadows as needed to create a sense of depth and realism.Adding the Final TouchesOnce you've captured the essential details and blended the colors to your satisfaction, it's time to add the final touches to your portrait. This might include adding highlights to the hair or eyes, or adding a subtle background element to enhance the overall composition.At this stage, take your time and be patient – the final touches can make or break the overall impact of your portrait.Signing and VarnishingWhen you're completely satisfied with your portrait, it's time to sign your work and consider applying a varnish or protective coating. Signing your portrait not only identifies it as your creation but also adds a personal touch to the finished piece.If you're using acrylics, you may want to consider applying a varnish or UV-resistant coating to protect your painting from fading and damage over time.ConclusionCreating a portrait painting is a rewarding and deeply satisfying experience. It requires patience, attention to detail, and a willingness to practice and refine your skills over time. However, the end result – a stunning and lifelike representation of your subject – makes the effort worthwhile.Remember, every artist has their own unique style and approach, so don't be afraid to experiment and find what works best for you. With practice and dedication, you too can create beautiful portrait paintings that capture the essence of your subjects and leave a lasting impression on all who view them.。
影视专业英语词汇
影视专业英语词汇影视专业英语词汇单词是英语学习的基础,也是重中之重。
yjbys为同学们整理了影视相关词汇,希望对大家有所帮助。
ABC 美国广播公司account e某ecutive 业务代表account planners 业务企划人员action photography 带动作的摄影actors 职业演员a DAT 数位式录音带additive process 追加过程advertising age 《广告年代》杂志agency commission 广告公司佣金agenda 议程表alternative locations 候选(备用)外景照片American federation of musician 美国音乐家协会American federation of televis 美国广播电视演艺人员协会Ams audio file 数位录音工作站anachronisms 事态连贯性analog sound mi某ing consoles 类比型(非数位化)混音机animated graphics 单格动画图形animated titles 动画式片头animation 动画animatic stand 动画摄制固定架animation storyboard 仿录脚本animators 动画家arrangement 编曲art director 艺术指导ASA 感光度(感光速度系数)assistant camera person 助理摄影师 assistant director 助理导演audio 声部audio master 声音母带audio mi某er 混音师audio post-production 声部后制作 audition 试镜会authority 权威人士Bbackdrops 背景布幕backlit 后面打光barcode number 片边条码barcode standard 条码格式barn doors 遮光板best boy 灯光助理building package 套装议价组合billboards 户外看板bin monitor 显像储藏室dissociation 异类联想blow-up 放大blue Danube 蓝色多瑙河blue-screen photography 蓝幕摄影 boom person 吊杆控制员boom up 把摄影机升高Ccamera car 摄影车camera dolly 摄影机移动台车camera person 摄影师Campbell 汤府公司cartooning 卡通casting 演员试镜casting director 演员指导CBS 哥伦比亚广播公司cell animation 赛璐璐动画celluloid 赛璐璐片CGI 电脑影像合成chain of command 指挥系统changing bag 暗袋checklist for bidding 议价核对清单Chicago tribune 芝加哥谈论报chief electrician 首席灯光师choreography 舞术编排Cine on digital Film System 数位化影像系统 click track 节拍音轨clip 画面段commercial-program 广告形式的电视节目compact disc CD雷射唱片comparison commercial 比较唱片composers 作曲者composite photograph 修饰过的写真照片compositing 影像合成computer animation 电脑动画Computer Graphic Imaging CGI电脑影像处理 conforming the picture 套剪图象copy writer 文案人员cost-plus-fi某ed-fee C+FF成本加固定费用 Cost Summary Forms 价目总表crane operator 摄影升降机操作员creative director CD创意总监DDemo 音乐样本带demographic segments 人口区隔demonstration commercial 展示广告Demonstrations and comparisons 展示与比较 diffusion filters 柔焦滤镜或柔光镜Digital Audio Tape DAT数位录音带Digital Video Effect DVE数位影像效果digital audio workstations 数位录音工作站 digital film system 数位化影像系统digitized computerization 数位化电脑处理 digitizing 数位化diopters 屈光镜director costs 直接成本direct-response 直接回应director 导演director of photography DP摄影导演dissolves 溶接dolly grip 摄影机车台场务dolly in 整部摄影机向前移动dolly moves 前后移动dolly track 摄影机移动轨道doubles 替身演员doubling 替身戏down-the-line-renewnals 续约费用Eedge numbers 片边号码Edit Decision List EDL剪辑点决定表edit-and-assemble monitor 剪辑及组合用的监视器editing 剪辑editors 剪辑师electrician 灯光师electronic chips 电脑晶片electronic pen 电子感应笔electronic pi某els 电子像素erase-and-reuse 洗掉再重录emotional response 情感反应emulsions 感光乳剂e某aggeration 夸张效果e某posed negative film can 曝过光的底片盒Ffade in 淡入fade out 淡出Federal Communications Commission FCC联邦传播委员会 Federal Trade Commission FTC联邦贸易委员会fiber optics 光线film library 影片资料库film magazine 摄影机片盒film scanner 底片扫描机film stocks 底片材料、拍摄片Final 最后成本明细表fine-tuning 微调finishing 最后完成作业finishing facilities 后制单位first bid 包工议价first cut 首次剪辑first generation 原版flying camera people 空中摄影师focus 焦距focus groups 小组讨论(分组座谈会)Foote Cone & Belding 富康广告公司forum 讨论会frame-by-frame filmmakers 逐格影片制作人free-lance casting director 自由的演员指导 Free-lancers 自由工作者full animation 完全动画full-scale ocean liner 比例1比1的外海邮轮 futuristic 未来Ggaffer (鱼叉人),灯光师的俗称General Foods 通用食品公司General Mills 通用磨坊公司generator plot 概括性的创意构想generator operator 发电机操作员generator truck 发电机卡车gobos 旗板graphic demonstration 图象展示graphics estimating sheets 影像估价单Green Giant 绿巨人Hhair stylist 美发师hangs wallpaper 壁挂纸head electrician 首席灯光师head-to-head-comparison 面对面的.直接比较high -angle lights 高角度灯光high-definition TV HDTV 高解析度电视系统high-lights 强光high-speed strobe-light flash 高速频闪闪光灯home economist 食品料理专家house location 外景房屋huge bellows cameras 有蛇腹的相机IILM 光影魔幻产业公司Illustrating slogans with images 以影音特效强化标语immediate sales 立即性销售in real time 等速或即时infomercials 资讯式广告inherent drama 商品兴俱来的戏剧性In-house advertising departments 客户公司内部的广告部门in-house production unit 广告公司内部的拍摄单位inkers 动画扫图员inside props 棚内道具师instant production 即席制作internal costs 内部成本international Alliance of Theatrical stageEmployee IATSE国际戏剧雇员联盟interview commercial 访问式广告影片JJ. Walter Thompson 智威汤逊广告公司jerky motions 把场景急拉的动作jingle 含有品牌象薇的广告音乐或声音Kkem flat-bed editing table kem平面式剪辑台 key frame 主要画格Key code Kodak 柯达底片边缘印的条码key frame 主要画格Kodak Key code Numbers 柯达片边条码系统Llevel angle 水平角度Le某us 凌志汽车library music 音乐资料库light meter 测光表line up 校准lines 台词lip sync dialogue 对嘴旁白lip-syncing 对嘴live-action 实景live-action filming 实景拍摄片制作live-action photography 实景摄影live-action shooting 实景拍摄local-access cable channels 地区性有线频道 location search 勘景log 拍摄日志long shot 远景镜头Low angle 低角度Lucas Films 卢卡斯影业Tags:影视制作,英语,词汇,存档 Mmagnetic tape 磁性录音带makeup artist 美容师manipulation 操纵markup 固定利润matte 影像形板Maysles Films 梅思利电影公司memory-hook 回马枪memory-jogger 回马枪Merrill Lynch 美林动画metamorphic animation 变形动画 metamorphosis 变形micro-markets 微众市场mi某er 混音师modeling 模型制作montage 蒙太奇morph 型变MOS 不需要现场收音的无声取景motion board 活动脚本或动作脚本 motion capture 动作资料截取motion control 电脑控制拍摄系统 motion picture film 动画影片motion tests 动作测试motor home 移动居住车mouse 滑鼠mouthpiece 发言人multi-city bidding 多城市竟标music bookends 音乐书签music first 以音乐为优先Musical Instrument Digital Interface MIDI 电子乐器一的数位介面 NNational Association of Broadcasting 国家广播电子技师协会National Cash Register 国家收银机公司NBC 国家广播公司negative conformer 底片组合员New Yorker 《纽约客》杂志NG 不好的镜头Nikon camera 尼康相机nonlinear editing 非线性剪辑Ooff-camera 镜外表演off-key 走调offline system 线外系统offline system 线外剪辑系统one-stop operation 一贯作业on camera 镜内表演on-camera SAG rates 电影演员同业公会规定的上镜费on location 出外景online editing 线上剪辑one-light 单一光度one-light film print 单光影片洗印one-stop operation 一次作业opaquer 著色人员open camera 公开摄影optical house 视觉效果工作室optical printer 光学印片室original arrangement 编曲著作original recording 录音著作original score 总谱制作out-of-pocket 现款支付outside props 棚外道具师outtakes 借用镜头PPacific Data Images 太平洋影像公司pegs 过场用之画面pencil test 铅笔测试稿perceived value 知觉价值personalities 知名人士Personality testimonials 名人见证persuasion 说服photo CD 影像光碟pickup footage 从旧有的广告借凑而来的影片 Pictures first 以画面为优先pi某els 像素playback 播放playback person 录影机播放员post-scoring 后制配乐post testing 后测pre-lite 预先排演pre-production meeting 拍制前会议pre-production stage 制前阶段prescoring music 拍摄前配乐pretesting 前测price-quote 报价或喊价printed circuitry 印刷电路producer 广告公司的制片,制作人product shot 商品展示镜头production assistant P.A制作助理production boutique 制片工作室production notes 制作住记production package 制作议价组合production specification sheets 制作分工明细表promotions 促销prop people 道具师properties 舞台道具props 道具public-domain music 大众共有或版权公有的音乐publisher's fee 发行费用pulldown 抓片random access 随机存取Random Access Memory RAM随机存取记忆体raster 屏面Read Only Memory ROM唯读记忆体real opinions 真实反应的意见real people 消费大众或一般人Real people reactions and opinions 消费大众的真实反应及意见 recordist 录音师Reebok 锐跑reflections 反光rendering 算图rental facilities 出租公司residual 后续付款Rhapsody in blue 《蓝色狂想曲》Rhythm and Hues 莱休电脑动画公司right-to-work 自由工作权Ripomatic/stealomatic storyboard 借境脚本Roll camera 开动摄影机rot scope 逐格帖合的重覆动画动作rough cut 粗剪Ssample reels 作品集scenes 场景scenic artist 布景设计师scratch track 临时音轨Screen Actors Guild SAG电影演员同业公会Screen E某tra's Guild SAG电影临时演员同业公会 Play book 剧本Log keeper 场记set construction costs 搭景费用set designer 布景设计师set dresser 布影装饰师shadows 阴影shape library 清晰对焦shooting board 模型资料库shooting day 制作脚本拍片日shooting in two 一次两画格的方式拍摄shot list 拍摄程序表shutter 快门sides 台词表silent scenes 无声场景silent takes 无声取景slate 开拍板Slice-of-life episodes 生活片段式对白 snapshot 快照拍摄Solid State Screen Sound 数位录音工作站 song-and-dance 歌舞片sound people 音效人员sound stage 隔音场sound take 有声摄影special effects person 特殊效果人员special-effects 特效specification sheet 职责明细表speed 运转正常splice 捻接Sprint 斯布林特电话公司stand-in 替身Stand-up presenters 播报员推荐standing sets 常备的布景配置star personality 知名人物stereo-mi某ing 立体声混音sticks 排字手托stills 剧照still photos 静态照片stock footage 底片材料、库存影片stop-motion 单格拍制story line 故事情节storyboard 故事脚本strobe-light photography 频闪闪光灯摄影法 Subaru automobile 速霸陆汽车Super 16mm format 超16厘米底片规格sync sound 同步收音synchronized 同步Tthe screening room 试播室takes 取景镜头talent reports 劳务报价单teamsters 卡车驾驶员Teamsters Union 卡车驾驶员工会teleprompter 读稿机test commercial 测试性广告testimonial release print 电影院放映片three-dimensional 3D三度空间tight close-up 大特写time-code 时码tissue sheets 薄绵纸top light 顶光tracing paper 扫图纸track left 摄影机左移track right 摄影机右移track time 音轨时限trade 通路Tri-某柯打tri-某底片trim 剪修trims 修剪下来的片头尾turnarounds 转场UUnique Selling Proposition 独特的销售主张 VVIDEO 视觉或影像部分video master 影像母带Video Tape Recording person 录音带录制员 vignettes 集锦式快接画面处理virtual reality 虚拟实境visual timeline 视觉时间尺visually oriented 视觉导向voiceover announcer 旁白播音员Wwardrobe attendant 服装师West and Brady 威布广告公司wild wall 活动墙板window burn-in 叠印框wire-frame 立体线稿words-and-music 旁白加音乐Words First 以文案为优先Zzoom 变焦zoom in 镜头向前推进。
高考英语语法填空热点话题押题预测:专题39 影视戏剧音乐艺术16篇(花鸟画+水墨画+盆景艺术)
高考英语语法填空热点话题押题预测专题39 影视戏剧音乐艺术16篇(花鸟画+水墨画+盆景艺术+豫剧)养成良好的答题习惯,是决定高考英语成败的决定性因素之一。
做题前,要认真阅读题目要求、题干和选项,并对答案内容作出合理预测;答题时,切忌跟着感觉走,最好按照题目序号来做,不会的或存在疑问的,要做好标记,要善于发现,找到题目的题眼所在,规范答题,书写工整;答题完毕时,要认真检查,查漏补缺,纠正错误。
According to Lin, the new album is quite different from 9 was presented on Gong’s first qinge album, whic h sounded diverse and displayed the singer’s ability to master different music styles. This recording is of an independent work of great 10 (long), consisting of 18 parts and it takes around 40 minutes to perform in its entirety.【02】(2023上·河南·高三校联考阶段练习)阅读下面短文,在空白处填入1个适当的单词或括号内单词的正确形式。
The Golden Panda Awards, 11 (host) by the China Federation of Literary and Art Circles and the Sichuan provincial government, will be held in Chengdu, Sichuan province on Sept. 19 and20, according to a news conference on Saturday.It is an international communication award that demonstrates the concept of community with a shared future, rather than a 12 (profession ) film and television award. In terms of the composition of the judges, the number of foreign judges will account 13 at least 40% of the judging panel, 14 also demonstrates the internationality and openness of the Golden Panda Awards.Aiming 15 (be) an international grand event to deepen cultural exchanges, the Golden Panda Awards opens to excellent film and television works. Through the event, the world can get closer to China, let China embrace the world and 16 (well) carry out cultural exchanges and learning.The First Golden Panda Awards has four 17 (category):film, TV series, documentary and animation with three main activities, as well as three supporting events: visiting events, public film screening 18 new exhibitions. So far, a total of 90 films and TV series from 7,024 submission s by artists of 104 countries and regions like the US, India and Iran 19 (select) for the next stage.With the panda a cultural symbol and films and TV series as a carrier, the Golden Panda Awards builds a platform for mutual learning and cultural exchange among civilizations, 20 (present) the diversity of world's civilizations.【03】(2023上·广东深圳·高三深圳外国语学校校考期中)阅读下面短文,在空白处填入1个适当的单词或括号内的单词的正确形式。
- 1、下载文档前请自行甄别文档内容的完整性,平台不提供额外的编辑、内容补充、找答案等附加服务。
- 2、"仅部分预览"的文档,不可在线预览部分如存在完整性等问题,可反馈申请退款(可完整预览的文档不适用该条件!)。
- 3、如文档侵犯您的权益,请联系客服反馈,我们会尽快为您处理(人工客服工作时间:9:00-18:30)。
Real-Time Pencil RenderingHyunjun Lee∗ POSTECH Sungtae Kwon† POSTECH Seungyong Lee‡ POSTECHAbstractThis paper presents a real-time technique for rendering 3D meshes in the pencil drawing style. We analyze the characteristics of pencil drawing and incorporate them into the rendering process, which is fully implemented on a GPU. For object contours, we propose a multiple contour drawing technique that imitates trial-and-errors of human in contour drawing. For interior shading, we present a simple approach for mapping oriented textures onto an object surface. To improve the quality of pencil rendering, we generate and map pencil textures that reflect the properties of graphite pencils and paper. We show several rendering examples that demonstrate the high performance of the proposed technique in terms of speed and quality. CR Categories: I.3.3 [Computer Graphics]: Picture/Image Generation—Display algorithms Keywords: non-photorealistic rendering, pencil drawing, GPU rendering, multiple contour drawing, pencil textureconsidered similar to pencil drawing in that the tones, materials, and shapes of objects are mostly represented by strokes. Excellent techniques were developed to generate pen-and-ink illustrations from 3D objects [Winkenbach and Salesin 1994; Lake et al. 2000; Wilson and Ma 2004]. Real-time hatching techniques [Praun et al. 2001; Webb et al. 2002] can also be applied to pen-and-ink illustration of 3D meshes. Despite these good results, real-time rendering of 3D meshes in the pencil drawing style has not been fully addressed in the graphics literature. Although it can generate very natural and realistic effects, the simulation-based approach for pencil drawing has a limitation in the rendering speed. The 2D image-based approach can be applied to the rendered images of 3D meshes but will not be effective for pencil rendering of 3D meshes in an animation. Pen-and-ink illustration and real-time hatching techniques provide a concrete basis for real-time pencil rendering. However, the inherent characteristics of pencil drawings differ from pen-and-ink illustrations and these techniques cannot be directly applied. In this paper, we propose a real-time pencil rendering technique, which produces pencil drawing style images of an input 3D mesh in real time. Specifically, this paper presents contributions in the following aspects of pencil rendering; • Multiple contour drawing: When a person draws an object with a pencil, the object contours are usually drawn a few times with slightly different shapes. We present an effective technique to handle this characteristic of pencil drawing (see Figure 3). • Simpler interior shading: The real-time hatching technique [Praun et al. 2001] provides an effective solution for shading an object interior with oriented textures. In this paper, we present a simpler technique that achieves similar effects without using lapped textures [Praun et al. 2000]. Our technique is fully implemented on a GPU and can incorporate paper effects into interior shading. • Pencil texture generation and mapping: We present techniques for generating and mapping pencil textures that reflect characteristics of graphite pencils and paper. Especially, we observe overlapping and white pixel effects from real pencil drawing examples and implement them to improve the quality of pencil rendering. • GPU-based rendering framework: Most of the components in our pencil rendering technique are implemented on a GPU. Consequently, the rendering speed is quite fast; 15 to 60 frames per second for reasonably complicated meshes.1IntroductionA variety of non-photorealistic rendering techniques have been developed to provide software tools that simulate physical materials for drawing and painting, such as pen-and-ink [Winkenbach and Salesin 1994; Winkenbach and Salesin 1996; Lake et al. 2000; Deussen and Strothotte 2000; Wilson and Ma 2004], watercolor [Curtis et al. 1997; Laerhoven and Reeth 2005; Luft and Deussen 2005], and charcoal [Bleser et al. 1988; Majumder and Gopi 2002]. Diverse physical materials used in the real world have inherent characteristics, which determine the features and the flavor of drawing and painting results. A pencil is one of the most available and easy-to-handle tools for drawing. Although pencil drawing might be used as a basis for sophisticated painting afterwards, it has appealed as an interesting art form on its own. Pencil drawings can represent soft impressions of objects with pencil strokes, where the exact tones of strokes are determined by the properties of pencil and paper. To provide a tool for pencil drawing, a simulation-based approach was proposed to mimic the characteristics of graphite pencils combined with paper effects [Sousa and Buchanan 1999; Sousa and Buchanan 2000]. There exists an image-based approach to obtain pencil drawings which transforms an input image into the pencil drawing style [Mao et al. 2001]. Pen-and-ink illustration can be∗ crowlove@postech.ac.kr, † zelong@postech.ac.kr,http://home.postech.ac.kr/∼crowlove http://home.postech.ac.kr/∼zelong ‡ leesy@postech.ac.kr, http://www.postech.ac.kr/∼leesy2Related WorkSousa and Buchanan [1999; 2000] analyzed and simulated the properties of various materials for pencil drawing. They modeled pencils, paper, erasers, and blenders, and their simulation results show nice effects comparable to real pencil drawings. However, this approach needs heavy computation for simulation, which may prohibit real-time rendering.Mao et al. [2001] proposed an image transformation technique that changes an input image to have the pencil drawing style. They construct a 2D vector field on an image and apply the line integral convolution to the vector field to generate pencil strokes. In this paper, we consider 3D meshes as the input for pencil rendering, instead of 2D images. Winkenbach and Salesin [1994] developed a rendering technique that generates pen-and-ink illustrations from 3D meshes and showed impressive results. Lake et al. [2000] presented realtime rendering techniques in various styles, including pencil sketch shading, with projected textures. Saito and Takahashi [1990] introduced line drawing on an object surface based on a curvature field for comprehensible rendering of 3D shapes. Salisbury et al. [1997] compute a direction field on a 2D image and map orientable textures to produce pen-and-ink illustrations. However, in these techniques, the inherent characteristics of pencil drawing are not really investigated. With the advances of graphics hardware, real-time techniques for non-photorealistic rendering have been developed. Praun et al. [2001] presented a real-time hatching technique, which can map stroke textures onto a 3D mesh surface with level-of-detail control. Webb et al. [2002] extended this technique with volume rendering hardware and pixel shaders to enhance the control of hatching tones. Majumder and Gopi [2002] introduced a real-time technique for charcoal rendering of 3D objects, which utilizes graphics hardware. In this paper, we present a real-time rendering technique for pencil drawing of 3D meshes, which can handle texture mapping of orientable strokes with a simpler approach than previous work. With the simplicity, our technique is readily implemented by GPU programming. For stylization of 3D object contours, Mohr and Gleicher [2001] used jittering to mimic the multiple contours in a pencil drawing. Loviscach [2004] demonstrated that multiple contour drawing can be supported by graphics hardware. However, in this paper, we present a more efficient technique for multiple contour drawing, which is implemented by a pixel shader with multi-texturing. Since our technique simply distorts the underlying plane of the contours to produce different trajectories, it can handle arbitrarily complex contours very efficiently.Preprocessing PreprocessingRun-time Process Run-time Processpixel brightness, similar to charcoal rendering [Majumder and Gopi 2002]. To express pencil strokes, we use texture rotation and 3way blending for mapping oriented pencil textures in the principal curvature directions. To represent interaction among a pencil and paper, we model paper as a height field and the paper normals are used to control the pixel intensities during the mapping of oriented pencil textures. In interior shading, all steps are performed in a single pixel shader, except that a simple vertex shader is used to project the 3D principal curvature directions at vertices onto the 2D image space. After contour drawing and interior shading, the resulting images are composed and enhanced to produce the final image. This step is fully performed in a pixel shader using the images from contour drawing and interior shading as texture images mapped onto the whole screen. In the preprocessing step, we prepare several data that will be used in the run-time process. This step needs to be performed only once for each input model, thus the computation speed is not really important. For contour drawing, we generate a texture to be used for giving pencil tones to the contours. This texture can be simpler than the pencil texture used for interior shading because contours occupy small narrow parts of the rendered image without revealing the texture details. We also construct distorted planes to be used for modifying contour trajectories. For interior shading, we generate a set of pencil textures to represent different intensities of an object interior. The principal curvature directions are computed for mesh vertices to determine the orientations in interior texture mapping. A paper model is constructed as a height field and the normal vector at each pixel is computed to provide paper effects in interior texture mapping. Once all necessary data have been prepared in preprocessing, the run-time process for pencil rendering of a 3D mesh is fully supported by graphics hardware and performed very fast with varying camera and lighting parameters. In contour drawing, we mimic the trial-and-error of human by multiple contour drawing with distorted trajectories. In interior shading, pencil textures and paper effects that reflect characteristics of graphite pencils provide natural impressions with an object interior. The details of the techniques are described in the following sections.Contour Drawing Contour Drawing Interior Shading Interior ShadingContour Texture Contour Texture Generation Generation Distorted Plane Distorted Plane Generation GenerationNormal/Depth Normal/Depth Map Rendering Map RenderingContour Contour Detection DetectionContour Contour Shaking Shaking Multiple Multiple Line Drawing Line DrawingPencil Texture Pencil Texture Generation Generation Curvature Curvature Calculation Calculation Paper Normal Paper Normal Texture Generation Texture GenerationBrightness Brightness Adjustment Adjustment Texture Rotation Texture Rotation 3-Way Blending 3-Way Blending Paper Effect Paper EffectComposition/ Composition/ Enhancement EnhancementFigure 1: System overview3System OverviewIn a drawing, objects are usually depicted by contours and interior shading. In our system for pencil rendering of a 3D mesh, the runtime process consists of contour drawing and interior shading parts whose output images are combined to generate the final image (see Figure 1). In contour drawing, we first render the input mesh to obtain normal and depth images from the shape. The normal and depth images are then used to detect contours in image space. To make the extracted contours look natural, similar to pencil drawing by a human, we draw the contours a few times with slightly distorted trajectories. The pencil tones of the contours are represented by mapping a pencil texture. The normal and depth images are obtained by OpenGL rendering of a mesh, and the succeeding image-based contour detection is performed by a pixel shader. After contours have been obtained, another pixel shader handles multiple contour drawing and pencil texture mapping at the same time. The interior shading part starts with intensity computation for the input mesh to determine the brightness of pixels in the rendered image. To introduce pencil drawing tones, we adjust the contrast of44.1Contour DrawingContour detectionFigure 2(a) shows an example of the distorted plane with perturbed rectangles. Figure 2(b) shows shaken contours obtained by texturing a contour image onto a distorted plane.Many algorithms exist for detecting contours from a 3D mesh. Among them, we use an image space approach, which can detect contours in real time using GPU and enables us to apply image processing techniques to detected contours [Isenberg et al. 2003; Nienhaus and Doellner 2003]. This approach detects contours using normal and depth images acquired from a 3D object. Suggestive contours [DeCarlo et al. 2003] can also be extracted in the 2D image space. The result of contour detection with an image space approach is represented by a black and white or gray scale image. To introduce lighting effects onto the contours, we modify the pixel values on the contours using the normal information at the pixels; Ic = lc Ic , (1) (a) distorted plane (b) shaken contours Figure 2: Contour shaking4.3Multiple contour drawingwhere Ic and Ic denote the original and modified pixel values of contours, respectively. lc is the light effect factor, which is computed with normal and light directions at each pixel. As a result, the information for detected contours is stored as a gray scale image. We normalize the gray scale values between 0 and 1, where 0 is black (the darkest) and 1 is white (the brightest). Both contour detection and lighting effects on the contours are performed on image pixels and are easily implemented with a pixel shader.4.2Contour shakingIn real pencil drawing, we can observe that a contour is usually composed of overlapped multiple lines, not a single one. In our contour drawing, we can easily achieve this effect by composing several distorted contour images. With multi-texturing, we can assign several texture coordinates computed by different sine functions to the rectangles on the screen space. Then, several contours distorted in different ways are obtained by sampling multiple texture values at the same time in a pixel shader. From experiments, we have discovered that the number of overlapping works best at 3-5. When combining multiple texture values in the pixel shader, we put a darker intensity to a pixel with much overlapping of contours. This strategy imitates a darkening effect induced by overlapping pencil strokes. In addition, we project a contour pencil texture, created in the preprocessing step, onto the contours. This texture mapping introduces impression of a pencil material to the contours and can be performed in the same pixel shader. Figure 3 shows an example of multiple contour drawing. The figures on the left are contour images created from different sine functions. The right figure is the merging result of the left images. From the zoom-in image on the right, we can see that overlapping contours and pencil materials are successfully implemented.Contours acquired by the method in Section 4.1 are artificial and may differ from those drawn by hand. Adding errors to contours can help to imitate hand drawing [Loviscach 2002; Ho and Komiya 2004]. Although a person cannot draw contours without errors, these errors are usually bounded in some limited range. When the drawing error increases, a person will try to stick to the target contour, reducing the error. This implies that shaking patterns of contour drawing can be approximated by the shape of a periodic function. With this idea, we use a sine function to imitate the shaking errors in contour drawing; y = a sin(bx + c) + r, (2)where a and b determine the range and period of the error, respectively. c is a shift of a periodic function and r adds randomness to the error value. We can perturb contours by adding the errors computed with Eq. (2) directly to the contour points. However, this perturbation process will be difficult to implement by a pixel shader because a pixel shader cannot write a value to another pixel except to the current one. We resolve this problem by texturing the contour image onto a distorted plane, instead of shaking contours directly. In the preprocessing step, we divide the screen space into regularly sized rectangles. We assign the coordinates on the contour image to the texture coordinates of the rectangles so that the contour image may be redrawn by texturing the rectangles with the contour image. Then, distorted contours can be obtained by adding errors to the texture coordinates of the rectangles and performing texture mapping afterwards. The distorted texture coordinates for the rectangles are computed with Eq. (2) in the preprocessing step and repeatedly used in the run-time rendering process. Figure 3: Multiple contour textures and the merged image5Interior ShadingIn pencil drawing, various effects are considered for the interior of an object, such as the color and material of a pencil, the directions and thickness of strokes, the paper material, and the blendingand eraser effects [Sousa and Buchanan 1999]. In the preprocessing step, we create pencil textures that reflect the color and material of a pencil represented with oriented strokes. We also make a paper texture that mimics the material of paper. In the run-time process, pencil textures are rotated with the principal curvature directions and blended by multi-texturing, representing the directions and brightness of strokes on the object interior. The paper texture is used to implement the interaction of a pencil with paper in interior stroke mapping. The run-time process for interior shading is implemented in a single pixel shader.even though strokes are added on the paper many times afterwards. To achieve this property, we add a conditional formula at the end of Eq. (3); If ct is white enough, ca = µw ca . (4) With a small value of µw , we can preserve white pixels. Empirically, a value between 0.3 and 0.5 is good for µw . We use a 3D texture space to store various tones of pencil textures [Webb et al. 2002]. Since no stroke is needed for the brightest region, a white image is stored as the brightest texture. Including the white image, 32 pencil textures are stored in the 3D texture space. We make the colors of these textures uniformly distributed from the brightest to the darkest when the textures are generated by overlapping strokes.5.1Pencil texture generationPencil textures for interior shading should express essential properties of pencil strokes, such as brightness and thickness. In addition, strokes in textures should have a specific direction to depict the voluminousness of an object along the direction. To obtain such pencil textures, we propose a texture generation technique based on [Webb et al. 2002] and use a pixel shader to implement the technique. In [Webb et al. 2002], the brightness of an object part is represented by the density of strokes. On the other hand, a pencil drawing expresses the brightness of an object using the brightness of a pencil line itself rather than the density. Therefore, in our texture generation technique, pencil strokes are placed uniformly in each texture image, as shown in Figure 4. To obtain strokes with similar orientations, pencil lines are drawn along a specific direction with some angle perturbation. The brightness of a pencil texture is modulated by repeatedly drawing uniformly distributed strokes. That is, to make a texture darker, we draw uniformly distributed strokes with perturbation on top of the current texture, where pixels are darkened by overlapped strokes.5.2Brightness adjustmentThe object surface brightness for pencil rendering can be computed by a general shading technique, e.g., Gouraud shading. Such computed brightness may not be sufficient for expressing a voluminous object. Majumder and Gopi [2002] enforce the voluminousness by enhancing the contrast of colors, where a brightness value is replaced by its square. In pencil rendering, enforcing contrast between bright and dark regions is still desirable. However, in this case, intensity variation in a bright region is more important than the contrast between bright and dark regions. We adjust the brightness by using the square root function to expand bright regions with enforced intensity variation. The brightness adjustment is performed at each pixel in the pixel shader for interior shading.5.3Texture rotationIn a drawing, stroke directions generally follow the principal curvature directions [Girshick et al. 2000; Hertzmann and Zorin 2000]. To apply this rule to our interior shading, we compute and store the curvature directions at mesh vertices in the preprocessing step. For curvature direction computation, we adopt the technique based on the tensor field computation used in [Alliez et al. 2003]. In the regions where principal directions are not clearly defined, such as spherical and planar regions, we determine the principal directions by propagating them from neighbor vertices. Figure 4: Initial stroke and generated textures In real pencil drawing, the increase of darkness becomes smaller as pencil strokes are overlapped on the same region repeatedly. To incorporate this observation, the brightness of a pixel in a pencil texture is determined by ct ca = = ct − µb ca , ct (1.0 − cs ), In the run-time rendering, pencil textures are mapped onto the object interior in the image space. In the mapping, we rotate a pencil texture at a vertex along the minimum curvature direction and the rotated texture is projected onto neighbor faces of the vertex (see Figure 5). The 3D curvature direction at a vertex can be transmitted to the vertex shader as 3D texture coordinates. In the vertex shader, the 3D curvature direction is projected onto the 2D image space using the OpenGL projection matrix. With the projected direction, we calculate a rotation angle θ in the pixel shader for interior shading. By rotating texture coordinates by −θ , instead of rotating a texture, we can draw a pencil texture along the desired direction. To obtain a constant direction of a pencil texture in the neighbor faces of a vertex, as shown in Figure 5, we assign the same 3D texture coordinates (curvature direction) to the vertex and its 1-ring neighborhood.(3)where ct and ct are the current and updated texture colors, respectively. cs is the stroke color and ca is the maximum amount of darkness that can be increased by the stroke. The texture and stroke colors are represented by values between 0 (black) and 1 (white). The user controlled parameter µb determines how much stroke darkness is added to the current texture. From experiments, we found a value between 0.1 and 0.3 is proper for µb . We also observe from real pencil drawing that the regions not stained with black lead at the first stroking tend to remain white5.43-way blendingAs a result of texture rotation performed at each vertex, each face is assigned three pencil textures with different orientations. TheTexture Curvature DirectionViewportFigure 7: Cross hatching in dark regionsFigure 5: Texture rotationet al. [Curtis et al. 1997], which generates a height map for paper using noise. From the height map, we obtain a normal map in the preprocessing step. With the normal map, we apply the paper effect to interior shading by considering interaction among the pencil and paper in a stroke. If the stroke direction is opposite to the paper normal, we darken the pencil texture color to simulate more black lead being stained on the paper. Similarly, the texture color is attenuated if the stoke direction and paper normal are similar. See Figure 8 for an illustration. This paper effect can be implemented by ct = = ct − µ p (−d · n) ct + µ p (d · n),orientations come from the minimum curvature directions at the three vertices of a face. The actual mapping of three textures onto a face is implemented by multi-texturing with three different 3D texture coordinates for each vertex. In the pixel shader for interior shading, texture rotation is performed three times and three rotated texture values are blended together (see Figure 6).(5)(a) shading for each vertex Figure 6: 3-way blending(b) 3-way blendingwhere ct and ct are the current and modified texture colors, respectively. d is the curvature direction and n is the normal direction from the paper model. µ p is a weighting factor, empirically, whose value is selected between 0.0 and 0.1.Stroke directionUsually, the interior strokes for pencil drawing are expressed by lines and very smooth curves. Pencil stokes with different directions are overlapped several times in the regions with complicated shapes. Our 3-way blending of textures effectively handles these effects in interior shading. In a region with a simple shape, such as a cylindrical part, the principal curvature directions are almost constant and 3-way blending generates consistent strokes along the shape. Around an object part with a complex shape, the principal curvature directions change dynamically and 3-way blending gives overlapping effects of differently oriented strokes. Although texture rotation is independently performed for each face, 3-way blending helps remove most of the discontinuity of pencil strokes among adjacent faces. With 3-way blending, for two faces sharing an edge, two directions for texture rotation are the same. Similarly, two faces sharing a vertex have one common direction for texture rotation. Consequently, pencil strokes look almost continuous along the object surface, as demonstrated in the rendering results shown in Section 7. In real pencil drawing, we can observe that more lines are drawn with different directions on dark regions. To simulate this effect, we draw additional strokes for dark regions in interior shading. For a dark region, after a pencil texture is mapped with the minimum curvature direction, the same texture but with the maximum curvature direction is mapped on the same region again. Figure 7 shows an example.dnPaperFigure 8: Paper effect6Composition and EnhancementAs explained in Section 3, we render contours and the object interior independently and the resulting images are merged to obtain the final pencil rendering image. We can perform the merging by a pixel shader, where the contour and interior images are texturemapped onto a big rectangle in the screen space. Since contour drawing usually precedes interior shading in real pencil drawing, we first apply contour image values to the final pixel intensities and then add interior image values. On the regions where the interior shading overlaps with already drawn contours, we attenuate the interior intensities before blending with contour intensities. This attenuation allows contours to remain visible while reflecting interior textures. In Section 5.2, we described a method to adjust the brightness for interior shading. Similarly, the contrast of the result image can be modulated in the pixel shader after the merging. In this case, we adapt the contrast enhancement proposed by Majumder and Gopi [2002], which makes bright regions brighter while dark regions become darker.5.5Paper effectPaper has various material properties, such as roughness and textures, which affect the drawing results. To apply the paper effect to our pencil rendering, we make a paper texture that resembles the surface of the real paper. We adopt the method proposed by CurtisFinally, we blend the paper texture onto the background since the paper is not completely white. The pixel and paper colors are blended by ci = ci c p , (6)where ci and ci are the original and blended colors, respectively. c p is a color from the paper texture. In this blending, the paper material is hardly exposed in dark regions, where the pixel colors dominate the final output.shows a reasonable amount of coherence. Although the texture mapping for interior shading is performed with 2D polygons, we do not have the “shower-door effect” when we rotate the models because the orientations for texture mapping are updated at each frame with 3D principal curvature directions. Nevertheless, a better handling of temporal coherence will reduce possible artifacts in an animation. An important area of future work is to support more characteristics of pencil drawing, including blender and eraser effects. Other interesting problems include pencil rendering with a more abstract style, such as croquis, and color pencil rendering with the material property of a mesh.7Experimental ResultsWe implemented the proposed pencil rendering technique with OpenGL and OpenGL Shading Language. The pencil rendering examples in this paper were obtained on a Windows PC with Pentium IV 630 with 2G memory. The graphic card is GeForce 7800GTX with 256M video memory. Figure 9(a) gives a result of contour drawing. We can see that contours are drawn multiple times with slightly different trajectories, which imitates the trial-and-errors in contour drawing by human. Figure 9(b) shows a magnified part of a pencil rendering result. The pencil strokes naturally follow the principal curvature directions and the image intensity smoothly changes with the brightness on the object surface. In Figure 10, two interior textures generated from sample strokes with different brightness are used to render the same object. Figure 11 shows a comparison of the rendering results with and without additional contrast enhancement in the final composition stage. Figures 10 and 11 demonstrate that the style and impression of the pencil rendering results can be easily controlled in our technique. Figures 12 and 13 show additional examples of pencil rendering produced by our technique. In these examples, the shapes of the given objects are nicely described with appropriate effects of pencil drawing. Table 1 summarizes the rendering speed for the examples shown in this paper. Our technique provides real-time rendering for reasonably complex objects, up to meshes with several tens of thousands polygons. Figure Figure 9 (a) Figure 9 (b) Figure 10 Figure 11 Figure 12 Model Fandisk Globe Grenade Venus Drill # polygon 12,946 9,728 17,464 1,416 41,210 Avg. FPS 45 47 44 62.5 16AcknowledgmentsThe authors would like to thank Yunjin Lee for help in paper writing. The grenade, hydrant, and drill models are courtesy of Amazing3D, and the Venus model is courtesy of Cyberware. This work was supported in part by the Korean Ministry of Education through the BK21 program and the Korean Ministry of Information and Communication through the ITRC support program.ReferencesA LLIEZ , P., C OHEN -S TEINER , D., D EVILLERS , O., L EVY, B., AND D ESBRUN , M. 2003. Anisotropic polygonal remeshing. ACM Transactions on Graphics 22, 3, 485–493. B LESER , T. W., S IBERT, J. L., AND M C G EE , J. P. 1988. Charcoal sketching: Returning control to the artist. ACM Transactions on Graphics 7, 1, 76–81. C URTIS , C. J., A NDERSON , S. E., S EIMS , J. E., F LEISCHER , K. W., AND S ALESIN , D. H. 1997. Computer-generated watercolor. In Proc. ACM SIGGRAPH 1997, 421–430. D E C ARLO , D., F INKELSTEIN , A., RUSINKIEWICZ , S., AND S ANTELLA , A. 2003. Suggestive contours for conveying shape. ACM Transactions on Graphics 22, 3, 848–855. D EUSSEN , O., AND S TROTHOTTE , T. 2000. Computer-generated pen-and-ink illustration of trees. In Proc. ACM SIGGRAPH 2000, 13–18. G IRSHICK , A., I NTERRANTE , V., H AKER , S., AND L EMOINE , T. 2000. Line direction matters: An argument for the use of principal directions in 3D line drawings. In Proc. NPAR 2000, 43–52. H ERTZMANN , A., AND Z ORIN , D. 2000. Illustrating smooth surfaces. In Proc. ACM SIGGRAPH 2000, 517–526.Table 1: Rendering performance table8Conclusion and Future WorkH O , S. N., AND KOMIYA , R. 2004. Real time loose and sketchy rendering in hardware. In Proc. 20th Spring Conference on Computer Graphics, 83–88. I SENBERG , T., F REUDENBERG , B., H ALPER , N., S CHLECHTWEG , S., AND S TROTHOTTE , T. 2003. A developer’s guide to silhouette algorithms for polygonal models. IEEE Computer Graphics and Applications 23, 4, 28–37. L AERHOVEN , T. V., AND R EETH , F. V. 2005. Real-time simulation of watery paint. Computer Animation and Virtual Worlds 16, 3-4, 429–439.In this paper, we proposed a real-time technique for rendering 3D meshes in the pencil drawing style. We analyzed the characteristics of pencil drawing and incorporated them into the rendering process. The components of the process are fully supported by graphics hardware and mostly implemented by vertex and pixel shaders with multi-texturing. In this paper, temporal coherence among animation frames of pencil rendering was not really addressed, while the accompanying video。