JS图片自动切换代码
js图片随机不定向浮动的实现代码

js图⽚随机不定向浮动的实现代码复制代码代码如下://很有趣的浮动哦,不⽤太多代码,和⼤家分享下<html><head>随机浮动<style type="text/css">#divimg{/*对图⽚进⾏绝对定位*/position:absolute;}</style></head><body><div id="divimg"><img src="../../resource/images/float.jpg" width="205" height="108"></div><script language="javascript" type="text/javascript">//获取图⽚的所有div对象var divimg=document.getElementById("divimg");//设置起始位置var x=0,y=0;//设置图⽚的前进速度var xSpeed=8,ySpeed=2;//设置图⽚浮动⾼度和宽度var w=document.documentElement.clientWidth-205,h=document.body.clientHeight-108;//alert(w);function floatimg(){//⽐较是否达到边界,如果到达边界以后就改变图⽚的⽅向为反向,如果未达到边界则继续向前if(x<0||x>w) xSpeed=-xSpeed;if(y<0||y>h) ySpeed=-ySpeed;x+=xSpeed;y+=ySpeed;setTimeout("floatimg()",1000);var n=divimg.style.top=Math.round(Math.random()*h)+"px";var m=divimg.style.left=Math.round(Math.random()*w)+"px";}floatimg();</script></body></html>。
Html、js图片轮播代码

Html、js图片轮播代码现在基本上每个网站都有一个自动轮播的banner广告图,在没有任何按钮的情况下,图片在规定的时间内进行自动切换。
下面是html、js 图片轮播代码详情。
代码效果图实例:第一秒:第二秒:第三秒:详细代码如下:Html代码部分:<body><ul class="banner"><li><img src="images/1.jpg"></li><li><img src="images/2.jpg"></li><li><img src="images/3.jpg"></li></ul></body>Css代码部分:<style type="text/css">ul,li{margin:0px;padding:0px}li{list-style:none}.banner{width:630px;height:250px;margin:100px auto;overflow:hidden;cursor:pointer} </style>Javascript代码部分:<script type="text/javascript"src="jquery.js"></script><script type="text/javascript">$(function(){var timer=setInterval(function(){if($(".banner li:last").is(":hidden")){$(".banner li:visible").addClass("on");$(".banner li[class=on]").next().fadeIn("slow");$(".banner li[class=on]").hide().removeClass("on");}else{$(".banner li:last").hide();$(".banner li:first").fadeIn("slow");}},2000)$(".banner li").hover(function(){clearInterval(timer);},function(){timer=setInterval(function(){if($(".banner li:last").is(":hidden")){$(".banner li:visible").addClass("on");$(".banner li[class=on]").next().fadeIn("slow");$(".banner li[class=on]").hide().removeClass("on");}else{$(".banner li:last").hide();$(".banner li:first").fadeIn("slow");}},2000)})})</script>【Jquery.js】是一个jquery库,只要百度一下搜索“jquery”下载这个文件就行。
swiper自动图片无限轮播实现代码
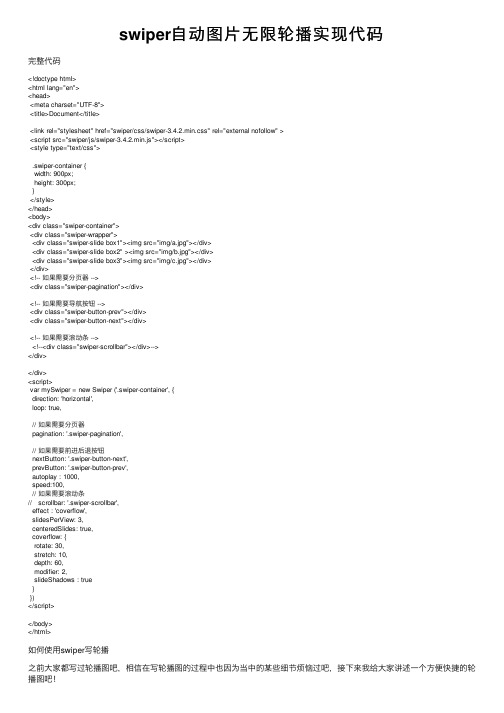
swiper⾃动图⽚⽆限轮播实现代码完整代码<!doctype html><html lang="en"><head><meta charset="UTF-8"><title>Document</title><link rel="stylesheet" href="swiper/css/swiper-3.4.2.min.css" rel="external nofollow" ><script src="swiper/js/swiper-3.4.2.min.js"></script><style type="text/css">.swiper-container {width: 900px;height: 300px;}</style></head><body><div class="swiper-container"><div class="swiper-wrapper"><div class="swiper-slide box1"><img src="img/a.jpg"></div><div class="swiper-slide box2" ><img src="img/b.jpg"></div><div class="swiper-slide box3"><img src="img/c.jpg"></div></div><!-- 如果需要分页器 --><div class="swiper-pagination"></div><!-- 如果需要导航按钮 --><div class="swiper-button-prev"></div><div class="swiper-button-next"></div><!-- 如果需要滚动条 --><!--<div class="swiper-scrollbar"></div>--></div></div><script>var mySwiper = new Swiper ('.swiper-container', {direction: 'horizontal',loop: true,// 如果需要分页器pagination: '.swiper-pagination',// 如果需要前进后退按钮nextButton: '.swiper-button-next',prevButton: '.swiper-button-prev',autoplay : 1000,speed:100,// 如果需要滚动条// scrollbar: '.swiper-scrollbar',effect : 'coverflow',slidesPerView: 3,centeredSlides: true,coverflow: {rotate: 30,stretch: 10,depth: 60,modifier: 2,slideShadows : true}})</script></body></html>如何使⽤swiper写轮播之前⼤家都写过轮播图吧,相信在写轮播图的过程中也因为当中的某些细节烦恼过吧,接下来我给⼤家讲述⼀个⽅便快捷的轮播图吧!Swiper常⽤于移动端⽹站的内容触摸滑动1.第⼀步先引⼊css---swiper.css插件和JQ---swiper.js 插件,然后呢就开始写轮播图了<div class="swiper-container">--⾸先定义⼀个容器<div class="swiper-wrapper"><div class="swiper-slide"><img src="" /></div> --添加图⽚<div class="swiper-slide"><img src="" /></div><div class="swiper-slide"><img src="" /></div></div><div class="swiper-pagination"></div>--⼩圆点分页器<div class="swiper-button-prev"></div>--上⼀页<div class="swiper-button-next"></div>--下⼀页</div>如果想让它动起来,那就继续来写js吧var mySwiper = new Swiper(".swiper-container",{autoplay:1000,--每秒中轮播⼀次loop:true,--可以让图⽚循环轮播autoplayDisableOnInteraction:false,--在点击之后可以继续实现轮播pagination:".swiper-pagination",--让⼩圆点显⽰paginationClickable:true,--实现⼩圆点点击prevButton:".swiper-button-prev",--实现上⼀页的点击nextButton:".swiper-button-next",--实现下⼀页的点击 effect:"flip"--可以实现3D效果的轮播})Swiper轮播的也有它的好处: 1.Swiper是纯javascript打造的滑动特效插件,⾯向⼿机、平板电脑等移动终端。
JS图片屏幕旋转特效代码

JS图片旋转特效代码JS图片旋转代码,像屏幕一样围成柱体圆形的图片旋转特效,图片的高度和宽度可自设,图片路径也可自定义,还有旋转速度也可以自定义调节。
<body onLoad="Carousel()"><script type="text/javascript">var Car_Image_Width=320;var Car_Image_Height=275;var Car_Border=true;var Car_Border_Color="white";var Car_Speed=4;var Car_Direction=true;var Car_NoOfSides=8;Car_Image_Sources=new Array("/jscss/demoimg/wall_s2.jpg","","/jscss/demoimg/wall_s3.jpg","","/jscss/demoimg/wall_s4.jpg","", //this slide isn't linked"/jscss/demoimg/wall_s7.jpg","" // NOTE No comma after last line);CW_I=new Array(Car_NoOfSides/2+1);C_ClcW=new Array(Car_NoOfSides/2);C_Coef=new Array(3*Math.PI/2,0,3*Math.PI/2,11*Math.PI/6,Math.PI/6,3*Math.PI/2,7*Math.PI/4, 0,Math.PI/4,3*Math.PI/2,5*Math.PI/3,11*Math.PI/6,0,Math.PI/6,Math.PI/3);var C_CoefOf=Car_NoOfSides==4?0:Car_NoOfSides==6?2:Car_NoOfSides==8?5:9;C_Pre_Img=new Array(Car_Image_Sources.length);varC_Angle=Car_Direction?Math.PI/(Car_NoOfSides/2):0,C_CrImg=Car_NoOfSides,C_MaxW,C_T otalW,C_Stppd=false,i,C_LeftOffset,C_HalfNo=Car_NoOfSides/2;function Carousel(){if(document.getElementById){for(i=0;i<Car_Image_Sources.length;i+=2){C_Pre_Img[i]=new Image();C_Pre_Img[i].src=Car_Image_Sources[i]} C_MaxW=Car_Image_Width/Math.sin(Math.PI/Car_NoOfSides)+C_HalfNo+1;Car_Div=document.getElementById("Carousel");for(i=0;i<C_HalfNo;i++){CW_I[i]=document.createElement("img");Car_Div.appendChild(CW_I[i]);CW_I[i].style.position="absolute";CW_I[i].style.top=0+"px";CW_I[i].style.height=Car_Image_Height+"px";if(Car_Border){CW_I[i].style.borderStyle="solid";CW_I[i].style.borderWidth=1+"px";CW_I[i].style.borderColor=Car_Border_Color}CW_I[i].src=Car_Image_Sources[2*i];CW_I[i].lnk=Car_Image_Sources[2*i+1];CW_I[i].onclick=C_LdLnk;CW_I[i].onmouseover=C_Stp;CW_I[i].onmouseout=C_Rstrt}CarImages()}}function CarImages(){if(!C_Stppd){C_TotalW=0;for(i=0;i<C_HalfNo;i++){C_ClcW[i]=Math.round(Math.cos(Math.abs(C_Coef[C_CoefOf+i]+C_Angle))*Car_Image_ Width);C_TotalW+=C_ClcW[i]}C_LeftOffset=(C_MaxW-C_TotalW)/2;for(i=0;i<C_HalfNo;i++){CW_I[i].style.left=C_LeftOffset+"px";CW_I[i].style.width=C_ClcW[i]+"px";C_LeftOffset+=C_ClcW[i]}C_Angle+=Car_Speed/720*Math.PI*(Car_Direction?-1:1);if((Car_Direction&&C_Angle<=0)||(!Car_Direction&&C_Angle>=Math.PI/C_HalfNo)){ if(C_CrImg==Car_Image_Sources.length)C_CrImg=0;if(Car_Direction){CW_I[C_HalfNo]=CW_I[0];for(i=0;i<C_HalfNo;i++)CW_I[i]=CW_I[i+1];CW_I[C_HalfNo-1].src=Car_Image_Sources[C_CrImg];CW_I[C_HalfNo-1].lnk=Car_Image_Sources[C_CrImg+1]}else{ for(i=C_HalfNo;i>0;i--)CW_I[i]=CW_I[i-1];CW_I[0]=CW_I[C_HalfNo];CW_I[0].src=Car_Image_Sources[C_CrImg];CW_I[0].lnk=Car_Image_Sources[C_CrImg+1]}C_Angle=Car_Direction?Math.PI/C_HalfNo:0;C_CrImg+=2}} setTimeout("CarImages()",50)}function C_LdLnk(){if(this.lnk)window.location.href=this.lnk}function C_Stp(){this.style.cursor=this.lnk?"pointer":"default";C_Stppd=true;}function C_Rstrt(){C_Stppd=false}</script>吕延良博客整理发布,更多的网站特效和广大站长分享讨论!<div id="Carousel" style="position:relative"></div>。
前端开发中的图片轮播插件推荐
前端开发中的图片轮播插件推荐随着互联网的迅猛发展,网页的交互性和美观性日益被重视。
而在网页中常见的一种元素就是图片轮播。
图片轮播不仅可以突出展示网页中的图片内容,还能够增加用户的视觉体验,提高用户的留存时间。
为了实现一个高质量、易于使用和具有丰富功能的图片轮播效果,前端开发者往往需要使用一些专业的插件。
本文将推荐几个常用的前端开发中的图片轮播插件。
1. SwiperSwiper 是一款功能强大的移动端触摸轮播插件。
它具有多种切换效果、支持无限循环轮播、自动播放等功能。
Swiper 使用简单,轻量级且高效,并且支持响应式设计,可以适应不同尺寸的屏幕。
它兼容各种主流浏览器,并提供了丰富的配置选项,可以满足开发者各种不同的需求。
2. SlickSlick 是一款简洁、易于使用的图片轮播插件。
它提供了丰富的切换效果,支持自动播放、响应式设计和无限循环轮播。
Slick 还支持多种自定义配置选项,包括循环播放、显示/隐藏箭头、添加自定义样式等。
虽然 Slick 主要用于移动端开发,但也可以很好地适应桌面端的需求。
3. Owl CarouselOwl Carousel 是一款功能全面且灵活的图片轮播插件。
它支持多种切换效果、自动播放和无限循环轮播。
Owl Carousel 还提供了丰富的配置选项,可以轻松自定义轮播效果,包括过渡动画、导航按钮、自适应布局等。
它还支持响应式设计,可以适应不同屏幕尺寸。
Owl Carousel 是一个开源项目,拥有强大的社区支持和活跃的开发团队。
4. FlickityFlickity 是一款流畅、快速和易于使用的图片轮播插件。
它提供了多种切换效果、自动播放、无限循环轮播以及触摸手势支持。
Flickity 还支持响应式设计,可以根据不同屏幕大小进行布局调整。
它的代码结构简洁,易于维护,并且具有良好的兼容性。
5. Glide.jsGlide.js 是一款轻量级、响应式和可定制的图片轮播插件。
carousel-item change用法
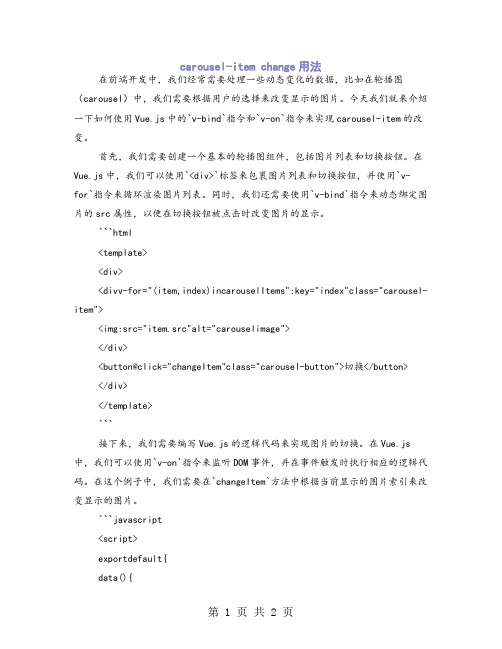
carousel-item change用法在前端开发中,我们经常需要处理一些动态变化的数据,比如在轮播图(carousel)中,我们需要根据用户的选择来改变显示的图片。
今天我们就来介绍一下如何使用Vue.js中的`v-bind`指令和`v-on`指令来实现carousel-item的改变。
首先,我们需要创建一个基本的轮播图组件,包括图片列表和切换按钮。
在Vue.js中,我们可以使用`<div>`标签来包裹图片列表和切换按钮,并使用`v-for`指令来循环渲染图片列表。
同时,我们还需要使用`v-bind`指令来动态绑定图片的src属性,以便在切换按钮被点击时改变图片的显示。
```html<template><div><divv-for="(item,index)incarouselItems":key="index"class="carousel-item"><img:src="item.src"alt="carouselimage"></div><button@click="changeItem"class="carousel-button">切换</button></div></template>```接下来,我们需要编写Vue.js的逻辑代码来实现图片的切换。
在Vue.js 中,我们可以使用`v-on`指令来监听DOM事件,并在事件触发时执行相应的逻辑代码。
在这个例子中,我们需要在`changeItem`方法中根据当前显示的图片索引来改变显示的图片。
```javascript<script>exportdefault{data(){return{selectedIndex:0,//当前选择的图片索引carouselItems:[{src:'image1.jpg'},//图片列表{src:'image2.jpg'},{src:'image3.jpg'},//...其他图片],};},methods:{changeItem(){//根据当前选择的图片索引来改变显示的图片this.selectedIndex=(this.selectedIndex+1)%this.carouselItems.length;},},};</script>```在这个例子中,我们使用了一个简单的模数运算来循环显示所有的图片。
JavaScript实现图像轮播特效教程
JavaScript实现图像轮播特效教程章节一:引言在现代网页设计中,图像轮播特效是非常常见的元素之一。
通过图像轮播特效,可以使网页更加动态、吸引人,提升用户体验。
本教程将介绍如何使用JavaScript实现图像轮播特效,并提供详细的步骤和示例代码。
章节二:基本结构首先,我们需要准备好轮播图的基本结构。
在HTML文件中,创建一个容器元素,用于包裹轮播图的图片和导航按钮。
然后,给容器元素添加一个唯一的ID,方便在JavaScript中进行操作。
章节三:样式设计接下来,我们需要为轮播图的容器元素和其中的图片设置样式。
使用CSS,可以设置容器元素的宽度和高度,以及图片的显示方式和过渡效果。
通过设置适当的样式,可以使轮播图在页面中居中显示,并可以根据需要进行自定义的设计。
章节四:添加JavaScript代码再接下来,我们需要使用JavaScript编写轮播图的逻辑代码。
首先,使用DOM操作获取到容器元素和其中的图片元素。
然后,使用数组或者类数组对象保存每张图片的路径或地址。
接下来,定义一个变量来存储当前显示的图片的索引。
然后,编写一个函数来实现图像切换的效果。
在函数中,通过改变图片元素的样式或属性,实现图片的切换。
同时,更新当前显示的图片的索引,以便进行下一次切换。
章节五:自动轮播功能除了手动切换图片,我们还可以添加自动轮播的功能。
使用JavaScript的定时器函数,可以定期触发图片切换的函数。
通过设置合适的时间间隔,可以实现自动轮播的效果。
同时,需要添加鼠标移入和移出事件,以便在用户鼠标悬停在图片上时停止轮播,鼠标离开时继续轮播。
章节六:导航按钮如果希望用户可以通过导航按钮来手动控制轮播图的切换,我们还需要添加导航按钮的功能。
在HTML文件中,创建相应数量的导航按钮,并为每个按钮设置一个特定的类名或索引属性。
在JavaScript中,使用事件委托的方式,监听导航按钮的点击事件。
当用户点击某个导航按钮时,获取该按钮的索引,然后调用图片切换函数,显示对应索引的图片。
JS滚轮控制图片缩放大小和拖动的实例代码
JS滚轮控制图⽚缩放⼤⼩和拖动的实例代码具体代码如下所⽰:<!DOCTYPE html><html lang="en"><head><meta charset="UTF-8"><title>Document</title><style>.dragAble {position: relative;cursor: move;}.img-con {position: relative;width: 713px;height: 455px;overflow: hidden;border: 1px solid red;}</style></head><body><p class="img-con"><img src="/uploadfile/downs/images/20110714/sy_20110714135215645030.jpg" class="dragAble" /></p> <script type="text/javascript" charset="utf-8">window.onload = function() {var oImg = document.getElementsByTagName("img")[0];function fnWheel(obj, fncc) {obj.onmousewheel = fn;if (obj.addEventListener) {obj.addEventListener('DOMMouseScroll', fn, false);}function fn(ev) {var oEvent = ev || window.event;var down = true;if (oEvent.detail) {down = oEvent.detail > 0} else {down = oEvent.wheelDelta < 0}if (fncc) {fncc.call(this, down, oEvent);}if (oEvent.preventDefault) {oEvent.preventDefault();}return false;}};fnWheel(oImg, function(down, oEvent) {var oldWidth = this.offsetWidth;var oldHeight = this.offsetHeight;var oldLeft = this.offsetLeft;var oldTop = this.offsetTop;var scaleX = (oEvent.clientX - oldLeft) / oldWidth; //⽐例var scaleY = (oEvent.clientY - oldTop) / oldHeight;if (down) {this.style.width = this.offsetWidth * 0.9 + "px";this.style.height = this.offsetHeight * 0.9 + "px";} else {this.style.width = this.offsetWidth * 1.1 + "px";this.style.height = this.offsetHeight * 1.1 + "px";}var newWidth = this.offsetWidth;var newHeight = this.offsetHeight;this.style.left = oldLeft - scaleX * (newWidth - oldWidth) + "px";this.style.top = oldTop - scaleY * (newHeight - oldHeight) + "px";});}<!--//拖拽var ie = document.all;var nn6 = document.getElementByIdx && !document.all;var isdrag = false;var y, x;var oDragObj;function moveMouse(e) {if (isdrag) {oDragObj.style.top = (nn6 ? nTY + e.clientY - y : nTY + event.clientY - y) + "px";oDragObj.style.left = (nn6 ? nTX + e.clientX - x : nTX + event.clientX - x) + "px";return false;}}function initDrag(e) {var oDragHandle = nn6 ? e.target : event.srcElement;var topElement = "HTML";while (oDragHandle.tagName != topElement && oDragHandle.className != "dragAble") {oDragHandle = nn6 ? oDragHandle.parentNode : oDragHandle.parentElement;}if (oDragHandle.className == "dragAble") {isdrag = true;oDragObj = oDragHandle;nTY = parseInt(oDragObj.style.top + 0);y = nn6 ? e.clientY : event.clientY;nTX = parseInt(oDragObj.style.left + 0);x = nn6 ? e.clientX : event.clientX;document.onmousemove = moveMouse;return false;}}document.onmousedown = initDrag;document.onmouseup = new Function("isdrag=false");</script></body></html>只缩放<!DOCTYPE html><html><head><title></title></head><body><img border="0" src="/uploadfile/downs/images/20110714/sy_20110714135215645030.jpg" onmousewheel="return rollImg(this)"> </body><script language="javascript">function rollImg(o){/* 获取当前页⾯的缩放⽐若未设置zoom缩放⽐,则为默认100%,即1,原图⼤⼩*/var zoom=parseInt(o.style.zoom)||100;/* event.wheelDelta 获取滚轮滚动值并将滚动值叠加给缩放⽐zoomwheelDelta统⼀为±120,其中正数表⽰为向上滚动,负数表⽰向下滚动*/zoom+=event.wheelDelta/12;/* 如果缩放⽐⼤于0,则将缩放⽐加载到页⾯元素 */if (zoom>0) o.style.zoom=zoom+'%';/* 如果缩放⽐不⼤于0,则返回false,不执⾏操作 */return false;}</script></html>总结以上所述是⼩编给⼤家介绍的JS滚轮控制图⽚缩放⼤⼩和拖动的实例代码,希望对⼤家有所帮助,如果⼤家有任何疑问请给我留⾔,⼩编会及时回复⼤家的。
js实现图片从左往右渐变切换效果的方法
js实现图⽚从左往右渐变切换效果的⽅法本⽂实例讲述了js实现图⽚从左往右渐变切换效果的⽅法。
分享给⼤家供⼤家参考。
具体实现⽅法如下:复制代码代码如下:<style type="text/css">.woon{border:1px solid #fff;}.wooff{border:1px solid #ffffff;filter:progid:DXImagetransform.Microsoft.Alpha(style=1,opacity=1500,finishOpacity=1);}</style><script language="JavaScript" type="text/JavaScript"><!--window.onerror = function(){return true}function MM_openBrWindow(theURL,winName,features) { //v2.0window.open(theURL,winName,features);}//--></script><table width=500 border=0 align=center cellPadding=0 cellSpacing=0background="/middle/60d27f6dt7942731cd87f&690"><tr><td height="300" align="center"><div id=fc style="filter:progid:DXImagetransform.Microsoft.GradientWipe(duration=3,gradientSize=0.5,motion=forward ); WIDTH:500px; HEIGHT:260px; border:1px solid #99cc66"><div style="display:block"><Ahref="#" target=_blank><img onmouseover=clearAuto(); onmouseout=setAuto() height=300src="/middle/60d27f6dtbc987f277bde&690" width=500 border=0></A></div><div style="display: none"><a href="#" target="_blank"><img onmouseover=clearAuto(); onmouseout=setAuto() height=300 src="/middle/60d27f6dtbc987f42b6b9&690" width=500 border=0></a></div><div style="display: none"><A href="#" target=_blank><img onmouseover=clearAuto(); onmouseout=setAuto()height=300 src="/middle/60d27f6dtbc987f3c3303&690" width=500 border=0></A></div><div style="display: none"><a href="#" target=_blank><img onmouseover=clearAuto(); onmouseout=setAuto()height=300 src="/middle/60d27f6dt7942732166fb&690" width=500 border=0></a></div></div></td></tr><tr><td height=100 valign="top"> <table border=0 align=center cellPadding=0 cellSpacing=1 id=num><tr><td class=woon onmouseover=clearAuto();onclick=Mea(0); onmouseout=setAuto() ><img src="/middle/60d27f6dtbc987f277bde&690" width="120" height="70" style="cursor: hand" onDblClick="MM_openBrWindow('#','','')"></td><td class=wooff onmouseover=clearAuto(); onclick=Mea(1); onmouseout=setAuto() ><img src="/middle/60d27f6dtbc987f42b6b9&690" width="120" height="70" border="0" style="cursor: hand" onDblClick="MM_openBrWindow('#','','')"></td><td class=wooff onmouseover=clearAuto(); onclick=Mea(2); onmouseout=setAuto() ><img src="/middle/60d27f6dtbc987f3c3303&690" width="120" height="70" style="cursor: hand" onDblClick="MM_openBrWindow('#','','')"></td><td class=wooff onmouseover=clearAuto(); onclick=Mea(3); onmouseout=setAuto() ><img src="/middle/60d27f6dt7942732166fb&690" width="120" height="70" style="cursor: hand" onDblClick="MM_openBrWindow('#','','')"></td></table><script>var n=0;var showNum = document.getElementByIdx_x("num");function Mea(value){n=value;setBg(value);plays(value);}function setBg(value){for(var i=0;i<4;i++)if(value==i){showNum.getElementsByTagName_r("td")[i].className='woon';}else{showNum.getElementsByTagName_r("td")[i].className='wooff';}}function plays(value){with (fc){filters[0].Apply();for(i=0;i<4;i++)i==value?children[i].style.display="block":children[i].style.display="none"; filters[0].play();}}function clearAuto(){clearInterval(autoStart)}function setAuto(){autoStart=setInterval("auto(n)", 5000)}function auto(){n++;if(n>3)n=0;Mea(n);}function sub(){n--;if(n<0)n=3;Mea(n);}setAuto();</script></body></html>希望本⽂所述对⼤家的javascript程序设计有所帮助。
js点击更换背景颜色或图片的实例代码
js点击更换背景颜⾊或图⽚的实例代码1,按钮样式复制代码代码如下:<script>org_Color=document.bgColor.substring(1.10)</script><form><input type="button" value="淡黄⾊背景"onClick="document.bgColor='#feffc6'"><input type="button" value="浅蓝⾊背景"onClick="document.bgColor='#c6fffe'"><input type="button" value="粉红⾊背景"onClick="document.bgColor='#ffc9c6'"><input type="button" value="墨绿⾊背景"onClick="document.bgColor='#508b7d'"><input type="button" value="天蓝⾊背景"onClick="document.bgColor='#7BC7FF'"><input type="button" value="⽶⽩⾊背景"onClick="document.bgColor='#f0f0f0'"></form>2,下拉样式复制代码代码如下:<selectonChange="document.bgColor=this.options[this.selectedIndex].value"><option value="#C0C0C0">灰⾊的<option value="BLACK">⿊的⾊<option value="d2c6ff">淡紫蓝<option value="feefc7">太阳黄<option value="ffd2c6">淡红橘<option value="c7fed8">苹果绿<option value="80ff80">草原绿<option value="#C1BC59">橄榄⾊<option value="#7BC7FF">天空蓝<option value="#AEDFD3">蓝绿⾊<option value="#508B7D">墨绿⾊<option value="#F0F0F0">⽶⽩⾊</select>3,触碰样式复制代码代码如下:<scriptlanguage="Javascript"><!--function backcolor(form){temp = ""for (var i = 0; i < 16; i++) {temp = form.color[i].valueif (form.color[i].checked){ document.bgColor = temp }}}function randombackground(){document.bgColor = getColor()}function getColor(){currentdate = new Date()backgroundcolor = currentdate.getSeconds()if (backgroundcolor > 44)backgroundcolor = backgroundcolor - 45else if (backgroundcolor > 29)backgroundcolor = backgroundcolor - 30else if (backgroundcolor > 15)backgroundcolor = backgroundcolor - 16if (backgroundcolor == 0 )return "olive";else if (backgroundcolor == 1 )return "teal";else if (backgroundcolor == 2 )return "red";else if (backgroundcolor == 3 )return "blue";else if (backgroundcolor == 4 )return "maroon";else if (backgroundcolor == 5 )return "navy";else if (backgroundcolor == 6 )return "lime";else if (backgroundcolor == 7 )return "fuschia";else if (backgroundcolor == 8 )return "green";else if (backgroundcolor == 9 )return "purple";else if (backgroundcolor == 10 )return "gray";else if (backgroundcolor == 11 )return "yellow";else if (backgroundcolor == 12 )return "aqua";else if (backgroundcolor == 13 )return "black";else if (backgroundcolor == 14 )return "white";else if (backgroundcolor == 15 )return "silver";}// --></script><body onload="document.bgColor='lime'; returntrue;"><a href="javascript:void(0);"onmouseover="randombackground()"><fontsize="5" face="宋体">碰我改变背景颜⾊</font></a>点击更换背景图⽚:复制代码代码如下:<div style="float:right;margin-right:20px;"><ahref="javascript:void(0);"><imgclass="button1"onClick="javascript:document.body.style.background='url(images/bg/1.jpg)'"></a><ahref="javascript:void(0);"><imgclass="button2"onClick="javascript:document.body.style.background='url(images/bg/2.jpg)'"></a><ahref="javascript:void(0);"><imgclass="button3"onClick="javascript:document.body.style.background='url(images/bg/3.jpg)'"></a><ahref="javascript:void(0);"><imgclass="button4"onClick="javascript:document.body.style.background='url(images/bg/4.jpg)'"></a><ahref="javascript:void(0);"><imgclass="button5"onClick="javascript:document.body.style.background='url(images/bg/5.jpg)'"></a><ahref="javascript:void(0);"><imgclass="button6"onClick="javascript:document.body.style.background='url(images/bg/6.jpg)'"></a></div>IE6不能⽤的解决⽅法:复制代码代码如下:<imgonClick="javascript:document.body.style.background='url(images/bg/1.jpg)';returnfalse;">。
- 1、下载文档前请自行甄别文档内容的完整性,平台不提供额外的编辑、内容补充、找答案等附加服务。
- 2、"仅部分预览"的文档,不可在线预览部分如存在完整性等问题,可反馈申请退款(可完整预览的文档不适用该条件!)。
- 3、如文档侵犯您的权益,请联系客服反馈,我们会尽快为您处理(人工客服工作时间:9:00-18:30)。
var widths=980; //焦点图片宽var w=2;var widthss=widths+w;var heights=195; //焦点图片高var heightss=heightss+w;var heightt=20;var counts=6; //总条数//img1=new Image();在这里是声明了一个图片元素的对象//后面是对图像的属性进行赋值或设置,如imgs.src="xxxx.jpg"是指定图片的索引地址.//这个代码一般用于head区,用于预加载图片,即加快图片显示.//只有用new Images()得到的图片IE7才认,//而IE6和firefox可认得imgUrl[1]="/y9q9ms7lbgbt.jpg";得到的图片img1=new Image();img1.src='style/img/top1.jpg';url1=new Image();url1.src='';img2=new Image();img2.src='style/img/top2.jpg';url2=new Image();url2.src='';img3=new Image();img3.src='style/img/top3.jpg';url3=new Image();url3.src='';img4=new Image();img4.src='style/img/top4.jpg';url4=new Image();url4.src='';img5=new Image();img5.src='style/img/top5.jpg';url5=new Image();url5.src='';img6=new Image();img6.src='style/img/top6.jpg';url6=new Image();url6.src='';var nn=1; //当前所显示的滚动图var key=0; //标识是否为第一次开始执行var tt; //标识作用function change_img(){if(key==0){key=1;} //如果第一次执行KEY=1,表示已经执行过一次了。
else if(document.all)//document.all仅IE6/7认识,firefox不会执行此段内容{document.getElementById("pic").filters[0].Apply(); //将滤镜应用到对像上document.getElementById("pic").filters[0].Play(duration=2); //开始转换document.getElementById("pic").filters[0].Transition=23;//转换效果}eval('document.getElementById("pic").src=img'+nn+'.src'); //替换图片eval('document.getElementById("url").href=url'+nn+'.src'); //替换URL//替换ALTfor (var i=1;i<=counts;i++){//将下面黑条上的所有链接变为未选中状态document.getElementById("xxjdjj"+i).className='axx';}document.getElementById("xxjdjj"+nn).className='bxx'; //将当前页面的ID 设置为选中状态nn++;if(nn>counts){nn=1;} //如果ID大于总图片数量。
则从头开始循环tt=setTimeout('change_img()',4000); //在4秒后重新执行change_img()方法.}function changeimg(n)//点击黑条上的链接执行的方法。
{nn=n; //当前页面的ID等于传入的N值,window.clearInterval(tt); //清除用于循环的TT//重新执行change_img();但change_img()内所调用的图片ID已经在此处被修改,会从新ID处开始执行.change_img();}//样式表document.write('<style>');document.write('.axx{padding:1px 7px;border-left:#cccccc 1pxsolid;font-size:12px;}');document.write('a.axx:link,a.axx:visited{text-decoration:none;color:#fff;');document.write('line-height:12px;font:9pxsans-serif;background-color:#666;}');document.write('a.axx:active,a.axx:hover{text-decoration:none;color:#fff ;');document.write('line-height:12px;font:9pxsans-serif;background-color:#999;}');document.write('.bxx{padding:1px 7px;border-left:#cccccc 1px solid;}'); document.write('a.bxx:link,a.bxx:visited{text-decoration:none;color:#fff ;');document.write('line-height:12px;font:9pxsans-serif;background-color:#009900;}');document.write('a.bxx:active,a.bxx:hover{text-decoration:none;color:#fff ;');document.write('line-height:12px;font:9pxsans-serif;background-color:#ff9900;}');document.write('</style>');//内容部分document.write('<div style="width:'+widthss+'px;height:'+heights+'px;'); document.write('overflow:hidden;text-overflow:clip;float:left;">'); document.write('<div><a id="url" target="_blank"><img id="pic" '); document.write('style="border:1px #cccccc solid;');document.write('FILTER: progid:DXImageTransform.Microsoft.RevealTrans (duration=2,transition=23)"');document.write(' width='+widths+' height='+heights+' /></a></div>'); document.write('<divstyle="filter:alpha(style=1,opacity=10,finishOpacity=90);');document.write('background: #888888;width:100%-2px;text-align:right;'); document.write('top:-16px;position:relative;margin:1px;height:14px;'); document.write('border:0px;padding-top:1px;z-index:4000;"><div>');for(var i=1;i<counts+1;i++){document.write('<a href="javascript:changeimg('+i+');"id="xxjdjj'+i+'"');document.write(' class="axx" target="_self">'+i+'</a>');}document.write('</div></div></div>');//开始执行滚动操作change_img();。