myeclipse下使用ext的插件有三种方式
在Eclipse中搭建ExtJS环境

下载:ExtJS 4.1.1在Eclipse中安装spket插件下载:spket-1.6.23.zip最低要求:你需要java 1.5或更高版本运行安装程序,可独立使用步骤:1.作为eclipse的插件使用,按Plugin进入下载页面把他下载下来。
2.下载完成解压文件得到一个eclipse文件夹,将文件夹下的plugins和features两个文件夹拷贝到使用的Eclipse安装包下覆盖原有同名文件夹,3.启动Eclipse,在工具栏window中打开preferences,弹出对话框左边会看到Spket,4.打开Spket下的JavaScript Profile,点击New,添加Ext(名称可自定义)5.点击Ext,选择右边的Add Library,选择ExtJS6.选中ExtJS,选择右边的Add File,选中已下载的并解压的ExtJS包的根目录下的build 下的sdk.jsb37.这时会出现很多的选择框,我是全选了,点击ok就安装好了,8.选中Ext,点击右面的Default,ok,然后重启eclipse,如果还不行,选中建立的js文件右击,有Open With,选择Spket JavaScript Editor,这样就应该可以了让spket作为javascript的默认编辑器步骤:Eclipse工具栏window --> preferences --> Editors --> File Associations --> 右面的File types选中*.js --> 下面的Associated editors选中Spket javascript Editor --> 按右面的按钮Default --> OK退出建立js文件,的图标变成js文件对应的图片就成功了。
Hello word 项目建立1.eclipse中新建Dynamic Web Project项目,命名为ExtjsTest2.为避免eclipse的校验可进行如下操作i 选中工程右键 --> Properties --> Resource --> Text file encoding -->Other --> UTF-8ii 选中工程右键 --> Properties -->左边选Builders --> 去掉JavaScript Validation和Validation前面的勾 --> OK退出iii 去到工程根目录下,找到.project,用记事本打开,把两处删除掉:[html]view plain copy1.<span style="font-size:14px;">第一处:2.<buildCommand>3.<name>org.eclipse.wst.jsdt.core.javascriptValidator</name>4.<arguments>5.</arguments>6.</buildCommand>7.第二处:8.<nature>org.eclipse.wst.jsdt.core.jsNature</nature></span>iiii 保存退出,refresh一下工程。
eclipse的插件安装方法

eclipse的插件安装方法Eclipse的插件机制是轻型软件组件化架构。
在客户机平台上,Eclipse使用插件来提供所有的附加功能,例如支持Jav a以外的其他语言。
已有的分离的插件已经能够支持C/C++(CDT)、Perl、Ruby,Python、telnet和数据库开发。
插件架构能够支持将任意的扩展加入到现有环境中,例如配置管理,而决不仅仅限于支持各种编程语言。
Eclipse的设计思想是:一切皆插件。
Eclipse核心很小,其它所有功能都以插件的形式附加于Ecl ipse核心之上。
Eclipse基本内核包括:图形API (SWT/Jface),Java开发环境插件(JDT ),插件开发环境(PDE)等。
Eclipse插件的安装方法大体有以下几种方式:第一种:直接复制法假设Eclip se的安装目录在C:\eclipse,解压下载的ec lipse插件或者安装e clipse插件到指定目录AA(如:c:\AA)文件夹,打开AA 文件夹,在AA文件夹里分别包含两个文件夹fea tures和plugin s ,然后把两个文件夹里的文件分别复制到C:\eclipse下所对应的文件夹下的fe atures和plugin s 下,一般的把插件文件直接复制到eclips e目录里是最直接也是最愚蠢的一种方法!因为日后想要删除这些插件会非常的困难,不推荐使用。
注意:直接将插件包解压到plug ins文件夹下之后,重启eclip se,可能不会加载新的插件。
解决方法是:1、打开命令行,到当前ecli pse的目录下,输入eclip se -clean,重新启动ecl ipse,这样eclip se 就会加上新的插件了。
2、如果插件不能生效,则请将ecli pse\configu ration\org.eclipse.update目录删除后再启动eclip se;你可以在ecl ipse的菜单"Help"-->"About Eclipse SDK"-->"Feature Details" 和"Plug-in Details"中看到新安装的插件。
ext用法简介
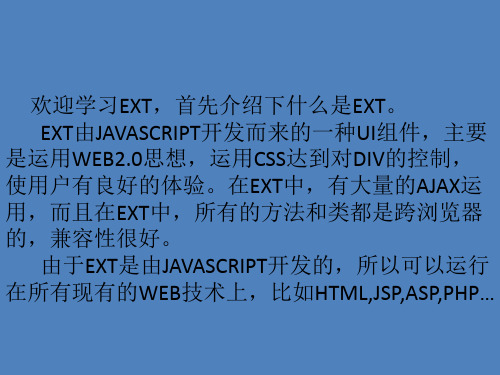
EXT 2.0学习和使用总结
• EXT是由JAVASCRIPT脚本编写成的一个强大 的B/S架构下的良好的用户体验的客户端程 序。对于饱受网页样式疾苦的广大程序员 同志们来讲,EXT让我们看到了黎明的曙光, 我们看到了JAVA也可以做的如此的——炫
• 在这里先给大家发几个截图看看,体会一 下
后台管理布局
tbfill
Ext.Toolbar.Fill 文件
tbitem
Ext.Toolbar.Item 工具条项目
tbseparator Ext.Toolbar.Separator 工具栏分隔符
tbspacer Ext.Toolbar.Spacer 工具栏空白
tbsplit Ext.Toolbar.SplitButton 工具栏分隔按钮
把EXT部署到TOMCAT上
将ext-2.0.2放到tomcat的webapps目录下, 然后启动,部署成功,端口设置成8080,方 便后面案例演示,最好把这个目录放在 TOMCAT下面,里面有拓展控件,下载的没 有。 原因:EXT中文件引用基本上都是相对的,放 在TOMCAT中可以很好的解析
使用前提-导入程序库
tabpanel Ext.TabPanel 选项面板
treepanel Ext.tree.TreePanel 树
viewport Ext.ViewPort 视图
window
Ext.Window 窗口
工具栏组件
toolbar Ext.Toolbar 工具栏
tbbutton Ext.Toolbar.Button 按钮
scripts/ext/resources/css/ext-all.css//EXT通用CSS,包含所有的样式(必须) scripts/ext/resources/css/icon.css//自定义存放菜单项或其他页面图标(自
Myeclipse10下载,安装,破解,插件,优化介绍

Myeclipse10下载,安装,破解,插件,优化介绍一.Myeclipse10下载与破解Genuitec 公司发布了MyEclipse 10,一款Genuitec旗下的商业化Eclipse集成开发工具的升级版本。
MyEclipse 10基于Eclipse Indigo构建,为Java和JavaEE项目提供了Maven3的支持。
本次发布的版本中还加入了对JaveEE 6、HTML5、JPA2和JSF 2的支持。
版本号10是为了庆祝即将到来的Eclipse的10周年诞辰(MyEclipse的首次发布是在8年前)。
我现在用的还是6.5的版本,6.5的版本是我觉得最好用的一个版本。
我装上了,还没感受到有哪些好用,就是感觉体积庞大,和IBM 的WID一样,是个多面手,啥事都能干,其实经常能使用的也就其中那么几个功能,要是能像插件一样,即插即用就好了。
MyEclipse 10使用最高级的桌面和Web开发技术,包括HTML5 和Java EE 6,支持JPA 2.0、JSF 2.0 、Eclipselink 2.1 以及OpenJPA 2.0. 而对IBM WebSphere 用户来说,MyEclipse Blue 支持最新版本的WebSphere Portal Server 7.0、WebSphere 8 以及以前的版本,无缝的支持IBM DB2 数据库。
MyEclipse 是一个十分优秀的用于开发Java,J2EE的Eclipse 插件集合,MyEclipse的功能非常强大,支持也十分广泛,尤其是对各种开元产品的支持十分不错。
MyEclipse目前支持Java Servlet,AJAX, JSP, JSF, Struts,Spring, Hibernate,EJB3,JDBC数据库链接工具等多项功能。
可以说MyEclipse几乎囊括了目前所有主流开元产品的专属eclipse开发工具。
以下是下载与破解链接(右击迅雷下载):Myeclipse10 正式下载Myeclipse10 Bule版下载Myeclipse9/10破解包(内附详细破解步骤)另附Myeclipse8/9/10 Verycd下载出处:Myeclipse_Verycd下载二.Myeclipse10修改字体MyEclipse10 是基于Eclipse3.7内核,但在Eclipse的Preferences-〉general-〉Appearance->Colors and Fonts 中并没有找到Courier New字体,它采用的是Consolas 字体,中文看着非常小非常别扭,在Windows7下,系统自带虽然有Courier New字体,但是并没有激活显示,需要手动激活,才能在软件中使用激活方法如下:在win7的控制面板->字体,找到Courier New,右键,显示。
eclipse安装插件的各种方法
eclipse安装插件的各种⽅法做为当下最流⾏的开源IDE之⼀,Eclipse的⼀⼤优势就在于其⽆数优秀的插件。
⼀个好的插件可以⼤⼤的提⾼我们的⼯作效率,学习如何安装Eclipse插件⾃然也是必修课了。
下⾯介绍Eclipse插件的安装⽅法。
eclipse插件的压缩包⼀般有以下两种形式1. *.zip的压缩包形式例如phpeclipse插件,解压⽬录结构⼀般是phpeclipse|-features/|-plugins/|-*(这个不重要啦)2. *.jar的java包形式为了演⽰如何安装,推荐2款eclipse插件1. phpeclipse,⽤于让eclipse⽀持php开发环境,*.zip形式2. easyplorer,⽤于让eclipse可以直接打开项⽬所在的服务器⽂件夹,很⽅便的哦,*.jar形式下⾯我们⽤%eclipse_home%代表eclipse的安装⽬录,⽐如eclipse的安装⽬录是D:\tool\eclipse,也就是说⽂章中提到的%eclipse_home%就是指代eclipse的安装⽬录D:\tool\eclipse啦Eclipse插件的安装⽅法⼤体有以下⼏种,⾃⼰选⼀种安装啦:第⼀种:直接复制法顾名思义,直接复制法就是直接把插件复制到eclipse对应的⽂件夹下,是不是很⽅便啊。
解压你下载的 phpeclipse⽂件夹,打开phpeclipse ⽂件夹,讲⾥⾯的features和plugins⽂件分别复制到eclipse下所对应的⽂件夹下的features 和plugins 下,easyplorer插件的话,直接把jar包放进plugins就⾏了,然后重启eclipse就好了。
这种⽅法好是好,但是不⽅便管理哦,假如以后插件越来越多,你就不到如何删掉原来的插件了。
注:直接将插件包解压到plugins⽂件夹下之后,重启eclipse,可能不会加载新的插件。
⽹上的解决办法是:1、打开命令⾏,到当前eclipse的⽬录下,输⼊eclipse -clean,重新启动eclipse,这样eclipse就会加上新的插件了。
细细品味ExtJS(Spket插件安装)

细细品味ExtJS——MyEclipse中Spket插件安装精华集锦csAxp虾皮工作室/xia520pi/2011年10月8日目录1、Spket绿色安装 (2)1.1、安装软件版本 (2)1.2、Spket破解插件 (2)1.3、Spket插件安装 (3)1.4、Spket插件配置 (4)2、Spket手动破解(1) (7)2.1、安装软件版本 (7)2.2、Spket插件文件 (7)2.3、Spket插件安装 (9)2.4、Spket插件配置 (13)2.5、调试ExtJS脚本 (18)3、Spket手动破解(2) (21)3.1、安装软件版本 (21)3.2、Spket插件文件 (21)3.3、Spket插件安装 (21)3.4、Spket插件配置 (24)3.5、Spket插件破解 (24)4、Spket网络安装 (25)虾皮提示“Spket绿色安装”是自己实践过的,经检验没有问题;而“Spket手动破解(1)”和“Spket手动破解(2)”是网络上找的两篇相关文章,把他们分别整理成两章,以备不时之需。
“Spket网络安装”可以作为参考。
安装“Spket”插件的方法可以按照上述顺序进行,优先选择排在前面的安装方法,希望你使用愉快。
1、Spket绿色安装1.1、安装软件版本MyEclipse版本号:8.xSpket版本号:1.6.12、1.6.17、1.6.18ExtJS版本号:3.2.11.2、Spket破解插件下载地址:/detail/xia520pi/3664865 该资源在CSDN上,需要1个积分,算个辛苦分。
上面的三个版本号人选其一都可以,具体情况根据实际工作情况。
1.3、Spket插件安装由于鄙人的MyEclipse安装目录是默认的,后来发现安装的居然是个很难发现的地方,不过还是找见了。
如果你选择了安装目录,可以照着下图找见“MyEclipse 8.x Latest”文件夹。
通过上面四步就可以找到“MyEclipse 8.x Latest”文件夹,在其下找到“dropins”文件夹。
extJS4x中文API学习教程
Html 文件中只引入了一个 css和 2 个 js 文件, 注意引用路径和你建立文件路径是否能匹配, 如果路径没有问题的话,打开浏览器输入
http://localhost:8080/Ext4/helloworld.html 您将会看到浏览器里显示一个 panel,标题是 Hello
Ext,内容 Hello! Welcome to Ext JS. ,如果没有,请查看是否有路径不匹配。 其他:
,打印出 'hello world!' 字样 .
获取元素Biblioteka 还有一个常用的方法 ,就是获取页面上的元素了 ,ExtJS 提供了一个 get 方法 ,可以根据 ID 取到
页面上的元素 :
var myDiv = Ext.get('myDiv'); 会取到页面上 ID 为 'myDiv' 的元素 .如果使用 Element.dom 的方法 ,则可以直接操作底层的
,看看页面打开后
(先建立 js 和 html 文件,将如下代码加入 js 文件中, html 文件相应引入对应的 js 文件, 本 文档所有示例代码均如此方式运行以下不再重复)
Ext.onReady(function() { alert('hello world!'); }); 上面的代码将在页面加载完毕后弹出一对话框
无效的。如果在 fit 布局中放置了多个组件,则只会显示第一个子元素。典型的案例就是当 客户要求一个 window 或 panel 中放置一个 GRID 组件, grid 组件的大小会随着父容器的大
小改变而改变。 示例代码:
Ext.application({ name: 'HelloExt', launch: function() {
在myeclipse上安装ExtBuilder
在myeclipse上安装ExtBuilder内容来自:/p/extbuilder/wiki/UserGuideIntroductionExtBuilder is an eclipse plugin can help developer work out good style Ext javascript code without typing code.InstallationEclipse 3.x1.make sure you eclipse version is 3.2,3.3 or 3.4 with GEF installed. (至少要myeclipse7.0)2.download archived update site from/p/extbuilder/downloads/list3.Click Help->Software Updates->Find and Install...->Search for new featuresto install,Click Next4.Click New Archived Site-> Browse to extbuilder_update.zip and click Open.5.Click OK and follow the instructions to install.6.Restart you eclipseAptana1.Install Aptana as a plugin to Eclipse./ eclipse版本要3.2以上(至少要myeclipse7.0),否则不能安装AptanaAvailable Software Sites/studio3/plugin/install AptanaStudio3.0.9 (没试过)/tools/studio/plugin/install/studio Apta na Studio2.0.5 (经测试,已安装成功)1.Install ExtBuilder to EclipseNote: Apatana Studio removed some build-in plugins from Eclipse, such asGEF,icu,JDT,etc. If you definitely want to use Apatana Studio without eclipse, please install these plguins first.StartingKick start1.Click Windows->Preferences..->ExtJs Builder2.Click Browse button to select your Ext home directory.1.Click File->New, then select Web->ExtJs Page. a wizard dialog will appear.2.Click Next3.Input the namespace you want4.Input class name you want, extbuilder create one class in one file, just likeJava5.Input the file name, default is the class name6.Select super class, default is Ext.Panel, you also can create a window by selectExt.Window7.Click Finish.8.Then there are two files created in Package Explorer, for example:CorpSelectPanel.ext and CorpSelectPanel.js. The first file is used byextbuilder, the second file is the script file for you.OverviewBefore you start to editing a Ext page, make sure you opened Outline View and Properties View. If not, please click Window->Show View to open these two views.Editor View It’s a multi-pages editor contains a source code editor and a UI editor. In source code editor, you can see the real code extbuilder generate for you. Please focus the initUIComponents function. In UI editor, you can see one palette at left side and a embedded browser at right side. With the embedded browser, you can preview the code generated by ExtBuilder. Outline ViewThe outline view is a component tree view. You can select specific component in the view. Properties ViewThe most important view you have to deal. In this view, you can set the configuration of one component. For example: For a Panel component, you may set the title property to ‘MyPanel’, the layout property to ‘Border’, the width property to ‘100’, etc. For a GridPanel component, you may set the store property and columns property. Allyou change make to a component take effect immediately. Both the code editor and UI editor will change. It’s a good way to watch your settings h ow change the UI to your wanted style. Drag ComponentsIn UI editor, you can see a palette with some components in several folders. Now extbuilder supports most components in latest Ext 2.2 You could click one component, such as a Panel then move the mouse to outline view, there must be a component named panel, it's the root component of one panel class. Click the mouse again, then the root panel component now have a child panel. In the way, you can use any components and organize the component tree as you wish. Although you may think drag a component and drop it to a canvas is better, but that means ExtBuilder need to implement all Ext components drawing,behavior and layout in Java code. From my opinion, this way is the fastest way to build a GUI page. How toSet PropertiesExt component have many properties. ExtBuilder divide these properties into two categories: common properties and advanced properties. By default, only common properties are shown,you can show advanced properties by click the Advanced button at the top toolbar of Properties View. Properties can be string, integer,drop down list. Some special properties like store, toolbar,buttons,columns Model will pop up a dialog for user set. Set LayoutThere are two panels, one parent, one child.1.Create a new Ext page2.Set the root panel's tilte to 'ParentPanel'3.Add a Panel to page root panel component4.Set the child panel's title to 'ChildPanel'5.Click the parent panel on outline view6.Set the parent panel's layout to 'Border'7.Click the child panel on outline view8.Set the child panel's region to 'center'Because Ext border layout require a center region component, so when you set the layout to 'border', and not set the child panel's region to 'center', you may see some error message in browser, it's not a bug of ExtBuilder.FormPanel1.Create a new Ext page2.Add a FormPanel to root panel3.Set the FormPanel's layout to 'column'4.Add two Panels to FormPanel, set columnWidth to '.5'5.Set these two Panels's layout to 'form'6.Add 4 TextField to these Two Panel, each have twoThen you get a two column form panelToolbarEach Ext Panel has two toolbars, tbar and bbar.1.Click one Panel of Outline view.2.Click Properties view, scroll to tbar or bbar property3.Click the right side button '...' to show Toolbar Settings Dialog4.In Toolbar Settings Dialog, click Add Button(+) to addButton,Separator,Spacer,Fill,TextItem and MenuButton. Menu editing is not ready in current version.5.Change the text toolbar text, by default, the handler is as "onButtonTextClick".Of course, you can change the handler function name.6.Then switch to Source code Editor, see what happened.tbar :newExt.Toolbar([{handler :function(button,event){this.onButtonClick(button,event);}.createDelegate(this),text :"button"}])Look at this code block, I use a little trick. Because ExtBuilder need to show preview page for users, some javascript errors will make the preview page as blank page. So I have to make it runs fine when renderer ext components. You may need to write your own event handler function in your class. For example: ...,onButtonClick :function(button,event){// your code here}ButtonsEach Panel has one buttons property. Just same as Toolbar buttons editing except the component can add here is only Ext.Button. You can use buttonAlignto align button at left,right or center. GridExtBuilder support three grid panels. GridPanel,PagingGridPanel and EditorGridPanel. PagingGridPanel is a gridpanel with paging toolbar on bottom.StoreStore can take data from remote(HttpProxy) or local(MemoryProxy). Here is a example we use MemoryProxy to build grid.1.Click '...' button to show Store Settings Dialog2.Select MemoryProxy in Basic Page3.Click Sample button to generate some random data4.Click OK button to save store settings.5.Add loadData function in class loadData :function(){this.store1.load();}here store1 is the component name of store.1.Add code in class constructorfunction system.CorpSelectPanel=function(config){Ext.applyIf(this, config);this.initUIComponents();system.CorpSelectPanel.superclass.constructor.call(this);//load store data herethis.loadData();};Now, you can see the data at preview page.ColumnsTreeListenersExtension。
Eclipse重构功能:扩展点的使用
Eclipse重构功能:扩展点的使用Eclipse中提供了几个扩展点,方便扩展重构功能。
基本的重构功能有,Rename,Move,Create,Delete,Copy.对应扩展点即为:org.eclipse.ltk.core.refactoring.renameParticipantsorg.eclipse.ltk.core.refactoring.moveParticipantsorg.eclipse.ltk.core.refactoring.createParticipantsorg.eclipse.ltk.core.refactoring.deleteParticipantsorg.eclipse.ltk.core.refactoring.copyParticipants以ReName为例,其余4项与ReName大同小异。
实现这个扩展点的基本语法:< extensionpoint="org.eclipse.ltk.core.refactoring.renameParticipants">< renameParticipantid="jp.co.intramart.app.producer.refactoring.renameTypeParticipan t"name="Ebuilder RenameTypeParticipant"class="jp.co.intramart.app.producer.refactoring.TypeRenamePartici pant">< enablement>< /enablement>< /renameParticipant>< /extension>这里默认对响应所有改名事件,如果需要过滤可以在元素< enablement/>中加以定义。
【Eclipse使用方法】Eclipse中安装插件的三种方式
【Eclipse使用方法】Eclipse中安装插件的三种方式Eclipse也用了很久,但是都没有怎么去研究过怎么安装插件,今天正好在自己新买的本上试了一下。
现在将心得写下,以供参考。
目前安装Eclipse插件主要有以下三种方式:在线安装:以TestNG的安装为例来阐述其安装过程。
第一步:点击菜单栏中“Help”菜单,在下拉列中选择“Install New Software...”.此时会弹出“install”的安装框。
第二步:在弹出的“install”框,选择之前已经建立好的site,如果没有建立好,则可以点击“Add”按钮,弹出一个添加site的对话框,在该框中的Name属性后面给该site起一个别名,在location属性后面输入该插件所在的网络位置(该位置一般都会在插件的官方网站上给一个地址,直接copy过来就行。
)。
第三步:点击OK。
系统会自动地将testNG给load出来。
然后选中,点击“next”。
逐步完成即可。
离线侵入式安装:也就是将插件下载下来,解压缩后,会看见features和plugins 两个文件夹,将这两个文件夹中的所有内容相应地拷贝到eclipse的features和plugins文件夹下面,重启eclipse即可。
如果没有这个两个文件夹,那说明所给的插件本身属于plugin,所以只需要将该插件解压缩后放在plugins下面即可。
此处以WTP为例:解压缩后会有features和plugins两个文件夹。
那么直接将这两个文件夹中的内容分别copy到eclipse安装目录下面的features和plugins里面。
然后重启eclipse即可。
以TestNG为例,只需将下载下来的插件jar包Copy到plugins 下面即可。
注:这种方式不太好,因为当你要去卸载或者更新某个插件的时候,去features和plugins里面找某个插件会非常的麻烦。
离线链式安装:在eclipse的安装目录下面,建立一个links的文件夹,在该文件夹下面创建一个以插件名命名的link文件,在该文件中输入以下键值对:path=“插件所在的绝对路径或插件所在的相对路径”。
- 1、下载文档前请自行甄别文档内容的完整性,平台不提供额外的编辑、内容补充、找答案等附加服务。
- 2、"仅部分预览"的文档,不可在线预览部分如存在完整性等问题,可反馈申请退款(可完整预览的文档不适用该条件!)。
- 3、如文档侵犯您的权益,请联系客服反馈,我们会尽快为您处理(人工客服工作时间:9:00-18:30)。
myeclipse下使用ext的插件有三种方式:
1:配置在线使用:
打开myeclipse:
1、选择Help -> Software Updates -> Find and Install...-> Search for new features to install ->New remote site...
Name: "Spket", Url: "/update/"下载完毕重启Eclipse
2、Window -> Preferences ->Spket -> JavaScript Profiles -> New ;
输入“ExtJS”点击OK;
选择“ExtJS”并点击“Add Library”然后在下拉条中选取“ExtJS”;
选择“ExtJS”并点击“Add File”,然后在你的./ext-2.x/source目录中选取“ext.jsb”文件;
3、设置新的ExtJS Profile,选中并点击“JavaScript Profiles”对话框右手边的“Defalut”按钮;
4、JS打开方式为Window -> Preferences ->General-> Editors-> File...选择JS 为Spket JavaScript Editor(default)*********(这个不要忘!!!)
2:是下载spket-1.6.16.jar包安装
转载地址:/elifefly/archive/2009/01/10/3745637.aspx
一、安装Spket
第一种方法:网上更新方式
1.插件首页:
2.插件名称:Spket IDE
3.更新连接(Update Site):/update/
更新安装方法:
1.[Help]-[Software Updates]-[Find and Install...]
2.[Search for new features to install] -> [Next]
3.[New Remote Site...] Name: "什么都行,spketjs" URL: /update/--> [Finish]
第二种方法:网上下载spket-1.6.16.jar破解版(目前最新版本)
1.如果你的JDK在1.6以上,可以直接双击spket-1.6.16.jar运行安装。
其它,使用命令行方式。
(注意:自己切换命令行到spket-1.6.16.jar所在目录)
2.
至此,安装完成。
二、配置Spket
注意:如果在安装spket过程中,你的eclipse或者Myeclipse是打开的,请重启eclipse或者Myeclipse。
以便初始化插件,下面才会在Preferences中看到Spket选项。
基本步骤如下:
1)Window →Preferences →Spket;
2)Spket→JavaScript Profiles →New,输入“ExtJS”点击OK;
3)选择“ExtJS”并点击“Add Library”然后在下拉条中选取“ExtJS”;
4)选择“ExtJS”并点击“Add File”,然后在你的./ext-2.x/source目录中选取“ext.jsb”文件(注:是下载的ext的源文件和api文档);
5)设置新的ExtJS Profile,选中并点击“JavaScript Profiles”对话框右手边的“Defalut”按钮;
下面这个操作,根据自己需要设置(可以全选)。
6)重启eclipse或者Myeclipse;
7)创建新的JS文件并输入:Ext这样就可设置Ext Code代码自动完成的功能。
效果如下:
3:下载spket-1.6.16.rar的压缩的包,
把spket-1.6.16/eclipse/plugins下的全部的文件放到myeclipse安装路径下eclipse/plugins下,重启myeclipse从上方法:二、配置Spket开始下同。
如果Window →Preferences 下没有→Spket,把myeclipse安装路径下eclipse/configuration 下有这个文件夹包org.eclipse.update,删除重新启动myeclipse从二、配置Spket开始下同。
