
巨鲨(JUSHA)显示器用户手册
信号线
计算机接口
D-sub信号线
D-Sub 15针
同步信号输入(BNC) 信号线
BNC信号线
计算机接口 BNC
DVI D-SUB VIDEO HS VS DCIN
根据实际应用条件,需要连接1条、2条或3条BNC 信号线。 ①计算机输出型号为同步信号复合在视频信号上 (SOG),只需连接1条BNC信号线在VIDEO接口上。 ②计算机输出型号为同步复合信号与视频信号,需 连接2条BNC信号线在VIDEO与HS接口上。 ③计算机输出型号为同步分离信号与视频信号,需 连接3条BNC信号线在VIDEO、HS和VS接口上。
011
4.1. 如何使用屏幕菜单
011
4.2. 屏幕菜单调节与设置
013
4.3. 画面设定
014
4.4. 实用功能
015
5. 故障分析
016
6. 清洁
017
7. 参数
018
7.1. 规格
018
7.2. D-Sub 15针端子
023
7.3. DVI-D端子
023
8. 符合性声明
024
9. 维修声明
024始冒烟并伴有焦糊味,或者发出奇怪的噪音,请立刻切断电源,然后与上 海巨鲨商贸有限公司联系以获得帮助。 使用有故障的设备可能导致起火、电击或设备损坏。 由合格的维修人员进行各种维修。 不要拆开机壳或者修改设备。不要试图自行维修此显示器。 拆开机壳或修改设备可能导致起火、电击或设备损坏。
不要堵塞机壳上的通风槽。 ● 不要在通风槽上放置任何物品。 ● 不要把设备安装在一个封闭的空间内。 ● 不要在平放或倒放的状态下使用设备。 堵塞机壳上的通风槽会阻碍正常的空气流通,可能导致起火、电击或设备损坏。 不要用湿手接触插头,否则可能导致电击。 定期清洁插头周边。 插头上的灰尘、水渍或油污可能会导致起火。
60Hz
VESA
C21、M11、M21
1600 x 1200 2048 x 1536
60Hz 60Hz
VESA VESA
仅C21、M21支持此模式 M31只支持此模式
2560 x 2048
60Hz
VESA
M51只支持此模式
008
巨鲨专业高分辨液晶显示器用户手册
3.2. 连接线缆
注意:确保计算机与显示器的开关均处于关闭状态。 1. 将信号线插入显示器背部接口,然后将另一端插入计算机的显示接口。连接后, 请锁紧螺丝。 模拟信号输入
本手册所采用的安全符号如下所示,均表示重要信息,请仔细阅读。 警告 此标志警告用户此处有对机器正常运行非常重要的说明。如果不遵守“警告” 提出的信息,可能会对人员造成严重伤害,并且危及生命。 注意 如果不遵守“注意”提出的信息,可能会对人员造成一定程度的伤害,或损坏 产品。 这个标志用来警示用户设备内部有未绝缘的电压,可能会产生大的电流导致触 电。因此,接触设备内部的任何部分都是非常危险的。为了降低触电的危险, 请千万不要打开外壳或者机箱。事实上,设备内部任何部件对用户使用都没有 帮助。如果需要维修,请和上海巨鲨商贸有限公司专业维修人员联系。
(1) LUT1 (2) LUT2 (3) LUT3 (4) LUT4 (5) LUT5 (6) 电源开关 (7) 电源指示灯
D-Sub 15针接口
DVI-D接口
电源接口
007
背面(JUSHA-M11、JUSHA-M21) 背面(JUSHA-M31、JUSHA-M51)
电源接口 BNC接口 D-Sub 15针接口 DVI-D接口
005
2. 介绍
得益于平板显示技术,本产品比CRT显示器的图像边缘更明显,未习惯这种变化的 使用者在使用本产品做重要用途前应自己习惯这种图像的变化。
机型: JUSHA-C21 20.1” 2M 彩色液晶显示器 JUSHA-M11 18.1” 1M 单色液晶显示器 JUSHA-M21 20.1” 2M 单色液晶显示器 JUSHA-M31 20.8” 3M 单色液晶显示器 JUSHA-M51 21.3” 5M 单色液晶显示器
将小件物体或液体放置在远离设备的地方。 若小件物体意外地通过通风槽掉进机壳或者液体流进机壳,可能导致起火、电击或设 备损坏。若物体或液体掉进/流进机壳,请立即拔掉设备电源插头,并和上海巨鲨商贸 有限公司的专业维修人员联系。
本显示器可以长时间开机,但使用寿命会减少。
请将设备放置在坚固而稳定的平面上。 若设备放置在不适当的平面上,可能发生坠落情况,导致人员受伤或设备损坏。若设 备坠落,请立即断开电源,并向上海巨鲨商贸有限公司寻求帮助。请不要继续使用已 损坏的设备。使用已损坏的设备可能会导致起火或电击。 请将设备放置在适当的位置,否则可能导致起火、电击或设备损坏。 ● 不要将设备放置在室外。 ● 不要将设备放置在交通工具里(轮船、飞机、火车、汽车等)。 ● 不要在有易燃空气的环境中使用。 ● 不要将设备放置在粉尘或潮湿的环境中。 ● 不要将设备放置在水蒸气可直接接触屏幕的位置上。 ● 不要将设备放置在供暖设备或加湿器旁。 为避免引起窒息危险,请将塑料包装袋放置在远离婴儿和小孩的地方。
电源接口 DVI-D接口
3. 线缆连接
3.1. 连接前
在显示器连接至计算机之前,请调整计算机显示设置(分辨率与刷新率)以符合下
表显示模式。
注意:较低分辨率的显示模式,如640 x 480,某些情况下会自动放大到满屏显示
(视不同的机型),有些字符可能会失真。若计算机与显示器均支持VESA DDC,无须任
巨鲨专业高分辨液晶显示器用户手册
目录
1. 使用安全/注意事项
002
1.1. 使用安全
002
1.2. 注意事项
002
1.3. 关于用户手册
005
2. 介绍
006
2.1. 特征
006
2.2. 装箱清单
006
2.3. 控制与接口
007
3. 线缆连接
008
3.1. 连接前
008
3.2. 连接线缆
009
4. 屏幕菜单
请保留好原始包装。若需要再次发送本产品,请务必使用原始包装。货物运输时请
勿重压。
006
巨鲨专业高分辨液晶显示器用户手册
2.3. 控制与接口
JUSHA-C21、M11、M21、M31侧面
JUSHA-M51机型侧面
背面(JUSHA-C21)
(1) 自动调整按键(M31机型该键无作用) (2) 控制按键(向上) (3) 控制按键(向下) (4) 菜单/确认按键 (5) 退出按键 (6) 电源开关 (7) 电源指示灯
打雷时绝对不要接触插头与电源线, 接触插头与电源线可能导致电击。
不要用裸手接触已损坏的液晶屏。 从屏中泄漏出的液晶如果进入眼睛或口中,将对人体产生毒副作用。 如果皮肤或人体的任何部分直接接触到液晶,请进行全面清洗。 若发生病症,请向医生咨询。 请遵守当地有关法规进行安全的废料处理。 在设备运输时请小心处理。 移动设备时请断开电源线与线缆。在线缆保持连接的状况下移动设备是非常危险的, 可能导致人员受伤。 在搬动设备时,请用双手紧紧抓住设备底部,确保显示屏在抬起前屏面朝外。 若设备坠落,可能导致人员受伤或设备损坏。
何手动设置,只需将显示器连接至计算机即可设定最佳分辨率与刷新率。
显示器仅支持以下显示模式:
分辨率
刷新率
标准
备注
640 x 480 800 x 600
60Hz 60Hz
VGA VESA
C21、M11、M21 C21、M11、M21
1024 x 768
60Hz
VESA
C21、M11、M21
1280 x 1024
10. 所有权声明
025
11. 附录1(VVREngineTM MD系列显示控制卡用户手册)
026
12. 附录2(Quadro NVS280显示控制卡安装说明)
045
001
1. 使用安全/注意事项
1.1. 使用安全
欢迎使用本公司产品,JUSHA医疗显示器主要为受过专业培训的医疗人员提供专业 的数字影像显示,从而对这些影像进行专业的阅读与分析。
1.3. 关于用户手册
本用户手册用于指导用户正确的安装、使用巨鲨医疗液晶显示器。 ● 在使用本产品之前请先详细阅读本手册。 ● 本手册提供了如何使用和安装本产品的详细说明,如果有任何问题,请致电上海 巨鲨商贸有限公司咨询。 ● 本产品具有不同的产品规格,相应地具有不同的规格参数,请根据产品规格的不 同阅读相应的章节。 ● 请保留好本手册,如果不慎遗失,请和上海巨鲨商贸有限公司联系。 ● 当本产品转与第三方时,请一并将本手册转交。 ● 本产品规格如有更改,恕不另行通知。
2.1. 特征
- 适应VGA模拟输入(仅M11、M21、C21机型支持) - 适应BNC同步输入(仅M11、M21机型支持) - 适应DVI数字输入(TMDS) - 分辨率: 1M像素(1280点 x 1024线)/ 2M像素(1600点 x 1200线)
3M像素(2048点 x 1536线)/ 5M像素(2560点 x 2048线) - 高度可调整底座 - 亮度稳定控制电路 - 可以纵向/横向显示
请使用正确电压。 ● 本设备仅适用于在特定电压。若将设备连接到本手册没有提及的其它电压上,则可 能导致起火、电击或设备损坏。 ● 电路不要过载,否则可能会导致起火或电击。 请谨慎使用电源线。 ● 不要在电源线上重压。 ● 不要用力拉扯或缠绕电源线。 若电源线损坏,请立即停止使用。使用已损坏的电源线可能会导致起火或电击。
3. 调整显示器的“高度”、“前后位置”和“角度”。 调整时,请握住显示器两侧的中间部分,然后缓慢移动。 4. 请依次开启显示器与计算机电源。 显示器的电源指示灯将会变亮。每次使用完毕,请依次关闭计算机与显示器的电 源。
ASUS VG34V 系列 液晶显示器 用户指南说明书
VG34V系列液晶显示器用户指南ii版权所有© 2020 ASUSTeK COMPUTER INC.保留所有权利。
除了购买者出于备份目的而保留的文档外,未经 ASUSTeK COMPUTER INC.(以下简称“ASUS ”)明确书面许可,不得以任何形式或通过任何方式复制、传播、转录本手册的任何部分,包括其中介绍的产品和软件,也不得将其存储到检索系统中或翻译成任何语言。
在下列情况下,不能享受产品保修或维修服务:(1) 未获得ASUS 书面授权,而修理、修改或改动产品;(2) 产品序列号损毁或缺失。
ASUS “按原样”提供本手册,不提供任何明示或隐含的担保,包括但不限于对于适销性或针对特定目的的适用性的隐含担保或条件。
无论在任何情况下,ASUS 及其董事成员、高级职员、员工或代理不对由于本手册或产品中存在任何缺陷或错误而导致的任何间接、特殊、偶然或必然损失(包括收益损失、业务损失、不能使用或数据丢失、业务中断等)承担任何责任,即使 ASUS 已被告知此类损失的可能性。
本手册中包含的规格和信息仅供一般性参考,可能会随时变更而不另行通知,因此不应构成 ASUS 的承诺。
ASUS 对本手册(包括其中介绍的产品和软件)中可能存在的任何错误不承担任何责任。
本手册中出现的产品名称和公司名称可能分别是或不是相应公司的注册商标或版权,仅用于标示或解释目的,无意侵犯其所有者的权益。
声明...............................................................................................................iii 安全信息 .......................................................................................................iv 保养和清洁 (vii)1.1欢迎使用! .....................................................................................1-11.2物品清单.........................................................................................1-11.3组装显示器 .....................................................................................1-21.4连接线缆.........................................................................................1-31.4.1 液晶显示器后部 ...............................................................1-31.5显示器简介 .....................................................................................1-41.5.1 使用控制按钮 .................................................................1-42.1调整显示器 .....................................................................................2-12.2卸下支撑臂/底座(VESA 壁挂安装时) .........................................2-22.3 外形尺寸.........................................................................................2-33.1 O S D (屏幕显示)菜单...................................................................3-13.1.1 如何重新配置 ..................................................................3-13.1.2 OSD 功能介绍 .................................................................3-23.2规格 ................................................................................................3-83.3故障排除(常见问题) ...................................................................3-93.4 支持的时序列表 ............................................................................3-10联邦通信委员会声明本设备符合 FCC 规则第 15 部分的要求。
巨鲨显示器(带讲解文稿)
衰减极慢,图像显示结果长时间保持一致性 诊断结果更准确
Medical Display Expert 巨鲨 专业显示器
40.
CT、磁共振专用双屏
最新科技创新之举---在一台显示器上实现双屏的应用
CT、磁共振专用?
Medical Display Expert 巨鲨 专业显示器
3M/2M/1M彩色专业显示器
CT、磁共振专用双屏
9M彩色专业显示器
4M彩色专业显示器
Medical Display Expert 巨鲨 专业显示器
17.
临床浏览系列
—— 全面医疗显示解决方案
1M彩色专业显示器
1M单色专业显示器
2M彩色专业显示器
2M单色专业显示器
Medical Display Expert 巨鲨 专业显示器
Medical Display Expert 巨鲨 专业显示器
11.
Gray Scale Terminology
医用10bit以上灰阶
民用8bit灰阶
Medical Display Expert 巨鲨 专业显示器
为了作出准确的诊断,要求医用显示器实行10bit以上灰阶。
12.
DICOM 3.0
Ins-guard是一套亮度实时监测和自动反馈控制系统,自动保证液晶面上每个像素点的亮 度输出都符合DICOM/DIN6868-57标准,使用过程中不再需要繁琐的手工校正。
校正器相对亮度值测量技术(比一些厂商的亮度绝对值测量 技术更准确),亮度响应更精确、亮度调节更方便;
原厂设置
DICOM 700 DICOM 650 DICOM 600 DICOM 550 DICOM 500 DICOM 450 DICOM 400 DICOM 350
医用数字化X射线摄影系统 JUSHA iDR
中小型医院,医院体检中心 中小型医院,医院体检中心 中小型医院
谢谢!
全电动升降、翻转胸片架,调整方便
1.悬吊Dancer主要参数以及特点 型号:Dancer iDR650T
功率:65KW
参数
分辨率:2880×2880 球管热容量:300kHU
全电动机械系统
特点
常用拍摄模式一键快速切换 全电动升降、翻转胸片架,调整方便
2. UC臂Waltz主要参数以及特点 型号: Waltz iDR500C
超高逆变主频率
4. 各型号产品其他共同特点 (1)碘化铯平板更低的辐射剂量
(2)完美可靠的影像质量
Opern iWS图像后处理软件
巨鲨专业医用显示器
4. 各型号产品其他共同特点 (3)可靠的关键部件
平板探测器
球管
高压发生器
4. 各型号产品其他共同特点 (4)丰富的产品线满足多种需求
产品系列 型号
功率:50KW
参数
分辨率:2816×2816 球管热容量:300kHU
球管中心与平板探测器中心始终对齐
特点
常用拍摄模式一键快速切换
Bucky可在±30°内翻转,可实现轴位摄 影
超高逆变主频率
2. UC臂Waltz主要参数以及特点 型号: Waltz iDR650T
功率:65KW
参数
分辨率:2880×2880 球管热容量:300kHU
医用数字化X射线摄影系统 JUSHA iDR
公司目前开发的DR产品共有3个系列7款型号的产品。分别为悬吊Dancer、双立 柱Tango、UC臂Waltz三个系列。
UC臂Waltz
双立柱Tango
悬吊Dancer
1.悬吊Dancer主要参数以及特点 型号:Dancer iDR800D
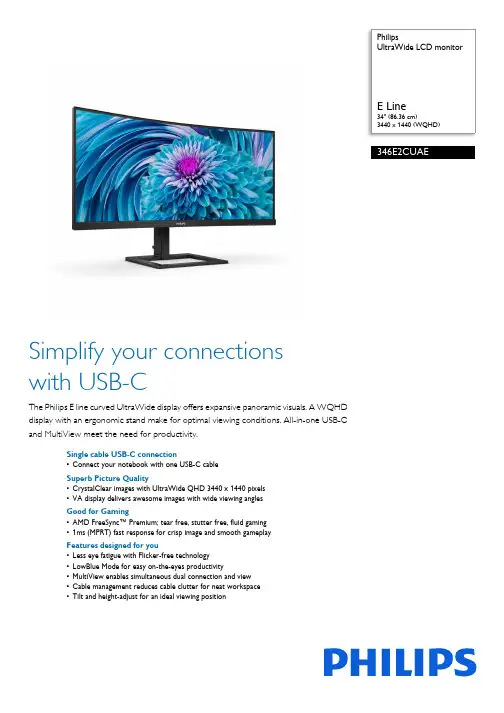
Philips 34英寸弧形UltraWide WQHD显示器说明书
PhilipsUltraWide LCD monitorE Line34" (86.36 cm)3440 x 1440 (WQHD)346E2CUAESimplify your connectionswith USB-CThe Philips E line curved UltraWide display offers expansive panoramic visuals. A WQHDdisplay with an ergonomic stand make for optimal viewing conditions. All-in-one USB-Cand MultiView meet the need for productivity.Single cable USB-C connection•Connect your notebook with one USB-C cableSuperb Picture Quality•CrystalClear images with UltraWide QHD 3440 x 1440 pixels•VA display delivers awesome images with wide viewing anglesGood for Gaming•AMD FreeSync™ Premium; tear free, stutter free, fluid gaming•1ms (MPRT) fast response for crisp image and smooth gameplayFeatures designed for you•Less eye fatigue with Flicker-free technology•LowBlue Mode for easy on-the-eyes productivity•MultiView enables simultaneous dual connection and view•Cable management reduces cable clutter for neat workspace•Tilt and height-adjust for an ideal viewing positionHighlightsUSB-C connectionThis Philips display features a USB type-C connector with power delivery. Withintelligent and flexible power management, you can power charge your compatible device directly. Its slim, reversible USB-C allows for easy, one-cable connection. You can watch high resolution video and transfer data at a super-speed, while powering up and re-charging your compatible device at the same time.VA displayPhilips VA LED display uses an advanced multi-domain vertical alignment technology which gives you super-high static contrast ratios for extra vivid and bright images. While standard office applications are handled with ease, it is especially suitable for photos, web-browsing, movies, gaming, and demanding graphical applications. It's optimized pixel management technology gives you 178/178 degree extra wide viewing angle, resulting in crisp images.UltraWide CrystalClear images These Philips screens deliver CrystalClear, UltraWide Quad HD 3440 x 1440 pixelimages. Utilizing high performance panels with high-density pixel count, 178/178 wide viewing angles, these new displays will make your images and graphics come alive. The UltraWide 21:9 format enables moreproductivity with more room for side-by-side comparisons and more viewable spreadsheet columns. Whether you are demanding professional requiring extremely detailed information for CAD-CAM solutions, or a financial wizard working on huge spreadsheets, Philips displays delivers CrystalClear images.AMD FreeSync™ PremiumGaming shouldn't be a choice between choppy gameplay or broken frames. AMD FreeSync™ Premium equips serious gamers with a fluid, tear-free gameplay experience at peak performance. There are no compromises, game confidently with a high refresh rate, low framerate compensation, and low latency.1ms MPRT fast responseMPRT (motion picture response time) is more intuitive way to describe the response time, which directly refers the duration from seeing blurry noise to clean and crisp images. Philips gaming monitor with 1 ms MPRT effectively eliminates smearing and motion blur, delivers shaper and precise visuals to enhance gaming experience. Best choice for playing thrilling and twitch-sensitive games.Flicker-free technologyDue to the way brightness is controlled on LED-backlit screens, some users experience flicker on their screen which causes eyefatigue. Philips Flicker-free Technology applies a new solution to regulate brightness and reduce flicker for more comfortable viewing.LowBlue ModeStudies have shown that just as ultra-violet rays can cause eye damage, shortwave length blue light rays from LED displays can cause eye damage and affect vision over time. Developed for wellbeing, Philips LowBlue Mode setting uses a smart software technology to reduceharmful shortwave blue light.Issue date 2022-06-22 Version: 6.0.212 NC: 8670 001 70679 UPC: 6 09585 25373 5© 2022 Koninklijke Philips N.V.All Rights reserved.Specifications are subject to change without notice. Trademarks are the property of Koninklijke Philips N.V. or their respective owners.SpecificationsPicture/Display•LCD panel type: VA LCD•Backlight type: W-LED system•Panel Size: 34 inch / 86.36 cm•Display Screen Coating: Anti-Glare, 3H, Haze 25%•Effective viewing area: 797.22 (H) x 333.72 (V) mm - at a 1500R curvature*•Aspect ratio: 21:9•Maximum resolution: 3440 x 1440 @ 100 Hz*•Pixel Density: 110 PPI•Response time (typical): 4 ms (Gray to Gray)*•MPRT:1ms•Brightness: 300 cd/m²•Contrast ratio (typical): 3000:1•SmartContrast: Mega Infinity DCR•Pixel pitch: 0.23175 x 0.23175 mm•Viewing angle: 178º (H) / 178º (V), @ C/R > 10•Flicker-free•Picture enhancement: SmartImage game •Color gamut (typical): NTSC 99.5%*, sRGB 121.3%*•Display colors: 16.7 M•Scanning Frequency: 30 - 160 kHz (H) / 48 - 100 Hz (V)•LowBlue Mode•EasyRead•sRGB•AMD FreeSync™ technology: Premium Connectivity•Signal Input: DisplayPort 1.2 x 1, HDMI 2.0 x 1•Sync Input: Separate Sync•USB:: USB-C x 1, USB 3.2 x 4 (downstream with 1 fast charge B. C 1.2)•Audio (In/Out): Audio outUSB•DP: Built-in Display Port Alt mode•Super speed: Data and Video transfer•Power delivery: USB PD version 3.0•USB-C max. power delivery: Up to 65W (5V/3A, 7V/3A, 9V/3A, 10V/3A, 12V/3A, 15V/3A, 20V/ 3.25A)Convenience•Built-in Speakers: 5 W x 2•MultiView: PIP/PBP mode, 2x devices•User convenience:Power On/Off, Menu, Volume, Input, SmartImage Game•OSD Languages: Brazil Portuguese, Czech, Dutch, English, Finnish, French, German, Greek, Hungarian, Italian, Japanese, Korean, Polish, Portuguese, Russian, Simplified Chinese, Spanish, Swedish, Traditional Chinese, Turkish, Ukrainian •Other convenience: Kensington lock, VESA mount (100x100mm)•Plug & Play Compatibility: DDC/CI, Mac OS X, sRGB, Windows 10 / 8.1 / 8 / 7Stand•Height adjustment: 100 mm•Tilt: -5/20 degreePower•On mode: 31.81 W (typ.) (EnergyStar test method)•Standby mode: 0.5 W (typ.)•Off mode: 0.3 W (typ.)•Power LED indicator: Operation - White, Standbymode- White (blinking)•Power supply: Internal, 100-240VAC, 50-60HzDimensions•Product with stand(max height): 807 x 495 x257 mm•Product with stand(max height): 31.8 x 19.5 x10.1 inch•Product without stand (mm): 807 x 367 x 110 mm•Product without stand in inch: 31.8 x 14.4 x4.3 inch•Packaging in mm (WxHxD): 980 x 500 x 224 mm•Packaging in inch (WxHxD): 38.6 x 19.7 x 8.8 inchWeight•Product with stand (kg): 10.05 kg•Product with stand (lb): 22.11 lb•Product without stand (kg): 7.83 kg•Product without stand (lb): 17.23 lb•Product with packaging (kg): 13.06 kg•Product with packaging (lb): 28.73 lbOperating conditions•Temperature range (operation): 0 to 40 °C•Temperature range (storage): -20 to 60 °C•Relative humidity: 20%-80 %•Altitude: Operation: +12,000ft (3,658m), Non-operation: +40,000ft (12,192m)•MTBF: 50,000 hrs (excluding backlight) hour(s)Sustainability•Environmental and energy: EnergyStar 8.0, TCOCertified, RoHS, Mercury Free•Recyclable packaging material: 100 %Compliance and standards•Regulatory Approvals: cETLus, CB, TUV/GS, TUVErgo, CU-EAC, EAEU RoHS, CE Mark, FCC ClassB, ICES-003, UKRAINIANCabinet•Color: Black•Finish: TexturedWhat's in the box?•Monitor with stand•Cables: HDMI cable, DP cable, USB-C to USB-Ccable , Power cable•User Documentation*The maximum resolution works for either HDMI input or DP input.*For best output performance, please always ensure that your graphiccard is capable of achieving the maximum resolution and refresh rateof this Philips display.*Response time value equal to SmartResponse*MPRT is to adjust brightness for blur reduction, so cannot adjustbrightness while MPRT is turned on. To reduce motion blur, LEDbacklight will strobe synchronously with screen refresh, which maycause noticeable brightness change.*MPRT is gaming-optimized mode. Turn on MPRT may causenoticeable screen flickering. It is recommended to turn off when youare not using the gaming function.*NTSC Area based on CIE1976*sRGB Area based on CIE1931*2020 Advanced Micro Devices, Inc. All rights reserved. AMD, theAMD Arrow logo, AMD FreeSync™ and combinations thereof aretrademarks of Advanced Micro Devices, Inc. Other product namesused in this publication are for identification purposes only and maybe trademarks of their respective companies.*For USB-C power and charging function, your Notebook/devicemust support USB-C standard Power Delivery specifications. Pleasecheck with your Notebook user manual or manufacturer for moredetails.*For Video transmission via USB-C, your Notebook/device mustsupport USB-C DP Alt mode*The monitor may look different from feature images.。
Dell UltraSharp U2913WM 显示器 用户指南说明书
Dell™ UltraSharp U2913WM 显示器用户指南将显示分辨率设置为 2560 x 1080(最大)本文档中的信息会随时变更,恕不另行通知。
©2012-2016 Dell Inc. 保留所有权利。
未经 Dell Inc. 书面许可,严禁以任何形式复制本文档之内容。
本文中使用的商标:Dell和 DELL标志是 Dell Inc. 的商标;Microsoft 和 Windows 是 Microsoft Corporation 在美国及/或其他国家的商标或注册商标;Intel 是 Intel Corporation 在美国及其他国家的注册商标;ATI 是 Advanced Micro Devices, Inc. 的商标;本文中用到的其它商标和品牌名称均属其各自拥有人所有。
Dell Inc. 对于自己之外的商标和品牌名称没有任何专有利益。
型号 U2913WMt2016 年6月 Rev. A10Dell™ UltraSharp U2913WM 显示器用户指南关于本显示器安装设置显示器操作显示器Dell Display Manager 用户指南故障排除附录注、注意和警告注: “注”表示可以帮助您更好使用显示器的重要信息。
注意:“注意”表示可能会造成硬件损坏和数据丢失,并告诉您如何避免该问题。
警告: “警告”表示可能会造成财产损失、人身伤害或死亡。
本文档中的信息会随时变更,恕不另行通知。
©2012-2016 Dell Inc. 保留所有权利。
未经 Dell Inc. 书面许可,严禁以任何形式复制本文档之内容。
本文中使用的商标:Dell和 DELL标志是 Dell Inc. 的商标;Microsoft 和 Windows 是 Microsoft Corporation 在美国及/或其他国家的商标或注册商标;Intel 是 Intel Corporation 在美国及其他国家的注册商标;ATI 是 Advanced Micro Devices, Inc. 的商标;本文中用到的其它商标和品牌名称均属其各自拥有人所有。
大型显示器产品说明书

The Large Displays are easy to configure and scale to virtually any engineering units with the push buttons on the front panel, or with a personal computer using the free configuration software and the optional Ethernet connectivity or Serial Communications.The Ethernet option allows the device to be connected on a standard Ethernet network and communicates using standard TCP/IP protocol. The Ethernet option (-C4EI) also includes RS485 (and RS422) Serial Communications. The serial communications option (-C24) includes both RS232 and RS485 (and RS422) on one instrument. It communicates with a straightforward ASCII communications protocol, as well as MODBUS protocol.Control FunctionsThe Universal Large Displays features a choice of two optional outputs: Form C SPDT (single pole double throw) mechanical relays (-3), Solid State Relays (-2), DC pulse (-4), and/or programmable analog output (-5) selectable as either a controlling function or as retransmission of the process value.The Universal Large Displays can control simple manual operation to ON-OFF and full Autotune PID control. (Selectable preset tune, adaptive tune, PID, PI, PD control modes.) The dual control outputs can be configured for a variety of independent control and alarm applications. The ramp-to-setpoint feature allows the user to define the rate of rise to setpoint, minimizing thermal shock to the load during start-up. Maximum ramp time: 99.59 (HH.MM), Soak: 00.00 to 99.59 (HH.MM), Damping: 1 to 8 in unit steps. Input types: 0 to 20 mA, 0 to 100 mV, 0 to 1 V and 0 to 10 Vdc. For applications that do not require PID control,Universal Large Displays controllers are available in a special model that offer simplified programming. The Universal Large Displays “Simplified Menu” model (specify -SM option) offers simplified programming. The menu flowchart is similar to programmable digital panel meters that are used for on/off control or alarms. (Please see the Universal Large Displays operator’s manuals for programming details.)Meters shown smallerthan actual size.Large DisplayMeters and ControllersThe Large Displays can handle a wide variety of signal inputs direct from transducer or process transmitters and offer multiple control output options and serial or Ethernet connectivity for logging the data.The “Universal Temperature+Process LargeDisplay ” (iLD-UTP) is designed for Thermocouples, RTD’s, and Process (DC) Voltage or Current. Ithandles TEN (10) thermocouple types: K, J, T, E, R, S, B, C, N, & J DIN.It works with a wide selection of RTD’s, both Pt. 0.00385 and 0.00392 curves for 100 Ω, 500 Ω, and 1000 Ω and it measures with 2, 3, or 4 wireconnections for the highest accuracy. This model also measures process voltage: 0 to 100 mV , 0 to 1V , 0 to 10V ranges and process current, 0 to 20 mA(4 to 20 mA) with built-in excitation of 24 Vdc standard.The “Universal Strain+Process Large Display ” (iLD-SP) handles a wide variety of DC voltage and current outputs from all common load cells, pressure transducers, and most any strain gagetype of transducer. The meter measures input ranges of 0 to 100 mV , -100 mV to 1V , 0 to 10V , 0 to 20 mA (4 to 20 mA) with built-in excitation of 5 Vdc and 10 Vdc standard. This model also features 10 point linearization enabling accurate measurements from a wide assortment of unique and nonlinear transducers.U U L and cUL Certified U B ig Bright LED 4-Digits U P rogram to Change Colors: RED, AMBER, GREEN U T emperature and Process Input Models U S train and Process Input Models U O ptional Relays, DC Pulse, and Analog Outputs for Alarm and Full PID Control U C ommunications Via Ethernet, RS232, RS485, and MODBUS ®U E mbedded Web Server U RoHS 2 Compliant57 and 101 mm (2.25 and 4")Displays Available!iLD-UTP and iLD-SP Series51Universal Temperature and Process Input (Model UTP)Accuracy: ±0.5°C temp; 0.03% reading processResolution: 1°/0.1°; 10 µV process Temperature Stability: RTD: 0.04°C/°CThermocouple @ 25°C (77°F):0.05°C/°C—cold junction compensation Process: 50 ppm/°CNMRR: 60 dB; CMRR: 120 dB A/D Conversion: Dual slopeReading Rate: 3 samples per second Digital Filter: ProgrammableDisplay : 4-digit, 7-segment LED 57.2 mm (2.25") or 101.6 mm (4.00") red, green and amber programmable colors for process variable, set point and temperature unitsInput Types: Thermocouple, RTD, analog voltage, analog currentThermocouple Lead Res: 100 Ω max Thermocouple Type (ITS 90): J, K, T , E, R, S, B, C, N, LRTD Input (ITS 68): 100/500/1000 Ω Pt sensor, 2-, 3- or 4-wire; 0.00385 or 0.00392 curveVoltage Input: 0 to 100 mV , 0 to 1 V , 0 to 10 VdcInput Impedance: 10 M Ω for 100 mV 1 M Ω for 1 or 10 VdcCurrent Input: 0 to 20 mA (5 Ω load)Configuration: Single-ended Polarity: UnipolarStep Response: 0.7 sec for 99.9%Decimal Selection: Temperature: None, 0.1Process: None, 0.1, 0.01 or 0.001Setpoint Adjustment: -1999 to 9999 cts Span Adjustment: 0.001 to 9999 cts Offset Adjustment: -1999 to 9999Excitation (Optional in Place of Communication): 24 Vdc @ 25 mAUniversal Strain and Process Input (Model SP)Accuracy: 0.03% reading Resolution: 10/1µVTemperature Stability: 50 ppm/°C NMRR: 60 dB; CMRR: 120 dB A/D Conversion: Dual slopeReading Rate: 3 samples per second Digital Filter: Programmable Input Types: Analog voltage, analog currentVoltage Input: 0 to 100 mVdc, -100 mVdc to 1 Vdc, 0 to 10 VdcInput Impedance: 10 M Ω for 100 mV; 1 M Ω for 1 V or 10 VdcCurrent Input: 0 to 20 mA (5 Ω load)Linearization Points: Up to 10 Linearization PointsConfiguration: Single-ended Polarity: UnipolarStep Response: 0.7 sec for 99.9%Decimal Selection: None, 0.1, 0.01 or 0.001Setpoint Adjustment: -1999 to 9999 cts Span Adjustment: 0.001 to 9999 cts Offset Adjustment: -1999 to 9999Excitation (Optional in Place of Communication):5 Vdc @ 40 mA; 10 Vdc @ 60 mACommunication OptionsEthernet: Standards compliance IEEE 802.3 10Base-TSupported Protocols: TCP/IP , ARP , HTTPGETRS232/RS422/RS485/MODBUS ®: Selectable from menu; both ASCII and MODBUS protocol selectable from menu; programmable 300 to 19.2 K baud;complete programmable setup capability; program to transmit current display,alarm status, minimum/maximum, actual measured input value and status RS485: Addressable from 0 to 199Connection: Screw terminals Control for UTP, SP Action: Reverse (heat) or direct (cool)Alarm 1 and 2 (Programmable)Operation: High/low, above/below, band, latch/unlatch, normally open/normally closed and process/deviation; front panel configurationsIsolationPower to Input/Output: 2300 Vac per 1 min test (RS232 or RS485, input or output)Between Inputs: 500 Vac per 1 min testGeneralPower: 100 to 240 Vac ±10%, 50/60 Hz 22.5 WEnvironmental Conditions: 0 to 40°C (32 to 104°F), 90% RH non-condensing Warm-Up to Rated Accuracy: 60 minutesProtection: NEMA 1 (IP65) front bezel DimensionsiLD24: 289 L x 137 W x 73 mm D (11.75 x 5.375 x 2.875")iLD44: 480 L x 211 W x 95 mm D (18.11 x 8.31 x 3.76")Factory Scaling (-FS) is available if you prefer the unit to be fully configured before shipment.Please provide your selections forOrdering Example: iLD24-UTP-33-C24, large 57.2 mm (2.25") 4-digit controller with temperature/process input, 2 relays and serial communication.Programmable Color Display The Large Display can be programmed to change colorsbetween RED , AMBER , and GREEN at any set point or alarm point. The Large Display has a wide range of signal inputs as well as control, alarm, and communication outputs including: RS232, RS485, MODBUS ®, and Ethernet. The device with anembedded Web Server can connect directly to Ethernet/Internet. Y ou can “see” your meter and control your process through a web browser over the Internet from halfway around the world. With the Large Display, you can also see your meter from a hundred feet.The Large Display can be mounted flush in a panel or surface mounted with the included brackets. The entire Large Display enclosure provides NEMA 1 protection.Configuration of the iLD-UTP or iLD-SP can be performed by using either -C24 or -C4EI options and the configuration software that is available on our website.2。
M34WQ 戰術電競顯示器 使用指南说明书
M34WQ戰術電競顯示器使用指南LCD ��使用手冊版權© 2021 GIGA-BYTE TECHNOLOGY CO., LTD.版權所有。
本手冊所提及的商標皆為各自所屬擁有者合法註冊的商標。
免責聲明本手冊中的資訊皆受著作權法保護,屬於 GIGABYTE 的財產。
GIGABYTE 隨時可能變更本手冊規格和功能變更,恕不另行通知。
未經 GIGABYTE 事先書面同意,任何人不得以任何形式或方式再製、複製、傳送或發行本手冊之任一部分。
• 請仔細閱讀使用手冊,透過使用手冊了解螢幕的使用方式。
• 有關更多資訊,請前往我們的網站:https://專有名詞 HDMI 和 HDMI 高解析度多媒體介面及 HDMI 標誌皆為 HDMI Licensing Administrator, Inc. 在美國與其他國家的商標或註冊商標。
LCD ��使用手冊安全須知使用本顯示器前,請詳細閱讀下列安全須知。
• 僅限使用顯示器隨附或製造商建議的配件。
• 妥善保管產品的塑膠包裝盒,避免放在兒童伸手可及之處。
• 在連接顯示器至電源插座之前,請確定電源纜線的電壓額定值相容於您所在國家的電源規格。
• 電源線插頭必須連接至正確接線與接地的電源插座。
• 請勿用濕手接觸插頭,否則很容易會造成觸電。
• 將顯示器放在穩固且通風良好的位置。
• 請勿將顯示器放在任何熱源附近,如電熱器或直射陽光下。
• 顯示器上的孔洞或開口為通風用途,請勿用任何物體遮蓋或阻擋通風孔。
• 請勿在水源、飲料或任何類型的液體附近使用顯示器。
否則,可能會造成觸電或損壞顯示器。
• 確定從電源插座拔除顯示器插頭後再進行清潔。
• 由於螢幕表面很容易刮傷,因此請避免用任何堅硬物或銳利物接觸表面。
• 請使用柔軟的無絨布代替面紙擦拭螢幕。
必要時您可使用玻璃清潔劑來清潔顯示器。
不過,切勿直接對螢幕噴灑清潔劑。
• 若長時間不使用顯示器,請拔除電源纜線。
• 請勿嘗試自行卸除或維修顯示器。
显示器操作指南说明书
TABLE OF CONTENTSIMPORTANT INFORMATION --------------------------------------------------------- 1 PRECAUTIONS ---------------------------------------------------------------------- 2 SPECIAL NOTES -------------------------------------------------------------------- 3 TAKE CARE OF THE MONITOR ------------------------------------------------ 3BEFORE YOU OPERATE THE MONITOR ---------------------------------------- 4 FEATURES ---------------------------------------------------------------------------- 4 PACKING LIST ----------------------------------------------------------------------- 4 INSTALLATION INSTRUCTIONS ---------------------------------------------- 5 ADJUSTING THE VIEWING ANGLE ------------------------------------------- 7 OPERATING INSTRUCTIONS ------------------------------------------------------- 8 GENERAL INSTRUCTIONS ------------------------------------------------------ 8 HOW TO RECONFIGURE ---- -------------------------------------------------- 9 OSD MENU TABLE ---------------------------------------------------------------- 10 PLUG AND PLAY ------------------------------------------------------------------- 12TROUBLESHOOTING (FAQ) --------------------------------------------------------- 13 ERROR MESSAGE & POSSIBLE SOLUTION ---------------------------- 14 APPENDIX ---------------------------------------------------------------------------------- 15 SPECIFICATIONS ------------------------------------------------------------------- 15 PRESET TIMING TABLE ---------------------------------------------------------- 16 CONNECTOR PIN ASSIGNMENT ---------------------------------------------- 17IMPORTANT INFORMATIONBefore operating the monitor, please read this User Guide thoroughly. This User Guide should be retained for future reference.FCC Class B Radio Frequency Interference StatementWARNING: (FOR FCC CERTIFIED MODELS)NOTE: This equipment has been tested and found to comply with the limits for a Class B digital device, pursuant to Part 15 of the FCC Rules. These limits are designed to provide reasonable protection against harmful interference in a residential installation. This equipment generates, uses and can radiate radio frequency energy, and if not installed and used in accordance with the instructions, may cause harmful interference to radio communications. However, there is no guarantee that interference will not occur in a particular installation. If this equipment does cause harmful interference to radio or television reception, which can be determined by turning the equipment off and on, the user is encouraged to try to correct the interference by one or more of the following measures:1. Reorient or relocate the receiving antenna.2. Increase the separation between the equipment and receiver.3. Connect the equipment into an outlet on a circuit different from that to which the receiveris connected.4. Consult the dealer or an experienced radio/TV technician for help.NOTICE:1. The changes or modifications not expressly approved by the party responsible forcompliance could void the user's authority to operate the equipment.2. Shielded interface cables and AC power cord, if any, must be used in order to complywith the emission limits.3. The manufacturer is not responsible for any radio or TV interference caused byunauthorized modification to this equipment. It is the responsibilities of the user to correct such interference.As an E NERGY S TAR®Partner our company has determined that this product meets the E NERGY S TAR® guidelines for energy efficiency.WARNING:To prevent fire or shock hazard, do not expose the monitor to rain or moisture. Dangerous high voltages are present inside the monitor. Do not open the cabinet. Refer servicing to qualified personnel only.PRECAUTIONSl Do not use the monitor near water, e.g. near a bathtub, washbowl, kitchen sink, laundry tub, swimming pool or in a wet basement.l Do not place the monitor on an unstable cart, stand, or table. If the monitor falls, it can injure a person and cause serious damage to the appliance. Use only a cart or stand recommended by the manufacturer or sold with the monitor. If you mount the monitor on a wall or shelf, use a mounting kit approved by the manufacturer and follow the kit instructions.l Slots and openings in the back and bottom of the cabinet are provided for ventilation. To ensure reliable operation of the monitor and to protect it from overheating, be sure these openings are not blocked or covered. Do not place the monitor on a bed, sofa, rug, or similar surface. Do not place the monitor near or over a radiator or heat register. Do not place the monitor in a bookcase or cabinet unless proper ventilation is provided.l The monitor should be operated only from the type of power source indicated on the label.If you are not sure of the type of power supplied to your home, consult your dealer or local power company.l The monitor is equipped with a three-pronged grounded plug, a plug with a third (grounding) pin. This plug will fit only into a grounded power outlet as a safety feature. If your outlet does not accommodate the three-wire plug, have an electrician install the correct outlet, or use an adapter to ground the appliance safely. Do not defeat the safety purpose of the grounded plug.l Unplug the unit during a lightening storm or when it will not be used for long period of time.This will protect the monitor from damage due to power surges.l Do not overload power strips and extension cords. Overloading can result in fire or electric shock.l Never push any object into the slot on the monitor cabinet. It may short circuit parts causing a fire or electric shock. Never spill liquids on the monitor.l Do not attempt to service the monitor by yourself; opening or removing covers can expose you to dangerous voltages and other hazards. Please refer all servicing to qualified service personnel.l To ensure satisfactory operation, use the monitor only with UL listed computers which have appropriate configured receptacles marked between 100 - 240V AC, Min. 5A.l The wall socket shall be installed near the equipment and shall be easily accessible.SPECIAL NOTESThe following symptoms are normal with the monitor and do not indicate a problem.•Due to the nature of the fluorescent light, the screen may flicker during initial use. Turn off the Power Switch and then turn it on again to make sure the flicker disappears.•You may find slightly uneven brightness on the screen depending on the desktop pattern you use.•The LCD screen has effective pixels of 99.99% or more. It may include blemishes of0.01% or less such as a missing pixel or a pixel lit all the time.•Due to the nature of the LCD screen, an afterimage of the previous screen may remain after switching the image, when the same image is displayed for hours. In this case, the screen is recovered slowly by changing the image or turning off the Power Switch for hours.•When the screen becomes black or flashing, or cannot illuminate any more, contact your dealer or service center to replace parts. Don’t repair the screen by yourself!TAKE CARE OF THE MONITOR•Do not install the monitor in a location near heat sources such as radiators or air ducts, or in a place subject to direct sunlight, or excessive dust or mechanical vibration or shock. •Save the original shipping carton and packing materials, as they will come in handy if you ever have to ship your monitor.•For maximum protection, repackage your monitor as it is originally packed in the factory. •To maintain cleanness of your LCD display, wipe it periodically with clean and soft cloth.The screen may be damaged by any liquid splash.•To keep the monitor looking new, periodically clean it with a soft cloth. Stubborn stains may be removed with a cloth lightly dampened with mild detergent solution. Never use strong solvents such as thinner, benzene, or abrasive cleaners, since these will damage the cabinet. As a safety precaution, always unplug the monitor before cleaning it.BEFORE YOU OPERATE THE MONITOR FEATURES•43.2cm(17”) TFT Color LCD Monitor.•Recommended Resolutions: SXGA 1280 X 1024 @60Hz.•8ms (Tr+Tf) Quick Response Time.•SPLENDID™ Video Enhancement Technology.• 5 Video Preset Modes Switiched by Hotkey• 3 Skin-Tones Selection for Users’ Preference.•Microsoft Windows 95/98/2000/XP Compliance•VESA Display Data Channel (DDC)1/2B Compliance •VESA Wall Mount Compliance (100x100mm).•EPA ENERGY STAR® and Ergonomic Design.•Cabel Binder and Compact Case Design for Space Saving. •Both VGA and DVI-D Inputs. (for MM17T only)• 1.2Wx2 Stereo Speakers / Earphone Jack. (for MM17T only) PACKAGE LISTThe product package should include the following items:1. LCD Monitor2. Quick Start Guide3. User Guide (CD)4. Power Cord5. VGA Cable6. Audio Cable (for MM17T only)INSTALLATION INSTRUCTIONSASSEMBLING THE MONITOR BASEInstall RemoveFigure 1POWER CORD / POWER SOURCE1. Make sure that the power cord is the correct type required in your area.2. This LCD monitor has an internal universal power supply that allows operation in either100/120V AC or 220/240V AC voltage area (No user adjustment is required.)3. Connect the power cord into your LCD monitor’s power input socket, and then plug theother end into a 3-pin AC power outlet. The power cord may be connected to either a wall power outlet or the power outlet socket on your PC, depending on the type of power cord supplied with your LCD monitor.NOTESA certified power supply cord has to be used with this equipment. The relevant national installation and/or equipment regulations shall be considered. A certified power supply cord not lighter than ordinary polyvinyl chloride flexible cord according to IEC 60227 (designation H05VV-F 3G 0.75mm2 or H05VVH2-F2 3G 0.75mm2) shall be used. Alternative a flexible cord be of synthetic rubber according to IEC 60245 (designation H05RR-F 3G 0.75mm2) shall be used.MAKING THE CONNECTIONSConnecting the Signal Cable:Plug one end of the VGA Cableto the LCD monitor’s VGA port, the other end to the computer's VGA socket and tighten the two screws on the cable connector. Moreover, for MM17T, you can buy an extra 24-Pin DVI-D cable from your dealer for the digital signal connection if preferred.Connecting the Power Cord: Plug one end of the AC-power cord to the LCD monitor’s AC input socket, the other end to the power outlet.Connecting the Audio Cable (MM17T only):Plug the audio cable between the computer multi-media (or audio) card's audio output and monitor's audio jack.Caution:If the AC outlet is not grounded (with three holes), install the proper grounding adapter (not supplied).Figure 21. AC Input Socket2. Audio Jack (MM17T only)3. DVI-D Port (MM17T only)4. VGA (D-SUB) Port5. Earphone Jack (MM17T only)6. Cable BinderADJUSTING THE VIEWING ANGLE•For optimal viewing it is recommended to look at the full face of the monitor, then adjust the monitor’s angle to your own preference.•Hold the stand so you do not topple the monitor when you change the monitor’s angle. •You are able to adjust the monitor’s angle from -5° to 20°.Figure 3NOTES•Do not touch the LCD screen when you change the angle. It may cause damage or break the LCD screen.•Careful attention is required not to catch your fingers or hands when you change the angle.OPERATING INSTRUCTIONSGENERAL INSTRUCTIONSPress the power button to turn the LCD monitor on or off. The other control buttons are located on the front bezel (See Figure 4). By changing these settings, the picture can be adjusted to your personal preferences.•The power cord should be connected.•Connect the signal cable from the LCD monitor to your computer.•Press the power button to turn on the LCD monitor. The power indicator will light up.Figure 41. SPLENDID™ Button :•Hotkey for switching between 5 advanced video preset modes (Scenery Mode, Standard Mode, Theater Mode, Game Mode, Night Mode) with SPLENDID™Video Enhancement Technology.•Automatically adjust the image to its optimized position, clock, and phase by pressing the button for 2 seconds.•Exit the OSD menu or go back to the previous menu as the OSD menu is active.Button :2. -•Decrease the level of the function selected or move to the previous function as the OSD menu is activated.3. Power Button / Power LED Indicator:•Switch the LCD monitor on or off.•LED lights blue(MM17T)/green(MM17D): normal operation mode.•LED lights amber: power saving mode.•LED is off: power off mode.4. +•Activate Brightness adjustment menu.•Increase the level of the function selected or move to the next function as the OSD menu is activated.5. Menu Button :•Activate the OSD (On-Screen Display) main menu.•Enter/select the icon(function) highlighted as the OSD menu is activated.HOW TO RECONFIGURE1. Press the MENU-button to activate the OSD main menu (Figure 5).2. Pressto change the settings of the selected function.3.4. To exit and save, select the exit function. If you want to adjust any other function, repeatsteps 2-3.Figure 5OSD MENU TABLEThe table describes the function of each OSD iconMain Menu ItemMain Menu Icon Sub Menu Item SubMenuIconDescriptionSceneryModeAdvance for general Windows use (SPLENDID ™Off) Theater ModeAdvance for game use withSPLENDID ™ Video EnhancementScenarioAdvance for dark-display use withSPLENDID™ Video EnhancementColor RAdjust greengain RGBAdjust blue gainReddishSelect natural skin stone SkinToneSelect yellowishskin stone CoolNormal imagecolor. (7500°K) Color AdjustWarmAdjust brightness levelLuminanceAdjust contrast levelOSD SetupAdjust horizontal position of theOSDOSD V-PositionAdjust OSD timeout PhaseClockAdjust horizontal position of theimage Image PositionAdjust verticalposition of theimage Image SetupAutomatically adjust the horizontal /vertical positions, phase and clock of the image Input SelectShow the resolution,H/V frequency and input port of current input timing LanguageRecall default setting ExitPLUG AND PLAYPlug & Play DDC2B FeatureThis monitor is equipped with VESA DDC2B capabilities according to the VESA DDC STANDARD. It allows the monitor to inform the host system of its identity and, depending on the level of DDC used, communicate additional information about its display capabilities.The DDC2B is a bidirectional data channel based on the I²C protocol. The host can request EDID information over the DDC2B channel.THIS MONITOR WILL APPEAR TO BE NON-FUNCTIONAL IF THERE IS NO VIDEO INPUT SIGNAL. TO OPERATE PROPERLY, THERE MUST BE VIDEO INPUT SIGNAL. This monitor meets the Green monitor standards as set by the Video Electronics Standards Association (VESA) and/or the United States Environmental Protection Agency (EPA) and The Swedish Confederation Employees (NUTEK). This feature is designed to conserve electrical energy by reducing power consumption when there is no video-input signal present. When there is no video input signal this monitor, following a time-out period, will automatically switch to an OFF mode. This reduces the monitor's internal power supply consumption. After the video input signal is restored, full power is restored and the display is automatically redrawn. The appearance is similar to a "Screen Saver" feature except the display is completely off. The display is restored by pressing a key on the keyboard, or clicking the mouse.USING THE RIGHT POWER CORD :The accessory power cord for the Northern American region is the wallet plug with NEMA 5-15 style and is UL listed and CSA labeled. The voltage rating for the power cord shall be 125 volts AC.Supplied with units are intended for connection to power outlet of personal computer: Please use a cord set consisting of a minimum No. 18 AWG, type SJT or SVT three conductors flexible cord. One end terminates with a grounding type attachment plug, rated 10A, 250V, CEE-22 male configuration. The other end terminates with a molded-on type connector body, rated 10A, 250V, having standard CEE-22 female configuration.Please note that power supply cord needs to use VDE 0602, 0625, 0821 approval power cord in European counties.TROUBLESHOOTING (FAQ)Problem & Question Possible SolutionPower LED is not ON l Press the Power Button to check if themonitor is in the ON mode.l Check if the Power Cord is properlyconnected the monitor and the poweroutlet.The Power LED lights amber and there is no screen image l Check if the monitor and the computer are in the ON mode.l Make sure the Signal Cable is properly connected the monitor and the computer. l Inspect the Signal Cable and make sure none of the pins are bent.l Connect the computer and another available monitor to check if the computer is properly working.Screen image is too light or dark l Adjust the Contrast and Brightness settings via OSD.Screen image is not centered or sized properly l Press the SPLENDID™ Button for 2 seconds to automatically adjust theimage.l Adjust the H-Position or V-Position settings via OSDScreen image bounces or a wave pattern is present in the image l Make sure the Signal Cable is properly connected the monitor and the computer. l Move electrical devices that may cause electrical interference.Screen image has color defects(white does not look white) l Inspect the Signal Cable and make sure that none of the pins are bent.l Perform Reset via OSD.l Adjust the R/G/B color settings or select the Color Temperature via OSD.Screen image is blurry or fuzzy l Press the SPLENDID™ Button for 2 seconds to automatically adjust theimage.l Adjust the Phase and Clock settings via OSD.No sound or sound is low (MM17T only). l Ensure that the Audio Cable is properly connected the monitor and the computer l Adjust the volume settings of both your monitor and computer.l Ensure the computer sound card driver is properly installed and activated.ERROR MESSAGE & POSSIBLE SOLUTIONNO SIGNAL︰1. Check that the signal-cable is properly connected , If the connector is loose, tighten theconnector’s screws.2. Check the signal-cable’s connection pins for damage.OUT OF RANGE︰Your computer has been set to unsuitable display mode ,set the computer to display mode given in the following Preset Timing Table.APPENDIXSPECIFICATIONSModel MM17T MM17DVisible Diagonals 17.0" (43.2cm)Screen Size Horizontal : 337.92mm, Vertical : 270.34mm Max. Resolution SXGA 1280x1024@75HzPixel Pitch 0.264mmBrightness 300cd/㎡ (Typ.), 400cd/㎡ (Max.)Contrast Ratio 500:1 (Typ.), 600:1 (Max.)Viewing Angle (CR≧10) 150°(H)/ 130°(V)Display Colors 16.2MResponse Time 8msSignal Frequency Horizontal: 30~80 kHz, Vertical: 55 ~ 75HzMax. Pixel Clock 135MHzPlug & Play VESA DDC2B TMVideo Input DVI-D & D_Sub D_SubAudio Input/ Earphone 3.5mm Mini-jack --Speaker (Built-in) 1.2W x 2 Stereo --Tilt +20°~ -5°VESA Wall Mount 100x100mmPower Source 100~240VAC,47~63HzPower Consumption Power On: <40W, Standby: <2WPhys. Dimension 380(W) x 390(H) x 180mm(D)Net Weight 4 kg (approx.)Environmental Conditions Operating Temp: 5° to 35°C Storage Temp.: -20° to 60°C Operating Humidity: 10% to 85%Regulatory Approvals TCO99, Energy Star, UL/cUL, TUV-GS, CB, CE, FCC, CCC, BSMI, Gost-R, C-Tick, VCCI,ISO13406-2 ClassIIPRESET TIMING TABLESTANDARD RESOLUTION HORIZONTALFREQUENCYVERTICALFREQUENCYDos-mode 640 × 350 31.47kHz 70Hz Dos-mode 720 × 400 31.47kHz 70Hz640 × 480 31.47kHz 60Hz640 × 480 35.00kHz 66.6Hz640 × 480 37.50kHz 75Hz VGA640 × 480 37.86kHz 72Hz800 × 600 37.879kHz 60Hz800 × 600 46.875kHz 75Hz800 × 600 35.16kHz 56Hz800 × 600 48.01kHz 72Hz SVGA832 × 624 49.725kHz 75Hz1024 × 768 48.363kHz 60Hz1024 × 768 56.476kHz 70Hz XGA1024 × 768 60.02kHz 75Hz1280 × 1024 64.00kHz 60Hz SXGA1280 × 1024 80.00kHz 75HzCONNECTOR PIN ASSIGNMENT15 - Pin Color Display Signal CablePIN NO.DESCRIPTION PIN NO.DESCRIPTION 1. Red 9. +5V2. Green 10. Detect Cable3. Blue 11. RXD4. TXD 12. DDC-Serial Data5. Ground 13. H-Sync6. R-Ground 14. V-Sync7. G-Ground 15. DDC-Serial Clock 8.B-Ground24 - Pin Color Display Signal Cable(MM17T only)PIN NO. DESCRIPTIONPI N NO.DESCRIPTION 1. TMDS Data 2- 13. TMDS Data 3+ 2. TMDS Data 2+ 14. +5V Power 3. TMDS Data 2/4 Shield15. Ground(for+5V)4. TMDS Data 4- 16. Hot Plug Detect5. TMDS Data 4+ 17. TMDS Data 0-6. DDC Clock 18. TMDS Data 0+7. DDC Data 19. TMDS Data 0/5Shield8. N.C. 20. TMDS Data 5- 9. TMDS Data 1- 21. TMDS Data 5+ 10. TMDS Data 1+ 22. TMDS Clock Shield 11. TMDS Data 1/3 Shield23. TMDS Clock +12. TMDS Data 3- 24. TMDS Clock -。
Philips 4000系列Ultra Slim LED 3D电视用户手册说明书
Philips 4000 seriesUltra Slim LED TV with Pixel Plus HD107cm (42")Easy 3D DTVi42PFL4908GHold onto your popcorn3D LED TV with added adrenalineExperience entertainment in brilliant LED quality on the Philips 4908 series 3D LED TV. Powered by the Pixel Plus HD engine, your favorite 3D content comes to life in vivid detail.Television viewing at your convenience •PC Input lets you use your TV as a PC monitor•Pause TV & USB recording—pause and record your programs Experience the next dimension in entertainment •Easy 3D for a comfortable 3D experience•Full HD LED TV—brilliant LED images with incredible contrast •240Hz Perfect Motion Rate (PMR) for clear motion sharpness •Pixel Plus HD for better details and clarity•Micro Dimming optimizes the contrast on your TV •USB for multimedia playback•Three HDMI inputs and Easylink for integrated connectivity •Feel the power of 20W RMS and Incredible SurroundHighlightsPause TV & USB recordingNeed to take a break and continue watching TV later? The Pause function means you’ll never have to wait for (or watch!) a commercial again. Want to record live digital TV and view it at your convenience? Use the Electronic Program Guide to find your favorite programs and easily schedule recordings. By simply connecting a USB hard disk to your TV, the broadcast will be conveniently stored for you to view later.PC inputUse your TV as a monitor. Simply connect using an HDMI-DVI cable/converter and you are ready to go.Easy 3DEnjoy hours of viewing comfort thanks to passive 3D technology that delivers you high quality, flicker free, low ghosting 3D. Convert any 2D content into vivid and flawless 3D. The stylish, lightweight 3D glasses are comfortable to wear and do not require batteries.Full HD LED TVPicture quality matters. Regular HDTVs deliver quality, but you expect the best. Imagine breathtakingly crisp detail paired with high brightness, incredible contrast, sharp motion definition, realistic colors and a true to lifepicture—as well as low power consumption.Well, look no further. Full HD LED deliversmore detail than standard HDTVs. And moredetail in the image means a more intenseviewing experience for you.240Hz PMRFor picture movement that looks precise,smooth and natural, Philips created PMR—ourstandard for measuring moving imagesharpness. Perfect Motion Rate is thecombined result of our unique videoprocessing, number of frames per second andrefresh rate of each frame, perfection indimming capabilities, and backlightingtechnology. A higher PMR number contributesto higher contrast and better motionclarity—which means a superior image for you.Pixel Plus HDOur advanced digital picture processingtechnology increases the number of lines andthe number of pixels. The result delivers razorsharp pictures with incredible detail and depth,every time and from any source.Micro DimmingExperience breathtaking pictures withextreme contrast, sharpness and vibrantcolors. Thanks to the Edge LED displaybacklight that analyzes the picture in 6400different zones and adjusts accordingly, you’llenjoy incredible contrast and image quality fora truly immersive life-like visual experience.USB (photos, music, video)Connect your USB memory-stick, digitalcamera, mp3 player or other multimediadevice to the USB port at the side of your TVto enjoy photos, videos and music with theeasy to use on screen content browser.Three HDMI with EasylinkAvoid cable clutter with a single cable to carryboth picture and audio signals from yourdevices to your TV. HDMI uses uncompressedsignals, ensuring the highest quality fromsource to screen. Together with PhilipsEasylink, you’ll need only one remote controlto perform most operations on your TV, DVD,Blu-ray, set top box or home theatre system.20W RMS Incredible SurroundCreate a lifelike sound stage. Powerfulamplifiers and Incredible Surround let youexperience total surround sound with greaterdepth and width of sound to complement yourrich viewing experience.Issue date 2019-06-22 Version: 3.0.212 NC: 8670 000 98455 EAN: 87 12581 67041 2© 2019 Koninklijke Philips N.V.All Rights reserved.Specifications are subject to change without notice. Trademarks are the property of Koninklijke Philips N.V. or their respective owners.SpecificationsPicture/Display•Display: LED Full HD•Diagonal screen size: 42 inch / 107 cm•Panel resolution: 1920x1080p•3D: 2 Player Full Screen Gaming*, 3D Depth adjustment, 2D to 3D conversion, Easy 3D •Aspect ratio: 16:9•Brightness: 350 cd/m²•Picture enhancement: Pixel Plus HD, 240Hz Perfect Motion Rate, Micro DimmingSmart Interaction•Program: Pause TV, USB Recording*•Ease of Installation: Auto detect Philips devices, Device connection wizard, Network installation wizard, Settings assistant wizard•Ease of Use: One-stop Home button, Onscreen Usermanual•Firmware upgradeable: Firmware auto upgrade wizard, Firmware upgradeable via USB, Online firmware upgrade•Screen Format Adjustments: 4:3, Autofill, Autozoom, Movie expand 16:9, Super Zoom, Widescreen, 16:9 stretch•Signal strength indicationSound•Output power (RMS): 20W•Sound Enhancement: Auto Volume Leveller, Clear Sound, Incredible Surround 3D Connectivity•Number of HDMI connections: 3•Number of component in (YPbPr): 1•Number of USBs: 1•Other connections: Antenna F-type, Ethernet-LAN RJ-45, Digital audio out (coaxial), PC-in VGA + Audio L/R in, Headphone out•HDMI features: 3D, Audio Return Channel •EasyLink (HDMI-CEC): Remote control pass-through, System audio control, System standby, Plug & play add to Homescreen, Auto subtitle shift (Philips), Pixel Plus link (Philips), One touch play Multimedia Applications•Video Playback Formats: Containers: AVI, MKV,H264/MPEG-4 AVC, MPEG-1, MPEG-2, MPEG-4,WMV9/VC1•Music Playback Formats: AAC, MP3, WMA (v2 upto v9.2)•Picture Playback Formats: JPEGSupported Display Resolution•Computer inputs: up to 1920x1080 @ 60Hz•Video inputs: 24, 25, 30, 50, 60 Hz, up to1920x1080pTuner/Reception/Transmission•Digital TV: SATVD, DTVi•Video Playback: NTSC, PALPower•Mains power: AC 110-240V, 50/60Hz•Ambient temperature: 5 °C to 35 °C•Standby power consumption: < 0.5 W•Power Saving Features: Auto switch-off timer, Ecomode, Picture mute (for radio)•Power consumption: 90 WDimensions•Box dimensions(W x H x D):1060 x 680 x 133 mm•Set dimensions(W x H x D):972 x 586 x 47.7 mm•Set dimensions with stand (W x H x D):972 x 631 x 220 mm•Product weight: 12.3 kg•Product weight (+stand): 14.4 kg•Weight incl. Packaging: 17.1 kg•Compatible wall mount: 400 x 400mmAccessories•Included accessories: 4x Passive 3D Glasses,Remote Control, 2 x AAA Batteries, Power cord,Quick start guide, Legal and safety brochure•Optional accessories: 3D glasses PTA417, 3Dglasses Game kit PTA436*MyRemote app and related functionalities varies per TV model andcountry, as well as smart device model and OS. For more detail,please visit: /TV.*Compatibility depends on wifi miracast certification Android 4.2 orlater. For more details please refer to your device documentation.*For smart TV app, visit /TV to discover the servicesoffering in your country*Parents should monitor their children during 3D viewing and ensurethey do not experience any discomfort as mentioned above.Watching 3D is not recommended for children under 6 years of ageas their visual system is not fully developed yet.*EPG and actual visibility (up to 8 days) is country and operatordependent.。
大金鲨连线说明书
大金鲨连线说明书主机调整说明一、进入主机菜单方法:方法一:主机在运行的时候按一次《功能》键,主机屏幕最上面的一行显示“返回”,那么在主机和分机运行完这一圈,就可以进入主机菜单。
方法二:主机已经到了时间或者出现了故障,请先把主机电源关闭,然后一直按住《功能》键不放,把主机电源打开,就可以进入主机菜单。
二、主机查账方法:按住《功能》键不放进入主机菜单(参照进入主机菜单方法),然后按《移动》键,把箭头光标移到“查账”,按《确认》键,进入“查账”,按《移动》键,把箭头光标指到“主机”后,按《确认》键可以查主机的所有账目,按《确认》键可以翻页。
按《返回》键可以退出查账。
三、主机关键账目说明。
(主机的账目是所有分机加起来的整组机器的账目)总利润(总利润=总投币—总退币)总投币(总投币=上分+投币)总退币(总退币=下分+退币)上分(上分数据)下分(下分数据)投币(投币数据)退币(退币数据)四、主机报账方法:按住《功能》键不放进入主机菜单(参照进入主机菜单方法),然后按《移动》键,把箭头光标移到“报账”,按确认,进入报账。
第1页所有分机总的盈利(从上次归零算起),第2页当期所有分机实际利润(从上次打条码算起),第3页总的打了多少次条码,第4页机器的号码,第5页效验码,最后显示“请输入条码”,输入正确的条码后按《确认》键,就会显示报账成功。
五、主机时间挡机,延时方法:只要正确报账一次(请参照主机报账方法),输入正确的条码,就可以把时间重新延长5500分钟。
不管时间有没有到,任何时候都可以通过报账把时间延长到5500分钟。
六、主机归零方法:只要连续报账两次(请参照主机报账方法)就可以把主机归零。
下列几种情况主机必须归零:1:主机出现故障。
2:有新的分机要加入。
3:主机已经做到最高账目,显示08账目挡机。
4:主机的参数被调整过。
七、主机归零必须注意的事项:1:如果主机要归零,请把所有的分机全部打开,并且和主机正确连接。