戴尔服务器如何升级硬盘的固件的操作指南
戴尔PowerEdge 1300系统EIDE硬盘驱动器更新说明书
EIDE HARD-DISK DRIVEUPDATENotes, Cautions, and WarningsThroughout this guide, blocks of text may be accompanied by an icon and printed in bold type or in italic type. These blocks are notes, cautions, and warnings, and they are used as follows:NOTE: A NOTE indicates important information that helps you make better use ofyour computer system.CAUTION: A CAUTION indicates either potential damage to hardware or loss of data and tells you how to avoid the problem.WARNING: A WARNING indicates the potential for bodily harm and tells you how to avoid the problem.____________________Information in this document is subject to change without notice.© 1998-1999 Dell Computer Corporation. All rights reserved.Trademarks used in this text: Dell, the DELL logo, and PowerEdge are trademarks of Dell Computer Corporation; Microsoft and Windows NT are registered trademarks of Microsoft Cor-poration. Other trademarks and trade names may be used in this document to refer to either the entities claiming the marks and names or their products. Dell Computer Corporation disclaims any proprietary interest in trademarks and trade names other than its own.January 1999 P/N 0130PDell PowerEdge 1300 Systems EIDE Hard-Disk Drive Update 1Dell™ PowerEdge™ 1300 Systems EIDE Hard-Disk Drive UpdateThis document updates information contained in your Dell PowerEdge 1300 Systems Installation and Troubleshooting Guide . It describes how to install and use the enhanced integrated drive electronics (EIDE) hard-disk drives supported by your sys-tem and provides an EIDE-related update to your System Setup program information.The integrated EIDE controller in the PowerEdge 1300 supports up to two optional 1-inch or 1.6-inch EIDE hard-disk drives. These drives can be installed vertically in the removable hard-disk drive cage located below the external drive bays at the front of the computer.NOTE: Alternatively, the drive cage provides space for up to four 1-inch small com-puter system interface (SCSI) drives or a mix of up to two 1.6-inch and up to two 1-inch SCSI drives. Y our Installation and Troubleshooting Guide describes how to install and use SCSI devices.EIDE hard-disk drives attach to the integrated EIDE controller through the 40-pin IDE1 connector on the system board.Installing an EIDE DriveThis section includes information on addressing, installing, partitioning, and formatting EIDE hard-disk drives.EIDE Drive AddressingAll EIDE devices should be configured for the cable select jumper position, which assigns master and slave status to devices by their position on the EIDE cable. When two EIDE devices are connected to a single EIDE cable and are configured for the cable select jumper position, the device attached to the last connector on the inter-face cable is the master or boot device (drive 0) and the device attached to the middle connector on the interface cable is the slave device (drive 1). Refer to the drive docu-mentation in your upgrade kit for information on setting devices to the cable selectjumper position.2Dell PowerEdge 1300 Systems EIDE Hard-Disk Drive UpdateWith the two EIDE interface connectors on the system board, your system can sup-port up to four EIDE devices. EIDE hard-disk drives should be connected to the EIDE interface connector labeled “IDE1.” (EIDE tape drives and CD-ROM drives should be connected to the EIDE interface connector labeled “IDE2.”)Installing a DriveTo install an EIDE hard-disk drive, perform the following steps:1.Complete the steps in “Installing a Hard-Disk Drive in the Internal Hard-Disk Drive Cage” in your Installation and Troubleshooting Guide .2.Connect a DC power cable to the power input connector on the back of the drive(see the following illustration).Check all connectors to be certain that they are properly cabled and firmly seated.3.Connect one of the device connectors on the EIDE cable to the 40-pin interfaceconnector on the back of the hard-disk drive (see the following illustration).CAUTION: You must match the colored strip on the EIDE cable with pin 1 on the interface connector to avoid possible damage to your system.Attaching Hard-Disk Drive Cables4.If the other end of the EIDE cable is not already connected, connect it to the IDE1connector on the system board.CAUTION: You must match the colored strip on the EIDE cable with pin 1 on the IDE1 connector to avoid possible damage to your system.interface connector on EIDE drivevertically; hiddenbehind side panel)Dell PowerEdge 1300 Systems EIDE Hard-Disk Drive Update 3To locate the IDE1 connector, see the “System Board Features” illustration in your Installation and Troubleshooting Guide.5.Replace the front bezel according to the instructions in “Removing and Replacing the Front Bezel” in your Installation and Troubleshooting Guide .6.Replace the computer cover. Then reconnect your computer and peripherals totheir power sources, and turn them on.NOTE: After you remove and replace the cover, the chassis intrusion detector will cause the following message to be displayed at the next system start-up:ALERT! Cover was previously removed.7.Insert a bootable diskette (such as the Dell Diagnostics Diskette ) into drive A.NOTES: For more information on performing steps 8 and 9, see the appropriate cate-gories in “Using the System Setup Program” in your Dell PowerEdge 1300 Systems User’s Guide.If a setup password has been assigned by someone else, contact your network administrator.8.Enter the System Setup program, and update the appropriate Drive category (Drive 0 or Drive 1) under IDE Drives: Primary .9.While in the System Setup program, reset the chassis intrusion detector bychanging Chassis Intrusion to Not Detected .After you update the System Setup settings, reboot the system.10.Partition and logically format your drive, as described in the next subsection,before proceeding to the next step.11.Test the hard-disk drive by running the Hard-Disk Drives (Non-SCSI) T est Groupin the Dell Diagnostics.See “Running the Dell Diagnostics” in your Installation and Troubleshooting Guide for information on running the diagnostics and troubleshooting any prob-lems that may occur.12.Install your operating system on the hard-disk drive.Refer to the documentation that came with your operating system.Partitioning and Logically Formatting Your EIDE Hard-Disk DriveEIDE hard-disk drives must be physically formatted, partitioned, and logically format-ted before they can be used to store data. Every hard-disk drive from Dell is physically formatted before it is sent to you.NOTE: When using the Microsoft ® Windows NT ® operating system with the file allo-cation table (FAT) 16 file system, the primary partition for each hard-disk drive can beno larger than 2 gigabytes (GB). Extended partitions can be larger than 2 GB, but eachlogical drive within an extended partition must be no larger than 2GB.To partition and logically format your hard-disk drive, use the program(s) offered byyour operating system.System Setup Program UpdateThe Power Management option in the System Setup program works with most EIDEhard-disk drives as well as with monitors. For most systems, enabling Power Man-agement at any level (Maximum, Regular, or Minimum) causes EIDE hard-diskdrives to switch to low-power mode after about 20 minutes of system inactivity.NOTE: Not all EIDE hard-disk drives support this feature. Enabling this feature for Array drives that do not support it may cause the EIDE drive to become inoperable until thecomputer is restarted and Power Management is disabled.In low-power mode, the disks inside the drive stop spinning. They remain idle until thenext drive access, which causes them to start spinning again. (Because the disks takea few seconds to regain full speed, you may notice a slight delay when you access thehard-disk drive the next time.)When Power Management is Disabled (the default), the disks spin constantly aslong as the system is turned on.4Dell PowerEdge 1300 Systems EIDE Hard-Disk Drive Update。
戴尔换固态硬盘教程
戴尔换固态硬盘教程戴尔换固态硬盘教程固态硬盘(SSD)是一种新型的存储设备,相比传统的机械硬盘,在速度、耐用性等方面有更大的优势。
如果你使用的戴尔电脑还使用着传统的机械硬盘,那么将其更换为固态硬盘将会大幅提升电脑的性能。
本教程将向您展示如何在戴尔电脑上更换固态硬盘。
所需工具:1. 戴尔电脑2. 新的固态硬盘3. 螺丝刀步骤一:备份数据在更换硬盘之前,您必须备份所有重要的数据。
将数据复制到外部存储设备(如USB闪存驱动器或移动硬盘)或将其上传至云存储服务,以确保数据的安全。
步骤二:准备固态硬盘将您购买的新的固态硬盘准备好,确保其与您的戴尔电脑兼容。
检查硬盘的接口类型(如SATA或NVMe)以及尺寸(如2.5英寸或M.2),并与您的戴尔电脑的规格进行匹配。
步骤三:关闭电脑并断开连接关闭您的戴尔电脑并拔下电源线,然后断开所有外部设备。
确保您的电脑与电源断开连接,并以防止静电冲击。
步骤四:打开电脑使用螺丝刀打开戴尔电脑的机箱。
请根据您电脑的型号和机箱设计找到正确的螺丝位置。
小心地打开机箱,并将螺丝保留在一个安全的地方。
步骤五:定位并移除旧硬盘在电脑主板的附近,您将会看到原来的硬盘。
这可能位于一个固定的托架上,或者使用螺丝固定在机箱上。
在移除硬盘之前,确认您已经关注任何关于保修和硬盘损坏的维修通知。
使用螺丝刀,谨慎地卸下硬盘的固定螺丝,并将其从托架或机箱中取出。
拔下连接到硬盘上的SATA数据线和电源线。
如果您的硬盘使用的是M.2接口,您需要找到相应的固态硬盘插槽,并将旧硬盘从中取出。
步骤六:安装新的固态硬盘将新的固态硬盘插入到之前的硬盘插槽或固定托架上。
确保硬盘插槽与固态硬盘的接口类型相匹配(如SATA或NVMe)。
连接SATA数据线和电源线到固态硬盘上。
确保连接牢固且安全。
步骤七:重新装上机箱将戴尔电脑的机箱盖重新安装好,并用之前取下的螺丝进行固定。
确保盖子安装正确,连接紧密。
步骤八:重新连接和开启电脑将电源线重新连接到戴尔电脑上,并重新连接任何外部设备。
计算机硬件维护与升级操作步骤详解

计算机硬件维护与升级操作步骤详解在我们日常使用计算机的过程中,难免会遇到一些硬件故障或者需要升级硬件的情况。
这时候,如果能够掌握一些基本的维护与升级操作步骤,将会对我们的计算机使用体验有很大帮助。
下面将详细介绍计算机硬件维护与升级的操作步骤,让我们一起来了解吧!1.清洁内部和外部保持计算机内部和外部的清洁是非常重要的。
定期清理机箱内部的灰尘和杂物,可以使用压缩空气吹扫散热器和其他部件。
使用干净的软布擦拭外部表面,保持整洁。
2.检查硬件连接接下来,检查硬件设备的连接是否牢固。
确保内存条、显卡、硬盘等设备都插入正确并牢固,以免造成不必要的故障。
3.更新驱动程序定期更新硬件设备的驱动程序也是非常必要的。
可以通过设备管理器查看哪些硬件需要更新对应的驱动程序,保持硬件与系统的兼容性。
4.硬件升级如果需要升级硬件,比如增加内存、更换显卡或者升级处理器,需要按照以下步骤进行操作:备份数据:在进行硬件升级之前,一定要备份重要数据,以免数据丢失。
选择合适的硬件:根据自己的需求和计算机配置选择适合的硬件进行升级。
断电:在操作之前确保计算机已经断电,并且拔掉电源线。
静电防护:戴好静电防护手环,避免静电对硬件的损坏。
安装硬件:按照硬件升级说明书,正确安装硬件,并连接相应的线缆。
重新组装:安装完硬件后,重新组装计算机,连接电源并启动计算机。
测试:进行硬件升级后,进行测试确保硬件正常工作。
通过以上的硬件维护与升级操作步骤的详解,我们可以更好地保养和升级自己的计算机硬件设备。
定期的维护可以延长计算机的使用寿命,而合理的硬件升级也能提升计算机的性能,让我们的工作和娱乐体验更加流畅和高效。
希望这些操作步骤能对大家有所帮助,让我们的计算机始终保持最佳状态!。
dell服务器加装旧硬盘(扩容)
dell服务器加装旧硬盘(扩容)
dell服务器加装旧硬盘(扩容)
⼀、dell服务器磁盘扩容,如果使⼀新硬盘,则直接在raid程序⼀创建vd,设置raid级别即可。
⼀、如果是旧硬盘,则需要先在其他服务器上进⼀硬盘的raid信息清除.
具体操作:
1、将旧硬盘插⼀服务器
2、启动服务器,进⼀raid程序,将光标停留在raid卡项上,并按F2键,弹出操作菜单,移动光标到"Clear Config"上,回车,清除raid配置信息
3、此时,硬盘信息清除后,显⼀
4、物理硬盘显⼀
ready状态。
三、将清除raid信息后的旧硬盘,插⼀需要扩容的⼀标服务器
1、重启⼀标服务器,并ctrl+r,进⼀raid设置程序
2、这是可以看到未配置的硬盘信息
3、创建vd,并设置raid级别。
电脑硬件升级操作规程
电脑硬件升级操作规程一、引言随着科技的进步和应用需求的不断提高,电脑硬件升级成为了许多用户为了提升电脑性能和功能而不可或缺的操作。
然而,不正确的升级操作可能导致硬件损坏或系统崩溃,因此,编写一个可靠、全面的操作规程对于保证电脑升级的成功和稳定至关重要。
二、准备工作在进行电脑硬件升级之前,必须做好以下准备工作:1.备份数据:在进行任何硬件升级之前,务必备份重要的数据和文件,以防升级过程中数据丢失或损坏。
2.了解硬件规格:了解电脑硬件的规格,包括主板型号、CPU型号、内存容量等,以便选购适合的硬件。
3.工具准备:准备好所需的工具,比如螺丝刀、钳子、导热硅胶等,以便于安装和拆卸硬件。
三、选择合适的硬件在选择要升级的硬件时,需要根据自己的需求和电脑的兼容性进行选择。
常见的硬件升级包括:1. CPU升级:更换更高性能的CPU,可以提升电脑的运算速度和多任务处理能力。
2. 内存升级:增加内存容量,可以改善电脑的运行速度和多任务处理能力。
3. 硬盘升级:更换更大容量的硬盘或者升级为固态硬盘,可以提升数据传输速度和存储容量。
4. 显卡升级:更换更高性能的显卡,可以提升电脑的图形处理能力和游戏效果。
四、操作步骤1. 关机断电:在进行升级之前,务必关机并拔掉电源线,确保安全操作。
2. 打开机箱:使用螺丝刀拆卸机箱侧板,便于安装和拆卸硬件。
3. 释放静电:通过触摸金属物品或者使用防静电腕带释放身上的静电,以防止对硬件产生静电损害。
4. 拆卸旧硬件:根据需要升级的硬件,拆卸旧硬件。
注意观察和记住拆卸的顺序和连接方式,方便后续安装新硬件。
5. 安装新硬件:根据硬件的安装指南,正确安装新硬件,确保接口连接紧密、稳固。
6. 连接电源和数据线:根据硬件的要求,连接相应的电源和数据线,确保供电和数据传输的正常。
7. 关闭机箱:安装完新硬件后,将机箱侧板重新装上,并用螺丝刀固定好。
五、系统启动和测试1. 插上电源线:确保所有线缆连接完好后,插上电源线并接通电源。
戴尔服务器如何升级硬盘的固件的操作指南
SAS&SATA硬盘Firmware升级指南 - U盘启动升级法
重要信息:
1. 请在升级前确认所有的数据已经备份;
2. 假如硬盘工作在Raid模式下,请确保所有需要升级的硬盘处于Online状态;
3. 假如升级的系统处于Cluster模式,请确保另外一个节点处于关闭的状态;
4. 一旦升级开始,需要等待升级完成,升级过程中不要断电或者重启服务器;
5. 该升级必须在纯DOS下进行,无法在Windows的DOS窗口下运行。
升级前的准备:
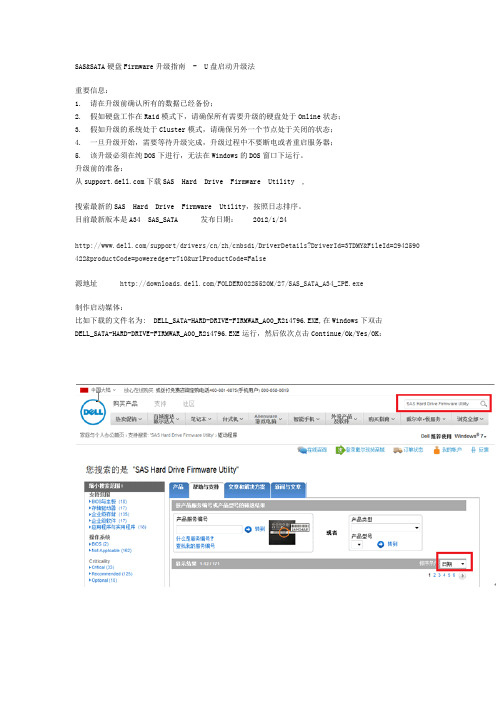
从下载SAS Hard Drive Firmware Utility ,
搜索最新的SAS Hard Drive Firmware Utility,按照日志排序。
目前最新版本是A34 SAS_SATA 发布日期: 2012/1/24
/support/drivers/cn/zh/cnbsd1/DriverDetails?DriverId=3TDMY&FileId=2942590 422&productCode=poweredge-r710&urlProductCode=False
源地址/FOLDER00225520M/27/SAS_SATA_A34_ZPE.exe
制作启动媒体:
比如下载的文件名为: DELL_SATA-HARD-DRIVE-FIRMWAR_A00_R214796.EXE,在Windows下双击
DELL_SATA-HARD-DRIVE-FIRMWAR_A00_R214796.EXE运行,然后依次点击Continue/Ok/Yes/OK:。
Dell-Raid扩容教程
DELL效劳器Raid扩容教程
一、虚拟磁盘扩容找不到新添加的物理硬盘,解决方法
1、如下列图,虚拟磁盘管理看不到第四块物理硬盘。
2、存在外部视图,可以看到第四块硬盘。
3、在虚拟磁盘管理中,按F2选择ForeignConfig→ Clear,清空外部配置。
3、完成后,第四块硬盘状态为Ready。
4、在虚拟磁盘管理中,看到第四块物理硬盘。
二、Raid扩容
1、安装DELLOMSA〔OpenManageServerAdministrator〕工具,翻开找到存储→虚拟磁
盘,选择任务“重新配置〞,执行。
2、选中要添加的物理硬盘,继续。
〔如果有多块要添加硬盘,建议一块一块添加,一块添加完成之后再加下一块。
〕
3、选择Raid级别,继续。
4,检查核对设置,完成。
5、执行过程一,第一个100%过程。
6、执行过程二,第二个100%过程。
7、Raid扩容完成。
8、重启之后,查看。
三、硬盘分区扩容
1、计算机管理→磁盘管理→最后一个分区→右键,扩展卷。
2、下一步。
3、下一步。
4、完成。
5、完成之后。
DELL R720XD 2T硬盘固件升级
DELL R720XD 2TB硬盘固件升级
1、首先使用已经下载好的升级软件制作U盘启动盘,选择UsbMake.exe。
2、如果已经插入U盘,则可以找到U盘信息,点击Install to USB Flash Drive制作启动盘。
3、将制作好的启动盘插入需要升级固件的服务器USB口中,重新启动服务器选择F11,使用U盘启动。
4、进入到BOOT MANAGER中选择UEFI Boot Menu。
5、在UEFI Boot Menu中,找到刚才制作好的U盘,选择用U盘启动。
6、选择U盘启动后,屏幕会变黑然后显示英文代码,等待5秒后会进入到升级界面。
7、在升级界面会将服务器的所有硬盘和背板的信息显示出来。
8、选择我们需要升级的硬盘,点击Update Firmware(在升级过程中鼠标无法移动)。
9、升级成功会提示Success。
10、把需要升级的所有硬盘升级完成后,点击Exit。
11、在下面的fs1:\>中输入exit回车后,会退回到第4部的BOOT MANAGER界面,然后退出重启服务器即可。
PS:升级过程中服务器切勿断电。
更新新固件的操作流程
更新新固件的操作流程固件是嵌入式设备的基本操作系统,它直接控制硬件设备以及其他软件的运行。
随着科技的进步,固件更新成为了保证设备性能、功能和安全的重要手段。
本文将介绍如何正确地更新固件的操作流程。
一、备份重要数据在进行固件更新之前,首先要确保重要数据得到备份。
固件更新可能会清除设备中的数据,因此备份是必要的。
可以使用云存储服务或外部存储设备进行数据备份,确保数据不会丢失。
二、查找适用的固件版本在更新固件之前,需要找到适用于设备的最新固件版本。
可以通过官方网站、设备手册或厂商提供的软件工具来获取固件版本信息。
确保下载的固件版本与设备型号和制造商完全匹配。
三、准备更新工具在开始固件更新时,需要准备相应的更新工具。
这可能包括设备连接线缆、烧录器或特定的软件工具。
根据设备的类型和厂商的要求,选择合适的工具,并确保其与设备的兼容性。
四、连接设备并进入更新模式将设备与电脑或其他适用设备连接,进入设备的更新模式。
不同设备可能有不同的方法进入更新模式,通常需要按下某个特定的按键组合或者遵循特定的操作顺序。
可以通过设备手册或官方网站获得相关的指导。
五、运行更新工具一旦设备进入更新模式,运行准备好的更新工具。
根据工具的指引,选择已下载的固件文件,并开始更新过程。
在更新过程中,不要中断设备的电源供应或断开设备与电脑的连接,以免引发意外情况。
六、等待更新完成固件更新过程需要一定的时间,耐心等待直到更新完成。
不要尝试在更新过程中进行其他操作,以免干扰更新的进行。
更新完成后,设备通常会自行重启。
七、测试设备功能一旦设备完成固件更新并重新启动,测试设备的功能以确保更新成功。
验证设备的正常运行状态、功能是否正常以及设备的性能改善情况。
如果发现任何问题,可以回滚到以前的固件版本或寻求专业技术支持。
八、注意事项在进行固件更新时,需要注意以下几点事项:1. 仔细阅读设备手册或官方网站提供的更新指南,确保按照正确的步骤进行操作。
2. 确保所下载的固件版本完全适用于设备的型号和制造商。
戴尔机箱管理控制器固件版本 3.1 用户指南说明书
Dell Chassis Management Controller Firmware 版本 3.1 用户指南注和小心本出版物中的信息如有更改,恕不另行通知。
© 2010 Dell Inc. 版权所有,翻印必究。
未经 Dell Inc. 书面许可,严禁以任何形式复制这些材料。
本文中使用的商标:Dell ™、DELL 徽标、FlexAddress ™、OpenManage ™、PowerEdge ™ 和 PowerConnect ™ 是 Dell Inc. 的商标。
Microsoft ®、Active Directory ®、Internet Explorer ®、Windows ®、Windows Server ® 和 Windows Vista ® 是 Microsoft Corporation 在美国和其他国家/地区的商标或注册商标。
Red Hat ® 和 Red HatEnterprise Linux ® 是 Red Hat, Inc. 在美国和其它国家/地区的注册商标。
Novell ® 和 SUSE ™ 分别是 Novell Inc. 在美国和其它国家/地区的注册商标和商标。
Intel ® 是 Intel Corporation 的注册商标。
UNIX ® 是 The Open Group 在美国和其它国家/地区的注册商标。
Avocent ® 是 Avocent Corporation 的商标。
OSCAR ® 是 Avocent Corporation 或其子公司的注册商标。
版权 1998-2006 The OpenLDAP Foundation 。
All rights reserved (版权所有,翻印必究)。
无论修改与否,以源代码和二进制的形式重新分发或使用都必须经过 OpenLDAP Public License 的授权许可。
- 1、下载文档前请自行甄别文档内容的完整性,平台不提供额外的编辑、内容补充、找答案等附加服务。
- 2、"仅部分预览"的文档,不可在线预览部分如存在完整性等问题,可反馈申请退款(可完整预览的文档不适用该条件!)。
- 3、如文档侵犯您的权益,请联系客服反馈,我们会尽快为您处理(人工客服工作时间:9:00-18:30)。
SAS&SATA硬盘Firmware升级指南- U盘启动升级法
重要信息:
1. 请在升级前确认所有的数据已经备份;
2. 假如硬盘工作在Raid模式下,请确保所有需要升级的硬盘处于Online状态;
3. 假如升级的系统处于Cluster模式,请确保另外一个节点处于关闭的状态;
4. 一旦升级开始,需要等待升级完成,升级过程中不要断电或者重启服务器;
5. 该升级必须在纯DOS下进行,无法在Windows的DOS窗口下运行。
升级前的准备:
从下载SAS Hard Drive Firmware Utility ,
搜索最新的SAS Hard Drive Firmware Utility,按照日志排序。
目前最新版本是A34 SAS_SATA 发布日期:2012/1/24
/support/drivers/cn/zh/cnbsd1/DriverDetails?DriverId=3TDMY&FileId=2942590 422&productCode=poweredge-r710&urlProductCode=False
源地址/FOLDER00225520M/27/SAS_SATA_A34_ZPE.exe
制作启动媒体:
比如下载的文件名为: DELL_SATA-HARD-DRIVE-FIRMWAR_A00_R214796.EXE,在Windows下双击
DELL_SATA-HARD-DRIVE-FIRMWAR_A00_R214796.EXE运行,然后依次点击Continue/Ok/Yes/OK:。