奇骏二代9寸屏DA产品介绍_1.0
千里达k021参数

千里达k021参数千里达K021参数是指该设备的性能、功能、规格等方面的具体信息。
下面是对千里达K021参数的相关参考内容:1. 设备尺寸和重量:千里达K021的尺寸为XXX毫米长、XXX毫米宽、XXX毫米高,重量约为XXX克,使其便于携带和操作。
2. 屏幕显示:千里达K021采用XXX英寸触摸屏,具有高清分辨率和广视角,可以提供清晰明亮的图像显示效果,方便操作和观看。
3. 处理器和存储容量:千里达K021配备了一颗高性能的XXX处理器,具有快速的运算能力和响应速度。
存储容量为XXXGB,可以存储大量的数据和应用程序。
4. 摄像头:千里达K021具有前置和后置摄像头,前置摄像头用于视频通话和自拍,后置摄像头用于拍摄照片和录制视频。
摄像头的像素数为XXX,能够拍摄出清晰细致的图像。
5. 电池容量和续航时间:千里达K021内置了一块高容量锂离子电池,容量为XXXmAh,可以支持长时间的使用。
续航时间为XXX小时,可以满足用户的日常需求。
6. 网络和连接:千里达K021支持XXX网络,并且具有Wi-Fi 和蓝牙功能,可以无线连接到互联网和其他设备。
此外,还具有XXX接口和XXX插槽,可以连接外部设备和存储卡。
7. 操作系统和用户界面:千里达K021运行的操作系统为XXX,具有简洁易用的用户界面,提供丰富的应用程序和功能。
8. 传感器和辅助功能:千里达K021配备了XXX传感器,如加速度计、陀螺仪和指纹识别传感器,可以提供更好的用户体验和安全性。
此外,还具有XXX辅助功能,如语音识别和指令控制等。
9. 包装内容:购买千里达K021时,包装内容通常包括主机设备、充电器、数据线、耳机和说明书等。
10. 其他特性:千里达K021还具有XXX特性,如快速充电、防水防尘等,增强了设备的实用性和耐用性。
总结:以上是对千里达K021参数的相关参考内容,包括设备尺寸和重量、屏幕显示、处理器和存储容量、摄像头、电池容量和续航时间、网络和连接、操作系统和用户界面、传感器和辅助功能、包装内容以及其他特性。
TP-LINK TL-ER5210G 说明书

2.3.1 2.3.2 第3章 3.1 3.2
前面板 ........................................................................................................................6 后面板 ........................................................................................................................7
4.2 4.3
系统模式...............................................................................................................................18 接口设置...............................................................................................................................20 4.3.1 4.3.2 4.3.3 4.3.4 WAN设置 .................................................................................................................20 LAN设置...................................................................................................................31 DMZ设置..................................................................................................................34 MAC设置......................................................................................................................................................................................................................37 多网段NAT ...............................................................................................................38 虚拟服务器...............................................................................................................41 端口触发 ..................................................................................................................43 ALG服务 ..................................................................................................................45 ARP防护 ..................................................................................................................46 访问控制 ..................................................................................................................49 攻击防护 ..................................................................................................................52
汉兰达12寸显示屏全部说明书

汉兰达12寸显示屏全部说明书一、产品概述汉兰达12寸显示屏是一款高性能的车载显示屏,适用于汉兰达系列车型。
该显示屏采用12寸大屏设计,提供清晰、细腻的图像显示效果,使驾驶者能够更好地获取车辆信息和导航指引。
本说明书将详细介绍汉兰达12寸显示屏的特点、使用方法和注意事项。
二、产品特点1. 大屏设计:汉兰达12寸显示屏采用12寸大屏设计,拥有更广阔的视野,能够提供更清晰的图像显示效果。
2. 高分辨率:该显示屏具备高分辨率特性,能够呈现更细腻、真实的图像细节,让用户能够更清晰地辨识所显示的内容。
3. 触控功能:汉兰达12寸显示屏支持触控操作,用户可以通过触摸屏幕来进行操作,提供更便捷的操作体验。
4. 多功能显示:除了车辆信息和导航指引外,该显示屏还支持多种功能显示,如音乐播放、视频观看等,满足用户的多样化需求。
5. 界面个性化:用户可以根据自己的喜好和需求,自定义显示屏的界面风格,使其更符合个人化的品味。
三、使用方法1. 开关机:长按显示屏上的开关按钮,直到屏幕亮起或熄灭,即可实现开关机操作。
2. 导航功能:在导航界面,用户可以通过触摸屏幕上的地图进行缩放、拖动操作,以实现对导航路线的查看和调整。
3. 车辆信息显示:通过菜单栏或触摸屏幕上的相关图标,用户可以查看车辆的速度、油耗、行驶里程等信息。
4. 多媒体功能:在多媒体界面,用户可以通过菜单栏或触摸屏幕上的相关图标,选择并播放音乐、视频等多媒体内容。
5. 设置个性化界面:用户可以进入设置界面,选择相应的主题、壁纸、字体等来个性化显示屏的界面。
四、注意事项1. 使用时请注意安全,避免在行驶过程中过度操作显示屏,以免影响驾驶安全。
2. 显示屏为精密电子产品,请避免将其放置在高温、潮湿或有强烈振动的环境中,以免影响正常使用寿命。
3. 使用时请避免使用尖锐物体或手指过度用力点击触摸屏,以免对显示屏造成损害。
4. 如需清洁显示屏,请使用干净柔软的布擦拭,避免使用化学药品或带有磨砂颗粒的清洁剂。
12款奇骏cd机说明书

12款奇骏cd机说明书感谢您选择奇骏品牌的CD机。
为了让您更好地了解和使用我们的产品,我们特别为您提供了以下12款奇骏CD机的说明书。
1.型号:QJ-CD01描述:这款CD机具有简洁而时尚的外观设计,支持CD、MP3、USB和蓝牙播放。
其强大的音频输出和多功能控制使您可以享受高品质的音乐体验。
2.型号:QJ-CD02描述:此CD机具有便携式设计,可以随身携带。
它支持CD、MP3和蓝牙播放,内置电池提供长时间的音乐播放时间。
还具有FM收音功能,您可以随时收听最新的音乐和新闻。
3.型号:QJ-CD03描述:这是一款功能齐全的CD机,既可以作为独立的音乐播放器,又可以作为扬声器使用。
它支持CD、MP3、USB和蓝牙播放,具有强大的音频输出和内置均衡器。
4.型号:QJ-CD04描述:此CD机具有紧凑的设计,适用于有限空间。
它支持CD、MP3和蓝牙播放,还具有内置音频放大器,提供清晰而强大的音质。
5.型号:QJ-CD05描述:这款CD机具有时尚而现代的外观,适合放置在家庭音乐室或办公室中。
它支持CD、MP3、USB和蓝牙播放,具有多种音频调节选项,使您可以根据个人喜好来调整音质。
6.型号:QJ-CD06描述:此CD机具有精致的设计和智能控制面板。
它支持CD、MP3、USB和蓝牙播放,可以与智能手机和其他设备连接,提供无线音乐传输。
7.型号:QJ-CD07描述:这是一款多功能的CD机,内置有立体声扬声器和低音炮。
您可以通过CD、MP3、USB或蓝牙播放音乐。
它还支持收音机功能和音频录制。
8.型号:QJ-CD08描述:此CD机具有高保真音质和强大的音频输出,适合音乐爱好者。
它支持CD、MP3和蓝牙播放,并具有多种音频调节选项,使您可以自定义音质。
9.型号:QJ-CD09描述:这款CD机具有时尚的外观和易于操作的控制面板。
它支持CD、MP3、USB和蓝牙播放,并具有音频录制和收音机功能。
10.型号:QJ-CD10描述:此CD机具有紧凑的设计,适用于小空间。
2021奇骏使用图解说明书

(一)中控按键
1、车身电子稳定系统(ESP)
默认为打开状态,一般情况不建议车主手动关闭,在极限驾驶状态时该系统能够有效防止车辆失控。
2、驻车雷达/影像
中控屏显示倒车影像,雷达监测靠近障碍物会有报警音。
3、内/外循环
内循环指车内空气封闭循环,外循环是车内外的空气交换更替。
拥堵路段或空气质量差的环境使用内循环。
高速路段应该每隔一个小时左右切换外循环,更替车内外的空气,以防缺氧。
4、温区同步
当温区同步功能打开后,只需要改变驾驶位的温度,其他的温区就会跟随着发生一样的变化。
关闭此温区同步后,每个分区可以自行个性化的设置,满足不同位置乘员需要。
5、自动驻车
在等红灯时,解放脚部疲劳,刹车钳自动锁住车轮。
再次踩下油门,车辆又会继续前进。
6、自动启停
在短暂停车时,发动机将关闭。
当车主的脚离开刹车踏板,车辆将重新启动。
(二)车门按键
日产奇骏驾驶员车门处:
①后车窗锁止按钮
②车窗一键升降控制开关
③外后视镜的调节开关(角度调节,折叠功能)
④中控锁按键
(三)车顶按键
①天窗开关
②主驾驶阅读灯
③副驾驶阅读灯
④灯光随车门开关
⑤车内灯光。
千里达k021参数

千里达k021参数千里达K021是一款智能手机,以下是该手机的一些常见参数:1. 外观设计,千里达K021采用了类似于传统手机的矩形设计,具有较窄的边框和大屏幕占比。
具体的尺寸和重量可能需要参考官方发布的信息。
2. 屏幕,该手机配备了一块屏幕,屏幕尺寸可能在5英寸至6.5英寸之间。
屏幕类型可能是液晶显示屏或者AMOLED显示屏,具体分辨率和屏幕技术可能需要参考官方发布的信息。
3. 处理器,千里达K021可能搭载了一款主流的移动处理器,例如高通骁龙系列或者联发科系列。
具体的型号和频率可能需要参考官方发布的信息。
4. 内存和存储,该手机可能提供不同的内存和存储配置,例如4GB/6GB/8GB的运行内存和64GB/128GB/256GB的存储空间。
一些型号可能还支持扩展存储,通过microSD卡来增加存储容量。
5. 摄像头,千里达K021可能配备了多个摄像头,包括主摄像头和前置摄像头。
具体的像素和功能可能需要参考官方发布的信息。
6. 电池,该手机可能搭载一块较大容量的电池,以满足日常使用需求。
具体的电池容量可能需要参考官方发布的信息。
7. 操作系统,千里达K021可能预装了一款安卓操作系统,具体版本可能需要参考官方发布的信息。
8. 其他功能,此外,千里达K021可能还具备一些其他功能,例如指纹识别、面部识别、快速充电、NFC等。
具体的功能可能需要参考官方发布的信息。
需要注意的是,以上参数仅为常见参数推测,具体的参数可能因不同地区或不同型号而有所差异。
建议您在购买前查阅官方渠道或可靠的媒体报道,以获取准确的信息。
2011-2018年品牌:Alpine,产品名:9英寸复刻车内挡線系统,型号:X209-WRA-OR
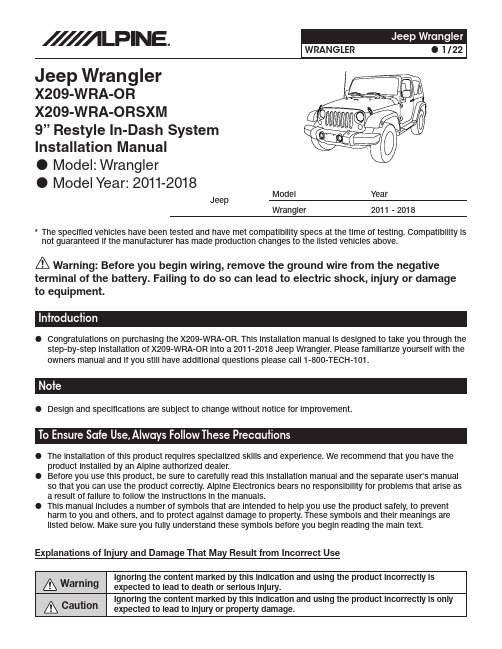
Jeep WranglerX209-WRA-ORX209-WRA-ORSXM9” Restyle In-Dash System Installation ManualModel: WranglerModel Y ear: 2011-2018Design and specifications are subject to change without notice for improvement.The installation of this product requires specialized skills and experience. We recommend that you have theproduct installed by an Alpine authorized dealer. Before you use this product, be sure to carefully read this installation manual and the separate user's manualso that you can use the product correctly. Alpine Electronics bears no responsibility for problems that arise as a result of failure to follow the instructions in the manuals. This manual includes a number of symbols that are intended to help you use the product safely, to preventharm to you and others, and to protect against damage to property. These symbols and their meanings are listed below. Make sure you fully understand these symbols before you begin reading the main text.Explanations of Injury and Damage That May Result from Incorrect UseJeepModel Year Wrangler2011 - 2018* The specified vehicles have been tested and have met compatibility specs at the time of testing. Compatibility is not guaranteed if the manufacturer has made production changes to the listed vehicles above.Warning: Before you begin wiring, remove the ground wire from the negativeterminal of the battery. Failing to do so can lead to electric shock, injury or damage to equipment.Congratulations on purchasing the X209-WRA-OR. This installation manual is designed to take you through thestep-by-step installation of X209-WRA-OR into a 2011-2018 Jeep Wrangler. Please familiarize yourself with the owners manual and if you still have additional questions please call 1-800-TECH-101.Types of PrecautionsStore screws and other small objects where small children cannot reach them. If one of these small objects is swallowed, consult with a doctor immediately.When replacing fuses, be sure to use fuses with the specified current rating. Failing to do so couldlead to an accident or fire.ForbiddenMandatory Before you begin wiring, remove the ground wire from the negative terminal of the battery. Failing to do so could lead to electric shock or injury.When making a hole in the vehicle body, be careful to avoid damaging pipes, the fuel tank, electrical wiring, and the like. This kind of damage could lead to an accident or fire.Bundle cords so that they don’t interfere with driving. Wrapping cords around the steering wheel, gearshift, brake pedal, or the like, could lead to an accident or damage equipment.Do not sandwich cords between the seat railing or allow them to touch protrusions. Resulting breaks or shorts could lead to electric shock or fire.Do not block vents or heat sinks. Doing so could lead to fire or damage equipment.The installation and wiring of this product requires specialized skills and experience. Have the product installed by an Alpine authorized dealer.Tools RequiredAccessory ListInstallation Kit Parts (G-KTX-X209D-WRA)Accessory ListHead Unit Box Parts (X209D OR)iDatalink Maestro Box Parts (ALP-MRR3/ALP-HRN-WRA2)Programming the iDatalink Maestro Module1INSTALL THE WEBLINK PLUG-INGo to:/plugin and follow the installation steps. The Maestro module must be programmed specifically for each vehicle and radio. Take care to enter the correct vehicle information, factory options, head unit model, and head unit serial number. The head units serial number is an alphanumeric value which is found on the head units label, underneath the bar code.Review the System Requirements before installing.If the plugin is already installed, the caution, “The plugin is alreadyinstalled” appears. Please skip to step 2.3 CONNECT YOUR MAESTRO MODULEUse your Maestro module to connect to your PC.5 PROGRAM YOUR MODULEFollow the programming steps for your vehicle.2REGISTER A WEBLINK ACCOUNTGo to:/register and complete the registration process.A confirmation email will be sent to you requiring validation.For existing customers, click log in.4 LOG INTO WEBLINKGo to:/login.Enter your username and password, then click OK.6 Once Programing is complete “FLASHINGCOMPLETED!” will be displayed.Proceed to the next page to complete installation.NOTE: If serial number is invalid, Call ADS at 1-866-427-2999 with the serial number.Component LocationsIMPORTANT: Follow the recommended component location shown below. Failure to do so, will result in poor GPS performance.GPS Antenna InstallationIMPORTANT: Follow the GPS antenna installation procedure shown below. Failure to do so will result in poor GPS performance for CarPlay, Android Auto, and off-road navigation.Factory Unit Disassembly Process1Remove the rubber cover from the top centerstorage area and extract (1) 7mm screw.3Remove the window switch pod using a panelremoving tool and extract (1) 7mm screw.radio.2Remove the knee cover panel and extract (2) 7mm screws located to the right and left sides of thesteering wheel column.steering wheelcolumn.steering wheelcolumn.4Remove the dash panel.6Extract (2) 7 mm screws from the factory radio bracket and remove it.Installation Instructions2Remove the vents from the radio section on the OEM dash panel by pressing down on the lock tab and turning right. Mount vents on to the X209-WRA-OR bezel.4Mount the microphone as illustrated and run the cable to the radio cavity.6Attach the Maestro to the main harness.1The factory dash panel needs to be trimmed toallow the new X209-WRA-OR bezel to fit into place. Remove the highlighted area by cutting along the dashed line.3Use a cutting tool to trim the highlighted areashown below.below the driver side dash and run the extension to the radio cavity.Installation Instructions2Position X209D OR source unit on top of X209 DVD/Display unit as shown, and attach the mounting brackets using the provided (8) 8mmscrews and rear support rubber cap screw.4Route the USB extension cable to the glove box, connect the main harness and other adapters to thefactory harness and secure them.Connect the radio bezel and snap it into place.1Attach the modified panel using the factory screws.3Attach the rear support bracket using (2) 7mm factory screws.5Route the key harness through the top-left side of the X209D OR source unit. Mount the X209D OR source unit using (4) 7mm factory screws.Connecting the Uconnect® USB port (only for vehicles with factory Uconnect®)1Remove the factory climate control panel. It is clipped on and can be removed with a panelremoving tool. Extract the (2) 7mm bolts fromUconnect® module.3Connect the 4pin OEM connector to the OEM USBadaptor (included).5Secure the Uconnect® module to the original location using the 7mm bolts.2Disconnect the 4pin OEM connector.4Use the USB extension to connect USB adaptor to the radio USB input.NOTE: if the factory Uconnect® system is not going to be used you can unplug the 24 pin connectorshown in step 2. This should only occur for people who do not want to use this feature. If Uconnect® module is not disconnected the Uconnect® system will stay paired with previously paired phones.The user’s phone may connect to both Bluetoothdevices simultaneously resulting in unpredictableand potentially distracting behavior.Connecting A SiriusXM Module (Sold Separately)There is no way to integrate the factory SiriusXMtuner. Once the radio is removed, the factorySiriusXM is removed. As the title states, SiriusXMrequires a tuner sold separately. This diagramshows how to integrate the antenna connection.For vehicles with factory SiriusXM connectMounting BracketsIMPORTANT: During the research and development of this product it was discovered that mounting tolerance may vary from the vehicle’s trim level to year built. We have added a 1mm tolerance to the mounting brackets to compensate for such variance in mounting tolerance. Use the guides below as reference if there are any required adjustments.Adjust the rear bracket as needed when the top or bottom is protruding or not flushed.Adjust the side brackets as needed when either side is protruding or not flushed.Bezel Wiring DiagramExploded-View DiagramSwitch Pod (not included)Brackets8 Pin Harness20 Pin Harness(Connect to X209D OR)8 Pin HarnessNOTE: If the 3-pin key harness is not plugged in the head unit will not power onX209-WRA-OR Wiring Diagram*X209-WRA-OR With Optional HDMI Interface Wiring DiagramUSB to power HDMI devices.This port is meant for AppleCarPlay, Android Auto, andUSB ash drives.X209-WRA-OR Wiring DiagramWire Harness Pin Outs654321Cam Aux Data123911131517481012141618576Red 22AWG Blue 22AWG Black 22AWG White 22AWG White 22AWG Blue 22AWG Black 22AWG Red 22AWG Black 22AWG Black 22AWG White 22AWGGreen/White 22AWG Red 22AWGHDMI SwitcherBlack 20AWG Red 20AWG Yellow 20AWG Brown 22AWG Brown 22AWG12345678910111213141516Radio Main Blue 22AWG Red 20AWGBlue/White 22AWG Orange/White 22AWG Yellow/Blue 22AWGPurple 20AWG Gray 20AWGPurple/Black 20AWG Gray/Black 20AWG Green 20AWG White 20AWGGreen/Black 20AWG White/Black 20AWG Yellow 18AWG Black 18AWG123456Direct CameraBlack 22AWG Black 22AWG Red 22AWG Blue 22AWG Black 22AWG White 22AWG135791124681012Remote HarnessRed/White 22AWG Brown 22AWG351462Rear CameraBlack 22AWG Yellow/Black 22AWG Red 22AWGOrange/White 22AWG Orange 22AWG32145678DVD DisplayRed 22AWGRed/White 22AWG Brown 22AWGPink/Silver 22AWG Black 22AWGBlack/Silver 22AWG Yellow 22AWGOrange/Silver 22AWG123Key HarnessBlack/Silver 22AWG Orange/Silver 22AWG Pink/Silver 22AWG123KAC-001 PowerYellow 18AWG Red 18AWG Black 18AWG123Yellow 18AWG Red 18AWG Black 18AWGAlternate PowerData SWC121113141615171812436587910Brown/Red 22AWG Brown/Yellow 22AWG Red/Brown 22AWG Yellow/Brown 22AWG Yellow/Black 22AWG12436587910Audio InWhite/Red 22AWG White/Brown 22AWG Grey/Red 22AWG White/Brown 22AWG46879101235Radio I/OOrange 22AWG White/Grey 22AWG Orange/White 22AWG Green/White 22AWG Yellow/Blue 22AWG Blue/White 22AWG123Yellow 18AWG Red 18AWG Black 18AWGPower/ACC4123iDatalinkBlue 22AWG White 22AWG Black 22AWG Red 22AWG123Audio OutRed 22AWG White 22AWG Black 22AWG12345678910Wrangler HarnessWhite/Red 22AWG White/Brown 22AWG Gray/Red 22AWG12345678910111213141516171819202122Brown/Yellow 22AWGGray 20AWG Brown/Red 22AWG Yellow 18AWG Black 18AWG Green 20AWGGray/Black 20AWG Green/Black 20AWG White 20AWG Purple 20AWGWhite/Black 20AWG Purple/Black 20AWG 1234Wrangler RadioPurple 20AWGPurple/Black 20AWG Green 20AWGGreen/Black 20AWGSpeaker Harness1234Gray 20AWGGray/Black 20AWG White 20AWGWhite/Black 20AWGSpeaker HarnessConnection Of HCE-TCAM1-WRAConnection Of An External AmplifierConnection Of KAC-001KAC-001 Side ViewTo Head UnitSteering Wheel ConfigurationButton Press Once Press And HoldVolume Up Volume +NoneVolume Down Volume -None Seek Up Track +NoneSeek Down Track -NoneSource Source/Camera View NoneNext Preset Preset & Folder +Preset & Folder -Voice Voice Or Siri NonePhone Answer Call Hang Up & Reject CallSet Up Guide1Turn the vehicle’s Ignition switch to ACC.2Turn ON the X209-WRA-OR by pressing any key.3Select the user language and press OK.4Engage and release the parking brake twice.5If a camera is present, turn it ON in the system menu. (MENU/SETUP/SYSTEM/CAMERA/CAMERA SELECT). 6AUDIO MUTE ON REVERSE- By default, when the vehicle is shifted into reverse the AUDIO will MUTE. If this feature is not desired turn it off in the AUDIO MENU (MENU/SETUP/SOUND/MUTE WHILE BACKING UP).7When the KCX-630HD (HDMI SELECTOR) is present be sure to turn it ON in the SETUP MENU. (MENU/ SYSTEM/EXTERNAL ACCESSORIES/HDMI SELECTOR).8Set the DVD player. (MENU/SETUP/SOURCE/HDMI).9When the KAC-001 (External Accessory Control Module) is present be sure to turn it ON in the SETUP MENU.(MENU/SYSTEM/EXTERNAL ACCESSORIES/EXTERNAL ACCESSORY CTLR).10Vehicle information- Set the desired gauge information. (MENU/VEHICLE INFO/GAUGES/CAR SETTINGS). Troubleshooting GuideSymptom Possible Cause Remedy1iPhone not working withHDMI.Not using Apple HDMI to Lightningadapter.Purchase the HDMI to Lightning adapterdirectly from Apple. Not all 3rd partyadapters work the same.Didn’t plug USB power into a 2Asource.Do not plug into the USB from the Alpinehead unit. A third party USB adapter willneed to be used that is 2A.2Android phone is not working with ing incorrect HDMI adapter.If the phone has the feature to use an HDMIadapter it must be the one purchased fromthe manufacturer of the phone, not a thirdparty adapter.Miracast adapter isn’t plugged intoa 2A source.Do not plug into the USB from the Alpinehead unit. A third party USB adapter willneed to be used that is 2A.Miracast adapter has resolutionsettings that are too high.Plug the adapter into another monitor (forexample a television in the home) and reducethe resolution settings.3iDatalink website says serialnumber is invalid.Incorrect serial number is beingused.In the X209-WRA-OR settings confirm theserial number. MENU/SETUP/GENERAL/ABOUT.Serial number may not be iniDatalink database.Call ADS at 1-866-427-2999 and verify.4No output from RCA’s Maestro module is flashed foramplified system.Re-flash module for non-amplified system.Troubleshooting Guide ContinuedSymptom Possible Cause Remedy5Headunit will not turn on.Incorrect serial number was usedwhen flashing maestro.Flash Maestro with correct serial number.4 pin Maestro data cable isdisconnected or damaged.Check for proper connection ordisconnected pins.OBD2 cable is not plugged in.Connect OBD2 connector to the OBD2 port. Monitor, key-harness or mainharness are not connected.Check for proper connection ordisconnected pins.6Cannot enter SETTINGSMENU.Vehicle is in motion or parkingbrake is not engaged.With vehicle in (P)PARK engage the parkingbrake. Release the parking brake andengage the parking brake a second time, asshown in the Setup Guide on page 20.7Cannot control the DVDPlayer properly.DVD has not been set on theSETUP menu.Ensure DVD is ON in HDMI SETUP menu. HDMI box has not been set on theSETUP menu.Ensure DVD is ON in HDMI SETUP menu andremote loop was cut on the wire harness.8Sound mutes when vehicle is shifted into reverse.Mute on reverse is turned on in theSOUND menu.Change Mute on reverse to off.9Only the front speakers are onfor SXM Radio.SXM Tuner has not been activated.Activate SXM Tuner.10The vehicle is incorrectlypositioned on the Navigationdisplay.Poor GPS signal.Ensure the recommeded GPS antenna routewas used. See page 7.11CarPlay, Android Auto, oroff-road navigation mappositioning issues.GPS antenna is positionedincorrectly.GPS antenna is obstructed and doesn’t haveline of sight to the sky. Perform a factoryreset. The unit will automatically recalibrate.12CarPlay, Android Auto, oroff-road navigation vehicleposition icon heading inwrong directionReverse Signal is not connected ornot reliable.Ensure that Reverse wire is connected. Alsoensure that no 3rd party interface module(s)interfere with the Reverse Signal. The headunit uses the Reverse Signal to achieveoptimal positioning performance.13iPhone or Android phone isnot recognizedwhen connected to theUSB cable.Loose or disconnected USB cable.Check the USB connection behindthe headunit.Non-compatible cable.Use the cable supplied with theiPhone or Android phone. Third partyadapters and long extensions may not work.Only use USB extension that came with thehead unit.Dirty charging port on phone.Clean charging port.14Volume controls on bezel andsteering wheel controls do notwork.The setting for External Processorwas turned on.That setting should only be checked whenusing an external sound processor. Whenthere isn’t one being used in the audiosystem it needs to be in the default settingof off. MENU/SETUP/SYSTEM/EXTERNALACCESSORIES/EXTERNAL AUDIOPROCESSOR/OFF15Disc mechanism is notejecting.The wires from the remote harnesswere pulled out during installation.Make sure the Red/White and Brown wiresare pinned correctly as shown on page 17 ofthis installation manual.。
西门子 MICROMASTER 420通用型变频器 说明书
用户文件MICROMASTER 420 0.12 kw-11kw使用大全用户手册合法出版物出版日期:12/03 变频器型号经校核的版本MICROMASTER 420 V1.1版本 12/03 概况 1 安装 2 调试 3 MICROMASTER 420的使用 4 系统参数 5 排障 6 MICROMASTER 420的技术规格7 可选件8 电磁兼容性(EMC)9 MICROMASTER 420变频器的参数表10功能框图11二进制互联连接(BiCo)功能12通讯13高级操作板(AOP)14选件安装图15附录ABCDEFG更多的信息可在互联网上查阅,网址:http:///products/sd核准的西门子软件和培训标准是:DIN ISO 9001,注册登记号:2160-01未经书面许可,不得翻印、传播、或使用本手册及其相关内容。
违者将对所造成的损害负法律责任。
西门子公司保留一切权利,包括由专利许可、实用样机注册、或工程设计等所产生的所有权利。
© Siemens AG 2001。
保留一切权利。
MICROMASTER® 是西门子公司已注册的商标。
本手册中对某些有效的功能可能未加说明。
但是,在新的控制装置中或进行服务时,并不因为西门子公司提供了这些功能而要承担任何责任。
编审过程中,我们对本手册的内容与所述的硬件和软件的一致性进行了审核。
但是,仍然可能存在矛盾和谬误的地方,不可能保证它们完全一致。
我们将定期检查本手册中涵盖的内容,并在以后修订的版本中予以必要的修正。
欢迎提出改进的建议。
西门子公司的手册都是用无氯纸张印刷的,这种纸张的生产原料来源于可持续生长的森林。
打印和装订的过程中未使用化学溶剂。
保留不预先通知而修改本手册的权利。
Order Number:6SE6400-5AA00-0BP0Siemens-Aktiengesellschaft前言前言用户文件警告在安装和调试变频器之前,请您务必阅读以下安全规则和警告,以及设备上粘贴的所有警示标志。
- 1、下载文档前请自行甄别文档内容的完整性,平台不提供额外的编辑、内容补充、找答案等附加服务。
- 2、"仅部分预览"的文档,不可在线预览部分如存在完整性等问题,可反馈申请退款(可完整预览的文档不适用该条件!)。
- 3、如文档侵犯您的权益,请联系客服反馈,我们会尽快为您处理(人工客服工作时间:9:00-18:30)。
谢谢!
安卓手机WiFi连接
步骤二
蓝牙连接:点击蓝牙电话→蓝牙匹 配→蓝牙可被发现,然后用手机连 接蓝牙
步骤三
功能入口:在主机上依次点击:主页 →Android设备→ WiFi互联
步骤四
无线入口:在手机端打开 “Screen Mirroring”或“无线显 示”、“屏幕镜像”等类似功能, 在手机弹出的Miracast界面搜索如 Hz8688的设备名称并连接
二代DA vs 一代DA
对比项
一代DA
外观
尺寸 屏幕亮度 分辨率
触控 是否支持多点触控
蓝牙
是否内置导航
外接设备
倒车影像 USB
是否支持手机导航APP
物理按键
8寸 450流明高亮度数字屏 1024*600高分辨率 电容屏触控 不支持 蓝牙4.0
无,加装导航模块的拆主机,取出TF卡升级
支持 USB2.0(不支持手机充电)
奇骏二代9寸屏DA产品介绍
iPhone 6 岂止于大
全新一代DA 又岂止于大
第一代DA
二代DA vs 一代DA 第二代DA
新增导航功能;
功能升级
操作升级 获取苹果MFI认证,可 实现苹果的双向操作;
连接升级 增加WIFI 无线联接方式
HDMI/MHL有线联结 USB(数据线)有线联结 WIFI无线联接
对插连接
智联”APP
功能入口:如右图:在主页界面 点击手机互联,再点击Android设 备USB连接
注意:Android设备成功与主机进行USB连接后,会自动推送安装“汽车智联”APP,检查手 机菜单内有如右图图标,即安装完成;部分手机安装了360类的软件会导致无法自动推送,此 时请参照安卓HDMI连接方法的二维码扫描
“DA SmartLink”下载教程
1、打开APP Store搜索DA SmartLink,然后免费下载安装;
2、打开DA SmartLink,点击“允许”后进入到DA SmartLink界面;
3、点击左上角的“设置”按钮,然后再点击“检查更新”,会自动跳转到DA SmartLink更新界面;
4、点击“下载”再点击“安装”即可更新到最新的DA SmartLink;
优势:当用户手机支持无线连接功能时,无线连接更方便摆脱线束干扰 当用户需要实现安卓手机WiFi无线连接时需要具备以下其中一个条件:
如:三星的ScreenMirroring功能
如:小米的无线显示功能
安卓手机WiFi连接
步骤一 手机需要安装汽车智联App,安装方法可参照USB连接的方法使用主机推送,也可在有 网络的条件下扫描下方二维码,打开“汽车智联”后按手机Home键后台运行
支持: iPhone 5、iPhone 5C、iPhone 5S、iPhone 6、iPhone 6Plus (用户自备)
iPhone专用转接头(需要用户自备)
HDMI公转公延长线(需用户自备)
iPhone手机HDMI连接
步骤一 iPhone 5以上手机在有网络的条件下,扫描下方二维码,根据iOS版本选择下载,打开 “汽车智联”后按手机Home键后台运行
联→ iPhone设备WiFi互联
步骤六
在手机端打开WiFi,搜索到如右图 的CarAirplayAP热点名称并连接
iPhone手机WiFi连接
步骤七
手机屏幕底部往上滑,点击倒数第二排位置的AirPlay,然后选择与主机一致的名称, 如右下图为Hazens,将镜像功能打开为绿色高亮状态
iPhone手机WiFi连接
安卓手机HDMI连接
连接成功,主机与手机画面一致,可通过主机操作手机的App应用。
安卓手机WiFi连接 iPhone手机WiFi连接 安卓手机USB连接 安卓手机HDMI连接 iPhone手机HDMI连接
iPhone手机HDMI连接
优势:长时间使用可以使用手机原装充电线车上取电,通过苹果HDMI转接头给手机充电 用户实现iPhone的HDMI连接需要注意一下情况:
iPhone手机WiFi连接
步骤四 步骤五
为确保用户连接蓝牙后的触摸正常, 打开设置→通用→辅助功能 →AssistiveTouch将AssistiveTouch 开关滑到右边显示为高亮状态,将小 乌龟的线滑到兔子标志的最高位置 (此处必须连接好手机蓝牙进行设置)
在主机上依次点击:主页→手机互
步骤四 步骤五
为确保用户连接蓝牙后的触摸正常, 打开设置→通用→辅助功能 →AssistiveTouch将 AssistiveTouch开关滑到右边显示 为高亮状态,将小乌龟的线滑到兔 子标志的最高位置(此处必须连接 好手机蓝牙进行设置)
在主机上依次点击:主页→ iPhone设 备→HDMI互联
iPhone手机HDMI连接
连接成功,主机与手机画面一致,可通过主机操作手机的App应用,iPhone在主界面时是不支持横 屏的,在App应用支持横屏时主机界面随着应用横屏而横屏,推荐用户手机导航使用美行手机导航。
安卓手机WiFi连接 iPhone手机WiFi连接 安卓手机USB连接 安卓手机HDMI连接 iPhone手机HDMI连接
步骤六
HDMI公转公一头与主机连接,一头与苹果转接头的HDMI母口连接,苹果转接头的lightning 头与手机的充电口对插
连接成功,主机与手机画面一致,可通过主机操作手机的App应用,iPhone在主界面时是不支持横 屏的,在App应用支持横屏时主机界面随着应用横屏而横屏,推荐用户手机导航使用美行手机导航。
iPhone手机HDMI连接
步骤二
为确保用户在其他定位关联功能使 用正常,打开设置→隐私→定位服 务→找到Da SmartLink →将定位 服务选为始终
步骤三
蓝牙连接:点击蓝牙电话→蓝牙匹 配→蓝牙可被发现,然后用手机连 接蓝牙,蓝牙连接成功弹出“允许 SmartLink”点击允许
iPhone手机HDMI连接
1、进入主菜单的设置功能
2、设置里面打开“{ }开发者选项”
3、“{ }开发者选项”右上角开关向右滑至高亮颜 色勾选调试功能里的USB调试
4、设置功能内打开安全功能选项
4、安全功能选项内找到未知源并将其勾选
系统版本为4.2.2(含)以下的设置方法 设置里面找到关于系统打开后连续点击”版 本号”4次即可打开开发者选项
iPhone手机WiFi连接
步骤二
为确保用户在其他定位关联功能使 用正常,打开设置→隐私→定位服 务→找到Da SmartLink →将定位服 务选为始终
步骤三
蓝牙连接:点击蓝牙电话→蓝牙匹 配→蓝牙可被发现,然后用手机连 接蓝牙,蓝牙连接成功弹出“Da SmartLink”点击允许,弹出Da Smart Link主界面按Home键后台 运行;
USB
HDMI
手机互联
多种连接方式、更多手机兼容
蓝牙电话
支持通讯录、通话记录查询
设定
四类个性设置随时查看系统信息
二代DA卖点介绍
Wifi USB HDMI 三种连接方式,安卓手机兼容90%以上
无损音频 断点续播 原车安装,高品质音效
9寸超大 全镜面电容触摸 热感应按键,更具客户体验价值
超高清 数字惯性导航 使用U盘通过USB接口便捷升级
步骤三
在主机上依次点击:主页Android 设备→ HDMI互联
步骤四
Android手机与主机使用HDMI连
接线连接(普通支持HDMI功能的
安卓手机不需要三星转接头,此处
车体端
以三星需要转接头的Gt-9300为例)HDMI 接 口
对插连接
对插连接
MHL 转 HDMI 连 接线
( 用户自备 )
车体端 HDMI 接口
内置导航系统,U盘通过USB接口升级 支持 USB2.0(可供手覆盖90%以上Android智能手机 支持
支持
支持
二代DA主要功能介绍
收音机
DSP高品质音效
导航
超高清导航系统数字惯性导航
外接设备
DSP高品质音效、支持蓝牙音乐、断点续播
Wifi
安卓手机USB连接
优势:兼容90%以上的安卓手机,连接条件简易方便 当用户手机不支持其他连接方式时可用USB连接功能,实现安卓的USB连接需要注意一下情况:
需要手机原装数据线(用户自备)
安卓系统4.0以上(用户自备)
安卓手机USB连接
步骤一 手机端设置打开“开发者选项”,将“USB调试模式”启用,并在安全选项将“未知 源”勾选;{此为安卓系统版本为4.2.2(不含)以下的打开方法},安卓系统版本4.2.2以上的开发者 选项功能打开参照右下角方法设置
手机需要有HDMI高清输出功能
安卓手机HDMI连接
步骤一
iPhone 5以上手机在有网络的条件下,通过APP Strore,进行下载,或扫描下方二 维码,根据iOS版本选择下载,打开“DA SmartLink”后按手机Home键后台运行;
安卓手机HDMI连接
步骤二
蓝牙连接:点击蓝牙电话→蓝牙匹 配→蓝牙可被发现,然后用手机连 接蓝牙
注:必须点击检查更新,更新为“DA SmartLink”,否则触摸将可能失效或者偏移
5、更新后打开“DA SmartLink”,点击“信任”,即可完成第一次使用“DA SmartLink”的安装流程,完成第一次安装之后再使用时直接打开“DA SmartLink” 即可.
备注:因IOS升级为最新系统(如8.1升级至8.11),导致“DA SmartLink”出现闪退现象, 请及时点击“检查更新”。
安卓手机USB连接
连接成功,主机与手机画面一致,可通过主机操作手机的App应用。
安卓手机WiFi连接 iPhone手机WiFi连接 安卓手机USB连接 安卓手机HDMI连接 iPhone手机HDMI连接