气压传感器(大气压传感器)使用说明书
呼吸机大气压传感器工作原理

呼吸机大气压传感器工作原理呼吸机是一种用于辅助或替代人体正常呼吸的医疗设备。
它通过监测患者的呼吸状态并提供合适的气流来维持呼吸功能。
在呼吸机中,大气压传感器扮演着至关重要的角色,它能够及时准确地感知气体压力的变化,从而协助呼吸机对患者进行有效的通气。
本文将深入探讨呼吸机大气压传感器的工作原理。
呼吸机大气压传感器是一种能够感知大气压力变化的传感器,它通常由感应元件、信号处理电路和输出电路组成。
当患者进行呼吸时,肺部的扩张和收缩会导致胸腔内的气压发生变化,呼吸机大气压传感器就是利用这一原理来监测和识别这种压力变化的。
传感器的感应元件是整个传感器的核心部分,它能够将外部气压的变化转化为与之对应的电信号。
常见的感应元件有压阻式、电容式和压电式传感器,它们的工作原理各有不同。
以压阻式传感器为例,当外部气压增大时,传感器内的导电物质阻值减小,反之则增大,从而通过信号处理电路转化为电压信号输出。
这样一来,呼吸机就能够获得患者呼吸引起的气压变化信息。
为了得到准确可靠的气压信息,大气压传感器通常会配备精密的信号处理电路。
这些电路能够对传感器输出的信号进行放大、滤波和线性化处理,以提高信噪比、减小干扰,并将处理后的信号送入呼吸机的控制系统中。
除了信号处理电路外,大气压传感器还需要配备输出电路以实时向呼吸机传递气压信息。
这些输出电路一般会将处理后的模拟信号转变为数字信号,并根据呼吸机控制系统的通信协议进行数据传输。
通过这些输出电路,呼吸机能够及时准确地获取到患者的呼吸状态,并对通气参数进行调整。
呼吸机大气压传感器的工作原理是基于感应元件对外部气压变化的感知,信号处理电路对传感器输出信号的处理以及输出电路将处理后的信号传输给呼吸机控制系统的过程。
它在呼吸机中承担着关键的作用,为呼吸机提供了准确的气压信息,从而保证了患者在呼吸机辅助下得到有效的通气支持。
希望通过本文的介绍,能够更加深入地了解呼吸机大气压传感器的工作原理。
美国MOTOROLA 压力传感器说明书

美国MOTOROLA压力传感器美国MOTOROLA公司的MPX系列硅压力传感器,主要以气压测量为主,适合用于医疗器械,气体压力控制等领域,输出数字信号。
其测量方式可分为:表压(GP)、绝压(A、AP)、差压(D、DP)型。
在宽温度范围工作时需外加补偿网络和信号调整电路。
具体型号分类而定名称:MPX2010DP 名称:MPX5700DP MPX5700GP 名称:MPX2100AP名称:MPX5500DP 名称:MPX5100AP 名称:MPX5050DP名称:MPX5010DP 名称:MPX4115AP 名称:MPX2200A 名称:MPX2200AP 名称:MPXH6115A6U 名称:MPX4250DP名称:MPX4115A 名称:MPX2202DP 名称:MPX2102AP名称:MPX2053GP 名称:MPXY8300A6U 压力传感器 名称:触力型压力传感器 FSG15N1A 名称:硅压力传感器 MPXH6115A 名称:MPX5700DP 硅压力传感器 名称:MPX53GP 硅压力传感器 名称:压力传感器FPM07 名称:轮胎压力传感器TP015 名称:轮胎压力传感器NPP301名称:Freescale 压力传感器 MPX2010DP商斯达实业传感器与智能控制分公司专门从事各种进口传感器的营销工作,代理多家欧美知名公司的产品。
涉及压力、温度、湿度、电流、液位、磁阻、霍尔、流量、称重、光纤、倾角、扭矩、气体、光电、位移、触力、红外、速度、加速度等多种产品。
广泛应用于航空航天、医疗器械(如血压计)、工业控制、冶金化工、汽车制造、教育科研等领域。
商斯达实业代理的品牌产品主要有:压 力:Kulite、ACSI、Honeywell、Entran、Gems、Dwyer、SSI、Smi、Senstronics、Intersema、Motorola、 NAIS、E+H、Fujikura、Dytran、APM称重测力:Transcell、HBM、Interface、Thamesside、Philips、Entran 温 湿 度:Honeywell、Dwyer流 量:Gems、Dwyer、Honeywell、Folwline、WorldMagnetics 液 位:Honeywell、Siccom、Gems、Dwyer、Kulite、SSI 加 速 度:Entran、Silicondesigns、Dytran 压力开关:ACSI、Gems、Dwyer、台湾矽微航空器材:TexTech 隔音材料、Honeywell 薄膜加热片、DigirayX 射线探伤仪 仪 表:Honeywell、Transcell、东辉、上润、AD、东崎商斯达实业 除代理上述产品外,还有几条传感器生产线,一条压力传感器组装线,可为用户提供各种用途的、特殊要求的配套产品。
呼吸机大气压传感器工作原理_理论说明

呼吸机大气压传感器工作原理理论说明1. 引言1.1 概述呼吸机是一种重要的医疗设备,广泛应用于临床医疗中,主要用于治疗呼吸系统疾病或帮助患者进行正常呼吸。
呼吸机中的大气压传感器是其中一个关键部件,用于监测和控制患者呼气和吸气过程中的压力变化。
了解大气压传感器的工作原理对于增强对呼吸机性能的理解以及改进和优化现有技术具有重要意义。
1.2 文章结构本文将从以下几个方面对呼吸机大气压传感器的工作原理进行详细介绍和论述。
首先,在第2部分中我们将介绍传感器的基本原理以及其组成和结构;然后,在第3部分将详细说明大气压传感器的工作流程;接着,在第4部分我们将探讨相关的理论知识,包括大气压检测原理、传感器信号处理方法以及压力转换与输出方式;最后,在第5部分总结文章要点,并对工作原理的意义及未来展望进行讨论。
1.3 目的本文的目的是通过对呼吸机大气压传感器工作原理的探究,深入了解传感器在呼吸机中的关键作用。
通过清晰地说明传感器基本原理、工作流程以及相关理论知识,我们旨在提供给读者一个全面而准确的认识,并为今后改进和优化现有技术提供一定的参考和指导。
此外,我们还将介绍呼吸机领域中的大气压传感器应用、相关技术进展与改进方向,以及一些应用案例分析和评价,以期能够拓宽读者对于该领域的视野。
2. 呼吸机大气压传感器工作原理:2.1 传感器基本原理:呼吸机大气压传感器是一种用于测量气体压力变化的传感器。
它利用了压力与传感器内部电气信号之间的关系,将外部施加在传感器上的压力量化为电信号输出。
2.2 传感器组成和结构:呼吸机大气压传感器通常由一个灵敏度较高的薄膜式无源传感元件和一个信号处理电路组成。
薄膜式无源传感元件是该类型传感器中常用的核心部件,它可以快速而准确地对外界压力变化做出响应。
信号处理电路则负责将传感元件采集到的模拟信号转换为数字信号,并进行放大、滤波等处理步骤。
2.3 传感器工作流程:呼吸机大气压传感器在工作时,首先会受到外界施加在其上面的气体压力。
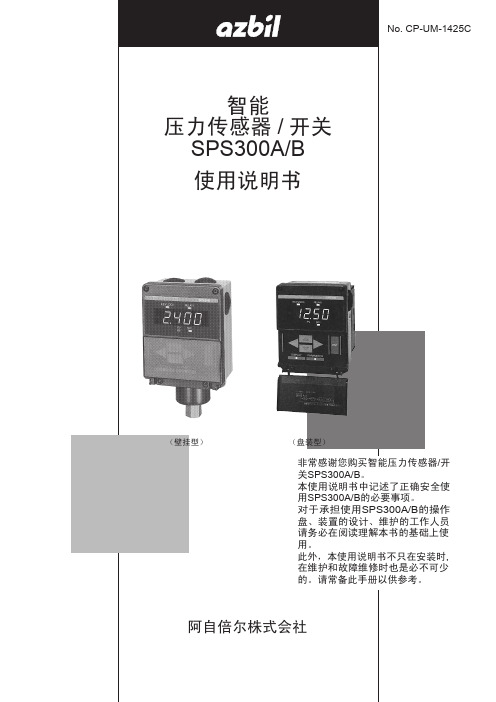
智能压力传感器_开关SPS300A_B使用说明书
电源频率 消耗功率
● 环境条件 请勿在有可燃性液体或者蒸气的环境下使用,否则会损坏本机的安全性。 使用温度范围 - 20 ~+ 60℃ 使用湿度范围 0 ~ 90%RH/40℃ 容许振動 4.9m/s2 以下 (10 ~ 60Hz) 过电压类型 Category Ⅱ (IEC60364-4-443, IEC60664-1) 汚染度 Pollution degree 2 ● 机器的设置 为避免仪表操作者触摸仪表背面端子,请务必将本机安装到盘上。 4 ~ 20mA 输出的共模电压 : 对大地间的电压小于等于 33V r.m.s.、峰值小于等 于 46.7V、小于等于 DC70V。 ● 适合规格 ※ EN61010-1 、EN61326 ※ 附热带处理(型号的最后是 B,T)的产品不对应 EN61010-1。
品 名 本体 使用说明书
C -1245 CP-UM
型 号 SPS300A/B CP-UM-1425
数量 1 1
备 注 型号构成 4 页
使用说明
书
阿自倍尔
株式会社
壁挂安装套件 盘装套件
- -
1 1
仅用于壁挂安装型 的构成
本使用说明书构成如下。 第 1 章 概 要 对 SPS300A/B 的概要进行说明。 第 2 章 各部份的名称 对 SPS300A/B 的各部份的名称进行说明。 第 3 章 设置 • 安装 对 SPS300A/B 的设置 • 安装方法进行说明。 第 4 章 接 线 对 SPS300A/B 的配线进行说明。 第 5 章 操作方法 使 SPS300A/B 动作的必要的设定方法的说明。 第 6 章 故障处理 SPS300A/B 的报警代码显示及使用过程中发生故障时的故障处 理方法的说明。 第 7 章 维 护 SPS300A/B 的维护及部品更换方法的说明。 第 8 章 废 弃 废弃 SPS300A/B 的方法的说明。 第 9 章 规 格 SPS300A/B 的规格、外形尺寸及附属品 • 可选部品等的说明。
卡西欧PRO TREK PRW-6000使用手册-方向、高度、气压、温度测量方法

卡西欧PRO TREK PRW-6000使用手册——方向、高度、气压、温度测量方法方向的测定数码罗盘模式用于确定北方,并检查到目的地的方位如何测定方向1.确认手表在计时、数码罗盘或测高计模式中。
2.将手表放在平坦的表面上。
如果手表正佩戴在手上,则确认手腕水平(相对于地平线)。
3.将手表的12时位置对准要测定的方向。
4.按C钮开始。
画面上出现COMP,表示数码罗盘操作正在进行。
开始数码罗盘测定将使秒针暂时转动到12时位置。
之后指示磁北。
数码罗盘测定•第一次测定结束后,手表将自动每秒进行一次数码罗盘的测定,持续测定60秒钟。
之后,测定自动停止。
•在数码罗盘进行测定的60秒钟内自动照明功能无效。
•在手表处于水平状态下,角度值及方向指示符的误差范围为±11度。
例如,若手表指示的方向为西北(NW)及315度,实际的方向应在304度至326度之间。
•如果手表不在水平状态下进行方向测定,测定结果误差会更大。
•如果怀疑手表测出的方向不正确,可以校准方位传感器。
•手表执行闹铃动作(每日闹铃、整点响报、倒数定时器闹铃)或照明电量(通过按L钮)时,正在进行的方向测定操作将暂停。
使方向测定暂停的动作结束后,方向测定操作将恢复,并持续进行到所定时间。
方向传感器的校准当感觉本表产生的方向测定结果不准时,应对方位传感器进行校准。
可以使用两种不同的方位传感器校准方法之一:双向校准或磁偏角校正。
•双向校准:双向校准模式校准方位传感器与磁北的关系。
双向校准应在受磁力影响的地方进行方向测定时进行。
如果手表由于某种原因被磁化,也应使用这种校准方法。
•磁偏角校正:使用磁偏角校正方法时,可输入一个磁偏角(磁北与真北之间的角度),让手表指示真北。
当使用的地图上标记有磁偏角时,可进行此操作。
磁偏角只能以整数的度为单位进行输入,因此需要将地图上标记的数值四舍五入。
例如,若地图上标记的磁偏角为7.4°,则应输入7°,7.6°时应输入8°,而7.5°时可输入7°或8°。
气压计GDH200-12说明书

Operating ManualBarometerGDH200-12SpecificationMeasuring Range:Abs. Pressure: 0 ... 1300 mbar, resolution 1mbar resp.0 ... 975 mmHg, resolution 1mmHgnon corrosive gasesMax. Overpressure:2000 mbar resp.1500 mmHgAccuracy:(±1 Digit)+/- 0.25% FS hysteresis and linearity(at nominal temperature = 25°C)+/- 0.50% FS temperature dependency 0 to 50°CPressure Connection:metal pressure port for connection to 6 x 1 mm tubes at the top of device (4mm inner tube Ø)standing out approx. 11mmOffset and Scale:digital offset and scale correction for pressure measuringMeasuring Frequency: 1 measuring per secondDisplay:approx. 13 mm high, 3½-digit LCDOperation Elements: 3 keys for ON/OFF, min-/max-value display, zero settingMin-/Max-Value Memory:Min and max measured value are storedSea Level Correction:By entering the elevation above sea level, the pressure at sea level can be displayedZero Function:Difference measuring: the display value is set to zeroAmbient Conditions:-25 to 50°C; 0 to 80% RH. (not condensing)Storage Temperature:-25 to 70°CPower Supply:9V-battery type JEC 6F22 (in scope of supply)Power Consumption:approx. 250µA (battery life: with standard zinc carbon battery more than 1200 hours! )Battery Change Indicator:automatically if battery is used up: "BAT"Auto-Off-Function:when the Auto Off Function is activated, the device switches automatically off, if keypad is not attended for a longer time (selectable 1..120min).Housing:impact-resistant ABS, transparent panel, front side IP65Dimensions: approx. 106 x 67 x 30 mm (L x W x D) without pressure portsWeight:approx. 135g incl. batteryEMC:The device corresponds to the essential protection ratings established in the Regulations of the Council for the Approximation of Legislation for the member countries regarding electromagnetic compatibility(89/336/EWG). Additional fault: <1%Safety instructions:This device has been designed and tested in accordance to the safety regulations for electronic devices.However, its trouble-free operation and reliability cannot be guaranteed unless the standard safety measures and special safety advises given in this manual will be adhered to when using it.1. Trouble-free operation and reliability of the device can only be guaranteed if it is not subjected to any other climatic conditionsthan those stated under “Specification”.If the device is transported from a cold to a warm environment condensation may result in a failure of the function. In such a case make sure the device temperature has adjusted to the ambient temperature before trying a new start-up.2. If there is a risk whatsoever involved in running it, the device has to be switched off immediately and to be marked accordingly toavoid re-starting. Operator safety may be a risk if:•there is visible damage to the device•the device is not working as specified•the device has been stored under unsuitable conditionsIn case of doubt, please return device to manufacturer for repair or maintenance.3. Warning: Do not use these product as safety or emergency stop device, or in any other application where failure of the productcould result in personal injury or material damage.Failure to comply with these instructions could result in death or serious injury and material damage.4. The battery has to be taken out, when storing device above 50°C.It is recommended to take the battery out, when storing device for a longer period of time.Measuring And FunctionsMeasuring The Atmospheric PressureThe device measures the absolute pressure of the ambient atmosphere. This is not necessarily the same like the values given by weather stations! The weather stations‘ values are pressure at sea level. Usually the sensor is placed above sea level and therefore, if the value at sea level(zero) is to be measured, the pressure loss resulting from the actual elevation above zero has to be considered! The device can correct the pressure. Therefore S.L (Sea Level correction) has to be activated in the configuration (=“on“) and the elevation above sea level (Alt = Altitude in [m]) has to be entered to get the correct value.Zero-FunctionBy means of the zero-function relative measurings can be made: press “zero“-key for 2 seconds – “nuL“ will be displayed shortly (abbreviation for …null“) and the display will be set to 0, pressing “zero“ for 2 seconds again: Absolute value will be displayed again. MIN/MAX Value Memorywatch MIN value (Lo):press key ‘Mode‘ shortly once display changes between ‘Lo‘ and MIN valuewatch MAX value (Hi):press key ‘Mode‘ shortly once again display changes between ‘Hi‘ and MAX valuerestore current value:press key ‘Mode‘ shortly once again current value is displayedclear MIN-/MAX- value: press key ‘Mode‘ for 2 seconds MIN and MAX value are cleared. The display shows shortly ‘CLr‘. Configuration Of The DeviceTo configure the instrument proceed like follows:1. Switch off the instrument.2. Press the ‘mode‘ key while switching on the instrument, keep ‘mode‘ key pressed until ‘P.oF‘ appears (after about 3 seconds).I.) Auto Power Off Time …P.oF“The auto power off time is entered in minutes. If no key is pressed during a measuring, the instrument switches itself off automatically after the entered period of time.3. Press ‘up‘ or ‘down‘ key, the currently selected power off time will be displayed (off, 1..120min)4. Enter the desired time by pressing ‘Mode‘ or ‘Zero‘ key.Possible input: off:The auto power off function is deactivated (permanent operation)1...120:auto power off time in minutes.5. Confirm the value by pressing left key, ‘Uni‘ appears in the displayII.) Display Unit …Uni“:6. Press ‘up‘ or ‘down‘ key, the currently selected unit will be displayed: mbar = hPascal (‘hPA‘) or mmHg (‘nHg‘)7. Enter the desired unit by pressing ‘up‘ or ‘down‘ key.8. Confirm the value by pressing left key, ‘S.L‘ appears in the displayIII.) Sea Level Correction …S.L“:The sea level correction corrects the measured pressure to the pressure value above sea level (zero altitude)9. Press ‘up‘ or ‘down‘ key, the currently selected state of the sea level correction will be displayed10. Enter the desired state by pressing ‘up‘ or ‘down‘ key.selectable values are:off: sea level correction deactivatedon: sea level correction activated11. Confirm with left-key: S.L = on: ‘Alt‘ appears in the displayS.L = off: values will be stored, the instrument will restart (segment test). End of configuration. IV.) Entering the Altitude For The Sea Level Correction …Alt“:Here the current elevation above sea level has to be entered.12. Press ‘up‘ or ‘down‘ key, the currently selected elevation for the sea level correction will be displayed13. Enter the desired state by pressing ‘up‘ or ‘down‘ key.selectable values are:-199.. 1999m14. Confirm the value by pressing left key. The values will be stored, the instrument will restart (segment test).Please note:If during the configuration no key is pressed within 60 seconds, the configuration will be aborted.Eventually made changes won’t be stored!Offset and Scale AdjustmentThe offset and scale adjustment is intended to be used to compensate errors of the internal pressure sensor.The display value is given by following formula:Display = (measured value - offset) * ( 1 + scale adjustment/100)To adjust a measuring offset and scale proceed like follows:1. Switch off the instrument.2. Press the ‘zero‘ key while switching on the instrument, keep ‘zero‘ key pressed until ‘OFS‘ appears (after about 3 seconds).3. Press ‘up‘ or ‘down‘ key, the currently selected offset adjustment appears.4. Choose the desired value by pressing ‘up‘ or ‘down‘ key. (max. input range: ±20mbar)5. Enter by pressing left key: SCL appears in the display6. Press ‘up‘ or ‘down‘ key, the currently selected scale adjustment appears7. Choose the desired value by pressing ‘Mode‘ or ‘Zero‘ key. (max. input range: ±1.99%)The input is displayed in %.example: scale adjustment is 1.00 => scale is increased by 1.00% => Scale = 101%At a measured value of 1000 (without offset correction) the instrument would show 10108. Store the values by pressing left key. The instrument will restart (segment test).Please note:If during the changing of the offset adjust no key is pressed within 60 seconds, the input will be aborted.Eventually made changes won’t be stored!System MessagesEr. 1= measuring range has been exceededEr. 2= meas. value has fallen below perm. rangeEr. 3= display range has been exceeded (>1999)Er. 4= meas. value has fallen below displayable range(<-199)Er. 7= System fault - the device has detected a system fault (defective or far outside allowable ambient temperature range)---= Sensor error or value could not be calculatedIf the symbol "BAT“ is displayed at the left side of display, the battery is weak, measuring can be continued for a certain time.If “bAt“ is displayed in the main display the battery is used up and needs to be replaced. Measuring is no more possible.。
STM32+MS5611测气压温度例程详解

STM32+MS5611测气压温度例程详解一、基础知识首先,MS5611是什么MS5611气压传感器是由MEAS(瑞士)推出的一款SPI和I²C总线接口的新一代高分辨率气压传感器,分辨率可达到10cm。
该传感器模块包括一个高线性度的压力传感器和一个超低功耗的24位Σ模数转换器(工厂校准系数)。
计算温度:D2 = MS5611_DO_Conversion(OSR_Te mp);delay_ms(10);dT = D2 - (((u32)c5)*256) ;Temperature = 2000 + dT*((float)c6)/8388608 ;计算大气压:D1 = MS5611_DO_Conversion(OSR_Pressure) ;delay_ms(10) ;OFF = (((int64_t)c2)*65536 + (((int64_t)c4*dT)/128)) ;SENS = (((int64_t)c1)*32768) + (((int64_t)c3*dT)/256) ;if(Temperature 《 2000)//µ±Î¶ÈÖµTEMPСÓÚ2000ʱÐèÒª×öζȲ¹³¥{T2 = (float)(dT*dT)/0x80000000 ;Aux = (Temperature - 2000)*(Temperature - 2000) ;OFF2 = 2.5f*Aux ;SENS2 = 1.25f*Aux ;if(Temperature 《 -1500)//µ±Î¶ÈÖµTEMPСÓÚ-1500ʱÐèÒª×öζȲ¹³¥{Aux = (Temperature+1500)*(Temperature+1500);OFF2 = OFF2 + 7*Aux;SENS2 = SENS2 + 5.5f*Aux;}}else{T2 = 0 ;OFF2 = 0 ;SENS2= 0 ;}Temperature = Temperature - T2 ;OFF = OFF - OFF2 ;SENS = SENS - SENS2 ;Pressure = ((D1*SENS)/2097152 - OFF)/32768 ;海拔计算:Altitude = (44330.0f*(1.0f - pow((float)Pressure/101325.0f,0.190295f))) ;MS5611主要用于智能手机、海拔高度测量和导航辅助,做四轴的朋友一般都了解。
大气压传感器原理
大气压传感器原理
大气压传感器是一种测量大气压力的设备,其工作原理基于气压对于传感器内部的某种物理量的影响。
一种常用的大气压传感器原理是压阻式传感器,其基本构造是由一个薄膜或弹性体和一个测量电路组成。
当外部气压变化时,这个薄膜或弹性体会产生微小的形变。
形变后的薄膜或弹性体会导致电阻发生变化。
通过测量电路可以测量出这个电阻变化的大小,从而得知外部气压的变化情况。
另一种常见的大气压传感器原理是压电式传感器,它利用了压电效应。
当外部气压改变时,传感器内部的压电材料会产生电荷。
通过测量电路可以测量出这个电荷的变化情况,从而得知外部气压的变化。
无论是压阻式传感器还是压电式传感器,它们都需要一个参考气压值来进行校准。
通常情况下,参考气压值可以通过气压计等设备进行测量得到。
使用大气压传感器可以广泛应用于各种领域,比如天气预报、高空气象观测、空调系统、车辆控制系统等。
通过测量大气压力,可以提供重要的气象信息和环境数据,为各种应用提供支持。
- 1、下载文档前请自行甄别文档内容的完整性,平台不提供额外的编辑、内容补充、找答案等附加服务。
- 2、"仅部分预览"的文档,不可在线预览部分如存在完整性等问题,可反馈申请退款(可完整预览的文档不适用该条件!)。
- 3、如文档侵犯您的权益,请联系客服反馈,我们会尽快为您处理(人工客服工作时间:9:00-18:30)。
气压传感器(大气压传感器)使用说明书
一、概述
气压传感器采用带不锈钢隔离膜的扩散硅压阻式压力传感器作为信号测量元件,信号处理电路位于不锈钢壳体内,传感器信号经过经过专业信号调理电路转换成标准4-20mA 电流或RS485信号输出,。
气压传感器DATA-52系列经过了长期老化及稳定性考核等工艺,性能稳定可靠。
气压传感器广泛地应用于石油、化工、冶金、电力等工业过程现场测量和控制。
防护等级:IP68。
型号意义:
示例说明:
DATA-5202(100kPa)表示为平升公司生产的4~20mA ,精度为0.5%,量程为100kPa 的压力变送器。
二、外形结构(单位:mm ):
供货产品接口螺纹: M20×1.5 □ G1/2 □
三、工作原理
气压传感器是以单晶硅为基体,采用先进的离子注入工艺和微机械加工工艺,制成了具有惠斯顿电桥和精密力学结构的硅敏感元件。
被测压力通过压力接口作用在硅敏感元件上,实现了所加压力与输出信号的线性转
换,经激光修调的厚膜电阻网络补偿了敏感元件的温度性能。
四、性能指标 型号:DATA-52系列
通讯类型:1—串口; 2—
4
~20mA
;
精 度:0—0.5%; 1—0.1%;
DATA-5 2 ××(×kPa 、MPa 等)
量程:0—×,单位:kPa 、MPa (一般在标牌中标注) 采集类型:压力;
唐山平升电子生产的变送器系列产品
测量介质:液体或气体(对不锈钢壳体无腐蚀)
量程:0-10MPa
输出信号:4-20mA;RS485
供电电源:12/24V DC
精度等级:0.1%FS;0.5%FS
环境温度:-10℃~80℃
存储温度:-40℃~85℃
过载能力:150%FS
稳定性能:±0.05%FS/年; ±0.1%FS/年
零点温度系数:±0.01%FS/℃
满度温度系数:±0.02%FS/℃
防护等级:IP68
结构材料:
外壳:不锈钢1Cr18Ni9Ti 密封圈:氟橡胶
传感器外壳:不锈钢1Cr18Ni9Ti 膜片:不锈钢316L
电缆:φ7.2mm聚氨酯专用电缆(配套2米,超出部分按长度加价)
五、注意事项
1.当收到产品时请检查包装是否完好,并核对变送器型号与规格是否与您选购的产品相符。
2.禁止测量与不锈钢不相兼容的介质。
3.确保电源供电电压符合供电要求,电源的正、负极与产品的正、负极对应,确保压力源的最高压力在该产品的测量范围内。
六、接线图
.。