CD盒子-05
2024-2025学年高二数学选择性必修第一册(配北师大版)课件3.1-3.2第2课时

们之间有9个空位,在9个空位中任选2个插入“隔板”,故有
不同的放法.
C92
9×8
=36(种)
=
2
探究点三
与几何有关的组合应用题
【例4】 如图,在以AB为直径的半圆周上,有异于A,B的六个点C1,C2,…,C6,
线段AB上有异于A,B的四个点D1,D2,D3,D4.
目录索引
基础落实·必备知识一遍过
重难探究·能力素养速提升
学以致用·随堂检测促达标
课程标准
1.能应用组合知识解决有关组合的简单实际问题.
2.能解决有限制条件的组合问题.
基础落实·必备知识一遍过
课程标准
1.能应用组合知识解决有关组合的简单实际问题.
2.能解决有限制条件的组合问题.
知识点 组合的有关概念
②部分均匀分组,应注意不要重复,若有n组均匀,最后必须除以n!;
③完全非均匀分组,这种分组不考虑重复现象.
(2)分配问题属于“排列”问题.分配问题可以按要求逐个分配,也可以分组后
再分配.
变式训练2《数术记遗》是东汉时期徐岳编撰的一本数学专著,该书介绍
了我国古代的14种算法,其中的13种需要计算器械.某研究性学习小组3人
m,n 较大时的组合
自主诊断
1.将5本不同的书分给4名同学,每名同学至少1本,不同的分法有
240 种.
解析 先将这 5 本书按 2,1,1,1 分为 4 堆,再分给 4
A44 =240(种)分法.
C 25 C 13 C 12 C 11
名同学,有 A 3
3
·
2.[人教A版教材习题](1)空间中有8个点,其中任何4个点不共面,过每3个点
CD、打口碟常识及常见CD术语扫盲
CD、打口碟常识及常见CD术语扫盲CD种类知多少香港的银圈版CD:银圈版与普通版最大的区别就在于光碟的内圈制作不同,银圈版CD的内圈(有些CD连同盘身)都是银色,而普通CD的内圈则是由透明塑胶材料制成,因而又叫做“胶圈版”。
另外;香港大部分歌手在1991年之前所推出的大碟在第一版印制上几乎都发行过银圈版CD,之后才是普通CD、再版CD,所以又称之为“首批银圈版”,生产数量不多、升值速度极快。
因为1992年之后就没有继续生产过银圈版CD!普通CD普通CD唱片的采样频率为44.1kHz,16比特量化。
可以达到20-20kHz的频响和90DB的动态范围以及不低于90DB的信噪比。
普通激光唱片的频率响应非常平坦,底噪声很小,动态范围相当大。
在模拟录音的时代,动态范围达到80DB已属不易,但数字录音可以轻轻松松地做到90DB。
既然普通CD唱片的技术指标不错,为什么后来又推出了很多种格式的CD唱片呢?这主要的因为普通CD唱片的采样频率过低,量化的比特数也不够高。
因此在聆听老一代的CD唱片时,总会有声音粗糙,缺少细节的甜美的歌唱性等问题。
在重播的音场深度、宽度等方面也比较窄、比较紧,整体的空气感和临场感不太好。
普通改良型CD1994年,美国泰拉克唱片公司推出了采用20比特录制的CD唱片。
在母带的录制、编辑过程中,动态范围达到了112DB。
然后转换成16比特进行数字压片。
1995年,美国泰拉克TELARC唱片公司推出了双声道环绕声录音方式的CD唱片。
这在录音史上具有阶段性的意义。
因为通过双声道环绕声方式,在普通的立体声音响系统中,你可以听到更深、更宽的音场,能够体会到一定程度的包围感了。
其实泰拉克唱片公司早在1986年就推出了采用双声道环绕声技术录制、出版了CD唱片。
只不过那时的双声道环绕声录音技术还处于实验阶段。
唱片投放市场后,效果良好。
在经过了十年的改进与完善之后,正式推出了双声环绕声系列CD唱片。
1996年,飞利浦唱片公司推出了采用24比特录制和模拟母带24比特重新制作的系列CD唱片,并且采取限量发行的方式。
U2EC5 USB2.0存储盒子套件用户指南说明书

USB2.0 Storage Enclosure kitU2EC5User’s GuideRev.1.0July 2001Contents1. Before installation (3)1-1. Package Confirmation (3)1-2. System Requirements (3)1-3. Restrictions (3)1-4. Front/Back Side Function (4)2. Setup (5)2-1. Mounting a drive (5)2-2. Connectiong a power cable and USB cable (8)2-3. Installing USB driver (8)3. Removing the U2EC5 (15)4. Disk Formatting and Partitioning Utility (16)5. Registration and Tech-support (19)Appendix (20)21. Before installation1-1. Package ConfirmationCheck package contents:•U2EC5 5 inch case•AC Cable•One USB2.0 Compliant cable(1m)•Mounting screws•Support Software CD-ROM•Installation guide(This document)•Software License AgreementNOTEIf any of these items are missing from the retail package, contact your supplier immediately.1-2. System Requirements•Windows 98SE/Windows Me/Windows 2000•PC with built-in USB port or with our add-on USB PCI board/PC card1-3. RestrictionsTo enjoy USB2.0 High-Speed performance, our add-on USB2.0 PCI board(PCIU2)/PC card(CBU2) and its EHCI driver are required. No other USB2.0 PCI boards/PC Cards or drivers are guaranteed.31-4. Front/Back Side Function[Front Side](1)Front cover[Back Side][Front Side](1)Front coverYou have to remove this cover when you mount a 5 inch drive.(2)Power LEDWhen this drive is powered, this green power LED comes on.(3)Power switchBy pushing this button, you can turn a drive on or off.[Back Side](1)Power cable inletConnect the bundled power cable.(2)FanThe fan is used to force out air in the U2EC5 to keep it cool.(3)USB portConnect the bundled USB cable to the PC.(4)Audio output(LINE OUT)If you connect a speaker with an amplifier, you can listen to sound.452. SetupTo set up the U2EC5, follow the steps:2-1. Mounting a drive(1)Release the screw at rear panel.Then, slide out the inner case by pushing back panel.(2)Slide the top cover off inner case.(3)Push the hook on front panel to release front cover if you mount a 5 inch drive. If not, you don’tneed to release it. In such a case, proceed to step (6).6(4)Set [MASTER] position in jumper setting. Then, slide a 5 inch drive such as a CD-ROM into inner case and connect IDE cable, power cable and analog audio cable(red-colored line is R ; white-colored line is L).Power cableIDE cable Set [MASTER] positionAudio cable (5)Fix the drive to inner case by screws. Then, replace the top cover and slide back the inner case intoenclosure. You have finished mounting a drive. Proceed to Chapter 2-2.(6)If you mount a 3.5 inch hard drive, set [MASTER] position in jumper setting. Then, connect IDE cable, power cable.Power cable IDE cable Set [MASTER]position (7)Fix the drive to inner case by screws. Then, replace the top cover and slide back the inner case intoenclosure. You have finished mounting a drive. Proceed to Chapter 2-2.782-2. Connectiong a power cable and USB cableConnect a power cable to an outlet. And connect the bundled USB cable to the USB port on yourPC as shown below.2-3. Installing USB driver(A)For Windows 2000, Windows Me usersTurn on the U2EC5 case. The drive will be detected and the driver will be installedautomatically. If the installation was successful, you can find the added icon in [My Computer]. The example figure below shows a CD-ROM drive is added (Drive letter depends on yoursystem).NOTE:If you are a Windows 2000 user, you must belogged on as Administrator or have adminis-trator privileges to install the driver.(B)For Windows 98SE usersa)Turn on the U2EC5 case. The following window appears. Insert the Support Software CD-ROM and.click [Next]b)Select [Search for the best driver for your device.(Recommended)] and click [Next]9c)Select the [CD-ROM drive] option and click [Next].d)Make sure RTUS2ST.INF was found and click [Next]10e)When the driver has been copied onto your system, the following window appears. Click [Finish].f)The following window appears. Click [Next].g)Select [Search for the best driver for your device.(Recommended)] and click [Next].h)Select the [CD-ROM drive] option and click [Next].i)Make sure RTUS2STS.INF was found and click [Next].j)When the driver has been copied onto your system, the following window appears. Click [Finish].If the installation was successful, you can find the added icon in [My Computer]. The example figure below shows a CD-ROM drive is added(Drive letter depends on your system).3. Removing the U2EC5(1)When you click on the removal icon on the task tray, a pop-up menu similiar to the following willappear. Select it.(OS:Windows 98SE)(2)When the message box saying [the device can now be safely removed from the system] appears,click [OK]. You can remove the U2EC5 from the PC safely.4. Disk Formatting and Partitioning UtilityWith the bundled utility, you can change file system or format a storage device. Follow the steps below to use the utility(The device information depends on a device in the U2EC5).1.Make sure the U2EC5 is connected and powered on.2.Insert the support software CD-ROM into the CD-ROM drive.3.Open [My Computer] and double click the CD-ROM drive icon. Double click the FRFMTW9X.EXEfile at the [Formatter] folder in the [Rhd-U2] folder.4.[Select the Drive] dialog will appear. Select the drive and click [Select].(NOTE)1.The drive list window shows all the devices connected to SCSI, IDE besides USB interface on yourPC.2.You can format a storage device such as a HDD, Zip, MO with this utility. But, you can’t format aCD-R, CD-RW, DVD-RAM.3.This utility runs only on Windows 98SE, Windows Me.4.If you use Windows 2000, you have to use [Disk Management] in Windows 2000. If you format anover 32GBytes HDD, you have to select [NTFS] file system. If you select [FAT32], you will fail to format the HDD.For more information, refer to Windows 2000 Help file.5.[Format Utility] dialog will appear. Select [Initialize/Format media] from the [Edit] menu.6.[Initialize/Format Media] dialog will appear. Select format type. Then, click [OK].(NOTE)You can’t do low level formatto the U2EC5. Never check this[Low level format] option.7.If you selected IBM-PC/AT FDISK Format, the message box saying [You should create partition next] will appear. Click [OK]. Then, you will see the screen shown in the step 5. Select [CreatePartition] from the [Edit] menu. [Create Partition] dialog will appear as shown to the right.Select File System from the list box and set Partition size, using the slider bar.If you format the drive, check the [Format Drive] option.Then, click [OK] to create partition. If you selected Super FD format, select File System from the list box and click [OK].8.The confirmation message box will appear. Click [OK].9.The dialog shown in the step 5 will appear. Select [Quit] from the [Edit] menu. The message box will appear. Click [OK].Then, remove the U2EC5 and reconnect it for your information to take effect. (See Chapter 3 for how to remove the U2EC5).5. Registration and Tech-support5-1. How to RegisterWe highly recommend to register yourself as our customerthrough our on-line registration.(1)On the Internet, access our site. (/english/)(2)Follow window menu guide to register.(3)Fill out and submit the registration form.5-2. Software Update and Support-Software Update-The latest driver and application software are subject to change for improvement or bug fix. You can download the latest version from our web site.(/english/)-Technical Support-You can reach our Tech support staff at the following:RATOC Systems International,Inc. Tech Support(Open : Mon - Fri 9:30AM - 5:00PM PST)Address : 1933 O’Toole Avenue Suite A109, SanJose, CA 95131, U.S.A.Phone : (408)955-9400Fax : (408)955-9402E-mail:************************.jpWeb : /english/AppendixCopyright©2001 RATOC Systems,Inc. All rights reserved. No part of this publication may be reproduced,stored in a retrieval system, or transmitted in any form or by any means(electronic, mechanical, photo-copying, recording or otherwise) without the prior written consent of RATOC Systems,Inc.Trademarks-Windows is a registered trademark of Microsoft Corporation.-Other brand and product names may be registered trademarks or trademarks of their respectiveholders.ChangesThe information in this User’s Manual is furnished for information only and is subject to changewithout notice.RATOC Systems,Inc. reserves the right to make changes in the product design orproduct improvements without reservations and without notification to its users. RATOCSystems,Inc. assumes no responsibility or liability for any errors or inaccuracies that may appear in this document.FCC StatementThis equipment has been tested and found to comply with the limits for a Class B digital device, pursuantto Part 15 of the FCC Rules. These limits are designed to provide reasonable protection against harmfulinterference in a residential installation. This equipment generates, uses and can radiate radio frequencyenergy and, if not installed and used in accordance with the instructions, may cause harmful interferenceto radio communications. However, there is no guarantee that interference will not occur in a particularinstallation. If this equipment does cause harmful interference to radio or television reception, which canbe determined by turning the equipment off and on, the user is encouraged to try to correct theinterference by one or more of the following measures:(1) Reorient or relocate the receiving antenna.(2) Increase the separation between the equipment and receiver.(3) Connect the equipment into an outlet on a circuit different from that to which the receiver isconnected.(4) Consult the dealer or an experienced radio/TV technician for help.Changes or modifications not expressly approved by the party responsible for compliance may result inthis unit not complying with FCC Rules Part 15.。
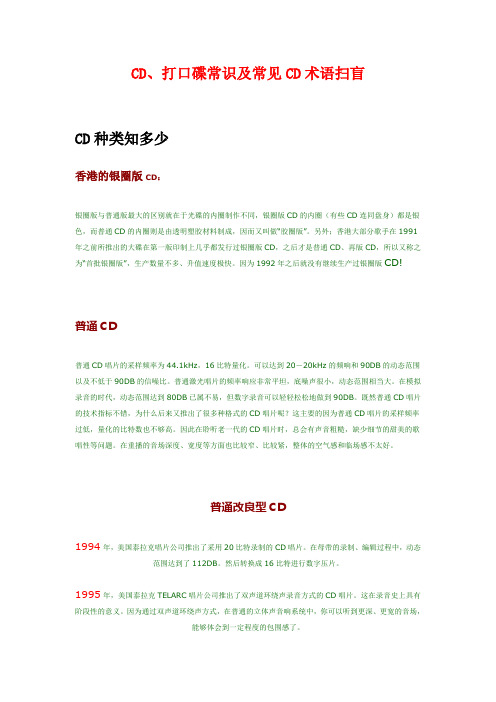
cd使用说明书
面板及操作说明
一、 开/关机
按下面板(1)POWER 键打开主机电源,屏幕 窗口显示转换,整机由待机状态进入工作状态。
工 作 状 态 下 轻 按 (1)POWER 关 机 , 整 机 由 工 作状态进入待机状态.
二、 音量调整
面板上(9)VOL 钮,顺时针旋动音量增大,逆时 针旋动音量减小。
三、 时钟显示及调整
z 注意防止灰尘异物(液体及金属物质)进 入机内。
z 请不要随意改造机器,若非法改制很可能 导致意外事故。
z 任何影响驾驶动作的操作,请先把车辆停 在安全位置后再执行。
—3—
供电及功率
额定电压 12V供 电 , 电 压 范 围 DC10.8~15.6V机 型
(DYS-1500)
24V供 电 , 电 压 范 围 DC20~30V机 型
—5—
注:如以上方法仍不能排除 故障,请到附近的供应商寻求协 助。请勿自行拆修。
z 保险被融化更换保险时,必须确保所用的 保险同原保险的电流值相同。若保险更换 后又被融化了请检查接线有无错误,如接 线无误则可能机器内部有故障,在这种情 况下请联系附近的供应商。
z 更换保险时请先关闭点火锁电源。
z 请勿使用劣制磁带
z 音响工作环境请勿长时间在极限参数上。 (例如:极限电压,极限温度)否则将缩 短音响使用寿命。
本机第一次接通电源或打开汽车钥匙(ACC 点火 锁 电 源 接 通 )时 屏 幕 窗 口 将 显 示 时 钟 状 态 , 整 机 进 入 待机状态。
—2—
操作说明及注意事项
四、收音机使用
波 段 转 换 : 在 收 音 模 式 下 按 下 面 板 (2)BND 键,收音锁定在 AM 中波调幅波段。弹开(2)BND 键后,收音锁定在 FM 调频波段。
ALPINE CDA-105E MP3 WMA AAC CD 接收机 说明书

1-CS
01CS03CDA105ETOC.fm
ALPINE CDA-105E 68-09359Z82-A (CS)
ALPINE ITALIA S.p.A. Viale C. Colombo 8, 20090 Trezzano Sul Naviglio (MI), Italy Phone 02-484781 ALPINE ELECTRONICS DE ESPAÑA, S.A. Portal de Gamarra 36, Pabellón, 32 01013 Vitoria (Alava)-APDO 133, Spain Phone 945-283588 ALPINE ELECTRONICS (BENELUX) GmbH Leuvensesteenweg 510-B6, 1930 Zaventem, Belgium Phone 02-725-13 15
准备工作
附件列表 .......................................................... 6 电源开启和关闭 .............................................. 6 拆卸和安装前面板 .......................................... 6 初始化系统启动 .............................................. 6 调节音量 .......................................................... 7 快速降低音量 .................................................. 7 设定时间 .......................................................... 7
CD-10 – CD-20 – CD-30 操作手册说明书
OPERATING MANUAL CD-10 – CD-20 – CD-30* non contractual picturesDear Customer,Thank you for purchasing one of the 3 Micromega CD players: CD-10, CD-20, CD-30. These players are mainly different by their audio characteristics. This manual is then common for the 3 models.This unit provides ease of use and sonics of the highest quality. Please pay close attention to this instruction manual, and read it fully before attempting to operate. It is designed to ensure you maximise your pleasure of CD player and familiarise you with its many unique functions .CHECKINGCheck that the carton has no damage. Should you have any doubt about its condition,The standby LED lightens up indicating that the unit is in standby mode.Press once the CD key of the remote control or the STANDBY key of the unit.If there is a disc, reading starts and its content is displayed. Otherwise it indicates:DISPLAY OFFYou can choose to minimize the display by pressing the key Display ▼ of the remote or by a long pressure on the DISC key of the unit.To come back to normal mode, press again on the MODE key. The display shows:In stop mode, after reading the content of the disc, the unit will display the name of the artist and the title of the albumBecause the display has 10 characters only, if the content is larger than this number, the display will scroll the text.DIGITAL OUPUTYou can activate the Digital output by executing a long pressure on the MODE key at any moment. This is necessary if you wish to use a separate Digital to Analog converter or if you wish to make a Digital recording. When activated, the display indicates:An optional DB9 female connector could be installed on the rear panel of CD player allows controlling it via RS232 interface. It accepts the following format:Baud Rate : 19200 Bauds Data bits : 8 Parity bit : None Stop bits : 1 Flow control : NoneYou will find complete instructions concerning this interface in the separate RS232 CD manual.AUDIS sarl. 13-15, rue du 8 mai 1945, ZA de la Haie Griselle, 94470 Boissy Saint Léger FRANCE TEL: +33 (0)1 4382 8860 - FAX: +33 (0)1 4382 6129 - INTERNET: TECHNICAL CHARACTERISTICS CD-XXDiscs supported ……………………………………………………………………………………..…… CD, CD-R, CD-RWAudio characteristicsBandwidth ( - 0.5dB )…………………………………………………………………………………….………… DC – 20Khz Linearity at –90dB………………………………………………………………………………………….……………. < 0.5dB Signal/Noise + THD…………………………………………………………………………………………….. < -96dB à1kHz Crosstalk………………………………………………………………………………..…………………….… >100dB at 1kHz D/A conversion type………………………………………………………………………………………………..………….. ∑∆ Oversampling (CD-10, CD-20)…………………………………………………………………………………..………… none Oversampling (CD-30)…………………………………………………………………………………….…………. 132.3 kHz Output impedance ……………………………………………………………………………………..………………….. 600 Ω Output level ………………………………………………………………………………………………………… 2Vrms / 0dBPowerPower consumption (Max) CD-10………………………………………………………………………………………... 20 W Power consumption (Max) CD-20, CD-30……………………………………………………………………………….. 40 WDimensions : ( L x P x H mm)………………………………………………………………………………... 430 x 250 x 70Weight CD-10……………………………………………………………………………………………….…….……….. 4.6 kg CD-20, CD-30…………………………………………………………………………………………….…….…. 5.6 kgWARRANTYThis warranty will start from the date of purchase of the Micromega product.Statutory warranty regulations apply in the country where the Micromega product was purchased. In case of complaints please contact the dealer who supplied your Micromega product.WARNING: Warranty will be nulled if the unit is not shipped back in its original packing or if the serial number has been modified or erased.Warranty Certificate Dealer's StampDate of PurchaseSerial Number。
王菲专辑购买手册
王菲专辑购买手册Enchiridion for Collecting Faye Wong’s CDs(19张大碟,5张EP,2张single,3场live)By: Wishing未经允许,请勿翻印寻找出版社出版2007年1月第一版No.1王靖雯(1989年11月)(粤语)内页欣赏:部分封面不同版本:No.2 Everything (1990年6月)(粤语)内页欣赏:部分封面不同版本:No.3You’re the Only One(1990年12月)(粤语)内页欣赏:部分封面不同版本:No.4 Coming Home(1992年8月)(粤语/英语)内页欣赏:部分封面不同版本:No.5执迷不悔(1993年2月)(粤语/国语)内页欣赏:部分封面不同版本:No.6 十万个为什么 (1993年9月)(粤语/国语/英语)内页欣赏:部分封面不同版本No.7 迷 (1994年4月)(国语)内页欣赏:部分封面不同版本:No.8 胡思乱想 (1994年6月)(粤语)内页欣赏(为从头认识版,首版难以照出或扫描出):部分封面不同版本:No.9 天空(1994年11月)(国语)内页欣赏:部分封面不同版本:No.10 讨好自己(1994年12月)(粤语)内页欣赏:部分封面不同版本:No .11 菲靡靡之音 (1995年7月)(国语)内页欣赏:部分封面不同版本:No.12 Di-Dar(1995年12月)(粤语/国语)内页欣赏:部分封面不同版本:No.13 浮躁 (1996年6月)(国语)内页欣赏:部分封面不同版本:No. 14 王菲 (1997年9月)(国语)内页欣赏:部分封面不同版本:No.15 唱游(1998年10月)(国语/粤语)内页欣赏:部分封面不同版本:No. 16 只爱陌生人 (1999年9月)(国语/内页欣赏:部分封面不同版本:No.17 寓言(2000年10月)(国语/粤语)内页欣赏:部分封面不同版本:No. 18 王菲 (01年10月) (国语/粤语)内页欣赏:部分封面不同版本:No. 19 将爱 (2003年11月) (国语/粤语)内页欣赏:部分封面不同版本:No. 20如风(1993年12月)(粤语/国语)内页欣赏:部分封面不同版本:No. 21 FAYE DISC (1994年4月)(粤语/国语)内页欣赏:No. 22一人分饰两角(1995年9月)(粤语/国语)内页欣赏:部分封面不同版本:No. 23 玩具 (1997年2月)(粤语)内页欣赏:部分封面不同版本:No.24自便(1997年4月)(粤语/国语)内页欣赏:部分封面不同版本:No. 25EYES ON ME (1999年2月)(英语/国语)内页欣赏:部分封面不同版本No. 26 SEPARATE WAYS ( 2001年7月) (日语/英语)内页欣赏:部分封面不同版本:No. 27 王菲最精彩的演唱会(1995年10月)(粤语/国语/英语内页欣赏:部分封面不同版本:No. 28 唱游大世界王菲香港演唱会98-99 (1999年12月)(粤语/国语/英语)内页欣赏:部分封面不同版本:No. 29 菲比寻常LIVE (2004年11月)(国语/粤语/英语)内页欣赏:不同封面版本:王菲杂歌集锦1,精选集《Shirley once more》-不可多得2,《Faye Best》1994――1、容易受伤的女人(国语版)2、忘掉你像忘掉我3,《菲卖品》――不得了4,《Faye Best》2002 ――心惊胆战5,《Loving Kindness & Wisdom》――弥勒佛咒6,软硬天师《广播道软硬杀人事件》――请勿客气7,张学友《饿狼传说》――非常夏日8,张学友《偷心》――爱,一次给不完9,Cocteau Twins《Milk & Kisses》(港台版)――SerpentSkirt10,那英《征服》――相约1998,梦醒了和声11,郭富城《着迷》――星空无限(国语版)12,梅艳芳《With》――花生骚13,《谁可改变》(谭咏麟十五周年纪念集)――我爱雀斑14,《Queen's Fellows》(松任谷由実纪念集)――Valentine's Radio15,《心经》(合辑)――心经(With 张智霖),群星合唱16,《天马行空》(合辑)――天马行空之开天辟地(with 黎明)17,《二人的世界》《两情相乐福茂男女情歌经典》(合辑)――将爱实现(With 邰正霄)18,《新艺宝精选》-爱侣19,《新艺宝5周年精选》——keep it together(With 软硬天师)20,《新艺宝5周年精选》——唱不完的歌(合唱)21,《英雄》电影原声带――英雄22,《笑傲江湖》原声带――笑傲江湖(With 刘欢)23,内地《我愿意》——请勿客气24,《福茂群星精选》——将爱实现,合唱版本25,《鼓舞飞扬》——将心照亮(合唱)26,黄翊《KISS》——迟到的爱27,《天下无双》电影原声——1、喜相逢(With梁朝伟)2、醉一场3、天下无双天啦地啦28,《天作之合》众星合集——星空无限(粤语版)29,《金曲廿载情》——1,最好的声音(合唱)2,香江组曲(合唱)3,回归颂(合唱)30,《回归颂》众星合集香港电台宣传碟——回归颂(说明:以上只是提供了一些杂歌的出处,并不是只能在以上的专辑中买到这些杂歌。
革命——松下J905CD随身听
革命——松下J905 CD随身听评测与试用76身听一般都是把按键安置在主机的侧面或者是背面.JE05也没有办法免l于其机身的特殊性按键和开仓键平行僦在了一起.非常有规律打开.的布局和前代产品基本保持一致看样子挫下也仅仅是对内部芯片进行}有对机器内部布局做大的调整禽}听领域每每在新机型发布的时候附件部分所受到的关注程度往往不:身这次跟随J905出征的全是经过改良的全新面孔.经过演化的ACTIVE YSTEM虽然体积上上代产品大幅度缩减但是其忧良的做工可以调}计吼厦相对优秀的声音还是得到了笔者的认可相信杜下也对新研发的系统寄予了很高的期望固为它是附件中少数的日奉制造.变化采自于鳢控器.尽管它的外型没有革命性的变革但是细节处体贴!却值得让人惊喜.由于引^了五方向操纵杆这个线柱的操作更为简单上手:液晶屏幕的凹陷设计可以太大减少其与外界摩擦的几率背光依$谢橙TJ905自市盘j815柜供评测与试用目是绿色但是由于调整了液晶屏的亮度"爱对比度显示的效果和以前的产品相比有了质的飞跃.对于整个缱拉边缘的亮化以及棱角化处理也能看出设计师对于细节完美的追求整个线控无论是外观还是性能都有了长足的进步除了线控外J9o5还使用了全新的耳塞这款耳塞和CT81O/CT710附带的耳塞相同同样采用了全新的振膜材料加强了低音和高音的表现能力但根据笔者个人的试用来看最大的改观进是要数佩棘的舒适性相对与索尼以及以往品牌的配机耳塞来说新款耳机的佩戴舒适性无疑是相当出色的随机配置的条形充电电池由镍镉改为了镍氢是个不小的进步不过同索尼产品一样作为中端机型J905采用的是eoomAh的电池依靠卦按电池盒后可以选到理论值最大130小时的连续播敲时间比前一代J9O0的53小时进步了不少功能的革命若是单单外形上的标新立异松下的9系列也不会取得傲人的销售或馈松下公司的杀手钢就是其最近几年R探索出鹄两种收听方式——即平时使用耳机收听以及使用外接音箱收听试想即可以享受一个人特立独行的音乐空间R可以和大家一起分享自己的最爱的确是非常诱人的何况Jg05附带的音箱不仅在体积上做到了可以随身携带更在技术上实现了突破即使在使用外接电源的情况下也可使用这无疑扩展了它的使用范围.如果说两种收听方式和一些小的改进是松下公司的小计谋的话那今年新推出的13SOUND系统便是彻头彻尾的革命了和cT81O/CT710一样Jg05也措载了松下最新开发的DSOUND 系统对提高音质大有裤益;而在抗震性能方面J905也有长足的进步它的内置缓存窖量较之以往的机型窨量增加了4倍选到了64Mbit使得在高音质表现下也很难产生跳音的现象音质的革命林林总总的说了这么多相信大家晶关心的还是它的音质吧由于使用了新的数字放大技术Jg05的声音解析度异常的高高音的延伸同样非常好丝毫没有声音顶不上去的感觉声底也极其干净使用原配耳塞试昕王菲的最新专辑将爱》高音不光是细我想要用细腻来形窖了感觉水水的嫩嫩的层次分明在播放女声的时候感觉声音异常美丽通透爽快细致也许这种轻柔但是又不失稳健的声音正是松下的当家绝活另外J905的低频表现也是值得一提的使用原配耳机将音效开到S-Y,BS+JgOE的低频真是有质有置不{x量感十足而且下潜力度很深虽然声音距离夏普MD那种拳拳到肉仍然有些差距但已经是相当不错了说到J9O5的音质就不得不提到那个随机配置的便携式小音箱笔者个人对这种小音箱一直没有太大的趣可能是挫下MD随身听MJ50附带音箱差强人意的表现让我对这种小玩艺有了根济蒂固的成见可是当这个名为ACTIVESPEAKERSYS TEM的袖珍音箱发出那,厶洪亮的声音的时候笔者还是被着实吓了一跳这个新款的小音箱在音量上大大超出了笔者的想象不仅如此在实际使用当中发现小音箱的声音除了高频的表现以外都非常好尽管在将声音开到最大以后还是难免出现破音但在个安静的二十平方米左右的房子内这个小音箱的音量应该完全能满足听音要求尚未结束的革命尽管J9051为新一年的主打机型应用到了不少具有革命性的技术不过在实际使用中笔者还是发现了不少设计上的小BUG首先在使用音箱的情况下机器本身的音效调节只剩一FLIVEc现场)模式可用并且J905无法同时使用外接音箱和耳机一起使用的时候耳机没有声音而且在同时使用的时候无论你把声音美到多少在拆卸音箱的时候系统都会把音量加到最大这个时候建议一定要取下耳机『另外机器仅支持MP3种音乐格式扩展性稍微弱了点松下9系列的CD机最致命的弱点——没有光纤输出也在JgO5上凸显建议经常使用CD——MD录碟的朋友在购买的时候要多多考虑了写在最后极具想象力的外形颠覆了^们对于CD机的观念两种收听方式让CD随身听的适用范围大大地扩展了全新的技术带来了新的高音质再加上榷下贯低廉的价格和优秀的产品质量这就是J905所带来的革命从J905身上也可以看出作为目前在CD随身听领域惟一能和翥尼平分天下的日系厂商松下在贯彻其自来水哲学的同时也在坚定不移地实现其数码领域霸主的野心.T8"。
CD唱盘的生产历史
CD唱片生产历史80年代初期,作为SONY和Philips的重要研究成果,CD走进了我们的生活,也走进了音乐世界。
短短30年间,出产了数以万计的艺术珍品。
而CD30年的发展历程,则是CD爱好者和收藏家乐此不疲研究的主题。
本文意在打开爱乐朋友们的音乐收藏之门,对于入门者或多或少有所帮助;且抛砖引玉,寄希望高人出面谈经论道。
在此声明,本文大部分内容来源于网络,谢谢各位无私的网友。
宝丽金集团(DG,Philips,Decca)最早的CD压片厂在日本和当时的西德,而宝丽金这3大品牌早期的CD全部都是西德压片,这也是最受CD爱好者们追捧的版本,一如LP迷们最爱的英国头版。
其实所谓银圈是因为早期CD生产工艺的缺陷使的CD的内圈和外圈必须用不同的材料,然后再拈合而成,后来工艺改进后就不用这种工艺了,说白了银圈只是代表了一种不成熟的CD生产工艺。
尽管如此,为什么银圈的老版CD炒的那么热呢?我想,原因有3:1.物以稀为贵,无论收藏什么都是这个理,再加适当的炒作。
2.音质好,这是大部分人都会选择的原因。
好在当时德国人做事认真,压片设备先进,好在用了纯度很高的银,更好在转录的时候没做过多的修饰(这是现在的CD 被指责最后的地方)3.收藏的满足感,或说收藏欲的实现,品位的独特那么,如何分辨CD的版本呢?无外乎,封面,封底,CD印刷面,CD内圈先看一下比较简单的标识,CD的底封会标注的信息,在CD编号的后面DG:正价唱片: GH、AH, A即ARCHIV的缩写,ARCHIV是DG专门用仿古乐器演奏作曲家作品的一家子公司。
中价唱片: GM、AM,另外它的以下系列:GOR 大禾花(THE ORIGINALS)系列,GDO 档案(DOKUMENTE)系列,G|GA 画廊(GALLERIA)系列也都是DG中价位唱片。
廉价唱片: GB、AB、GRDECCA:正价唱片: DH(DECCA)、LH(LONDON)、OH(L'OISEAU-LYRE)(DECCA专门用仿古乐器演奏作曲家作品的一家公司)、ZA(ARGO)中价唱片: DM(DECCA)、LM(LONDON)、OM(L'OISEAU-LYRE)、DA(DECCA BALLET GALA)、DWO(DECCA "WORLD OF" SERIES),DCE(DECCA CLASSIC SOUND SERIES)、LPF(LONDON PHASE FORU SERIES)廉价唱片: LRX(RELAXATION SERIES)、DEC(ECLIPSE SERIES)、LC(BOX SETS)特价版:DX:Decca,DF:2 for the price of 1 — Double Decca 小双张系列,LF:2 for the price of 1 — London,OF:2 for the price of 1 — L'Oiesau-Lyre 琴鸟,DL:2 for the price of 1 — Decca Legends 传奇录音系列,DSR:low top price The Singers 歌者系列。
DCD-50 使用说明书
DCD-50COMPACT DISC PLAYER操作说明书可在单页纸张上打印多个PDF页面。
附件4功能5高音效5高性能5部件名称和功能6前面板6显示屏8后面板9遥控器10连接连接方法13安装本机14水平安装14垂直安装15使用遥控器前17遥控器的操作范围18连接数字设备19连接模拟设备20连接电源线21播放基本操作23开启电源23切换显示屏亮度23播放CD24播放CD24以特定顺序播放曲目(编程播放)26播放DATA CD(MP3和WMA文件)27播放文件28设置其他设置30 Auto Standby(自动待机)30自动播放31提示提示33故障诊断34保修和修理38附录可播放的媒体39光碟39文件39 MP3/WMA文件的播放顺序40关于光碟和文件41使用媒体的注意事项42装入光碟42装入光碟的注意事项42关于媒体的使用43清洁光碟43术语解释44商标信息45规格46索引49感谢您购买本Denon产品。
为了确保正确操作,请在使用本品前认真阅读本操作说明书。
阅读后,请务必妥善保存本说明书以供将来参考。
附件请检查确认本品随附以下部件。
功能高音效0新型CD播放机具有Denon的品牌质量,内嵌高精度32位D/A 转换器D/A转换器是音质的关键要素,此款产品内嵌本公司的32bit/ 192kHz的D/A转换器,凭借高精度为您带来最佳音质。
0本机可与本公司高级的PMA-50 D类集成放大器组合使用,即使极弱的信号也可达到高度再现本公司高级的PMA-50 D类集成放大器采用Advanced AL32 Processing,Denon独创的模拟波形再现技术。
本机使用此项技术可获得最卓越的音质,其灵敏度和震撼力可令人忽略音箱箱体尺寸。
高性能0此新型设计是本公司PMA-50集成放大器的最佳搭配0支持垂直安装本机可垂直或水平安装。
显示屏将自动变化显示方向以匹配本机安装的方向。
无论本机是处于垂直安装还是水平安装,CD插槽的运转机构均可保证其平稳打开和关闭。