思沃压膜机说明书
压膜机的操作规程

压膜机操作规程
压膜机操作规程
1 目的
正确指导员工操作,提高工作效率,提高产品品质,规范生产管理
2 范围
生产部贴膜工序全体员工
3职责
生产部贴膜工序人员负责设备操作
4相关文件
4.1SY-QC-03《贴膜工序工艺规程》
5手动压膜机操作规程
5.1打开电源;
5.2打开气压;
5.3安装干膜并校正上、下膜的对准度;
5.4开启加热开关升温至设定温度;
5.5开启废气排放;
5.6开启压下气缸;
5.7开启启动开关,调整输送速度;
5.8将待压膜基材平整放置于输送滚轮进行压膜;
5.9压膜完毕依次关闭输送,加热开关、压下气缸,废气排放;
5.10关闭气压,断开电源。
6相关记录表格
6.1设备日常维护记录
设备日常维护记录
部门:
工序:序号:。
思沃自动贴膜机资料

拉辊的直径
6.准备好麦拉辊后(步骤 5),将其放置于干膜架单元的麦拉辊支架上
7.
拉出干膜,并在盖膜分离辊使盖膜和感光膜分离
8. 将盖膜固定到麦拉辊并将麦拉辊从支撑架 转移到滑槽。盖膜分离出来后,再将盖膜旋 转几周。
检查项目 割刀槽 割刀 压着条
压着板 膜引导块
每月检查
检查项目 割刀 机器内部
季度检查
检查项目 压膜辊 辊加热器 集电环,加热电刷 压着条加热器 压着板
引导块加热器*可选项 割刀 割刀槽 传感器
半年检查(一年两次)
检查项目
检查方法 清洁 清洁 清洁,检查表面状况,更 换 清洁,检查表面状况 清洁
参考部分 清洁干膜运行接触面” 清洁/更换割刀 “清洁压着条”
12.接通电源 按操作面板上的电源“开”开关启动程序,触摸面板上将显示主屏幕。完成“通 电后的检查”
1. 参数设置 设置参数屏幕上的参数
2. 系统数据设置 设置系统操作屏幕上的系统数据参数
3. 黄色的“手动”按钮 按主屏幕上的黄色“手动”按钮进入手动操作模式,现在可以手动操作屏幕来 操作机器
4. 白色的“手动”按钮 按白色“手动”按钮。显示手动屏幕
自动操作
设置好系统数据和参数后,该机器就可进行自动压膜操作。本节介绍启动和停止自动操作的程 序,并在发生报警时采取的相应政策。
自动操作的启动程序
启动自动操作之前,确保已完成日常检测和准备工作。 要启动自动操作,请按如下指定步骤执行
13.确保机器已正确连接电源、压缩空气和排风管,所以部件工作正常
12
8. 干膜和 DF 单元的定位。 将装有干膜的 DF 单元安装到主单元。沿着膜运行线移动压膜,并使用割刀割 去多余部分。DF 单元的在那晃取决于所使用单元的规格
斯威士尔莫莫兹 Trim-N-Mow 裁剪机说明书
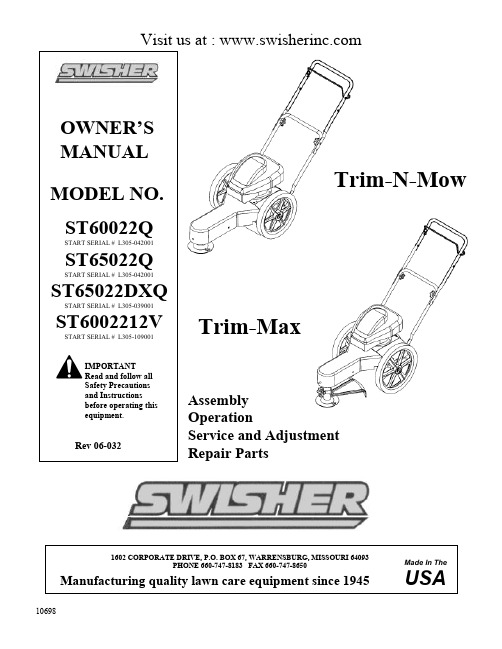
Assembly OperationService and Adjustment Repair PartsRead and follow all Safety Precautions IMPORTANTTrim-N-MowTrim-MaxVisit us at : LIMITED WARRANTYThe manufacturer’s warranty to the original consumer purchaser is: This product is free from defects in materials and workmanship for a period of two (2) years from the date of purchase by the original consumer purchaser. We will repair or replace, at our discretion, parts found to be defective due to materials or workmanship. This warranty is subject to the following limitations and exclusions:1) Engine Warranty All engines utilized on our products have a separate warranty extendedto them by the individual engine manufacturer. Any engine servicedifficulty is the responsibility of the engine manufacturer and in no wayis Swisher Mower Co., Inc. or its agents responsible for the enginewarranty. The Briggs & Stratton Engine Service Hot-Line is 1-800-233-3723. The Tecumseh Engine Service Hot-Line is 1-800-558-5402.2) Commercial Use This product is not intended for commercial use and carries nocommercial warranty.3) Limitation This warranty applies only to products which have been properlyassembled, adjusted, and operated in accordance with the instructionscontained within this manual. This warranty does not apply to anyproduct of Swisher Mower Co., Inc., that has been subject to alteration,misuse, abuse, improper assembly or installation, shipping damage, or tonormal wear of the product.4) Exclusions Excluded from this warranty are normal wear, normal adjustments, andnormal maintenance.In the event you have a claim under this warranty, you must return the product to an authorized service dealer. All transportation charges, damage, or loss incurred during transportation of parts submitted for replacement or repair under this warranty shall be borne by the purchaser. Should you have any questions concerning this warranty, please contact us toll-free at 1-800-222-8183. The model number, serial number, date of purchase, and the name of the authorized Swisher dealer from whom you purchased the mower will be needed before any warranty claim can be processed.THIS WARRANTY DOES NOT APPLY TO ANY INCIDENTAL OR CONSEQUENTIAL DAMAGES AND ANY IMPLIED WARRANTIES ARE LIMITED TO THE SAME TIME PERIODS STATED HEREIN FOR ALL EXPRESSED WARRANTIES. Some states do not allow the limitation of consequential damages or limitations on how long an implied warranty may last, so the above limitations or exclusions may not apply to you. This warranty gives you specific legal rights and you may have other rights, which vary from state-to-state. This is a limited warranty as defined by the Magnuson-Moss Act of 1975.• Read, understand and follow all instructions in the manual and on the trimmer before starting• Read this manual carefully. Become familiar with the controls and how to operate the unit properly.• Only allow responsible adults, who are familiar with the instructions, to operate the unit.• Clear the area of objects such as rocks, toys, etc. that could be thrown by the unit.• Be sure the area is clear of other people before trimming. Stop the unit if anyone enters the area.• Be aware of the direction of the trimmer discharge and do not direct it at anyone. Do not direct trimmer discharge at breakable objects, such as windows, etc.• Do not operate trimmer without all guards and shields in place. • Never leave the machine running unattended. • Trim only in daylight or good artificial light.• Do not operate the trimmer while under the influence of alcohol or drugs. • Watch for traffic when operating near roadways.• Use the trimmer as the manufacturer intended and as described in the manual.• Do not operate trimmer if it has been dropped or damaged in any manner. Always have the damage repaired before operating.• Always wear safety glasses or eye shields when using the trimmer.• Dress properly. Do not operate the trimmer when barefoot or wearing open sandals. Wear only solid shoes for good traction when trimming. Wear long sleeved shirts or jackets, also long pants. Do not trim in shorts.• Keep your eyes and mind on your trimmer and the area being trimmed. • Do not let other interests distract you.• Do not put hands and feet near or under rotating parts.• Before cleaning, inspecting or repairing your trimmer, stop the engine and disconnect the spark plug wire and keep it away from the spark plug to prevent accidental starting.• Do not operate the trimmer if it vibrates abnormally. Excessive vibration is a sign of damage. Stop the engine and safely check for damage and repair as required.• Do not operate the trimmer in wet grass, where good footing may not be possible. Walk; never run• Stop the trimmer when crossing gravel drives, etc.Safety InstructionsSlope Operation• DO: Trim across the face of a slope and not up and down.• DO: Remove objects such as rocks, tree limbs, etc.• DO: W atch for holes, ruts or bumps. Tall grass can hide obstacles.• DO NOT: Mow near drop-offs, ditches or embankments. The operator could loose footing or balance.• DO NOT: Trim excessively steep slopes• DO NOT: Trim on wet grass. Reduced footing could cause slipping.Children• Keep children out of the area and under the watchful care of another responsible adult.• Be alert and turn the machine off if children enter the area.• Before and when backing, look behind and down for sm all children.• Never allow children to operate this m achine.• Use extra care when approaching blind corners, shrubs, trees or other objects that m ay obstruct vision.Service• Use extra care handling gasoline and other fuels. They are flammable and vapors are explosive.• Use only an approved container.• Never rem ove gas cap or add fuel with the engine running.• Allow engine to cool before refueling. Do not sm oke• Never refuel the machine indoors.• Never store the machine or fuel container where there is an open flam e, such as a water heater.• Never run a machine inside a closed area.• Keep nuts and bolts tight and equipment in good condition.• Never tam per with safety devices.• Keep machine free of grass, leaves or other debris build up. Clean oil or fuel spillage. Allow machine to cool before storing.• Stop and inspect the equipm ent if you strike an object. Repair if necessary before restarting.• Never make repairs or adjustm ents with the engine running.Handle AdjustmentAssemblyContents of Box:•Trimmer •Parts bag containing:•Manual •Engine manual •Safety goggles •Bottle of engine oil • 4 sets of .155 trimmer line •Cable Clip Tools Required:•½”wrenchInstallation of handles:•Remove loose fasteners from lower handles.•Pivot handles up and align lower hole in handles with hole on trimmer frame. Installhardware removed in previous step. Snug, but do not tighten bolts.•Pivot upper handles to fit the lower handles. Tighten knobs.•Adjust handles for comfortable operation.•Tighten all bolts.Handles may be adjusted up and down and in and out for comfortable operation.Installation Of WheelsRefer to Page 12 for illustration.•Slide axle through the mounting plates.•Install Conical springs with the large diameter side against the Axle Plate. •Install Flat Washer against the conical spring. •Slip wheel on one side and install Cotter Pin.•Bend cotter pin over to prevent it from falling out. •Push the Axle completely over to the other side.•Install the second wheel and insert cotter pin and bend. Some compression of the conical springs is necessary .Preparing Unit For First Use•Fill engine crankcase with oil. A bottle has been provided with this unit. DO NOT OVERFILL.•Fill the engine fuel tank with gasoline. GASOLINE SHOULD BE ADDEDOUTSIDE IN A WELL-VENTILATED AREA.•Check to ensure string has been installed properly. A diagram is provided just above the wheel for proper installation.OperationImportant! To ensure proper operation, clean the engine and trimmer regularly. Remove any build up of chaff from the top of the engine.To stop the trimmer:•Release the control bail. Engine will stop immediatelyTo start the trimmer:•Remove any built up debris from engine.•Pull control bail against the handle and hold.•Push primer button on engine as directed.•Pull back sharply on recoil starter handle.•Begin trimming.Important! For safest operation, make sure debris is directed away from you and others. Important! On 12 Volt Start units. For optimum battery performance, you should run engine for at least 15 Minutes after start to keep battery charged.Trimming Hints•Do not lift the trimmer head when trimming. Let the head rest lightly touching the ground.•Keep an eye on the length of the trimmer line. As the line gets shorter they become less effective at cutting and will take longer to trim properly. Replace the line as necessary. (See installing cutter line).•Do not trim wet grass.•Use caution when trimming slopes.•Use the proper length on line. Using a line too long for the unit will cause stalling and unacceptable operation.Installing Trimmer LineTrim-Max OperationThe Trim-Max trimmer is designed to also be used as an edge trimmer and to offset left to right for easier close trimming.Edge trimming/ Bevel CuttingThe trimmer disk may be tilted from horizontal to vertical so that it may be used as an edge trimmer. The head may also be tilted slightly to trim closer. This may be handy for trimming foundations without damaging the siding.To Tilt:• Stop unit.• Make sure head is in the straight forward position. (see offset operation) • Loosen the trimmer tilt clamp lever. (Clockwise) • Tilt head to desired position.• Tighten trimmer tilt clamp lever. (Counter Clockwise)• Adjust Lower trimmer shield to keep debris from coming back at operator.Offset trimming.The trimmer head may be offset to the left or right to allow trimming under bushes, etc.To Offset:• Stop unit.• Raise offset lever.• Push or pull handles to achieve desired offset.• Release offset lever. Make sure head has locked into position.• Adjust lower trimmer shield to keep debris from coming back at operator.Important! Note direction of debris when offsetting head. Offsetting trimmer to the left is recommended.Trim-Max Tilt AdjustmentDirection Of DebrisTrim-Max Pivot AdjustmentStep 1Step 2Step 3Important! Use the proper length of line. Using a line too long for the unit will cause stalling and unacceptable operation.5+ HP use 18” StringPre Cut Line Purchase P3618 • Loosely fold cutter line in half.• (1) Place loop of line against outside of loop on the trimmer head.• (2) Bring ends around and through the loop and over the cutter line loop. • (3) Pull ends to tighten loop.Engine• Refer to the engine service manual provided with this unit. Belt• Occasionally check the belt for wear. A worn belt should be replaced. Belt Adjustment• The TRIM-N-MOW has an automatic belt tightener and needs no further adjustment• The TRIM-MAX has an automatic belt tightener that automatically adjusts when the head is tilted. Ifyou do not regularly tilt the head on your trimmer, it is recommended that you loosen the head twice a year. (See edge trimming) Belt Replacement• Remove front belt cover.• Push trimmer head toward back of unit, compressing tensioner spring. • Remove old belt.• Install new belt by first routing belt under the engine and around the engine pulley. • Push trimmer head toward back of unit, compressing tensioner spring. • Install belt over front pulley.• Release trimmer head. Ensure that belt is correctly installed in the groove of the engine and frontpulleys.Re install front belt Cover.M ake sure your trim m er is in safe w orking condition by keeping the follow ing guidelines in m ind every tim e you use your trim m er.• K eep trim m er in good operating condition and keep all guards and shields in place. D O N O Toperate this trim m er if any of the shields and guards are m issing.• C heck all fasteners for secure fit to keep equipm ent in safe w orking order. M ake adjustm entsas necessary.• T o reduce fire hazards, keep engine free of grass leaves or excessive grease.• D O N O T operate trim m er w ith a dam aged or m issing m uffler. D O N O T tam per w ith exhaustsystem ; this m ay cause a fire hazard.• D O N O T operate engine if air cleaner or the cover over the carburetor air intake is m issing.R em oval of these parts could create a fire hazard.• B efore cleaning, m aking adjustm ents or repairing the trim m er, ST O P engine, disconnectspark plug w ire and allow engine to cool.• H andle G asoline w ith care. D O N O T sm oke or use open flam e near gasoline. U se onlyapproved gasoline containers. N ever fuel or run trim m er in poorly ventilated areas, such as a garage or utility building.• A lw ays replace fuel tank cap. B e sure to clean up any spilled gasoline.• D o not change the engine governor settings or over-speed the engine; severe injury ordam age m ay result.• N ever store m ow er, w ith gasoline in the tank, inside a building w here fum es m ay reach anopen flam e or spark. A lw ays allow engine to cool before storingTrimmer MaintenanceSee Detail Page 1112311161514133510119876311292111122722202342425112628171918Trim-N-Mow17112348591061231251316181719192015910Trimmer HeadAssembly for Deluxeand 12V DeluxeTrimmer HeadAssembly for Standard13562Trim-Max Axle SetupService Part 2076 Parts Breakdown1542634DeluxeSee Detail Page 111171614151824252221225563025101191319202171223262534272829See Details Page 1212 Volt DeluxeFor Additional PartsSee Page 132314569872101 2102NotesVisit us at: Each trimmer has its own model number. Each engine has itsown model number. The model number for the trimmer will befound on the left hand side of the motor base. The modelnumber for the engine will be found on the top of the blowerfan housing.All trimmer parts listed herein may be ordered directly fromSwisher Mower & Machine Co. Inc. or your nearest Swisherdealer.All engine parts may be ordered from the nearest dealer of theengine supplied with your mower.WHEN ORDERING PARTS, PLEASE HAVE THEFOLLOWING INFORMATION AVAILABLE:* PRODUCT –TRIMMER* SERIAL NUMBER -_______________* MODEL NUMBER -_______________* ENGINE MODEL NUMBER -_______________TYPE -_______________* PART NUMBER WITH PAINT CODE* PART DESCRIPTIONTELEPHONE -1-800-222-8183FAX -1-660-747-8650SWISHER MOWER & MACHINE CO. INC.1602 CORPORATE DRIVEP.O. BOX 67WARRENSBURG, MO 64093。
压膜机工作说明
压膜机工作说明压膜机是一种用于对薄膜材料进行加工的设备,它可以将薄膜材料经过一系列的加工步骤,最终形成所需的产品。
在工业生产中,压膜机被广泛应用于包装、印刷、制造等领域。
本文将对压膜机的工作原理、操作步骤和注意事项进行详细说明。
一、工作原理压膜机的工作原理主要是通过一对加热辊和压膜辊对薄膜材料进行加热和压力处理,使其与其他材料结合,形成一定的产品结构。
在压膜机中,加热辊通常采用电加热或者热传导油加热的方式,通过加热辊对薄膜材料进行加热,使其软化并与其他材料粘合。
而压膜辊则通过一定的压力将薄膜材料与其他材料进行压合,形成所需的产品结构。
二、操作步骤1. 准备工作:首先需要对压膜机进行检查和准备工作,确保设备处于正常状态。
检查加热辊和压膜辊的温度和压力设定,确认其符合加工要求。
2. 调整参数:根据加工要求,调整压膜机的加热温度、压力和速度等参数,确保其符合产品加工的要求。
3. 放置材料:将待加工的薄膜材料和其他材料放置在压膜机的进料位置,调整位置和对齐,确保加工过程中材料不会出现偏移或者错位。
4. 开机运行:启动压膜机,将待加工的材料送入设备中,加热辊对薄膜材料进行加热,同时压膜辊对加热后的材料进行压合,形成所需的产品结构。
5. 监控加工过程:在加工过程中,需要不断监控加热温度、压力和速度等参数,确保加工过程的稳定和产品质量的一致性。
6. 收集成品:当加工完成后,将成品从压膜机的出料口取出,并进行检查和包装,确保产品质量符合要求。
三、注意事项1. 安全操作:在使用压膜机时,操作人员需要严格遵守设备操作规程,确保操作过程的安全和稳定。
2. 定期维护:定期对压膜机进行维护和保养,清洁加热辊和压膜辊的表面,检查设备的各项参数和部件,确保设备的正常运行。
3. 调整参数:在加工不同材料和产品时,需要根据实际情况调整加热温度、压力和速度等参数,确保产品加工的质量和效率。
4. 检查产品质量:在加工过程中,需要不断检查产品的质量,确保产品结构的一致性和表面的平整度,及时调整设备参数和操作步骤。
自动套膜机使用及问题详解说明书(本)

自动套膜机使用及问题详解说明书第一章:套膜机操作流程一、机台开启前的准备工作1.外袋及内膜封底切刀加热。
开机前可先将内膜封底和外袋切刀加热,以便减短加热浪费的时间。
外袋切刀温度一般为260℃,其最高温度不宜超过270℃。
内膜封刀温度在150℃左右,如图1.1.1。
具体温度要根据实际情况加以调整。
图1.1.1:温度调节界面2.给机台排水、添油保养。
开机前为保证机台运行的流畅以及延长机台的使用寿命,有必要给机台的运动部分进行加油保养润滑。
主要加油保养部位有:a、内膜封刀竖直方向运动副间应加入润滑油(一天一次,可定在转班时加油);b、各轴承和移位链条上以及各滑块运动副中添黄油(频率为半年一次);c、缝纫机加入机油润滑以及清理其内部的棉絮(频率以实际耗油决定);d、三联体中加入三联体专用油(一般为半月一次);e、排清机台内部储气罐的积水(频率为一星期一次)。
具体位置如下图1.1.2、1.1.3、1.1.4。
图1.1.2:封刀加油区图1.1.3:三联体加油区图1.1.4:储气罐排水3.机台表面的清理。
开机前要注意机台上的物件,如机台上的修理工具、抹布以及线团等。
防止其影响机台运行和造成机台损坏(尤其是内膜切刀上的平台,严禁摆放物品及修理工具如图1.1.5)。
除此之外还要清理机台上的灰尘及油渍。
图1.1.5:内膜切刀平台禁止摆放物品4.参数的输入。
清理完机台后可以根据生产要求输入设备生产的参数,主要有:编织袋长度、内膜长度、外袋宽度以及外袋间距等。
输入界面如图1.1.6。
图1.1.6:触摸屏参数输入界面二、开机调试操作流程1.筒布卷的上料在输入好生产规模参数后将圆织布卷安装上机台。
其具体操作步骤为:①将筒布卷送料机架的纠偏调节到居中如图1.2.1;图1.2.1纠偏器按键位置图②拉下气压阀如图1.2.2,让筒布放料轴自动下放。
取下送料轴放置一旁,将筒布卷推至筒布卷送料机架标记好的位置(筒布卷右平面与机架上贴有的斑马胶对齐如图1.2.3)。
膜压机使用说明书

G23V—/1—25隔膜压缩机使用说明书丹东市江城压缩机厂目录一、技术规格二、结构概述及使用范围三、主要组件的结构说明四、压缩机的启封五、运转前的准备工作六、压缩机的日常操作七、压缩机的维护与修理八、排除故障的一般次序及注意事项九、压缩机的油封1一、主要技术规格(一)压缩机1、型号:M2V—20/1—252、型式:二级V型3、排气量:20m3/h4、进气压力:0.0~0.10MPa5、排气压力:一级0.5~0.7MPa二级 2.45MPa6、排气温度:≤100℃(进气温度≤35℃时)7、转速400r/min8、油缸直径:一级98mm二级52 mm9、活塞行程:95 mm10、排油压力一级0.78~0.88MPa二级 2.75~2.94MPa11、膜片直径一级498 mm二级342 mm12、轴功率: 3.7KW13、润滑油牌号:20号液压油14、曲轴箱油温:≤60℃15、冷却水消耗量:约400L/h(二)电动机(按合同要求提供)1、型号:YB132S—42、型式:防爆式d II CT43、额定功率: 5.5KW4、满载转速:1430r/min5、额定电压:220/380V6、额定频率:50HZ(三)机组1、外廓尺寸(长×宽×高)1450×845×1120mm2、机组净重:约900kg二、结构概述及使用范围1、结构概述:(参看剖面图)M2V—20/1-25型隔膜压缩机(以下简称压缩机)主要由曲轴箱、曲轴、主副连杆及按V型排列的一级、二级缸所组成。
每一缸都包括缸盖、配油盘及缸体气阀等零件。
缸盖与配油盘上有一坐标相同的曲面,膜片夹于其间,缸盖上装有进排气阀,配油盘上钻有小孔,使膜片下面的空腔与油缸相通。
一级油缸的活塞与主连杆相连,二级油缸的活塞与十字头浮动连接,十字头与副连杆相连。
曲轴转动时,使油缸活塞往复运动,推动油液,使膜片作往复振动,在进排气阀的控制下,膜片每振动一次,即完成一次进排气过程。
SMC 55-(E)CQ2 Series II 2GD 胶囊式压力膜肤活动器说明书

Instruction ManualCompact Cylinder 55-(E)CQ2 SeriesProduct marking shown above is for the standard product.II 2potential energy provided by compressed air into a force which causes mechanical linear motion. subject to “Special Conditions of Use”, please see Section 2.3.1 Safety InstructionsThese safety instructions are intended to prevent hazardous situations and/or equipment damage. These instructions indicate the level of potential hazard with t he labels of “Caution,” “Warning” or “Danger.” They are all important notes for safety and must be followed in addition to International Standards (ISO/IEC) *1), and other safety regulations. *1)ISO 4414: Pneumatic fluid power - General rules relating to systems. ISO 4413: Hydraulic fluid power - General rules relating to systems.IEC 60204-1: Safety of machinery - Electrical equipment of machines. (Part 1: General requirements)ISO 10218-1: Manipulating industrial robots -Safety. etc.∙ Refer to product catalogue, Operation Manual and Handling Precautions for SMC Products for additional information. ∙ Keep this manual in a safe place for future reference.not avoided, will result in death or serious injury.Warning∙ Always ensure compliance with relevant safety laws and standards.∙ All work must be carried out in a safe manner by a qualified person in compliance with applicable national regulations.2 SpecificationsThis product is certified to ATEX Category 2GD and therefore is suitable for use in Zones 1, 2, 21 and 22 only. 2.1 Product Specifications:Refer to the operation manual for this product;2.2 Production Batch Code:The batch code printed on the label indicates the month and the year of production as per the following table;2.3 Special Conditions of Use:∙ Products are suitable for sub-divisions IIC & IIIC. ∙ Products are suitable for Zones 1, 2, 21 & 22 only. 2.3.1 Temperature Marking: 2.3.1.1 Standard Product:∙ In the normal ambient temperature range (-10°C to +40°C) the product is rated to temperature class T6 and has a maximum surface temperature of 84°C.∙ In the special ambient temperature range (+40°C to +60°C) the product is rated to temperature class T4 and has a maximum surface temperature of 104°C.3 Installation3.1 InstallationWarning∙ Do not install the product unless the safety instructions have been read and understood.∙ Do not twist or bend the cylinder, or mount the product when subject to tension.∙ Do not use in an application where the product is stopped mid-stroke, via an external stop.∙ Do not use where cylinders are being synchronised to move a single load.∙ In order to install the product, use one of the brackets available found in the standard product catalogue;represents the Bore Size (e.g. Ø40 is 040), see catalogue for more details.∙ When replacing brackets use the hexagon wrench and torques shownSketchSee the product catalogue for the exact code to order which relates to the bore size of your product.∙ Tighten these accessories with a suitable wrench using the flat surfaces provided. Ensure that they are tightened against the rod end 3.2 EnvironmentWarning∙ Do not use in an environment where corrosive gases, chemicals, water, salt water or steam are present.∙ Do not use in an explosive atmosphere except within the specified rating.∙ Do not expose to direct sunlight. Use a suitable protective cover.∙ Do not install in a location subject to vibration or impact in excess of the produ ct’s specifications .∙ Do not use in a place subject to heavy vibration and/or shock.∙ Do not use in wet environments, where water can remove the presence of the lubrication.∙ Do not use in case of heavy dusty environments where dust can penetrate into the cylinder and dry the grease.∙ Do not allow dust layers to build up on the cylinder surface and insulate the product.3.3 PipingCaution∙ Before connecting piping make sure to clean up chips, cutting oil, dust etc.∙ When installing piping or fittings, ensure sealant material does not enter inside the port. When using seal tape, leave 1 thread exposed on the end of the pipe/fitting.∙ Tighten fittings to the specified tightening torque.CQ2ECQ2Note 4: In the case without autoswitch, M5 x 0.8 is used for 5mm stroke only.3.4 LubricationCaution∙ SMC products have been lubricated for life at manufacture, and do not require lubrication in service.∙ If a lubricant is used in the system, refer to catalogue for details.3.5 Basic Circuit∙ Plugging one of the ports on the actuator is considered a non-intended use, and could relate to an increase in maximum surface temperature above what the product specification declares.3.6 Electrical Connection∙ The product should be grounded by the piston rod and the body in order to create an electrically conductive path to the system/application. ∙ Ground the product in accordance with applicable regulations. ∙ Do not pass an electrical current through the product.4 SettingsRefer to the standard product operation manual for settings.ORIGINAL INSTRUCTIONSRefer to Declaration of Conformity for relevant DirectivesRefer to the standard product catalogue for ‘How to Order’. Refer to the standard product catalogue for general dimensions.7.1 General MaintenanceCaution∙Not following proper maintenance procedures could cause the product to malfunction and lead to equipment damage.∙If handled improperly, compressed air can be dangerous.∙Maintenance of pneumatic systems should be performed only byqualified personnel.∙Before performing maintenance, turn off the power supply and be sure to cut off the supply pressure. Confirm that the air is released to atmosphere.∙After installation and maintenance, apply operating pressure and power to the equipment and perform appropriate functional and leakage tests to make sure the equipment is installed correctly.∙If any electrical connections are disturbed during maintenance, ensure they are reconnected correctly and safety checks are carried out as required to ensure continued compliance with applicable national regulations.∙Do not make any modification to the product.∙Do not disassemble the product, unless required by installation or maintenance instructions.∙Do not use a product which looks or contains damage, this will invalidate the certification. If damage is seen, please replace the product immediately.∙Periodically check the product for any damage or rust appearing. This could result in an increase in friction and lead to dangerous conditions. Replace the whole actuator if any of these conditions appear.∙Periodically check the condition of the rod seal and for the presence of lubrication, where possible. If these areas appear to be dry, please follow the lubrication procedure.∙Replace the seals, when air leakage is above the allowable value given in the table below;7.2 Disassembly Procedure∙Disassemble the cylinder, remove the old grease and place all the parts on a clean cloth in a clean environment. Use a set of snap ring pliers to remove the snap ring. Remove the old tube gaskets, rod seal, piston seal, wear ring using a fine screwdriver where necessary.Caution∙If a magnet is present on the piston do not remove it. The magnet is not replaceable.7.2.1 Model: (E)C(D)Q2# 12~100-#D(C)(M)7.2.2 Models: (E)C(D)Q2B 125~200-#DC(M), (E)C(D)Q2# 32~100-7.3 Seal Replacement Part NumbersWarningOnly use SMC seal kits as listed in the table below;7.4 Lubrication Procedure∙Apply lubricant to:• The rod seal and the rod seal groove on the rod cover.• The piston outer surface and piston seal groove.• The piston seal and tube gaskets.• The piston rod surface and cylinder tube internal surface.∙Lubricate the parts with the grease packs provided with the seal kit.7.5 Reassembly Procedure∙Inserting the collar assembly into the piston rod assembly.Apply grease to the end of the piston rod, especially on the 30° chamferand on the flats. Insert with care the piston rod into the collar to preventany damage to the rod seal.∙Inserting piston rod assembly and the collar assembly into the cylindertube.Insert slowly with care the piston assembly and the collar assembly intothe cylinder tube to prevent any damage of the piston seal and tubegasket.∙Installing snap ring.Use appropriate pliers (tool for C-shape snap ring) for installation.CautionWhen installing the snap ring, be aware that the snap ring may come offthe pliers and could result in operator injury or equipment damage. Alsomake sure ring is firmly seated in ring groove.∙Checking assembly.Make sure that no air is leaking from packing seals and that the cylinderoperates smoothly at minimum operating pressure. Check for cylindersmooth movement and for air leakage.8 Limitations of Use8.1 Limited warranty and Disclaimer/Compliance RequirementsRefer to Handling Precautions for SMC Products located on .8.2 Obligations of the end-user∙Ensure the product is used within the specification outlined.∙Ensure that the maintenance periods are suitable for the application.∙Ensure any cleaning processes to remove dust layers are made withthe atmosphere in mind (e.g. using a damp cloth to avoid static buildup).∙Ensure that the application does not introduce additional hazards bymounting, loading, impacts or other methods.∙Ensure that there is sufficient ventilation and air circulation around theproduct.∙If the product is subject to direct heat sources in the application, theyshould be shielded so that the actuator temperature stays within thestated operating range.Caution∙SMC products are not intended for use as instruments for legalmetrology.Measurement instruments that SMC manufactures or sells have notbeen qualified by type approval tests relevant to the metrology(measurement) laws of each country.Danger∙Do not exceed any of the specifications listed in Section 2 of thisdocument as this will be deemed improper use.∙Air equipment has an air leakage during operation within certain limits.Do not use this equipment when the air itself introduces additionalhazards and could lead to an explosion.∙Use only ATEX certified auto switches. These should be orderedseparately.∙Do not use this product in the presence of strong magnetic fields thatcould generate a surface temperature higher than the productspecification.∙Avoid applications where the piston rod end and the adjoining part inthe application can create a possible ignition source.∙Do not install or use these actuators where there is the possibility forthe piston rod to impact foreign objects.∙In the event of damage or failure of any parts located in the vicinitywhere this product has been installed, it is the responsibility of the userto determine whether or not this has compromised the safety andcondition of this product and/or the application.∙External impact on the cylinder body could result in a spark and/orcylinder damage. Avoid any application where foreign objects can hitor impact the cylinder. In such situations the application should installa suitable guard to prevent this occurrence.∙Do not use this equipment where vibration could lead to failure.9 ContactsRefer to Declaration of Conformity and for contacts.URL : http// (Global) http// (Europe)'SMC Corporation, Akihabara UDX15F, 4-14-1, Sotokanda, Chiyoda-ku, Tokyo 1010021Specifications are subject to change without prior notice from the manufacturer.© 2018 SMC Corporation All Rights Reserved.Template DKP50047-F-085H。
压膜机的操作规程
压膜机的操作规程压膜机是一种用于包装和封装的设备,广泛应用于食品、药品、日化品、电子产品等行业。
正确操作压膜机是确保产品质量和生产效率的重要环节。
下面是一份关于压膜机的操作规程,供参考:一、安全操作规程1.操作人员必须穿着适合的工作服,避免长发、衣物或饰品接触到设备。
2.在操作压膜机前,应先确认设备的电源已经关闭,拉出电源插头并贴上警示标识,以免误操作。
3.操作人员需戴上适当的防护手套和眼镜,确保安全操作。
4.在操作过程中,不得将手伸入机器内部,以免发生意外。
5.在清洁和维护设备时,必须先切断电源,并待设备完全停止后方可进行操作。
二、设备操作规程1.操作人员应熟悉设备的操作控制面板,了解各功能按钮的作用。
2.操作人员应将设备连接到电源,并确认设备的电源开关处于关闭状态。
3.操作人员应根据需要调整设备的温度、压力和速度等参数。
根据产品的要求进行调整,并确保参数的准确性。
4.将待加工的产品放置在正确的位置,并注意产品的方向和数量。
5.开启设备的电源开关,并根据需要将待加工的产品放置到设备的工作台上。
6.按下启动按钮,设备即开始运行。
此时操作人员应保持警惕,随时注意设备的运行状态。
7.如发现设备运行不正常或有异常现象,应立即停止设备,并排除故障。
8.在操作过程中,应定期观察设备的运行状态,确保设备正常运行。
9.当产品加工完毕时,应按下停止按钮,停止设备的运行。
10.关闭设备的电源开关后,及时清理工作台、调整参数,并将设备进行维护保养。
三、设备维护规程1.定期对压膜机进行检查和维护,确保设备的良好状态。
2.清除设备内部的灰尘、杂物和油污,保持设备的清洁。
3.定期检查设备的电源线、接线端子和开关等部分,确保其正常工作。
4.定期检查设备的压力机构、电机、传动部件和传感器等,如发现异常应及时更换和修理。
5.定期对设备进行润滑,确保设备的正常运转。
6.在设备维护时,切断设备的电源,确保安全操作。
7.不得随意更换设备的零部件和附件,如需更换应选择原厂配件或专业人士指导。
- 1、下载文档前请自行甄别文档内容的完整性,平台不提供额外的编辑、内容补充、找答案等附加服务。
- 2、"仅部分预览"的文档,不可在线预览部分如存在完整性等问题,可反馈申请退款(可完整预览的文档不适用该条件!)。
- 3、如文档侵犯您的权益,请联系客服反馈,我们会尽快为您处理(人工客服工作时间:9:00-18:30)。
设备规格书
REFERENCE SPECIFICATIONS
全自动贴膜机Dry Film Auto Cutting Laminator
FCM-30
思沃技术Shenzhen Sowotech Co.,Ltd
目录
・PCB/FPC/HDI FCM-30设备规格书
1【适用范围】
2【装置概要】
3【材料规格】
4【处理速度】
5【压膜精度】
6【压膜结构】
7【干膜预热】
8【压膜压着】
9【干膜切割】
10【干膜吸附】
11【PCB输送段】
12【干膜张力控制】
13【污染物控制】
14【电控部分】
15【公用设施】
16【机台高度】
17【特别事项】
18【贴膜机设置条件】
20【平面图】
PCB用贴膜机参考规格书
1【适用范围】
本规格适用于PCB板的片式贴膜工艺。
2【装置概要】
本装置为自动贴膜装置。
本装置是通过光纤传感器感应板边自动对中,完成贴膜后自动切割干膜,前后留边可自由设定,有效解决贴膜过程中的干膜碎屑问题。
3【材料规格】
3-1干膜尺寸
(1)膜宽.250-630mm
(2)外径.MAXØ200mm
3-2PCB尺寸
(1)板大小.MAX.640(w)*640(l)mm MIN.250(w)*250(l)mm
(2)板厚度.0.1-6.0mm
*0.06-3.2mm需要根据客户板面铜厚做测试
4【处理速度】
4-1内层线路
(1)630L(24.8inch)216片/小时
(2)500L(19.7inch)257片/小时
(3)305L(12inch)356片/小时
*条件
(1)输送速度:2.6m/min
(2)贴膜时间:1.2s
(3)板间距:50mm
4-2外层线路
(1)630L(24.8inch)186片/小时
(2)500L(19.7inch)229片/小时
(3)305L(12inch)346片/小时
*条件
(1)输送速度:2-2.5m/min
(2)贴膜时间:1.3s
(3)板间距:50mm
*做板的速度与外层板线路的密度与线宽线距有关。
当线路密度大,线宽线距小的情况则需要降低速度。
5【压膜精度】
(1)露铜精度:
干膜
线路板
PCB流向
B A
A:2~60mm±1.0mm
B:0~25mm±1.0mm
C:±1.0mm
*上图描述了机台机械精度。
不包括线路板尺寸误差,干膜卷绕,干膜特性等问题。
(2)温度控制精度:
静态:±5℃(压膜辘空转,无板通过用接触式测温仪测试)
6【压膜机构】
6-1热压辘尺寸.φ77.5×680L(包胶厚度1.5-2.0mm)2pcs
6-2热压辘加热器.φ20×750L220V 1.5kw
三段式电阻丝加热器2pcs
6-3加压方法.Φ50气缸2pcs
全力臂型压力结构
6-4压力.3.0—5.0kpa
6-5压辘表面硅胶层.建议表面温度:90-120℃,最高不超过:150℃
6-6表面材质.硅胶硬度:60-70°
6-7温度控制.单独的两个Non-Contac红外测温热电偶测温,总共四个红外热电偶
7【干膜预热】*选配件,只有在寒冷的环境中才需配装。
7-1压条加热.24V*635L220V250W薄片式加热器2pcs
7-2导膜块温度.最高温度.60℃
7-3温度控制.PID开/关控制片状加热器2pcs
8【干膜压着】
8-1压条加热器.φ3.2×645L40V100W嵌入式外壳屏蔽加热器2pcs
8-2贴磨盘驱动.φ32×100气缸4pcs
8-3贴膜压力.最大.2-4kpa
8-4压着条.4W×642L mm2pcs表面温度:最高.70℃
8-5温度控制.PID开/关控制φ1.6×250L嵌入式热电偶2pcs
9【干膜切割】
9-1割刀片.φ64×0.8t圆盘式割刀2pcs
9-2切割方式.低转速割刀,高速度往返切割
9-3同步皮带/步进马达驱动(上下各一个)
10【干膜吸附】
10-1多孔真空吸盘.上下贴膜盘各分为五个真空区域
(五个真空区由一个整体模块控制)
220V 2.2kw高压涡轮风机1台
10-2导膜块/割刀.上下多孔板吸力保持部件
220V0.75kw涡轮风机1台
11【PCB输送段】
11-1输送滚轮.有效宽度640mm
11-2滚轮材质.SUS316精磨
11-3输送速度. 1.0~5.5m/min可调
11-4对中机构.两条精密导轨导向,步进马达控制,光纤传感器感测板边
11-5薄板输送装置.送板区传动
(1)前进.与入料输送速度自动同步
(2)导向板.SUS316,软体同时启动薄板模式
12【干膜张力控制】
12-1张力轮.φ38×636L张力辊2pcs
φ25×25气缸2pcs
12-2真空张力.自动张力控制
13【污染物控制】
13-1链条/皮带.加装保护盖,无粉尘污染板面
13-2割刀系统.加装保护盖
14【电控部分】
14-1PLC.Mitsubishi FX3U系列
14-2人机界面.Mitsubishi8.5寸彩色LCD触摸屏
14-3电控箱.长1650×宽250×高685mm带漏电断路器
14-4马达.东方马达产品
14-5气动.SMC产品
14-6继电器/空开.和泉.富士.欧姆龙
14-7传感器.Keyence.Sunx
14-8手动模式.面板手动按键
14-9安全措施.紧急停止按钮・互锁功能・蜂鸣报警器・三色指示灯15【公用设施】
15-1电源.φ322050/60Hz10kw
15-2气源.5kgf/cm215L/minφ10气管
15-3抽风.9.5m3/minφ150mm抽风管
15-4体积.长2150×宽1615×高2150mm
15-5重量. 1.2吨(约350kgf/m2)
16【机台高度】
16-1有效高度.900-+520mm
16-2方向侧.从操作侧看
左→右〔常规方向〕
右→左〔可选方向〕
17【特别事项】
17-1若用户有安全标准,电气设备标准等,请注明。
17-2本装置的结构可能会在满足功能的范围内进行变更。
17-3操作面板的显示采用中文。
17-4使用说明书随附册数.操作手册2本
18【贴膜机放置场地条件】
为了充分发挥和确保贴膜机的性能,满足用户的需求,应具备以下各项场地条件。
18-1无尘室10000级
18-2室内照明黄灯安全光下
19-3温度22-25±1℃
19-4湿度55-60%RH
深圳市思沃精密械有限公司
自动贴膜机使用配件清单
名称品牌产地
1贴膜盘马达东方日本
2压辘马达东方日本
3割刀马达东方日本
4进板马达东方日本
5真空泵1日立日本
6真空泵2昭和日本
7编码器欧姆龙日本
8感应器欧姆龙日本
8感应器神视日本
9对射感应器基恩士日本
10链条椿本日本
11触摸屏三菱日本
12PLC三菱日本
13导轨IKO日本
14温度模块RKC日本
15温度感应器眼镜蛇美国
16气缸SMC日本
17电磁阀SMC日本
18空气开关三菱日本
19交流接触器欧姆龙日本
20继电器欧姆龙日本
日本/
21轴承NSK,NTN SKF FAG德国/
瑞士
深圳市思沃精密机械有限公司
销售实绩(部分)
1.万泰电路(深圳)有限公司
2.广州美维电子有限公司
3.苏州美维电子有限公司
4.深圳南电路有限公司
5.精汇电子科技有限公司
6.方正高密电路板有限公司
7.联泰电路板(深圳)有限公司
8.珠海乐健电路板有限公司
9.江门荣信电路板有限公司
10.中山兴达电路板有限公司
11.南车时代电子有限公司
12.建生实业电路板有限公司
13.清远扬宣电子有限公司
14.惠州雄昱电子有限公司
15.杭州方正电路板有限公司
16.深圳市仁创艺电子有限公司
17.武汉凯迪思特科技有限公司。