
Linux命令之for
Linux命令之for
bash shell提供了for命令,用于创建通过一系列值重复的循环。
每次重复使用系列中的一个值执行一个定义的命令集。
for命令基本格式为:
for var in list
do
commands
done
1.读取列表中的值
#!/bin/bash
#basic for command
for test in a b c d e f
do
echo The next state is $test
done
每次for命令通过提供的值列表进行矢代时,它将列表中想下个值赋值给变量
[root@localhost ~]# ./test1.sh
The next state is a
The next state is b
The next state is c
The next state is d
The next state is e
The next state is f
2.读取列表中的复杂值
#!/bin/bash
for test in i don\'t know
do
echo "Word:$test"
done
注意:分号(')这里需要加斜杠(\)进行转义
[root@localhost ~]# ./test2.sh
Word:i
Word:don't
Word:know
3.从变量读取列表
#!/bin/bash
list="a b c d "
for state in $list
do
echo "Have you ever visited $state?"
done
[root@localhost ~]# ./test4.sh
Have you ever visited a?
Have you ever visited b?
Have you ever visited c?
Have you ever visited d?
4.读取命令中的值
生成列表中使用的另一个方法是使用命令输出,可以使用反引号字符来执行生成输出的任何命令,然后在for命令中使用命令输出:
新建一个states文件,并且添加数据内容
[root@localhost ~]# cat states
ak
bn
cd
dr
#!/bin/bash
file="states"
for state in `cat $file`
do
echo "Visit beautiful $state"
done
[root@localhost ~]# ./test5.sh
Visit beautiful ak
Visit beautiful bn
Visit beautiful cd
Visit beautiful dr
5.改变字段分隔符
内部字段分隔符(IFS),bash shell将以下字符看作是字段分隔符
空格
制表符
换行符
#!/bin/bash
file="states"
IFS=$'\n'
for state in `cat $file`
do
echo "Visit beautiful $state"
done
IFS=$'\n'通知bash shell在数值中忽略空格和制表符
6.使用通配符读取目录
#!/bin/bash
for file in /home/l*
do
if [ -d "$file" ]
then
echo "$file is a directory"
elif [ -f "$file" ]
then
echo "$file is a file"
fi
done
[root@localhost ~]# ./test6.sh
/home/ley is a directory
for命令失代/home/ley列表的结果,然后用test命令查看是目录(-d)还是文件(-f)。
linux命令大全pdf

Generated by Foxit PDF Creator © Foxit Software For evaluation only.
linux命令大全.txt hantfup信号,因此用户退出登陆后,仍可继续运行。 17. &,bg:&,bg命令是后台执行命令,有时候用户执行的程序可能要话很多时间,如果放在前台执行,可能无法继续 其他操作,最好将他放在后台执行。 18. fg:fg命令是前台执行命令,如果用户有程序在后台运行,可以通过fg命令将程序从后台移到前台执行。 19. jobs:此命令用于显示正在后台执行的任务清单。Bg,fg,jobs命令都属于bash命令, 20. kill:此命令用于终止一个程序,例如:#[root@rathat9 root]kill 3793 21. ps:此命令用于显示程序的状态。 22. top:此命令用于显示当前CPU进程。 23. at batch atp atrm:这些命令用于排序,检查或删除后台运行的任务。
Generated by Foxit PDF Creator © Foxit Software For evaluation only.
linux命令大全.txt 文件系统操作命令: 1. cat:可以显示文件的内容(经常和more搭配使用),或将多个文件合并成一个文件。 2. chgrp:用来改变文件或目录所属的用户组,命令的参数以空格分开的要改变属组的文件列表,文件名支持通配符, 如果用户不是该文件的所有者,则不能改变该文件的所属组。 3. chmod:用于改变文件或目录的访问权限,该命令有两种用法:一种是使用图形化的方法,另一种是数字设置法。 4. chown:用来将指定用户或组为特定的所有者。用户可以设置为用户名或用户ID,组可以是组名或组ID。特定的文件 是以空格分开的可以改变权限的文件列表,文件名支持通配符。 5. clear:用来清除终端屏幕。 6. cmp:用来比较两个文件的大小。 7. cp:(copy)可以将文件或目录复制到其他目录中,就如同Dos下的copy命令一样,功能非常强大。在使用cp命令 时,只需要指定源文件名或目标目录即可。 8. cut:用来移除文件的部分内容。 9. diff:用来找出两个文件的不同之处。 10. du: 用来显示磁盘的剩余空间的大小。 11. file:用来显示并执行指定的操作。 13. head:只查看文件的头几行内容,而不必浏览整个文件。 14. ln:可以在文件之间创建链接,实际上是给某个文件指定一个访问它的别名。 15. less:用法与more类似,可以查看超过一屏的文件内容,不同的是less除了可以按空格键向下显示文件外,还可以 利用方向键来滚动显示文件,要结束浏览,只要在less的提示符“:”后按Q即可。 16. locate:可用于查找文件,且比find命令的搜索速度快。 17. ls(list):用来显示当前目录中的文件和子目录列表。 18. mkdir(make directory):建立子目录。 19. more:用于显示内容超过一屏的文件,为了避免文件内容显示瞬间就消失,可以使用more命令让文件显示满一屏时 暂停,在按下任意键的时候继续显示下一屏的内容。 20. rmkdir(remove directory):用来删除“空”的子目录或无用的目录文件。 21. mv(move):可以将文件以及目录移到其他位置,或更改文件以及目录的名称。 22. pico:可指定文本的编辑方式。 23. pwd(print working directory):可显示用户当前所在的目录。 24. rm:用来删除系统中过时或无用的文件,可以删除目录中的文件或目录本身,对于链接文件,原有文件保持不变。 25. sort:将文本文件自动分类。 26. stat:用于显示文件或文件系统的状态。 27. Strings:显示文件中要打印的字符串。 28. tail:输出文件的结尾。 29. touch:改变文件的时间戳。 30. umask:用于启动bash shell。 31. uniq:移除已分类文件中的重复文本行。 32. vi:启动vi文本编辑器。 33. wc:显示文件中字节、词组合文本行的数目。 34. whereis:查找特定目录下的原始程序,二进制程序或用户手册等文件的位置。 35. man:如果用户对某个命令想了解更详细的话,可使用此命令。 36. dd:复制一个文件。 37. df:查看一个文件系统的磁盘空间使用情况。 38. edquoat:设置用户与用户组的磁盘空间限制,即Windows系统中的配额。 39. fdformat:格式化软盘。 40. fdisk:执行Linux下的磁盘分区。 41. mkfs:建立一个Linux文件系统。 42. mkswap:创建一个Linux交换分区。 43. mount:挂载一个文件系统。 44. quota:限制和显示用户可用的磁盘空间。 45. swapon,swapoff:启用或取消设备和文件的交换页。 46. quotaon,quotaoff:启用或取消quota限制。 47. umount:取消文件系统的装备。
Linux_SHLL命令详解

Linux的SHELL编程Shell本身是一个用C语言编写的程序,它是用户使用Linux的桥梁。
Shell既是一种命令语言,又是一种程序设计语言。
作为命令语言,它交互式地解释和执行用户输入的命令;作为程序设计语言,它定义了各种变量和参数,并提供了许多在高级语言中才具有的控制结构,包括循环和分支。
它虽然不是Linux系统核心的一部分,但它调用了系统核心的大部分功能来执行程序、建立文件并以并行的方式协调各个程序的运行。
因此,对于用户来说,shell是最重要的实用程序,深入了解和熟练掌握shell的特性极其使用方法,是用好Linux 系统的关键。
可以说,shell使用的熟练程度反映了用户对Linux使用的熟练程度。
一、什么是shell当一个用户登录Linux系统之后,系统初始化程序init就为每一个用户运行一个称为shell(外壳)的程序。
那么,shell是什么呢?确切一点说,shell就是一个命令行解释器,它为用户提供了一个向Linux内核发送请求以便运行程序的界面系统级程序,用户可以用shell来启动、挂起、停止甚至是编写一些程序。
当用户使用Linux时是通过命令来完成所需工作的。
一个命令就是用户和shell之间对话的一个基本单位,它是由多个字符组成并以换行结束的字符串。
在Linux下比较流行的shell有好几个,每个shell都各有千秋。
一般的Linux系统都将bash作为默认的shell。
二、几种流行的shell目前流行的shell有ash、bash、ksh、csh、zsh等,你可以用下面的命令来查看你自己的shell类型:#echo $SHELL$SHELL是一个环境变量,它记录用户所使用的shell类型。
你可以用命令:#shell-name来转换到别的shell,这里shell-name是你想要尝试使用的shell的名称,如ash等。
这个命令为用户又启动了一个shell,这个shell在最初登录的那个shell之后,称为下级的shell或子shell。
【Linux命令】linux一次性解压多个.gz或者.tar.gz文件

【Linux命令】linux⼀次性解压多个.gz或者.tar.gz⽂件原⽂:解压多个压缩包对于解压多个.gz⽂件的,⽤此命令:for gz in *.gz; do gunzip $gz; done对于解压多个.tar.gz⽂件的,⽤下⾯命令:for tar in *.tar.gz; do tar xvf $tar; done扩展:tar命令tar [-] A --catenate --concatenate | c --create | d --diff --compare | --delete | r --append | t --list |--test-label | u --update | x --extract --get [options] [pathname ...]-A, --catenate, --concatenateappend tar files to an archive-c, --createcreate a new archive-d, --diff, --comparefind differences between archive and file system--deletedelete from the archive (not on mag tapes!)-r, --appendappend files to the end of an archive-t, --listlist the contents of an archive--test-labeltest the archive volume label and exit-u, --updateonly append files newer than copy in archive-x, --extract, --getextract files from an archive-a, --auto-compressuse archive suffix to determine the compression program--add-file=FILEadd given FILE to the archive (useful if its name starts with a dash)--anchoredpatterns match file name start--no-anchoredpatterns match after any `/' (default for exclusion)--atime-preservepreserve access times on dumped files, either by restoring the times--no-auto-compressdo not use archive suffix to determine the compression program-b, --blocking-factor BLOCKSBLOCKS x 512 bytes per record-B, --read-full-recordsreblock as we read (for 4.2BSD pipes)--backupbackup before removal, choose version CONTROL-C, --directory DIRchange to directory DIR--check-devicecheck device numbers when creating incremental archives (default)--no-check-devicedo not check device numbers when creating incremental archives--checkpointdisplay progress messages every NUMBERth record (default 10)--checkpoint-action=ACTIONexecute ACTION on each checkpoint--delay-directory-restoredelay setting modification times and permissions of extracted--no-delay-directory-restorecancel the effect of --delay-directory-restore option--exclude=PATTERNexclude files, given as a PATTERN--exclude-backupsexclude backup and lock files--exclude-cachesexclude contents of directories containing CACHEDIR.TAG,--exclude-caches-allexclude directories containing CACHEDIR.TAG--exclude-caches-underexclude everything under directories containing CACHEDIR.TAG--exclude-tag=FILEexclude contents of directories containing FILE, except--exclude-tag-all=FILEexclude directories containing FILE--exclude-tag-under=FILEexclude everything under directories containing FILE--exclude-vcsexclude version control system directories-f, --file ARCHIVEuse archive file or device ARCHIVE-F, --info-script, --new-volume-script NAMErun script at end of each tape (implies -M)--force-localarchive file is local even if it has a colon--full-timeprint file time to its full resolution-g, --listed-incremental FILEhandle new GNU-format incremental backup-G, --incrementalhandle old GNU-format incremental backup--group=NAMEforce NAME as group for added files-h, --dereferencefollow symlinks; archive and dump the files they point to-H, --format FORMATcreate archive of the given formatFORMAT is one of the following: --format=gnuGNU tar 1.13.x format--format=oldgnuGNU format as per tar <= 1.12--format=paxPOSIX 1003.1-2001 (pax) format--format=posixsame as pax--format=ustarPOSIX 1003.1-1988 (ustar) format--format=v7old V7 tar format--hard-dereferencefollow hard links; archive and dump the files they refer to-i, --ignore-zerosignore zeroed blocks in archive (means EOF)-I, --use-compress-program PROGfilter through PROG (must accept -d)--ignore-caseignore case--no-ignore-casecase sensitive matching (default)--ignore-command-errorignore exit codes of children--no-ignore-command-errortreat non-zero exit codes of children as error--ignore-failed-readdo not exit with nonzero on unreadable files--index-file=FILEsend verbose output to FILE-j, --bzip2-J, --xz-k, --keep-old-filesdon't replace existing files when extracting-K, --starting-file MEMBER-NAMEbegin at member MEMBER-NAME in the archive--keep-newer-filesdon't replace existing files that are newer than their archive copies -l, --check-linksprint a message if not all links are dumped-L, --tape-length NUMBERchange tape after writing NUMBER x 1024 bytes--level=NUMBERdump level for created listed-incremental archive--lzip--lzma--lzop-m, --touchdon't extract file modified time-M, --multi-volumecreate/list/extract multi-volume archive--mode=CHANGESforce (symbolic) mode CHANGES for added files--mtime=DATE-OR-FILEset mtime for added files from DATE-OR-FILE-n, --seekarchive is seekable-N, --newer, --after-date DATE-OR-FILEonly store files newer than DATE-OR-FILE--newer-mtime=DATEcompare date and time when data changed only--null-T reads null-terminated names, disable -C--no-nulldisable the effect of the previous --null option--numeric-owneralways use numbers for user/group names-O, --to-stdoutextract files to standard output--occurrenceprocess only the NUMBERth occurrence of each file in the archive;--old-archive, --portabilitysame as --format=v7--one-file-systemstay in local file system when creating archive--overwriteoverwrite existing files when extracting--overwrite-diroverwrite metadata of existing directories when extracting (default)--no-overwrite-dirpreserve metadata of existing directories--owner=NAMEforce NAME as owner for added files-p, --preserve-permissions, --same-permissionsextract information about file permissions (default for superuser)-P, --absolute-namesdon't strip leading `/'s from file names--pax-option=keyword[[:]=value][,keyword[[:]=value]]...control pax keywords--posixsame as --format=posix--preservesame as both -p and -s--quote-chars=STRINGadditionally quote characters from STRING--no-quote-chars=STRINGdisable quoting for characters from STRING--quoting-style=STYLEset name quoting style; see below for valid STYLE values-R, --block-numbershow block number within archive with each message--record-size=NUMBERNUMBER of bytes per record, multiple of 512--recursionrecurse into directories (default)--no-recursionavoid descending automatically in directories--recursive-unlinkempty hierarchies prior to extracting directory--remove-filesremove files after adding them to the archive--restrictdisable use of some potentially harmful options--rmt-command=COMMANDuse given rmt COMMAND instead of rmt--rsh-command=COMMANDuse remote COMMAND instead of rsh-s, --preserve-order, --same-ordersort names to extract to match archive-S, --sparsehandle sparse files efficiently--same-ownertry extracting files with the same ownership as exists in the archive (default for superuser)--no-same-ownerextract files as yourself (default for ordinary users)--no-same-permissionsapply the user's umask when extracting permissions from the archive (default for ordinary users) --no-seekarchive is not seekable--show-defaultsshow tar defaults--show-omitted-dirswhen listing or extracting, list each directory that does not match search criteria--show-transformed-names, --show-stored-namesshow file or archive names after transformation--sparse-version=MAJOR[.MINOR]set version of the sparse format to use (implies --sparse)--strip-components=NUMBERstrip NUMBER leading components from file names on extraction--suffix=STRINGbackup before removal, override usual suffix ('~' unless overridden by environment variableSIMPLE_BACKUP_SUFFIX)-T, --files-from FILEget names to extract or create from FILE--to-command=COMMANDpipe extracted files to another program--totalsprint total bytes after processing the archive;--transform, --xform EXPRESSIONuse sed replace EXPRESSION to transform file names-U, --unlink-firstremove each file prior to extracting over it--unquoteunquote filenames read with -T (default)--no-unquotedo not unquote filenames read with -T--utcprint file modification times in UTC-v, --verboseverbosely list files processed-V, --label TEXTcreate archive with volume name TEXT; at list/extract time, use TEXT as a globbing pattern for volume name--volno-file=FILEuse/update the volume number in FILE-w, --interactive, --confirmationask for confirmation for every action-W, --verifyattempt to verify the archive after writing it--warning=KEYWORDwarning control--wildcardsuse wildcards (default for exclusion)--wildcards-match-slashwildcards match `/' (default for exclusion)--no-wildcards-match-slashwildcards do not match `/'--no-wildcardsverbatim string matching-X, --exclude-from FILEexclude patterns listed in FILE-z, --gzip, --gunzip --ungzip-Z, --compress, --uncompress。
linux系统中awk命令for循环提取文件的连续列

linux系统中awk命令for循环提取⽂件的连续列1、测试数据[root@centos7 test2]# cat a.txte d g e d w is d g w e i da x d g i w en d i d o e w2、提取1-3列,1-5列[root@centos7 test2]# cat a.txte d g e d w is d g w e i da x d g i w en d i d o e w[root@centos7 test2]# awk '{for (i = 1; i <= 3; i++) printf("%s ", $i); printf("\n")}' a.txte d gs d ga x dn d i[root@centos7 test2]# awk '{for (i = 1; i <= 5; i++) printf("%s ", $i); printf("\n")}' a.txte d g e ds d g w ea x d g in d i d o3、提取1-3列加第6列,1-3列加5-6列[root@centos7 test2]# cat a.txte d g e d w is d g w e i da x d g i w en d i d o e w[root@centos7 test2]# awk '{for(i = 1; i <= 3; i++) printf("%s ", $i); print $6}' a.txte d g ws d g ia x d wn d i e[root@centos7 test2]# awk '{for(i = 1; i <= 3; i++) printf("%s ", $i); print $5,$6}' a.txte d g d ws d g e ia x d i wn d i o e4、提取奇数列[root@centos7 test2]# cat a.txt1234567e d g e d w is d g w e i da x d g i w en d i d o e w[root@centos7 test2]# awk '{for (i = 1; i <= NF; i+=2) printf("%s ", $i); printf("\n")}' a.txt1357e g d is g e da d i en i o w[root@centos7 test2]# awk '{for (i = 1; i <= NF; i++) if (i % 2 != 0) printf("%s ", $i); printf("\n")}' a.txt1357e g d is g e da d i en i o w5、提取偶数列[root@centos7 test2]# cat a.txt1234567e d g e d w is d g w e i da x d g i w en d i d o e w[root@centos7 test2]# awk '{for(i = 2; i <= NF; i+=2) printf("%s ", $i); printf("\n")}' a.txt246d e wd w ix g wd d e[root@centos7 test2]# awk '{for(i = 1; i <= NF; i++) if (i % 2 == 0) printf("%s ", $i); printf("\n")}' a.txt 246d e wd w ix g wd d e5、提取3倍数列[root@centos7 test2]# cat a.txt1234567e d g e d w is d g w e i da x d g i w en d i d o e w[root@centos7 test2]# awk '{for (i = 1; i <= NF; i++) if (i % 3 == 0) printf("%s ", $i); printf("\n")}' a.txt 36g wg id wi e6、提取倒数后4列、后5列[root@centos7 test2]# cat a.txt1234567e d g e d w is d g w e i da x d g i w en d i d o e w[root@centos7 test2]# awk '{for (i = NF - 3; i <= NF; i++) printf("%s ", $i); printf("\n")}' a.txt4567e d w iw e i dg i w ed oe w[root@centos7 test2]# awk '{for (i = NF - 4; i <= NF; i++) printf("%s ", $i); printf("\n")}' a.txt 34567g e d w ig w e i dd g i w ei d o e w7、去倒数5列中的偶数列[root@centos7 test2]# cat a.txt1234567e d g e d w is d g w e i da x d g i w en d i d o e w[root@centos7 test2]# awk '{for (i = NF - 4; i <= NF; i++) if (i % 2 == 0) printf("%s ", $i); printf("\n")}' a.txt 46e ww ig wd e。
linuxfor命令常用的读写方法

5、从命令读取值 file="states" for state in $(cat $file) do echo "Visit beautiful $state" done $ cat states Alabama Alaska Arizona $ ./test5 Visit beautiful Alabama Visit beautiful Alaska Visit beautiful Arizona
6、在bash shell C 语言的 for 命令 for (( i=1; i <= 10; i++ )) do echo "The next number is $i" done The next number is 1 The next number is 2 The next number is 3 7、bash shell C 语言的 for 命令,使用多个变量 for (( a=1, b=10; a <= 10; a++, b-- )) do echo "$a - $b" done 1 - 10 2-9 3-8
就我而言有时候部分测试用手工来执行太累与繁琐用python自动化还是很方便的
linuxfor命 令 常or var in list do commands done
2、一行书写方式: for var in list; do
3、读取列表中的值 for test in Nevada New Hampshire New Mexico New York North Carolina do echo "Now going to $test" done
4、从变量读取列表 list="Alabama Alaska Arizona Arkansas Colorado" list=$list" Connecticut" for state in $list do echo "Have you ever visited $state?" done $ ./test4 Have you ever visited Alabama? Have you ever visited Alaska?
linux sh循环参数
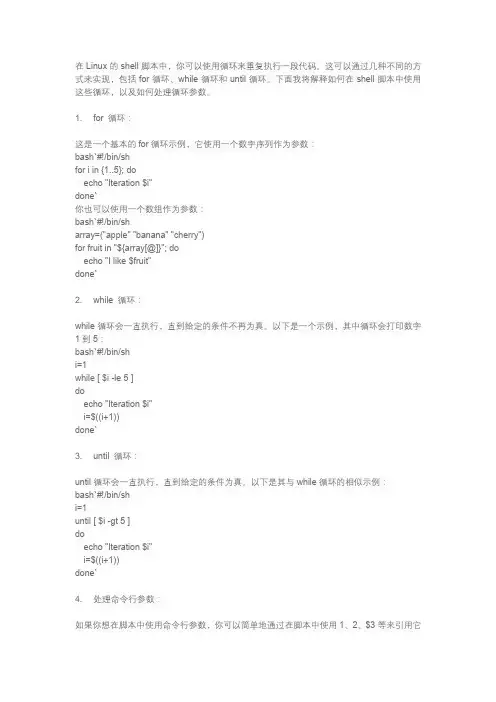
在Linux的shell脚本中,你可以使用循环来重复执行一段代码。
这可以通过几种不同的方式来实现,包括for循环、while循环和until循环。
下面我将解释如何在shell脚本中使用这些循环,以及如何处理循环参数。
1. for 循环:这是一个基本的for循环示例,它使用一个数字序列作为参数:bash`#!/bin/shfor i in {1..5}; doecho "Iteration $i"done`你也可以使用一个数组作为参数:bash`#!/bin/sharray=("apple" "banana" "cherry")for fruit in "${array[@]}"; doecho "I like $fruit"done`2. while 循环:while循环会一直执行,直到给定的条件不再为真。
以下是一个示例,其中循环会打印数字1到5:bash`#!/bin/shi=1while [ $i -le 5 ]doecho "Iteration $i"i=$((i+1))done`3. until 循环:until循环会一直执行,直到给定的条件为真。
以下是其与while循环的相似示例:bash`#!/bin/shi=1until [ $i -gt 5 ]doecho "Iteration $i"i=$((i+1))done`4. 处理命令行参数:如果你想在脚本中使用命令行参数,你可以简单地通过在脚本中使用1、2、$3等来引用它们。
例如:bash`#!/bin/shecho "First argument: $1"echo "Second argument: $2"````如果你运行这个脚本并传入两个参数,它会分别打印出这两个参数。
windows subsystem for linux 中的for的意思
windows subsystem for linux 中的for的意思Windows Subsystem for Linux(WSL)是一个在微软Windows操作系统中运行的Linux子系统,它允许用户在Windows环境下运行Linux应用程序。
WSL的出现,使得Linux用户能够在不离开Windows系统的情况下,无缝地使用他们熟悉的命令行工具和编程语言。
在WSL中,"for"的含义与传统Linux系统中的含义相同,表示循环操作。
例如,下面的示例代码:```pythonfor i in range(10):print(i)```这段代码将在WSL中按照预期运行,输出0到9的整数。
WSL的应用场景和优势在于,它为开发者提供了一个在Windows平台上运行Linux应用程序的便捷方式。
例如,开发者可以使用WSL进行以下操作:1.使用WSL中的终端模拟器,方便地运行Linux命令行工具。
2.在Windows上进行Linux应用程序开发,利用WSL的Git功能进行版本控制。
3.在WSL中安装和使用Linux特定的软件,如Node.js、Docker等。
要使用WSL,用户需要按照以下步骤操作:1.启用WSL功能:在Windows设置中,打开“开发者模式”,然后启用“Windows Subsystem for Linux”。
2.安装WSL发行版:在应用商店中搜索并安装喜欢的Linux发行版,如Ubuntu、Debian等。
3.打开WSL:在开始菜单中,找到对应的Linux发行版图标,点击进入。
总之,WSL作为一个创新性的技术,使得Linux用户可以在Windows环境中无缝地运行Linux应用程序。
Linux13:shell脚本基本命令
Linux13:shell脚本基本命令shell脚本基本命令输出命令echo输出命令echo,基本模式就是echo [选项] [输出内容]输出内容如果包含空格,则必须将内容⽤双引号括起来。
选项-e可以使输出语句⽀持反斜线转义。
加⼊退格后就不会显⽰退格符左边的⼀个字符。
ascii码表中有对应的⼋进制和⼗六进制表⽰法,所以可以表⽰对应的字符。
显⽰环境变量的值:echo ${PATH}或echo $PATH,如果⼀个变量没有被设定,那么就什么都不返回。
颜⾊输出如将abcd⽤红⾊打印:echo -e "\e[1;31m abcd \e[0m"其中\e[1的意思是开启颜⾊输出,⽽\e[0m是结束颜⾊输出,31m代表红⾊,abcd是输出内容,其他颜⾊如下:第⼀个脚本与脚本执⾏⽅式新建⼀个脚本hello.sh:#!/bin/bash#the first programecho "hello world"exit 0其中第⼀⾏是声明,不是注释,不能省略,这是在指定使⽤哪个shell,如果没有这⾏有的程序可能⽆法执⾏。
第⼆⾏#开头的是注释,第四⾏是命令。
最后⼀⾏在设置回传值,在执⾏完该脚本后,执⾏echo $?就能查看这个值,可以通过这个⾃定义错误信息。
在脚本中有需要时要重新定义⼀下PATH环境变量,以便直接使⽤⼀些外部命令⽽不是写绝对路径:PATH=/usr/lib64/qt-3.3/bin:/usr/local/sbin:/usr/local/bin:/sbin:/bin:/usr/sbin:/usr/bin:/opt/module/jdk1.8.0_144/bin:/opt/module/hadoop-2.7.2/bin:/opt/module/hadoop-2.7.2/sbin:/root/bin export PATH执⾏shell脚本要先赋予其可rx权限:chomd 755 hello.sh然后再执⾏./hello.sh这⾥也可以⽤绝对路径执⾏。
linux查看系统资源命令
linux查看系统资源命令lsof -n | grep loglsof -p 进程id 能看到这个进程加载了哪些资源,连接了哪些⽂件,⾃⼰⽹络链接虽然平时⼤部分⼯作都是和Java相关的开发, 但是每天都会接触Linux系统, 尤其是使⽤了Mac之后, 每天都是⼯作在⿊⾊背景的命令⾏环境中. ⾃⼰记忆⼒不好, 很多有⽤的Linux命令不能很好的记忆, 现在逐渐总结⼀下, 以便后续查看.基本操作Linux关机,重启# 关机shutdown -h now# 重启shutdown -r now查看系统,CPU信息# 查看系统内核信息uname -a# 查看系统内核版本cat /proc/version# 查看当前⽤户环境变量envcat /proc/cpuinfo# 查看有⼏个逻辑cpu, 包括cpu型号cat /proc/cpuinfo | grep name | cut -f2 -d: | uniq -c# 查看有⼏颗cpu,每颗分别是⼏核cat /proc/cpuinfo | grep physical | uniq -c# 查看当前CPU运⾏在32bit还是64bit模式下, 如果是运⾏在32bit下也不代表CPU不⽀持64bitgetconf LONG_BIT# 结果⼤于0, 说明⽀持64bit计算. lm指long mode, ⽀持lm则是64bitcat /proc/cpuinfo | grep flags | grep ' lm ' | wc -l建⽴软连接ln -s /usr/local/jdk1.8/ jdkrpm相关# 查看是否通过rpm安装了该软件rpm -qa | grep 软件名sshkey# 创建sshkeyssh-keygen -t rsa -C your_email@#id_rsa.pub 的内容拷贝到要控制的服务器的 home/username/.ssh/authorized_keys 中,如果没有则新建(.ssh权限为700, authorized_keys权限为600)命令重命名# 在各个⽤户的.bash_profile中添加重命名配置alias ll='ls -alF'同步服务器时间sudo ntpdate -u ntp.api.bz后台运⾏命令# 后台运⾏,并且有nohup.out输出nohup xxx &# 后台运⾏, 不输出任何⽇志nohup xxx > /dev/null &# 后台运⾏, 并将错误信息做标准输出到⽇志中nohup xxx >out.log 2>&1 &强制活动⽤户退出# 命令来完成强制活动⽤户退出.其中TTY表⽰终端名称pkill -kill -t [TTY]查看命令路径which <命令>查看进程所有打开最⼤fd数ulimit -n配置dnsvim /etc/resolv.confnslookup,查看域名路由表nslookup last, 最近登录信息列表# 最近登录的5个账号last -n 5设置固定ipifconfig em1 192.168.5.177 netmask 255.255.255.0查看进程内加载的环境变量# 也可以去 cd /proc ⽬录下, 查看进程内存中加载的东西ps eww -p XXXXX(进程号)查看进程树找到服务器进程ps auwxf查看进程启动路径cd /proc/xxx(进程号)ls -all# cwd对应的是启动路径添加⽤户, 配置sudo权限# 新增⽤户useradd ⽤户名passwd ⽤户名#增加sudo权限vim /etc/sudoers# 修改⽂件⾥⾯的# root ALL=(ALL) ALL# ⽤户名 ALL=(ALL) ALL强制关闭进程名包含xxx的所有进程ps aux|grep xxx | grep -v grep | awk '{print $2}' | xargs kill -9磁盘,⽂件,⽬录相关操作vim操作#normal模式下 g表⽰全局, x表⽰查找的内容, y表⽰替换后的内容:%s/x/y/g#normal模式下0 # 光标移到⾏⾸(数字0)$ # 光标移⾄⾏尾shift + g # 跳到⽂件最后gg # 跳到⽂件头# 显⽰⾏号:set nu# 去除⾏号:set nonu# 检索/xxx(检索内容) # 从头检索, 按n查找下⼀个xxx(检索内容) # 从尾部检索打开只读⽂件,修改后需要保存时(不⽤切换⽤户即可保存的⽅式) # 在normal模式下:w !sudo tee %查看磁盘, ⽂件⽬录基本信息# 查看磁盘挂载情况mount# 查看磁盘分区信息df# 查看⽬录及⼦⽬录⼤⼩du -H -h# 查看当前⽬录下各个⽂件, ⽂件夹占了多少空间, 不会递归du -sh *wc命令# 查看⽂件⾥有多少⾏wc -l filename# 看⽂件⾥有多少个wordwc -w filename# ⽂件⾥最长的那⼀⾏是多少个字wc -L filename# 统计字节数wc -c常⽤压缩, 解压缩命令压缩命令tar czvf xxx.tar 压缩⽬录zip -r xxx.zip 压缩⽬录解压缩命令tar zxvf xxx.tar# 解压到指定⽂件夹tar zxvf xxx.tar -C /xxx/yyy/unzip xxx.zip变更⽂件所属⽤户, ⽤户组chown eagleye.eagleye xxx.logcp, scp, mkdir#复制cp xxx.log# 复制并强制覆盖同名⽂件cp -f xxx.log# 复制⽂件夹cp -r xxx(源⽂件夹) yyy(⽬标⽂件夹)# 远程复制scp -P ssh端⼝ username@10.10.10.101:/home/username/xxx /home/xxx# 级联创建⽬录mkdir -p /xxx/yyy/zzz# 批量创建⽂件夹, 会在test,main下都创建java, resources⽂件夹mkdir -p src/{test,main}/{java,resources}⽐较两个⽂件diff -u 1.txt 2.txt⽇志输出的字节数,可以⽤作性能测试# 如果做性能测试, 可以每执⾏⼀次, 往⽇志⾥⾯输出 “.” , 这样⽇志中的字节数就是实际的性能测试运⾏的次数, 还可以看见实时速率. tail -f xxx.log | pv -bt查看, 去除特殊字符# 查看特殊字符cat -v xxx.sh# 去除特殊字符sed -i 's/^M//g’ env.sh 去除⽂件的特殊字符, ⽐如^M: 需要这样输⼊: ctrl+v+enter处理因系统原因引起的⽂件中特殊字符的问题# 可以转换为该系统下的⽂件格式cat file.sh > file.sh_bak# 先将file.sh中⽂件内容复制下来然后运⾏, 然后粘贴内容, 最后ctrl + d 保存退出cat > file1.sh# 在vim中通过如下设置⽂件编码和⽂件格式:set fileencodings=utf-8 ,然后 w (存盘)⼀下即可转化为 utf8 格式,:set fileformat=unix# 在mac下使⽤dos2unix进⾏⽂件格式化find . -name "*.sh" | xargs dos2unixtee, 重定向的同时输出到屏幕awk ‘{print $0}’ xxx.log | tee test.log检索相关grep# 反向匹配, 查找不包含xxx的内容grep -v xxx# 排除所有空⾏grep -v '^/pre># 返回结果 2,则说明第⼆⾏是空⾏grep -n “^$” 111.txt# 查询以abc开头的⾏grep -n “^abc” 111.txt# 同时列出该词语出现在⽂章的第⼏⾏grep 'xxx' -n xxx.log# 计算⼀下该字串出现的次数grep 'xxx' -c xxx.log# ⽐对的时候,不计较⼤⼩写的不同grep 'xxx' -i xxx.logawk# 以':' 为分隔符,如果第五域有user则输出该⾏awk -F ':' '{if ($5 ~ /user/) print $0}' /etc/passwd# 统计单个⽂件中某个字符(串)(中⽂⽆效)出现的次数awk -v RS='character' 'END {print --NR}' xxx.txtfind检索命令# 在⽬录下找后缀是.mysql的⽂件find /home/eagleye -name '*.mysql' -print# 会从 /usr ⽬录开始往下找,找最近3天之内存取过的⽂件。
linux系统for循环语法
linux系统for循环语法
Linux系统中的for循环语法是一种重要的控制结构,用于在脚本中重复执行一系列命令,直到满足特定条件为止。
for循环语法通常由以下几部分组成:
1. 初始化:定义一个变量,并赋初值。
2. 条件:判断某个条件是否为真。
3. 操作:执行一系列命令。
4. 更新:每次循环结束时更新变量的值。
例如,下面是一个简单的for循环示例:
```
for i in 1 2 3 4 5
do
echo $i
done
```
这个脚本会输出数字1到5,每个数字占一行。
在这个示例中,变量i被初始化为1,条件是i小于或等于5,操作是输出变量i的值,并在每次循环结束时将i加1。
在Linux中,for循环语法还可以使用通配符和变量来构造更复杂的循环。
例如,下面的循环会列出当前目录下的所有文件和目录: ```
for file in *
do
echo $file
done
```
在这个示例中,通配符*用于匹配当前目录下的所有文件和目录,并将每个匹配到的文件名赋值给变量file,然后输出file的值。
总之,Linux系统中的for循环语法是一个非常有用的功能,可以帮助我们快速地重复执行一系列命令,提高工作效率。