Microsoft Word - 08989SM设计说明书
微软Office和Adobe软件的使用指南说明书
MICROSOFT ® WORD ............................................................................. PÁG. 2MICROSOFT ® POWERPOINT ................................................................ PÁG. 4MICROSOFT ® PUBLISHER .................................................................... PÁG. 6ADOBE ® PHOTOSHOP ........................................................................... PÁG. 9ADOBE ® ILLUSTRATOR ....................................................................... PÁG. 13CORELDRAW ® ....................................................................................... PÁG. 17INDESIGN ............................................................................................... PÁG. 21INKSCAPE ............................................................................................... PÁG 26 E MCEXPLANATORY GUIDEMICROSOFT® OFFICE WORDIn the upper bar select Page Layout . Then click on Size and, further down, on More Paper Sizes...In the box that opens, enter the size of your document.CREATE DOCUMENTCPage Layout . Then click on Size More Paper Sizes...In the box that opens, enter the size of your document.Certi fique is added 4mm (0,4cm) to the height and width of the your document. In the case of the business card with 8,5x5,5cm insert 8,9x5,9cm.To save your document choose File > Save As.Choose Save as type: PDF . Then select the Save .BLEED Bleed is the extra measure you should put on your document to ensure that it does not have white borders around it.You should therefore add 4 mm to the height and width of your document.SAVE DOCUMENT It is recommended that you save the PDF document in order to guarantee its quality.In the upper bar select Page Layout . Then click on Sizeand, further down, on More Paper Sizes...In the box that opens, enter the size of your document.C XPLANATORY GUIDE ICROSOFT® OFFICE WORDREATE DOCUMENTIn the box that opens put the size of your document.BLEED Bleed is the extra measure you should put on your document to ensure that it does not have white borders around it.99In the upper bar select Design and then on the right side in and in Custom Slide Size.CXPLANATORY GUIDEICROSOFT® OFFICE WORDGo to Page Design > Page Setup (right arrow).It will open a window (image below) where you can define the settings of the document.Add another 4mm (0,4cm) to the height and width so that your document has enough margin for cutting.6CREATE DOCUMENTIn the case of a business card with the dimension 8,5x5,5cm, in Page place 89mm (8,9 cm) in width and 59mm (5,9 cm) in height.In Layout type select the option One page per sheet.Add 0,2 cm to the margins (Margins Guides ) to make surethat you do not place important text or images outside the margin line, as this is the line where the product will be cut.In the box that opens, enter the size of your document.In Margin Guides add 0.2cm to each side, this will causea line to appear around your card.This line serves as a guide, so we know how far we can write or put images, because it will be here that the product will be cut.8Select Okand save the document.In the upper bar select Page Layout . Then click on Sizeand, further down, on More Paper Sizes...In the box that opens, enter the size of your document.In the box that opens, enter the size of your document.BLEED Bleed is the extra measure you should put on your document to ensure that it does not have white borders around it.You should therefore add 4 mm to the height and width of your document.Push on the ruler and pull the guides to the endsof the document.do documento.In the box that opens, enter the size of your document.C.In Canvas Size (image below) indicate the size of your documentnot forgetting to put more 4 mm in height and width to create theBleed.You will see lines that de fi ne your Bleed, so extend your templateto the limits of Bleed.In the example below, the pink ornament should be extended to thenew end created.11. Then click on SizeIn the box that opens, enter the size of your document.Before you save the document, be sure to place it in CMYKso that there are no changes in color.Go toImage > Mode > CMYK Color.Save the document in File > Save As and select the PDF format.Click Save.SAVE DOCUMENTIt is recommended that you save the PDF document in order to guarantee its quality.Para qualquer esclarecimento contacte-nos através do email:****************************In the window that opens, in Adobe PDF Preset select [PDF/X-1a:2001].This option ensures that the PDF will not be changed.Do lado esquerdo clique em Compression e de seguida do lado direitoin Options select the option Do Not Downsaple.Then select Output and on the right side in Color Conversionselect No Conversion option. This option ensures that you burn your files with no color prompts.NOTA: Please note that the Standard field continues with thePDF/X-1a:2001 option selected, otherwise your file will not be Below, click Save Preset… , save these PDF presets with whatevername you want, so you can always reuse them.Clique on Save PDF .correctly saved.In the upper bar select Page Layout . Then click on Sizeand, further down, on More Paper Sizes...In the box that opens, enter the size of your document.Go to File > New.It will open a window (image below) where you can definethe settings of the document.In Units choose the unit you prefer, in this case we usedMilimeters.CREATE DOCUMENTbusiness card11In the box that opens put the size of your document.CIn the top menu, click the Document Setup button.BLEED Bleed is the extra measure you should put on your document to ensure that it does not have white borders around it.You should therefore add 4 mm to the height and width of your document.14It will open a window (image below). In the Bleedoption put2 mm in all fields.Select Ok.An external line will appear in your document.In the upper bar select Design and then on the right side in Slide Size and in Custom Slide Size.In the box that opens put the size of your document.4C15Before you save the document, be sure to place it in CMYKso that there are no changes in color.Go to File > Document Color Mode > CMYK Color.SAVE DOCUMENT It is recommended that you save the PDF document in order to guarantee its quality.In the upper bar select Design and then on the right side in Slide Size and in Custom Slide Size.42Save the document in File > Save As and select the PDF format.3In the window that opens, inAdobe PDF Preset select [PDF/X-1a:2001]. Esta opção garante que o PDF não sofrerá alterações.4On the left side click on Marks and Bleeds , and then under Bleeds select the Use Document Bleed Settings option (this allows the document to be saved with the safety margins you created earlier.5In Output and then in Destination select the FOGRA39color profile, which will prevent your filw with a different color tone at the time of printing..6After all changed fields, make sure that the Standardfield continues with the selected PDF/X-1a:2001 option, otherwise your fi le will not be recorded correctly.7Click Save Preset, save these PDF presets with the name you want,so you can always reuse it.Finally, click Save PDF .NOTA: If you are using a newer version of Illustrator, the Save Presetoption will not appear, so you do not need to follow this step.In the upper bar select Design and then on the right side in Slide Size and in Custom Slide Size.In the box that opens put the size of your document.Cbusiness cardIn the box that opens, enter the size of your document.Go to Tools > Options.BLEED Bleed is the extra measure you should put on your document to ensure that it does not have white borders around it.You should therefore add 4 mm to the height and width of your document.18On the Bleed panel place the 2mm measurement on the editable Show bleed area ..Your document should look similar to the one shown below.Then, extend the bottom of your fi lter to the bleed area.In the Options window, open the Document > Page Size option.In the upper bar select Page Layout . Then click on Sizeand, further down, on More Paper Sizes...In the upper bar select Page Layout. Then click on Size and, further down, on More Paper Sizes...In the window that will open, click Settings... In the box that opens, enter the size of your document.CIn the box that opens, enter the size of your document.8555In the box that opens, enter the size of your document.In the top menu, click File > Document Setup.BLEED Bleed is the extra measure you should put on your document to ensure that it does not have white borders around it.You should therefore add 4 mm to the height and width of your document.22Will open a window (image below). Click More Options.In Bleed and Slug write 2 mm in all fields, as in the imagebelow.In the upper bar select Page Layout . Then click on Sizeand, further down, on More Paper Sizes...In the box that opens, enter the size of your document.EM CSAVE DOCUMENT It is recommended that you save the PDF document in order to guarantee its quality.In the upper bar select Page Layout . Then click on Sizeand, further down, on More Paper Sizes...In the box that opens, enter the size of your document.EMClick Savein this new window.In the window that opens, in Adobe PDF Preset select [PDF/X-1a:2001].This option ensures that the PDF will not be changed.On the left side click on Marks and Bleeds and, below inBleeds select the optionUse Document Bleed Settings.24 In the upper bar select Page Layout. Then click on Sizeand, further down, on More Paper Sizes...In the box that opens, enter the size of your document.In Output and then in Destination select the FOGRA39 colorprofile, which will prevent your file from having a different colortone at the time of printing.After all changed fields, make sure that the Standard fieldcontinues with the selected PDF/X-1a:2001 option, otherwiseyour file will not be recorded correctly.7Click Save Preset, save these PDF presets with the name you want,so you can always reuse it.Finally, click Export.NOTA: If you are using a newer version of InDesign, athe Save Preset option will not appear, so you do not need to followthis step.25In the upper bar select Design and then on the right side inSlide Sizeand in Custom Slide Size.In the box that opens put the size of your document.4EMCEXPLANATORY GUIDEINKSCAPEGo to File > New .It will open a window (image below) where you can definethe settings of the document.In Units choose the unit you prefer, in this case we usedMilimeters.CREATE DOCUMENTIn Width set the width of your document, and in the Height field a altura do mesmo.26tab under Available Color Profiles select so that there are no changes to the color.In the upper bar select Page Layout . Then click on Sizeand, further down, on More Paper Sizes...In the box that opens, enter the size of your document.Make sure you add 4 mm to the height and width of your document.In the case of the business card with 85x55mm insert 89x59mm.BLEED Bleed is the extra measure you should put on your document to ensure that it does not have white borders around it.You should therefore add 4 mm to the height and width of your document.27Go to File > Save As and in the window that opens (image below),select Portable Document Format (PDF) and then click Save . SAVE DOCUMENT It is recommended that you save the PDF document in order to guarantee its quality.In the new window that opens, select Convert texts to path optionso that your document does not change.In Resolution for rasterization (dpi) insert 300.Click Ok .Copyright © 2019 360onlineprint. All rights reserved.Copyright © 2019 Bizay. All rights reserved。
微软公司产品指南说明书
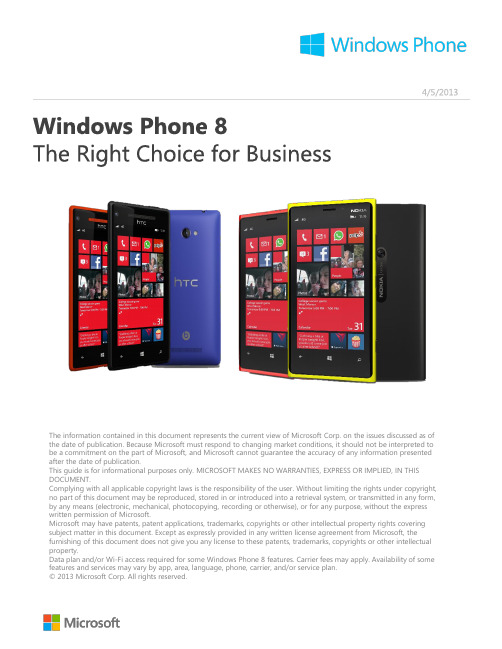
The information contained in this document represents the current view of Microsoft Corp. on the issues discussed as of the date of publication. Because Microsoft must respond to changing market conditions, it should not be interpreted to be a commitment on the part of Microsoft, and Microsoft cannot guarantee the accuracy of any information presented after the date of publication.This guide is for informational purposes only. MICROSOFT MAKES NO WARRANTIES, EXPRESS OR IMPLIED, IN THIS DOCUMENT.Complying with all applicable copyright laws is the responsibility of the user. Without limiting the rights under copyright, no part of this document may be reproduced, stored in or introduced into a retrieval system, or transmitted in any form, by any means (electronic, mechanical, photocopying, recording or otherwise), or for any purpose, without the express written permission of Microsoft.Microsoft may have patents, patent applications, trademarks, copyrights or other intellectual property rights covering subject matter in this document. Except as expressly provided in any written license agreement from Microsoft, the furnishing of this document does not give you any license to these patents, trademarks, copyrights or other intellectual property.Data plan and/or Wi-Fi access required for some Windows Phone 8 features. Carrier fees may apply. Availability of some features and services may vary by app, area, language, phone, carrier, and/or service plan.© 2013 Microsoft Corp. All rights reserved.With BYOD (Bring Your Own Device) becoming the industry norm, it is important for IT departments to choose a smartphone platform that appeals to consumers and will delight their end users. Windows Phone is rapidly winning the hearts of consumers and gathering industry accolades.Consumers love Windows PhoneBoth Windows Phone 8 and Windows Phone 8 devices are receiving high praise from consumers. Windows Phone 8 was rated the #1 OS by all readers of PC magazine and the Nokia Lumia 920 was rated the #1 phone by AT&T readers of PC Magazine.PC Magazine 2013Reader’s Choice AwardWindows Phone Accolades and Awards• 4 of the top 9smartphones across all carriers on are Windows Phone 8 devices •The Nokia Lumia 920 won the 2012 Engadget Readers Choice Award•The Windows Phone 8X by HTC won the Red Dot Design Award for 2013Your favorite apps, and over 130,000 moreWindows Phone has the apps and games youwant from brands you love. The WindowsPhone store has 130,000+ apps and 48 of thetop 50 apps on competing platforms. Get appsfor personal use such as Flixster, Cut theRope®, and Pandora. Or get apps for worksuch as, Evernote, Box, and LinkedIn. OnlyWindows Phone has Live Apps that bring youthe info you want, right on your start screen.With Windows Phone 8 we made certain that IT professionals could have peace of mind and effortlessly integrate with their Exchange, SharePoint, Lync and Office 365 infrastructure to lower their TCO. We ensured end users had the best possible Office, Outlook and Lync experience on their Windows Phone 8 devices. And we ensured that developers could use the Visual Studio and .NET tools they are already familiar with to develop code that would run on PCs, tablets and smartphones.Windows Phone Gaining Momentum Among CIOs•In a recent poll by Aberdeen Group, CIOs revealed that they plan to deploy mobile apps forWindows Phone and Windows tablets more than any other platform over the next 12 months. •Windows Phone has also seen significant growth over the past year, at the expense of BlackBerry.• A report by Strategy Analytics indicates that Windows Phone surpassed BlackBerry in Q4 2012 to become the #3 smartphone platform in the US.13432191012 118765The 13 Layers of Security on Windows Phone 8Below is an explanation of the security provided by the 13 numbered boxes in the security architecture diagram above:1.All Windows Phone 8 devices have to meet specific hardware requirements. This not onlyguarantees a base-level user experience, it limits the hardware-related security attack vectors.2.Windows Phone 8 is the only smartphone platform that has a Trusted Platform Module (TPM) 2.0chip embedded on every device. The TPM chip is a huge boost to security –it protects encryptionkeys, contains a crypto processing engine, and is a foundational element of a secure boot chain.3.Windows Phone 8 uses the Unified Extensible Firmware Interface (UEFI) Secure Boot industrystandard. UEFI is the new BIOS. In a UEFI Secure Boot process the firmware, the bootloader, thekernel and kernel extensions, are all cryptographically signed. This makes it easy to detect when any of these layers has been tampered with. If any layer in this boot process has been maliciouslyaltered, the device won’t boot.4.The crypto signing goes beyond the kernel –the entire OS and every single app on the system iscode-signed to guarantee a chain of trust from the hardware all the way up. This is not necessarilythe case for competing platforms. There is no real concept of a trusted boot chain on Android . And it is well known that the trusted boot chain on iPhone is not entirely trustworthy because everysingle version of iOS has been jailbroken within days of release .5.Windows Phone 8 uses the same NT Kernel as Windows 8 and Windows Server 2012. But it alsoshares the same driver model, developer platform, security, and networking stack and graphics and media platform. All of these have been tried and tested on more than a billion client and servermachines, many running mission-critical workloads.6.All updates to Windows Phone 8 now come directly from, and only from, Microsoft. This ensures theintegrity of the OS. Also all security fixes follow the same rigorous standards set by the Microsoft Security Response Center or MSRC for our client and server products.7.Windows Phone 8 supports alpha-numeric and complex passwords for device-locking.8.The internal storage on a device can now be fully encrypted using the same BitLocker technology thatships with Windows. The BitLocker encryption key is protected by the TPM 2.0 chip and will only be released if i) the device successfully passes the UEFI Secure Boot process to boot up a trusted OS, and ii) if the encrypted disk is physically located in the original device. This protects data at rest and guards against offline attacks. So it is not possible to take the encrypted storage out and get access to the data by booting from another OS, and it is also not possible to place the encrypted storage in another Windows Phone 8 device to access the data. This protects data at rest and guards against offlineattacks. With both device-lock and BitLocker enabled it is extremely difficult to gain unauthorized access to data on the internal storage.9.Every app runs in its own isolated chamber. Even the OS services run in their own isolated chamber.Each app receives only the capabilities it needs to perform all its use cases. It cannot elevate itsprivileges at run time, it cannot communicate with other apps on the phone other than through the cloud, and it cannot access memory, data or the keyboard cache used by another app.10.Even the browser runs in its own sandbox. Windows Phone 8 ships with a locked down version ofInternet Explorer 10 that does not support plug-ins, and comes with anti-phishing filters built-in.11.To further protect the data in each app, Windows Phone 8 provides another layer of encryption via theData Protection API. This is smart technology that uses entropy information already available on the device to automatically generate new encryption keys. This way apps do not have to worry about generating, storing and managing new keys. Each app also automatically receives its own decryption key when it first runs.12.However, no amount of encryption will prevent an authenticated user on a trusted device from sharingdata with unintended parties, willingly or unwillingly. This makes Information Rights Management (IRM) critical and Windows Phone is the only smartphone platform that has IRM built-in to prevent data leakage.13.Finally, data synchronization with most cloud services like Office 365 and on-premise servers likeExchange and SharePoint is done via the latest SSL 3.0 technology with AES 128 or 256 encryption.This protects data in transit.Note on TPM and UEFI Secure Boot standardsMicrosoft is a strong believer in open standards for security, like UEFI Secure Boot and TPM. Standards have numerous advantages over proprietary methods used by other smartphone platforms. Standards go through a transparent development process, survive rigorous open review from the best security minds across multiple organizations, and help ensure broad support across companies. The list of 100+ companies that define the TPM specifications can be found here and the firms behind the UEFI specifications can be found here.Maximize Value from Existing Microsoft InvestmentsThe built-in IRM client on Windows Phone helps you maximizevalue from your existing investments because it uses the ActiveDirectory Rights Management Service already available with yourWindows Servers. Exchange ActiveSync is also built-in andsupported and this is how Microsoft IT manages more than70,000 BYOD Windows Phone devices. Additionally, a built-inmanagement client is available so you can use your existingMobile Device Management software such as MobileIron,AirWatch, Citrix XenMobile, Symantec or Windows InTune andSystem Center 2012 SP1. Finally, to further lower your TCO,Windows Phone 8 comes with full-fidelity mobile versions ofOffice so you can make the most of your existing investments inExchange, SharePoint, Lync and Office 365.Windows Phone 8 integrates with your existing Microsoft infrastructure. Right out of the box, Windows Phone seamlessly works with Microsoft products you know and already own, such as Exchange, Office, SharePoint, Lync and Office 365 –no need to purchase additional third-party software.BES server software and admin costThird-party software for OfficeThird-party software for SharePointTypical incremental software & administration cost required to leverageSharePoint, Office and Exchange functionality on1,000 smartphonesWindows Phone 8 gives you the best Outlook and Exchange experience, the best mobile versions of Office, and the best communication and collaboration experiences with Lync and SharePoint.WP 8iOS 6Android4.0BB 10Setup,Lock screen, and Start screen Fast Office 365setup with simple input of ID and passwordResizable live tiles to access more information Notifications on lock screenOutlook e-mail, calendar, and contacts Pin frequently accessed e-mail folders to the Start screenSame integrated mail and calendar as Outlook on PC Access and search for e-mails on the Exchange Server Read protected e-mail (IRM)Office documents View, edit, and comment on Word, Excel, and PowerPoint documents“Places” panel for easy access to docs opened via email, or stored on SharePoint, SkyDrive or the phone Read protected IRM documents“Thumbnail” view to easily navigate long ppt decksLync communication Make VoIP and HD video Lync calls, and receive Lync calls like standard voice callsMultitask during Lync call -read email, view/edit/save docs, access SharePoint sites, use other apps etc. Attend Lync meetings with audio, video, and web conferencing with one click from OutlookSharePoint sites Sync documents across devices. Edit on one device andcontinue working right where you left offDownload documents for offline access and editing;upload changes when you are back onlineSearch for content on SharePoint team sites, lists ordocument librariesWrite and edit documents with colleagues at thesame timePin SharePoint sites to the Start screen for easy access485936Feature available Feature not available Feature available with conditions11.Not open to third party developers2.Requires setup through widgets3.Requires BlackBerry Enterprise Server (BES)4.View only5.Supported only by a few devices6.Documents To Go included7.No Lync app for BB 108.Access and view only, no editing9.Supported only by a few devices21777Common Development Foundation for Client and Mobile ComputingHistorically, apps for client computing devices like PCs, laptops and desktops have been developed separately from apps for mobile computing devices like smartphones and tablets. But as more client computing devices get touch screens and mobile broadband radios, and more mobile computing devices take on client computing workloads, it is going to be critical for you to be able to share code between the mobile and client computing worlds.From an app development perspective there is deep commonality between Windows Phone 8, Windows 8 and Windows RT.In fact, Windows Phone 8, Windows 8 and Windows RT share several components in a common development foundation that makes it easy to port apps across different form factors on the Windows platform.First, Windows Phone 8, Windows 8 and Windows RT share a common development environment and tools with Visual Studio and .NET. Second, they also share the same driver model, security model, web browser and managed code Common Language Runtime (CLR). Finally, Windows Phone 8, Windows 8 and Windows RT all support native code and have the exact same API set for Networking, File System, Input, Sensors, Graphics and Media, Audio, and Commerce.Flexibility with 3 Development ModelsApp developers also have flexibility in how they develop apps and can choose from 3 development models. They can write an app that uses whatever combination they desire between managed code, native code and HTML/JavaScript code. And they can run a lot of that code across Windows Phone 8, Windows 8 and Windows RT because of the common foundation. So porting apps and business functionality across your mobile and client computing worlds becomes a lot faster. This will be a critical capability needed by businesses as the worlds of mobile and client computing converge.There are a number of programs available to help you transition your organization to Windows Phone. Your Microsoft account team can provide more information and help you get started.Frequently Asked QuestionsWhat support options are available for businesses?The “Get technical support” section on /gp/windows-phone-8lists a variety of Windows Phone 8 technical support options available to businesses.Where can I learn more about Microsoft’s Support Lifecycle policy?The most common questions on this topic have been answered on/gp/lifepolicyWill Windows Phone 8 devices be upgradeable to the next version of the Windows Phone OS? Yes, Windows Phone 8 devices will be able to upgrade to the next version of Windows Phone OS when it is launched.Where can I get an in-depth overview of Windows Phone 8 for businesses?The Windows Phone 8 Reviewers Guide goes into considerable depth for all the areas covered by this document.。
微软办公室移动版在Windows Phone 7上的产品指南说明书

目錄Microsoft Office Mobile:概觀 (1)Office Mobile:概觀 (2)Office Mobile:深入探討 (3)檢視及更新 Office 文件 (3)Office 整合中心 - 新功能! (3)使用者介面 - 改良功能! (5)註解 - 新功能! (6)檔案格式支援 - 改良功能! (7)產品相關要點 (8)Word Mobile (8)Excel Mobile (9)PowerPoint Mobile (10)更有效率地導覽文件 (11)大綱窗格 - 新功能! (11)導覽式目錄 - 新功能! (12)改良的尋找功能! (12)手勢支援 - 改良功能! (13)保持收件匣井然有序 (14)電子郵件帳戶設定 - 改良功能! (14)收件匣檢視 - 新功能! (16)電子郵件選擇模式 - 新功能! (16)全盤掌握行程 (17)行事曆檢視 - 全新及改良的功能! (17)「遲到」電子郵件 - 新功能! (19)排程工具 - 改良功能! (19)行駛路線 - 新功能! (20)隨時隨地記錄筆記並與他人共用 (22)筆記記錄工具 - 改良功能! (22)電子郵寄筆記 - 新功能! (23)OneNote 電子郵件附件 - 改良功能! (24)隨時皆可使用筆記及保持筆記的一致性 (24)與 Windows Live或 SharePoint 進行同步 - 新功能! (25)筆記方塊 - 新功能! (27)搜尋筆記 - 新功能! (27)筆記結構 - 改良功能! (28)從遠端參加 PowerPoint 簡報廣播 (29)檢視 PowerPoint 簡報廣播 - 改良功能! (29)電子郵寄 Office 文件 (30)存取及更新儲存在 SharePoint 中的資訊 (31)更新 Office 文件與筆記 - 改良功能! (31)管理 SharePoint 檔案 - 改良功能! (32)從「我的網站」匯入最愛的連結 - 新功能! (33)伺服器轉譯的文件 - 新功能! (33)Office Mobile:常見問題集 (35)功能的可用性/公開揭示 (36)Microsoft Office Mobile:概觀最近您可能都是仰賴行動裝置隨時獲取工作、親朋好友與外界的最新消息。
微软产品表说明书

C N t g iOpen License•A Select Enterprise Agreement–ÚC N t g i (1) (5) (5) (6)Enterprise Desktop Professional Platform i (8)/ƒg (9) (9)Enterprise Agreement MultiLanguage Pack (9)(ƒg) •i t g E A ƒA A (10) (10) (10)Microsoft® Access 2002 for Windows (10)Microsoft® Creative Writer version 2.0 (Academic) (11)Microsoft® Data Analyzer version 2002 (11)Microsoft® Encarta® Encyclopedia Deluxe version 2003 (Academic) (11)Microsoft® Encarta® Reference Library version 2003 (Academic) (11)Microsoft® Excel version 2002 for Windows (11)Microsoft® Excel version 10 for Macintosh (12)Microsoft® FrontPage version 2002 for Windows (12)Microsoft® Magic School Bus Animals version 1.0 for Windows (13)Microsoft® Magic School Bus Bugs version 1.0 for Macintosh/Windows (13)Microsoft® Magic School Bus Flight version 1.0 for Macintosh/Windows (13)Microsoft® Magic School Bus Mars version 1.0 for Macintosh/Windows (13)Microsoft® Magic School Bus Volcanoes version 1.0 for Mac/Windows (13)Microsoft® Magic School Bus Whales/Dolphins version 1.0 for Macintosh/Windows (15)Microsoft® MapPoint version 2002 for Windows (15)Microsoft® Enterprise Learning Library (MELL) Desktop Edition (15)Microsoft® Enterprise Learning Library (MELL) IT Professional Edition (16)Microsoft® MSDN® Enterprise (17)Microsoft® MSDN®ƒI y e B O ƒV X e (18)Microsoft® MSDN® Professional (18)Microsoft® MSDN® Universal (19)Microsoft® Office XP Enterprise for Windows (20)Microsoft® Office XP Enterprise for Windows – ‰p/‘ (21)Microsoft® Office XP Professional for Windows (21)Microsoft® Office XP Professional for Windows – ‰p/‘ (22)Microsoft® Office XP Professional with FrontPage for Windows (22)Microsoft® Office XP Professional with FrontPage for Windows – ‰p/‘ (23)Microsoft® Office XP Developer for Windows (23)Microsoft® Office version 10 for Macintosh (24)Microsoft® Outlook® version 2002 for Windows (24)Microsoft® PowerPoint® version 2002 for Windows (25)Microsoft® PowerPoint® version 10 for Macintosh (25)Microsoft® Project version 2002 for Windows (25)Microsoft® Project version 2002 for Windows – ‰p/‘ (26)Microsoft® Project Professional version 2002 for Windows (27)Microsoft® Project Professional version 2002 for Windows – ‰p/‘ (27)Microsoft® Proofing Tools version 2002 (27)Microsoft® Publisher version 2002 for Windows (27)Microsoft® Streets and Trips 2003 (28)Microsoft® TechNet Plus CAL (28)Microsoft® TechNet Plus Server (28)Microsoft® Visio® Standard version 2002 for Windows (28)Microsoft® Visio® Professional version 2002 for Windows (29)Microsoft® Visual FoxPro® Professional version 7.0 (30)Microsoft® Visual SourceSafe® version 6.0 (31)Microsoft® Visual Studio .Net Professional Edition version 2002 (31)Microsoft® Visual Studio .Net Enterprise Developer Edition version 2002 (32)Microsoft® Visual Enterprise Architect version 2002 (32)Microsoft® Word version 2002 for Windows (33)Microsoft® Word version 2001 for Macintosh (33)Microsoft® Word version 10 for Macintosh (33)Microsoft® Works version 7.0 for Windows (33) (35)Microsoft® Windows XP Professional Upgrade (35)Microsoft® Windows XP Professional Upgrade – ‰p/‘ (38) (39) (39)Microsoft® Application Center version 2000 1v b T ƒC X (39)Microsoft® BizTalk Financial Services Enterprise version 1.0 1v b T ƒC X (39)Microsoft® BizTalk Financial Services Standard version 1.0 1v b T ƒC X (39)Microsoft® BizTalk HIPAA Standard version 2.0 1v b T C X (39)Microsoft® BizTalk HIPAA Enterprise version 2.0 1v b T C X (39)Microsoft® BizTalk HIPAA Enterprise version 2000 1v b T ƒC X (40)Microsoft® BizTalk RosettaNet Standard version 1.0 1v b T ƒC X (40)Microsoft® BizTalk RosettaNet Standard version 2.0 1v b T ƒC X (41)Microsoft® BizTalk RosettaNet Standard version 2.0 1v b T ƒC X (41)Microsoft® BizTalk RosettaNet Enterprise version 2.0 1v b T ƒC X (41)Microsoft® BizTalk SAP Enterprise ƒA v version 1.0 1v b T ƒC X (41)Microsoft® BizTalk Server Standard version 2002 1v b T ƒC X (41)Microsoft® BizTalk Server Developer version 2002 (41)Microsoft® BizTalk Server Enterprise version 2002 1v b T ƒC X (43)Microsoft® BizTalk Supplier Accelerator version 1.0 1v b T ƒC X (43)Microsoft® Class Server 2.0 (43)Microsoft® Class Server 2.0 Student License (43)Microsoft® Commerce Server Standard version 2002 1v b T ƒC X (43)Microsoft® Commerce Server Enterprise version 2002 1v b T ƒC X (45)Microsoft® Commerce Server Developer version 2002 (45)Microsoft® Content Management Server Enterprise version 2002 1v b T ƒC X (45)Microsoft® Core CAL (Client Access License) (45)Microsoft® Exchange Server CAL (Client Access License) (45)Microsoft® Exchange Server Standard version 2000 (46)Microsoft® Exchange Server Enterprise version 2000 (46)Microsoft® Exchange Conferencing Server version 2000 (46)Microsoft® Host Integration Server version 2000 1v b T ƒC X (46)Microsoft® Internet Security and Acceleration Server version 2000 1v b T ƒC X (47)Microsoft® Internet Security and Acceleration Server Enterprise version 2000 1v b T ƒC X (47)Microsoft® Mobile Information Server Enterprise version 2002 (49)Microsoft® Mobile Information Server Enterprise version 2002 with OMA (49)Microsoft® Mobile Information Server Developer version 2002 (49)Microsoft® MOM 2000 Application Management Pack 1v b T ƒC X (49)Microsoft® MOM Operations Manager Base version 2000 (50)Microsoft® Project Server version 2002 for Windows (50)Microsoft® Project Server CAL version 2002 for Windows (50)Microsoft® Services for Netware version 5.0 (50)Microsoft® Services for Unix version 3.0 (51)Microsoft® SharePoint Portal CAL version 2001 (51)Microsoft® SharePoint Portal Server version 2001 (51)Microsoft® Small Business Server 2000 (5 Client Access License t) (51)Microsoft® Small Business Server 2000 5 Client Add On (51)Microsoft® SQL Server CAL (Client Access License) version 2000 (52)Microsoft® SQL Server Standard version 2000 (52)Microsoft® SQL Server Standard version 2000 1v b T ƒC X (53)Microsoft® SQL Server Developer version 2000 (53)Microsoft® SQL Server Enterprise version 2000 (53)Microsoft® SQL Server Enterprise version 2000 1 ƒv b T ƒC X (54)Microsoft® SQL Server CAL 2000 Runtime (Independent Software Vendor (ISV) •p) (54)Microsoft® SQL Server Standard 2000 Runtime (Independent Software Vendor (ISV)•p) (54)Microsoft® SQL Server Standard version 2000 1 processor license Runtime (Independent Software Vendor (ISV)•p) (55)Microsoft® SQL Server Enterprise version 2000 Runtime (Independent Software Vendor (ISV)•p) (55)Microsoft® SQL Server Enterprise version 2000 1 ƒv b T ƒC X Runtime (Independent Software Vendor (ISV)•p) (56)Microsoft® Systems Management Server CAL (Client Access License) version 2.0 (56)Microsoft® Systems Management Server version 2.0 (56)Microsoft® Windows 2000 Server CAL (Client Access License) (57)Microsoft® Windows 2000 Server (57)Microsoft® Windows 2000 Server – ‰p/‘ (58)Microsoft® Windows 2000 Advanced Server (58)Microsoft® Windows 2000 Advanced Server – ‰p/‘ (58)Microsoft® Windows 2000 Internet Connector (60)Microsoft® Windows 2000 Terminal Services Internet Connector (60)Microsoft® Windows 2000 Terminal Server Client Access License (60)C N t g I i g p¾EI: C N t g i A o A–A BXA (—A o: Bureau of Export Administration) ‚A o K (EAR, 15 CFR 730-744) ‚u EI vB A /products/exporting/basics.htm QB¾l’: •i g p u l v p A e C X–l–B•Open License: •u C V v u l v•Select: •u X v A u h X A v A u M v Au A v u A v•Enterprise Agreement: •u J X v A u A v A u M vu A vi C v’¾C X i License•ji C v o W A i o W g p tB A o W ƒA b v O h A v N g ƒA b v O h A R y e B e B u ƒA b v O h AQ W A b v O h V K C X i Standard License•jB¾A b v O h(Windows f X N g b v ƒI y e B O ƒV X e g p)i C v Windows f X N g b v I y e B O V X e’A o W’A’i o W g p t B A o W A b v O h Ai A b v O h A R y e B e B u A b v O h Q W A b v O hB¾t g E F A ƒA V A X(Software Assurance)i C v o W B s xt g E F A ƒA V A X’O A l C X i K vB t g E F A ƒA V A X A L’A i V o W A bv O h A g p B¾C X t g E F A ƒA V A X(License & Software Assurance)i C v o W A l C X t g E F A A V A XB¾A b v O h t g E F A ƒA V A X(Upgrade & Software Assurance)(Windows f X N g b v ƒI y e B O ƒV X e g p)i C v Windows f X N g b v I y e B O V X e’A o W’A l f X N g b v ƒI y e B O ƒV X e A b v O h t g E F A ƒAV A X B¾Work at Home C XWork at Home C X o W’B Work at Home C XI i’g p B Work at Home CX At Work Computer•i’R s A KC X t g E F A R s g p R s j U A YWork at Home C X i g p i L B Work at Home C Xi A e i m F B¾A b v O h ƒA h o e WA b v O h ƒA h o e W’Select Open License l A’s x A C X C N t g t g E F A i A AA b v O h A h o e W L O’nˆi V o W g p B A b v O h A h o e W LA Select Open License F L’v‚B A b vO h A h o e W’P“C X B A b v O h A h o e Wv A i V o W o W C X K vBl A b v O h A h o e W N I v V I A2x x zA A b v O h A h o e W’’A x I xi X e Bi C v w¾V K C XSelect License (‘S o W)•A Open License 5.0/6.0e v O’BSelect License Open License v O l V K C X w O’ñB¾A b v O h(Windows f X N g b v ƒI y e B O ƒV X e g p)Select License (‘S o W) •A Open License 5.0/6.0e v O’Bl Windows f X N g b v I y e B O V X e A b v O h C X wO A f X N g b v I y e B O V X e C X K vB A g®I y e B O V X e(Windows 9.x embedded•A Windows XPembedded)‚®f o C X L l A Y f o C X CX v O Windows f X N g b v I y e B O V X e A b v O h wB Windows f X N g b v I y e B O V X e A b v O h wf X Ng b v I y e B O V X e i i X g A V X e i QB¾t g E F A ƒA V A Xw:Select License (‘S o W)•A Open License 5.0/6.0•A Enterprise Agreement 6.0e v O’B t g E F A A V A X A C X w A t gE F A A V A X L I w B t g E F A ƒA V AX w A X v O Q Bp b P W i OEM w C X t g E F A A V AX l A C X t g E F A A V A Xw90A Select License Open License v OB p b P W i A v P V iC XA t g E F A ƒA V A X BX V:t g E F A ƒA V A X A b v O h p A l A C X w Aƒt g E F A ƒA V A X L I t g E F A ƒA V A X wB l AC X w A ƒt g E F A ƒA V A X L It g E F A A V A X w A A L C X A b v Oh A V K C X A A C X t g E F A A V A X wB(Windows f X N g b v I y e B O V X e A A b v O hA A b v O h t g E F A ƒA V A X w B)¾C X t g E F A ƒA V A XSelect License (‘S o W)•A Open License 5.0/6.0•A Enterprise Agreement 6.0Enterprise Subscription Agreement 6.0e v O’B C X t gE F A A V A X O’ñB t g E F A A V A X AY C X w A t g E F A A V A X X V wB SC X v O A l A t g E F A A V AX w t g E F A A V A X A b v O hA C X t g E F A ƒA V A X w B¾A b v O h t g E F A ƒA V A XSelect License (‘S o W)•A Open License 6.0•A Enterprise Agreement 6.0Enterprise Subscription Agreement 6.0e v O’Bl A b v O h t g E F A ƒA V A X O A f X N g b v ƒI y e B O ƒV X e C X B t g E F A ƒA V A XA Y A b v O h ƒC X w A ƒt g E F A ƒA V A X X Vw B S C X v O A l A t gE F A A V A X w t g E F A A V A X A b v Oh A A b v O h t g E F A A V A X wB Windows f X N g b v ƒI y e B O ƒV X e A A b v O h&t g E F A ƒA V A X’B¾Work at Home C XSelect License (‘S o W) ‚Enterprise Agreement 6.0e v O’B l i™iC X K v BWork at Home C X At Work Computer •i’R s A KC X t g E F A R s g p R s j g p iB Work at Home l ASelect Enterprise Agreement l (‰) ‚Work at Home C XB¾A b v O h X V l A2001N101t gE F A ƒA V A X wSelect License X V: A b v O h A h o e W S t g E F A A V A X™B A b v O h A h o e W A t g E F A A V A X A A b v Oh C X O C N t g C X(6.0o W)‚w A t g E F A A V A X A b v O h X V lA Y A b v O h90A V Select 6.0’B A b v O h h®A V Select 6.0A O k A l V’A t g E F A ƒA V A X X V’K v BOpen License X V: A b v O h A h o e W S t g E F A A V A X™B A b v O h A h o e W A t g E F A A V A X A A b v Oh C X2001N930O Open License F w A t gE F A A V A X A b v O h X V l A O Open License F90A V Open License 6.0Ft g E F A ƒA V A X A b v O h X V BEnterprise Agreement X V: V G v C Y 6.0A S f X N g b vC X t g E F A A V A X B l A G v C Y6.0A Enterprise Agreement X V i X V B X V i t g E F A ƒA VA X i’B Enterprise Agreement 4.x 5.x Œl A Y G v C Y f X N g b v’w it g E F A A V A X X V l A O G v C Y90A V Enterprise Agreement 6.0’B A b v O h h®A V Enterprise Agreement 6.0A O k B¾A b v O h ƒA h o e W2002N731A l L Select 4.x 5.x iA b v O h A h o e W w B2002N731A l LOpen License 5.0Open License 6.0F i A b v O h ƒA h o e W w BEnterprise Desktop Professional Platform i¾Enterprise Desktop Professional Platform i A Enterprise Agreement l’B Enterprise Desktop Professional Platform A V o W OfficeProfessional•A Windows Desktop Operating System Upgrade w’èWindowso W(Windows 95•A Windows 98Windows 2000 Professional o W)•A Core Client Access License B Enterprise Desktop Professional Platform i Ai Enterprise Agreement u E•v BC g/ƒj b g¾u C g v A C N t g A i f C X’l‚Al K p i x v g p B’i u0•i j v C g A w’èv O Y i’AC g0i j B Enterprise Agreement EnterpriseSubscription Agreement C g O A Enterprise Agreement Enterprise Subscription Agreement i C g B Select 4.0A u j b g v u Cg v B–}Open = ‚Open License v O ƒo WSelect = Select License 6.0•A5.x 4.x v O ƒo WEA (Enterprise Agreement) = Enterprise Agreement 6.0•A Enterprise Agreement 5.x v Oo W A Enterprise Select Agreement 4.xEA Sub (Enterprise Subscription Agreement) = Enterprise Subscription Agreement 6.0E = •i G v C Y i BA = •i’w i BL (ƒC X) = Žw’èi V K C X’C g’l•BU (ƒA b v O h ƒC X) = Žw’èi A b v O h’C g’l•BL&SA (ƒC X t g E F A A V A X) = Žw’èi C X t g E F A ƒA V A X’C g’l•BU&SA (ƒA b v O h t g E F A A V A X) = Žw’èi A b v O h t gE F A ƒA V A X’C g’l•BSA (ƒt g E F A A V A X) = Žw’èi t g E F A A V A X’C g’l•B3 Yr = (Žc–3N)2 Yr = (Žc–2N)1 Yr = (Žc–1N)Enterprise Agreement MultiLanguage Pack¾u v I v V Enterprise Agreement l A Enterprise Agreement 4.1 4.11 ’u f X N g b v i v A Enterprise Agreement 5.0’u G v C Y i v u’Çw i v CX A MultiLanguage Pack g p B i Enterprise Agreement 6.0 ‚A u v I v V B j(ƒX C g) •i t g E F AƒA V A X X V¾ u (ƒX C g )•v i (Microsoft® Office•A Microsoft Visual Studio™‚) ‚t g E F AƒAV A X X V l A i S X V K v B e R l g i t g E F A ƒA V A X X V B A Y i i g p r L BC N t g A v P V i QI i g p¾ N X v b g t H C XMicrosoft Excel A Office Standard Edition A Office Professional Edition A PowerPoint AMicrosoft Project•A Word Works A u v b g t H v C X K p B N X v b g t H C X A C X o W o W O o W A t g E F A R s v b g t H (‚A Intel®ƒx X A Macintosh ) ’i g p B A Microsoft Excel 5.0 for Macintosh w l A C X g p Microsoft Excel 5.0 for Windows Microsoft Excel 5.0 for Windows NT g p A Microsoft Excel 7.0 for Windows 95g p B A N X v b g t H C X t g E F A A V A X ’l A11o W C X g g p A A b v O h ’g p Y i V o W v b g t H g p i B A Word for Macintosh Word for Macintosh t g E F A ƒA V A XA b v O h A h o e W ’l A l A b v O h ’Word for Windows V o W g p BMicrosoft® Access 2002 for WindowsSelect Open EAEASubL L&SA SA L L&SA SA3Yr 2Yr 1Yr 3Yr 2Yr 1Yr1 32 2 2 1 11 2 2 i g pAccess 2002v N g LC X l A Select CD f B X N L b g Office XP X Office XP A v P V C X g A V B C X l A Select CD f B X N L b g C X g s A C X v N g L K v B C X g B Office XP X Office XP A v P V C X g A v N g L B A f B X N L b g L v N g L A C X v N g L g p K v BC X v N g L @A /japan/info/license/mpa/ ‚m F BAccess 2002V A C X gC X l Access 2002V A C X g A C X v N g L g p B Access 2002V A v N g L g p A f X N g b v A N e B x V s K v BOfficeXP V A C X g K v v N g L @A ‚m F BMicrosoft® Creative Writer version 2.0 (Academic )Select Open EAEASub L L&SA SA L L&SA SA3Yr 2Yr 1Yr 3Yr 2Yr 1Yr0 Microsoft® Data Analyzer version 2002Select Open EAEASubL L&SA SA L L&SA SA 3Yr 2Yr 1Yr 3Yr 2Yr 1Yr 1 3 2 2 2 1 11 2 1 Microsoft® Encarta® Encyclopedia Deluxe version 2003 (Academic )Select Open EAEASub L L&SA SA L L&SA SA3Yr 2Yr 1Yr 3Yr 2Yr 1Yr0 Microsoft® Encarta® Reference Library version 2003Select Open EAEASubL L&SA SA L L&SA SA 3Yr 2Yr 1Yr 3Yr 2Yr 1Yr 11Microsoft® Excel version 2002 for WindowsSelect Open EAEASubL L&SA SA L L&SA SA3Yr 2Yr 1Yr 3Yr 2Yr 1Yr1 32 2 2 1 11 2 1i g pExcel 2002v N g LC X l A Select CD f B X N L b g Office XP X Office XP A v P V C X g A V B C X l A Select CD f B X N L b g C X g s A C X v N g L K v B C X g B Office XP X Office XP A v P V C X g A v N g L B A f B X N L b g L v N g L A C X v N g L g p K v BC X v N g L @A /japan/info/license/mpa/ ‚m F BExcel 2002V A C X gC X l Excel 2002V A C X g A C X v N g L g p B Excel 2002V A v N g L g p A f X N g b v A N e B x V s K v BOffice XP VA C X g K v v N g L @A ‚m F BMicrosoft® Excel version 10 for MacintoshSelect Open EAEASubL L&SA SA L L&SA SA3Yr 2Yr 1Yr 3Yr 2Yr 1Yr1 32 2 2 1 11 2 1 Microsoft® FrontPage version 2002 for WindowsSelect Open EAEASubL L&SA SA L L&SA SA3Yr 2Yr 1Yr 3Yr 2Yr 1Yr1 32 2 2 1 11 2 1 A A i g pFrontPage 2002v N g LC X l A Select CD f B X N L b g Office XP X Office XP A v P V C X g A V B C X l A Select CD f B X N L b g C X g s A C X v N g L K v B C X g B Office XP X Office XP A v P V C X g A v N g L B A f B X N L b g L v N g L A C X v N g L g p K v BC X v N g L @A /japan/info/license/mpa/ ‚m F BFrontPage 2002V A C X gC X l FrontPage 2002V A C X g AC X v N g L g p B FrontPage 2002V A v N g L g p A f X N g b v A N e B x V s K v BOffice XP V A C X g K v v N g L @A ‚m F BMicrosoft® Magic School Bus Animals version 1.0 for WindowsSelect Open EAEASubL L&SA SA L L&SA SA3Yr 2Yr 1Yr 3Yr 2Yr 1Yr0 Microsoft® Magic School Bus Bugs version 1.0 for Macintosh/WindowsSelect Open EAEASubL L&SA SA L L&SA SA3Yr 2Yr 1Yr 3Yr 2Yr 1Yr0 Microsoft® Magic School Bus Concert version 1.0 for Macintosh/WindowsSelect Open EAEASubL L&SA SA L L&SA SA3Yr 2Yr 1Yr 3Yr 2Yr 1Yr0 Microsoft® Magic School Bus Flight version 1.0 for Macintosh/WindowsSelect Open EAEASubL L&SA SA L L&SA SA3Yr 2Yr 1Yr 3Yr 2Yr 1Yr0 Microsoft® Magic School Bus Mars version 1.0 for Macintosh/WindowsSelect Open EAEASubL L&SA SA L L&SA SA3Yr 2Yr 1Yr 3Yr 2Yr 1Yr0 Microsoft® Magic School Bus Volcanoes version 1.0 for Mac/WindowsSelect Open EAEASubL L&SA SA LSAL&SA3Yr 2Yr 1Yr1Yr3Yr2YrMicrosoft® Magic School Bus Whales/Dolphins version 1.0 for Macintosh/WindowsSelect Open EAEASubL L&SA SA L L&SA SA3Yr 2Yr 1Yr 3Yr 2Yr 1Yr0 Microsoft® MapPoint version 2002 for WindowsSelect Open EAEASubL L&SA SA L L&SA SA3Yr 2Yr 1Yr 3Yr 2Yr 1 3 2 2 2 1 11 2A A Microsoft® Enterprise Learning Library (MELL) Desktop EditionSelect Open EAEASubL L&SA SA L L&SA SA3Yr 2Yr 1Yr 3Yr 2Yr 1Yr3 2 2 2 1 12 1 A A i g pMicrosoft Enterprise Learning Library (MELL) Desktop Edition eMicrosoft Enterprise Learning Library (MELL) Desktop Edition C X A Core Trainingfor Microsoft Office XP•A Core Training for Microsoft Windows XP Professional•A Core Training for Microsoft Excel 2000A Core Training for Microsoft Outlook 2000A Core Training for Microsoft Windows 2000 Professional, Core Training for Microsoft Word 2000•A EBook B Microsoft Office XP Inside Out•A Microsoft Windows XP Inside Out•A Running Microsoft Excel 2000•A Running Microsoft Outlook 2000•A Running Microsoft Windows 2000 Professional•A Running Microsoft Word 2000•A Microsoft Computer Dictionary (Fifth Edition)•A Creating Dynamic Presentations with Streaming Media•A Taming the Information Tsunami•B•Microsoft® Enterprise Learning Library (MELL) Developer EditionSelect Open EAEASubL L&SA SA L L&SA SA3Yr 2Yr 1Yr 3Yr 2Yr 1Yr3 2 2 2 1 12 1 A A i g pMicrosoft Enterprise Learning Library (MELL) Developer Edition eMicrosoft Enterprise Learning Library (MELL) Developer Edition C X A EBookB MCAD/MCSD Self-Paced Training Kit: Developing Web Applications with Microsoft Visual Basic .NET and Microsoft Visual C# .NET•A MCAD/MCSD Self-Paced Training Kit: Developing Windows-Based Applications with Microsoft Visual Basic .NET and Microsoft C# .NET•A Microsoft Visual C# .NET (Core Reference)•A Programming Microsoft .NET•A Inside Microsoft .NET IL Assembler A Introducing Microsoft .NET (Second Edition)A Inside C# (Second Edition)A Developing XML Solutions A XML and SOAP Programming for BizTalk Servers A XML Programming (Core Reference)A Building XML Web Services for the Microsoft .NET Platform•A Building Web Solutions with and •A Programming the Microsoft Windows Driver Model•A Debugging Applications•A Microsoft Windows Script Host 2.0 Developer’s Guide•A Designing Secure Web-Based Applications for Microsoft Windows 2000•A Inside Microsoft Windows 2000 (Third Edition)•A Building .NET Applications for Mobile Devices A Network Programming for Microsoft Windows (Second Edition)A Writing Secure Code•BMicrosoft® Enterprise Learning Library (MELL) IT Professional EditionSelect Open EAEASubL L&SA SA L L&SA SA3Yr 2Yr 1Yr 3Yr 2Yr 1Yr3 2 2 2 1 12 1 A A i g pMicrosoft Enterprise Learning Library (MELL) IT Professional Edition eMicrosoft Enterprise Learning Library (MELL) IT Professional Edition A EBook B Microsoft Exchange 2000 Server Administrator's Companion•A MCSE Training Kit: Microsoft Exchange 2000 Server Implementation and Administration•A MCSE Training Kit: Microsoft Exchange 2000 Server Design and Deployment A Microsoft SQL Server 2000 Administrator's Companion A MCSE Training Kit: Microsoft SQL Server 2000 System Administration A MCSE Training Kit: Microsoft SQL Server 2000 Database Design and Implementation•A MCSE Training Kit: Microsoft Windows 2000 Active Directory Services•A MCSE Training Kit: Designing a Microsoft Windows 2000 Directory Services Infrastructure•A MCSE Training Kit: Upgrading to Microsoft Windows 2000•A MCSE Training Kit: Microsoft Windows 2000 Accelerated•A MCSE Training Kit: Microsoft Windows XP Professional (Exam 70-270)•A MCSE Microsoft Windows XP Professional Readiness Review (Exam 70-270)•A Microsoft Windows XP Professional Resource Kit Documentation•A Microsoft Windows 2000 Professional Resource Kit•A MCSE Training Kit: Microsoft Windows 2000 Professional•A MCSETraining Kit: Designing Microsoft Windows 2000 Network Security A MCSE Training Kit: Designing a Microsoft Windows 2000 Network Infrastructure A MCSA/MCSE Self-Paced Training Kit: Managing a Microsoft Windows 2000 Network Environment (Exam 70-218)•A MCSE Training Kit: Networking Essentials Plus (Third Edition)•A MCSE Training Kit: Microsoft Windows 2000 Network Infrastructure Administration•A MCSE Training Kit: Microsoft Windows 2000 Advanced Server Clustering Services•A MCSE Training Kit: Designing Highly Available Web Solutions with Microsoft Windows 2000 Server Technologies A MCSE Training Kit: Microsoft Windows 2000 Server•BMicrosoft® MSDN® EnterpriseSelect Open EAEASubL L&SA SA L L&SA SA 3Yr 2Yr 1Yr 3Yr 2Yr 1Yr 20 15 10 15 10 515 10 A A i g pT u X N v VMSDN Enterprise T u X N v V A Select Open License F L I BMSDN Enterprise t g E F AƒA V A X wC X L l A MSDN Enterprise t g E F AA V A X w B• L MSDN Enterprise • L MSDN Professional •L MSDN Universal• Visual Studio Professional Visual Studio Enterprise ‚A b v O h A h o e W (ˆI i g p K ’è’w )•Visual Tools (Professional ‚ Enterprise) ‚ Visual SourceSafe ‚A b v Oh A h o e W (ˆI i g p K ’è’w )Microsoft® MSDN® ƒI y e B O ƒV X eSelectOpen EAEASubL L&SA SA L L&SA SA 3Yr 2Yr 1Yr 3Yr 2Yr 1Yr22i g pT u X N v VMSDN I y e B O ƒV X e T u X N v V A(a) MSDN I y e B OƒV X e ƒT u X N v V o 1N A A(b) Select Open License FL t I BMSDN I y e B OƒV X e ƒt g E F AƒA V A X wMSDN I y e B O V X e C X L l AMSDN Enterprise•A MSDNProfessional MSDN Universal t g E F A ƒA V A X w B A A b v O h MSDN x C X t g E F AA V A X w K v BMicrosoft® MSDN® ProfessionalSelect Open EAEASub L L&SA SA L L&SA SA3Yr 2Yr 1Yr 3Yr 2Yr 1Yr 16 12 8 12 8 412 8 i g pT u X N v VMSDN Professional T u X N v V Select Open License F L I BMSDN Professional t g E F AƒA V A X wC X L l A MSDN Professional t g E F A A V A X w B• L MSDN Enterprise • L MSDN Professional •L MSDN Universal• Visual Studio Professional Visual Studio Enterprise ‚A b v O h A h o e W (ˆI i g p K ’è’w )•Visual Tools (Professional ‚ Enterprise) ‚ Visual SourceSafe ‚A b v Oh A h o e W (ˆI i g p K ’è’w )Microsoft® MSDN® UniversalSelect Open EAEASubL L&SA SA L L&SA SA 3Yr 2Yr 1Yr 3Yr 2Yr 1Yr 31 23 15 24 16 823 16 A A i g pT u X N v VMSDN Universal T u X N v V Select Open License F L I BMSDN Universal t g E F AƒA V A X wC X L l A MSDN Universal t g E F AƒA V A X w B• L MSDN Enterprise • L MSDN Professional •L MSDN Universal• Visual Studio Professional Visual Studio Enterprise ‚A b v O h A h o e W (ˆI i g p K ’è’w )•Visual Tools (Professional ‚ Enterprise) ‚ Visual SourceSafe ‚A b v Oh A h o e W (ˆI i g p K ’è’w )Microsoft® Office XP Enterprise for WindowsSelect Open EAEASubL L&SA SA L L&SA SA 3Yr 2Yr 1Yr 3Yr 2Yr 1Yr2 5 43 3 2 12 4 2* WAH for Office XP Enterprise for Windows (1C g )‚A Select 6.0l p B* WAH for Office XP Enterprise for Windows A Enterprise Agreement 6.0l p Bi g pOffice XP Enterprise R l gOffice XP Enterprise•A Office XP Professional•A Office XP Professional with FrontPage Office XP Developer A ’Pˆi C X ’B e i X R l g A 2R s g p B Office XP Standard R l gOffice XP Standard C X R l g B Excel 2002•A Outlook2002•A PowerPoint 2002Word 2002•B Office XP v N g LC X l A Select CD f B X N L b g Office XP X Office XP A v P V C X g A V B C X l A Select CD f B X N L b g C X g s A C X v N g L K v B C X g B Office XP X Office XP A v P V C X g A v N g L B A f B X N L b g L v N g L A C X v N g L g p K v BC X v N g L @A /japan/info/license/mpa/ ‚m F BOffice XP V A C X gC X l Office XP Developer V A C X g A C X v N g L g p B Office XP Developer V A v N g L g p A f X N g b v A N e B x V s K v B Office XP V A C X g K v v N g L @A ‚m F B。
说明书 Microsoft Word 文档

摘要约瑟夫环问题是典型的线性表的应用实例,猴子吃桃问题是递归的应用实例,稀疏矩阵是对三元组的主要运用,它们的开发主要包括后台数据库的建立和维护以及前端应用程序的开发两个方面。
对于前者要求建立起数据一致性和完整性强、数据安全性好的库。
而对于后者则要求应用程序功能完备,易使用等特点。
经过分析,我们使用MICROSOFT公司的Microsoft Visual C++6.0开发工具,利用其提供的各种面向对象的开发工具,尤其是数据窗口这一能方便而简洁操纵数据库的智能化对象,首先在短时间内建立系统应用原型,然后,对初始原型系统进行需求迭代,不断修正和改进,直到形成用户满意的可行系统。
关键词:c语言;约瑟夫环;递归;三元组;序言数据结构是研究数据元素之间的逻辑关系的一门课程,以及数据元素及其关系在计算机中的存储表示和对这些数据所施加的运算。
该课程设计的目的是通过课程设计的综合训练,培养分析和编程等实际动手能力,系统掌握数据结构这门课程的主要内容。
本次课程设计的内容是用单循环链表模拟约瑟夫环问题,循环链表是一种首尾相接链表,其特点是无须增加存储容量,仅对表的链接方式稍作改变,使表处理更加灵活,约瑟夫环问题就是用单循环链表处理的一个实际应用。
通过这个设计实例,了解单链表和单循环链表的相同与不同之处,进一步加深对链表结构类型及链表操作的理解。
猴子吃桃问题是采用数组数据结构、链式数据结构。
分别利用递归算法、链式存储、数组来实现函数功能。
将所有模块放在一起,利用主函数中的菜单来调用不同子函数以实现题目要求。
稀疏矩阵采用三元组表示,建立稀疏矩阵,并能按矩阵和三元组方式输出;完成稀疏矩阵的转置操作;完成对两个具有相同行列数的稀疏矩阵进行求和操作;对前一矩阵行数与后一矩阵列数相等的两个矩阵,完成两个稀疏矩阵的相乘操作。
通过该课程设计,能运用所学知识,能上机解决一些实际问题,了解并初步掌握设计、实现较大程序的完整过程,包括系统分析、编码设计、系统集成、以及调试分析,熟练掌握数据结构的选择、设计、实现以及操作方法,为进一步的应用开发打好基础。
Microsoft Office 文档编辑器用户指南说明书

Afficher ou masquer le ruban Cliquez sur cette flèche pour masquer le ruban. Pour afficher le ruban, cliquez sur un onglet, puis cliquer sur l’icône d’épingle.
Lorsque vous insérez plusieurs images à la fois, Publisher 2013 les insère dans une colonne dans le plan de montage. À partir du plan de montage, vous pouvez faire glisser une image sur la page de votre composition et l’en retirer, ou remplacer l’image par une autre si elle ne vous convient pas.
Ajoutez une ou plusieurs images dans votre composition à partir de votre ordinateur, à partir de la galerie d’images clipart ou à partir du web.
Intervertir des images
Vous pouvez facilement remplacer une image dans votre disposition par undeux sur la même page ou que l’une d’elles se trouve sur le plan de montage.
微软Word 2010用户教程说明书
About the T utorialMicrosoft Office Word 2010 allows you to create and edit personal and business documents, such as letters, reports, invoices, emails and books.By default, documents saved in Word 2010 are saved with the .docx extension. Microsoft Word can be used for the following purposes:∙To create business documents having various graphics including pictures, charts, and diagrams.∙To store and reuse readymade content and formatted elements such as cover pages and sidebars.∙To create letters and letterheads for personal and business purpose.∙To design different documents such as resumes or invitation cards etc.∙To create a range of correspondence from a simple office memo to legal copies and reference documents.AudienceThis tutorial has been designed for computer users who are willing to learn Microsoft Word in simple steps and they do not have much knowledge about computer usage and Microsoft applications. This tutorial will give you enough understanding on MS Word from where you can take yourself to higher levels of expertise.PrerequisitesBefore you begin with this tutorial, we assume you have a basic understanding of Computer peripherals like mouse, keyboard, monitor, screen, etc. and their basic operations.Copyright & Disclaimer© Copyright 2018 by Tutorials Point (I) Pvt. Ltd.All the content and graphics published in this e-book are the property of Tutorials Point (I) Pvt. Ltd. The user of this e-book is prohibited to reuse, retain, copy, distribute or republish any contents or a part of contents of this e-book in any manner without written consent of the publisher.We strive to update the contents of our website and tutorials as timely and as precisely as possible, however, the contents may contain inaccuracies or errors. Tutorials Point (I) Pvt. Ltd. provides no guarantee regarding the accuracy, timeliness or completeness of our website or its contents including this tutorial. If you discover any errors on our website or inthistutorial,******************************************T able of ContentsAbout the Tutorial (i)Audience (i)Prerequisites (i)Copyright & Disclaimer (i)Table of Contents (ii)MS WORD BASICS 0Word 2010 ─ Getting Started (1)Word 2010 ─ Ex plore Window (5)Word 2010 ─ Backstage View (8)Document Information (10)Document Properties (10)Exit Backstage View (10)Word 2010 ─ Entering Text (11)Word 2010 ─ Move .Around (13)Moving with Mouse (13)Moving with Scroll Bars (14)Moving with Keyboard (15)Moving with Go To Command (16)Word 2010 ─ Save Document (17)Saving New Document (17)Saving New Changes (18)Word 2010 ─ Opening a Do cument (20)Opening New Document (20)Opening Existing Document (22)Word 2010 ─ Closing a Document (25)Word 2010 ─ Context Help (28)Context Sensitive Help (28)Using F1 Key (28)Using Help Icon (30)Using Help Option (31)EDITING DOCUMENTS (32)Word 2010 ─ Insert Text (33)Insert and Add Text (33)Insert and Replace Text (35)Word 2010 ─ Select Text (40)Using the Selection Bar (41)Using the Keyboard (42)Word 2010 ─ Delete Text (43)Using Backspace & Delete Keys (43)Using Selection Method (44)Word 2010 ─ Move Text (46)Move within the same document (46)Move within different documents (47)Word 2010 ─ Copy & Paste (51)Copy & Paste Operation (51)Cut & Paste Operation (54)Copy, Cut & Paste in different documents (56)Word 2010 ─ Find & Replace (57)Find Command (57)Find & Replace Operation (61)Word 2010 ─ Spell Check (63)Check Spelling and Grammar using Review tab (64)Check Spelling and Grammar using Right Click (67)Word 2010 ─ Zoom In-Out (68)Zoom-in & Zoom-out using view tab (68)Zoom-in & Zoom-out using (+) and (-) Buttons (70)Word 2010 ─ Special Symbols (71)Insert Special Symbols (71)Assign Shortcut Key (74)Word 2010 ─ Undo Changes (76)How to use Undo & Repeat operations (76)Shortcuts to use Undo & Repeat operations (79)FORMATTING TEXT (80)Word 2010 ─ Setting Text Fonts (81)Change the Font Type & Size (81)Use Shrink and Grow Buttons (85)Clear Formatting Options (86)Word 2010 ─ Text Decoration (87)Making text bold (87)Making Text Italic (87)Underline the Text (89)Strikethrough the Text (90)Word 2010 ─ Change Text Case (91)Change Text to Sentence Case (91)Change Text to Lowercase (92)Change Text to Uppercase (93)Capitalize Text (94)Toggle the Text (95)Word 2010 ─ Change Text Color (96)Change Font Colors (96)Highlight Text with Colors (97)Apply Text Effects (97)Word 2010 ─ Text Alignments (99)Left-Aligned Text (99)Center Aligned Text (100)Right-Aligned Text (101)Justified Text (102)Word 2010 ─ Indent Paragraphs (103)Left Indentation (103)Right Indentation (104)First Line Indentation (104)Hanging Indentation (105)Word 2010 ─ Create Bullets (107)Create a List from Existing Text: (107)Create a List as You Type (108)Word 2010 ─ Set Line Spacing (111)Spacing between Lines (111)Spacing between Paragraphs (112)Word 2010 ─ Borders and Shades (113)Add Borders to Text (113)Add Borders to Page (115)Add Shades to Text (117)Word 2010 ─ Set Tabs (120)Setting a Tab (121)Moving a Tab (124)Word 2010 ─ Apply Formatting (126)Copy and Apply Text Formatting (126)Copy and Apply Text Formatting multiple times (127)FORMATTING PAGES (128)Word 2010 ─ Adjust Page Margins (129)Adjust Margins (129)Word 2010 ─ Header and Footer (132)Add Header and Footer (132)Edit Header and Footer (135)Word 2010 ─ Add Page Numbers (137)Add Page Numbers (137)Remove Page Numbers (140)Word 2010 ─ Insert Page Breaks (141)Insert Page Breaks (141)Delete a Page Break (142)Wo rd 2010 ─ Insert Blank Page (143)Insert Blank Pages (143)Delete Blank Pages (144)Word 2010 ─ Cover Pages (146)Add Cover Pages (146)Delete Cover Pages (148)Word 2010 ─ Page Orientation (149)WORKING WITH TABLES (152)Word 2010 ─ Create a Table (153)Create a Table (153)Delete a Table (157)Word 2010 ─ Rows & Columns (158)Add a Row (158)Delete a Row (160)Add a Column (162)Delete a Column (164)Word 2010 ─ Move a Table (166)Word 2010 ─ Resize a Table (168)Word 2010 ─ Merging Cells (170)Word 2010 ─ Split a Table (172)Word 2010 ─ Split Cells (174)Word 2010 ─ Add Formula (177)Word 2010 ─ Borders & Shades (181)Add Borders to Table (181)Using Border Options (182)Add Shades To Table (185)ADVANCED OPERATIONS (187)Word 2010 ─ Quick Styles (188)Apply Quick Styles (188)Change Styles (190)Word 2010 ─ Use Templates (193)Using Existing Template (193)Create New Template (196)Word 2010 ─ Use Graphics (198)Adding Picture in Document (198)Adding WordArt in Document (199)Word 2010 ─ Auto Correction (202)Word 2010 ─ Auto Formatting (205)Word 2010 ─ Table of Contents (209)Create Table of Contents (209)Update Table of Contents (212)Delete Table of Contents (214)Word 2010 ─ Preview Documents (215)Word 2010 ─ Printing D ocuments (217)Word 2010 ─ Email Documents (221)Word 2010 ─ Translate Document (223)Word 2010 ─ Compare Documents (227)Compare Two Documents (227)Word 2010 ─ Document Security (232)Set Document Password (232)Remove Document Password (234)Set Editing & Formatting Restrictions (237)Remove Editing & Formatting Restrictions (240)Word 2010 ─ Set Watermark (242)Set Standard Watermark (242)Set Custom Watermark (244)Remove Watermark (247)MS Word Basics1Word 2010 2In this chapter, we will discuss how to get started with Word 2010. We will understand how to start a Word 2010 application in simple steps. Assuming you have Microsoft Office 2010 installed in your PC, to start the Word application, follow these steps: Step 1: Click the Start button.Word 2010 ─ Getting StartedWord 20103Step 2: Click the All Programs option from the menu.4Step 3: Search for Microsoft Office from the submenu and click it.5Step 4: Search for Microsoft Word 2010 from the submenu and click it.This will launch the Microsoft Word 2010 application and you will see the following window.6Word 2010 7In this chapter, we will understand how to explore Window in Word 2010. Following is the basic window which you get when you start the Word application. Let us understand the various important parts of this window.File TabThe File tab replaces the Office button from Word 2007. You can click it to check the Backstage view . This is where you come when you need to open or save files, create new documents, print a document, and do other file-related operations.Word 2010 ─ Explore Window8Quick Access ToolbarThis you will find just above the File tab. This is a convenient resting place for the most-frequently used commands in Word. You can customize this toolbar based on your comfort. RibbonRibbon contains commands organized in three components:∙Tabs: These appear across the top of the Ribbon and contain groups of related commands. Home, Insert, Page Layout are examples of ribbon tabs.∙Groups: They organize related commands; each group name appears below the group on the Ribbon. For example, group of commands related to fonts or group of commands related to alignment, etc.∙Commands: Commands appear within each group as mentioned above.Title barThis lies in the middle and at the top of the window. Title bar shows the program and document titles.RulersWord has two rulers - a horizontal ruler and a vertical ruler. The horizontal ruler appears just beneath the Ribbon and is used to set margins and tab stops. The vertical ruler appears on the left edge of the Word window and is used to gauge the vertical position of elements on the page.HelpThe Help Icon can be used to get word related help anytime you like. This provides nice tutorial on various subjects related to word.Zoom ControlZoom control lets you zoom in for a closer look at your text. The zoom control consists of a slider that you can slide left or right to zoom in or out; you can click the + buttons to increase or decrease the zoom factor.View ButtonsThe group of five buttons located to the left of the Zoom control, near the bottom of the screen, lets you switch through the Word's various document views.9∙Print Layout view: This displays pages exactly as they will appear when printed.∙Full Screen Reading view: This gives a full screen view of the document.∙Web Layout view: This shows how a document appears when viewed by a Web browser, such as Internet Explorer.∙Outline view: This lets you work with outlines established using Word’s standard heading styles.∙Draft view: This formats text as it appears on the printed page with a few exceptions. For example, headers and footers aren't shown. Most people prefer this mode.Document AreaThis is the area where you type. The flashing vertical bar is called the insertion point and it represents the location where text will appear when you type.Status BarThis displays the document information as well as the insertion point location. From left to right, this bar contains the total number of pages and words in the document, language, etc.You can configure the status bar by right-clicking anywhere on it and by selecting or deselecting options from the provided list.Dialog Box LauncherThis appears as very small arrow in the lower-right corner of many groups on the Ribbon. Clicking this button opens a dialog box or task pane that provides more options about the group.Word 2010 10In this chapter, we will discuss the Backstage View in Word 2010. The Backstage view was introduced in Word 2010. This acts as the central place for managing your documents. The backstage view helps in creating new documents, saving and opening documents, printing and sharing documents, and so on.Getting to the Backstage View is easy: Just click the File tab , located in the upper-left corner of the Word Ribbon. If you already do not have any opened document, then you will see a window listing down all the recently opened documents as follows:If you already have an opened document, then it will display a window showing detail about the opened document as shown below. Backstage view shows three columns when you select most of the available options in the first column.Word 2010 ─ Backstage View11The first column of the backstage view will have following options:12Document InformationWhen you click the Info option available in the first column, it displays the following information in the second column of the backstage view:∙Compatibility Mode: If the document is not a native Word 2007/2010 document, a Convert button appears here, enabling you to easily update its format. Otherwise, this category does not appear.∙Permissions: You can use this option to protect your word document. You can seta password so that nobody can open your document, or you can lock the documentso that nobody can edit your document.∙Prepare for Sharing: This section highlights important information you should know about your document before you send it to others, such as a record of the edits you made as you developed the document.∙Versions: If the document has been saved several times, you may be able to access the previous versions of it from this section.Document PropertiesWhen you click the Info option available in the first column, it displays various properties in the third column of the backstage view. These properties include the document size, the number of pages in the document, the total number of words in the document, the name of the author etc.You can also edit various properties by clicking on the property value and if the property is editable, then it will display a text box where you can add your text like title, tags, comments, Author.13Exit Backstage ViewIt is simple to exit from the Backstage View. Either click on the File tab or press the Esc button on the keyboard to go back to the working mode of Word.Word 2010 14In this chapter, let us discuss how to enter text with Microsoft Word 2010. Let us see how easy it is to enter text in a Word document. We assume you know that when you start Word, it displays a new document by default as shown below:Document area is the area where you type your text. The flashing vertical bar is called the insertion point and it represents the location where the text will appear when you type. keep the cursor at the text insertion point and start typing the text. We typed only two words "Hello Word" as shown below. The text appears to the left of the insertion point as you type:Word 2010 ─ Entering TextWord 201015The following are the two important points that will help you while typing:∙You do not need to press Enter to start a new line. As the insertion point reaches the end of the line, Word automatically starts a new one. You will need to press Enter, to add a new paragraph.∙When you want to add more than one space between words, use the Tab key instead of the spacebar. This way you can properly align text by using the proportional fonts.Word 2010 16In this chapter, we will discuss how to move around in Word 2010. Word provides a number of ways to move around a document using the mouse and the keyboard.To begin with, let us create some sample text. To create a sample text, there is a short cut available. Open a new document and type =rand() and press Enter. Word will create the following content for you:Moving with MouseYou can easily move the insertion point by clicking in your text anywhere on the screen. There may be instances when a document is big and you cannot see a place where you want to move. Here, you will have to use the scroll bars, as shown in the following screenshot:Word 2010 ─ Move Around17You can scroll through your document by rolling your mouse wheel, which is equivalent to clicking the up-arrow or down-arrow buttons in the scroll bar.Moving with Scroll BarsAs shown in the above screenshot, there are two scroll bars: one for moving vertically within the document, and one for moving horizontally. Using the vertical scroll bar, you may:∙Move upward by one line by clicking the upward-pointing scroll arrow.∙Move downward by one line by clicking the downward-pointing scroll arrow.∙Move one next page, using the next page button (footnote).∙Move one previous page, using the previous page button (footnote).∙Use the Browse Object button to move through the document, going from one chosen object to the next.18Moving with KeyboardThe following keyboard commands, used for moving around your document, also move the insertion point:You can move word by word or paragraph by paragraph. You would have to hold down the Ctrl key while pressing an arrow key, which moves the insertion point as described here: Ctrl +Ctrl +Ctrl +19Ctrl +Moving with Go T o CommandPress the F5 key to use the Go To command. This will display a dialogue box where you will have various options to reach to a particular page.Normally, we use the page number, the line number or the section number to go directly to a particular page and finally press the Go To button.Word 2010 20In this chapter, we will discuss how to save a document in Word 2010.Saving New DocumentOnce you are done with typing in your new Word document, it is time to save your document to avoid losing work you have done on a Word document. Following are the steps to save an edited Word document:Step 1: Click the File tab and select the Save As option.Word 2010 ─ Save Document21Step 2: Select a folder where you will like to save the document, Enter the file name which you want to give to your document and Select the Save As option, by default it is the .docx format.Step 3: Finally, click on the Save button and your document will be saved with the entered name in the selected folder.Saving New ChangesThere may be an instance when you open an existing document and edit it partially or completely, or an instance where you may like to save the changes in between editing of the document. If you want to save this document with the same name, then you can useeither of the following simple options:22∙Just press the Ctrl + S keys to save the changes.∙Optionally you can click on the floppy icon available at the top left corner and just above the File tab. This option will also help you save the changes.∙You can also use the third method to save the changes, which is the Save option available just above the Save As option as shown in the above screenshot.If your document is new and it was never saved so far, then with either of the three options, Word will display a dialogue box to let you select a folder, and enter the document name as explained in case of saving new document.Word 2010 23In this chapter, we will discuss how to open a document in Word 2010.Opening New DocumentA new, blank document always opens when you start Microsoft Word. Suppose you want to start another new document while you are working on another document, or you closed an already opened document and want to start a new document. Here are the steps to open a new document:Step 1: Click the File tab and select the New option.Step 2: When you select the New option from the first column, it will display a list of templates in the second column. Double-click on the Blank document ; this is the firstWord 2010 ─ Opening a Document24option in the template list. We will discuss the other templates available in the list in the following chapters.You should have your blank document as shown below. The document is now ready for you to start typing your text.You can use a shortcut to open a blank document anytime. Try using the Ctrl + N keys and you will see a new blank document similar to the one in the above screenshot.25Opening Existing DocumentThere may be a situation when you open an existing document and edit it partially or completely. Follow the steps given below to open an existing document:Step 1: Click the File tab and select the Open option.26Step 2: This will display the following file Open dialog box. This lets you navigate through different folders and files, and also lets you select a file which you want to open.27Step 3: Finally, locate and select a file which you want to open and click the small triangle available on the Open button to open the file. You will have different options to open the file, but simply use the Open option.This will open your selected file. You can use the Open Read-Only option if you are willing just to read the file and you have no intention to modify, i.e., edit the file. Other options can be used for advanced usage.28End of ebook previewIf you liked what you saw…Buy it from our store @ https://。
word详细教程模板
word详细教程模板WORD软件第一节、认识WORD软件一、启动WORD1、双击桌面上的快捷方式。
2、单击“开始”——所有程序——WORD。
二、窗口组成:标题栏菜单栏:菜单栏中某项如果有…表示单击该项会出现对话框。
菜单栏中某项后面有小三角,表示会有下一级菜单。
菜单栏中某项是灰色的表示当前不能用。
菜单栏如果有向下的书名号表示有隐藏菜单。
菜单栏中如果该项打勾表示当前正在使用。
工具栏:1、显示或隐藏工具栏:单击“视图”菜单——工具栏——勾选或不勾选相应的工具栏名字。
2、移动工具栏:拖动工具栏左侧的小横线。
状态栏:显示当前的状状态信息.工作流程:二、新建文件:1、启动WORD时自动新建一个空白的文件2、单击常用工具栏上的新建按钮。
3、单击“文件”菜单——单击“新建”——在任务窗格选择新建文件的方式。
(如:空白文档、模板)三、输入文字:1、光标出现的位置是第一个字开始的位置,如果光标想往后移,按空格键;光标想向下移按回车键。
2、注意:1. 各行结尾处不要按Enter键,一个段落结束才可按此键。
2. 对齐文本时不要用空格键,用缩进方式对齐。
3. 中英文输入切换按Ctrl+空格键或者单击输入法来选择用户所使用的输入法。
CTRL+SHIFT键在不同的输入法之间进行切换。
4. 输入有错,按Del删除插入点右边的错字,按BackSpace删除插入点左边的错字。
5. 漏了内容,将插入点定位,在插入状态(状态栏的“改写”为暗淡)直接输入内容。
(改变该状态按INSERT键切换)3、录入特殊符号1、单击“插入”→符号→字体——单击需要的符号——单击“插入”。
2、也可右击软键盘——单击符号的类型——单击需要的符号,使用完以后再单击一次软键盘。
3、视图→工具栏→符号栏3㎡4、中文标点符号状态下按:“\\”——“、” 顿号Shift+6-------“……“省略号SHIFT+4是“¥”四、保存1、单击常用工具栏上的保存按钮。
(小磁盘)——出现另存为对话框——选择保存位置——输入文件名字,单击“保存”按钮。
Microsoft Word 2013 使用指南说明书
Barre d’outils Accès rapide
Les commandes ici sont toujours visibles. Cliquez avec le bouton droit sur une commande pour l’ajouter ici.
Onglets du ruban
Aperçu du modèle Faites défiler la liste pour afficher des aperçus miniatures des modèles. Cliquez sur une image pour afficher un aperçu plus grand.
Conseil Pour ignorer cet écran et accéder directement à un document vide, appuyez sur Entrée ou appuyez sur Échap.
Vous pouvez facilement personnaliser le ruban pour l’adapter à vos besoins en créant de nouveaux onglets et y insérant les commandes que vous utilisez le plus souvent. Pour commencer à personnaliser les commandes du ruban, cliquez sur Fichier > Options > Personnaliser le ruban.
Se connecter à Office
Travaillez où et quand vous le souhaitez. En vous connectant à Microsoft Office, vous pouvez accéder à vos fichiers Office en toute sécurité à partir de n’importe où.
微软Office指南精艺说明书
1) Explain what is VBA or Visual Basic for Applications?VBA stands for Visual Basic for Applications; it is an event driven programming language developed by Microsoft. It is predominantly used with Microsoft office applications like MS-word, MS-Access, and MS-Excel.2) Mention where you can write your VBA program for Macro?Module is the place where you can write VBA program for Macro, to insert a Module navigate to Insert ->Module3) Mention what are the comments style used in VBA?Comments are used to document the program logic and the user information with which other programmers can work seamlessly on the same code in future. There are mainly two methods in VBA to represent comments.∙Any statement that begins with a single quote is treated as comment∙Or you can use statement REM instead of single quotation mark (')4) In VBA how we can declare variable and constant?In VBA, variable can be declared with the keyword “DIM” while constant i s declared with keyword “Const.”5) What are the data types in VBA?Data types in VBA are classified into two categoriesNumeric Data type Non-numeric Data typeByte String (fixed length)Integer String (variable length)Long DateSingle BooleanDouble ObjectCurrency Variant (numeric)Decimal Variant (text)6) Explain what is ADO, ODBC and OLEDB?ADO: ActiveX Data Objects or ADO is a universal data access framework that encompasses the functionality of DAOODBC: Open Database Connectivity or ODBC is a technology that enables a database client application connect to an external databaseOLEDB: It is a low-level programming interface designed to access a wide variety of data access object linking and embedding (OLE)7) Explain about function pointers in VBA?The VBA (Visual Basic Information) have flexible applications, but there is a limitation to a function pointer in VBA. Windows API has inadequate support for function pointers because it has the ability to use the function but not the functional support to call back the function. It has inbuilt support for the call but not for a callback.8) Explain how “reference counting” in VBA is done?In VBA, soon a variable goes out of scope, the reference counter on the reference object is decremented. When you assign the object reference to another variable, the reference counter is incremented. While when your reference count reaches to zero it terminates the event.9) How can you decrease the reference counter explicitly?To decrease the reference counter explicitly, you need to set a variable to “Nothing”.10) Explain what is COM (Component Object Model) objects in VBA?COM objects are usually .dll files, and are compiled executable programs.11) Explain how can you dial a phone number through VBA?In order to dial a phone number through VBA, you need to follow the following steps∙Shell command in VBA can be used to start the dialer present in Windows O.S∙To connect to your modem, phone number can be used∙With the help of send keys and shell command, you can dial to your user∙Sendkey dictate the windows to dial according to the keystrokes of the application while Shell activates the Windows application∙ A macro can be used to initiate the card file program which triggers the auto dialer feature 12) Explain what is the meaning of “Option Explicit”? Where it should be used?“Option Explicit” makes the declaration of variables mandatory. Line explicit function makes the compiler to determine all the variables that are not declared by the dim statement. This command diminishes the problem of type errors significantly. It is used in VBA because it deals with information rich application in which type errors are common. Before starting any, sub-procedures it can be used inside a module.13) Explain how can you pass arguments to VBA functions?When arguments are passed to VBA functions, they can be passed in two ways∙ByVal: When argument is passed by Value, then it means that only value is passed to the procedure, and any changes that are made to the argument inside the procedure will be lost when the procedure is exited∙ByRef: When the argument is passed by reference than the actual address of the argument is passed to the procedure. Any changes that are made to the argument inside theprocedure will be recalled when the procedure is exited14) Mention the method that are called from the ObjectContext object to notify MTS that the transaction was unsuccessful or successful?Setabort and setcomplete method are called from the ObjectContext object to notify MTS that the transaction was unsuccessful or unsuccessful15) What is the code to find a last used Row in a column or last used Column of a row?To find the last row in a column, the command used is End(xlUp) and to find last column in a row, the command used is End(xlToLeft).16) Mention the difference between the Subroutines and Functions in VBA?The difference between the Subroutines and Functions is that∙Subroutines never return a value, but functions does return values∙Subroutines could change the values of the actual arguments while a function could not change the value of actual arguments17) Explain what is the difference between CurrentRegion properties and UsedRange?∙CurrentRegion: The current region is a range bounded by any combination of blank columns and rows∙UsedRange: This property is used to select the range of used cells on a worksheet. It returns a Range object that represents the used range on the specific worksheet18) Explain how to debug a VBA code?To debug a VBA code, follow the steps∙Using Breakpoints (F9)∙Step by step execution (F8)∙Print & Immediate Window and Watch the window19) How can you stop VBA script when it goes into the infinite loop?By pressing Cntrl+ Pause Break key one can stop VBA script when it goes into infinite loop.20) Mention which property of menu cannot be set at runtime?At runtime Name property of menu cannot be set.21) Mention whether VBA have dictionary structure?Yes, VBA does have a dictionary structure. You can set a reference to dictionary like∙Set dict = CreateObject(“Scripting.Dictionary”)∙OR Dim dict as New Scripting.Dictionary22) Mention how can you comment and uncomment blocks of code in the office VBA editor?In office VBA editor, you can comment and uncomment blocks of code by following steps ∙In the VBA editor go to View -> Toolbars -> Customise… OR righ t click on the tool bar and select Customise∙Select the edit menu on the left, under the commands tab∙When you scroll down you can see two icons, “Comment Block” and “Uncomment ”∙When you drag and drop these onto your toolbar, you will have an easy access to highlighta block of code and do action on itGuru99 Provides FREE ONLINE TUTORIAL on Various courses like。
- 1、下载文档前请自行甄别文档内容的完整性,平台不提供额外的编辑、内容补充、找答案等附加服务。
- 2、"仅部分预览"的文档,不可在线预览部分如存在完整性等问题,可反馈申请退款(可完整预览的文档不适用该条件!)。
- 3、如文档侵犯您的权益,请联系客服反馈,我们会尽快为您处理(人工客服工作时间:9:00-18:30)。
连封面共 9 页 型号:NG-220/9.8-Q11锅炉设计说明书编号:08989SM杭州锅炉集团股份有限公司(杭州锅炉厂)2009年5月目录一. 锅炉基本特征1.锅炉参数2.燃料资料3.锅炉性能保证4.锅炉基本尺寸二. 锅炉结构简述1.锅筒及汽水分离装置2.炉膛和水冷壁3.过热器和汽温调节4.燃烧设备5.省煤器6.空气预热器7.锅炉范围内管道8.炉墙和密封9.钢架和平台扶梯附1:锅炉水容积表编制校对标审审核批准日期日期日期日期日期1.锅炉参数额定蒸发量 220t/h过热蒸汽出口温度 540℃过热蒸汽出口压力 9.8MPa(表压)锅筒工作压力 11.3MPa(表压)给水温度 215℃锅炉连续排污率 <2%冷风温度 20℃2.燃料资料(1)(各燃料成份,体积比)燃料成份 高炉煤气 转炉煤气 焦炉煤气CO 23.2% 53.6% 6.2%H2 3.2% 0.2% 58%CH426%CO220% 25.3% 2.2%N253.6% 17.8% 4.5%O20.4% 0.6%C m H n 2.5%Q y dw3056KJ/NM3 6795KJ/NM3 17900KJ/NM3含尘量机械含水量3. 锅炉性能保证(1)锅炉额定蒸发量 220t/h。
(2)锅炉保证设计热效率 86%(包括低压省煤器)。
(3)锅炉50%负荷保证蒸汽参数。
(燃料为设计值100%高炉煤气,满负荷时燃烧器前煤气压力不低于4000Pa。
)炉膛宽度(两侧水冷壁中心线间距离)7570mm炉膛深度(前后水冷壁中心线间距离)7570mm锅筒中心线标高35550mm锅炉最高点标高(过热器连接管)39750mm锅炉运转层标高(锅炉钢架内不设运转层平台)8000mm锅炉钢架左右两柱中心线间距离18000mm锅炉钢架前后两柱中心线间距离22000mm锅炉最大宽度(包括平台)~20900mm锅炉最大深度(包括平台)~26500mm二.锅炉结构简述本锅炉为单锅筒、自然循环、集中下降管、倒“U”型布置的煤气锅炉。
本锅炉采用全膜式水冷壁。
炉顶,水平烟道及转向室设顶棚过热器管和包墙过热器管。
尾部竖井烟道中布置省煤器、空气预热器及低压省煤器。
锅炉构架采用双框架全钢结构,按七度地震烈度设计。
炉膛、过热器和上级省煤器为全悬吊结构,下级省煤器、空气预热器及低压省煤器为支承结构。
锅炉燃料为全烧高炉煤气,并可掺烧转炉煤气(最大25000NM3/h)和焦炉煤气15%,点火及稳燃燃料为焦炉煤气,煤气燃烧器前后墙布置。
1.锅筒及汽水分离装置锅筒外径为Φ1800 mm,壁厚为100mm,锅筒全长为13194mm,设计材料为19Mn6。
锅筒为全焊接结构,厂内整体退火以消除应力,锅筒及其内部装置总重约61t。
锅筒正常水位在锅筒中心线下180mm处,最高和最低水位离正常水位各50mm。
锅筒采用单段蒸发系统。
锅筒内布置有旋风分离器,清洗孔板、顶部波形板分离器和顶部多孔板等设备。
它们可以充分分离汽水混合物中的水和蒸汽。
其中,清洗水来自下级省煤器出口(未沸腾水)。
锅筒上配置了2只就地双色水位表,2只电接点水位表接口,3只水位平衡容器。
此外,为保证蒸汽品质良好,以及能及时处理锅筒满水现象,在锅筒内还装有磷酸盐加药管,连续排污管和紧急放水管。
整个锅筒由两组链片吊架悬吊于顶板梁上,吊架对称布置在锅筒两端。
2.炉膛和水冷壁考虑到高炉煤气是一种低热值气体燃料,为了保证燃烧的稳定性,炉膛设计成半开式,即炉膛下部前、后墙水冷壁弯成一个缩腰,同时燃烧器区和炉底敷有卫燃带。
整个水冷壁采用Φ60×5节距为80mm的光管加扁钢焊接成膜式水冷壁。
每面墙沿宽度分成四个管屏。
每面墙各有94根上升管,由连接管Φ133×10和Φ108×8从水冷壁上集箱引入锅筒。
集中下降管从锅筒最低点引出。
共4根Φ377×25的大直径管在其下部通过Φ133×10的分散下降管与水冷壁下集箱相连。
每根集中下降管与炉膛的一个角构成4个结构特性相同的循环回路,循环回路的结构特性见下表。
每个循环回路特性表:名 称 单位 数值上升管直径 mm Φ60×5上升管数量 根 94上升管总截面积f1m2 0.185集中下降管直径 mm Φ377×25 集中下降管数量 根 1集中下降管截面积f2 m2 0.084引入管(引出管)直径 mm Φ133×10 引入管(引出管)数量 根 10引入管(引出管)截面积f3 m2 0.1集中下降管与上升管截面积比f2/f1 / 0.454引入管(引出管)与上升管截面积比f3/f1/ 0.54 注:后墙连接管Φ108×8共16根,其截面积与f3同。
炉膛水冷壁的重量通过上集箱用吊杆悬吊于顶部梁格上,斜后水冷壁由穿过水平烟道的引出管悬吊于顶部钢架上。
整个炉膛受热后一起向下膨胀。
水冷壁外侧四周沿高度方向每隔3m左右设置一圈刚性梁,以增加水冷壁的刚度,满足炉膛设计压力±3.92KPa的要求。
后墙水冷壁在炉膛出口处向内凸出形成折焰角,以改变炉膛上部空气动力场。
前后墙水冷壁下部内折形成15°角,组成炉膛炉底。
3.过热器和汽温调节本锅炉采用辐射和对流相结合,多次交叉混合,两级喷水调温的典型过热器系统。
屏式过热器布置在炉膛折焰角上部,两级对流过热器布置在水平烟道中。
顶棚管、包墙管采用Φ51×5.5mm,节距为100mm的光管加扁钢膜式壁管。
第二级对流过热器(即低温过热器)蛇形管采用Φ38×4.5mm,沿宽度方向布置74片,节距为100mm,材料为20G钢管。
第一级对流过热器(即高温过热器)蛇形管采用Φ42×5mm,节距为100mm,材料为12Cr1MoVG钢管,第一级对流过热器又分为冷段和热段,冷段布置在两侧,共36片,热段布置中间,共38片。
屏式过热器采用Φ42×5mm管子,最外两圈及管夹材料为钢研102(12Cr2MoWVTiB),其余采用12Cr1MoVG,屏式过热器沿宽度方向布置12片,横向节距为600mm。
蒸汽温度调节采用给水喷水减温方式,在减温水管道上装设有流量孔板、调节阀、截止阀等。
减温器分二级布置,第一级喷水点布置在第二级对流过热器与屏式过热器之间,为粗调,对屏式过热器也可以起保护作用,第二级喷水点布置在一级过热器冷段和热段之间,为细调。
经二级喷水调温,保证了锅炉额定负荷下的过热蒸汽温度。
喷水减温器由笛形喷管、混合套筒和外壳组成。
过热器所有部件均通过吊杆悬吊在顶部钢架上。
4.燃烧设备本锅炉采用双旋流煤气燃烧器,煤气燃烧器分两层布置在锅炉炉膛下部燃烧室前、后墙上。
使用这种燃烧器,锅炉负荷在50%~100%范围内进行调节,并保证蒸汽参数。
煤气燃烧器二层标高分别为6400、8600mm,前后墙每层各布置三只煤气(高炉煤气和转炉煤气的混合气体)燃烧器,共12只。
下层每只煤气燃烧器均布置有1支焦炉煤气枪和1支高能点火枪。
高能点火枪配置气动推进装置,便于实现程控。
上层六只为配有主焦炉煤气接口的高炉煤气燃烧器,主焦炉煤气燃烧器在焦炉煤气较多工况时与下层燃烧器的点火枪一道配合使用。
用焦炉煤气点火,炉前焦炉煤气压力应不低于4000Pa。
上层六只主焦炉燃烧器及下层焦炉煤气枪全部投入约能带15%左右的负荷。
另外为保证燃烧安全,每只燃烧器上留有火焰检测装置接口,用户可以根据需要配置火检设备。
5.省煤器省煤器布置在尾部竖井中,双级布置,工质与烟气呈逆流。
上级省煤器顺列布置,下级省煤器错列布置。
上级省煤器为单管圈,下级省煤器采用螺旋鳍片管。
上下级省煤器均由Φ32×4mm、材料为20G的蛇形管组成,上级省煤器横向节距为60mm,下级省煤器横向节距为80mm,215℃的给水经下级省煤器加热至约314℃后,约20%的流量直接进入锅筒的清洗装置,作为清洗水,其余流量进入上级省煤器,上级省煤器为沸腾式,水经加热后引入锅筒内后侧旋风分离器。
上级省煤器采用悬吊结构,全部重量通过Φ42×5mm的引出管悬吊在顶部钢架上。
下级省煤器搁于通风梁上,通风梁穿出炉墙支承在炉墙护板上。
6.空气预热器空气预热器采用立式管箱结构,单级单行程布置。
空预器管为40×1.5mm 螺旋槽管,横向节距为60mm,纵向节距为40mm,管箱高度3.6m,烟气为管内纵向冲刷,空气为管外横向冲刷。
为防止空气预热器的震动,在管箱中装有防震隔板。
7.低压省煤器低压省煤器在尾部竖井空气预热器后,单级、顺列布置,工质与烟气呈逆流,由Φ32×3mm、材料为20GB3087-99的螺旋鳍片管组成,横向节距为80mm。
其工作原理是将40℃的补给水引入低压省煤器吸收烟气热量加热后返回去除氧器管道;不同工况时,低压省煤器在保证一定流量的前提下,通过改变工质出口温度来达到降低排烟温度的目的,运行中应控制低压省煤器出口水温低于相应压力下的饱和温度。
低压省煤器搁于通风梁上,通风梁穿出炉墙支承在炉墙护板上。
8.锅炉范围内管道锅炉为母管给水,给水由给水母管引入给水操纵台后,通过给水操纵台实现对锅炉给水的调节和控制。
给水操纵台分成二条管路:D N175、D N50,分别作为正常运行负荷管路和点火启动用管路。
由给水操纵台出来的给水从端部进入Φ219×25的分配集箱,再通过12根Φ76×6的连接管,进入下级省煤器集箱。
从下级省煤器出口集箱引出4根Φ76×6的管子到锅筒,约占20%的水量作为锅筒清洗水,其余水量通过8根Φ76×6的管子进入上级省煤器。
锅炉装有各种监督、控制装置。
如水位表、水位自控装置、压力表、清洗水调节装置、紧急放水管、加药管、连续排污管和调节燃烧用的压力冲量装置及保护装置等。
所有水冷壁下集箱、集中下降管底部均设有定期排污阀。
本锅炉机组设有3只全量型弹簧安全阀,其中锅筒上装有2只弹簧安全阀,过热器集汽集箱上装有1只弹簧安全阀。
集汽集箱上装有生火排汽管路,反冲洗管路和疏水管路。
减温器和集汽集箱上均装有热电偶管座,供监督和自控用。
在锅炉管道各最高点均装有空气阀,各最低点装有疏水阀或排污阀。
为了监督给水、炉水和蒸气品质,提供了给水、炉水、饱和蒸汽和过热蒸汽的取样及冷却装置。
锅炉启动时为保护省煤器,在锅筒至给水分配集箱间装有Φ76×6的再循环管。
另外在水冷壁下集箱管路上配有反冲洗阀。
8.炉墙和密封炉膛和上级省煤器前区段均采用膜式壁管,故此区域炉墙采用敷管式轻型炉墙,外层敷设外护板,外护板可采用彩色钢板波纹板。
下级省煤器区域采用护板框架炉墙的形式。
水平炉底、折焰角处采用密封塞块以使前后墙与侧墙密封。
炉顶及其它包墙管均采用Φ51×5.5管子和扁钢组成的膜式管结构,管子节距为100mm,使得穿墙密封易于处理并具良好的密封性能。