最简单的数字收音机
飞乐2p1收音机资料

飞乐2p1收音机资料一、介绍飞乐2P1收音机飞乐2P1收音机是一款便携式AM/FM收音机,由中国广播电视总公司研制生产。
该收音机采用了先进的数字调谐技术,具有稳定的接收信号和清晰的声音效果。
它还有多种功能,如闹钟、定时关机、电池电量显示等,是一款性价比很高的收音机。
二、外观和设计1.外观飞乐2P1收音机采用了经典的矩形设计,整体呈现出简洁明快的感觉。
它的尺寸为130×80×30mm,重量为200g,非常适合携带。
2.按键布局该收音机按键布局合理,操作简单方便。
主要按键包括:开关键、模式切换键、频道调谐键、音量调节键、闹钟设置键等。
3.显示屏幕飞乐2P1收音机采用了LED数码显示屏幕,可以清晰地显示当前频道和时间等信息。
三、功能特点1.数字调谐技术飞乐2P1收音机采用数字调谐技术,可以实现精准的频道搜索和调谐,大大提高了接收信号的稳定性和清晰度。
2.多频道收听该收音机可以收听AM/FM两种频段的广播电台,可以满足不同用户的需求。
3.闹钟功能飞乐2P1收音机还具有闹钟功能,可以设置多组闹钟时间,并可选择铃声类型。
4.定时关机功能该收音机还具有定时关机功能,可以在设定的时间内自动关闭,非常适合睡前使用。
5.电池电量显示飞乐2P1收音机还具有电池电量显示功能,可以实时显示剩余电量,方便用户及时更换电池。
四、使用方法1.开关机按下开关键即可打开或关闭收音机。
2.模式切换按下模式切换键即可在AM和FM两种频段之间进行切换。
3.频道调谐按下频道调谐键即可进行频道搜索和调谐。
在搜索状态下,长按频道调谐键可自动搜索所有可用的广播电台,并将其保存到预设列表中。
在预设列表中选择一个频道后,短按频道调谐键即可完成调谐操作。
4.音量调节按下音量调节键即可进行音量大小的调节。
长按音量调节键可以快速静音。
5.闹钟设置按下闹钟设置键即可进入闹钟设置模式。
在该模式下,可以设置多组闹钟时间,并可选择铃声类型。
6.定时关机按下定时关机键即可进入定时关机设置模式。
ADS调频数字收音机

• (3)定位柱高度不可超过PCB厚度,防止在印刷时板子印刷不均匀。
• (4)定位前应保证微调处于归位状态。
定位柱:
PCB定位 :
半自动印刷机的使用
• (1)找到工作台的中心位置并对应板子的中心进行调整。 • (2)确定PCB板子的方向以及大致位置。 • (3)放下模板进行微调,调到准确无误。 • (4)夹紧,拧紧微调等螺母
黄色 红色 红色 黑色 ADS-2122
4*5
C16.C17.C18
SMT
5*5
C19.C20
SMT
0633
C4.C5
SMT
0633
C10
SMT
0633
C2.C7.C11.C12.C14.C15
SMT
0633
C8.C9.C13
SMT
∮ 5264.5 24*15*0.5
9/1.2*55M 9/1.2*60M 9/1.2*80M 9/1.2*80M
NPN PNP
贴片电阻
规格
ADS-2212D-1 UTBOO570 ZST3652 AT24C02 RDA5807SP TD2822 立体声 32.768KHZ 9018 8550 220K 100K 33K 22K 10K 2.2K 1K
封装
SOP8 SOP8 SOP14 SOP8 3507 DIP SOT23 SOT23 0633 0633 0633 0633 0633 0633 0633
所需设备
• 设备:
半自动印刷机 、JUKI贴片机、回流焊机、恒温焊台、焊锡丝、斜口钳、螺 丝刀。
收音机装配流程
产品特点
• 采用主控IC(ZST3652-ADSFM)收音机集 成电路,调谐方便准确。
数字收音机的原理
数字收音机的原理
数字收音机是一种利用数字技术实现无线电接收的设备。
其工作原理主要包括接收、处理和解码三个步骤。
首先,数字收音机通过天线接收到所需频率范围内的调幅/调频信号。
天线将收到的无线电信号传送到收音机的调谐电路。
调谐电路负责选择与用户所设定的频率相匹配的信号,并将其传送到下一个处理步骤。
接下来,收音机会对接收到的信号进行处理,以提取出所需的音频信息。
首先,收音机将信号进行放大,以增强接收到的信号强度。
之后,通过滤波器将信号中的杂散干扰滤除,只保留与音频信息相关的部分。
随后,收音机会将滤波后的信号进行采样,即按照一定时间间隔将信号的振幅值记录下来并转化为数字形式。
这个过程称为模数转换。
最后,数字收音机对已经转换为数字形式的信号进行解码,以还原原始的音频信息。
通过解码器将数字信号重新转换为模拟信号,并进行数字信号处理,如消除噪音、均衡音质等。
经过处理后,原始音频信息会被传送到扬声器或耳机中进行播放,供用户听取。
总而言之,数字收音机通过接收、处理和解码三个步骤,实现了将模拟的调幅/调频信号转化为数字形式,并还原出音频信息的功能。
这种数字化的技术使得收音机具有更好的抗干扰性能和音质表现。
德生 PL-680 高性能全波段数字调谐立体声收音机说明书
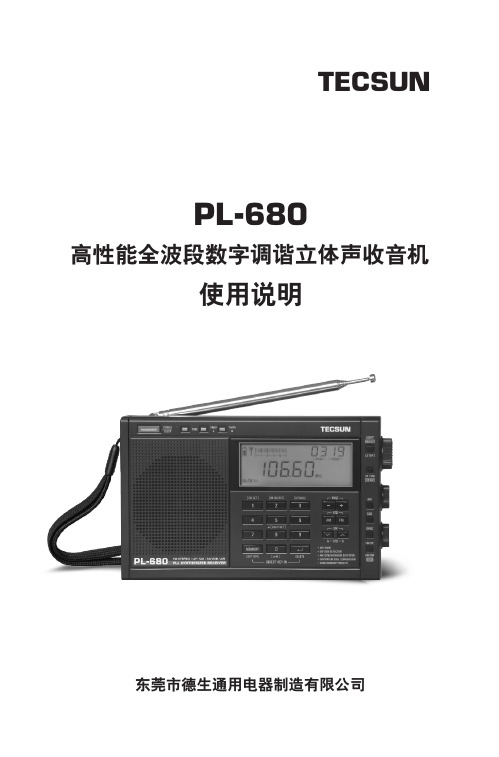
TECSUN东莞市德生通用电器制造有限公司使用说明PL-680高性能全波段数字调谐立体声收音机● 可接收调频立体声、中波、长波、短波、短波单边带(SSB)通讯信号以及航空波段信号,灵敏度高,选择性好,音质优美,操作便捷● 短波单边带(SSB)分上边带(USB)和下边带(LSB)独立接收● 调幅应用了同步检波、二次变频技术,极大地提高接收的灵敏度、选择 性以及抗镜像、邻频干扰的能力● 设有调频/短波外接天线插口和高/中/低3档灵敏度控制开关,便于进行远程接收(DX)● 可手动、半自动、全自动(ATS)储存多达2000个电台频率。
其中有800个为按波段存储(调频/中波/长波/航空波段各存100个、短波/单边带各存 200个),其余1200个频率不按波段随意分类存储在12个页面里(12x100)●设有 采用优质高灵敏度喇叭,音色好;高/低音控制开关,满足收听不同节目的需要;用耳机可听调频立体声广播● 人机界面友好,使用便捷,设有非常实用的多功能数码调节旋钮,可用来设置时间、调节频率、选择存储页面和地址等 ● 调频接收覆盖76-108MHz 范围,可接收中国,欧美日的调频广播频率, 也可收听部分国内校园广播频率和电视伴音● 且开机后可收听预存频率的电台节目双定时开机功能,● 智能开关机:您可以设置在开机1~120分钟后自动关机,也可取消自动关机功能●电源适配器 随机附送专用、外接天线、镍氢充电电池、立体声耳机、精美保护套功能特点● 使用4节五号电池供电;本机已具备智能充电功能是德生工程师总结多年的设计经验,精心制作的一款段数字调谐收音机精品,它能满足您收听全球广播的绝大部分需求。
全波PL-680● 六种选台方式:手动搜索电台频率(VF)、直接输入频率数字、手动搜索预存电台(VM)、直接输入预存电台地址数字、还可以自动搜索浏览电台频率和已存储的电台频率感谢您购买了高性能全波段数字调谐立体声TECSUN PL-680收音机,使用前请阅读说明书。
Connexx SB-26 数字FM收音机与蓝牙音箱说明书
MODEL: SB-26--INSTALLATION AND OPERATION MANUAL--PLEASE READ INSTRUCTIONS CAREFULLY AND KEEP FOR FUTURE REFERENCE1514131311129941116810752-3INTRODUCTION......................................................................................Page FEATURES..............................................................................................Page PACKING LIST........................................................................................Page PLACING AND MOUNTING.....................................................................Page IMPORTANT SAFETY INSTRUCTIONS...............................................Page GENERAL VIEW......................................................................................Page REMOTE CONTROL................................................................................Page BATTERY INSTALLATION--REMOTE CONTROL..................................Page GENERAL OPERATIONS........................................................................Page LISTEN TO FM RADIO............................................................................Page BLUETOOTH PAIRING AND PLAYBACK...............................................Page ADDING OPTIONAL SUBWOOFER AND SPEAKER.............................Page CONNECT TO TV/DVD............................................................................Page CONNECT USING OPTICAL...................................................................Page AUX IN PLAYBACK.................................................................................Page USB PLAYBACK AND CHARGING.........................................................Page TROUBLESHOOTING GUIDE.................................................................Page SPECIFICATIONS....................................................................................PageFeatures of the Connexx SB26 include:Digital FM tuner 10 presets Bluetooth wireless technologyBuilt-in subwoofer (optional external subwoofer can be added as an accessory)2 zone audio distribution3.5 mm aux input jack on front panelUSB input on front panel with device charging capabilities Digital Optical input on rear panel 2 analog stereo inputs on rear panel Wireless remote control includedThank you for choosing a Connexx product. We hope you will find the Instructions in this owner's manual clear and easy to follow. If you take a few minutes to review, you will learn how to use all of the features of your new soundbar stereo for maximum enjoyment.User Manual RCA Connection CableWall Mounting BracketsFM AntennaRemote Control with Two Batteries Main UnitA A AA A AINTRODUCTIONFEATURESPACKING LISTPower HarnessFUSE-+DC Power Extension (Red and Black) WireFCC NOTICE:This equipment has been tested and found to comply with the limits for a Class B digital device, pursuant to part 15 of the FCC Rules. These limits are designed to provide reasonable protection against harmful interference in a residential installation. This equipment generates, uses and can radiate radio frequency energy and, if not Installed and used in accordance with the instructions, may cause harmful interference to radio communications.● Reorient or relocate the receiving antenna. Increase the separation between the equipment and receiver.● Connect the equipment into an outlet with a circuit different from that to which the receiver is connected.● Consult the dealer or an experienced radio/TV technician for help.Before using the unit, be sure to read all operating instructions carefully. Please note that these are general precautions and may not pertain to your unit.1 ) Read these instructionsAll the safety and operating instructions should be read before the product is operated.2 ) Keep these instructionsThe safety and operating instructions should be retained for future reference.3 ) Heed all warningsAll warnings on the product and in the operating instructions should be adhered to.4 ) Follow all instructionsAll operating and use instructions should be followed.5 ) Do not use this apparatus near waterDo not use this product near water and moisture, for example: near a bathtub, washbowl, kitchen sink or laundry tub; in a wet basement; or near a swimming pool.WARNING:TO R E D U C E T H E R I S K O F F I R E O R ELECTRIC SHOCK, DO NOT EXPOSE THIS PRODUCT TO RAIN OR MOISTURE.WARNING:TO R E D U C E T H E R I S K O F F I R E O R E L E C T R I C S H O C K , A N D A N N O Y I N G INTERFERENCE, USE THE RECOMMENDED ACCESSORIES ONLY .FCC WARNING:To assure continued compliance, follow the attached installation instructions and use only shielded cables when connecting to other devices. Modifications not authorized by the manufacturer may void user`s authority to operate this device.However, there is no guarantee that interference will not occur in a particular installation. If this equipment does cause harmful interference to radio or television reception, which can be determined by turning the equipment off and on, the user is encouraged to try to correct the interference by one or more of the following measures:8 ) Do not install near any heat sources such as radiators, heat registers, stoves, or other apparatus(including amplifiers) that produce heat.9 ) Do not defeat the safety purpose of the polarized or grounding-type plug. A polarized plug has two blades with one wider than other. A grounding type plug has two blades and a third grounding prong. The wide blade or the third prong are provided for your safety. If the provided plug does not fit into your outlet, consult an electrician for replacement of the obsolete outlet.10 ) Protect the power cord from being walked on or pinched particularly at plugs, convenience the apparatus.13 ) Refer all servicing to qualified service personnel. Servicing is required when the apparatus apparatus, the apparatus has been exposed to rain or moisture does not operate normally, or has been dropped.14 ) Power sourceThis product should be operated only from the type of power source indicated on the marking label.refer to the operation instructions.15 ) ServiceDo not attempt to service this product yourself as opening or removing covers may expose you to dangerous voltage or other hazards. Refer all servicing to qualified service personnel.6 ) Clean only with dry clothUnplug this product from the wall outlet before cleaning. Do not use liquid cleaners or aerosol cleaners. Use a dry cloth for cleaning.7)D o n o t b l o c k a n y v e n t i l a t i o n openings. Install in accordance with the manufacturer's instructionsSlots and openings in the cabinet and in the back or bottom are provided for ventilation, to ensure reliable operation of the product and to protect it from overheating. These openings must not be blocked or covered. The openings should never be blocked by placing the product on a bed, sofa, rug or other similar surface. This product should never be placed near or over a radiator or heat source. This product should not be placed in a built-in installation such as a bookcase or rack unless proper ventilation is provided or the manufacturer's instructions have been adhered to.receptacles, and the point where they exit from has been damaged in any way, such as power-supply cord or plug is damaged, liquid has the been objects have fallen into or spilled WARNING:To reduce the risk of fire or electric shock, do or splashing and that objects vases shall not be placed on apparatus.11 ) Only use attachments/accessories specified by the manufacturer.12 ) Unplug this apparatus during lightning storms or when unused for long periods of timeTo protect your product from a lightning storm, or when it is left unattended and unused for long periods of time, unplug it from the wall outlet and disconnect the antenna or cable system.lightning and power-line surges.This will prevent damage to the product due to not expose this apparatus to rain or moisture. The apparatus shall not be exposed to dripping filled with liquids,such assupply dealer or to your home, consult your appliance If you are not sure of the type of power local power company. For products intended to operate from battery power, or other source,2. Mounting the Sound Bar onto a wallWe recommend having this Sound Bar professionally mounted. By using the included wall mounting metal brackets, the Sound Bar can be mounted onto a wall.Distance between two brackets1. Placing on the tableWhen placing the Sound Bar on an entertainment center, bookshelf, or any type ofoduce a potential heat hazard.space around the Sound Bar for ventilation.If the Sound Bar is enclosed in a tight space, without ventilation, heat generated from the Sound Bar could pr enclosed space, be sure to allowFront ViewRear View14. LED Display 15. Remote Sensor5. ZONE B Button12. Volume Up Audio In Jack5. DVD Audio In Jack7. External Subwoofer Switch 3. External Subwoofer Connector 8. Optical In Power Jack 3. POWER Button 11. PREVIOUS/TUNE Down 13. Play/Pause/ Preset/Memory/Preset Play Button 4. POWER Indicator 2. ZONE A Button 1. PAIR Button 7. AUX IN Jack 8. USB Jack 10. Volume Down9. NEXT/TUNE Up 6. (SOURCE)Button 2. ZONE B Left Channel Connector 1. ZONE B Right Channel Connector 4. Pig Tail Antenna 9. Extended Remote Sensor 10. DC IN Jack1. POWER button5. TUN- / /TUN+ button6. VOL ( Volume )+/- buttons 4. TV Mode Switch button9. OPTICAL Mode Switch button 2. Bluetooth Mode Switch button 3. AUX IN Mode Switch button 10. USB Mode Switch button 11. ZONE A button 13. ZONE B button12. FM Mode Switch button 14. DVD Mode Switch button 8. MUTE button15. PAIR button7. ( Play/Pause )/ ( Memory/Preset /Preset Play )button If using the external optional remote sensor, insert the plug into the EXT IR Jack as the arrowhead shown on above picture. This will allow the remote control to work in another zone if desired.Battery InstallationRemote Control Effective Rangecontrol of the unit, the remote control may not operate properly.When there is an obstacle between the unit and the remote control, the remote control may not operate properly.When direct sunlight, an incandescent lamp, fluorescent lamp or any other strong light shines on the remote Battery Precaution1.Slide and lift the battery door (Figure 1).2.Install 2 (two) AAA size batteries into the battery compartment as indicated by the polarity markings (Figure 2).3.Replace the battery door (Figure 3).3. During Playback:Follows the order below:2. The default mode is "BT". Touch the (mode) button repeatedly to switch to desired mode.5. If the unit is not used for long period of time, please disconnect the power.~ Press ZONE B button on Remote Control or touch "B" on front panel of the unit to switch ON or OFF the corresponding ZONE B speakers.~ Press ZONE A button on Remote Control or touch "A "on front panel of the unit to switch ON speakers.or OFF the soundbar ~ Press MUTE button on Remote Control to mute the sound on all active zones. Press again to resume.BT TV AUX FM OPTICAL USB DVDThe power indicator will light up blue.~ Press the VOL - /VOL+ button on remote control or touch +/- button on unit to adjust volumelevel as desired.the unit from standby mode.the unit.FM Antenna2. Touch the (mode) button repeatedly until "FM" appears on the display.3. Press and hold the /TUN - or /TUN + buttons and then release,The antenna wire on the rear of the unit is for radio reception. If reception is weak, unwind andextend the wire or relocate the wire to improve the radio reception.3. Turn on the external BT Device and enter BT searching mode. Start to the user's manual of your BT Device. )Notes:display of the external BT Device, select it and make pairing.Pairing code "0000" may need to be entered.pairing as the screen instructions on the external BT Player.( For details pairing procedures, please refer ~ ~ The unit will start to search next ( or previous ) available FM radio station then plays.5. Press button on remote control or touch button to play the preset stored station.location(such as Pxx.), then press A total of 10 stations can be stored into the unit's memory.the button to complete station storage. When the external BT Device searched the unit, will appear on the / 4. When a station searched, press and hold the button to display the desired storage "SB26"1. Power ON the unit.Or press FM button on Remote Control.1. Power ON the unit. / / / /TUN - or /TUN + buttons on remote control or touch the or button to change the storage location, press button on the / remote control or touch 2. Touch the (mode) button repeatedly until "BT" appears and blinks on the display.Or press BT button on Remote Control to switch to BT mode.~ Press the VOL - /VOL+ button or touch +/- button to adjust volume level as desired.~ Press the button or touch button to pause or play. / / 4. After successful pairing and connection, the "BT" will stop blinking and send a tone.5. To disconnect the current pairing, touch and hold the PAIR button on unit or press the PAIR button on remote control.During playback:First Time PairingNOTE:After first time pairing, the unit can be automatically connected with the last connected device.~ Touch the or button on unit or press the /TUN- or /TUN+ button to skip to next or previous track.There is a SUBWOOFER SELECTOR on the back of the unit to turn on or turn off the external subwoofer output.IN(Internal subwoofer)- When the switch is moved to "IN" position, there will be no audio output from the external subwoofer.NOTE: Before connecting, disconnect power.1. Connect one end of subwoofer connection cable ( not supplied ) to the "+" Jack on the rear of the unit as the figure above.2. Connect the other end to the "-" Jack on the rear of the unit as the figure above.3. Slide the selector to "EX" position as figure above.6. Play the music as usual and set the desired volume.5. Power ON the unit.+-+-4. Connect the R(right channel speaker) and L(left channel speaker) as the figure above.LRDuring playback, touch A or B on the unit to switch audio between ZONE A and ZONE B.Or press ZONE A or ZONE B button on remote control.A B and will appear on display if ZONE A and ZONE B are activated.NOTE:NOTE: Before connecting, disconnect power.1. Connect as the figure above.2. Power ON the unit.3. Touch the (mode) button repeatedly until "TV" appears on display. Or press TV button on Remote Control.TV audio is selected and it will play through the unit.4. Touch the (mode) button repeatedly until "DVD" appears on display. Or press DVD button on Remote Control.DVD audio is selected and it will play through the unit.5. Play the audio or video as usual and set the desired volume.3. Power ON the unit.1. Connect one end of optical connection cable ( not supplied ) to the optical jack on the rear of the unit as pictured above.2. Connect the other end to the DVD or TV back panel.4. Touch the (mode) button repeatedly until the "OPTICAL" appears on display.NOTE: Before connecting, disconnect power.DVD or TV5. Play the music as usual and set the desired volume.Or press OPTICAL button on Remote Control.NOTE:If there is no audio output (only picture) when your TV or DVD player is connected with the soundbar, please check DVD or TV audio setting, and set the digital output to PCM format.4. Touch the (mode) button on unit repeatedly until "AUX" appears on display.1. Connect one end of audio connection cable (not supplied) to the AUX IN jack on the front 2. Connect the other end to the Audio out/Line out/Phone jack on the external player ( such as iPod, iPhone, iPad, MP3 player, Discman... etc. )5. Play the music in the external player as usual and set the desired volume.of the unit as pictured above.1. Insert the USB as the figure on right.~ Press button on the Remote Control to play or pause.~ Press or button on the Remote Control to skip to next or previous track.The USB port can also be used for charging.Or press AUX IN button on Remote Control.3. Power ON the unit.2. Power ON the unit.NOTE:3. Touch the (mode) button on unit repeatedly until"USB" appears on display.To the Phones/Aux Out/Line Outz Max Power Consumption............................................................................................................60W Radio Coverage ................................................................................................FM 87.5 -108.0 MH Bluetooth Effective Range.............................................................................................Up to 32 feet(Measured in open area. Wall and structures may affect the effective range.)Power Supply Requirement................................................................DC 12 Volts, Negative Ground Operation Voltage............................................................................................................DC10V-14V Specifications subject to change without notice.Unit size..........................................................................................646.9(W) X 85.6(H)X 80.7(D)mm NOTE:THE MANUFACTURER IS NOT RESPONSIBLE FOR ANY RADIO OR TV INTERFERENCE CAUSED BY UNAUTHORIZED MODIFICATIONS TO THIS EQUIPMENT. SUCH MODIFICATIONS COULD VOID THE USER'S AUTHORITY TO OPERATE.(1) The device may cause harmful interference. andThe device complies with Part 15 of the FCC rules. Operation is subject to the following two conditions.(2) This device must accept any interference received, including the interference that maycause undesired operation.Changes or modifications not expressly approved by the party responsible for compliance could void the user's authority to operate the equipment.FCC WARNINGS:Remote Effective Range................................................................................................Up to 15 feetDevice and Accessories Net Weight.............................................................................1.45kg(3.2 lb) 2016 RIVERPARK Inc.V. 09.16C。
华宝收音机操作说明
华宝收音机操作说明一、收音机简介华宝收音机是一款便携式收音机,具有精准的调谐功能和清晰的音质效果。
它采用现代数字技术,可以接收广播电台的信号,并通过扬声器播放出来。
华宝收音机小巧轻便,操作简单,适合在户外、旅行或日常生活中使用。
二、开机及调音操作1. 开机:在收音机的侧面或顶部可以找到开关按钮,将开关按钮拨到“ON”位置,收音机即可开机。
开机后,收音机会自动搜索可用的广播电台,并显示在屏幕上。
2. 调音:华宝收音机提供多种调谐方式,可以根据个人喜好选择。
a. 手动调谐:在收音机的前面板或旋钮上,可以找到调谐按钮或旋钮。
通过手动旋转或按压按钮,可逐步调整电台频率,以找到所需的广播电台。
b. 自动调谐:收音机上可能还配有自动调谐功能,通过按下相应的按钮,收音机会自动搜索并锁定信号强度最好的广播电台。
3. 调整音量:在收音机的前面板或旋钮上,可以找到音量控制按钮或旋钮。
通过旋转或按压按钮,可调整收音机的音量大小。
建议在使用收音机时,根据实际环境调节音量,以免影响他人。
三、使用功能按钮1. 频道选择:华宝收音机通常提供多个预设频道,用户可以根据自己的喜好和需求进行选择。
在收音机的面板上,可能会有多个数字按钮,每个按钮对应一个预设频道。
通过按下相应的数字按钮,即可切换到对应的频道。
2. 播放模式:有些华宝收音机还提供不同的播放模式,如单曲循环、随机播放等。
用户可以通过在收音机面板上找到相应的按钮,按下按钮切换不同的播放模式。
3. 储存频道:如果用户经常收听某个频道,可以将该频道储存在收音机的预设频道中,以便下次快速切换。
具体操作方法是,在收听到所需频道时,按住收音机面板上的一个数字按钮,直到听到“储存成功”的提示音。
四、电池更换及充电1. 电池更换:当收音机电池用量过大,无法正常使用时,需要更换电池。
首先,找到收音机背面的电池仓盖,打开电池仓盖,取出旧电池。
然后,将新电池正确放入电池仓内,注意正负极的对应关系。
无线电基础知识
第一单元无线电基本知识什么是波?波是是振动在物质中传播能量的一种形式,,我们常见的波有机械波(如声波、水波)、电磁波(无线电波、宇宙射线、光波)等。
正弦波:正弦波是频率成分最为单一的一种信号,这种信号的波形是数学上的正弦曲线。
对于一个正弦量来说,如果幅值、频率、初相位确定了,那么这个正弦量就完全确定了。
幅值、频率(与周期是倒数关系)、初相位称为正弦量的三要素。
正弦波可表达为:Asin(ωt+φ),其中:A为振幅;ω为角频率(ω=2πf,f为频率);φ为初相位(描述波前状态的量)。
频率:声波或交变电流(或电压)在单位时间内完成周期性变化的次数,称为频率,单位:赫芝(Hz)。
例如;交流市电的频率为50 Hz;声音信号的频率范围为20Hz-20000Hz;我国所处地区中波广播发射信号的频率范围为526.5-1606.5kHz,我国调频广播发射信号的频率范围为87-108MHz。
复杂信号的频率成分:一般信号(例如语音信号和音乐信号等)都是由许多不同频率、不同幅度的正弦信号组成的。
反过来说,一个复杂信号可以分解为许多不同频率、不同幅度的的正弦信号。
为分析问题简单起见,通常使用单一频率的正弦信号。
波长:沿着波的传播方向,两个相邻的同相位质点间的距离叫做“波长”。
它是指波动媒质中,任意两个相位差为2π的质点之间的距离。
在质点振动的一个周期内,振动状态传播的距离恰是一个波长。
波长反映了波在空间上的周期性。
波长最长的无线电从长波,到中波,短波,微波,然后是红外,可见光,紫外,X光,直到波长最短的伽玛射线波速:单位时间内波形传播的距离,称波速。
通常以V表示,单位是米/秒。
声波在空气中传播的速度为340m/s(温度为150C时,温度升高时略有增加)。
真空下的电磁波波速为299792458m/s,近似为30万千米每秒,而在任何介质中电磁波波速均小于这一数值。
波速(V )与波长(λ)和频率(f)的关系:V = λ·f电磁波:电磁波是在空间传播的交变电磁场,即电磁波是由交变电场和交变磁场构成的。
PL-398MP
调频、调幅、短波、长波什么是调频(FM)、调幅(AM)、短波(SW)、长波(LW)?在一般的收音机或收录音机上都有AM及FM波段,相信大家已经熟悉,这两个波段是用来供您收听国内广播的,若收音机上还有SW波段时,那么除了国内短波电台之外,您还可以收听到世界各国的广播电台节目。
为了让您对收音机的使用有更进一步的认识,以下就什么是AM、FM、SW、LW作一简单的说明。
事实上AM及FM指的是无线电学上的二种不同调制方式。
AM: Amplitude Modulation称为调幅,而FM: Frequency Modulation称为调频。
只是一般中波广播(MW: Medium Wave)采用了调幅(AM)的方式,在不知不觉中,MW及AM之间就划上了等号。
实际上MW只是诸多利用AM调制方式的一种广播,像在高频(3-30MHz)中的国际短波广播所使用的调制方式也是AM,甚至比调频广播更高频率的航空导航通讯(116-136MHz)也是采用AM的方式,只是我们日常所说的AM波段指的就是中波广播(MW)。
那FM呢?它也同MW的命运相类似。
我们习惯上用FM来指一般的调频广播(76-108MHz,在我国为87.5-108MHz、日本为76-90MHz),事实上FM也是一种调制方式,即使在短波范围的27-30MHz之间,做为业余电台、太空、人造卫星通讯应用的波段,也有采用调频(FM)方式的。
而SW呢?其实可以说是对短波的一种简单称呼,正确的说法应该是高频(HF:High Frequency)比较贴切。
而短波这名称是怎么来的呢?以波长而言,中波(MW)介于200-600米(公尺)之间,而HF的波长却是在10~100米(公尺)之间,与上述的波长相比较,HF的波长的确是短了些,因此就把HF称做短波(SW: Short Wave)。
同样的,比中波MW更低频率的150KHz-284KHz之间的这一段频谱也是作为广播用的,以波长而言,它大约在1000~2000米(公尺)之间,和MW的200-600米相比较显然"长"多了,因此就把这段频谱的广播称做长波(LW: Long Wave)。
德生(TECSUN)系列收音机由东莞市德生通用电器制造有限...
德生(TECSUN)系列收音机由东莞市德生通用电器制造有限公司生产,其价格适中,体积小巧,外观漂亮,性能优良。
由于德生系列收音机品种繁多,难以面面俱到,全面点评。
我们可以将其分为全数字调谐收音机,二次变频高灵敏度收音机和机械调谐式袖珍收音机三大类。
一、数字调谐收音机德生公司推出最早的数字调谐收音机是PL737。
该机性能出色,有口皆碑。
其核心器件采用了东芝公司成熟芯片TC9307-010,这是一枚高品质锁相环DTS专用芯片,它具有FM、SW、MW三个波段,可预置15个电台频率。
PL737外壳采用高强度工程塑料,前面板采用铝合金材料。
PL737FM高放采用了韩国产LAP722优质集成电路,该芯片实际上与经典的TA7358内部结构完全一样,可以互换。
中放与立体声鉴频采用的是东芝公司TA8132集成电路,立体声分高度指标较高。
音频功放电路PL737选用了SONY公司的CXA1622双声道功放IC。
耳机收听,呈立体声状志,用机内扬声器收听,功放工作在BTL状态。
当然PL737也存在一些缺点,最主要表现为耗电偏大,存台偏少,夜间使用不方便等。
针对这种现象,德生公司又推出了改进版本PL747。
PL747外观采用流行的流沙银色,实物尺寸为140 X 85 X 3Omm,略大于737。
其内部电路与PL737大同小异,部分电路做了优化,耗电更省,灵敏度更高,制作工艺更精致。
它具有FM、MW、SW1、SW2四个阶段,可预置20个电台频率,另具手动快速搜索功能和自动插台功能。
并具有夜间照明功能。
PL747与PL757一样同样具有时钟显示和定时开/关机及l-90分钟的睡眠自动关机功能。
PL757目前是德生数字调谐收音机中最豪华,最优秀的一种,无论是外观工艺,还是制作水准都代表了国产收音机最高水平,整机尺寸比747略大一点,体积为145x 90x30mm。
其核心器件采用东芝公司专用数字调谐芯片TC9316F,最诱人的可能是直接输入电台频率的先进功能。
德生BCL3000,乐信RP2100,山进ATS-818ACS,安键DTS-10 收音机爱好者的专业配备
四大金刚----------德生BCL3000,乐信RP2100,山进ATS-818ACS,安键DTS-10.国产收音机中四款个头差不多的大便携机,其中德生BCL3000是手调数显机,其它三款都是传统的数调机,其中山进的还带有老式的磁带播放功能,它们共通的特点是比普通收音机要大的多的音量和优质的音色,有幸把它们集合在一起作一番比较,和喜欢大机器的朋友们共赏。
四款机器体积大同小异都差不多,其中BCL3000最小,ATS-818ACS最大。
山进的机器是台湾企业制造,其余三款都是大陆收音机之乡广东的企业制造。
除了刚上市的安键DTS-10,其余德生的BCL3000,乐信RP2100,山进ATS-818ACS都不同程度的给海外品牌做过OEM,行销全世界,其中ATS-818ACS已于去年停产。
其中安键的机器最近才推出,所以功能最齐全,改进的最完美,四台机器都有屏幕背光,其中德生和安键可以设置常亮,观看效果德生最佳。
从后背可以看出安键和乐信几乎一摸一样,只是交流电插口位置不同。
机身右侧,可以看到安键也和山进也很相像,德生和乐信都是些选择开关。
机身左侧,大部分是一些插口,德生在这块没有安排任何功能。
机顶安键和乐信也是几乎一摸一样,连按键的形状和轮廓线条都是一个磨子里刻出来的,山进机器上安排了磁带录音机的控制键,德生在这块安排了个极具特色的手提背带。
德生的调谐轮和乐信的飞梭设在前面板上,山进和安键的飞梭设在机身右侧。
山进和安键都拥有频率直选数字按键,乐信和德生都没有,其中德生BCL3000属于手调机不可能配备,乐信只有靠RP3100来补缺憾了。
德生的LOGO最漂亮,立体感和光泽最佳。
由于是手调数显机,德生的机器操控最简单。
特别设计的快慢双调谐旋钮实用性非常强。
山进的LOGO最简单,直接印在了机器上。
键位安排合理,手感好,做工精细。
飞梭手感优异,有一棱一棱的感觉,拥有像高级功放多级音量电位器的手感。
乐信的LOGO偏小,但也是金属制造,立体感强,其实乐信的英文直译应该是红太阳,呵呵。
- 1、下载文档前请自行甄别文档内容的完整性,平台不提供额外的编辑、内容补充、找答案等附加服务。
- 2、"仅部分预览"的文档,不可在线预览部分如存在完整性等问题,可反馈申请退款(可完整预览的文档不适用该条件!)。
- 3、如文档侵犯您的权益,请联系客服反馈,我们会尽快为您处理(人工客服工作时间:9:00-18:30)。
最简单的数字收音机
成都信息工程学院刘建睿
五个按键、一个电感,三个电容,一个晶振、一个耳机插口、一块芯片。
相信吗?只要上面的元件,再加上一块电路板,不超过10块钱,就能制作出一台数字FM调频收音机,没错收音机就是这么简单。
如果你曾经因为复杂的电路和痛苦的调试过程而对自己组装收音机望而却步,那么今天RDA7088单片DSP收音机芯片一定能实现你的梦想。
RDA7088是锐迪科微电子生产的单片收音机芯片,主要安装在MP4,手机等设备上实现收音机功能,由于不能回传频道数据,不能接收任意频道,实际使用较少,淘宝售价不到2元一片。
RDA7088
相关参数:
●芯片电压要求:1.8-3.6V
●封装:SOP16
●FM频率覆盖76MHz-108MHz
●自动搜台
●软开/关机功能
●末组电台记忆功能
●定频接收功能
●全频道搜索时间:<5秒
●最大工作电流20mA
●立体声
管脚功能:
1.PDN:电源使能
2.GND:地
3.GND:地
4.FMIN:FM信号输入
5.GND:地
6.VDD:电源正
7.SEEK-:频道加
8.SEEK+:频道减
9.VOL-:声音加
10.VOL+:声音减
11.GND:地
12.ROUT:右声道输出
13.LOUT:左声道输出
14.GND:地
15.VDD:电源正
16.RCLK:32.768k参考频率输入
电路使用耳机地作为天线(很多MP4,手机等收音机都是这样做的),L1与C2组成谐振网络,旁边二极管是防止天线意外输入大信号损坏芯片的,在一般使用使用环境下可以取消,使用电池供电时,C1电容也可以取消。
使用操作: 开机:按下POWER 键开机; 搜台:按下SEEK+、SEEK- 分别为加频道和减频道; 音量调节:按下VOL+、VOL-分别是加、减音量; 关机:开机状态下按下POWER 键
234
12345678
9
10111213141516JP1
R DA7088
Y132.768K VCC
VCC S1
SEEK-S5SEEK+
S3VOL-S4
VOL+
S2
POWER
L1100n H
C 124P
C 2223
R OUT LOUT
R OUT
LOUT
C 3
47uF C 4
47uF
123
J2LM1117
+5
VCC
12J3DC IN
+5
J1
PHONEJ AC K212J42V-3V
VCC
原理图
PCB 图。