果蔬烘干机软件控制系统说明书
派沃烘干机专用控制器说明书

TXZK-1型密集烤房控制器使用说明书深圳市派沃新能源科技有限公司目录一、密集烤房控制器简介: (1)二、控制器面板功能说明 (3)三、控制器的工作模式 (5)四、按键功能与操作说明 (6)五、高级设置与手动操作 (9)六、安装指导........................................................ 错误!未定义书签。
七、注意事项........................................................ 错误!未定义书签。
八、技术指标........................................................ 错误!未定义书签。
九、售后服务承诺及免责声明.......................................... 错误!未定义书签。
十、环境保护倡议.................................................... 错误!未定义书签。
十一、保修卡.. (18)一、密集烤房控制器简介:密集烤房控制器是为烟叶烘烤设计的一款自动控制产品,适用于各种密集型烤房。
该控制器采用数字温度传感器及高性能单片机设计,内置烘烤曲线,适应不同地区不同种类烟叶的烘烤,具有很大的灵活性和实用性。
控制器具有以下特点:1)使用超大液晶屏显示,简单直观易操作。
2)采用美国原装数字温度传感器,具有测温精确、抗干扰能力强及防潮防水等性能。
3)控制器内置两种工作模式:自设模式(单段或多段工作方式)、曲线模式(3条曲线:上部叶、中部叶、下部叶),满足用户的不同需要。
4)完备的安全保护功能,包括过流保护、防雷击保护、输出短路保护,具有传感器开路报警、循环风机故障报警、电源故障报警、偏温报警等,确保烘烤过程及烘烤设备的安全。
5)具有循环风机电机过载保护功能,在发生缺相、过载的情况下,能自动切断循环风机电源,防止设备损坏。
蔬菜热风干燥脱水控制系统的智能化运行与优化

蔬菜热风干燥脱水控制系统的智能化运行与优化1. 背景简述蔬菜是人们日常生活中不可或缺的食物之一,但是由于蔬菜季节性生长,保存期短,为了延长蔬菜的保鲜期和便于运输,热风干燥脱水技术应运而生。
随着科技的不断发展,蔬菜热风干燥脱水控制系统也逐渐智能化,为提高生产效率、节省能源、保证产品质量提供了更好的解决方案。
2. 智能化运行蔬菜热风干燥脱水控制系统的智能化运行主要通过智能传感器和控制器来实现。
智能传感器可以实时监测蔬菜的含水量、温度和湿度等参数,将数据传输给控制器进行实时调节。
控制器可以根据预设的程序对加热、通风、湿度等设备进行智能控制,保证蔬菜在干燥过程中达到最佳的处理效果。
3. 优化方案为了进一步提高蔬菜热风干燥脱水控制系统的运行效率和产品质量,可以进行以下优化措施:- 根据不同种类和水分含量的蔬菜,设置对应的干燥程序,以实现最佳的干燥效果;- 对于气流速度、温度和湿度进行实时监测和调节,确保干燥过程中的均匀性和稳定性;- 采用先进的能源回收技术,降低系统运行的能耗,实现绿色环保生产;- 结合大数据和人工智能技术,对系统进行数据分析和学习,不断优化控制策略,提高系统的智能化水平。
4. 智能化运行与优化成效通过智能化运行和优化,蔬菜热风干燥脱水控制系统可以实现以下显著成效:- 提高生产效率,减少人工干预和监督的时间和成本;- 优化蔬菜干燥效果,确保产品质量和口感更佳;- 节能减排,降低系统的能耗和生产成本;- 为企业实现智能化管理,提升竞争力和市场份额。
综上所述,蔬菜热风干燥脱水控制系统的智能化运行与优化是未来蔬菜加工行业的趋势和发展方向。
通过不断提升系统的智能化水平和优化方案,可以为生产企业带来显著的经济效益和社会效益,推动蔬菜干燥技术的创新和发展。
Westinghouse食品干燥机WFD101W用户手册说明书
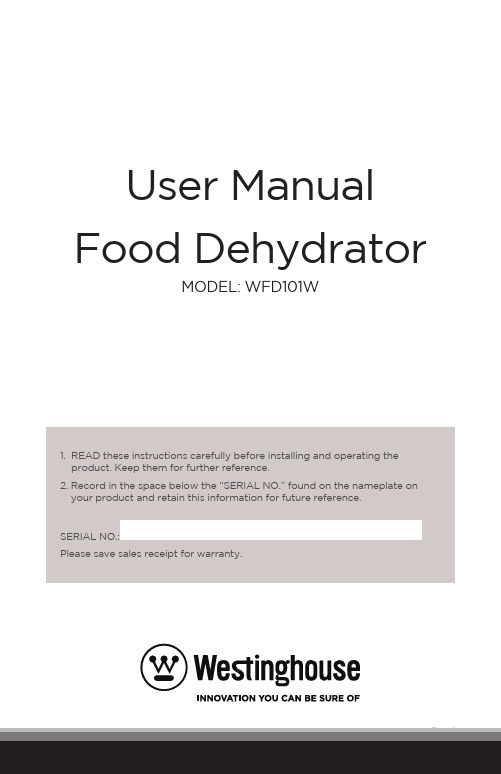
User Manual Food DehydratorMODEL: WFD101W1. R EAD these instructions carefully before installing and operating theproduct. Keep them for further reference.2. R ecord in the space below the “SERIAL NO.” found on the nameplate on your product and retain this information for future reference.SERIAL NO.:Please save sales receipt for warranty.Thank you for purchasing ourWestinghouse product. This easy-to-use manual will guide you ingetting the best use of your unit.Remember to record the model andserial numbers. They are on a labelon the back of the product._____________________________ Model number _____________________________ Serial number _____________________________ Date of purchase Staple your receipt to your manual. You will need it to obtain warranty service.SAFETY INFORMATIONImportant Safety Instructions (4)Polarized Plug ............................................................................................................................................................................5SET UP & USEParts & Features .......................................................................................................................................................................6 Operation Instructions ....................................................................................................................................................7-12CLEANING & CARE ..............................................................................................................................................13TROUBLESHOOTING & WARRANTYBefore You Call For Service (13)Customer Service (13)Limited Warranty (14)IMPORTANT SAFETY INSTRUCTIONS1. Read all instructions.2. Do not touch hot surfaces. Use handles or knobs.3. T o protect against electrical shock do not immerse cord, plugs, or (unit base) in water or other liquid.4. C lose supervision is necessary when any appliance is used by or near children.5. U nplug from outlet when not in use and before cleaning. Allow to cool before putting on or taking off parts.6. D o not operate any appliances with a damaged cord or plug or after the appliance malfunctions or has been damaged in any manner. Return appliance to the nearest authorized service facility forexamination, repair or adjutsment.7. T he use of accessory attachments not recommended by theappliance manufacturer may cause injuries.8. Do not use outdoors.9. D o not let cor hang over edge of table or counter or touch hot surfaces.10. D o not place on or near a hot gas or electric burner or in a heatedoven.11. A lways attach plug to appliance first, then plug cord into the wall outlet. To disconnect, turn any control to “off”, then remove plug from wall outlet.12. Do not use appliance for other than intended use.SAVE THESE INSTRUCTIONS HOUSEHOLD USE ONLYPOLARIZED PLUGThis appliance has a polarized plug (one blade is wider than the other). To reducethe risk of electrical shock, the plug is intended to fit into a polarized outlet only one way. If the plug does not fit fully into the outlet, reverse the plug. If it still does not fit, contact a qualified electrician. DO NOT ATTEMPT TO MODIFY THE PLUG IN ANY WAY.POWER SUPPLY CORDLonger extension cords are available & may be used if care is excercised in their use.1. T he marked electrical ratings of the cord should be at least as great as theelectrical rating of the appliance.2. T he cord shall be arranged so that it will not dape over the countertopwhere it can be pulled on by children or tripped over unintentionally.NOTE: Neither Westinghouse nor the dealer can accept any liability for damage to the product or personal injury resulting from failure to observe the electrical connection procedures.PARTS & FEATURESBEFORE FIRST TIME USE• Remove all packaging from the appliance.• C heck that your mains voltage corresponds with that stated on the appliances rating label.• W ash the lid and tray sections of the appliance in warm soapy water. The power base should be cleaned with a damp cloth (do not wash the power base with water).SELECTING FOODS TO DRY• Foods that are ripe and high in quality will provide the best flavor.• F ruits such as apples, pears and peaches are best dehydrated after they have been pre-treated. To pre-treat, you can soak fruit in fruit juice such as orange, lemon or lime or alternatively blanch or steam the fruit. This will ensure the fruit does not discolour or deteriorate during the drying process.• V egetables such as green beans, broccoli, asparagus and potato should be placed in boiling water for 3 minutes, pat dry and place in the dehydrator.• S lice fruit and vegetables evenly to enable even drying. Thickly sliced fruits and vegetables or those with a high quantity of water will take longer to dry.• Disperse foods evenly to dry in single layers.• A lways wash the food before putting it into the appliance. Do not place wet food into the trays, always ensure that the food is fully dried before it is dehydrated.• C ut off any spoiled parts of the food before dehydrating. Slice the products in such a way so that it rests freely between the two trays.• I f the food placed in the higher trays is dehydrating slower than the food in the lower trays, you can change the position of the trays to allow them to dry evenly. Food placed in the higher trays will usually take slightly longer to dehydrate than those placed in the lower trays.• S ome of the fruits are covered by a natural protective layer which can increase the time it takes to dehydrate. To avoid this it is advisableto boil food for approximately 1-2 minutes then place it in cold water. Please make sure the food is completely dry before beginning the dehydrating process.• T he length of time it takes to dehydrate foods depends on certain factors such as the temperature and humidity of the room, size and thickness of food and also how ripe the food is.TO BEGIN USE1. P lace the food flat on the trays. Do not completely cover the bottom of the tray as this will stop the air circulation. Overloading the trays or placing the food on top of each other will reduce the efficiency of the dehydrator.2. P repare the food as recommended and place on the trays. Always start by placing the food in the lower sections of the dehydrator. Leave the central hole uncovered.3. P lace the trays on the power base.4. P lace the lid onto the appliance. During the dehydrating process theupper lid should always be left on the appliance.5. P lug the appliance in to the electrical socket and turn on theappliance by pressing the switch to the “On” position, the red light will then illuminate.6. S et the temperature of the dehydrator to the recommended setting.7. R otate the trays at intervals throughout, to ensure even drying. Unplug the appliance, rotate the trays, then plug the appliance back in and continue to dry.8. W hen you have finished using the appliance, turn it off by putting theswitch to the “Off” position and unplug the appliance. Allow the food to cool down and then place it into a container or jar.NOTE:I t is recommended to use all 5 trays whenever you use the appliance no matter how many sections are left empty.EXAMPLES:• W hen the food is placed in the first lower tray only, the 4 other empty trays should be placed on top of the first tray. Make sure that the lid is on the appliance.• W hen the food is placed in the first two lower trays only, the 3 other empty trays should be placed on top of the first two trays. Make sure the upper lid is on the appliance.STORAGE• V acuum packing dried foods extends the shelf life of the food by 3 times.• S tore the foods in airtight, moisture-proof containers. Do not expose to light.• S tore in cool (below 15°C), dark and dry areas. Dehydrated meat and fish are best stored in the refrigerator.• F oods such as onions and tomatoes quickly absorb moisture from the air and should be immediately packed after removing them from the dehydrator.• D uring the first week after drying, it is better to check if there is any moisture present in the container. If moisture is present, it meansthat the foods have not been fully dehydrated and you start the dehydrating process again.• T he naturally high acidic and sugar content contained in many fruits allows them to be stored for longer periods of time.• W hen packaged and stored correctly most fruit can last for about a year while vegetables can be stored for up to about 6 months.• D o not consume fruits and vegetables that show any signs of deterioration.DEHYDRATING TIPSHERBSIt is recommended to dry new leaves. Once the leaves are dry put them into paper bags or glass jars and store them in a dark cool place.Herbs and spices are most flavorful when they first open and should be harvested while very fresh, before they begin to blossom. Because the aromatic oils are very sensitive, temperatures should be 90˚F - 100˚F (30˚- 40˚C) for drying. Take care not to load trays too heavily as this will prolong the drying time.Dried flowers, herbs and spices used for potpourri should be driedat temperatures ranging from 90˚F - 100˚F (30˚ - 40˚C) to maintain aroma and color.FRUITS, FRUIT ROLLS AND VEGETABLESFruits, fruit rolls and vegetables should be dried at 130˚F - 140˚F (55˚ - 60˚C). By drying foods in this temperature range you will minimize the loss of heat-sensitive vitamins A and C. All foods sweat when they begin to dry. The temperature may be set higher than 140˚F (60˚C) during the first couple of hours of drying. The actual temperature of the food will remain 15˚F - 20˚F (6˚ to 8˚C) lower than the air temperature for the first couple of hours.NUTS AND SEEDSNuts and seeds are high in oil, and if higher temperatures are used,they will tend to become rancid, developing off flavors. The best temperature is from 90˚F - 100˚F (30˚ - 40˚C).DEHYDRATING VEGETABLESVegetable Preparing ConditionafterDuration of dehydratingprocess (hours)Artichoke Cut into strips (3-4mm)Fragile5-13 Aubergine Peel and slice (6-12mm)Fragile6-18 Broccoli Peel and cut, steam for 3-5 mins Fragile6-20 Mushrooms Slice or dry whole (small Hard6-14 Green beans Cut and boil till they become transparent Fragile8+26 Vegetable marrows Slice into pieces (6mm)Fragile6-18CabbagePeel and cut into stripes(3mm) take out the heartHard6-14Brussel sprouts Cut the sterns into 2 pieces Crispy8-30 Cauliflower Boil till soft Hard6-16 Potato Slice. Boil for about 8-10 min Crispy8-30 Onion Slice into thin pieces Crispy8-14Carrot Boil until becomes soft. Shred and slice intoround piecesCrispy8-14Cucumber Peel and slice into round pieces (12mm)Hard6-18Sweet pepper Cut into stripes or round pieces (6mm) takeout the heartCrispy4-14Piquant pepper Need to cut it Hard8-14 Parsley Put the leafs into sections Crispy2-10 Tomato Peel and cut into pieces or into round pieces Hard8-24 Rhubarb Peel and slice into pieces (3mm)Hard8-38Beetroot Boil and then let it cool down. Cut off theroots and the tops. Slice into round piecesCrispy8-26Parsley Put the leafs into sections Crispy2-10 Tomato Peel and cut into pieces or into round pieces Hard8-24 Rhubarb Peel and slice into pieces (3mm)Hard8-38Beetroot Boil and then let it cool down. Cut off theroots and the tops. Slice into round piecesCrispy8-26Celery Slice into pieces (6mm)Crispy6-14 Spring onion Shred it Crispy6-10 Asparagus Slice into pieces (2.5mm)Crispy6-14 Garlic Peel and slice into round pieces Crispy6-16 Spinach Boil until becomes wilted Crispy6-16Mushrooms Choose the mushrooms with hats which bendinside. Cut into pieces or chunks.Hard andCrispy3-10Note: The times and procedures, which are described in the table above are only a guide. Personal preferences of customers can differ to that as described in the table. It is recommended to experiment with times and temperatures to achieve your preferred texture and taste.DEHYDRATING FRUITSFruit Preparing Dryness test Approx. time (hours) Apples Pare, core and cut into slices or rings Pliable5-6Artichoke Cut into 1/8 inch strips Brittle5-13Apricots Clean, cut in halves or in slices Pliable12-38Banana Peel and cut into 1/8 inch slices Crisp8-38Berries Cut strawberries into 1/4 inch slices, otherberries wholeNo moisture8-26Cherries Pitting is optional, or pit when 50% dry Leathery8-34 Cranberries Chop or leave whole Pliable6-26 Dates Pit and slice Leathery6-26 Figs Slice Leathery6-26 Grapes Leave whole Pliable8-38Nectarines Cut in half, dry with skin side down. Pit when50% dryPliable8-26Orange rind Peel in long strips Brittle8-16Peaches Pit when 50% dry. Halve or quarter with cutside upPliable10-34Pears Peel and slice Pliable8-30RE-HYDRATING FOODSFoods that have been dehydrated can be re-hydrated in water, this can be performed in 3 ways:• F ruits and vegetables can be soaked in water for 2-6 hours, ensure that they are refrigerated during this process.• T hey can be soaked in boiling water for 5-10 minutes until they have reached the desired consistency.• Y ou can also re-hydrate fruits and vegetables by cooking them. Do not add seasoning or sugar during this process. A good general rule is to use 2 cups of water to the fruit and allow it to stew. PREPARING MEAT, FISH, POULTRY & GAMEIt is recommended to pickle meat before dehydrating it to saveits natural taste and make the meat softer. Ensure that the meat is marinated for at least 3 hours. Please note the longer your marinade the meat, the better the flavour will be.It is necessary to add salt to pickle as it helps to remove the water from the meat and allows it to dehydrate more efficiently. Always use clean meats. Meats with higher fat content do not dry correctly.STANDARD PICKLE:• 1/2 glass of soybean sauce• 1 clove of garlic, cut into small pieces• 2 tbsp. sugar• 2 tbsp. Ketchup• 1 and 1/4 tsp of salt• 1/2 tsp onion powder• 1/2 tsp dried pepperNote: Mix ingredients together.POULTRYBefore starting the drying process, poultry should be prepared by either boiling or frying it.FISHIt is recommended to boil or bake it on a stove before beginning the dehydrating process (bake it for about 15 minutes on 200˚c (392˚F) or until the fish becomes easily broken).MEAT AND GAMEPrepare the meat by cutting it into small pieces and placing it into the appliance for about 2-8 hours or until all moisture has gone.Meats and fish should be dried on the highest temperature setting of your dehydrator. These temperatures also keep bacteria and other spoilage micro-organisms, common to meat and fish, to a minimum during the first stages of drying. MAKING BEEF JERKYAs with nearly all foods, it is important to start with a quality cut of meat. Selecta lean cut or round steak about one to one and a half inches thick, trim off all the excess fat and connective tissue. Fat hampers how well the meat will dry and the connective tissue will make the beef jerky hard to chew.For easier cutting, place meat in the freezer for about 30 minutes to partially freeze. Then turn it over and freeze it for an additional 15 minutes. Cut across the grain into strips about 1/8 inch thick.Marinate the strips for three hours.Drain the marinated strips on a paper towel, and place the strips on the drying tray. Remember to protect the dehydrator from dripping foods as described earlier inthe manual. Dehydrate until strips are quite dry and can bend without breaking. This will take from 6-16 hours. Unlike other dried meats, jerky should be slightly chewy but not brittle.CLEANING THE UNIT1. B efore cleaning check if the appliance is unplugged and has fully cooled down.2. C lean the base of the appliance with the help of a damp cloth and then rub it dry3. W ash the lid and tray sections of the appliance in warm soapy water.4. D o not use metal brushes or abrasives to clean the appliance, as it can damage thesurfaces.BEFORE YOU CALL FOR SERVICEIF THE PRODUCT FAILS TO OPERATE:A) C heck for a blown circuit fuse or a tripped main circuit breaker. If these seem tobe operating properly, test the outlet with another appliance.B) C heck to make sure the temperature selector control is set and ON/OFF switch isin correct position.IF NONE OF THE ABOVE SOLVES THE PROBLEM, DO NOT TRY TO ADJUST OR REPAIR THE PRODUCT YOURSELF.CUSTOMER SERVICEIMPORTANTDO NOT RETURN THIS PRODUCT TO THE STOREIf you have a problem with this product, please contact the W Appliance Co. Customer Satisfaction Center at 1-855-855-0294. DATED PROOF OF PURCHASE, MODEL # AND SERIAL # REQUIRED FOR WARRANTY SERVICELIMITED WARRANTYWestinghouse brand is used under license. Any repair, replacement, or warranty service, and all questions about this product should be directed to W Appliance Co. at 1 (855) 855-0294 from the USA or Puerto Rico.W Appliance Co. warrants to the original purchaser that the product will be free from defects in material, parts and workmanship for the period designated for this product. The warranty commences the day the product is purchased and covers up to a period of1 year (12 months) for labor/1 year (12 months) for parts (manufacturing defects only).W Appliance Co. agrees that it will, at its option, replace the defective product with either a new or remanufactured product equivalent to your original purchase during the warranty period. Should thePart warranty period exceed the Labor warranty period, W Appliance Co. will supply at no chargefor the remainder of the Part warranty, any newor remanufactured replacement parts as requiredby the product. During this period all labor and service charges will become the responsibility of the customer.Exclusions: This warranty does not apply to thebelow:1. If the appearance or exterior ofthe product has been damaged ordefaced, altered or modified in design orconstruction.2. If the product original serial numberhas been altered or removed or cannotbe readily determined.3. If there is damaged due to power linesurge, user damage to the AC powercord or connection to improper voltagesource.4. If damage is due to general misuse,accidents or acts of God.5. If repair attempts are done byunauthorized service agents, use ofparts other than genuine parts or partsobtained from persons other thanauthorized service companies.6. On units that have been transferredfrom the original owner.7. On products that have been purchasedas refurbished, like new, second-hand, ina “As-Is” or “Final Sale” terms.8. To products used in a commercial orrental setting.9. To products used in settings other thanordinary household use or used otherthan in accordance with the providedinstructions.10. To damages for service calls forimproper installations.11. To damages to decorative trims,finishes of the appliance or homeincurred during installation.12. Transportation and shipping costs.13. Labor after the initial 12 months.14. Food loss for loss due to productfailure or delay in service, repair orreplacement.15. To charges occurred for after hourservice, weekend, holiday charges, tollsor mileage expense for service calls toremote areas.16. Charges to make product available forservice, such as removal of trim, shelvesetc. that are not a part of the appliance.17. Service calls to install or correct theinstallation of your product.18. Service calls to instruct you how to useyour product.19. Service calls to repair or replace thehouse fuse, reset the circuit breaker orcorrect the wiring in the house. REPAIR OR REPLACEMENT AS PROVIDED UNDER THIS WARRANTY IS THE EXCLUSIVE REMEDY OF THE CUSTOMER; W Appliance Co. SHALL NOT BE LIABLE FOR ANY INCIDENTAL OR CONSEQUENTIAL DAMAGES FOR BREACH OF ANY EXPRESS OR IMPLIED WARRANTY ON THIS PRODUCT, EXCEPT TO THE EXTENT PROHIBITED BY APPLICABLE LAW. ANY IMPLIED WARRANTY OF MERCHANTABILITY OF FITNESS FOR A PARTICULAR PURPOSE ON THIS PRODUCT IS LIMITED TO THE DURATION OF THE WARRANTY.Some states do not allow the exclusion or limitations of incidental or consequential damages, or limitations on how long the warranty lasts. In these cases the above exclusions or limitations may not apply to you. This warranty gives you specific legal rights and you may also have other rights which vary from state to state.Obtaining Service: To obtain service, product literature, supplies or accessories please call1 (855) 855-0294 to create a ticket for exchange/ repair. Please make sure to provide the date of purchase, model number and a brief description of the problem. Our customer service representativewill contact you or send detailed return instructions.W Appliance Co. does not warrant that the appliance will work properly in all environmental conditions, and makes no warranty and representation, either implied or expressed, with respectto the quality, performance, merchantability, or fitness for a particular purpose other than the purpose identified within this user’s manual. W Appliance Co. has made every effort to ensure that this user’s manual is accurate and disclaims liability for any inaccuracies or omissions that may have occurred. Informationin this user’s manual is subject to change without notice and does not represent a commitment on the part of W Appliance Co. W Appliance Co. reserves the right to make improvementsto this user’s manual and/or to the products described in this user’s manual at any time without notice. If you find information in this manual that is incorrect, misleading, or incomplete, please contact us at 1- 855-855-0294.W Appliance Co.,New York, NY 10018, WESTINGHOUSE, and INNOVATION YOU CAN BE SURE OFare trademarks of Westinghouse Electric Corporation. Used underlicense by W Appliance Company. All Rights Reserved.102615。
基于热风干燥技术的蔬菜脱水过程自动调控系统的设计

基于热风干燥技术的蔬菜脱水过程自动调控系统的设计热风干燥技术在蔬菜脱水过程中起着至关重要的作用,其能够快速、高效地将蔬菜中的水分蒸发掉,从而延长蔬菜的保存时间和改善口感。
为了更好地控制脱水过程,提高生产效率和产品质量,设计基于热风干燥技术的蔬菜脱水过程自动调控系统显得尤为重要。
首先,该系统应包括一个智能温湿度控制模块,通过实时监测蔬菜烘干室内的温湿度情况,自动调节热风的温度和湿度,确保热风的传热效果和蔬菜表面温度的适宜。
在这个模块中,可以设置一些温湿度的标准数值,系统将根据实际情况进行即时调整,保证蔬菜在最佳的脱水环境中进行干燥,避免水分含量不均匀或者因温度过高而导致蔬菜营养成分流失。
其次,系统还需要一个智能风速控制模块,该模块可以根据蔬菜种类、湿度、温度等因素自动调节热风风速,确保在脱水过程中蔬菜受到均匀的热风吹拂,实现蔬菜表面水分快速蒸发。
风速的调节需要考虑到热风对蔬菜的穿透性和受热均匀性,从而达到最佳的脱水效果。
此外,系统应该具备一个智能传感器监测模块,通过安装在烘干室内的各类传感器实时监测蔬菜的水分含量、温度、湿度等参数,并将这些数据反馈给系统控制端。
基于传感器数据,系统可以实现对蔬菜脱水过程的精准控制,实时调整温湿度和风速,以达到最佳的脱水效果。
最后,系统设计中还应加入一个智能安全保护模块,用于监控烘干室内的各种运行状态,如温度过高、湿度异常等情况,及时发出警报并自动停机,确保蔬菜脱水过程的安全性和稳定性。
此外,系统还应具备远程监控和控制功能,以便操作人员可以通过手机或电脑随时随地监视脱水过程并进行必要的调整。
综上所述,基于热风干燥技术的蔬菜脱水过程自动调控系统的设计需要包括温湿度控制、风速控制、传感器监测及安全保护等模块,通过智能化的技术手段实现蔬菜脱水过程的自动化和精准化,提高生产效率和产品质量,为蔬菜加工行业带来更多的发展机遇。
云南果蔬烘干机燃烧机使用说明

云南果蔬烘干机燃烧机使用说明一、安全须知:1.本燃烧机操作前,请仔细阅读本使用说明书,并确保理解。
2.使用本燃烧机前,请确保燃烧机与果蔬烘干机正确连接,并确保电源(电压和频率)符合要求。
3.在操作过程中,请遵守以下安全规定:a.不要触摸燃烧机的热表面;b.不要试图绕过任何安全装置或操作程序;c.不要操作时穿戴松散的衣服,以及可以易燃的衣物;d.当燃烧机停止工作时,不要立即再次启动,应等待一段时间,确保燃烧机完全冷却。
二、安装:1.在安装前,请确保燃烧机的位置安全,并且与果蔬烘干机正确连接。
2.确保燃烧机周围通风良好,远离易燃物质,并避免有害气体的积聚。
3.确保燃烧机底部的支架平稳,且牢固地安装在平坦的地面上。
三、操作步骤:1.打开燃烧机的盖子,插入点火装置,并确保它安全地固定在燃烧机内。
2.将燃烧机连接到电源,并按下启动按钮。
3.点击燃烧机上的点火按钮,点燃点火装置。
4.燃烧机将开始工作,燃烧室内的温度将逐渐升高。
在温度达到预设值之前,请不要打开燃烧机的盖子。
5.燃烧机达到预设温度后,可以打开燃烧机的盖子,将果蔬放入燃烧室中。
请注意,放入燃烧室的果蔬数量不要过多,以免影响干燥效果。
6.在果蔬烘干过程中,请定期检查并搅拌果蔬,以确保其均匀干燥。
7.当果蔬干燥完毕后,关闭燃烧机,并断开电源连接。
8.撤除燃烧机内的残留果蔬,并将燃烧机进行清洁,以确保下次使用前能够达到最佳效果。
四、维护和保养:1.在使用燃烧机前,请检查燃料供应系统是否正常工作。
如果有问题,请立即修理或更换。
2.定期检查燃烧机内部的过滤器,并清洁或更换,以确保燃烧机的正常工作。
3.确保燃烧机安装牢固并保持干燥。
如果发现燃烧机有任何损坏,请立即修理或更换。
4.定期检查燃烧机的电线和插头是否受损,如果发现有问题,请立即更换。
五、故障排除:1.如果燃烧机无法启动,请检查电源连接是否正确,并确保燃烧机的电源开关是否处于打开状态。
2.如果燃烧机无法达到预设温度,请检查燃料供应系统是否正常,并确保燃烧机内部的过滤器干净。
烘干机控制系统课程设计说明书

成绩□优□良□中□与格□不与格课程设计课程名称电气控制与PLC课程设计课题名称烘干机控制系统设计专业自动化班级1202学号27姓名谭丰源指导老师赖指南、星平、谭梅、余小霏、细群2015年6月19日电气信息学院课程设计任务书课题名称烘干机控制系统设计姓名谭丰源专业自动化班级1202 学号27指导老师赖指南课程设计时间2015年6月8日~2015年6月19日一.任务与要求设计任务:以PLC为核心,设计一个烘干机控制系统,为此要求完成以下设计任务:1.根据烘干机的工艺过程和控制要求,确定控制方案。
2.配置电器元件,选择PLC型号。
3.绘制烘干机控制系统的PLC I/O接线图。
设计PLC梯形图程序,列出指令程序清单。
4.上机调试程序。
5.编写设计说明书。
设计要求1.一般要求:(1)所选控制方案应合理,所设计的控制系统应能够满足烘干机的工作过程要求,并且技术先进,安全可靠,操作方便。
(2)所绘制的设计图纸符合国家标准局颁布的GB4728-84《电气图用图形符号》、GB6988-87《电气制图》和GB7159-87《电气技术中的文字符号制定通则》的有关规定。
(3)所编写的设计说明书应用词准确,语句通顺,层次清楚,条理分明,重点突出,结构合理,容详实。
2.具体要求:(1)连续工作方式:在烘干机处于初始状态的情况下,按下启动按钮时,要求烘干机能够自动地一个循环接一个循环地工作下去,在此工作方式下,能对烘干机进行预停和紧急停止操作。
(2)单周工作方式:在烘干机处于初始状态的情况下,按下启动按钮时,要求烘干机能够自动地完成一个循环的工作。
当烘干机完成一个循环的工作并返回到初始状态时能自动停止。
在此工作方式下,能对烘干机进行紧急停止操作。
(3)单机手动工作方式:要求能对烘干机的加热器和通风机进行手动操作。
二.进度安排1.第一周星期一:布置课程设计任务,讲解设计思路和要求,查阅设计资料。
2.第一周星期二~星期四:详细了解烘干机的基本组成、工作过程和控制要求。
谷物烘干机PLC课设
目录第一章谷物烘干机原理简介 (1)1.1 工艺过程 (1)1.2 谷物烘干机的设计要求 (1)1.3谷物烘干机工艺流程 (1)第二章 PLC控制系统选型与硬件介绍 (3)2.1 系统机型选择与配置 (3)2.2 电源模块 (4)2.3 底板或机架 (5)2.4 PLC系统的其它设备 (5)2.5 PLC的通信联网 (5)2.6 统机型选择与配置 (6)第三章谷物烘干机PLC的设计 (8)3.1 热风循环自动控制部分的程序流程图的设计 (8)3.2 I/O模块 (9)3.3 电气控制系统原理图 (11)第四章谷物烘干机PLC控制梯图设计 (15)4.1系统梯形图设计 (15)4.2程序的编写。
(17)第五章收获与结论 (18)致谢 (20)参考文献 (21)第一章谷物烘干机原理简介1.1 工艺过程随着农业产业化进程的推进,农业机械化自动化水平不断提高,越来越需要在工业环境较差的环境中能安全运行且对安全性和可靠性要求都较高的设备,这也就使得PLC在其中的应用也不断地增加。
现以谷物烘干机为例,当前各种形式谷物烘干机源源不断地推进市场,要实现它的自动控制,可用传统的电器控制,也可用单片机控制,还可用PLC控制。
本文主要讲解用PLC对燃油循环式谷物烘干机进行介绍,实现谷物烘干全过程,即进粮循环烘干出粮的自动控制。
1.2 谷物烘干机的设计要求循环式烘干也称为批次式烘干,是指谷物的干燥、缓苏全部在机体内循环完成。
为保证谷物的品质,通常每小时降水率在1%以下,谷物需在机体内多次上下提升进行干燥-缓苏循环才能达到所需水份,故称为循环式。
循环式烘干的进出料需单独工作,不能与干燥同时进行。
相同投资的情况下,产量略低。
间接热源有热风炉(燃煤炉、稻壳炉),直接热源有天燃气、优质煤油或柴油、蒸汽。
需室内放置,不可露天作业。
烘干房占地面积约550m2,平面尺寸为15.5m×35.5m,屋脊高12.5m。
钢结构烘干房及设备与周边建筑的防火间距均须12m 以上,与周边围墙的距离均须5m以上。
机器人烘干器设置指南说明书
4additional information (ʑDrum light(depending on model) –goes out automatically when the washing machine door is opened or closed and after the programme Do not trap any items of washing!ServiceflapWashing machine door with handleEnd of programme ...When the display button.Rinse holdIf Rinse hold –select Terminating the programme––Select Washing1.To prevent unused detergent from flowing into the outlet2.Consumption valuesProgramme Load Current***Water***Programme Programme Additional function Load consumption consumption–Insert laundry–––SoakingDose detergent with i-DOS or pour into dispenserinstructions. Select the required programme. SelectStarchingSelectaccording to manufacturer's specifications (if required clean beforehand). SelectLoad displayThe load sensor detects the load level in the washing machine. The washing is not balanced.Load adjustIndependently of the load display, the load adjust. uses other sensors to optimally adjust thewater and power consumption and the programme duration in each programme – dependingon textile type and load.ReloadSelectstarts. The machine checks whether a top-up is possible. Follow the information on the displaypanel#11Filling dispenserWhen selecting your detergent and care product, follow the manufacturers instructions.We recommend the use of standard, universal and color liquid detergents for all machine-washable, coloured textiles made of cotton and synthetic materials.Do not use any solvent-based, corrosive or gas-emitting products (e.g. liquid beach).To prevent product from drying, do not leave the fill cover open for a long time.Changing dosage strength:setting isThe selection (OFF/light/normal/strong) of i-DOS1 and i-DOS2 is retained for eachprogramme until the next change occurs, even if the machine is switched off.ʑTo adjust the basic dosages:13Intelligent Dosage System (i-DOS)ʑConverting i-DOS2 dispenser contentsInstead of softener, a second liquid detergent can also beused in dispenser i-DOS2.1.PressÙOptions button to select i-DOS2: content.2.Press / Change buttons to switch between softener anddetergent.finished in 2:26Ēi-DOS2: content®)c softener–An additional changeable insert for a second detergent is enclosed and can be fitted in thefill cover. a Page 11–When the dispenser contents are changed, the basic dosage is reset to the correspondingfactory setting. If required, adjust the basic dosage.Manual dosage in dispenser B/C1.Set intelligent dosage to – (OFF). a Page 122.Dose in dispenser B/C according to amount of washing,manufacturer’s specifications and existing water hardness.B/C = Powder/liquid detergent–Do not manually dose liquid detergent for programmes with Prewash and/or withend time programme option.–For programmes with Prewash pour in detergent. a Page 9Do not open detergent drawer while water is being supplied.Customer serviceʑIf you cannot rectify the fault yourself (a separate Installation/Maintenance instructions,What to do if ...), please contact our customer service. We will always finds a suitable solutionto avoid unnecessary visits by technicians.ʑYou can find the contact data for your nearest customer service here or in the customerservice list (depending on model).–GB–IE***********(Calls from a BT landline will be charged at up to 3 pence per minute. A call set-upfee of up to 6 pence may apply.)01450 2655ʑPlease give customer service the product number (E-Nr.) and the production number (FD)of the appliance.Product number Production numberThese instructions can be found on:inside of washing machine door */openservice flap * and rear of the appliance.* depending on modelʑRely on the competence of the manufacturer. Contact us.You can therefore be sure that the repair is carried out by trained service technicians whocarry original spare parts.en operating instructionsWashing machinewith Intelligent Dosage SystemWAS32890EUObserve the safety instructions on page 8.Read these instructions and the separate installationinstructions before operating the washing machine.12Buttons, display panela Page 6Handle of the detergent drawerYour washing machineCongratulations – You have opted for a modern, high-qualitydomestic appliance manufactured by Bosch. The washing machine is distinguished by its economical consumption of water, energy and detergent.Each appliance which leaves our factory is inspected thoroughly to ensure that it functions properly and is in perfect condition.Every machine has been preset at the factory for the intelligent dosage system. You can start washing immediately!Changes to the standard settings. a Page 12, 13Further information on our products, accessories, spare parts and services can be found at: °C Select the temperature – – (cold) up to 90°; by pressing i-DOS1Select the detergent dosage. a l = light, ll = normal, lll = strong, – i-DOS2Select the softener or detergent d l = light, ll = normal, lll = strong, –Select the spin speed (revolutions p 0 to 1600 * (* depending on modÙ Options Select standard settings. a Page Options Select programme options. a Pa / Change Change settings in the options. ai-DOS1i-DOS1 selected/reload display.a Page 11 – 13Detergent i-DOS2i-DOS2 selected/reload display.a Page 11 – 13Softener or Detergentʋfor household use only,ʋfor washing machine-washable textiles and hand-washable wool in the apropriate detergent,ʋwhen dosage any detergents/cleaning aids andcleaning agents, always follow manufacturer’s instructions,ʋto be operated with cold drinking water andcommercially available detergents and care products which are suitable for use in washing machines.–Do not leave children unattended near the washing machine!–Children must not use the washing machine!–Keep pets away from the washing machine!Intended useIntelligent Dosage System (i-DOS)Your washing machine features an intelligent dosage system for liquid detergent and softener. Dispensers i-DOS1 and i-DOS2 (1.3 l/0.5 l) in the detergent drawer are used for this. You can select whether you want to use one liquid detergent and one softener or two liquid detergents. a Page 13Automatic programmesAutomatic adjustment of the wash programme and intelligent dosage depending on the detected washing type and soiling. a Page 10ContentsPageʋIntended use.......................................................................................1ʋPreparing your washing machine...................................................2ʋBefore 1st wash..............................................................................2/3ʋBefore each wash..........................................................................3/4ʋAfter each wash..............................................................................4/5ʋSelect options and change settings/Display panel.....................6ʋOverview of programmes.................................................................7ʋSafety instructions..............................................................................8ʋConsumption values..........................................................................8ʋImportant information........................................................................9ʋInformation on programmes/options ...........................................10ʋIntelligent Dosage System (i-DOS)........................................11–13ʋManual dosage.................................................................................13ʋCustomer service (13)Protection of the environment/conservation tips–Utilise the maximum load of washing for each particular programme.–Wash normally soiled fabrics without prewash.–The selectable temperatures apply to the care labels on thetextiles. The temperatures in the machine may deviate from this so that you get the optimum mix of energy-saving and washing results.–Detergent dosage using the intelligent dosage system helps save detergent and water.–Energy saving mode: The display panel light goes out after several minutes, $Start/Reload flashes. To activate the light, select any button.–If the washing is then dried in the tumble dryer, select spin speed according to the instructions of the dryer manufacturer.Automatic stain treatmentSpecial treatment of 16 different stain types is possible.No pretreatment of the stains is required – washing machine adjusts the washing process. a Page 10Preparing your washing machineCorrect installation according to separate Installation/Maintenance instructions.Checking the machine–Never switch on a damaged machine!–Inform your customer service!Insert mains plug–With dry hands only!–Take hold of the plug only!Turn on the tap34Start/ReloadProgramme selectorDrum light(depending on model) –goes out automatically when the washing machine door is opened or closed and after the programme starts.Open the washingmachine door 1.Sort the washing2.According to the information on the care labels.According to type; colour; soiling and temperature.Follow manufacturer’s care information!Do not exceed maximum load. a Page 7Follow important instructions! a Page 9Select a programme3.Programme selector for switching the machine on and offand for selecting the programme. Can be rotated in either direction.If childproof lock active, a Deactivate, Page 9Follow the information on thedisplay panel!Max. 8kg Cottons Insert laundryInsert laundry4.Observe load display on the display panel.a Page 90 Load: Max. 8kgCottons Insert laundryClose the washing machine door5.Do not trap any items of washing!finished in 2:26Cottonsi-DOS1: II i-DOS2: IIIntelligent dosage has been preset at the factory:i-DOS1 : ll = Detergent dosage : normal i-DOS2 : ll = Softener dosage : normalChange dosage a Page 12Select programme settings6.All buttons are sensitive, they only need to be touched gently!Temperature/Spin speed a Page 2Programme options (menu) a Page 6Stain selection a Page 10Manual dosage a Page 13Start programme7.B /C dispenser for manuali-DOS1 dispenser fo liquid detergenti-DOS2 dispenser for in softener or liquid detergWashinDetergent drawer with:/ Change buttons.Page 12= OFF; by pressing / Change buttons.dosage. a Page 12= OFF; by pressing / Change buttons.per minute, 0 = no spin while the programme is running). del); by pressing / Change buttons.e 6age 6a Page 6Before each washHandle of the detergentdrawerWashinFill dispensers i-DOS1 and i-DOS2a Page 11Wash once without any washing1.To prevent unused detergent from flowing into the outletduring the first wash: Pour 1 litre of water into dispenser B /C and start the >Empty programme.2.Wash once using L Cottons 90 °C programme withoutany washing .Before 1stwashadditional information (ʑServiceflap Washing machine door with handle End of programme ...When the displaybutton.Rinse holdIf Rinse hold–selectTerminating the programme––Selectng56–Insert laundry–––Soaking Dose detergent with i-DOS or pour into dispenser instructions. Select the required programme. Select Starching Select according to manufacturer's specifications (if required clean beforehand). Select Load displayThe load sensor detects the load level in the washing machine. The washing is not balanced.Load adjustIndependently of the load display, the load adjust. uses other sensors to optimally adjust the water and power consumption and the programme duration in each programme – depending on textile type and load.ReloadSelect starts. The machine checks whether a top-up is possible. Follow the information on the display panel #When selecting your detergent and care product, follow the manufacturers instructions.We recommend the use of standard, universal and color liquid detergents for all machine-washable, coloured textiles made of cotton and synthetic materials.Do not use any solvent-based, corrosive or gas-emitting products (e.g. liquid beach).To prevent product from drying, do not leave the fill cover open for a long time.11Changing dosage strength:setting is The selection (OFF/light/normal/strong) of i-DOS1 and i-DOS2 is retained for each programme until the next change occurs, even if the machine is switched off.ʑTo adjust the basic dosages:13Intelligent Dosage System (i-DOS)ʑConverting i-DOS2 dispenser contentsInstead of softener, a second liquid detergent can also be used in dispenser i-DOS2.1.Press ÙOptions button to select i-DOS2: content .2.Press / Change buttons to switch between softener anddetergent.finished in 2:26Ēi-DOS2: content®)c softener–An additional changeable insert for a second detergent is enclosed and can be fitted in the fill cover. a Page 11–When the dispenser contents are changed, the basic dosage is reset to the corresponding factory setting. If required, adjust the basic dosage.Manual dosage in dispenser B /C1.Set intelligent dosage to – (OFF). a Page 122.Dose in dispenser B /C according to amount of washing,manufacturer’s specifications and existing water hardness.B /C = Powder/liquid detergent–Do not manually dose liquid detergent for programmes with Prewash and/or with end time programme option.–For programmes with Prewash pour in detergent. a Page 9Do not open detergent drawer while water is being supplied.Customer serviceʑIf you cannot rectify the fault yourself (a separate Installation/Maintenance instructions, What to do if ...), please contact our customer service. We will always finds a suitable solution to avoid unnecessary visits by technicians.ʑYou can find the contact data for your nearest customer service here or in the customer service list (depending on model).–GB –IE***********(Calls from a BT landline will be charged at up to 3 pence per minute. A call set-up fee of up to 6 pence may apply.)01450 2655ʑPlease give customer service the product number (E-Nr.) and the production number (FD) of the appliance.Product number Production numberThese instructions can be found on: inside of washing machine door */open service flap * and rear of the appliance.* depending on model ʑRely on the competence of the manufacturer. Contact us.You can therefore be sure that the repair is carried out by trained service technicians who carry original spare parts.enoperating instructionsObserve the safety instructions on page 8.Read these instructions and the separate installationinstructions before operating the washing machine.。
- 1、下载文档前请自行甄别文档内容的完整性,平台不提供额外的编辑、内容补充、找答案等附加服务。
- 2、"仅部分预览"的文档,不可在线预览部分如存在完整性等问题,可反馈申请退款(可完整预览的文档不适用该条件!)。
- 3、如文档侵犯您的权益,请联系客服反馈,我们会尽快为您处理(人工客服工作时间:9:00-18:30)。
果蔬烘干机软件控制系统说明书
一、引言
该软件控制系统是用于果蔬烘干机的控制和管理的,旨在提高果蔬的
烘干质量和效率。
本说明书将介绍系统的功能模块、操作流程和使用方法,以帮助用户正确使用该软件控制系统。
二、系统功能模块
1.用户管理模块:该模块用于管理用户账号和权限,包括添加、修改
和删除用户,设置用户权限等功能。
2.参数设置模块:该模块用于设置烘干机的参数,包括烘干温度、烘
干时间、风速等参数,可根据不同的果蔬进行灵活调整。
3.运行控制模块:该模块用于启动、停止和暂停烘干机的运行,用户
可以根据实际需要进行操作。
4.数据监控模块:该模块用于实时监测烘干机的运行状态和参数,包
括温度、湿度、风速等数据,方便用户进行实时调整和掌握烘干机的运行
情况。
5.故障报警模块:该模块用于监测烘干机的故障状态,一旦发生故障
会发出警报,并显示具体故障信息,帮助用户及时处理故障。
6.数据存储模块:该模块用于存储烘干机的运行数据和历史记录,包
括温度曲线、湿度曲线、运行时间等信息,方便用户进行数据分析和性能
评估。
7.报表生成模块:该模块用于生成和导出烘干机的运行报表,用户可
根据需要选择不同的报表类型和时间段进行生成和导出。
三、操作流程
1.首先,用户需登录系统,输入正确的账号和密码。
2.登录成功后,用户可以根据自己的权限进行相应的操作,如修改参数、启动烘干机等。
3.用户可通过数据监控模块实时查看烘干机的运行状态和参数,根据
需要进行调整。
4.若发生故障,用户可通过故障报警模块获得警报并查看具体故障信息,及时处理故障。
5.用户可通过数据存储模块查看和导出烘干机的运行数据和历史记录,进行数据分析和评估。
6.最后,用户可通过报表生成模块生成和导出烘干机的运行报表,方
便日常管理和备案。
四、使用方法
1.在电脑或手机上安装该软件控制系统,并确保设备与烘干机的连接
正常。
2.打开软件,输入正确的账号和密码登录系统。
3.根据自己的权限进行相应的操作,如修改参数、启动烘干机等。
4.及时监测烘干机的运行状态和参数,根据需要进行调整。
5.处理故障时,注意查看故障报警模块中的具体故障信息,并采取相
应的措施。
6.查看和导出烘干机的运行数据和历史记录,进行数据分析和性能评估。
7.需要时,生成和导出烘干机的运行报表,方便日常管理和备案。
五、总结
通过该软件控制系统,用户可以方便地管理和控制果蔬烘干机的运行,提高烘干质量和效率。
通过实时监测和数据分析,用户可以及时调整参数
和处理故障,保证烘干机的稳定运行。
希望本说明书对用户正确使用该软
件控制系统提供了帮助。