OBIEE11g操作手册
Oracle Database Mobile Server 11g 用户手册说明书
ORACLE DATABASE MOBILE SERVER ® 11g Oracle Database Mobile Server 11g is the best way to securely connect embedded devices and mobile applications to Oracle Database. Any organization with a mobile workforce or network of remote devices can benefit from using Oracle Database Mobile Server to safely and reliably link them into their existing enterprise infrastructure. Oracle Database Mobile Server is designed to work with Berkeley DB, Oracle’s high performance mobile data store. It is also compatible with SQLite, the popular open source project. Oracle Database Mobile Server Overview Oracle Database Mobile Server 11g is a reliable, secure way to link mobile applications and embedded devices into existing enterprise infrastructure. It is well suited for mission critical applications or any application where high performance and reliability are required. It extends the application grid to mobile devices, allowing access to enterprise data and applications in the absence of a network connection. When a network connection is available, Oracle Database Mobile Server uses data synchronization to allow reliable and secure data exchange with a backend Oracle Database. The three main components of Oracle Database Mobile Server are: 1) Mobile Client, resides on mobile platform to facilitate sync and remote management 2) The Sync Server itself, coupled with the Mobile Manager console, provide scalable, secure management of data, applications and devices. 3) Mobile Development Kit (MDK), a suite of tools for packaging, publishing and testing applications. Multi-Platform Mobile Client Oracle Database Mobile Server supports many different client platforms, including Java, Android, Blackberry, Windows Desktop & Mobile, and Linux. The Mobile Client provides support for either a SQLite database or Oracle Berkeley DB. • Berkeley DB is a widely deployed, mature embedded database library that provides enterprise class features, including high throughput, low-latency reads, non-blocking writes, data scalability and in-memory caching in a small memory footprint. Berkeley DB offers a SQL API that is SQLite compatible. Berkeley DB offers features that allow it to scale well beyond the limitations of the SQLite native library, while retaining the ease-of-use of the SQLite API. • SQLite is a very popular open source embedded database library and is widely used in smart phones, including Android and Blackberry devices. It is a small footprint, transactional database library that is self-administering, requiring no external DBA. The Mobile Client supports both databases with a rich set of data synchronization features. Data synchronization can be enabled in a variety of ways – automatic background sync, manual sync using a GUI, command line app, or even from another application using API calls.A device agent on the Mobile client allows administrators to remotely manage the device by sending commands or querying the system. Application life-cycle management can be achieved by enabling remote application updates.Enterprise Ready Mobile ServerAt the core of the Oracle Database Mobile Server product is the server itself, which can be deployed on commodity server hardware running industry standard operating systems including Windows, Linux, Solaris, HP-UX and IBM AIX. The Mobile Server provides a reliable, bi-directional synchronization system and a powerful administration interface.Robust and Scalable Synchronization SystemBased on the publish/subscribe or “pub-sub” model, the Oracle Database Mobile Server synchronization system allows efficient asynchronous and synchronous incremental data synchronization between thousands of mobile users and the Oracle Database.Oracle Database Mobile Server features a robust and resilient synchronization process. In the event of a network failure, the client will resume the function from the last acknowledged checkpoint rather than restart the transmission. The result is that a successful synchronization can be achieved even over unreliable network connections.Oracle Database Mobile Server is capable of analyzing information contained in the mobile application to automatically create the application's server-side synchronization logic. It provides a flexible architecture that enables customization of the synchronization process at multiple levels. Callback support enables interleaving various application-specific tasks during the various synchronization phases. Developers can choose to optimize only the resource intensive Compose phase of synchronization by implementing java classes that leverage their insights into the data model. Alternatively, developers can provide full control of the synchronization system by independently managing the data queues that contain the uploaded data and the client updates to be downloaded.Conflicts can occur when the same data has been modified by the server and the client, or by multiple clients. Oracle Database Mobile Server automatically detects such conflicts and resolves them based on a highly customizable rule set.Comprehensive Management and AdministrationOracle Database Mobile Server employs a secure, centralized repository to support a unified interface for distributing and managing software and data on remote systems. Mobile Manager, a web-based administration interface for Mobile Server, enables 100% server-side management of all mobile applications, devices, users and mobile servers. The administrator can create users and groups, assign application access privileges, send device commands and retrieve device diagnostic information from a single interface. Integration with enterprise Oracle OID and LDAP directories further simplifies user management. In addition, the administrator can manage the synchronization process by setting its frequency, resolving errors, or analyzing and tuning its performance from the same interface. A scripting language is available that can be used to batch administration functions minimize administrator overhead.Rapid Application Development SupportThe Mobile Development Kit (MDK) is included with Oracle Database Mobile Server. It consists of a set of tools, APIs, tutorials and code samples that accelerate the development of mobile applications.The main component of the MDK is the Mobile Database Workbench (MDW), a visual development tool for designing synchronized databases. Wizards in the MDW accelerate creation of synchronized databases by allowing developers to quickly define and customize snapshots of enterprise data models for incorporation into these databases. The Packaging Wizard enables bundling all application components (executables, libraries, images, help files etc.) into a JAR file for simple upload to the Mobile Server from where it can be deployed to mobile, embedded or lightweight business environments easily.Developers can use Oracle JDeveloper with ADF Mobile to visually develop applications that enable access to critical business data. Oracle Database Mobile Server includes support for deploying and managing applications created using JDeveloper and ADF Mobile.Oracle Database Mobile Server also supports familiar data access interfaces and open standards such as ODBC, JDBC, and . Tutorials and samples included in the documentation and MDK install highlight how to leverage specific features or develop applications on a particular platform.Table 1 Supported client platformsHigh Performance and ScalabilityOracle Database Mobile Server delivers impressive out-of-the-box performance, enabling users to access information quickly and efficiently. Support for multiprocessor systems and dynamic cache sizing ensure top performance for larger databases and greater numbers of connected users. Oracle Database Mobile Server provides tools to tune the performance of data synchronization.Oracle Database Mobile Server integrates with Oracle WebLogic Server to enable scaling of Mobile Server deployments by taking advantage of the load balancing features.On the mobile device side, Berkeley DB’s small footprint, extreme scalability, and fine-grain locking make it suitable for almost any application. It supports a high degree of concurrency, including support for concurrent Vacuum and Backup commands.Unparalleled Device and Application SecurityOracle Database Mobile Server provides standard device commands as well as the infrastructure to implement customized commands to support enterprise business processes and security best practices. For example, you can issue commands to synchronize the database, perform diagnostics, or change application settings. In the event of a device loss, theft, or other security concern, you can delete applications and databases, uninstall the client or reset the password. SSL based encryption protects data integrity while data is in transit between the device and the enterprise database.JavaN/A Yes N/A AndroidN/A Yes N/A BlackberryN/A Yes N/A Windows Desktopand MobileYes Yes Yes Linux Yes Yes N/ATable 2 Key Oracle Database Mobile Server featuresConclusionOrganizations of all types can leverage Oracle Database Mobile Server 11g to increase employee productivity, reduce operation costs, and improve customer satisfaction. Oracle Database Mobile Server has delivered demonstrable impact in a wide variety of roles, including sales force automation, data collection, customer relationship management (CRM), and field service applications. It has an established presence in a range of industries including financial services, healthcare, transportation, logistics, government, retail, military, and law enforcement. It is also commonly used as a building block for custom solutions by ISVs and System Integrators (SIs).Contact UsFor more information about Oracle Database Mobile Server, please visit or call +1.800.ORACLE1 to speak to an Oracle representative.Oracle is committed to developing practices and products that help protect the environmentCopyright © 2011, Oracle and/or its affiliates. All rights reserved.This document is provided for information purposes only and the contents hereof are subject to change without notice. This document is not warranted to be error-free, nor subject to any other warranties or conditions, whether expressed orally or implied in law, including implied warranties and conditions of merchantability or fitness for a particular purpose. We specifically disclaim any liability with respect to this document and no contractual obligations are formed either directly or indirectly by this document. This document may not be reproduced or transmitted in any form or by any means, electronic or mechanical, for any purpose, without our prior written permission.Oracle is a registered trademark of Oracle Corporation and/or its affiliates. Other names may be trademarks of their respective owners.• Footprint is 1 MB• Very broad platform support• High performance• Non-blocking writes• In-memory caching• Concurrent access bymultiple threads orprocesses• Full ACID transactions• Automatic recovery• Scales to TB of data ina single table• JDBC, ODBC, APIs• SQL API compatiblewith SQLite, SQL-92• 128-bit AES encryption • Fine-grain locking• Zero administration • Flexible & reliable bi- directional synchronization • Asynchronous architecture for high scalability • Multi-threaded architecture • Custom synchronization invocation • Automatic (background) Synchronization • Support for schema evolution • SSL encryption & data compression • Network failure recovery • Built-in and custom conflict detection / resolution • Ability to synchronize data and applications• EM compliant UI • Single Sign-On capability using Oracle Identity Management • Scripting language for batch administration • Extension APIs • User management • Application provisioning and deployment • Device management including remote diagnostics • Unified interface to monitor synchronization and resolve errors。
BIEE 11G 安装配置文档_Villa

BIEE 11G 安装文档编写日期:2011年4月编辑者:孙歆哲目录目录 (2)一准备阶段 (3)1 环境准备 (3)2 软件准备 (3)二数据库安装 (4)1 Oracle Database 11g Release 2安装 (4)2 网络配置 (10)三Repository Creation Utility安装 (16)四Oracle Business Intelligence 11g 安装 (19)五BIEE配置 (23)1 internet的设置 (24)2Flash插件安装 (24)3 用pack实现admintool使用 (24)4 变量 (31)(1)会话变量,利用变量在sql创建用户 (31)(2)资料库变量,获取当前日期 (37)5 备份和迁移 (41)(1)备份 (41)(2)迁移 (44)6 停止和启动OBIEE (52)(1)停止OBIEE (52)(2)启动OBIEE (53)六附录 (55)1资料库档案初始化块DATE变量里的sql 语句 (55)2会话初始化块AUTU变量里的sql语句 (55)3自动备份计划任务里的语句 (55)一准备阶段1.环境准备环境如下:CPU:Intel(R) Xeon(R)) cpu 2*4 2.00Hz 2.00Hz(2处理器) 内存:24GB硬盘空间:550GB操作系统:Windows2008操作系统类型:64位操作系统OBIEE服务器地址为192.168.90.235OBIEE测试环境虚拟机地址为192.168.90.233SQL服务器地址为192.168.90.2302.软件准备(1)数据库软件:SQL SERVER 2008 ;Oracle 11g(2)R CU:Repository Creation Utility (11.1.1.3.3)(3)O BIEE:Oracle Business Intelligence 11g(4)OBIEE pack 补丁包biee_client_install (11.1.1.3)(5)VM虚拟机二数据库安装1. 下载Oracle Database 11g Release 2后安装2. 网络配置输入超级管理员用户名SYS及密码后,进入数据库管理界面点选服务器标签,选择初始化参数选项,然后选择SPFile修改open_cursors参数值为500,修改processes参数值为500应用保存后,数据库安装及设置完成。
BIEE11g集群系统环境安装配置手册-v10

BIEE 集群系统测试环境安装配置手册Table of Contents1.文档介绍 (1)1.1文档目的 (1)1.2缩写与术语定义 (1)1.3目标 (1)1.4系统用户与密码汇总 (1)2.安装前的准备 (2)2.1操作系统准备 (2)2.2Linux系统设置 (2)2.3软件介质的准备 (3)3安装和配置OBIEE (3)3.1安装RCU (Repository Creation Utility) (3)3.2安装BIEE (10)3.3安装p1*******_111170_Linux-x86-64 (154.155都必须安装) (24)3.4安装patch p1*******_111170_Linux-x86-64(154,155都必须安装) (25)1.文档介绍1.1文档目的本文档介绍Oracle BIEE1117及其补丁系统的安装、配置过程,详细记录配置信息,用于以后系统的维护和相关人员的培训。
1.2缩写与术语定义1.3目标1.4系统用户与密码汇总2.安装前的准备Oracle BIEE安装需要一定的系统参数和相关的软件包的支持,特别是Linux系统的系统,本节介绍安装的需要做的准备工作。
2.1操作系统准备其中操作系统、Oracle DB(实例需要以AL32UTF8为字符集)以及Oracle DB Client(需要安装管理员版客户端)均由浦发技术人员安装完成,此文档不再赘述。
2.2Linux系统设置1.确认Linux系统已支持Utf8,例如例如EN_UTF8,US_UTF8,ZH_UTF8等!(已由浦发技术人员确认)2.由于Linux系统由模板生成,需要确保151,154,155三台机器拥有不同的机器名。
之后,并修改linux的host文件 /etc/hosts (以154机器为例,除了需要修改成红框中的第1、2行,还需要添加第3行和第4行对155、151机器的映射,这样后续安装即可以机器名来进行引用)(在155机器上的配置)3.确认Linux版本命令:cat /etc/version内核: Linux version 3.0.13-0.27-default命令: lsb_release -a系统版本: SUSE Linux Enterprise Server 11 (x86_64)4.修改系统参数 (154和155)编辑文件:/etc/security/limits.conf 加入以下语句:oracle soft nofile 65536oracle hard nofile 65536oracle soft nproc 16384oracle hard nproc 163845.创建安装用户biee(154和155)命令: useradd -m biee passwd biee1234创建用户 biee 密码 biee12346.确保biee拥有dba和oinstall组的权限(154和155)及其对oracle客户端目录下的oraInventory目录的写权限。
Oracle 11g Data Guard 物理备库快速配置指南

Oracle 11g Data Guard 物理备库快速配置指南(上)June 26, 2012缘起最近做了10g和11g的物理备库配置实验,发现Data Guard 其实很容易,但是缺少好文档。
我是参考官方文档做的实验,觉得它写的不是很清楚的。
Google 出来两个pdf文档,读了觉得比官方文档强很多。
翻译下,也许会对某些朋友有用。
翻译的同时我也好更熟悉下这两个文档。
好久没翻译过英文了,可以顺便练练手。
原文档下载地址(墙外):Data Guard 是Oracle 数据库的一个功能,能够提供数据库的冗余。
冗余是通过创建一个备用(物理复制)数据库实现,备库最好是在不同的地理位置或者在不同的磁盘上。
备库通过应用主库上的变化来保持数据同步。
备库可以使用重做日志应用(物理备库)或SQL应用同步(逻辑备库)。
本文旨在说明Data Guard 的配置并不复杂,不需要特殊的技能或者培训才能学会搭建。
它将快速展示给读者搭建一个物理备库的过程。
我的目标是,即使你第一次接触Data Guard,刚考虑要使用它或担心它会不会很难配置,本文将帮助你快速搭建起一个正常运行起来的物理备库。
每种Oracle 高可用性工具都有其目的。
使用Data Guard 的理由有:∙整个数据库的冗余∙故障时的快速恢复∙故障后客户端能自动重连∙在备库运行备份∙较好的故障平均修复时间∙并不复杂有一些任何生产库都应该有的基本的设置。
其中一个就是归档模式。
对于生产库,这应该是一个明显的必须配置。
如果你的生产库没有适用归档模式,你要么需要马上开始读点书,要么你得有一个非常非常好的理由。
我不大确定谁真能找出一个理由,但任何准则都有例外。
如何修改你的数据库为归档模式:SQL> shutdown immediateSQL> startup mountSQL> alter database archivelog;SQL> alter database open;SQL> archive log list;))主库的TNS 名字文件配置:JED2 =(DESCRIPTION =(ADDRESS = (PROTOCOL = TCP)(HOST = dev-db2)(PORT = 1521)) (CONNECT_DATA =(SERVER = DEDICATED)(SERVICE_NAME = JED2)))备库的TNS 名字文件配置:JED =(DESCRIPTION =(ADDRESS = (PROTOCOL = TCP)(HOST = dev-db1)(PORT = 1521)) (CONNECT_DATA =(SERVER = DEDICATED)(SERVICE_NAME = JED)))然后在备库服务器上创建所需目录结构和修改相关文件。
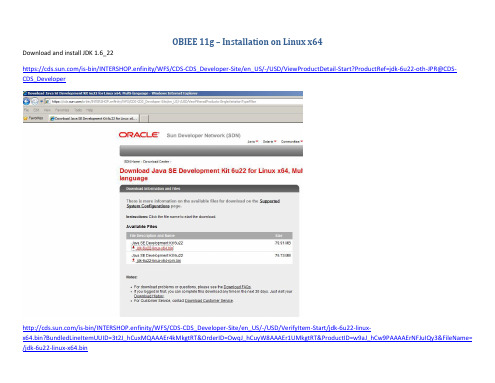
OBIEE 11g – Installation on Linux x64
Checking for hardnofiles=4096; found hardnofiles=131072. Checking for softnofiles=4096; found softnofiles=131072. Check complete. The overall result of this check is: Passed
Passed Passed
Check Name:GLIBC Check Description:This is a prerequisite condition to check whether the recommended glibc version is available on the system Expected result: ATLEAST=2.3.4-2.19 Actual Result: 2.3.4-2.43 Check complete. The overall result of this check is: Passed
Check Name:Packages Check Description:This is a prerequisite condition to test whether the packages recommended for installing the product are available on the system. Checking for binutils-2.15.92.0.2; found binutils-2.15.92.0.2-25-x86_64. Passed Passed
Check Name:TotalMemory Check Description:This is a prerequisite condition to test whether the system has sufficient physical memory. Expected result: 1024MB Actual Result: 2008MB Check complete. The overall result of this check is: Passed
oracle11g使用手册

oracle11g使用手册1、首先安装Oracle11g,如下图所示:Oralce不支持中文路径及空格。
切忌。
记录好相关信息2、导出数据备份:Expdp 用户名/密码@连接串dumpfile=ora11g.dmp directory=服务器路径schemas=nc56并将dmp文件从服务器上取到本机3、使用PL/SQL软件,使用system用户登录,使用如下语句,创建nc56用户-- Create the usercreate user NC56identified by "nc56"default tablespace USERStemporary tablespace TEMPprofile DEFAULTpassword expire;-- Grant/Revoke role privilegesgrant dba to NC56;-- Grant/Revoke system privilegesgrant unlimited tablespace to NC56 with admin option;--创建表空间:执行脚本前先建立db 文件夹否则报错CREATE TABLESPACE "NNC_DATA03" LOGGING DATAFILE'd:\db\nc3.ora'SIZE500M ;CREATE TABLESPACE "NNC_DATA02" LOGGING DATAFILE'd:\db\nc2.ora'SIZE500M ;CREATE TABLESPACE "NNC_DATA01" LOGGING DATAFILE'd:\db\nc1.ora'SIZE500M ;CREATE TABLESPACE "NNC_INDEX01" LOGGING DATAFILE 'd:\db\I1.ora'SIZE500M ;CREATE TABLESPACE "NNC_INDEX02" LOGGING DATAFILE 'd:\db\I2.ora'SIZE500M ;CREATE TABLESPACE "NNC_INDEX03" LOGGING DATAFILE 'd:\db\I3.ora'SIZE500M ;alter database datafile'D:\db\I1.ora'autoextend on; alter database datafile'D:\db\I2.ora'autoextend on; alter database datafile'D:\db\I3.ora'autoextend on;alter database datafile'D:\db\nc1.ora'autoextend on; alterdatabase datafile'D:\db\nc2.ora'autoextend on; alter database datafile'D:\db\nc3.ora'autoextend on;第一次使用nc56登录时需要修改密码4、导入数据,注意:一定要把网线拔掉,否则很容易覆盖正式库数据impdp nc56/nc56@nc56 dumpfile=ora11g.dmp5.配置启动NC1)在NC_HOME\BIN 目录下运行ncSysConfig.bat,首先需要建立数据源。
OBIEE11G监控和优化性能
This guide explains how to monitor and optimize performance of Oracle Business Intelligence. It describes how to monitor service levels, set performance parameters, and configure query cache. For more detailed information about these and other tasks, see the Oracle BI EE documentation on Oracle Technology Network. 1. Start Fusion Middleware Control and go to the Business Intelligence Overview page. 2. Display the Metrics tab of the Capacity Management page. 3. On the Metrics tab, you can view metrics that are related to current responsiveness, load, and reliability. 4. To find out more about the following metrics, click the Help button: Request Processing Time (ms) SOA Request Processing Time (ms) Average Query Time (seconds) Active Sessions Requests (per minute) SOA Requests (per minute) Presentation Services Requests (per second) Server Queries (per second) Failed Queries Errors Reported (in the last hour) Understanding service levels typically involves monitoring process state and viewing system metrics. Viewing Common Performance Metrics Using Fusion Middleware Control 1. Start Fusion Middleware Control and in the tree navigator,expand the Business Intelligence folder and right-click the coreapplication node. 2. Select Monitoring , then select Performance . The Performance Summary page is displayed with a selection of metrics relating to this installation. Viewing All Oracle Business Intelligence Metrics Using Fusion Middleware Control 3. To customize the metrics that are displayed on the Performance Summary page, click Show Metric Palette . Then expand the metric category, and select or deselect individual metrics. The metrics that you select are displayed on the Performance Summary page. For information about a particular metric, right-click the metric and select Help . Monitoring Service LevelsViewing Metrics for Java Components Using the Oracle WebLogic Server Administration Console 1. Start Fusion Middleware Control and go to the Business IntelligenceOverview page. 2. Display the Performance tab of the Capacity Management page. 3. Click Lock and Edit Configuration . 4. Select Disallow RPD Updates to prevent updates to the repository file.5. Click Apply , then click Activate Changes .6. Return to the Business Intelligence Overview page and click Restart .3. Click Servers . The Summary of Servers page is displayed.4. Click the server name (for example, bi_server1).5. Click the Monitoring tab. 1. Start the Oracle WebLogic Server Administration Console.2. Expand the Environment node in the Domain Structure window.Setting Performance Parameters Using Fusion Middleware Control Disallowing RPD Updates Setting the User Session Log-Off Period 1. Start Fusion Middleware Control and go to the Business Intelligence Overview page. 2. Display the Performance tab of the Capacity Management page. 3. Click Lock and Edit Configuration . 4. Specify the expiry time. 5. Click Apply , then click Activate Changes . 6. Return to the Business Intelligence Overview page and click Restart .You can configure the Oracle BI Server to maintain a local, disk-based cache of query result sets (query cache). The query cache enables the Oracle BI Server to satisfy many subsequent query requests without having to access back-end data sources, such as Oracle. The query cache enables the Oracle BI Server to satisfy many subsequent query requests without accessing back-end data sources, thereby increasing query performance. As updates occur on the back-end databases, the query cache entries can become stale. Therefore, you must periodically remove entries from the query cache. For more information, see Oracle Fusion Middleware System Administrator’s Guide for Oracle Business Intelligence Enterprise Edition . Setting the Maximum Number of Rows Processed to Render a Table Note the following when setting this value: This specification applies to tables, not to pivot tables. The default value is 65000. The minimum value is 50. If the user exceeds the maximum value, then the server returns an error message when the table view is rendered. The maximum value is at least 16 bits, which varies by platform. The system is likely to consume all its memory before approaching a number larger than this value. 1. Start Fusion Middleware Control and go to the Business Intelligence Overview page. 2. Display the Performance tab of the Capacity Management page. 3. Click Lock and Edit Configuration . 4. Specify the maximum number of rows to be processed to render a table view. Enter an integer value greater than 50. 5. Click Apply , then click Activate Changes . 6. Return to the Business Intelligence Overview page and click Restart . Understanding the Oracle BI Server Cache 2. Display the Performance tab of the Capacity Management page. 3. Click Lock and Edit Configuration .4. Specify the maximum number of rows to download and maximum number of rows per page to include.5. Click Apply , then click Activate Changes .6. Return to the Business Intelligence Overview page andclick Restart .Configuring Query Cache Using Fusion Middleware Control2. Display the Performance tab of the Capacity Management page.3. Click Lock and Edit Configuration .4. Confirm that Cache enabled is selected. If Cache enabled is not selected, select it now.5. Specify the size of the query cache and the number of entries it can contain.6. Click Apply , then click Activate Changes .7. Return to the Business Intelligence Overview page and click Restart . Setting Global Cache Parameters 1. Start Fusion Middleware Control and go to the BusinessIntelligence Overview page 2. Display the Performance tab of the Capacity Management page. 3. Click Lock and Edit Configuration . 4. Specify the global cache path and the global cache size.5. Click Apply , then click Activate Changes .6. Return to the Business Intelligence Overview page and click Restart . Understanding the Global Cache In a clustered environment, Oracle BI Servers can be configured to access a shared cache called the global cache . This global cache resides on a shared file system storage device. It stores purging events, seeding events (often generated by agents), and result sets that are associated with seeding events. The seeding and purging events are sorted by time and stored on the shared storage as a logical event queue. Individual Oracle BI Server nodes push to and pull from the logical event queue. Each Oracle BI Server still maintains its own local query cache for regular queries.。
Oracle BIEE 12c SampleApp v511 快速部署指南说明书
Oracle BIEE 12c SampleApp v511 Virtual Appliance Quick Deployment Guide-root/Admin123-oracle/Admin123-12c db. system/Admin123-virtual machine auto logon as user oracle-by default image is set with NAT networkingo change to bridge networking if your VM isusing DHCP-1st Startup time for BI services is between 7-10minutes-All 12c BI related product logons are prodney/Ad-min123-All WLS related logons are weblogic/Admin123-Users that obtained the image from OTN please seethe disclaimer below regarding necessary R packagesSTART HERE:-See desktop icon ‘v511 image details’ for full detailson this releaseAbout 12c SampleAppv511This virtual machine is intended to showcase the functionality and capabilities of Oracle BI 12c. All standard OOB Sam-pleApp content from v506 has been updated and enhanced for this releaseNOTE: Users who download V511 from OTN. Many examples in this release use external R packages in order to getR/ORE and BI-AA examples to work. To install these packages and enable the OOB examples follow the directionsin the FIRST_README.txt from /home/oracle/scripts/RSampleApp Deployment Guide IndexVirtual machine download &deployment (2)Extraction and Import (3)Virtual Machine Settings (3)Starting Services overview (4)Start Here: Getting to Know SampleAppv511 and BI 12c (5)Virtual machine download &deployment1.Prepare your host system.Minimum 8GB, 16 GB ram and SSD are recommended.Turn on Virtual Assist features in the BIOS (usually done by default). Refer to Troubleshooting tips in Step 12 for more details.~ 100 GB of temp disk space needed to download and install. (Includes zips files that total 18 GB, and an 18 GB .ova, 55 GB deployed image) note: ova and zip files can be deleted once the import is completed-Download and install Free Download Manager or an ftp client of your choice.-Download and install md5sum (optional)2.Download and install Oracle Virtual Box (4.3.x and above is supported, 5.10 is the current version)3.Click Here to open the SampleApp OTN Pagea.Sign into OTN prior to starting your download4.Navigate to the SampleAppv511 Sectiona.You must accept the licensing terms prior to proceedingDownload files SampleAppv511p-appliance.zip .001 through .004Extraction and Import4a. When all zip files are downloaded into a single directory, unpack them with 7zip or zip utility of your choice.Extract your zip files (note: you only need to select zip file .001 when extracting, the rest will automatically unpack)Linux users can run the following command as shown below. Users with a graphical zip utility can right click on .zip.001 and choose extract-7za x SampleAppv511p-appliance.zip.001-(Typical extraction time will take between 5 and 10 minutes depending on your host machine) when completed a folder called SampleAppv511p-appliance will be created containing a SampleAppv511p-appliance.ova file5. Start Oracle Virtual Box Manager Click File / Import Appliance /Open appliance (you can also double click your.ova file to open virtual box manager-Navigate to the location you downloaded the SampleAppv511rc3-10-15.ova file-Click import (typical import time is between 10 to 20 minutes)Check [x] Reinitialize the MACaddress of all network cardsO NCE YOUR VM IMPORT IS COMPLETED PROCEED TO STEP 6Virtual Machine Settings6. Virtual Machine Settings(Review this section fully before powering on)By default your vm is configured with the following parameters which is ideal for an 8GB host system - 6.2 GB ram- 2 processors-NAT Network adaptero By default your VM once powered on will have a IP address 10.0.2.15o See how to setup port forwarding on YouTube. Port forwarding allows you to access your VM from a local web browser directly on your host machine-Users with more physical host memory can allocate more memory to the virtual machineo You can edit any of the VM configurations by clicking on edit/settings-If your VM can obtain a DHCP address change your networking to bridged7.Start your VM Your VM will auto logon as oracle/Admin123. Upon logon your IP address will be displayed with further instructions on configuring your vm. Note: If your VM does not have an active network connection no IPaddress will be displayed.NOTE: if your VM is having issues obtaining a IP address power down the VM and refresh the MAC addressif you are using bridge networking and your VM does not have a IP address at boot up you must either assign it one manually or power off and switch to NAT networking in order for services to start properly8.Adjust your screen resolution to fit your host machine-From your toolbar menu click on system/preferences/display and select a screen resolution as needed-Your screen should auto adjust automaticallyVBox Tools /shared folders/guest extensions: ensure your virtual box tools are up to date and your Vbox guest exten-sion pack is installed to ensure maximum performance and stability. For recordings on these topics as well as creating shared folders click hereP ROCEED TO STEP 9 TO REVIEW THE SERVICE STARTUP PROCESSStarting Services overview9. Starting ServicesClick on the desktop icon “v511 image details”> starting services tab for instructions on starting services -Typical 1st start time is between 7 to 10 minutes (subsequent service starts are substantially faster)-Follow the ‘recommended startup’ processo Note: start/stop all scripts are available-Subsequent services startup will be faster-Download the bi thin client here click hereSampleApp v511 DesktopStart Here: Getting to Know SampleAppv511 and BI 12cAll Users should start with the v511 image details launch Pad for details, tips and deployment options, service control and users and URLs for this release.NOTE: service control tab contains all port numbers used in 12c。
obiee11g简单入门详解
1、启动BI服务该启动过程会发费比较长的时间,该启动过程共启动了weblogic的consol、obiee的em和obiee,启动完成后会直接打开obiee的网页:http://机器名:9704/analytics.输入在安装obiee 时创建的用户名weblogic和对应的密码进行登陆2、利用BI 管理建立资料库并导入元数据(BI 管理主要是用来创建BI分析模型的工具,全称为:oracle bi administrator tool,使用该工具创建的资料库(.rpd文件)可以通过http://机器名:9704/analytics来进行访问(在后面会进行展现)创建的模型共有三层:物理层、逻辑层和展现层,只有这三层都实现后,obiee才能使用它,否则在登陆obiee网页的时候会登陆失败物理层:是定义与各类数据源的连接,如关系数据库、多维数据库、XML数据源及excel表等等,具体需要定义物理表的结构,主外健关系等等逻辑层:从物理层发展而来,需要定义具体的维表和事实表的主外健关系。
这是整个模型的核心层,需要兼顾技术和业务人员的思维角度展现层:从逻辑层发展而来,是最终用户看到的视图,所以所有对象的名称均需按照客户的要求命名,以便让他们完全理解各对象的含义,展现层中的一个文件夹对应“分析”中所看到的一个“主题区域”,会在以后的步骤里面展现出来给大家看)点击BI管理后会出现以下界面现在就可以通过这个页面来创建资料库了,点击“文件”来新建资料库接着会出现如下界面输入资料库名称sh111(我们是以11g数据库自带的sh用户来进行实验,请在做这之前先将oracle11g数据库中的sh用户解锁并设置密码为sh),然后选中导入元数据并输入资料库sh111.rpd的密码,可以自己设置,我设置的是12345678,设置完后按下一步(同时注意下资料库的存放位置,默认的所有资料库都是存放在该目录下),接下来会出现如下界面在连接类型处我们选择OCI10g/11g,也可以使用odbc,不过odbc使用非常麻烦,所以我选择了OCI10g/11g,接下来输入数据源名称及oracle11g数据库的sh用户名和密码。
OracleOBIEE详细入门
OracleOBIEE详细入门1目录1 ORACLE BIEE基础 (4)1.1 OBIEE 概述 (4)1.1.1 BIEE 历史 (4)1.1.2 数据模型 (4)1.2 BIEE 安装 (5)1.2.1 JDK要求 (5)1.2.2 下载BIEE (6)1.2.3 安装BIEE (6)1.2.4 Logs (8)1.3 配置 (9)1.3.1 安装后的目录 (9)1.3.2 几个重要的配置文件 (9)1.4 预览Demo效果 (9)1.4.1 启动BI服务和OC4J (9)1.4.2 打开BIEE仪表盘 (10)2 BIEE 开发步骤 (12)2.1 数据库 (12)2.1.1 安装数据库 (12)2.2 创建资料库 (12)2.2.1 资料库 (12)2.3 创建物理模型 (13)2.3.1 导入物理表 (13)2.3.2 选择维度表和事实表 (14)2.3.3 完成物理模型 (15)2.3.4 新建主键和外键 (16)2.4 创建逻辑模型 (18)2.4.1 创建逻辑层 (18)2.4.2 查看逻辑层 (19)2.4.3 修改逻辑层 (19)2.5 创建展现模型 (20)2.5.1 创建展现层 (20)2.6 保存资料库 (21)2.6.1 保存资料库 (21)2.6.2 修改密码 (22)2.7 发布资料库 (22)2.7.1 修改NQSConfig.INI (22) 2.7.2 重启Oracle BI Server (22) 2.8 Answers –答复 (23)2.8.1 登陆BI Dashboards (23) 2.8.2 选择主题 (23)2.8.4 新建文件夹 (25)2.8.5 保存报表 (26)2.9 Dashboards –仪表盘 (27) 2.9.1 创建仪表盘 (27)2.9.2 编辑仪表盘 (27)2.9.3 查看仪表盘 (28)3 Answer详细介绍 (29)3.1 列 (29)3.1.1 新建报表 (29)3.1.2 列属性 (30)3.1.3 fx-编辑属性 (30)3.1.4 添加筛选器 (31)3.1.5 最终效果 (32)3.2 答复 (33)3.2.1 Prompts-报表提示 (33) 3.2.2 Title-标题 (33)3.2.3 Legend-图例 (34)3.2.4 Narrative-叙述内容 (35)3.2.5 Ticker-标记视图 (36)3.2.6 合计 (37)3.2.7 Chart-图表 (38)3.2.8 Pivot Table-数据透视图 (39)3.2.9 Gauge-计量表 (39)3.2.10 Column Selector-列选择器 (41)3.2.11 View Selector-视图选择器 (41)4 Dashboard详细介绍 (43)4.1 仪表盘设置 (43)4.1.1 管理 (43)4.1.2 我的账户 (43)4.2 仪表盘功能 (43)4.2.1 Dashboard Prompt-仪表盘提示 (44)4.2.2 Link or Image-链接或图像 (44)4.2.3 Embedded Content-嵌入式内容 (45)4.2.4 Text-文本 (46)4.2.5 Briefing Book-简要簿 (47)4.2.6 Folder-文件夹 (49)4.2.7 Guided Nav. Link-引导导航链接 (49)4.2.8 Briefing Book Nav. Link-工作簿导航链接 (50) 4.2.9 BI Publisher 报表 (51)4.2.10 条件显示内容 (51)5 Delivers介绍 (53)5.1 Scheduler 配置 (53)5.1.1 安装计划表 (53)5.1.3 添加用户认证 (55)5.1.4 查看Scheduler (56)5.2 Delivers应用 (57)5.2.1 编辑我的客户 (57)5.2.2 创建iBot (58)5.2.3 查看Alerts (60)5.2.4 发送Mail (60)6 其他功能介绍......................................................................................... 错误!未定义书签。
- 1、下载文档前请自行甄别文档内容的完整性,平台不提供额外的编辑、内容补充、找答案等附加服务。
- 2、"仅部分预览"的文档,不可在线预览部分如存在完整性等问题,可反馈申请退款(可完整预览的文档不适用该条件!)。
- 3、如文档侵犯您的权益,请联系客服反馈,我们会尽快为您处理(人工客服工作时间:9:00-18:30)。
ORACLE BIEE 11G第一章、系统管理1.1、ORACLE BIEE 11G 安装指引注:如果使用的操作系统是windows2008 则需首先安装MS Visuall C++ 2005.1.1.1、配置要求1、数据库要求在Oracle Database 11g Release 2(11.2.0.1.0)以上的版本(字符集为UTF8)。
2、使用固定的IP地址,不能使用DHCP获取动态IP地址,关闭系统服务“DHCP client”。
3、检查C:\WINDOWS\system32\drivers\etc目录中的host和host.txt文件,仅保留内容127.0.0.1 localhost,去掉其余映射,否则在安装或创建BIEE服务过程中会出现coreapplication_obips1服务无法启动。
4、安装Oracle Repository Creation Utility 11.1.1.3.3。
在oracle网站/technetwork/middleware/bi-enterprise-edition/downloads/bu s-intelligence-11g-165436.html可以下载。
5、浏览器IE7.0以上。
1.1.2、安装Oracle Repository Creation Utility步骤:运行BIN文件夹下面的RCU.BAT2.点击创建,创建组件方案并添加到数据库中3填写主机名,端口,服务器名,用户及密码。
用户必须具备DBA权限。
4.选择组件,做为企业版,最好是全选所有的组件。
如果只是个人的话,只要选择Oracle Business Intelligence即可,然后自动会选择AS共用方案中的源数据服务5.方案口令,建议选用统一的口令.如果是全选组件的话,就会要求配置其他的一些变量,如果不填写的话,默认为Admin1236.映射表空间,直接点下一步,然后提示你创建用户及表空间,点确定即可.7.概要,直接点击创建即可8.安装完成.1.1.3、安装Oracle BIEE 11G步骤:1.运行Disk1文件夹下的setup.exe2.有3种安装类型,通常采用企业安装.3.先决条件检测.直接下一步4.创建新BI系统,设置登录WEBLOGIC的用户名、密码及OBIEE的域名5.设置中间件目录等信息6.选择安装的组件,这里3个都选择7 数据库详细资料连接字符串填写格式为: hostname:portnumber:serversname.BIPLATFROM方案用户名即安装RCU中的Oracle Business Intelligence 组件的用户名BIPLATFROM方案口令即安装RCU中的Oracle Business Intelligence 组件的口令8制定安全更新电子邮件可以填写,也可不填写.9.概要点击保存可以把前面的配置文件保存下来10安装进度及配置进度最后安装完成所需时间接近2个小时11.安装完成.1.1.4、验证安装是否成功访问BIEE域管理服务。
http://ip:7001/console,输入用户名和密码(1.3章节第4步中设置的用户及密码)登录。
查看所有服务状态是否启动,查看所有程序状态是否启动。
访问oracle中间件管理服务。
http://ip:7001/em, 输入用户名和密码(1.3章节第4步中设置的用户及密码)登录。
所有的应用程序状态都是绿色的。
3、访问BIEE主题分析服务。
http://ip:9704/analytics,输入用户名和密码(1.3章节第5步中设置的用户及密码)登录。
1.2、创建资料档案库(RPD)文件1.2.1、创建数据源连接1、在OBIEE安装之后会创建一个oracle-OHXXXXXXXXX目录(数字是随机产生的)。
运行Net Manager程序,与oracle DB11G的Net Manager操作一样,但是创建的数据库服务本质是有区别的(或配置..\OBIEE11G\Oracle_BI1\network\admin配置一个tnsnames.ora)。
通过oracle DB11G的Net Manager创建的数据库服务不能在BIEE的管理工具中使用。
2、创建网络服务名1.2.2、创建资料档案库文件1、进入Oracle BI管理工具2、新建资料档案库3、输入名称,选择导入元数据,输入口令。
文件的存放位置可以自由设置,注意RPD文件的存放位置,因为需要部署这个文件4、连接类型可以是ODBC3.5或者OCI10g/11g。
如果使用ODBC3.5需要在ODBC数据源配置中设置ODBC连接。
我选择OCI10g/11g连接方式,填写数据源名称(2.1章节中创建的)5、选择所需的表创建资料档案库。
不需要一次性选择所有的表,在文件中也能陆续加入这些表(BI管理工具—>文件—>导入元数据)。
6、建立业务模型和映射。
右键点击‘业务模型和映射’区域,然后选择‘新建业务模型’。
7、设置业务模型名称8、选择‘物理’区域中的表,然后使用鼠标拖到‘业务模型和映射’(注:鼠标拖的过程按住shift键)9、业务模型和映射创建完毕10、将‘业务模型和映射’中的SCOTT拖到‘表示’区域11、点击‘保存’,并检查一致性12、在弹出界面选择‘是’13、资料档案库创建完毕1.2.3、在BIEE服务中运行RPD文件1、启动BI服务2、输入用户名和口令(在第1.3章4节中的设置)3、登录http://ip:7001/em。
选择Business Intelligence->coreapplication。
右边界面选择“部署”标签页下的“资料档案库”。
点击激活更改可以上传自己创建的RPD文件(biee安装目录\Oracle\instances\instance2\bifoundation\OracleBIServerComponent\coreapplication_obis1\repository\biee.RPD)4、设置资料档案库口令,点击“应用”。
5、点击‘激活更改’,如果出现错误信息,重试一遍。
6、返回“概览”标签页,点击“重新启动”按钮,重新启动BI组件。
1.3、卸载与重新安装1.3.1、BIEE知识库删除与创建运行Oracle Repository Creation Utility安装程序BIN文件夹下面的RCU.BAT,此程序能删除知识库也能安装新的知识库。
1.3.2、删除BIEE instance1、运行开始菜单Oracle Business Intelligence->卸载,出现如下界面,可以选择删除整个BIEE 程序或者删除BIEE 实例。
2、输入域主机名,端口,用户名及密码。
3、选择托管实例,下一步将删除实例。
1.3.3、重新配置BIEE instance找到BIEE的安装目录\Oracle_BI1\bin\config.bat,运行config.bat。
2、为新的BI系统(weblogic域)设置登录用户名、密码及域名,域名不能重复。
3、设置实例目录,实例名称不重复和实例主目录不能重复。
4、等待漫长的配置过程,直到完成。
1.4、旧版RPD文件和主题升级1、运行升级程序前,确保BIEE 11G服务正常运行。
2、运行BIEE安装目录下Oracle_BI1\bin\ua.bat。
选择“升级RPD和演示编录”3、制定10g RPD文件位置,旧的管理员用户名、密码,输入新的11g RPD的口令4、输入weblogic管理服务器连接详细资料。
5、下一步检查BIEE版本,检查通过后下一步即可开始升级。
6、升级成功之后,BIEE服务自动运行升级以后的RPD文件,与http://ip:7001/em控制台部署RPD文件效果一样。
第二章、操作指南2.1、开始创建分析的过程2.1.1、登录a、在IE浏览器输入地址:http://IP:9704/analyticsb、在登录窗口输入用户名和密码(安装BIEE时输入的用户名密码),然后点击‘登录’2.1.2、创建分析1.创建分析a、点击‘新建’—>‘分析’注:创建主题域请参考《》?3.进入分析界面4.在分析界面选择和排序列a、展开树形菜单b、双击ORG_NAME,将它加入所选列窗口c、双击NUM,将它加入所选列窗口注:PUB_ORG和PUB_WORK为主外键关系,在主题域编辑界面设置5.点击‘结果’TAB页,出现默认复合布局6.添加过滤器a、点击‘标准’,回到分析所选列界面b、鼠标单击PUB_WORK列图标c、点击下拉项7.在新建过滤器界面选择运算符和输入值,然后点击‘确定’8.保存分析a、点击保存图标b、点击共享文件夹,点击图标,新建文件夹c、输入名称,然后点击确定2.1.3、创建仪表盘提示9.新建—>仪表盘提示10.选择主题域11.新建列提示12.选择列13.设置提示a.设置运算符b.设置用户输入14.保存仪表盘提示2.1.4、创建仪表盘15.新建—>仪表盘16.设置仪表盘的属性17.将仪表盘对象‘区域’拖拽到画板18.将‘分析’及‘仪表盘提示’分别拖拽到中间画板区域19.点击‘预览’或‘运行’查看结果20.保存仪表盘a、创建柱状图b、编辑图形c、编辑布局2.1.6、饼图a、添加饼图b、编辑布局2.1.7、添加聚合规则a、将列和度量的布局设置为晚于b、选择聚合规则第三章、知识点整理3.1、发布报表URLhttp://192.168.6.96:9704/analytics/saw.dll?Go&Path=/shared/test/test2&Acti on=Navigate&NQUser=weblogic&NQPassword=weblogic1&P0=1&P1=eq&P2= %22Time%22.%22Per%20Name%20Month%22&P3=1+2009%20/%2001说明:✧http://192.168.6.96:9704/analytics BIEE 访问路径。
✧Path=/shared/test 存放的路径名。
✧Test2 文件名。
✧Action=Navigate 必须添的选项。
✧&NQUser=weblogic 代表用户名。
✧&NQPassword= weblogic 代表密码。
✧P0 代表参数的个数。
最多为6个。
&P2= "Time"."Per%20Name%20Month" 。
代表表名.字段名。
注:如果表名或字段名中包含有空格,要转换成%20 。
例如:"Time"."Per Name Month"转换成:22%Time22%.22%Per%20Name%20Month22%✧&P3=n+xxx+yyy+...+zzz&P3=n+xxx+yyy+...+zzz 。