费希尔久安产品维护手册
一款用于维护和检查设备的服务手册说明书

Connect inlet to port “B” for normally open valve. Port “A” is exhaust.Plug exhaust port for 2-way operation.Port Identifications / ConnectionsService ProceduresT o disassemble unit, use the following procedure:T o detach the hand toggle, cam head, or button actuator assembly from the valve body assembly, remove the 4 pan head screws (using a Philips screwdriver). T o remove the stem, stem guide, and seals from the body, unscrew the end plug using a 3/8" Allen wrench. Then gently press on the “pin” side of the stem until it slides out of the body. The stem guide may be removed by pulling axially on the radial holes drilled in the stem guide. Be careful not to scratch the sealing surfaces or cut the seals.Thoroughly clean the valve body bore and stem guide, and inspect for possible nicks, scratches and material imperfections. Lightly lubricate the stem seals. (Use a non-detergent hydro-carbon based oil or grease.) Replace any o-rings or other seals if they are damaged.The Assembly procedure is the reverse of the above. Tighten the end plug to 60 in-lbs and apply 15-18 in-lbs of torque to the pan head mounting screws.If you have questions concerning how to service this unit, contact your local authorized dealer or your customer service representative.Application LimitsThese products are intended for use in general purpose compressed air systems only.Operating Pressure Range:psig Bar kPa Minimum 000Maximum150101000Operating Temperature Range:0°F to 160°F(-18°C to 71°C)Installation & Operating InstructionsValve should be installed with reasonable accessibility for service whenever possible - repair service kits are available. Keep pipe or tubing lengths to a minimum with inside clean and free of dirt and chips. Pipe joint compound should be used sparingly and applied only to the male pipe - never into the female port. Do not use PTFE tape to seal pipe joints - pieces have a tendency to break off and lodge inside the unit, possibly causing malfunction.Filtered and lubricated air is necessary for maximum valve life and minimum maintenance.Factory Pre-Lubrication - All valves are pre-lubricated at assembly with a petroleum based grease.Valve OperationThese valves will operate mounted in any position; they are also suitable for vacuum service.Series C & CW (wall mounting) valves can be operated either Normally Closed to pressure or Normally Open to pressure.Connect inlet to port “A” for normally closed valve. Port “B” is exhaust.Normally ClosedNormally OpenInstallation & Service Instructions V-222DC2, C3, C3M1A, C4, C5, C9, C13, C92, C94,CW2, CW3, CW3M1A, CW4, CW5, CW9,CW13, CW92, & CW94 Series Valves ISSUED: September, 2000Supersedes: February, 1994ECN# P27805Pneumatic Division North America Richland, Michigan 49083!!WARNINGTo avoid unpredictable system behavior that can cause personal injury and property damage:•Disconnect electrical supply (when necessary) before installation,servicing, or conversion.•Disconnect air supply and depressurize all air lines connected to this product before installation, servicing, or conversion.•Operate within the manufacturer’s specified pressure, temperature,and other conditions listed in these instructions.•Medium must be moisture-free if ambient temperature is below freezing.•Service according to procedures listed in these instructions.•Installation, service, and conversion of these products must be performed by knowledgeable personnel who understand how pneumatic products are to be applied.•After installation, servicing, or conversion, air and electrical supplies (when necessary) should be connected and the product tested for proper function and leakage. If audible leakage is present,or the product does not operate properly, do not put into use.•Warnings and specifications on the product should not be covered by paint, etc. If masking is not possible, contact your local representative for replacement labels.WARNINGFAILURE OR IMPROPER SELECTION OR IMPROPER USE OF THE PRODUCTS AND/OR SYSTEMS DESCRIBED HEREIN OR RELATED ITEMS CAN CAUSE DEATH, PERSONAL INJURY AND PROPERTY DAMAGE.This document and other information from Parker Hannifin Corporation,its subsidiaries and authorized distributors provide product and/or system options for further investigation by users having technical expertise. It is important that you analyze all aspects of your application,including consequences of any failure and review the information concerning the product or systems in the current product catalog. Due to the variety of operating conditions and applications for these products or systems, the user, through its own analysis and testing, is solely responsible for making the final selection of the products and systems and assuring that all performance, safety and warning requirements of the application are met.The products described herein, including without limitation, product features, specifications, designs, availability and pricing, are subject to change by Parker Hannifin Corporation and its subsidiaries at any time without notice.EXTRA COPIES OF THESE INSTRUCTIONS ARE AVAILABLE FOR INCLUSION IN EQUIPMENT / MAINTENANCE MANUALS THAT UTILIZE THESE PRODUCTS. CONTACT YOUR LOCAL REPRESENTATIVE.V-222D Maintenance & Trouble Shooting Hints:Air Leakage Through Exhaust Ports:1.Check for internal leakage in cylinder being operated byvalve.2.Check center stem seal for nicks, cracks, peeling and/ordelamination.3.Check for missing, damaged, swollen, or incorrectlyassembled o-rings and gaskets.4.Check stem guide and body bore for nicks, scratches, anddirt particles.Replace worn or damaged parts. Re-assemble and re-test unit.Service Kit and Parts AvailableValve Body Service Kit:(consists of items # 3, 4, 5, 7, 8, & 9)PL502600Valve Body Assemblies:C25 (1/4" NPTF Ports)PL2479C37 (3/8" NPTF Ports)PL2480CW25 (1/4" NPTF Ports)PL2481CW37 (3/8" NPTF Ports)PL2482Hand Toggle Actuator AssemblyNon-Locking PL3355LockingCam Head AssemblyBall (C & CW2)PL2209Roller (Overriding C & CW9)PL2210Roller (C & CW13)PL2422Heavy Duty Roller (Uni-Directional C & CW92)PL4030D Heavy Duty Roller (Bi-Directional C & CW94)PL4009D Palm Button Actuator Assembly1 5/16" Dia. Button PL22082 1/2" Dia. ButtonPL4005Part Identification ListItem #Description1Valve Body Assembly2Valve Body3Stem Retainer Snap Ring 4Stem O-ring 5Stem6Stem Guide7Stem Guide Gasket 8Stem Guide O-ring 9Stem Return Spring 10End PlugHeavy Duty Roller Cam Head Bi-Directional: C94 &CW94Palm Button ActuatorC3 & CW3Ball Cam Head C2 & CW2Hand Toggle Actuater Non-locking: C4 & CW4Locking: C5 & CW5Heavy Duty Overriding Roller Cam HeadUni-Directional: C92 & CW92。
HART手操器调试fisher费希尔dvc6200阀门定位器
HART手操器调试fisher费希尔dvc6200阀门定位器HART调试FISHERdvc6200阀门定位器DVC6200与475通讯器阀门校检调试步骤进入界面,选择HART1、离线2、在线3 、多功能4、诊断选择online后enter找到两个非零状态码、忽略下一个50状态的发生1、供给压力低报警2、需要维护如有报警信号,选择YES后enter1、概述2、组态、配置3、维修工具online 下拉菜单选择configure(组态)后按enter1、引导设置2、手动设置3、报警设置4、校验选择calibration(校检)菜单后按enter1、自动校验2、手动校验3、校验类型4、校验时间5、校准器6、上次自动校准状态选择autocalibration警告菜单选择outofservice警告:校准会照成仪器的输出突然变化及其它损失1、继续2、退出选择CONTINUE 后enter选择travelcontrol阀门自动校验无须操作,只需等待直到下图界面自动校验完成OK键确认选择OK注意:要细调相应,使用性能调节器在仪器处于维修模式时,阀门可能会移动在服务/运行中止服务修改成为inservice状态,校检完成。
定位器反馈调试使用说明:1、引导设置2、手动设置3、报警设置4 、校准在configure(组态)菜单选择manualsetup1、模式与保护2、仪器3、行程、压力控制4、整定5、阀门与执行机构6、输出选择模式保护将inservice改为OUTOFservice1、仪器模式中止服务2、更换仪器3、写保护禁用4、更改保护帮助发送菜单选择改变仪表模式警告!在以下情况下输出将不跟踪输入模式以停用在服务中止服务选择o utofservice。
Enter后返回提醒:仪器必须返回到用于跟踪输入的输出服务温馨提醒OK手动设定1、模式与保护2、仪器3、行程、压力控制4、整定5、阀门与执行机构6、输出值保存菜单主页在manualsetup中选择outputs用来设定定位器反馈输出1、输出终端组态2、开关组态3、变送器输出4mA时=阀关4、HART变量分配选择outputterminal输出配置1、输出端激活/禁用2、功能发送器3、失败信号发射低/··选择outputterminalenable输出端选择启用禁用启用禁用选择enable后enter输出端配置1、输出启用2、功能变送器3、失败信号发射低/·发送主页一定要选择send发送后完成反馈使用设置。
Fisher定位器使用说明书
Fisher定位器使用说明书一、Fisher定位器调校基本步骤1.将375手操器连接到接线端子上,进入菜单选择 Setup(设置)→Basic setup(基本设置)→Auto setup(自动设置)→Setup wizard(设置向导)2.根据Setup wizard的提示选择相应的参数⑴instrument mode is in service ,continue for prompts to pleaseout of service.仪表模式是在线状态,继续须要准时设置为离线状态选择 Yes.⑵output will not track input when instrument mode is out ofservice.当仪表在离线状态时,仪表的输出将不随输入的变化而变化选择Yes.⑶change to out of service to continue.继续需改变为离线模式选择out of service选择enter说明:仪表正常工作时其模式为in service状态,当对仪表进行调校时需改为out of service状态。
⑷Tru/Press select 行程/压力选择选择Travel control⑸Pressure units 压力单位选择psi⑹Max supply press 最大供气压力此时输入的最大供气压力值应与空气过滤减压阀的输出压力一致,此值不宜过大,过大,阀门易损坏,超行程。
应调整空气过滤减压阀使阀门刚好全行程,这时输入此时的压力值。
⑺Actuator manufacturer 执行机构制造商选择Fisher controls⑻Actuator model 执行机构型号查看阀体上的铭牌,有此执行机构型号,选择相应型号,如667,1035,1051等。
⑼Actuator size 执行机构尺寸查看阀体上的铭牌,有此执行机构尺寸,选择相应尺寸,如30,34,40,45,50,46,60,70,100等。
NEBL-T12G4-E-LE4和NEBL-T12W4-E-LE4产品操作手册说明书

原版操作手册的译本1适用文件有关产品的所有可用文件 è /pk。
2安全2.1安全注意事项–仅在无电压情况下进行插拔连接。
–仅允许将产品安装在处于安全状态的部件上。
–仅允许由具备资质的专业人员进行安装和装配。
专业人员接受过电气职业培训或相应指导。
2.2按规定使用用于 M12 T 编码设备电源、防护等级为 IP 65/67 的连接电缆。
3结构3.1产品配置1插座M12x1,T 编码2芯线端 (4x)3电缆Fig. 1 NEBL-T12G4-E-...-LE41插座 M12x1,T 编码2芯线端 (4x)3电缆Fig. 2 NEBL-T12W4-E-...-LE43.2针脚分配1) 颜色代码符合 IEC 60757:1983-01Tab. 1 针脚分配4装配4.1电接口 1 的安装1.将插座 1 与适配的插头对齐。
2.将插座 1 插到插头上。
3.拧紧插座 1 的螺丝紧固。
拧紧扭矩:0.4 Nm ± 55 %4.2电接口 2 的安装1.根据需要缩短引线端和电缆护套并进行装配。
2.按照针脚分配接线。
4.3安装4.4电缆敷设特性电缆属性电缆敷设-E-适合于导向链中继用于拖链中或灵活敷设Tab. 2 电缆敷设4.5引线应力消除件可移动电缆敷设时的应力消除件•将电缆护套固定在芯线端前部区域 2。
Ä不得有任何作用力传导至芯线。
4.6拖链中的安装1.根据实际铺设情况截取所需长度的拖链。
2.拖链中的电缆铺设无扭曲。
–在拖链的弯曲半径 KR 内,电缆可以自由移动。
Ä不要强行将电缆拉过拖链。
7.安装拖链 è 相应的指南。
8.固定电缆:–对于长度较短的拖链,通过两端固定安装–对于长度较长的滑动拖链,只能在拖链的惯量补偿器那端固定Fig. 59.电缆不要移动至固定点。
Ä保证固定点和弯垂下降之间的固定距离 A 。
由于拖链断裂导致电缆破损。
•拖链断裂后更换电缆。
垂直悬吊的电缆可能导致功能障碍和财产损坏。
操作和维护手册

热电集团型号:1284,1285,1286,12872级A2型生物安全柜操作和维护手册手册号:7021284 版本1阅读使用说明书如果不阅读、理解和按照手册说明使用安全柜,可能会破坏安全柜部件,伤害使用人,降低设备性能。
警告!所有的内部调试和维护必须由有资质的维修人员来完成。
参考手册背面的系列标签本手册中的内容仅起提供信息的作用,其内容和介绍的产品可以在没有告示情况下更改。
Thermo Electron公司不对本手册进行代理和担保。
本公司将不对与该手册使用相关的损坏、直接或相关事故负责任。
!灯、温度计、温度调节计含有水银。
不要放在垃圾里,要作为危险垃圾再使用或处理。
警告!标有该图标的部件和装置易被静电放电损坏。
手册号7021284—21497/HD-1424 9/8/04 增加了厂家安装的固定系统附件——6/7/04 验证测试页面1 22280 4/20/04新的简化的统一测试方法22197 4/8/04 风机马达更换—21984 11/13/03最新的1284型测试单(补充了“高于窗边4英寸”)0 21741/HD-1405 8/7/03版本ECR/ECN 日期说明提醒使用者重视操作和维护说明。
可以单独或与其他安全标识一块使用。
仔细阅读附带的内容。
潜在电压危险。
标有该符号的指令或程序应由有资质的人员来操作。
危险。
不要触及。
只有使用特殊手动设备或穿特殊防护服时,才可以操作标有该符号的指令。
潜在生物危险。
操作标有该符号的指令时,必须使用适当的保护设备和程序。
参考O.S.H.A. 规章1910-1030潜在危险能源:维护或维修设备时必须关掉和锁住标有该符号的指令,以防止可能的损伤。
参考O.S.H.A.规章1910-147热表面可能烧伤没防护的皮肤,或破坏实验材料。
警告!安装在设备内的紫外灯发光可能导致皮肤或眼睛受伤。
在该组件内工作时严禁开紫外灯。
总是使用适当的防护装备(防护服、手套、护目镜等)总是防止过冷或过热,总穿防护服总是遵循良好的卫生习惯每人都应该为自己安全负责你需要热电公司产品的信息或帮助吗?如果需要,请在美国东部时间8:00a.m-16:0p.m通过下列电话同我们联系:1-740-373-4763 直拨1-888-213-1790 免费电话,美国和加拿大1-740-373-4189 传真我们的销售部可为您提供价格信息和报价单,可接受您的定单,提供主要设备目录的邮递信息,或安排您当地的销售代理同您联系。
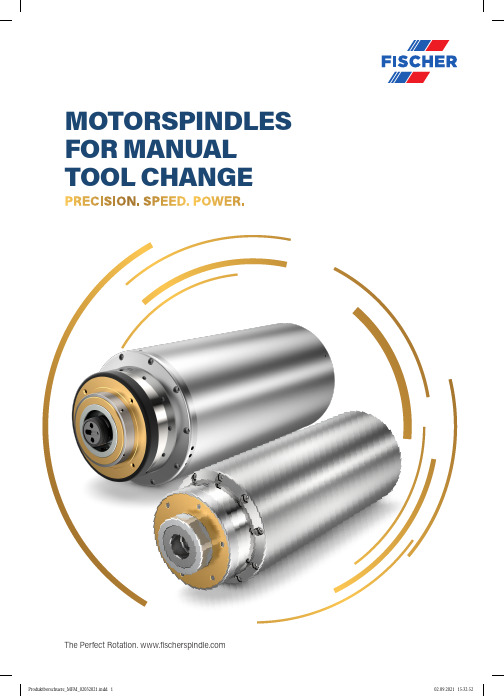
菲舍尔主轴产品手册说明书
The Perfect Rotation. IN THE WORLD MARKETAN INDEPENDENT LEADERThe FISCHER Spindle Group is synonymous with high-quality rotary systems. This familyfirm can look back on over 80 years' experience. Highly-qualified specialists develop andproduce both standardised and customer-specific components, as well as complete sys-tems involving rotation – spindles, milling heads and compressors. Rotary systems fromFISCHER are characterised by their superb reliability, long service life and best possible performance. In addition, FISCHER can offer a complete installation and commissioningpackage, as well as servicing and repairs.Specialised technical experts support users in the selection, project planning, installationand commissioning of optimal individual solutions. All over the world: The FISCHER Spind-le Group, with its headquarters in Switzerland and its subsidiaries, distributors and repre-sentatives in Germany, USA, China, Taiwan and Russia, is present close to its customersaround the globe.34MFM PRECISION GRINDING SPINDLES FOR MAXIMUM PRODUCTIVITYSpindles with manual tool change offer high speeds and excellent concentricity. They are universally suitable for grinding, milling, drilling and engraving with low to high machining forces. Robust hybrid bearings ensure a long service life. Your Tool interface is prepared for manual tool change.•Compact and robust design •Highest speed•Excellent stability and concentricity for maximum dimensional and form tolerances •Designed for high radial and axial forces •Air barrier assisted sealing system•Various manual tool interfaces availableASYN = asynchronous motor SYN = synchronous motorDLS = Direct Lubrication System HJND = Thread InterfaceMFM-modelsMODEL MFM-650MFM-660MFM-825MFM-850MFM-850M Outer diameter D [mm]606080808080Tool interface HSK-C25Collet SRP6HSK-C32Collet SRP20HSK-C25H Max. speed nmax [rpm]50‘00060‘00025‘00050‘00050‘00050Lubrication Grease Grease Grease DLS Grease G Direction of rotationleft and rightleft and right left and right right left and right le Power S1 / S6 40%P [kW] 1.2 / 1.8 1.2 / 1.87.0/ 10.5 3.0 / 3.4 3.4 / 5.1 6.Torque S1 / S6 40%M [Nm]0.29 / 0.430.19 / 0.29 4.0 / 5.570.7 / 0.80.81 / 1.22 1.5Nominal speed nN [rpm] 40'00060'00018'00050‘00040'00040Motor frequency [Hz]8341‘000 8331'6671‘667 1‘6Motor technology ASYN ASYN SYN ASYN ASYN SY Voltage [V]22020038035038038Current S1[A] 5.5 5.017.07.010.015Length without CTU L [mm]228234289.628836436Weight [kg]3.8 3.510.08.010.010Static stiffness Axial [N/µm]502775484848Radial[N/µm]7818124979797OptionsCoolant Through Unit --Yes -Yes Ye Encoder--Yes --Ye Standstill monitoringYesYesYes---MFM-850MFM-860MFM-890MFM-8120MFM-1032MODEL 80808080100 D [mm]Outer diameterArbor, HJND-50Arbor, HJND-70HSK-C40Tool interface HSK-C25Arbor, HJND-42HSK-C2550‘00060‘00090‘000120‘00032‘000nmax [rpm]Max. speed Grease DLS DLS DLS Grease LubricationDirection of rotation left and right right /left and right right right left and right6.0 / 9.0 3.0 / 3.8 3.0 / 4.0 1.5 / 2.19.0 / 13.5P [kW] Power S1 / S6 40% 1.59 / 2.150.62 / 0.780.43 / 0.530.17 / 0.22 3.0 / 4.3M [Nm]Torque S1 / S6 40% 40'00060'00090'000120'00030'000nN [rpm] Nominal speed 1‘6671‘0001‘5002‘0001'067[Hz]Motor frequency SYN ASYN ASYN ASYN ASYN Motor technology 380350350350350[V]Voltage 15.0 6.47.5 3.728.0[A]Current S1 364 263237206433L [mm]Length without CTU 10.0 6.5 6.25 5.515.0[kg]Weight 4870574971[N/µm]Axial Staticstiffness 97877760143[N/µm]RadialOptions Yes---Yes Coolant Through Unit Yes---Yes Encoder -Yes Yes Yes Yes Standstill monitoring5MFM-modelsMODEL MFM-1022/45MFM-1032/60MFM-1090MFM-10120MFM-1224/30MFM-1224/42M Outer diameter D [mm]10010010010012012012Tool interface Arbor, HJND-21HSK-C40Arbor, HJND-28HSK-C25Arbor, HJND-50Arbor, HJND-60Arbor, HJND-21HSK-C40Arbor, HJND-21HSK-C40AHMax. speed nmax [rpm]45‘00060‘00090‘000120‘00030‘00042‘0004 Lubrication DLS DLS DLS DLS Grease DLS GDirection of rotation right /left and right rightleft and right right rightrightleft and rightright/left and rightrilePower S1 / S6 40%P [kW] 7.5 / 8.67.5 / 10.5 4.2 / 5.4 2.0 / 2.515.0 / 20.015.0 / 20.012 Torque S1 / S6 40%M [Nm] 3.9 / 4.9 3.2 / 4.00.6 / 0.750.2 / 0.258.1 / 10.108.1 / 10.104 Nominal speed nN [rpm] 22‘00032‘00090'000120'00024‘00024‘0003 Motor frequency[Hz]1‘5002‘0001‘5002‘0001‘0001‘4001‘Motor technology ASYN ASYN ASYN ASYN ASYN ASYN A Voltage[V]3503503803803803803 Current S1[A]17.3199.0 4.438383 Length without CTU L [mm]2982602152073363362 Weight[kg]12.510.08.57.520.520.517Static stiffness Axial[N/µm]1007748421001007 Radial[N/µm]1279039321401408OptionsCoolant Through Unit Yes Yes Yes Yes Yes Yes Y Encoder----Yes Yes Y Standstill monitoring Yes Yes Yes Yes Yes Yes Y ASYN = asynchronous motorSYN = synchronous motorDLS = Direct Lubrication SystemHJND = Thread Interface6MFM-1236/45MFM-1242/60MFM-1240/60MFM-1290MFM-12120MFM-1406/12MODEL 120120120120120140 D [mm]Outer diameterArbor, HJND-28 HSK-C25Arbor, HJND-28HSK-C25Arbor, HJND-42Arbor, HJND-50Arbor, HJND-60Arbor, HJND-16Outer coneHSK-C50"Tool interface45'00060‘00060‘00090'000120'00012'000nmax [rpm]Max. speed Grease DLS Grease DLS DLS Grease Lubricationright/left & right right/left & right right right rightright/left & rightDirection of rotation12.0 / 16.010.0 / 13.07.0 / 9.3 4.2 / 5.4 2.0 / 2.510.0 / 12.0P [kW] Power S1 / S6 40% 4.3 / 5.4 3.0 / 3.75 2.2 / 2.750.6 / 0.750.2 / 0.2519.6 / 24.5M [Nm]Torque S1 / S6 40% 36‘00042‘00042‘00090'000120'0006‘000nN [rpm] Nominal speed 1‘5002‘0002‘0001‘5002‘000600[Hz]Motor frequency ASYN ASYN ASYN ASYN ASYN ASYN Motor technology 380380350380380350[V]Voltage 3128209 4.432[A]Current S1289289268222209391L [mm]Length without CTU 17.517.515.013.514.232.0[kg]Weight7070564842133[N/µm]Axial Staticstiffness 88130553932170[N/µm]RadialOptions Yes Yes Yes Yes Yes Yes Coolant Through Unit Yes Yes---Yes Encoder Yes Yes Yes Yes Yes Yes Standstill monitoring7MFM-modelsMODEL MFM-1406/18MFM-1418/36MFM-1418/42MFM-1524/45MFM-1709/15MFM-1709/30 Outer diameter D [mm]140140140150170170Tool interface Arbor, HJND-16HSK-C50Arbor, HJND-16HSK-C50HSK-C40Arbor, HJND-21HSK-C40HSK-C63HSK-C63Max. speed nmax [rpm]18'00036'00042'00045'00015'00030'000 Lubrication DLS DLS DLS DLS Grease DLSDirection of rotation right/left and right right/left and right left and rightright/left and right left and right left and rightPower S1 / S6 40%P [kW] 10.0 / 12.018.0 / 22.018.0 / 22.022.0 / 30.020.0 / 26.020.0 / 26.0 Torque S1 / S6 40%M [Nm]19.6 / 24.511.9 / 14.911.9 / 14.913.8 / 17.328.0 / 35.028.0 / 35.0 Nominal speed nN [rpm] 6‘00018‘00018‘00024‘0009‘0009‘000 Motor frequency[Hz]9001‘2001‘4001‘5005001‘000 Motor technology ASYN ASYN ASYN ASYN ASYN ASYN Voltage[V]350350350350350350 Current S1[A]28.43838575656 Length without CTU L [mm]391391381354407407 Weight[kg]32.032.032.028.548.048.0Static stiffness Axial[N/µm]162162110115184249 Radial[N/µm]194194180210214287OptionsCoolant Through Unit Yes Yes Yes Yes Yes Yes Encoder Yes Yes Yes Yes Yes Yes Standstill monitoring Yes Yes Yes Yes Yes Yes ASYN = asynchronous motorSYN = synchronous motorDLS = Direct Lubrication SystemHJND = Thread Interface8Corporate Headquarters in Switzerland and branchesFISCHER Spindle Group Ltd.+41 62 956 22 22***************************SwitzerlandFISCHER Ltd. Precision Spindles+41 62 956 22 22***************************GermanyFISCHER GERMANY GmbH+49 2173 20535 0***************************USAFISCHER USA Inc.+1 262 632 6173****************************ChinaFISCHER SHANGHAI Spindle Technologies, Inc. +86 21 643 481 50**************************TaiwanFISCHER TAIWAN Inc.+886 4 2620 2200***************************RussiaFISCHER Spindle Technology+7 383 302 22 11***************************AuthorisedpartnersFrancePRECISE France+33 4 50 36 90 15 ******************JapanCAPTAIN INDUSTRIES, Inc.+81 3 5674 1162www.capind.co.jp**************.jp10 11Your Partner for the precise, fast and powerful rotation.FISCHER USA Inc.Racine, USA FISCHER GERMANY GmbHLangenfeld, Germany FISCHER Spindle TechnologyNovosibirsk, RussiaFISCHER TAIWAN Inc.Taichung City, TaiwanFISCHER Spindle Group Ltd.Herzogenbuchsee, SwitzerlandFISCHER Ltd. Precision SpindlesHerzogenbuchsee, Switzerland FISCHER SHANGHAI Spindle Technologies Inc.Shanghai, China。
使用维护手册
EMC CLARiiON使用维护手册第一章系统日常使用规范1环境需求空气质量EMC设备须安装于空调环境中,空气的温度及湿度均可调节;如从室外补充新风,需经滤网过滤,以保证空气的洁净度。
机房温度湿度机房高度对于EMC CLARiiON CX3系统,从活动地板至天花板或吊顶的最小高度为250cm.水平高度重量设备重量因设备型号,配置的不同及产品的改进而有所不同,变化范围很大。
下表仅供活动地板活动地板必须能够支撑设备的重量,包括静态单点承重及动态移动承重。
如果地板不够,地板的四角必须有坚固立柱支撑。
对于超过500公斤存储系统的安装,除满足上述要求外,承重地板需进行额外加固,在每块承重地板的中央另加立柱支撑静态单点承重静态单点承重的计算方法是:设备满配置重量(最大重量)÷承重点数量所有EMC存储设备均有4个滚轮,因此活动地板的静态单点承重=设备满配置重量÷ 4动态移动承重态移动承重是指设备移动时地板承受的重量动态移动承重的计算方法是:设备重量÷承重点数量除上述设备重量外,用户应根据自己的实际情况,考虑周围设备及人员活动情况,综合计算地板的承重电源容量的开关,以防止当某一相电源跳闸时,带动另外两相电源同时跳闸。
2管理设备为了更好的对盘阵状态进行监控,要求在机房内安装一台预装Win2000 的PC并与机房网络连接。
该PC 同时要求预装JRE 1.4。
3注意事项为确保数据高可用性及安全,我公司对所有销售的EMC CLARiiON 系列产品均有完善周到的售后服务,因此在设备出现硬件故障时,希望客户及时与我们联系。
如因特殊原因需客户自行进行硬件更换,必须在远程监控下完成。
同时光纤线不能被挤压,踩踏,折角不能超过90度。
所有的备用盘均应避免震动。
第二章系统启动和停止系统启动1.开启机柜电源2.开启所有与CX3-40连接的DAE电源3.开启CX3-40风扇电源模块电源4.开启SPS电源开关5.加载应用系统关闭1.停止主机所有对盘阵的I/O2.如果应用系统是UNIX OS 要Umount file systems3.关闭SPS电源4.在SPS电源关闭后,将所有的DAE电源开关置于关闭状态5.将机柜电源关闭第三章日常监控监控工具EMC CLARiiON CX3-40可以通过EMC公司Navisphere Manager软件进行日常监控,Navisphere Manager 可以安装在Windows 2000/NT/XP 平台上,可以通过网络对盘阵进行日常监控。
fiil-diva-pro-1 产品安全指南说明书
请在把产品交给第三方时务必附带本提示及使用说明书。
使用fiil提供的附件/配件;
6 12
状态/电量指示灯
请扫描第5页的二维码下载fiil+ APP,进入音源的设置页面,
(详见第12-13页)
(详见第9页)
4
短按MFB实现播放/暂停,
长按多功能键直至绿灯/红灯亮起
点亮/熄灭Fiil灯:
接通/挂断电话: 来电/通话时短按MFB
56
78
开/关 My AudioFiilter功能,开/关风中模式
音量加/减:向上滑动/向下滑动触控板下一首/上一首:向前滑动/向后滑动触控音量加/减:长按上/下触控板快进/快退:长按前/后触控板
本地-蓝牙音源切换:
顺序/随机播放切换:
全部歌曲/最爱歌曲切换:
长按MAF(按住4秒直至听到第二声嘟
请使用电脑通过耳机Micro-
详见第6页
请使用标准普通话/英语以提高识别准确率
如果耳机没有连接fill+或者手机/PAD没有联网则无法使用该功能在Diva Pro连接fiil+且手机/PAD联网时,
910
11
14
0000
/Apt-x/SBC; FLAC/AAC/MP3/APE/WAV/OGG等,详见第
9页 ;04-01/
22-51
音乐/通话可持续播放长达32小时
储存温度-30℃ to 70℃
支持普通话/英语
有线/无线多模式设计,
1516。
Handicare产品维护指南说明书
for Handicare productsEnglish We provide complete solution s for easy transfers. The concept encompasses fourproduct areas that meet most needs in different transfer situations.Transfer, between two locations. Positioning, within the same location.Support, for mobility. Lifting, both manual and mechanical.Laundering and cleaning instructionsLaundry, cleaning and reconditioning of assistive devices is a prerequisite for hygiene and safety as well as for infection control. General information on how to care for our products can be found hereunder . For more detailed information, please read the instru c tions on the product labels. Our products are continuously beingdeveloped and improved, which is why we reserve the right to make changes in products without prior noticeT extile productsAll of our textile manual devices can be washed in 60-80°C/140-176°F water and tumbler-dried at low temperature. Low temperature for tumbler-drying is 45-50°C/104-120°F . Do not use rinse/fabric softener and avoid tumbler-drying for optimal service life. If disinfection is needed, 70% ethanol, 45% isopropanol or similar should be used.All of our textile lifting slings can be washed in 60-85°C/140-185°F water and tumbler-dried at low temperature.WendyLett, WendyLean, ReadyLett TopSheet and IncoSheet can be washed in 60-90°C/ 140-194°F water and tumbler-dried.Plastic productsThe surface of the product can be cleaned with warm water or a soap solution. If disinfection is needed, 70% ethanol, 45% isopropanol or similar should be used.Mobile and stationary liftsIf necessary, clean the lift with warm water or a soap solution and check that the castors are free from dirt and hair. Do not use cleaning agents containing phenol or chlorine, as this could damage the aluminum and plastic materials. If disinfection is needed, 70%ethanol, 45% isopropanol or similar should be used.Quality and environmentcertificationHandicare AB is quality and environment certified in accordance with ISO 9001, ISO 14001 and ISO 13485. Handicare AB is continuously and actively working to secure and develop the quality and the environmental thinking within the company.Handicare AB strives to ensure that all textile products are Ökotex certified, which ensures that they do not contain any health-hazardous substances in dangerous concentrations.T ested and approved productsThe assistive devices manufactured by Handicare AB are of top-quality and fulfill established standards for these types of medical- and healthcare aids. All of our assistive devices are CE-marked and many are patented. All of our assistive devicescomply with the requirements of the Medical Devices Directive for Class 1 products (MDD 93/42/EEC).Functional materialsULF™ (Ultra Low Friction) is the registered trademark for Handicare AB’s sliding material which is used to achieve extremely low friction in, for example, sliding mats.Disposable and wipeable materials facilitate infection control effortsHandicare offers an increasing selection ofpersonal transfer aids for short-term use. Instead of laundering, these products are discarded after use, when they get soiled or when the user no longer needs them. This prevents the spread of multi-resistant and other types of contagious bacteria.Our wipeable transfer aids are made from a strong, safe and comfortable material with a smooth and soft surface and many practical features. The surface of the entire product can be cleaned using disinfectants. In fact, we call this material “wipeable” but these products can actually be dipped in water or used in the shower without getting wet.Protective coversMost sizes of EasySlide can be fitted with a replace-able protective cover, which is made of polyester and can easily be cleaned. Most sizes of EasySlide and RollerSlide can also be fitted with disposable covers, made of bio-degradable polyethylene, which provide for even further improved hygiene and less laundry.19490Using Handicare products should feel good from start to finish.We provide a complete solution for easy transfers. The concept encompasses four product areas that meet most needs in different transfer situations.Transfer , between two locations. Positioning , within the same location. Support , for mobility. Lifting, both manual and mechanical.。
SQC-310使用说明书
买方可按任何理由在发货后的 30 天内返回新状态下的本产品. 往返所需的全部运输费用 均由买方负担.
INFICON Two Technology Place Syracuse, NY 3057 USA 电话: +1.315.434.1100 传真: +1.315.437.3803
0-3
T目a 录ble of
SQC-310 系 列 薄膜镀层控制仪 用户手册
版号 6.10
© 版权 INFICON 公司 2009
0-读本手册. 切勿安装替代件, 或对产品执行任何未授权的 修改. 将产品返回 INFICON 维修确保其安全特征的持久性.
安全符号
警告: 提醒注意可能引起人身伤害或死亡的程序, 实践, 或条件. 警示: 提醒注意可能引起设备损坏或数据永久丢失的程序, 实践, 或条件.. 在使用这个产品前参阅手册中的全部警告或警示信息, 以避免人身伤害或设备 损坏. 存在危险电压. 接地符号. 机箱接地符号. 等电位接地符号.
0-2
保用信息
如按本手册中的说明使用, 本 INFICON 产品对材料和工艺缺陷实行自发货日起两年的 保用期. 在保用期内, INFICON 将决定对查验损坏的产品进行检修或更换.
保用限制
除材料或工艺缺陷外, 由于误用或更改产品引起的损坏从而必须检修的产品不属于本保 用范围. 无其它保证, 表达或暗示, 包含为特殊目的适用或适销的隐含保证. 在任何情况 下, INFICON 对违反本有限保证导致的或接着发生的其它索赔无责.
第 3 章–菜单.......................................................................................................... 3-1 3.0 引言......................................................................................................... . . .3-1 3.1 主屏, 菜单 1.......................................................................................... . . . . 3-2 3.2 主屏, 菜单 2.......................................................................................... . . . 3-3 3.3 主屏, 菜单 3.......................................................................................... . . . . 3-4 3.4 快速编写菜单 ................................................................................................3-5 3.5 过程菜单 ................................................................................................... . .3-7 3.6 编写膜层菜单................................................................................................ 3-9 3.7 膜层复制, 插入和删除菜单.............................................................. ..... . . . . . 3-12 3.8 膜系菜单 ....................................................................................................... 3-15 3.8.1 编写膜系菜单 ......................................................................................... 3-16 3.8.2 膜系前提条件处理菜单 .......................................................................... 3-19 3.8.3 膜系沉积控制菜单....................................................................... . . . . . 3-20 3.8.4 膜系配置传感器菜单...................................................................... . . . 3-21 3.9 系统菜单 .................................................................................................... 3-22 传感器和源 ............................................................................................. . . . . 3-22 3.9.1 输入和继电器菜单 ................................................................................ 3-25 3.9.2 逻辑菜单................................................................................................. 3-27 3.9.3 传感器和源菜单 .......................................................................... . . . . . . 3-32
- 1、下载文档前请自行甄别文档内容的完整性,平台不提供额外的编辑、内容补充、找答案等附加服务。
- 2、"仅部分预览"的文档,不可在线预览部分如存在完整性等问题,可反馈申请退款(可完整预览的文档不适用该条件!)。
- 3、如文档侵犯您的权益,请联系客服反馈,我们会尽快为您处理(人工客服工作时间:9:00-18:30)。
1目录一、调压装置 51. 51.1 功能 (5)基本功能 (5)可扩展功能 (5)1.2 配置 (5)基本配置 (5)标准调压柜流程图 (6)1.3 运行状况显示方式 (6)1.4 操作方式 (6)1.5 分类 (6)2. 安装 (7)3. 使用 (7)3.1 使用注意事项 (7)3.2 气密性检查 (8)3.3 设定值检查 (9)调压器出口压力设定值检查 (9)切断阀启动压力设定值检查 (9)放散阀启动压力设定值检查 (10)3.4 启用 (10)3.5 工作管路与备用管路的压力设定和切换方法 (10)3.5.1 压力设定 (10)3.5.2 切换方法 (11)4. 维护维修114.1 维护通则 (11)4.2 首检 (11)4.3 巡检 (11)4.4 定期检查 (12)4.5 定期维修 (12)4.6 故障维修 (12)二、调压器 (13)1. RTZ-50FQ 调压器 (13)1.1 简介 (13)用途 (13)技术特性 (13)结构特征 (13)工作原理 (14)主要结构尺寸 (14)1.2 安装 (15)1.3 使用 (15)总则 (15)启用 (15)出口压力设定 (16)切断器启动压力设定 (16)切断器的复位操作 (16)1.4 维护 (16)日常维护 (16)定期检查 (16)维修 (17)1.5 常见故障及处理方法 (19)2. RTZ-SN 系列调压器 (20)2.1 简介 (20)2.1.1 用途 (20)2.1.2 技术特性 (20)2.1.3 结构特征 (20)2.1.4 工作原理 (21)2.1.5 主要安装尺寸 (21)2.2 安装 (22)2.3 使用 (22)总则 (22)启用 (22)出口压力设定 (23)关闭压力检查 (23)2.4 维护 (23)2.4.1 日常维护 (23)2.4.2 定期检查 (23)2.4.3 维修 (23)2.5 常见故障及处理方法 (25)3. RTZ-SP 系列调压器 (26)3.1 简介 (26)3.1.1 用途 (26)3.1.2 技术特性 (26)3.1.3 结构特征 (26)3.1.4 工作原理 (27)3.1.5 主要结构尺寸 (27)3.2 安装 (28)3.3 使用 (28)总则 (28)启用 (28)出口压力设定 (29)关闭压力检查 (29)切断启动压力设定 (29)切断阀复位操作 (29)3.4 维护 (30)日常维护 (30)定期检查 (30)3.5 常见故障及处理方法 (34)4. RTJ-NH 系列调压器 (35)4.1 简介 (35)用途 (35)技术特性 (35)结构特征 (35)工作原理 (36)主要结构尺寸 (36)4.2 安装 (37)4.3 使用 (37)总则 (37)启用 (37)出口压力设定 (38)关闭压力检查 (38)4.4 维护维修 (38)日常维护 (38)定期检查 (38)维修 (38)4.5 常见故障及处理方法 (43)5. RTZ-Q 系列调压箱 (44)5.1 简介 (44)用途 (44)技术特性 (44)结构特征 (44)工作原理 (45)主要结构尺寸 (45)5.2 安装 (46)5.3 使用 (46)总则 (46)启用 (46)出口压力设定 (46)关闭压力检查 (46)切断器启动压力设定 (46)切断器复位操作 (46)5.4 维护维修 (47)日常维护 (47)定期检查 (47)维修 (47)5.5 常见故障及处理方法 (48)6. AQZ 切断阀........................................................................ ....... ....... ....... (49)6.1 简介 (49)用途 (49)技术特性 (49)结构特征 (49)工作原理 (49)主要结构尺寸 (50)6.2 安装 (50)6.3 使用 (51)总则 (51)启用 (51)启动压力设定 (51)启动压力检查 (51)复位操作 (52)6.4 维护维修 (52)日常维护 (52)定期检查 (52)维修 (52)6.5 常见故障及处理方法 (54)本手册主要描述了Fisher-Jeon公司生产的调压装置及主要设备的结构、工作原理和安装、使用、维护维修及常见故障的处理方法。
一、调压装置1. 简介调压装置包括:城镇燃气输配系统中不同压力级制管道之间连接的调压站、调压柜、调压箱。
1.1功能1.1.1.基本功能燃气净化:对燃气中的杂质进行过滤,以保证装置内设备正常工作。
燃气调压:将上游管网的燃气压力降至下游管网或管道所需的使用压力,且压力值保持在一定的范围内不随上游压力和流量变化的影响。
安全保护:当下游压力因故超过规定的压力范围时,对下游气流进行控制或对上游气流进行截流,以保证安全用气。
流量计量:对燃气流量进行测量并换算为标准状态下的流量。
1.1.2.可扩展功能自控系统:对运行状况进行遥测遥讯或遥控。
报警系统:对泄漏、故障进行报警。
加溴装置:将溴液加入燃气中使之具有臭味。
伴热装置:对管壁进行加热给燃气保温。
热交换装置:对燃气加热。
1.2配置1.2.1.基本配置1.2.2.标准调压柜流程图(2+1)系统流程图3 4 5 6 7 8 9 10 1115 1612 13 1417 18(1+1)系统流程图3 4 5 6 7 8 9 10 1115 161217 1813 141.气体进口绝缘接头(选配)2.气体进口压力表3.压力记录仪(选配)4.气体进口阀门5.气体过滤器6.压差表(选配)7.压差表前后阀门(选配)8.安全切断阀9.调压器10.气体出口压力表11.气体出口阀门12.排污阀13.旁通阀门14.手动调节阀15.气体出口测压阀16.安全放散阀17.气体出口阀门18.气体出口绝缘接头(选配)非标准结构调压装置的配置,视具体情况而定,可根据要求,增加其它功能设备。
1.3运行状况显示方式现场仪表目视手记;现场压力记录仪记录;压力变送器、温度传感器等远传遥示;燃气报警。
1.4操作方式现场人工操作;远程遥控操作。
1.5分类按使用场所分为:首站、门站、调压站、区域调压柜、专用调压柜;按进出口压力分为:高高压、高中压、高低压、中中压、中低压;按结构型式分为:撬装式、落地柜式、壁挂式。
2. 安装◇场址的选择、与周围建筑物的水平间距、距地坪高度及防火安全要求应符合当地政府和现行国家标准GB50028《城镇燃气设计规范》的有关规定。
◇放散管的管口高度应符合GB50028《城镇燃气设计规范》的规定。
◇当调压装置用于快速起闭的燃烧设备时,调压装置与燃气器间应有足够的管道容积,以避免流量快速变化引起压力波动。
◇安装前必须确认以下参数:进口压力、出口压力、流量、适用介质、介质的流向。
◇安装前必须吹扫干净与之相联的管道。
◇吊装时,应轻吊、轻放,水平安装在带有地脚螺栓的混凝土基础上,箱体不得倾斜、倒置。
◇调压装置进、出口管与站前、后管道的对接时严禁强力安装。
◇安装时注意除去调压装置进出口法兰上的防尘盲孔垫片。
◇管线试压时必须在调压装置的进、出口加上盲板以防止损坏设备。
3. 使用调压装置安装完成后,供气方和用户准备妥当,方可开始启用,应进行:外观及各阀门的启闭情况检查,各阀门均应处于关闭状态;气密性检查;压力设定值检查。
合格后才能向下游用户供气。
检查用仪表要求:压力表量程为试验压力的2倍左右,但不得低于1.5倍或高于4倍;进行气密性试验的压力表精度不得低于1.5级,表盘直径一般不小于100mm;进行压力设定值检查所用压力表精度不得低于0.4级,表盘直径不小于150mm。
(压力在0.015MPa以下可用U形水柱计)3.1使用注意事项◇切忌快速启闭装置内各阀门,猛开阀门极易损坏站内设备!◇在调压装置通气、检查、启用、维护维修时,进出口阀门的开启必须十分缓慢,应先略微开启,使其管道内的压力非常缓慢地上升,稳定后再逐渐缓慢开大至全开。
否则燃气过快充入管道中,可能造成调压器内部零件受冲击损坏、压力表损坏;出口阀门关闭过快也会造成调压后管线压力升高使切断阀启动。
◇切忌向出口管道充入过高压力,否则会损坏调压器内部零件!◇调压装置启用时须确认调压装置的进、出口阀门已关闭;◇在通气运行时极易造成低压端出口压力表超量程损坏。
通气前可先关闭压力表下的针形阀,压力稳定后再缓慢开启针形阀;若在通气时须观察压力表,应将针形阀略微开启一点,使燃气缓慢进入压力表,压力稳定后全开针形阀。
◇在进行切断阀复位操作时必须关闭调压装置的进、出口阀门及出口端压力表下针形阀!◇◇试验介质:氮气或其使用介质。
试验压力:调压前为最大进口工作压力的1.05倍。
若在调试运行中进行,可为进口工作压力;调压后为超压切断压力的1.05倍;试验方法:(1)关闭切断阀及出口端阀门,向调压器前管路缓慢充入试验压力,稳定后纪录压力值,保压30min检查进出口管道中的压力。
若调压器前管路压力下降则有外漏;若调压器后管路压力升高则切断阀关闭不严。
(2)合格后,开启切断阀,随着气体流向调压器后管路,调压器自动关闭。
压力稳定后纪录压力值,保压30min,压力值应稳定不变,若压力上升,则说明调压器关闭不严;若压力下降,则表示有外漏。
(3)合格后,向调压器后管道缓慢充入试验压力,保压30min,压力表读数不得下降,否则有外漏。
3.3.1.调压器出口压力设定值检查关闭出口阀门及旁通阀门、放散前阀门,开启切断阀,十分缓慢地开启进口阀门,待进出口压力稳定后,略微开启测压嘴,使管道中有一小股流量通过,缓慢关闭测压嘴,观察出口压力表或U形水柱计,此时应为调压器的关闭压力,有流量运行时再准确检查调压器出口压力。
若调压器的出口工作压力与设定值不符,应缓慢旋动调节螺杆调整调节弹簧直至出口压力为设定值。
3.3.2.切断阀启动压力设定值检查方法1:关闭出口阀门、旁通阀门,开启切断阀,缓慢开启进口阀门,待进出口压力稳定后,再从测压嘴向出口端缓慢加压,直至切断阀启动,检查此时压力表读数是否与设定值相符,应重复检查三遍方法2:开启切断阀,关闭上图中信号启闭阀,打开检测阀,缓慢均匀地向切断阀传感器P2腔内充入空气,直至切断阀启动,检查此时压力表读数是否与设定值相符,应重复检查三遍若需调整切断阀启动压力,应缓慢调节切断压力设定弹簧至要求的设定值,并保持弹簧压缩量不变,缓慢升压至切断阀启动,重复操作三遍,检查切断压力是否与设定值相符。
3.3.3.放散阀启动压力设定值检查关闭放散阀前球阀,从放散管测压嘴向放散管加压,缓慢升高压力,直至有气体从放散口排出,检查此时压力表读数是否与设定值相符,应重复检查三遍。