Oracle 12C数据库客户端安装(详细教程截图)
ArcGIS10.4创建Oracle12cR1(12.1.0.2)地理数据库

ArcGIS10.4创建Oracle12cR1(12.1.0.2)地理数据库通过ArcGIS帮助⽂档得知ArcGIS 10.4⽀持的Oracle数据库有 Oracle 11g R2 11.2.0.4 和 Oracle 12c R1 12.1.0.21 安装 Oracle 12c R1在安装了ArcGIS 10.4 的电脑上,安装Oracle 12c R1的数据库,运⾏setup.exe出现下⾯安装加载界⾯不勾选我希望通过My Oracle Support 接收安全更新点击消息窗体的是,并点击下⼀步选择创建和配置数据库,并点击下⼀步笔者是个⼈使⽤数据库,通常装在笔记本电脑/⼀般台式机上,所以选择桌⾯类,并点击下⼀步根据Oracle的建议,选择创建新Windows⽤户,并设置⽤户名为:oracle,为⽅便记忆密码,设置⼝令为:oracle,然后点击下⼀步设置字符集为utf-8,管理⼝令为:orcl,不勾选创建为容器数据库,然后单击下⼀步。
(PS: 在Oracle Database 12c中,可插⼊数据库(Pluggable Database)为云计算⽽⽣,且为收费项⽬,Pluggable Database 其体系结构的核⼼是:由⼀个容器数据库(CDB)和多个可插⼊式数据库(PDB)构成,PDB包含独⽴的系统表空间和SYSAUX表空间等,但是所有PDB共享CDB的控制⽂件、⽇志⽂件和UNDO表空间。
各个PDB之间互访需要通过DB Link进⾏,就仿佛是多个数据库⼀样。
)若勾选创建为容器数据库,ArcMap 建⽴Oracle的企业地理数据库会出现下⾯问题:Executing: CreateEnterpriseGeodatabase Oracle 192.168.220.203/orcl # DATABASE_AUTH sys ***** SDE_SCHEMA sde ***** sdeC:\Users\Administrator\Desktop\ArcGISforServerAdvancedEnterprise_server.ecpStart Time: Wed Feb 12 09:17:20 2014User has privileges required to create database objects.Tablespace created.Error creating geodatabase admin user. [ERROR: Failed to create new Oracle user sde (-51).Error: Underlying DBMS error (-51).Extended error code: (65096)ORA-65096: invalid common user or role name]Failed to execute (CreateEnterpriseGeodatabase).Failed at Wed Feb 12 09:17:32 2014 (Elapsed Time: 12.37 seconds)忽略上述添加的⼝令不符合Oracle建议的标准,点击是等待先决条件检查完成检查安装程序设置是否有问题,然后点击安装进⼊程序安装过程,等待安装完成安装过程中,当数据库orcl建⽴成功后,会弹出窗体,单击⼝令管理默认情况下,只解锁了sys和system⽤户,为便于记忆,设置这两个⽤户访问orcl数据库的⼝令均为:oracleOracle Database 安装结束,点击关闭2 ArcMap 创建 Oracle 12c R1 地理数据库安装Oracle 12c R1的客户端。
WindowsServer2016虚拟机安装Oracle12c_RAC

WindowsServer2016虚拟机安装Oracle12c_RAC群集磁盘2:ASM第1章安装环境确认1.1 硬件平台(Hyper-V)RAC-A 1G内存双网卡RAC-B 1G内存双网卡iscsi服务器1G内存1.2 软件环境操作系统:Windows Server 2016Oracle软件:Oracle Database 12c Release 1 (12.1.0.2.0)集群工具:Oracle Database Grid Infrastructure (12.1.0.2.0)磁盘管理工具:ASM1.3 安装平台信息第2章环境准备2.1 修改主机名在两台主机上分别执行,计算机——右键(属性),主机名设置为RAC-A和RAC-B。
2.2 关闭防火墙关闭所有防火墙。
停止Windows Firewall系统服务。
在主机1和主机2上ping对方的公用和私用地址,要求都能ping通。
2.3 配置DEP在两台主机上,计算机——右键(属性)——更改设置——高级(设置)——数据执行保护(DEP),选择仅为基本windows程序和服务启用(重启后才能生效)。
2.4 关闭UAC在两台主机上,控制面板(小图标方式查看)——用户账户——更改用户账户控制设置,改为从不通知,确定(重启后生效)。
2.5 禁用媒体感知功能因为在网络调试时,Windows 的“媒体感知”功能会检测出本机和局域网设备没有正常连通,接着可能就会禁用捆绑在网卡上的某些网络协议,其中就包括TCP/IP 协议。
由于TCP/IP 协议被禁用了,这样该TCP/IP 应用程序就无法进行调试了。
(该设置重启生效)在HKEY_LOCAL_MACHINE\System\CurrentControlSet\Services\Tcpip\Parameters中添加键值如下:Value Name: DisableDHCPMediaSense Data Type: REG_DWORD -Boolean Value: 12.6 停止MSDTC服务2.7 修改虚拟内存按照Oracle的官方文档,虚拟内存至少为实际内存的2倍。
多租户(Oracle12c及以上)环境下 APEX + ORDS 安装指南_V4

APEX&ORDS多租户环境下安装指导Author:hysun.he@Created:2020-06-07Last Updated:2020-09-08目录目录 (1)前言 (2)资源下载 (2)安装步骤 (2)安装APEX (2)安装ORDS (5)访问APEX/ORDS (8)访问管理员控制台,执行创建工作区和用户等操作 (8)访问APEX工作区,创建应用/具体开发等 (9)高可用配置 (10)不同机器部署多个ORDS实例 (10)同一台机器部署多个ORDS实例 (10)代理配置-本例中用NGINX (11)前言APEX/ORDS有多种安装模式,本手册仅为其中一种,采用的是ORDS独立运行模式。
根据实际场景,也可以把ORDS部署到T omcat等Web容器中。
本文中APEX和ORDS都使用目前最新版本,使用Oracle多租户数据库。
APEX和ORDS将安装在PDB1中。
本文仅为APEX/ORDS安装指导,为了简单起见,本文不涉及数据库安装、操作系统配置、网络配置、防火墙配置、负载均衡配置、Linux基本操作等可能相关的方面,如果有这些配置的需要,请查找相关的资料。
资源下载下载最新的APEX(Oracle APEX xxx-All languages):https:///tools/downloads/apex-downloads.html下载最新的ORDS(Oracle REST Data Services):https:///database/technologies/appdev/rest-data-services-downloads.html安装步骤安装APEX1)删除已有安装sqlplus“/as sysdba”SQL>select P.PDB_NAME,R.VERSION,R.STATUS from DBA_PDBS P,CDB_REGISTRY Rwhere P.PDB_ID=R.CON_ID AND P_ID='APEX'order by1;no rows selectedSQL>这里之前没有安装APEX;如果已经安装,则执行apxremov.sql删除已有安装。
WindowsSever2012下Oracle12c安装配置方法图文教程
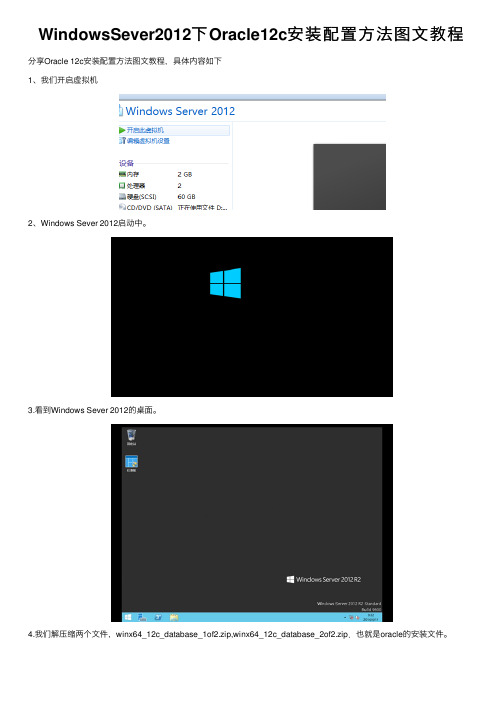
WindowsSever2012下Oracle12c安装配置⽅法图⽂教程分享Oracle 12c安装配置⽅法图⽂教程,具体内容如下1、我们开启虚拟机2、Windows Sever 2012启动中。
3.看到Windows Sever 2012的桌⾯。
4.我们解压缩两个⽂件,winx64_12c_database_1of2.zip,winx64_12c_database_2of2.zip.也就是oracle的安装⽂件。
5.这个时候我们可以看到服务器启动以后的仪表板。
6.然后我们合并两个解压缩以后⽂件夹的内容,进⾏合并。
可以查看⼤⼩2G多。
7.我们可以看到合并后应该是这样。
8.然后启动setup.exe进⾏安装。
9.然后选择是启动。
10.这个时候命令⾏正在启动中。
11.oracle正在启动中。
12.我们配置安全更新,其实是幌⼦,哥没有银⼦付费,不更新,先装了再说。
13.接下来我们单击下⼀步。
14.我们单击是,继续。
15.我们选择跳过软件更新,我们使⽤my oracle support⾝份证明需要很多银⼦啊,穷⼈买不起。
16.我们创建与配置数据库。
17.然后选择服务器类,安装功能最强⼤的。
18.我们选择单实例数据库安装。
19. 我们选择典型安装。
20.我们选择使⽤windows内置账户。
21.接下来我们单击是。
22.我们如下配置,安装企业版,另外我们基于学习,密码不必太复杂。
23.接下来我们单击是。
跳过⼝令检测。
24.我们检测下环境看看是否够装。
25.我们可以看到我们安装的选项全部定制完成。
26.这个时候安装进⾏中。
27.这个时候单击确定。
28.安装成功。
29.我们查看所有的选项,可以看到Oracle的所有组件。
30.在这我们可以看到数据库ORCL。
31.这个时候我们看到所有的本地⾓⾊,ORacle对于权限管理很精细。
32.在这个我们接着启动数据库设置助⼿。
33.我们可以对数据库任意操作。
34.我们还可以配置数据库的⽹络服务。
Oracle Database 12c RAC for AIX 7.1

Oracle Database 12c RAC for AIX 7.1一、安装说明服务器:IBM Power 750(两台)共享存储:华为DS6800OS:AIX 7.1.3ORACLE:12.1.0.1.0网络(hosts文件解析):二、环境检查查看内存:# lsattr-E -l sys0 -a realmem系统架构:# getconf HARDWARE_BITMODE(或# bootinfo -K或# getconf KERNAL_BITMODE//输出64才可以查看Swap空间:# lsps -a,使用chps -s增加目录大小:# df -g(默认的不太大,最好扩展一下smitty chfs)检查软件包:# lslpp -l bos.adt.base bos.adt.lib bos.adt.libm bos.perf.libperfstatbos.perf.perfstat bos.perf.proctools rsct.basic.rte pat.clients.rte xlC.aix61.rte.11.1.0.4 xlC.rte.11.1.0.4(最后两个有版本要求)相关补丁:# instfix -i -k "IV16737IV21116 IV21235 IV28925 IV34869 IV35057 IV39136 IV41415 IV45072 IV45073"由于系统版本7.1.3,安装系统时已包括相关补丁集,安装过程中会有相关WARNING,忽略即可安装12c必须的其它软件包:ssh——建立信任关系、安装过程scp都需要的sshbash——如没有此包,安装GRID时会报INS-06001 Failed toperform operation due to internal driver errorunzip——AIX默认不支持.zip解压1.安装ssh相关包,一般系统盘中就有,smitty installp或mkdir dvdmount -v cdrfs -o ro /dev/cd0 /mnt/dvdcd /mnt/dvd/usr/sys/inst.immagesinstallp -ac -Y -d . openssh.base openssl.base openssl.man.en_US openssh..man.en_US①在/etc/security/login.cfg文件中,将usw下auth_type的默认值std_auth改为pam_auth②/etc/pam.conf中添加sshd auth required pam_aixsshd account required pam_aixsshd password required pam_aixsshd session required pam_aix③将/etc/ssh/sshd_config中#LoginGraceTime 2m改为 LoginGraceTime 0④重启sshstopsrc -s sshdstartsrc-s sshd2.bash需要网上下载(ftp:///gnu/bash/ 据说版本没有限制)后,上传到服务器,使用root用户执行:# rpm -ivh bash-4.2-1.aix6.ppc.rpm在/etc/security/login.cfg的usw:下添加/usr/bin/bash(此操作不知道是不是有效)3. 同样下载unzip_aix.Z文件,上传到服务器,解压uncompress unzip_aix(这里使用刻盘上传时会把.Z改为.z,解压前要改回来,否则报错)chmod 751 unzip将文件cp到/usr/bin# cp -v /u01/unzip_aix /usr/bin/unzip三、系统参数查看异步io:# ioo-a |grep aio_maxreqs(此版本为131070,不用修改)虚拟内存参数:# vmo –aF 与下面值不一致时,修改为下面值(调整后重启生效):vmo -p -o minperm%=3vmo -p -o maxperm%=90vmo -p -omaxclient%=90vmo -p -olru_file_repage=0vmo -p -ostrict_maxclient=1vmo -p -o strict_maxperm=0系统分配的块大小(建议值128-1024):chdev-l sys0 -a ncargs=1024用户允许的最大进程数:chdev–l sys0 –a maxuproc=16384网络参数:no -a | more查看兼容性:lsattr –E –l sys0 –a pre520tune1.如返回结果是pre520tuneenable Pre-520 tuning compatibity mode True,在/etc/添加如下:if [ -f /usr/sbin/no ] ; then/usr/sbin/no -o udp_sendspace=65536/usr/sbin/no -o udp_recvspace=655360/usr/sbin/no -o tcp_sendspace=65536/usr/sbin/no -o tcp_recvspace=65536/usr/sbin/no -o rfc1323=1/usr/sbin/no -o sb_max=4194304/usr/sbin/no -o ipqmaxlen=512fi2.如返回结果是pre520tunedisable Pre-520 tuning compatibity mode True,执行下面命令no -r -o ipqmaxlen=512 //此参数要求重启系统生效no -p -o rfc1323=1no -p -o sb_max=4194304no -p -o tcp_recvspace=65536no -p -o tcp_sendspace=65536no -p -o udp_recvspace=655360no -p -o udp_sendspace=65536其它网络参数:no -p -o tcp_ephemeral_low=9000-o tcp_ephemeral_high=65535no -p -o udp_ephemeral_low=9000-o udp_ephemeral_high=65535关闭NTPmv -v /etc/ntp.conf /etc/ntp.conf.bakstopsrc -s xntpd修改用户限制,将/etc/security/limits文件中部分内容如下:default:fsize = -1core = -1cpu = -1data = -1rss = -1stack = -1nofiles = -1四、添加IP解析、创建用户等信息在/etc/hosts添加解析地址(使用hosts解析IP)192.168.10.1 nc180p001192.168.10.2 nc180p002192.168.10.3 nc180p001-vip192.168.10.4 nc180p002-vip10.10.10.1 nc180p001-pri10.10.10.2 nc180p002-pri192.168.10.5 racscan创建组mkgroup -'A' id='1000' adms='root' oinstallmkgroup -'A' id=' 1001' adms='root' dbamkgroup -'A' id='1002' adms='root' opermkgroup -'A' id='1003' adms='root' asmadminmkgroup -'A' id='1004' adms='root' asmopermkgroup -'A' id='1005' adms='root' asmdba创建用户mkuser id='1000' pgrp='oinstall'groups='dba,asmdba,oper,asmadmin,asmdba’home='/home/grid' –s /usr/bin/bash gridmkuser id='1001' pgrp='oinstall'groups='dba,oper,asmadmin,asmdba,asmoper' home='/home/oracle' –s /usr/bin/bash oracle修改密码echo oracle | passwd --stdin oracleecho oracle | passwd --stdin grid添加用户能力lsuser -a capabilities gridchusercapabilities=CAP_NUMA_ATTACH,CAP_BYPASS_RAC_VMM,CAP_PROPAGATE grid lsuser -a capabilities oraclechusercapabilities=CAP_NUMA_ATTACH,CAP_BYPASS_RAC_VMM,CAP_PROPAGATE oracle信任关系(可选)1.生成密钥对(两个节点,两个用户oracle,grid)ssh-keygen -t rsassh-keygen -t dsa2.配置信任关系(一个节点)cat .ssh/id_rsa.pub>>.ssh/authorized_keyscat .ssh/id_dsa.pub>>.ssh/authorized_keysssh nc180p002 cat .ssh/id_rsa.pub>>.ssh/authorized_keysssh nc180p002 cat .ssh/id_dsa.pub>>.ssh/authorized_keysscp .ssh/authorized_keysnc180p002:~/.ssh3.验证信任关系(两个节点,两个用户)ssh nc180p002 datessh nc180p002-pri datessh nc180p001 datessh nc180p001-pri date创建目录设置权限mkdir -p /u01/app/11.2.0/gridmkdir -p /u01/app/oraclechown -R grid:oinstall /u01chown oracle:oinstall /u01/app/oraclechmod -R 775 /u01/共享存储生成PV:chdev -l hdiskn -a pv=yes设置共享文件系统的权限供grid和oracle用户使用1.改变用于数据库存储的PV的属主chown grid:asmadmin /dev/rhdisk[2-12]2.改变用于数据库存储的PV的权限chmod 660 /dev/rhdisk[2-12]3.检测和设置保持策略lsattr -E -l hdisk[2-12] | grep reserve_设置保持策略:chdev -l hdisk[2-12] -areserve_policy=no_reserve (如果是reserve_policy)chdev -l hdisk[2-12] -areserve_lock=no (如果是reserve_lock)添加环境变量节点1上Oracle用户,在~/.bash_profile文件umask 022export EDITOR=viexport ORACLE_BASE=/u01/app/oracleexport ORACLE_HOME=$ORACLE_BASE/product/11.2.0/db_1export ORACLE_SID=ora11g1exportPATH=.:${PATH}:$ORACLE_HOME/bin:/bin:/usr/bin:/usr/sbin:/usr/local/bin exportLD_LIBRARY_PATH=$ORACLE_HOME/lib:${LD_LIBRARY_PATH}export NLS_LANG=AMERICAN_AMERICA.UTF8 #此变量最好安装完再加上节点2上Oracle用户,在~/. bash_profile文件添加:umask 022export EDITOR=viexport ORACLE_BASE=/u01/app/oracleexport ORACLE_HOME=$ORACLE_BASE/product/11.2.0/db_1export ORACLE_SID=ora11g2export PATH=.:${PATH}:$ORACLE_HOME/bin:/bin:/usr/bin:/usr/sbin:/usr/local/bin exportLD_LIBRARY_PATH=$ORACLE_HOME/lib:${LD_LIBRARY_PATH}export NLS_LANG=AMERICAN_AMERICA.UTF8#此变量最好安装完再加上节点1上Grid用户,在~/. bash_profile文件添加:umask 022export EDITOR=viexport ORACLE_BASE=/u01/app/gridexport GRID_HOME=/u01/app/11.2.0/gridexport ORACLE_SID=+ASM1exportPATH=.:${PATH}:$ORACLE_HOME/bin:/usr/bin:/bin::/usr/local/binexportLD_LIBRARY_PATH=$ORACLE_HOME/lib:${LD_LIBRARY_PATH}节点2上Grid用户,在~/. bash_profile文件添加umask 022export EDITOR=viexport ORACLE_BASE=/u01/app/gridexport GRID_HOME=/u01/app/11.2.0/gridexport ORACLE_SID=+ASM2export PATH=.:${PATH}:$ORACLE_HOME/bin:/usr/bin:/bin:/usr/local/binexportLD_LIBRARY_PATH=$ORACLE_HOME/lib:${LD_LIBRARY_PATH}五、安装GI1.解压grid两个安装包cd /u01unzip aix.ppc64_12c_grid_1of2.zipunzip aix.ppc64_12c_grid_2of2.zip2.解压目录属主改为grid用户cd /u01chmod -R grid:oinstsall grid/3.进入解压目录执行使用root用户rootpre.sh,将此文件传到第二个节点同样使用root 执行cd /u01/grid./rootpre.sh4.grid用户进入解压目录验证su - gridcd /u01/grid./runcluvfy.shstage -pre crsinst -n nc180p001,nc180p002 -fixup -verbose5.开始安装:$ ./runInstaller输入Y,回车继续进入图形界面。
oracle 12 在oracle Linux 7上的安装

Oracle 12c 在OEL7.1上的安装实施文档日期:2015年9月2日目录一、介质说明 (1)二、准备工作 (2)2.1VM WARE W ORKSTATION P RO 12.0.0 FOR W INDOWS 安装 (2)2.2O RACLE L INUX-R7-U1-S ERVER-X86_64系统安装 (2)2.2.1 创建OEL7.1虚拟机 (2)2.2.2 OEL7.1系统安装 (11)三、安装ORACLE 12C (23)3.1基础配置 (23)3.2配置本地YUM包源 (24)3.3安装软件包 (25)3.4创建用户和组 (27)3.5内核参数调整 (27)3.5.1 标准 (27)3.5.2 实际查询值 (28)3.5.3 修改下面文件即可 (29)3.6参数生效 (30)3.7软件用户资源限制 (30)3.7.1 联机文档要求 (30)3.7.2 实际配置 (30)3.8修改安装目录权限 (32)3.9修改ORACLE环境变量 (32)3.10数据库软件安装 (32)3.10.1 解压下载的文件 (32)3.10.2 安装步骤 (33)3.11创建数据库 (41)3.11.1 安装监听 (41)3.11.2 安装数据库 (44)四、ORACLE 12C新特性介绍 (54)一、介质说明Oracle Database 12c Release 1 for Linux x86-64 oracle 12c 数据库软件下载地址:/technetwork/database/enterprise-edition/downloads/index.htmlOracleLinux-R7-U1-Server-x86_64-dvd.iso oracle linux 操作系统下载地址:https:///osdc/faces/Home.jspx?_afrLoop=1944357500338522&_afrWindowMode=0&_adf.ct rl-state=1br89kn0pd_4VMware Workstation Pro 12.0.0 for Windows 虚拟机软件下载地址:https:///cn/web/vmware/info/slug/desktop_end_user_computing/vmware_workstation_pro/12_ 0oracle12cr1 online document oracle12c联机文件下载地址:/technetwork/database/enterprise-edition/documentation/index.html二、准备工作2.1VMware Workstation Pro 12.0.0 for Windows 安装标准下一步下一步即可,不做过多讲解。
Oracle Forms 12c客户端部署配置选项说明书
Oracle Forms 12cClient Deployment Configuration Options O R A C L E W H I T E P A P E R|M A Y2016Table of ContentsIntroduction 2 Oracle Forms 12c Client Deployment Configuration Options 3 Java Applet Embedded in HTML 3 JNLP Embedded in HTML 4 Java Web Start 4 Forms Standalone Launcher 5 Conclusion 8IntroductionIn the early 1990’s, the Internet (World Wide Web) began to evolve from a system designed and used by government organizations to one used globally by the public. This transition began a wave of related technologies being born. The Internet allowed people to have immediate access to information once thought to be out of reach. Web technology, specifically Web browsers, gave developers an opportunity to deliver their applications to end-users without the need to install software on the end-user’s machine.Until the 1990’s, Oracle Forms was delivered as a t wo-tier technology. With its client and server concept, Oracle Forms required that the technology’s runtime software be installed and configured on the end-user’s machine. This meant that each end-user machine would require an administrator to install runtime software one machine at a time. Often this was a difficult task given that an organization could have thousands of end-users, who could be located anywhere in the world. As we moved toward and into the twenty first century, Oracle realized that Oracle Forms customers would begin expecting to have access to their applications in the same way as so many other applications, through a web browser. Oracle Forms 6i was the first version to fully support application deployment via a web browser. Because of the need for tight integration on the client tier, it was necessary to use Java Applet technology to host the applications. So, although applications were launched from a browser, it was actually the Java Runtime Environment (JRE) on the client that ran or hosted the applications. After more than fifteen years of web browsers supporting integration with the Java Plug-in, many browser vendors are moving to a plugin-free model. As a result, Oracle Forms needs new ways of being deployed if it is to continue using Java technology on the client tier.Beginning with Oracle Forms 12c, product users can now choose from several client configuration options. With several options available, administrators can choose which option best suits their needs. This document aims to describe each of the configuration options and how to use them. It will also explain the advantages and limitations of each.Oracle Forms 12c Client Deployment Configuration OptionsBeginning with Oracle Forms 12c, there are now four supported client deployment configuration options. The available options are as follows.»Java Applet embedded in HTML»JNLP embedded in HTML»Java Web Start (JWS)»Forms Standalone Launcher (aka Standalone or FSAL)Although each option will have minimal to no impact on the appearance and behavior of any application, each will be contained slightly differently. Enabling and configuring any of these can be accomplished in the Forms Web Configuration page (i.e. formsweb.cfg) in Fusion Middleware Control.Any examples provided in this paper assume that you have properly configured Secure Socket Layer (SSL) in the server environment, as this is the most secure way to run any web deployed application. All options can also be used with non-SSL, but this is not recommended. Refer to the Oracle HTTP Server and WebLogic Server Administration Guides for details on properly configuring SSL in your environment.Java Applet Embedded in HTMLThis option was the first offered when browsers began supporting the Java Plug-in. Its configuration is the default for any Oracle Forms installation, 12.2.1 and older. This option can be used to give the appearance that the Forms application (applet) is embedded in a web page. This is often desirable when the HTML content surrounding the Forms application contains related or integrated information. This can also be helpful when using the Forms JavaScript integration feature. Single sign-on and single sign-off are also fully supported in this configuration.Disadvantages of using this option include the requirement of a Java Plug-in and the need for a certified browser that supports the Java Plug-in. The loss of usable space taken up by the browser’s window, toolbar, and menu will also need to be tolerated.Using the Applet embedded in HTML option is simple because this is the default configuration. Simply enter a URL in the browser that appears something like one of the following.»https:///forms/frmservlet»https:///forms/frmservlet?config=defaultThese parameters/values are required for this configuration and are found in the Forms Web Configuration page of Fusion Middleware Control.Non-WebUtil Enabled Forms WebUtil Enabled FormsJNLP Embedded in HTMLEmbedded JNLP is very similar to embedded Applet, however the application is treated more like a Java Web Start application although embedded within a web page. Like an embedded Applet, embedded JNLP fully supports JavaScript integration, single sign-on, single sign-off, and the ability to visually embed the form in a web page. Embedded JNLP has the added advantage of base-64 encoding the JNLP content. This content includes most of the parameter/value pairs configured for the application. Because the base-64 encoded text is not human readable, curious end-users will be discouraged from attempting to alter any of the parameters. It should be understood that the base-64 encoding is not a security mechanism. The base-64 encoding used in this configuration is required by Java and helps to improve the performance of delivery from server to client. This configuration requires the Java Plug-in and a certified browser that supports the Java Plug-in.To use this configuration you can either use the provided example configuration named “jnlp” or create your own.»https:///forms/frmservlet?config=jnlpThese parameters/values are required for this configuration and are found in the Forms Web Configuration page of Fusion Middleware Control.Non-WebUtil Enabled Forms WebUtil Enabled FormsWhen using Java Web Start or Embedded JNLP, if the application uses custom jar files (e.g. jacob.jar, icons.jar, example.jar, etc), these should be added to extensions.jnlp. The file is located in Oracle_Home\forms\java. Open this file in a text editor and make the appropriate entries. An example is included in the file. Each entry should be added on its own line.Java Web StartJava Web Start is considered a semi-browserless configuration. The use of Java Web Start will give an Oracle Forms application the appearance of being a natively installed application rather than a web app because when running, the application is not contained by the boundaries of the browser. This is often desirable with Point of Sale applications where the only application used on the device is the POS application or in cases where the application is designed to use the full screen. Different from the functionality provided by the use of separateFrame=true (available in the previous two configurations only), the use of Web Start allow you to close the browser window used to call the application once it has started.Oracle Forms’ use of Java Web Start allows applications to be called from a browser using a hyperlink or by directly entering a URL. Alternatively, the application can be run from a JNLP file stored on the end-user machine. This method eliminates the need for a browser, except when the application is single sign-on protected. Java Web Start can also be used to call an Oracle Forms application from the command line. Although there are several variations of how Java Web Start can be used, if the application requires the use of single sign-on, it must be called from a browser. Attempts to call an SSO protected application from a static JNLP file or the command line will fail.Because this is a mostly browser-less configuration, features like single sign-off and JavaScript integration are not supported when using the Java Web Start configuration.This configuration requires the Java Plug-in be installed if calling from a browser. If not calling from a browser, either the Java Plug-in or Java Development Kit (JDK) installation is required. A browser is optional and would only be required if single sign-on is used.To use this configuration you can either use the provided example configuration named “webstart” or create your own. The application can be called from a browser or you can use the command line or custom script.»jnlps:///forms/frmservlet?config=webstart»https:///forms/frmservlet?config=webstart»javaws “https:///forms/frmservlet?config=webstart”The “jnlp” and “jnlps” protocols (used in above example) are supported with Java 8u92+ on Microsoft Windows.The following are required parameters/values for this configuration and are found in the Forms Web Configuration page of Fusion Middleware Control.Non-WebUtil Enabled Forms WebUtil Enabled FormsWhen using Java Web Start or Embedded JNLP, if the application uses custom jar files (e.g. jacob.jar, icons.jar, example.jar, etc), these should be added to extensions.jnlp. The file is located in Oracle_Home\forms\java. Open this file in a text editor and make the appropriate entries. An example is included in the file. Each entry should be added on its own line.Forms Standalone LauncherThe Forms Standalone Launcher is a fully browser-less configuration. Further, it does not require that the Java Plug-in be installed. It does require Java on the client, but it can be any one of the following; JRE, JDK, or Server JRE.With this configuration, applications are launched from the command line or custom script files by calling the platform specific “java” executable. This con figuration fully isolates the application from the Java Plug-in or Java Web Start and the browser. Using the Forms Standalone Launcher can provide the appearance of a fully native application. Single sign-on, single sign-off, and JavaScript integration are not supported with this configuration.This configuration requires that a small jar file (frmsal.jar) be stored on the end-user machine. The file can be transferred to the end-user machine using any desirable method (e.g. web download, email, ftp, etc). This file is the Forms Standalone Launcher. It is version specific, so it cannot be used with other Forms versions or patch levels.The file is staged on the server in the Oracle_Home\forms\java directory. However, a helpful usage guide that includes a download link can be easily accessed when the server is running. Administrators can easily disable, remove, or edit this page if desired. Navigate to the following to display the page.»https:///forms/html/fsal.htmTo use this configuration you can either use the provided example configuration named “standaloneapp” or create your own. The application can be called from the command line or custom script. You cannot use a browser with this configuration. The command line entry would look something like the following.»java –jar frmsal.jar –url “https:///forms/frmservlet?config=standaloneapp”»java –jar frmsal.jar –url “https:///forms/frmservlet?config=standaloneapp” –t 30000Refer to the Usage Guide mentioned above for more details on command line syntax.The following are key parameters/values used by this configuration and are found in the Forms Web Configuration page of Fusion Middleware Control.Non-WebUtil Enabled Forms WebUtil Enabled FormsIn this release, the Forms Standalone Launcher does not have the ability to determine which Java version is being used. It will be up to the Administrator and/or user to ensure that an appropriate Java version is used. Refer to Figure 1 below for a simple Microsoft Windows script (batch) example.Figure 1 - Microsoft Windows script example.ConclusionOracle Forms 12c offers a variety of possible client configurations options. Choosing which is best will depend on the application’s needs and desired appearance at runtime. Because users can choose which option suits them best, no longer will they be constrained to a single possibility. If choosing the Java Web Start or Forms Standalone Launcher options, administrators no longer have to be concerned about compatibility between browser and Java versions. This should make application deployment and manageability easier.Oracle Corporation, World Headquarters Worldwide Inquiries 500 Oracle ParkwayPhone: +1.650.506.7000 Redwood Shores, CA 94065, USAFax: +1.650.506.7200Copyright © 2016, Oracle and/or its affiliates. All rights reserved. This document is provided for information purposes only, and the contents hereof are subject to change without notice. This document is not warranted to be error-free, nor subject to any other warranties or conditions, whether expressed orally or implied in law, including implied warranties and conditions of merchantability or fitness for a particular purpose. We specifically disclaim any liability with respect to this document, and no contractual obligations are formed either directly or indirectly by this document. This document may not be reproduced or transmitted in any form or by any means, electronic or mechanical, for any purpose, without our prior written permission.Oracle and Java are registered trademarks of Oracle and/or its affiliates. Other names may be trademarks of their respective owners.Intel and Intel Xeon are trademarks or registered trademarks of Intel Corporation. All SPARC trademarks are used under license and are trademarks or registered trademarks of SPARC International, Inc. AMD, Opteron, the AMD logo, and the AMD Opteron logo are trademarks or registered trademarks of Advanced Micro Devices. UNIX is a registered trademark of The Open Group. 0116Oracle Forms 12c Client Deployment Configuration Options May 2016Author: Michael FerranteContributing Authors: Oracle Forms DevelopmentC O N N E C T W I T H U S/oracle/oracle/oracle。
Oracle12c安装详细步骤,带截图
Oracle12c安装详细步骤,带截图1,在官⽹上下载oracle的压缩⽂件,两个都要下载。
并两个同时选中解压在⼀个⽂件夹⾥⾯。
2,解压之后,如下图,点击setup.exe稍等⼀会⼉,3,开始安装: 不选点击下⼀步,或者直接点击下⼀步,弹出提醒的会选是就可以了。
4,创建和配置数据库,直接点击下⼀步5,默认桌⾯类,直接点击下⼀步6,选中创建新的windows⽤户,⽤户名跟密码⾃⼰取,取个简单的⽐较好,容易记住。
填好之后点击下⼀步,可能会弹框说你的⼝令跟规则的不⼀样,直接点击是就⾏了。
7 这⾥的⽬录可以⾃定义,选⼀个内存空间⽐较⼤的盘安装,如果内存不⾜的话会导致后⾯⽆法安装的。
⼝令就是你之前输⼊的哪⼀个。
我没试过弄个不⼀样的。
哈哈。
点击下⼀步。
有如下这种弹框直接点是就可以了。
9.这个时候就会检查内存什么的是否符合了。
耐⼼等待。
10 检查完通过之后,会给你这个信息,你可以截图保存⼀下,以后可能会⽤到。
点击安装。
11,之后就是耐⼼等待安装了,我的安装了半个⼩时。
12,接着会弹出如下框出来,点击⼝令管理。
去设置⼝令。
13,SYS SYSTEM之后就是你要⽤到的⽤户了。
你可以填写⼝令,不过⼀定要记住。
之后的oracle链接都是⽤户跟⼝令通过才可以链接成功,不填的话会默认为你之前的⼝令。
这⾥我没有填,直接点击确定。
14,点击确定。
15,这下你就安装成功了。
点击关闭就可以了。
16,运⾏哪⾥像输⼊cmd⼀样输⼊sqlplus 会弹出⼀下这个输⼊⽶的⽤户名跟密码就可以了,也可以这样输⼊:SYSTEM/123456 ,123456只是列⼦,就是你的密码显⽰⼀下这个就说明你成功安装了。
以下的图⽚你可以在开始菜单,还有服务哪⾥看到。
我的服务之所以这么多,是因为我之前安装了⼀次⼿动卸载了,然后⼜来安装⼀次,不过两次的windows⽤户不⼀样和数据库的名称也不⼀样,所以后⾯的⼀次没有去覆盖。
不过不影响。
安装的步骤就到这⾥了,谢谢。
Oracle 12C数据库安装(详细教程截图)
右键setup.exe,选择以管理员模式运行。
图17 运行示意图图18 配置安全更新图点击下一步,若弹窗提示未提供电子邮箱地址,选择是。
图19 安装选项图选择创建和配置数据库,点击下一步。
图20 系统类配置图选择服务器类,点击下一步。
图21 网格安装选项配置图选择单实例数据库安装,点击下一步。
图22 安装类型配置图选择高级安装,点击下一步。
图23 产品语言配置图默认设置,直接点击下一步。
图24 数据库版本配置图默认设置,直接点击下一步。
图25 Oracle主目录用户选择配置图注:此步根据需求而定,可单独设定用户,也可使用内置账户。
选择创建新Windows用户,输入用户名oracle,口令oracle,若弹窗显示口令无效,是由于本地的安全策略。
具体修改措施如下:打开服务器管理器-> 工具-> 本地安全策略-> 账户策略-> 密码策略-> 修改参数图26 本地安全策略配置图图27 安装位置配置图使用默认的安装位置,点击下一步。
图28 配置类型选择图默认选择,直接点击下一步。
图29 数据库表示符配置图取消创建为容器数据库选项,点击下一步。
图30 配置选项选择图选择启用自动内存管理选项,点击右侧下一个选项卡。
图31 字符集配置图字符集选择Unicode,点击下一个选项卡。
图32 示例方案配置图选择创建具有示例方案的数据库,点击下一步。
图33 数据库存储配置图默认设置,直接点击下一步。
图34 管理选项配置图直接点击下一步。
图35 恢复选项配置图选择启用恢复选项,点击下一步。
图36 方案口令配置图选择对所有用户使用相同的口令选项,口令为oracle,点击下一步,弹出口令不符合,选择是。
图37 概要图点击安装按钮,耐心等待一段时间。
图38 数据库创建完成示意图图39 数据库软件创建成功示意图。
20170817-Oracle 12c dataguard 部署-公开发布v1.0
Oracle 12c Dataguard部署实施长天科技-刘磊 2017-08目录1. 环境说明 (3)2. 环境配置及先决条件 (3)3. (主库)启动FORCE LOGGING (3)4. (主库)启动归档模式 (4)5. (主库)添加standby redo logfile (5)5.1. 查看Primary 库的REDO 相关信息: (5)6. (主备库)分别配置监听并启动 (6)7. (主备库)分别配置tnsnames.ora (6)8. (备库)创建必要的目录 (6)9. (主库)创建pfile 文件并修改pfile 内容 (7)9.1. 创建pfile (7)9.2. 修改pfile (7)9.3. (主库)用新参数重启数据库: (7)10. (主库)将主库的口令文件copy到备库 (8)11. 将主库的参数文件copy到备库并修改 (8)12. (备库)用spfile 将备库启动到nomount 状态 (8)13. (备库)开始进行Active duplicate (8)14. (备库)打开备库并并启动apply (9)15. 验证DG (10)15.1. 主库CDB表T实验 (10)15.2. 备库实验 (11)15.3. 主库CDB表pdb实验 (11)15.4. 主库PDB表T实验 (13)16. 附录 (15)16.1. .bash_profile(Oracle用户:orcl-p.) (15)16.2. (两节点)/etc/hosts (16)16.3. (两节点)tnsname.ora (16)16.4. (两节点)listener.ora (17)16.5. initorcl.ora(主库) (17)16.6. initorcl.ora(备库) (18)1.环境说明测试环境:redhat 6.5 64bit oracle 12C 12.2.0.1.0 - 64bit说明:(1)oracle12的Dataguard是在CDB级别进行,所以所有的配置都是从cdb角度出发。
- 1、下载文档前请自行甄别文档内容的完整性,平台不提供额外的编辑、内容补充、找答案等附加服务。
- 2、"仅部分预览"的文档,不可在线预览部分如存在完整性等问题,可反馈申请退款(可完整预览的文档不适用该条件!)。
- 3、如文档侵犯您的权益,请联系客服反馈,我们会尽快为您处理(人工客服工作时间:9:00-18:30)。
Oracle12c客户端软件在主机windows10上的安装与卸载安装部分
打开客户端软件安装文件夹
图40 客户端安装文件夹图
右键setup,以管理员模式运行。
图41 选择安装类型图
选择管理员安装类型,点击下一步。
图42 选择产品语言配置图默认设置,点击下一步。
图43 主目录用户选择配置图
选择创建新Windows用户,用户名输入leilei,口令输入oracle。
图44 指定安装位置配置图默认设置,点击下一步。
图45 概要信息图
直接点击安装,耐心等待。
图46 客户端安装成功图
卸载部分
打开客户端的oracle安装根目录,选择deinstall.bat文件,右键以管理员模式启动。
图47 客户端oracle数据库根目录图
输入汉字是,回车。
图48 客户端命令行卸载图
卸载完成后,命令行会自动关闭。
三、Oracle相关服务的查看与启动
打开虚拟机上的服务器管理器,选择所有服务器,在服务中输入oracle。
图49 oracle服务查看图
逐个点击oracle服务,右键选择重新启动服务,变成以下状态。
图48 服务状态显示图
四、通过网络配置助手配置远程数据库的本地网络服务名
打开客户端上的net Configuration Assistant网络配置助手。
图49(a)网络配置助手图
选择本地网络服务名配置。
图49(b)网络配置助手图
选择添加,点击下一步。
图49(c)网络配置助手图
S输入服务名,即全局数据库名,由于oracle安装时仅默认创建了一个orcl数据库,填写orcl,点击下一步。
图49(d)网络配置助手图
选择TCP协议,点击下一步。
图49(e)网络配置助手图
主机名输入虚拟机服务器的IP地址,使用默认端口号,点击下一步。
图49(f)网络配置助手图
选择是,进行测试。
图49(g)网络配置助手图
提示用户身份检索失败,点击更改登录,用户名system保持不变,口令改为oracle
图49(h)网络配置助手图
图49(i)网络配置助手图
显示测试成功,点击下一步。
图49(j)网络配置助手图
设置网络服务名,这里可以随便自定义,点击下一步。
图49(k)网络配置助手图
选择是,点击完成。
图50 net Manager示意图
打开客户端的net Manager软件,展开本地,展开服务命名,可以看到刚刚建立的数据库服务。
五、连接远程数据库的若干种方法总结
使用客户端的SQL Developer连接
图51 SQL Developer建立连接图
图52 数据库详情图
使用sqlplus连接
图53 sqlplus登录图
六、创建数据库查看
打开虚拟机,运行Oracle Administration Assistant程序,查看创建的数据库。
图54 查看创建数据库图
七、安装过程中BUG解决方法总结
问题描述:
客户端使用网络配置助手远程连接数据库服务,显示身份证明检索失败
图55 问题截图
解决方案:
打开虚拟机上oracle数据库的根目录,用记事本打开sqlnet.ora文件。
图56 sqlnet文件路径图
将该文件中的倒数第二行括号中的NTS修改为NONE,NTS原意为使用本地操作系统登录,修改为NONE后,可以使用口令登录,但是不能将该行注释。
图57 sqlnet内容图
图58 sqlnet修改图。