LeicaiCB70说明书
莱卡 DM2700 M 光学显微镜使用手册说明书

From Eye to InsightLeica DM2700 MThe reliable and convenient upright materials microscope with bright universal LED illumination.3 LEIca DM2700 M – ThE rELIabLE, convEnIEnT uprIghT MaTErIaLs MIcroscopESimple and Reliable:The Leica DM2700 MSee materials in the best lightExamine materials in the best light. The universal white light (4500 K) LED illumination in combination with renowned high quality Leica optics provide the ideal inspection tool for all of your quality assessments. The Leica DM2700 M demonstrates how simple and reliable microscopy can be, while at the same time, helps to improve your workflow so you can concentrate on the task at hand.›Brilliance›Reliability›Flexibility›Easy Documentation4LeD illumination, Daylight at a Touch The universal microscope illumination for a wide range of industrial applicationsA powerful light source for Brightfield, Darkfield, Differential Contrast, and Polarized Images on the right: Universal LED illumination.Light applications:› white light, constant color temperature› true color imaging› entirely adjustment-free› and lasts 20 yearsEnter the future of microscopy.5LEIca DM2700 M – ThE rELIabLE, convEnIEnT uprIghT MaTErIaLs MIcroscopE image Brilliance You can count OnTop of the line opticsA microscope is as good as its optics. This statement is still true for in today's digital Image on the right: n PLAn EPI series of objectives (plan achromat)world. The brand Leica Microsystems has always represented the highest standards in optical performance. Leica objectives are innovative, cost-effective, and always pro-vide high-contrast, pin sharp images as seen through the eyepieces and captured with digital cameras. They combine brilliance and sharp contrast with high resolution and optimized image fields. Whatever your work demands Leica Microsystems offers anaffordable solution.6Reliability You can count OnWe don’t make a science out of microscope operationUncomplicated AnD easy to understand functionality is built into the design of theLeica DM2700 M. Concentrate on your work, not on microscope adjustments.Ferrit C60, etched, undereutectoid, ferrit-perlite grain structure. LED brightfield, 500xBEnEFITSThe combination of Leica's color codedobjectives and the aperture diaphragmresults in the Color Coded DiaphragmAssistant (CCDA). With it, the basicsetting of resolution, contrast, and depth of field is simple and straightforward.The built-in focus stop, the heightadjustable focus knobs, as well as the three-gear focus mechanism for coarse, fine, and ultra-fine focusing make the Leica DM2700 M convenient and reliable for daily use. It can dramatically speed up your work processes while minimizingoperating errors. Using a manual microscope has never been easier.Accept no compromises when it comes to operation, performance, and features. The Leica DM2700 M is sturdy, durable, and ergonomically designed for ease ofuse and user comfort.7LEIca DM2700 M– ThE rELIabLE, convEnIEnT uprIghT MaTErIaLs MIcroscopE Flexibility Means Saving MoneyVersatility for all samplesThe Leica DM2700 M is a flexible upright microscope system for Brightfield (BF),Darkfield (DF), DIfferential Interference Contrast (DIC), Qualitative Polarization (PoL), and Fluorescence (FLUo) applications. In addition to all incident light applications, theLeica DM2700 M can also be equipped with transmitted light.Image on the right: Leica DM2700 M with Ergo Tube, upright/non-reversed image, 100%-0%, 50%-50%, 0%-100% beamsplitter.oBJECTIVE TURRETS There are three objective turrets tochoose from: The BF/DF M32 nosepieceholds up to five objectives, while the (BF/FLUo) can accommodate six or seven objectives.FLExIBLE In EVERY APPLICATIon Specimens with a size of up to 100 × 100 mm – such as foils, wafers or PCBs – and a thickness of up to 80 mm, such asmachined components, can be examined using the comprehensive stage program.KEEP TRACK oF YoUR SAMPLESThe Macro objective enables you to see almost 40 mm of the sample at a glance. The ideal addition for fast orientation and overview documentation.8Documentation SimplifiedDocumenting, saving, and retrieving imagesLeica digital cameras, optimized for reflected light applications, in combinationwith Leica Application Suite (LAS) image acquisition and archiving software, ensureconvenient and efficient documentation of your results.Upper image: Coated and annealed brass sample in LED brightfield-oblique contrast, 500x,Lower image: Plastic composite material in LED brightfield-oblique contrast, 200x. 3D-like image due to oblique illumination.QUICK AnD PRECISE AnALYSIS oF MATERIALS DATALeica Steel Expert, Phase & grain Expert, and Cleanliness Expert are dedicatedsoftware packages that providehigh-quality solutions, particularly in environments that require high samplethroughput and automated operation. With a modular structure, the functional-ity ranges from simple, interactive to automated photogrammetry; for example, characterizing metal surfaces or particle analysis.9 Chapter – SubChapter10(Dimensions in mm)Dimensions Leica DM2700 M331.4410505.5302.8365.8Undereutectoid, ferrit-perlite grain structure LED brightfield-oblique contrast, n Plan 100x Undereutectoid, ferrit-perlite grain structure LED brightfield contrast, n Plan 100xLEIca DM2700 M – ThE rELIabLE, convEnIEnT uprIghT MaTErIaLs MIcroscopE11 SpecificationsLeica DM2700 Morder no.: English 11914788 ∙ Copyright © by Leica Microsystems CMS gmbh,Wetzlar, germany, 2016. Subject to modifications. LEICA and the Leica Logo are registered trademarks of Leica Microsystems IR gmbh.Leica Microsystems – an international company with a strong network of worldwide customer services:Leica Microsystems operates globally in three divisions, where we rank with the market leaders.LIFE SCIEnCE DIVISIonThe Leica Microsystems Life Science Division supports the imaging needs of the scientific community with advanced innovation and technical expertise for the visualization, measurement, and analysis of microstructures. our strong focus on understanding scientific applications puts Leica Microsystems’ customers at the leading edge of science.InDUSTRY DIVISIonThe Leica Microsystems Industry Division’s focus is to supportc ustomers’ pursuit of the highest quality end result. Leica Microsystems provide the best and most innovative imaging systems to see, measure, and analyze the microstructures in routine and research industrial applications, materials science, quality control, forensic science inves-tigation, and educational applications.MEDICAL DIVISIonThe Leica Microsystems Medical Division’s focus is to partner with and support surgeons and their care of patients with the highest-quality, most innovative surgical microscope technology today and into the future.The statement by Ernst Leitz in 1907, “With the User, For the User,” describes the fruitful collaboration with end users and driving force of innovation at Leica Microsystems. We have developed five brand values to live up to this tradition: Pioneering, high-end Quality, Team Spirit, Dedication to Science, and Continuous Improvement. For us, living up to these values means: Living up to Life .active worldwide Tel. Fax australia ∙ north ryde+61 2 8870 3500 2 9878 1055austria ∙ vienna +43 1 486 80 50 0 1 486 80 50 30belgium ∙ Diegem +32 2 790 98 50 2 790 98 68canada ∙ concord/ontario +1 800 248 0123 847 405 0164Denmark ∙ ballerup +45 4454 0101 4454 0111France ∙ nanterre cedex+33 811 000 664 1 56 05 23 23germany ∙ Wetzlar +49 64 41 29 40 00 64 41 29 41 55Italy ∙ Milan +39 02 574 861 02 574 03392Japan ∙ Tokyo +81 3 5421 2800 3 5421 2896Korea ∙ seoul+82 2 514 65 43 2 514 65 48netherlands ∙ rijswijk+31 70 4132 100 70 4132 109people’s rep. of china ∙ hong Kong +852 2564 6699 2564 4163∙ shanghai +86 21 6387 6606 21 6387 6698portugal ∙ Lisbon +351 21 388 9112 21 385 4668singapore +65 6779 7823 6773 0628spain ∙ barcelona +34 93 494 95 30 93 494 95 32sweden ∙ Kista+46 8 625 45 45 8 625 45 10switzerland ∙ heerbrugg +41 71 726 34 34 71 726 34 44united Kingdom ∙ Milton Keynes +44 800 298 2344 1908 246312usa ∙ buffalo grove/lllinois+1800 248 0123847 405 0164。
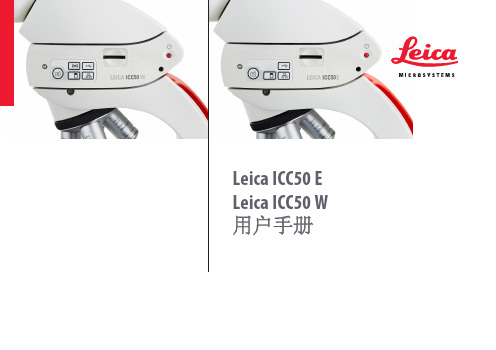
Leica ICC50 E Leica ICC50 W 用户手册说明书
Leica ICC50 E Leica ICC50 W 用户手册目录常规说明4所使用的符号5安全说明6 Regulatory Compliance Information (Regarding Leica ICC50 W Only) 9保养、维护、联系人12介绍15基本特点16 Leica ICC50 E 或 Leica ICC50 W:概述17拆箱19使用之前的准备工作21连接24 USB模式—使用计算机摄取和调整图像25 SD模式—不使用计算机或无线设备的情况下摄取图像27在SD模式下调整设置29 WiFi模式—使用无线设备摄取和调整图像(仅限Leica ICC50 W)30以太网模式—使用网络摄取和调整图像31选配遥控器33借助选配遥控器查看图像和视频34调出摄像头菜单35 COLOR (自动白平衡) 36 COLOR (手动白平衡) 37 EXPOSURE (曝光) 38 RESOLUTION (分辨率) 39 SETUP CAMERA (摄像头设置) 40 SETUP USER (设置用户) 41 SETUP ETHERNET (以太网设置) 42 SETUP WiFi (WiFi设置) (仅限Leica ICC50 W) (续) 43摄像头与遥控器配对44准备!设置!开始!46规格48规格 (仅限Leica ICC50 W)49证书 (仅限Leica ICC50 W)50常规说明常规说明Leica ICC50 E 或 Leica ICC50 W摄像头随附包含所有相关用户手册的交互式CD光盘。
请将其放在安全且便于取用的地方。
也可以从我们的网站下载和打印用户手册及更新。
同时,还可在您的 iOS 或Android应用商店中搜索适用于移动设备的App。
在安装、操作或使用仪器之前,请先阅读上述用户手册。
尤其是要仔细阅读所有安全说明。
为了使仪器保持其原始状态,并确保操作安全,用户必须遵守上述用户手册中的说明和警告。
徕卡操作说明

Tca1800/2003全站仪简明操作ON/OFF 开机/关机屏幕显示——主菜单(应用程序)功能键:F1 EXTRA 外部工具● 1 GeoCOM On-Line mode 打开GeoCOM通信● 2 Format memory card 格式化PC卡● 3 Remote control mode on/off 遥控控制开关,没有遥控装置设为OFF F2 CAL 仪器检校●F1 l t 补偿器纵横向误差检校●F2 I 指标差检校●F3 c,a 照准差,横轴倾斜误差检校●F4 i,c,a指标差,照准差,横轴倾斜误差检校●F5 ATR A TR自动目标识别检校F3 CONF 仪器配置● 1 System date and time 设置系统日期和时间● 2 define fumctionality 定义功能项(最好全部选择YES)● 3 GSI communication parm. GSI通信参数(波特率,校验,数据位等)● 4 FeoCOM communication parm.GeoCOM通信参数(同GSI通信参数)● 5 instrument identification 仪器名称● 6 autoexec-application 开机自动启动的程序●7 system protection 系统密码设置●8 user template 用户模板(单位,显示和存贮格式,模板选择等)F4 DATA 数据的输入和浏览●F1 INPUT 输入数据●F5 SEARC 搜索数据Shift+F5 DEL 删除数据F5 SETUP 测站设置F4 QSET 用后视已知点设置测站F5 SIN 水平角Hz0(方位角)设置测站F6 LIST 列表选择F6 MEAS 测量F1 ALL 测量并记录F2 DIST 测量F3 REC 记录F4 TARGT 目标点信息(大气及曲率改正/偏心测量/棱镜选择)F5 Hz0 设置水平角固定功能键.aF…功能键快速调整常用功能er template & files 选择用户模板和文件------user templ.: 用户模板选择------rec.device:记录装置选择memory card (PC卡)和RS232接口------meas.file :选择测量文件名------data file :选择数据文件名2.EDM measuring program 距离测量方式设置(标准/精测/快速/跟踪/平均数)F1 STAND 标准测距1+1ppm 3sF2 PRECT 精测距离1+1ppm 3sF3 FAST 快速测距3+2ppm 1.5sF4 TRK 跟踪测距5+2ppm 0.3sF5 AVERG 平均测距3spensator/Hz-corrections 补偿器开关/水平角改正(全设为ON)Instr.setup 选择No check或stability checkNo check补偿器在工作范围内不作任何检查stability check稳定性检查,检查补偿器是否工作,并且达到仪器规定的精度才允许记录测量值Compensator on/off 补偿器开关Hz-corr 水平角改正开关4.EDM test<sigual/frequency>测距回光信号及频率测试F3 测量频率和回光信号强度显示状态的转换开关F5 结束并返回原对话框F6 回光信号音响开关5.Beep/Hz-sector按键声音和水平角响铃设置---keystr.Beep 按键声响(on关low小loud大)---sector beep ON/OFF 角度音响开关---angel 需要响铃的角度值6.V-Angel display 垂直角显示方式(天顶距/高角度/坡度角)---zenith angel 天顶距水平方向为90度---elev.Angle +/- 高度角水平方向为0度(仰角为正)--- elev.Angle % 坡度角水平方向为0,向上为正坡度(3%)7.Power off、sleep 关机方式及休眠设置---sleep after…休眠---auto-off after 自动关机---remains on 全站仪一直打开8.Accessories 使用附加目镜和物镜时设置目镜与物镜的起止角,因为马达驱动仪器的转动将受到限制。
路博LB-70C 自动烟尘烟气检测仪 使用说明书

LB-70C自动烟尘烟气检测仪使用说明书安装、使用本产品前,请详细阅读本使用说明书安装、使用本产品前,请详细阅读本使用说明书感谢您选用LB-70C自动烟尘烟气测试仪。
在使用仪器前,请您仔细阅读本使用说明书,从中可以获得有关仪器性能、使用方法以及维护等方面的信息,这会有助于您更好的使用仪器。
如果您有好的建议或需要我们提供更进一步的服务,请按以下方式与我们联系:仪表一部400-6086-707仪表二部400-9929-113室内环保400-6316-707网址:厂址:山东青岛市城阳区金陵工业园锦宏西路与路博路交接口路博1号门。
目录一、概述 (4)二、主要特点 (4)三、工作条件 (5)四、主要技术指标 (5)五、工作原理 (6)六、整机结构 (6)七、使用方法 (7)八、注意事项 (28)九、保养和维护 (28)十、公式 (29)十一、参数符号及单位 (30)十二、简单故障及排障方法 (30)一、概述LB-70C自动烟尘烟气测试仪是执行行业标准HJT48-1999《烟尘采样器技术条件》、依据国家检定规程JJG680-2007《烟尘采样器检定规程》、JJG968-2002《烟气分析仪检定规程》,吸取国内外同类仪器之优点,由我公司研发人员精心研制的新一代智能型烟尘烟气测试仪,该机技术性能指标符合国家环保局颁布的烟尘烟气采样仪的有关规定,实现烟尘、烟气同机采样及检测,大大缩短现场工作时间。
适用于各种锅炉、工业炉窑的烟尘排放浓度、折算浓度和排放总量的测定和各种锅炉、工业炉窑的SO2、NO、NO2、CO、CO2、H2S等有害气体的排放浓度、折算浓度和排放总量的测定及各类脱硫设备效率的测定。
二、主要特点1.自动跟踪烟气流速等速采集烟尘主机内集成差压、微压传感器、微处理器、直流滑片泵,基于皮托管平行法等速采样原理,自动测量跟踪烟气流速等速采集烟尘。
2.测量干、湿球温度,计算含湿量主机内集成温度传感器、压力传感器。
徕卡M8说明书
LEICA M8Anleitung/Instructions1.2 1.11.161.141.13a 1.13b1.13 1.13c1.14a1.121.211.21a 1.21b 1.15 1.21.31.4 1.5 1.71.6 1.81.91.20a1.201.191.181.171.21c 1.281.29 1.301.311.321.331.271.261.251.241.231.221.101.341.91.371.361.351.40 1.381.391.411.41a1.42 1.431.461.451.44Foreword Dear customerLeica would like to thank you for purchasing theLEICA M8 and congratulate you on your choice. Withthis unique digital view- and rangefinder camera, youhave made an excellent choice.We wish you a great deal of pleasure and successusing your new LEICA M8.In order to make best use of all the opportunitiesoffered by this high performance camera, we recom-mend that you first read these instructions.This manual has been printed on 100% chlorine free bleachedpaper. The complex manufacturing process eases the burdenon the water system and thus helps to protect our environment. 70/ ForewordThis is a Class B product based on the standard of the Voluntary Control Council for Interference from Information Technology Equipment (VCCI). If this is used near a radio or television receiver in a domestic environment, it may cause radio interference. Install and use the equipment according to the instruction manual.FCC Note: (U.S. only)This equipment has been tested and found to complywith the limits for a Class B digital device, pursuant toPart 15 of the FCC Rules. These limits are designed toprovide reasonable protection against harmful interfer-ence in a residential installation. This equipment gen-erates, uses, and can radiate radio frequency energyand, if not installed and used in accordance with theinstructions, may cause harmful interference to radiocommunications. However, there is no guarantee thatinterference will not occur in a particular installation.If this equipment does cause harmful interference toradio or television reception, which can be determinedby turning the equipment off and on, the user isencouraged to try to correct the interference by oneor more of the following measures:• Reorient or relocate the receiving antenna.• Increase the separation between the equipment andreceiver.• Connect the equipment into an outlet on a circuitdifferent from that to which the receiver is connected.• Consult the dealer or an experienced radio/TVtechnician for help.FCC Caution:To assure continued compliance, follow the attachedinstallation instructions and use only shielded inter-face cables with ferrite core when connecting to com-puter or peripheral devices.Any changes or modifications not expressly approvedby the party responsible for compliance could void theuser’s authority to operate this equipment.Trade Name:LEICAModel No.:LEICA M8Responsible party/Support contact:Leica Camera Inc.156 Ludlow AvenueNorthvale, New Jersey 07647Tel.:+12017679608Fax:+12017678666e-mail: olesin@This device complies with Part 15 of the FCC Rules.Operation is subject to the following two conditions:(1) This device may not cause harmful interference,and (2) this device must accept any interferencereceived, including interference that may cause unde-sired operation.This Class B digital apparatus complies with CanadianICES-003Leica Camera Inc.1 Pearl Court, Unit AAllendale, New Jersey 07401Tel.: +1 201 995 0051 232Fax: +1 201 995 1684repair@Safety instructions / 71Table of ContentsForeword . . . . . . . . . . . . . . . . . . . . . . . . . . . . . . . . . . .70 Warning messages . . . . . . . . . . . . . . . . . . . . . . . . . . . .74 Legal notes . . . . . . . . . . . . . . . . . . . . . . . . . . . . . . . . . .74 Disposal of electrical and electronic equipment . . . . . .74 Scope of delivery . . . . . . . . . . . . . . . . . . . . . . . . . . . . .75 Designation of parts . . . . . . . . . . . . . . . . . . . . . . . . . . .76 The displaysIn the viewfinder . . . . . . . . . . . . . . . . . . . . . . . . . . .78 In the top panel LCD . . . . . . . . . . . . . . . . . . . . . . . .78 In the monitor . . . . . . . . . . . . . . . . . . . . . . . . . . . . .79 Menu itemsIn the main menu . . . . . . . . . . . . . . . . . . . . . . . . . . .80 In the picture parameters menu . . . . . . . . . . . . . . .80 Quick guidePresets . . . . . . . . . . . . . . . . . . . . . . . . . . . . . . . . . . .81 Taking photographs . . . . . . . . . . . . . . . . . . . . . . . . .81 Viewing pictures . . . . . . . . . . . . . . . . . . . . . . . . . . . .81 Enlarging pictures on the monitor . . . . . . . . . . . . . .81 Deleting pictures . . . . . . . . . . . . . . . . . . . . . . . . . . .81 Comprehensive instructionsPreparations . . . . . . . . . . . . . . . . . . . . . . . . . . . . . . . . .82 Attaching the carrying strap . . . . . . . . . . . . . . . . .82 Charging the battery . . . . . . . . . . . . . . . . . . . . . . .82 Inserting the battery into the camera/removing the battery from the camera . . . . . . . . .84 Charge level displays . . . . . . . . . . . . . . . . . . . . . . .84 Inserting and removing the memory card . . . . . . .85The most important settings/controlsLeica M lenses . . . . . . . . . . . . . . . . . . . . . . . . . . . .86Turning the lens type detection on/off . . . . . . . .86The extension factor . . . . . . . . . . . . . . . . . . . . . . .87Attaching a lens . . . . . . . . . . . . . . . . . . . . . . . . . .87Removing a lens . . . . . . . . . . . . . . . . . . . . . . . . . .87Switching the camera on and off/the main switch . . . . . . . . . . . . . . . . . . . . . . . . . . .88Selecting picture taking and review modes . . . . . .88Review for unlimited time . . . . . . . . . . . . . . . . . .88Automatic review of last picture . . . . . . . . . . . . .89The shutter release button . . . . . . . . . . . . . . . . . . .89Serial exposures . . . . . . . . . . . . . . . . . . . . . . . . .90The shutter speed dial . . . . . . . . . . . . . . . . . . . . . .91The monitor . . . . . . . . . . . . . . . . . . . . . . . . . . . . . .92Setting the brightness . . . . . . . . . . . . . . . . . . . . .92Displaying picture data . . . . . . . . . . . . . . . . . . . .92The histogram . . . . . . . . . . . . . . . . . . . . . . . . . . .92Menu control . . . . . . . . . . . . . . . . . . . . . . . . . . . . .93PresetsBasics settings for the camera . . . . . . . . . . . . . . .95Menu language . . . . . . . . . . . . . . . . . . . . . . . . . .95Date and time . . . . . . . . . . . . . . . . . . . . . . .95/96Automatic power off . . . . . . . . . . . . . . . . . . . . .96Button acknowledgement and signal tones . . . .96Basic picture settingsResolution . . . . . . . . . . . . . . . . . . . . . . . . . . . . .97Compression rate/file format . . . . . . . . . . . . . .97White balance . . . . . . . . . . . . . . . . . . . . . . . . . .98For automatic or fixed settings . . . . . . . . . . . .98For direct setting of color temperature . . . . . .99For manual setting by metering . . . . . . . . . . . .99ISO sensitivity . . . . . . . . . . . . . . . . . . . . . . . . .100Image properties (contrast, sharpness,color saturation) . . . . . . . . . . . . . . . . . . . . . . . .100Working color space . . . . . . . . . . . . . . . . . . . .100Holding the camera correctly . . . . . . . . . . . . . . . . . . .100The bright-line frame view- and rangefinder . . . . . . . .102The frame selector . . . . . . . . . . . . . . . . . . . . . . . . .102Distance metering /focusing . . . . . . . . . . . . . . . . . . .104Superimposed image method (double image) . . . .104Split image method . . . . . . . . . . . . . . . . . . . . . . . .104Exposure metering . . . . . . . . . . . . . . . . . . . . . . . . . . .105Turning the exposure meter on/off . . . . . . . . . . .105Exposure modes . . . . . . . . . . . . . . . . . . . . . . . . .106Aperture priority . . . . . . . . . . . . . . . . . . . . . . . .106Metering memory lock . . . . . . . . . . . . . . . . . . .106Exposure compensation . . . . . . . . . . . . . . . . . .107Manual exposure setting . . . . . . . . . . . . . . . . . .107The B setting . . . . . . . . . . . . . . . . . . . . . . . . . . .108Exposure meter metering range . . . . . . . . . . . . . .108Working below the metering range . . . . . . . . . .108Metering diagram . . . . . . . . . . . . . . . . . . .108/10972/ Table of ContentsGeneral information on flash exposuremetering and control . . . . . . . . . . . . . . . . . . . . . . .110 Compatible flash units . . . . . . . . . . . . . . . . . . . . .110 Attaching the flash unit . . . . . . . . . . . . . . . . . . . . .111 Flash mode . . . . . . . . . . . . . . . . . . . . . . . . . . . . . .111 The settings for camera-controlled automaticflash mode . . . . . . . . . . . . . . . . . . . . . . . . . . . . .112 The flash exposure control displays in the viewfinder with dedicated flash units . . . . . . . . .112 In automatic flash mode . . . . . . . . . . . . . . . . . .112 When the flash unit is set to cameracontrol (A) or manual mode (M) . . . . . . . . . . . .112 Selecting the sync speed/the sync speed range . .119 Selecting the firing moment . . . . . . . . . . . . . . . . .119 Additional functionsUser/application specific profiles . . . . . . . . . . . .114 Resetting all custom settings . . . . . . . . . . . . . . . .115 Review mode . . . . . . . . . . . . . . . . . . . . . . . . . . . . .115 Viewing other pictures/“Scrolling” inthe memory . . . . . . . . . . . . . . . . . . . . . . . . . . . . .115 Enlarging/selecting the section/simultaneous viewing of several reduced pictures . . . . . . . . . . .116 Deleting pictures . . . . . . . . . . . . . . . . . . . . . . . . .117 Protecting pictures/Clearing delete protection . .118Additional functionsChanging the picture numbering . . . . . . . . . . . . .120Formatting the memory card . . . . . . . . . . . . . . . .120Taking photographs with the self timer . . . . . . . .120Transferring data to a computer . . . . . . . . . . . . . . . . .121with Windows® XP . . . . . . . . . . . . . . . . . . . . . . .121with Mac® OS X . . . . . . . . . . . . . . . . . . . . . . . . .121with card reading units . . . . . . . . . . . . . . . . . . . .121Data structure on the memory card . . . . . . . . .122Installation of supplied software . . . . . . . . . . . . . . . . .122Working with DNG raw data . . . . . . . . . . . . . . . . . . . . .123Computer remote control of the camera . . . . . . . . . . .123MiscellaneousSystem accessories for the LEICA M8 . . . . . . .124Exchangeable lenses . . . . . . . . . . . . . . . . . . . .124Filters . . . . . . . . . . . . . . . . . . . . . . . . . . . . . . .124Universal Wideangle Viewfinder M . . . . . . . . .124Viewfinder Magnifier M 1.25x . . . . . . . . . . . . . .124Handgrip M8 . . . . . . . . . . . . . . . . . . . . . . . . . .124Correction lenses . . . . . . . . . . . . . . . . . . . . . .124Cases . . . . . . . . . . . . . . . . . . . . . . . . . . . . . . .124Spare parts . . . . . . . . . . . . . . . . . . . . . . . . . . . .124Precautions and care instructionsGeneral precautions . . . . . . . . . . . . . . . . . . . .125LCDs . . . . . . . . . . . . . . . . . . . . . . . . . . . . . . . .125Condensation . . . . . . . . . . . . . . . . . . . . . . . . .125Care instructions . . . . . . . . . . . . . . . . . . . . . . .126For the camera . . . . . . . . . . . . . . . . . . . . . . . .126For lenses . . . . . . . . . . . . . . . . . . . . . . . . . . . .126For the battery . . . . . . . . . . . . . . . . . . . . . . . .127For the charger . . . . . . . . . . . . . . . . . . . . . . . .127For memory cards . . . . . . . . . . . . . . . . . . . . . .127Cleaning the sensor . . . . . . . . . . . . . . . . . . . .128Storage . . . . . . . . . . . . . . . . . . . . . . . . . . . . . .129Warning messages . . . . . . . . . . . . . . . . . . . . . . . . . . .130Malfunctions and their resolution . . . . . . . . . . . . . . . .131Index . . . . . . . . . . . . . . . . . . . . . . . . . . . . . . . . . . . . . .132Technical data and descriptions . . . . . . . . . . . . . . . . .134Leica Academy . . . . . . . . . . . . . . . . . . . . . . . . . . . . . .137Leica on the Internet . . . . . . . . . . . . . . . . . . . . . . . . . .137Leica information service . . . . . . . . . . . . . . . . . . . . . .137Leica Customer Service . . . . . . . . . . . . . . . . . . . . . . .137Table of Contents / 73Warning messages• You should use exclusively the recommended accessories to prevent faults, short circuits or electric shock.• Do not expose the unit to moisture or rain.• Do not attempt to remove parts of the body (covers); specialist repairs can be carried out only at authorized service centers.Legal notes• Please ensure that you observe copyright laws.The recording and publication of pre-recordedmedia such as tapes, CDs, or other published orbroadcast material may contravene copyright laws.• This also applies to all of the software supplied.• The SD logo is a registered trademark.• Other names, company or product names referredto in this manual are trademarks or registeredtrademarks of the relevant companies.Disposal of electric andelectronic equipment(Applicable in the EU, and other European countrieswith segregated waste collection systems)This device contains electricaland/or electronic componentsand should therefore not be dis-posed of in general householdwaste! Instead it should be dis-posed of at a recycling collectionpoint provided by the local author-ity. This costs you nothing.If the device itself contains exchangeable (recharge-able) batteries, these must be removed first and, ifnecessary, also be disposed of according to the rele-vant regulations (see also the respective comments inthis unit’s instructions).Further information on this point is available at yourlocal administration, your local waste collection com-pany, or in the store where you purchased this device.74/ Warning messagesScope of delivery Before using your LEICA M8 for the first time, pleasecheck that the accessories supplied are complete.A.BatteryB.ChargerB connecting leadD.Carrying strapE.CD-ROM with instructional PDF, remote controlsoftware LEICA DIGITAL CAPTURE 1.0F.CD-ROM with Capture One LE from Phase OneScope of delivery / 75Designation of parts Front view1.1Lens release button1.2Eyelets for carrying strap1.3Distance meter viewing window1.4Brightness sensor11.5Bright line illumination window1.6Viewfinder window with reflectors for bettervisibility of the viewfinder displays in very brightconditions1.7Self timer LED1.8Frame selector1.9Bottom cover retaining clipFront view of camera bayonet /rear viewof lens bayonet1.10Sensor for lens identification code1.11 6 bit lens identification code Top view1.12LCD1.13Fixed ring witha. Index for distance settingb. Depth of focus scale andc. Red index button for changing lenses1.14Distance setting ring witha. Finger grip1.15Aperture setting ring1.16White index point for aperture setting1.17Lens hood1.18Shutter speed dial with- A detent position for automatic control 1.19Main switch with detent positions for– OFF(camera switched off)– S(single pictures)(series exposures)(self timer)1.20Shutter release button witha. Thread for cable release1.21Flash (hot) shoe witha. Central (firing) andb. Control contacts, andc. Hole for locking pin1Leica M lenses with viewfinder attachments cover the brightnesssensor. Information about the use of these and other lenses canbe found in the sections “The displays/In the viewfinder”, p. 78,and “Leica M lenses”, p. 86.Illustrations inside front and rear covers76/ Designation of partsRear view1.22SET button for calling up the picture parametermenus/for calling up the sub-menus within themenus/for confirming settings/functionsselected in the sub-menus1.23INFO button for displaying image data whenreviewing pictures1.24PROTECT button for selecting delete protectionfunction1.25DELETE button for selecting delete function 1.26USB port cover1.27PLAY button for switching on (continuous)review mode/for return to full-size picture display 1.28Viewfinder eyepiece1.29MENU button for entering and exiting the mainmenu1.30Central setting ring for navigation in menus/setting the selected menu items/functions,scrolling in the memory and for enlarging/reducing the pictures viewed1.31Direction buttons for navigation within themenus/for setting the selected menu items/functions and for scrolling through the memory 1.32LED for indicating picture taking mode/recording data on to the card1.33Monitor View with USB port cover open1.34USB port (5-pin, for connecting to computers)Bottom view(with bottom cover in place)1.35Tripod thread A 1/4, DIN 4503 (1/4”).1.36Bottom cover1.37Locking toggle for bottom cover(with bottom cover removed)1.38Battery compartment1.39Battery locking catch1.40Memory card slotCharger1.41Charging bay for battery witha. Contacts1.42Green (POWER) LED to indicate mainsconnection1.43Yellow (CHARGE) LED to indicate charging1.442-pin socket for car charging cable1.45Unlocking slider for1.46Interchangeable mains plugs (Euro/GB/USA)Designation of parts / 7778/ The displays/In the viewfinderThe displays2.In the viewfinder2.1LEDS (L ight E mitting D iodes)(with automatic brightness control, adapts to the ambient brightness 1) for:2.1.1Four-digit seven-segment digital display withdots above and below Digital display:– Display of the automatically determined shut-ter speed for aperture priority mode, or for counting down exposure times longer than 1s– Warning that the metering or setting ranges are overshot or undershot using aperture priority mode– Information that the buffer memory is (temporarily) full Dot above:– Information (when lit) that metering memory lock is being used Dot below:– Information (flashing) that an exposure compensation is set2.1.2Two triangular and one circular LED:– Jointly used as light balance for manual exposure control– Warning of values below the metering range 2.1.3Flash symbol:– Flash readiness– Details of flash lighting before and after the picture 2.2Bright line frames for 24mm and 35mm (example)2.3Metering field for distance setting3.In the top panel LCD 3.1Number of pictures remaining 3.2Battery status1The automatic control is not available for Leica M lenses with viewfinder attachments, since they cover the brightness sensor 1.4 which supplies the information required for their operation. In such cases the displays always maintain a constant brightness.The displays/In the monitor / 794.In the monitor 4.1At normal review(image/s fill the entire monitor area)4.1.1Delete protection symbol (only if set)4.1.2Picture number/total number of availablepictures 4.1.3Enlargement level and/or position of sectionshownschematic, for enlarged view only)4.1.4Selected picture(for reduced viewing of 4 or 9 pictures only)4.2Reviewing with additional information(INFO ; reduced picture size)4.2.1Picture (if necessary with “Clipping” display 1)4.2.2.Histograma. Luminance (brightness)b. Red/green/blue(separate display of individual colors)4.2.3Delete protection symbol (only if set)4.2.4Date/time4.2.5Picture number/total number of availablepictures4.2.6Picture informationa.Exposure mode and shutter speedb.Focal length 2c.Sensitivityd.Exposure compensatione.Resolutionpression/file formatg.White balanceer profile numberj.Folder number/file namek.Size and position of section (only if in use)1see “The Histogram”, p. 922Only with the latest M lenses with 6-bit coding, or suitably converted lenses (see p. 86)4.1.14.2.3 4.2.4 4.2.54.1.21.3a b c k e f g i jdMenu items 5.1In the main menu5.1.1Lens Detection Lens type detection5.1.2Save User Profile User-specific profile (save)5.1.3Self timer Self timer delay time5.1.4Sharpening Sharpening of image5.1.5Color Saturation Color saturation of image5.1.6Contrast Image contrast5.1.7Monitor Brightness5.1.8Histogram Graphic to indicate distri-bution of brightness5.1.9Picture Numbering5.1.10Auto Review Automatic replay of lastpicture5.1.11Auto Power Off Automatic power off5.1.12Flash Sync Firing time of flash5.1.13Auto Slow Sync Shutter speed with flash5.1.14Color Management Working color space5.1.15Reset Reset all settings (to origi-nal factory settings)5.1.16Sensor Cleaning Shutter opening for clean-ing the sensor5.1.17Date5.1.18Time5.1.19Acoustic Signal Button acknowledgementtones5.1.20Language5.1.21Format Formatting the memorycard5.1.22Firmware Firmware version5.2In the picture parameters menu5.2.1ISO Sensitivity5.2.2Exp. comp.Exposure compensation 5.2.3White Balance5.2.4Compression Compression rate/fileformat5.2.5Resolution5.2.6User Profile User-specific profile(recall)80/ Menu itemsQuick guideYou will need the following items:• Camera• Battery (A)• Memory card (not supplied)• Battery charger (B)Presets1.Insert the battery (A) into the charger (see p. 83)2.Connect the charger (B) to the mains, to chargethe battery (see p. 83)3.Set the main switch (1.19) to OFF.4.Insert the charged battery into the camera (seep. 84).5.Insert a memory card (see p. 85).6.Set the main switch (1.19) to S.7.Select the desired language (see p. 95).8.Format the memory card (see p. 120).Notes:• This is required generally only if the card has not been factory-formatted• Formatting deletes all data on the memory card.9.Set the date and time (see p. 95/96).Taking photographs10.Attach the desired lens to the camera (see p. 87).11.With the viewfinder to the eye, set the focus usingthe distance setting ring on the lens (see p. 104).12.Press the shutter release button (1.20) as far asthe first pressure point to activate the cameraexposure metering.13.Set the exposure using the aperture setting ringon the lens (1.15) and/or the camera shutterspeed dial (1.18) (see p. 107)14.Press the shutter release button all the way downto take the picture.Viewing picturesFor automatic brief reviews of the last picture (withinpicture taking mode).The LEICA M8 is factory-set to this function - AutoReview. Various function options can be selected inthe main menu under this item (5.1.10) (see p. 89).For review without a time limit:1.Select review mode by pressing the PLAY button(1.27) (see p. 88).2.Press the left or right direction button (1.31) toview other pictures.Enlarging pictures in the monitorTurn the central setting ring (1.30) to the right (clock-wise) to enlarge the picture display (see p. 116).Deleting picturesPress the delete button (DELETE, 1.25) and folllowthe instructions in the monitor (1.33) (see p. 117).Quick guide / 81Comprehensive instructions PreparationsAttaching the carrying strapCharging the batteryThe LEICA M8 is powered by a Lithium ion battery (A).Attention:• Only the battery type specified and described inthis manual, and/or battery types specified anddescribed by Leica Camera AG, may be used in thiscamera.• This battery may only be used in the units for whichit is designed and may only be charged exactly asdescribed below.• Using this battery contrary to the instructions andusing non-specified battery types can result in anexplosion under certain circumstances.• Never throw batteries into a fire as this can causethem to explode!• The charger supplied should be used exclusively forcharging this battery type. Do not attempt to use itfor other purposes.• Ensure that the mains outlet used is freely accessi-ble.• The charger may not be opened. Repairs may onlybe carried out by authorized workshops.Notes:• The battery should be charged before the LEICA M8is used for the first time.• The battery must have a temperature of 0°-35°C/32°–95°F to be charged (otherwise the charger willnot switch on, or will switch off again).• Lithium ion batteries can be charged at any time,regardless of their current charge level. If a batteryis only partly discharged when charging starts, it ischarged to full capacity faster.• The batteries warm up during the charging process.This is normal and not a malfunction.• If the yellow CHARGE LED (1.43) flashes aftercharging has started, this indicates a charging fault.In this case, disconnect the charging unit from themains and remove the battery. Ensure that theabove temperature conditions are met and thenrestart the charging process. If the problem per-sists, please contact your dealer, the Leica office inyour country or Leica Camera AG.• A new battery only reaches its full capacity after ithas been fully charged and – by use in the camera –discharged 2 or 3 times. This discharge procedureshould be repeated every 25 cycles. To ensure amaximum service life of the battery, it should not beexposed to constant extremes of temperature (e.g.in a parked car in the summer or winter).• Even with optimum conditions of use, every batteryhas a limited service life! After several hundredcharging cycles, this becomes noticeable as theoperating times get significantly shorter. !12a2b34582/ Comprehensive instructions/Preparations• Defective batteries should be disposed of according to the respective instructions (see p. 74).• The replaceable battery provides power to a back-up battery which is built into the camera. This back-up battery maintains the reference data such as the date for up to 3 months. If this back-up batterybecomes discharged it must be recharged by insert-ing the replaceable main battery. Once the replace-able battery has been inserted, the full capacity of the back-up battery is recovered after about 60hours. This process does not require that the cam-era be switched on.1. Insert the plug appropriate to the mains supply into the charger. To do this the unlocking slider (1.45)must bea. pushed upwards (towards the plug),b. held there, andc. the mains plug (1.46) exchanged for the appro-priate sort2.Insert the mains plug into a socket.• The green LED (1.42) marked POWER lights up.3.Insert a battery with its contacts and the endmarked with an arrow facing downwards obliquely in the charging bay (1.41) of the charger.4.Then press it downwards until it lies flush in the charging bay.• When it is in the correct position the yellowCHARGE LED (1.43) will light up to confirm that charging is in progress. After completion of charging – about 3 hours – the yellow LED goes out.5.The charger should then be disconnected from the mains. However, there is no risk of overcharging.6.Remove the battery by pulling its upper faceupwards a little and then pulling it out of the charg-er bay.The following LED displays indicate that charging is defective or is not possible:If a fault cannot be resolved by eliminating the causes stated in the above table, you should contact your dealer, the Leica office in your country or Leica Cam-era AG.Comprehensive instructions/Preparations / 83Green /a. Mains connection –POWER LEDnot correct b. Inserted battery cannot be chargedYellow / Battery is not beinga. Battery outside tem-chargedperature range speci-CHARGE LED a. Battery not insertedfied abovecorrectlyb. Battery totally dis-b. Inserted battery charged, pulsed already fully charged precharging will be carried out firstLED not litLED flashing。
徕卡D LUX5中文使用说明书教材

LEICA D - LUX 5 Gebruiksaanwijzing / Brugervejledninger / Инструкция по эксплуатации / 使用说明/ 说明书Cover_Instructions_D-Lux 5_93358_rz.indd 1 22.07.10 13:40 110 亲爱的顾客,我们很高兴能借此机会感谢您购买此款LEICA D-LUX 5 数码相机。
请仔细阅读本使用说明书,并将其妥善保管以备日后参考。
请注意,您的数码相机的实际控件、元件、菜单项等看起来可能与本使用说明书的图例中所显示的略有不同。
请严格遵守版权法。
�6�1若非个人使用,复制先期录制的磁带、磁盘、其他出版物或播放材料都侵犯版权法。
即使是个人使用,也严禁复制某些特定的材料。
LEICA D-LUX5E-VQT3A34_sch.book 110 ページ2010年8月30日月曜日午后2时5分111 安全注意事项警告: 为了减少火灾、触电或产品损坏的危险,�6�1 请勿让本机遭受雨淋、受潮、滴上或溅上水,也不要将诸如花瓶等盛满液体的物品置于本机上。
�6�1 请仅使用推荐的附件。
�6�1 请勿卸下机身的前盖(或后盖);机身内没有用户可维修的部件。
需要维修时,请联系授权的维修人员。
电源插座应安装在设备附近并应易于触及。
LEICA D-LUX5E-VQT3A34_sch.book 111 ページ2010年8月30日月曜日午后2时5分112 ∫关于电池组�6�1请勿将电池加热或接触明火。
�6�1请勿将电池长时间放置在门窗紧闭受阳光直射的汽车内。
∫关于电池充电器�6�1连接着时,电池充电器处于待机状态。
只要电池充电器和电源插座相连,原电路就会始终“带电”。
注意如果电池放置错误,有发生爆炸的危险。
更换电池时,只能用与此相同的电池或制造商建议使用的同等类型的电池。
根据制造商的说明处理废旧电池。
警告电池有发生火灾、爆炸和灼伤的危险。
禄来双反2.8F3.5F图文使用教程说明书

禄来双反2.8F3.5F图⽂使⽤教程说明书太多客⼈问了禄来双反 F系使⽤其实很简单先说禄来操作,有⼀点得注意:上弦后,最好不要再调节快门速度。
意思就是上弦前得调好快门速度!(光圈调节随时都可以,这没什么要求)但我也只是说最好不要,有时忘了就忘了吧,偶尔⼀两次忘了就算了图⽂说明书/使⽤教程(按上图下字排列):1 笔尖指着的地⽅,按着往左扭。
2 如图,⽤⼿指扒起外侧的机关,然后就可以把后盖打开3 看这个机关,这样打开的。
否则⽆法放⼊⽚芯,注意:机器内部上下各有⼀个,因为得放两个⽚芯嘛......4 这点太重要了!!新卷放在机器下⾯,ok,然后拉出⽚头,⼀定得穿过图中那个⾦属杠,否则⽆法击发计数器5(图是从左到右,从上到下看)然后把⽚头穿过空⽚芯中间的缝⾥,卡好,然后拉动上弦,把卷上紧和上到位,所谓的到位就是”START“对准差不多图中的位置6 关上后盖(图就略过了,记得把后盖锁死)。
然后如图,此时计数器显⽰为”0“,然后顺时针转动上弦把⼿,转⼏圈,机器会⾃动停住的,此时计数器显⽰”1“,ok,准备好了,还差⼀步(下⾯说)可以拍了(别忘了,事先调节好快门速度.....)注意:上弦把⼿的起始位置是不固定的,别纠结.....7 把上弦把⼿,逆时针转动,转到图中上弦把⼿刚好可以放在那个孔⾥,这点很重要,禄来有防误碰机关,上弦把⼿不在这个孔的位置,⽆法击发快门(⽆法按下快门拍照的意思),这就是经常有客⼈问为什么按不下快门的原因8 ok 现在假设拍完第⼀张,我想拍第⼆张,如图操作,先顺时针转动上弦把⼿,转了⼤半圈后,会⾃动停住的,然后逆时针转回来,⼜是如第7个步骤⼀样,把上弦把⼿放到孔⾥的位置此时,相机⼜准备好了,可以拍第⼆张照⽚了9 现在来讲调节快门速度和光圈,其实很简单,如图,从上往下看,左边是光圈调节,右边是快门速度调节,完了.......(再啰嗦⼀下,上弦前调好快门速度,上弦后最好不要再调)10 讲别的按键,⼿指指着的是快门锁,另外2点钟⽅向的是闪光灯座(禄来是可以⽤⽆线引闪的,这问题有⼈问过)11 放⼤镜是这样捅出来的,完.....12 讲个很重要的,怎么双重曝光假设此时我拍完第⼀张,但没还上弦,ok,停住。
Leica SL2 快速入门指南说明书
LEICA SL2QUICK START GUIDEDownload the full scope instruction manual here:https:///Service-Support/Support/DownloadsPlease register via the following link if you would like to receive a printed copy of the full scope instruction manual:PART DESIGNATIONS1Shutter buttonTap:–Autofocusing–Activating exposure metering andexposure controlPress down fully:–Shutter release–Video recording Start/Stopin standby mode:–The camera is reactivated2Front setting wheelin the menu:–Scrolling through the menu screensin recording mode:–depending on exposure mode, confi(see table under “Wheel assignment”)in review mode:–Zooming in/out of the frame3FN button**in recording mode:–Photo: ISO–Video: ISO (Cine: Exposure Index)4FN button**in recording mode:–Mode change photo/videoin review mode:–Marking/rating a recording5Top display–Set operating mode–Recording data–Camera information6Accessory shoeRecommended fl ash units:Leica SF 40, SF 64 and SF 587MicrophoneSound is recorded in stereo8Speaker9FN button**in recording mode:–Photo: Magnifi cation–Video: Microphone Gain10FN button**in recording mode:–Setting the AF metering method 11Lens release button17Viewfi nder eyepiece18Eye sensorAvailable settings: LCD panel only/EVF only/ automatic switchover202122in recording mode:–depending on exposure mode, confi gurable2324252627LCD panel3.2” TFT LCD, 1080 x 720 pixels,2,332,800 dots, touch panelA 1⁄4 DIN 4503 (1⁄4”) with stainless steel in30Contact for multifunction hand grip0105060807 27262829091420152116221723182419251011121303020401Focal length 02Memory card used 03Remaining memory capacity 04Battery capacity 05Menu section PHOTO 06Menu sections VIDEO 07Light balance08Exposure compensation scale 09Exposure mode 10Exposure value 11Shutter speed 12ISO Sensitivity13Exposure compensation VALUE 14Picture mode (Picture sequence )15Autofocus mode16Autofocus metering method 17Autofocus settings 18Exposure metering method 19White balance mode20File format/compression level/resolution 21Formatting a memory card 22User profi le23Locking/unlocking the setting wheels 24Leica FOTOS 25Main menu26Microphone recording level 27Recording time 28Recording level 29Headphone volumeGESTURE CONTROLA BBSWITCHOVER: PHOTO/VIDEOFN button 4LEICA FOTOS APPExperience the new Leica FOTOS app. The Leica FOTOS app is a digital tool with plenty of excitingS/A/M/AM/The function assignment can be switched between the two wheels.▸Select Direct Access Settings in the main menu▸Select Wheel Assignment (AF Lenses) / Wheel Assignment (MF Lenses) in the submenu ▸Select the desired settingTECHNICAL DATACAMERADesignationLeica SL2Camera typeMirrorless full-frame system cameraType no.2998Order No.10 854 EU/JP/US (black), 10 856 ROW (black) Buffer memory4 GBDNG™: 78 recordingsJPG: > 100 recordingsStorage mediumUHS-II (recommended), UHS-I, SD/SDHC/SDXC memory cardMaterialFull-metal housing made of aluminum and magnesium, leatherette cover, splash-water protect-ed in compliance with IEC standard 60529 (protection type IP54).Lens mountLeica L bayonet with contact strip for communica-tion between lens and cameraOperating conditions-10 to +40°CDimensions (WxHxD)146 x 107 x 42 mmWeightapprox. 835 g (without battery)SENSORSensor sizeCMOS sensor, pixel pitch: 4.3 µmFullframe (47.3 MP): 8368 x 5584 pixelsAPS-C (20.2 MP): 5504 x 3664 pixelsPicture resolutionDNG™: 8368 x 5584 pixels (46.7 MP)JPG: 8368 x 5584 pixels (46.7 MP), 6000 x 4000 pixels (24 MP), 4272 x 2848 pixels (12 MP)VIEWFINDER/LCD PANELViewfinder (EVF)Resolution: 5,760,000 pixels (dots), 120 fps, magnification: 0.78x, aspect ratio: 4:3, frame coverage: 100%, exit pupil position: 21 mm, setting range +2/-4 diopters, with eye sensor for automatic switchover between viewfinder and LCD panel, time delay 0.005 sLCD panel3.2" (backlight LED) with anti-fingerprint andanti-scratch coating, 2,100,000 pixels (dots), format 3:2, touch control availableEQUIPMENTWLANThe Leica FOTOS app is required to use the WLAN function. The Leica app is available from the Apple App Store™ or the Google Play Store™. Complies with Wi-Fi IEEE802.11b/g/n, 2.4 GHz, channel1-11 (2412-2462 MHz) and Wi-Fi IEEE802.11ac, 2.4 GHz & 5 GHz, channel 39-48 (5180-5240 MHz), channel 52-64 (5260-5320 MHz), channel 100-140 (5500-5700 MHz) (standard WLAN protocol), encryption method: WLAN-compatible WPA™/ WPA2™BluetoothBluetooth v4.2 (Bluetooth Low Energy (BLE)), 2402 to 2480 MHzMenu languagesEnglish, German, French, Italian, Spanish, Russian, Japanese, Simplified Chinese, Traditional Chinese, KoreanPOWER SUPPLYRechargeable battery (Leica BP-SCL4) Lithium-ion rechargeable battery, rated voltage: 7.2 V (DC); capacity: 1860 mAh (min.), approx. 370 recordings (based on CIPA standard, without EVF); charging time: approx. 140 min (after deep discharge); manufacturer: Panasonic Energy (Wuxi) Co. Ltd., Made in ChinaCharger (Leica BC-SCL4)Input: AC 100–240 V, 50/60 Hz, 0.25 A, automatic switchover; Output: DC 8.4 V 0.85 A; Manufacturer: Salom Electric (Xiamen) Co., Ltd., Made in ChinaYou will find the manufacturing date of your camera on the stickers in the Warranty Card and/or on the packaging. The date format is year/month/day. Subject to changes in design and production.93 989 XII/19/DSAFETY REMARKSGENERAL INFORMATION• Do not use your camera in the immediate vicinity of devices with powerful magnetic, electrostatic or electromagnetic fields (e.g. induction ovens, microwave ovens, television sets or computer monitors, video game consoles, cell phones, broadcasting equipment). Their electromagnetic fields can interfere with recordings.• Strong magnetic fields, e.g. from speakers or large electric motors can damage the stored picture data or disrupt recording.• Switch off the camera, remove the battery and switch the camera back on in case of a camera malfunction due to the effects of electromagnetic fields.• Do not use the camera in the immediate vicinity of radio transmitters or high-voltage power lines. Their electromagnetic fields may interfere with recordings.• Always store small parts e.g. the accessory shoe cover as follows:–out of the reach of children–in a safe location, where they will not get lost or stolen• State-of-the-art electronic components are sensitive to static discharge. Since people can easily pick up charges of several 10,000 volts by walking on synthetic carpets, a discharge can occur when you touch the camera, and especially it is placed on a conductive surface. A static discharge on the camera housing poses no risk for the electronics. Despite built-in safety circuits, you should avoid direct contact with external camera contacts like those in the flash shoe.• Take care not to soil or scratch the sensor for lens detection (6-bit encoding) in the bayonet. You must similarly prevent direct contact of the bayonet with grains of sand or similar particles, as these could cause irreparable damage. This component must only be cleaned with a dry cloth (in system cameras).• Use a cotton or linen cloth instead of a microfiber cloth from an optician’s (synthetic) when cleaning the contacts. Make sure to discharge any electrostatic charge by deliberately touching a heating or water pipe (conductive, grounded material). Dirt deposits and oxidation on the contacts can be avoided by storing your camera in a dry location with the lens cap and the flash shoe/viewfinder cap (in system cameras) attached.• Only use accessories specified for this model to prevent faults, short circuits or electric shock.• Do not attempt to remove parts of the housing (covers) yourself. Repairs must be done at authorized service centers only.• Protect the camera against contact with insect sprays and other aggressive chemicals. Petroleum spirit, thinner and alcohol must not be used for cleaning. Some chemicals and liquids can damage the camera housing or the surface finish.• Rubber and plastics are known to expel aggressive chemicals and should therefore not be kept in contact with the camera for extended periods of time.• Prevent any sand or dust or water penetration into the camera, e.g. during snowfall or rain or on the beach. Be extra careful when changing the lens (in system cameras) and when inserting or removing the memory card and rechargeable battery. Sand and dust can damage the camera, the lens, the memory card and the battery. Moisture can cause malfunctions and irreparable damage to the camera and memory card.LENS• A camera lens can have the effect of a magnifying glass when exposed to direct frontal sunlight. The camera must therefore be protected against extended exposure to direct sunlight.• Attaching the lens cap and keeping the camera in the shade or ideally in its camera case, will help prevent damage to the interior of the camera.RECHARGEABLE BATTERY• Improper use of the batteries or the use of unapproved battery types may result in an explosion!• Do not expose the rechargeable battery to sunlight, heat, humidity or moisture for prolonged periods of time. Likewise, the batteries must not be placed in a microwave oven or a high-pressure container as this would pose a fire or explosion hazard.• Do not under any circumstances charge or insert a damp or wet battery into the camera!• A safety valve in the battery ensures that any excess pressure caused by improper handling is discharged safely. It is nevertheless important to dispose of a bloated battery immediately. It may pose an explosion hazard!• Keep the battery contacts clean and easily accessible. Although lithium-ion batteries are secured against short circuits, they should still be protected against contact with metal objects like paper clips or jewelry. A short-circuited battery can get very hot and cause severe burns.• When a battery is accidentally dropped, make sure to check the housing and the contacts immediately for any damage. A damaged battery can damage the camera.• The battery must be removed from the camera or charger and must be replaced immediately in case of a strange smell, discoloration, deformation, overheating or leakage. Continued use of the battery may result in overheating, which can cause fire and/or explosion!• Never throw batteries into a fire as they might explode!• Keep the battery away from sources of heat in case of a leak or a smell of burning. Leaked fluid can catch fire!• The use of other chargers not approved by Leica Camera AG can cause damage to the batteries – and in extreme cases – cause serious or life-threatening injuries.• Make sure that the power socket is freely accessible at all times.• The in-car charging cable must never be connected while the charger is connected to mains electricity.• Do not attempt to open the battery or the charger. Repairs must only be carried out by authorized service centers.• Keep batteries out of the reach of children. Batteries can cause suffocation when swallowed.CHARGER• Using the charger in the vicinity of broadcasting receivers may interfere with reception. Ensure a distance of at least 1 m (3 ft) between the charger and the receiver.• When the charger is in use, it may emit a buzzing sound – this is normal and not a malfunction.• Disconnect the charger from the mains when it is not in use, because it consumes some a very small amount electricity, even when no battery is inserted.• Always keep the charger contacts clean, and never short circuit them.MEMORY CARD• Never remove the memory card during a datasave or card reading process. The camera must not be switched off or be subjected to impact or vibrations while working.• Do not open the compartment or remove the memory card or battery while the status LED is flashing to indicate camera memory access. Data on the card may otherwise be destroyed and camera malfunctions may occur.• Do not drop or bend memory cards as this will cause damage and result in the loss of stored data.• Do not touch the connections on the reverse of the memory card and keep them clean and dry.• Keep memory cards out of the reach of children. Swallowing a memory card may cause suffocation. SENSORCosmic radiation (e.g. during flights) may cause pixel defects.CARRY STRAP• Once you have attached the carry strap, please make sure that the clips are mounted correctly to prevent the camera from falling.• Carry straps are usually made of very robust material. You should therefore keep it out of the reach of children. A carry strap is not a toy and poses a strangulation risk.• Use the carry strap only for its intended purpose on a camera or on binoculars. Any other use poses the risk of injury and may possibly result in damage to the carry strap and is therefore not permitted.• Carry straps should also not be used for cameras/binoculars during sports activities with a high risk of getting entangled in the carry strap (e.g. mountain climbing and similar outdoor activities).TRIPOD• When using a tripod, make sure it is standing securely and turn the camera only by turning the tripod, not the actual camera. • Ensure that the tripod screw is hand-tightened only.• Avoid transporting the camera while the tripod is attached. You might injure yourself or others and the camera could get damaged. FLASHThe use of incompatible flash units with your Leica SL2 may result in irreparable damage to the camera and/or the flash unit. REGULATORY INFORMATIONSpecific regional approvals for this device can be found in the camera menu.▸Select Camera Information in the main menu▸Select Regulatory Information from the submenuDISPOSAL OF ELECTRICAL AND ELECTRONIC EQUIPMENT(Applies within the EU and for other European countries with active waste separation policies)This device contains electric and/or electronic components which must not be disposed of in general household waste. Instead, it should be disposed of at a recycling collection point provided by your local authority. This service is free of charge. Any standard or rechargeable batteries used in this device must be removed and disposed of separately in accordance with local regulations. Please contact your local authorities, waste disposal collection point or the retailer, from whom you purchased the device for more information on correct waste disposal.English Declaration of Conformity (DoC)Hereby, “Leica Camera AG” declares that this product is in compliance with the essential requirements and other relevant provisions of Directive 2014/53/EU.Customers can download a copy of the original DoC to our RE products from our DoC server: In case of further questions, please contact:Leica Camera AG, Am Leitz-Park 5, 35578 Wetzlar, GermanyProduct dependent (see technical data)Type Frequency band (central frequency)Maximum power (dBm e.i.r.p.)WLAN 2412–2462/5180–5240 MHz/5260–5320/5500–5700 MHz 20Bluetooth Wireless Technology 2402–2480 MHz 20The CE mark on our products documents compliance with the fundamental require-ments of applicable EU guidelines.WLAN: 5150 to 5350 Mhz for indoor use only WARRANTYIn addition to your statutory warranty rights regarding your dealer, you will receive an additional Leica Camera AG product warranty valid from the date of purchase at an authorized Leica retailer. Previously, the product warranty was included with the product in the packaging. From now on, the product warranty will only be available online as a new service. You will be able to review the warranty conditions for your product at any time, without having to search fr the document. Please note that this new policy applies only for products that are no longer delivered with a hardcopy product warranty included in the packaging. Any products still delivered with the warranty document in the packaging remain governed exclusively by that document. For more information regarding the warranty scope, services and limitations, please visit: FOR US ONLY:FCC Note: This equipment has been tested and found to comply with the limits for a Class B digital device, pursuant to Part 15 of the FCC Rules. These limits are designed to provide reasonable protection against harmful interfer e nce in a residential installation. This equipment generates, uses, and can radiate radio frequency energy and, if not installed and used in accordance with the instructions, may cause harmful interference to radio communications. However, there is no guar a ntee that interference will not occur in a particular installation. If this equipment does cause harmful interference to radio or television reception, which can be determined by turning the equipment off and on, the user is encouraged to try to correct the interference by one or more of the following measures:• R eorient or relocate the receiving antenna.• I ncrease the separation between the equipment and receiver.• C onnect the equipment into an outlet on a circuit different from that to which the receiver is connected.• C onsult the dealer or an experienced radio/TV technician for help.FCC Caution:To assure continued compliance, follow the attached installation instructions and use only shielded inter f ace cables with ferrite core when connecting to com p ut e r or peripheral devices. Any changes or modifications not expressly approved by the party responsible for compliance could void the user’s authority to operate this equipment.Trade Name:LEICA Type No.2998Responsible party/Support contact: L eica Camera Inc.1 Pearl Count, Unit A, Allendale, New Jersey 07401Tel.: +1 201 995 0051/ Fax: +1 201 995 1684********************************Contains FCC ID: VPYLB1JS955This transmitter must not be co-located or operated in conjunction with any other antenna or transmitter. This equip-ment complies with FCC radiation exposure limits set forth for an uncontrolled environment and meets the FCC radio frequency (RF) Exposure Guidelines. This equipment has very low levels of RF energy that are deemed to comply without testing of specific absorption ratio (SAR).FOR CANADA ONLY:CAN ICES-3 (B)/NMB-3(B)HMN: 2998Contains IC: 772C-LB1JS955 A recyclable lithium ion/polymer battery powers this camera. Please call 1-800-8-BATTERY for information on how to recycle this battery.This device complies with Industry Canada licence-exempt RSS standard(s). Operation is subject to the following two conditions: (1) this device may not cause interference, and (2) this device must accept any interference, including interference that may cause undesired operation of the device.The available scientific evidence does not show that any health problems are associated with using low power wireless devices.There is no proof, however, that these low power wireless devices are absolutely safe. Low power Wireless devices emit low levelsof radio frequency energy (RF) in the microwave range while being used. Whereas high levels of RF can produce health effects(by heating tissue), exposure of low-level RF that does not produce heating effects causes no known adverse health effects.Many studies of low-level RF exposures have not found any biological effects. Some studies have suggested that some biologicaleffects might occur, but such findings have not been confirmed by additional research. Model 4889 has beentested and found to comply with IC radia-tion exposure limits set forth for an uncontrolled environment and meets RSS-102 of theIC radio frequency (RF) Exposure rules.FOR SINGAPORE ONLY Complies with IMDA Standards DA106734FOR UNITED ARAB EMIRATES ONLY:TRA REGISTERED No:ER73893/19DEALER No: DA0112968/13。
- 1、下载文档前请自行甄别文档内容的完整性,平台不提供额外的编辑、内容补充、找答案等附加服务。
- 2、"仅部分预览"的文档,不可在线预览部分如存在完整性等问题,可反馈申请退款(可完整预览的文档不适用该条件!)。
- 3、如文档侵犯您的权益,请联系客服反馈,我们会尽快为您处理(人工客服工作时间:9:00-18:30)。
LeicaiCB70说明书
Leica iCB70是一款高精度的工程测量仪器,用于土地测量、建筑工程和道路施工等领域。
它采用先进的技术和功能,具有可靠性、精确性和易于使用的优点。
本说明书将详细介绍Leica iCB70的主要特点、操作方法、注意事项和保养要求。
第一部分:产品概述(200字)
Leica iCB70是一款全自动全站仪,具有高度精确的测量功能和用户友好的界面。
它采用了先进的激光技术和无线通信功能,可以精确测量任何不同的地形和条件。
iCB70具有高达1"的角度和2mm+2ppm的距离测量精度,确保了在各种测量任务中的可靠性和准确性。
第二部分:操作方法(600字)
1.安装三脚架:首先,在级平地面上安装三脚架,并确保其稳定和平衡。
然后,将iCB70放置在三脚架上,并确保其水平。
2. 打开仪器:按下仪器上的电源按钮,等待几秒钟,直到显示屏出现Leica标志。
3.基准设置:进入基准设置菜单,选择合适的基准模式,如水平面、平均和快速。
4.设置目标点:使用iCB70的触摸屏或按键设置测量目标点。
可以选择手动输入坐标值,或者使用改正参数和测量参考点进行自动测量。
5.进行测量:根据显示屏上的指示,在相应的位置进行测量。
iCB70会自动记录测量数据,并进行相应的计算和校正。
6.数据处理:测量完成后,可以将数据传输到电脑或其他设备上进行
进一步处理和分析。
iCB70支持无线数据传输,以提高工作效率。
第三部分:注意事项(300字)
1.使用前先阅读说明书:在操作iCB70之前,务必仔细阅读并理解本
说明书中的所有内容。
遵循正确的操作方法和注意事项,以确保测量工作
的准确性和安全性。
2.保持清洁和干燥:在使用过程中,要保持iCB70清洁并远离任何液
体或湿度。
使用软布擦拭外壳,并使用干燥的环境存放。
3.防止震动和碰撞:iCB70是一种精密仪器,要避免受到震动和碰撞。
在使用时,请谨慎操作并避免跌落或碰撞。
第四部分:保养要求(200字)
1.保持干燥:在存储和使用iCB70时,要保持干燥的环境。
避免在潮
湿或有露水的地方使用,并使用干燥的布擦拭外壳。