爱普生投影机遥控器使用说明书
EPSON 多媒体液晶投影仪 说明书
1使用说明书请妥善保管此说明书。
请确保先阅读此产品的相关资料,再按照其中的要求安装及使用此产品。
如通过查询此产品的相关资料和爱普生(中国)有限公司主页,仍无法解决问题,请您联系爱普生客户服务热线(800-810-9977)解决。
2说明书中的符号的意义f 安全指示使用说明书和投影机上都使用了符号,指出可能对用户或他人造成的伤害以及财产受损的风险,以便您能够安全、正确地使用投影机。
指示及其含义如下。
请确保在阅读说明书之前正确理解这些指示。
f 一般信息指示警告此符号指示一些信息,若忽视这些信息,则可能由于错误操作而导致死亡或人身伤害。
小心此符号指示一些信息,若忽视这些信息,则可能由于错误操作而导致人身伤害或物品损坏。
注意列示了如果不采取足够的措施可能引起投影机的损坏和人身伤害的内容。
q记述了方便用户使用的一些相关资讯。
s指明可以找到相关主题详细资讯的所在页。
g表示该符号前有下划线的用语在用语解说中作了说明。
请参阅“附录”中的“用语解说”部分。
s 第123页表示操作方法和操作顺序。
请按照编号顺序进行所需的操作。
[(名称)]指示遥控器或控制面板上按钮的名称。
实例:[Esc] 按钮“(菜单名称)”表示配置菜单选项。
实例:“图像”-“亮度”步骤3目录投影机的功能 (5)所有型号的共有特性 (5)EB-G5350 / G5150 特性 (6)各部件的名称和作用 (7)前面 / 上面 (7)底面 (9)后面 (10)控制面板 (12)遥控器 (13)有用功能校正投影图像中的失真 (16)使用 Quick Corner 校正失真 (16)切换投影图像 (18)自动探测外来信号,并切换投影图像(源搜索) (18)直接从遥控器切换 (19)提高投影的功能 (20)选择投影质量(选择颜色模式) (20)暂时隐藏图像和声音(A/V 无声) (21)暂停图像(静止) (21)改变长宽比 (22)光标功能(指示器) (26)放大部分图像(E 变焦) (27)使用多台投影机时目标投影机的限制 (28)设定投影机识别号 (29)检查投影机识别号 (29)设置遥控器识别号 (30)为多台投影机校正颜色(多屏幕调节颜色调节) (31)校正步骤概要 (31)校正方法 (31)安全功能 (33)管理用户(密码保护) (33)限制操作(操作锁) (35)防盗锁 (36)配置菜单使用配置菜单 (38)功能一览表 (39)图像菜单 (39)信号菜单 (40)设定菜单 (42)扩展菜单 (44)网络菜单(只适用于 EB-G5300 / G5200W / G5100) (46)网络菜单(只适用于 EB-G5350 / G5150) (48)信息菜单(只适用于显示) (60)重设菜单 (61)故障排除使用帮助 (63)解决问题 (64)读懂指示灯 (64)看了指示灯仍不明白时 (67)附录安装方法 (77)清洁 (78)清洁投影机表面 (78)清洁镜头 (78)清洁空气过滤器 (78)更换消耗品 (81)更换遥控器电池 (81)更换灯泡 (82)更换空气过滤器 (85)选购件和消耗品 (87)运输注意事项 (89)在附近移动 (89)运输时 (89)保存用户标识 (90)使用无线 LAN 接入点进行 WPS(Wi-Fi Protected Setup)连接(仅适用于 EB-G5350 / G5150) (92)连接设定方式 (92)屏幕尺寸和距离 (96)EB-G5350 / G5300 / G5150 / G5100 的投影距离 (96)EB-G5200W 的投影距离 (97)连接到外部设备 (98)连接到外部监视器 (98)连接到外部扬声器 (98)拆卸和连接投影机镜头单元 (99)拆卸 (99)连接 (99)目录4连接和拆卸 USB 设备(只适用于 EB-G5350 / G5150) (101)连接 USB 设备 (101)读懂 USB 指示灯 (101)拆卸 USB 设备 (101)插入和弹出 SD 卡(只适用于 EB-G5350 / G5150) (102)插入 (102)读懂 SD 卡访问指示灯 (102)拆卸 (103)连接 LAN 电缆 (104)使用 USB 电缆连接和投影(只适用于 USB Display EB-G5350 / G5150) (105)连接 (105)读懂邮件通知功能的问题 (108)ESC/VP21 命令 (109)命令表 (109)电缆配线 (110)读懂网络投影机(只适用于 EB-G5350 / G5150) (111)关于 PJLink (112)受支持的监视器显示一览表 (113)受支持的监视器显示(适用于 EB-G5350 / G5300 / G5150 / G5100) (113)受支持的监视器显示(适用于 EB-G5200W) (116)规格 (119)投影机一般规格 (119)随附软件的操作条件 (121)外形尺寸图 (122)用语解说 (123)索引 (125)5投影机的功能所有型号的共有特性f位于中心的镜头可容易地对准屏幕和投影机,因为镜头位于投影机的中心。
爱普生Epson CB-L250F使用说明书

投影机介绍
10
投影机的功能 .................................................................................... 11
打开镜头盖 ........................................................................................ 33
安装遥控器电池 ................................................................................ 31
遥控器操作 ........................................................................................ 32
投影机部件和功能............................................................................. 14
投影机部件 - 前面/上面............................................................................................................. 14 投影机部件 - 后面 ........................................................................................................................ 15 投影机部件 - 底面 ........................................................................................................................ 16 投影机部件 - 控制面板............................................................................................................... 16 投影机部件 - 遥控器 ................................................................................................................... 17
投影仪遥控器使用方法
投影仪遥控器使用方法投影仪是现代会议、教学、娱乐中常见的设备,而投影仪遥控器作为操作投影仪的重要工具,使用方法的熟练程度直接影响到投影仪的使用效果。
下面将为大家介绍投影仪遥控器的使用方法,希望能够帮助大家更好地操作投影仪。
首先,我们需要了解投影仪遥控器上的各个按键的功能。
通常,投影仪遥控器上会有开关机键、菜单键、方向键、确认键、音量调节键、输入源切换键等。
在使用投影仪遥控器时,首先要明确各个按键的作用,这样才能更加方便地操作投影仪。
接下来,我们来详细介绍一下投影仪遥控器的使用方法。
首先是开关机操作。
在使用投影仪遥控器时,首先要找到遥控器上的开关机键,通常是一个带有电源标识的按钮。
按下开关机键,投影仪就会开机或者关机。
在开机后,我们可以使用方向键和确认键来选择投影仪的各项功能,比如投影画面的调节、输入源的切换等。
除了开关机操作,投影仪遥控器还可以用来调节投影画面的大小和清晰度。
当我们需要调节投影画面时,可以使用方向键来移动光标,然后通过确认键来选择需要调节的项目,比如亮度、对比度、色彩等。
通过遥控器上的音量调节键,我们还可以方便地调节投影画面的音量大小。
此外,投影仪遥控器还可以用来切换输入源。
在投影仪连接了多个输入源设备时,我们可以通过遥控器上的输入源切换键来切换不同的输入源,比如切换到电脑、DVD播放器、手机等设备上显示的画面。
在使用投影仪遥控器时,还需要注意一些使用技巧。
首先,要注意保持遥控器与投影仪的正对,这样才能确保信号的传输畅通,避免操作失误。
其次,要注意遥控器的电池电量,及时更换电池以确保遥控器的正常使用。
最后,要注意避免遥控器受到湿气、阳光直射等影响,以免影响遥控器的正常使用寿命。
总的来说,投影仪遥控器是操作投影仪的重要工具,熟练掌握其使用方法对于提高投影仪的使用效果至关重要。
希望通过本文的介绍,大家能够更加熟练地使用投影仪遥控器,为会议、教学、娱乐等场合的使用提供便利。
EPSON PowerLite 107 3LCD 投影仪用户手册说明书

Manuals+— User Manuals Simplified.EPSON PowerLite 107 3LCD Projector User Guide Home » Epson » EPSON PowerLite 107 3LCD Projector User GuideContents1 EPSON PowerLite 107 3LCDProjector2 Product Information3 Product Usage Instructions4 Quick Setup5 Turn on your equipment6 Adjust the image7 Using the remote control8 Project over a wired network9 Setting up a wireless connection10 Select wireless network settings11 Install the optional software12 Troubleshooting13 Where to get help14 Documents / Resources14.1 References15 Related PostsEPSON PowerLite 107 3LCD ProjectorProduct InformationThe product described in the user manual is a projector. It is designed for projecting visual content onto a screen or surface. The projector has various input ports including HDMI, VGA, USB, and audio, allowing it to be connected to different devices such as computers, video devices, mobile media devices, and USB devices. The projector also comes with a remote control for convenient operation.Product Usage Instructions1. Before using the projector, read the safety instructions in the online User’s Guide.2. Connect the projector to your desired device using one of the following methods:Computer: Connect one end of an HDMI cable to the projector’s HDMI port and the other end to anHDMI port on your computer. Alternatively, connect one end of a VGA cable to the projector’s Computer1 or Computer2 port and the other end to your computer’s monitor port. Make sure to switch your laptop to external display.USB: Connect the square end of a USB cable to the projector’s USB-B port and the flat end to any USB port on your computer. If you are using OS X 10.7.x or higher, follow the on-screen instructions to install the Epson USB Display software.Video Device: Connect multiple video devices and use the Source Search button on the projector orremote control to switch between them.Mobile Media Device: Connect tablets, smartphones, and other devices that support the MHLTMstandard to the HDMI2/MHL port. Use an MHL cable if required.USB Device or Epson DC-07 Document Camera: Connect a digital camera, USB flash drive, USBstorage device, or Epson DC-07 document camera to the projector’s USB-A port. Use a USB cable forconnection.3. Turn on your computer or video source.4. Plug in the projector. The power light on the projector will turn blue.5. Open the A/V Mute slide all the way.6. Press the power button on the projector or remote control. The projector will beep and the Status light will flashblue before staying on.7. Use the arrow buttons on the remote control to navigate and select options on the Home screen.8. To change the language of the menu system, press the Menu button on the projector or remote control. SelectExtended, then Language, and choose your desired language. Press the Menu button again to exit the menu system.For more detailed information and troubleshooting, refer to the online User’s Guide.Quick SetupBefore using the projector, make sure you read the safety instructions in the online User’s Guide.Note: Your product may differ from the illustrations on this sheet, but the instructions are the same.Connect the projectorChoose from the following connections. See the sections below or the online User’s Guide for details. Computerlaptop or computer’s monitor port. Make sure to switch your laptop to external display (seeSome devices may require an adapter or may not require an MHL cable. Not all features or functions may be supported. Check your device’s documentation for more information.If you connect a digital camera, USB flash drive, or USB storage device, you can use the projector’s PC Free feature. See the online User’s Guide for details.Turn on your equipmentPlug in the projector. The power light on the projector turns blue.3. Open the A/V Mute slide all the way.4. Press the power button on the projector or remote control. The projector beeps, the Status light flashesblue, and then stays on.Note: To shut down the projector, press the power button twice.5. Use the arrow buttons on the remote control to highlight any of the options on the Home screen that appears,then press to select it. You can switch between projection sources and quickly access various adjustment options from this screen.6. The default language of the menu system is English. To select another language, press the Menu button on theprojector or remote control. Select Extended and press Select Language and press . Select your language and press . Press the Menu button to exit the menu system.Adjust the image1. If you don’t see an image, press the Source Search button on the projector or remote control to select theimage source.Note: If you still see a blank screen or have other display problems, see the troubleshooting tips on the back of this sheet.2. To raise the image, press the foot release button and lift the front of the projector. Release the button to lockthe foot in position.3. To reduce or enlarge the image, turn the zoom ring.To sharpen the image, turn the focus ring.If your image looks like , you may have placed the projector off to one side of theYour projector automatically adjusts images that look like but if necessary you can press the button on the projector to correct it.For more information on using the remote control, see the online User’s Guide.Project over a wired networkFollow the steps here to configure your projector for your wired network using the projector’s menu system.1. Plug in and turn on the projector.2. Press the Menu button on the remote control, select the Network menu, and press .3. Select Network Configuration and press4. Select the Basic menu and press5. Select the Projector Name setting and enter a name (up to 16 characters long) to identify your projector overthe network.Use the displayed keyboard to enter characters. Press the arrow buttons on the remote control to highlight the characters and press to select them.Note: See the online User’s Guide for information on adding passwords.6. Select the Wired LAN menu and press7. Choose IP Settings and press8. If your network assigns addresses automatically, turn on the DHCP setting. If not, turn off the DHCP settingand enter the projector’s IP Address, Subnet Mask, and Gateway Address, as needed. Then pressEsc.9. To prevent the IP address from appearing on the network standby screen, set the IP Address Display setting toOff.10. When you are finished, select Complete and press , then press again to save your settings.11. Press the Menu button to exit the menu system.Setting up a wireless connectionFollow the steps here to set up the projector for a wireless connection. You will need the optional wireless LAN module (part number V12H731P02).Install the optional LAN module1. Remove the wireless LAN module cover screw.2. Insert the optional wireless LAN module into the USB-A port.3. Attach the included wireless LAN module cover and secure it using the screw you removed.Note: The light on the wireless LAN module turns on when the module is installed and operating. The light flashes when the module is communicating over the network.Select Wireless LAN On as the Wireless Mode setting.Select Network Configuration and pressSelect the Wireless LAN menu and pressSelect one of the following as the Connection Mode setting:Quick for a direct connection to a computer, tablet, or smartphone.If you connected the projector to a network wirelessly, make sure to connect your mobile device to the sameFollow the app instructions to connect your device to the projector. For more information on setting up and using this app, visitmonitor. It may be labeled CRT/LCD or have an icon such as . You may have to hold down the Fn key while pressing it (such as Fn + F7). Wait a moment for the display to appear.If you’re using a Mac laptop, open System Preferences and select Displays. Click the Arrangement tab andAndroid and Chromebook are trademarks of Google Inc.General Notice: Other product names used herein are for identification purposes only and may be trademarks of their respective owners. Epson disclaims any and all rights in those marks.This information is subject to change without notice.© 2017 Epson America, Inc., 7/17Printed in XXXXXX CPD-54224Documents / ResourcesEPSON PowerLite 107 3LCD Projector [pdf] User Guide01, PowerLite 107, PowerLite 107 3LCD Projector, 3LCD Projector, ProjectorReferencesWireless Projector - iProjection App | Epson CanadaEpson® Official SupportiProjection App | Epson USEpson® Official SupportEpson Product RegistrationBuy Direct from Epson | Epson CanadaBuy Direct from Epson | Epson USSearch - Manuals+,。
爱普生投影机点对点无线连接方法
如何通过快速连接模式实现无线投影
文档编号:370011
本文以EB-C1915投影机为例进行说明,其它机型设置方法基本相同
一、连接方式
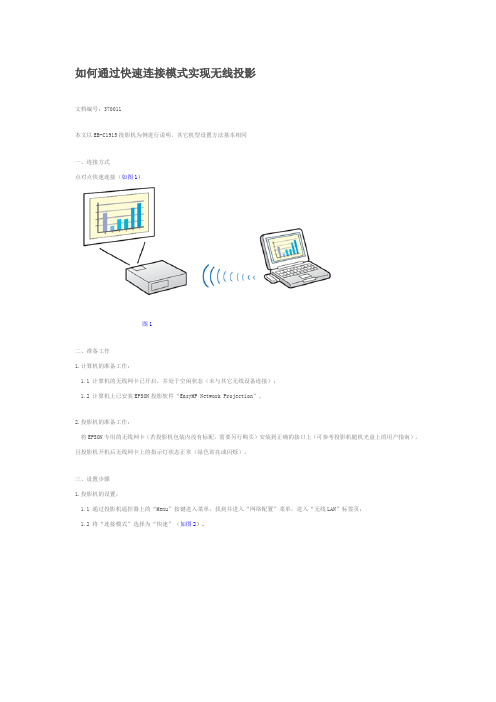
点对点快速连接(如图1)
图1
二、准备工作
1.计算机的准备工作:
1.1 计算机的无线网卡已开启,并处于空闲状态(未与其它无线设备连接);
1.2 计算机上已安装EPSON投影软件“EasyMP Network Projection”。
2.投影机的准备工作:
将EPSON专用的无线网卡(若投影机包装内没有标配,需要另行购买)安装到正确的接口上(可参考投影机随机光盘上的用户指南),且投影机开机后无线网卡上的指示灯状态正常(绿色常亮或闪烁)。
三、设置步骤
1.投影机的设置:
1.1 通过投影机遥控器上的“Menu”按键进入菜单,找到并进入“网络配置”菜单,进入“无线LAN”标签页;
1.2 将“连接模式”选择为“快速”(如图2)。
图2
2.计算机的设置:
2.1 运行EasyMP Network Projection软件,连接模式选择“快速连接”(如图3);
图3
2.2 软件会自动搜索正在待机的投影机,选中要连接的投影机并点击“连接”即可(如图4);
图4
2.3 若软件无法自动搜索到投影机,也可通过“手动搜索”进行查找。
EPSON EB-D290 投影机手册

安全功能 .....................................................................................................17
爱普生tw7400调试教程
爱普生tw7400调试教程
爱普生tw7400投影仪调试教程总共分为3个操作步骤,具体的操作步骤如下所示:
1、投影仪与屏幕位置应该在同一直线上,这样可以让投影最大化的投射在屏幕上。
在投影仪后面的电源插口上连接好电源线,同时将视频线与电脑设备相连。
2、打开投影仪和电脑,在电脑里打开分辨率选项,选择和投影仪匹配的分辨率。
3、在投影仪的前面找到开关按钮并打开,此时投影仪的指示灯会由红变绿,并启动灯泡开始投影。
4、打开投影灯前的挡板,以防开灯泡因为发热而减少使用寿命。
5、通过旋钮对影像大小进行调节,以及投影的焦距的调节,从而使图像清晰。
3、用投影仪的遥控器调整投影仪的屏幕大小和清晰度,屏幕内容投影到投影布之后要进行投影的位置和大小的矫正。
爱普生投影仪液晶组调重合教程

爱普生投影仪液晶组调重合教程
调整液晶组重合是为了使投影仪在投影时能够显示出清晰、锐利的图像。
下面是爱普生投影仪液晶组调重合的教程:
1. 打开投影仪,让它预热几分钟,确保设备处于正常工作状态。
2. 在投影仪上找到菜单按钮,按下进入菜单选项。
3. 在菜单中找到“图像调整”选项,按下进入调整界面。
4. 在调整界面中,找到“液晶组调整”或“重合调整”选项,按下
进入调整界面。
5. 在调整界面中,通常会显示出几个方格图案。
使用遥控器上的方向键,将图案移动至屏幕中央位置。
6. 根据图案的具体形状,使用投影仪遥控器上的相关调整按钮进行调整。
一般来说,液晶组调整有水平、垂直和角度调整选项。
7. 逐步调整每个方格图案,直到它们完全重合在一起,形成一个整体的图像。
8. 调整完所有方格图案后,退出液晶组调整界面,保存设置。
完成以上步骤后,投影仪的液晶组调整就完成了。
接下来,您可以测试投影仪的图像质量,如果需要,可以根据实际需要进
行微调。
请注意,在进行液晶组调重合时,最好在暗室环境下进行,以确保能够看清图案的细节。
此外,不同型号的投影仪可能在调整界面和调整步骤上略有差异,请根据具体的机型和说明书进行操作。
- 1、下载文档前请自行甄别文档内容的完整性,平台不提供额外的编辑、内容补充、找答案等附加服务。
- 2、"仅部分预览"的文档,不可在线预览部分如存在完整性等问题,可反馈申请退款(可完整预览的文档不适用该条件!)。
- 3、如文档侵犯您的权益,请联系客服反馈,我们会尽快为您处理(人工客服工作时间:9:00-18:30)。
爱普生投影机遥控器使用说明书
一、产品概述
爱普生投影机遥控器是一款专为爱普生投影机设计的遥控器,旨在提供便捷、高效的投影机控制体验。
本使用说明书将详细介绍爱普生投影机遥控器的功能、操作方法以及注意事项,帮助用户正确、方便地使用该遥控器。
二、功能介绍
1. 电源控制:爱普生投影机遥控器通过电源按钮可实现投影机的开机和关机操作,方便用户快速控制投影机的使用。
2. 菜单导航:遥控器上配备了方向键,可实现菜单导航功能,用户可通过方向键在投影机菜单中进行选择、确认和返回操作。
3. 输入源切换:投影机遥控器还具备输入源切换功能,用户可通过遥控器上的输入源按钮,快速切换投影机的输入信号源,如电脑、DVD播放器等。
4. 音量调节:遥控器上的音量加减按钮可实现对投影机的音量进行调节,用户可根据需要随时调整音量大小。
5. 图像调整:爱普生投影机遥控器还具备图像调整功能,用户可通过遥控器上的亮度、对比度、色彩等按钮,调整投影机的图像效果,以获得最佳视觉效果。
三、操作方法
1. 开关机:按下遥控器上的电源按钮,可实现投影机的开机和关机操作。
当投影机处于待机状态时,按下电源按钮,投影机将自动开机;当投影机处于工作状态时,按下电源按钮,投影机将自动关机。
2. 菜单导航:使用方向键进行菜单导航。
当投影机菜单显示在屏幕上时,用户可通过方向键上下左右进行菜单选项的选择和确认。
按下方向键的上、下按钮,可实现菜单选项的上下选择;按下方向键的左、右按钮,可实现菜单选项的左右选择。
确认选项时,按下方向键中间的确认按钮即可。
3. 输入源切换:按下遥控器上的输入源按钮,可实现投影机输入源的切换。
用户可根据实际需要选择相应的输入源,如电脑、DVD播放器等。
每按一次输入源按钮,投影机将切换至下一个输入源。
4. 音量调节:按下音量加减按钮,可实现对投影机音量的调节。
按下音量加按钮,投影机音量将逐渐增大;按下音量减按钮,投影机音量将逐渐减小。
用户可根据需要调整音量大小。
5. 图像调整:通过遥控器上的亮度、对比度、色彩等按钮,可实现对投影机图像的调整。
按下亮度按钮,可增加或减小投影机图像亮度;按下对比度按钮,可增加或减小投影机图像对比度;按下色彩按钮,可调整投影机图像的色彩饱和度。
用户可根据实际需求,调整投影机图像的效果。
四、注意事项
1. 使用时请确认遥控器与投影机之间的距离不超过10米,以确保信号的稳定传输。
2. 遥控器操作时请保持对准投影机的红外接收器,确保信号的准确接收。
3. 遥控器上的电池使用时请正确安装,避免反装或短路。
4. 遥控器在长时间不使用时,请将电池取出,以免电池漏液损坏遥控器。
五、总结
本使用说明书详细介绍了爱普生投影机遥控器的功能、操作方法以及注意事项。
用户在使用遥控器时,可以根据需要开关机、进行菜单导航、切换输入源、调节音量和图像等操作。
同时,在操作过程中需要注意保持信号稳定、正确安装电池以及及时取出电池等。
希望通过本说明书的介绍,用户可以更加方便、准确地使用爱普生投影机遥控器,享受到更好的投影机使用体验。
