tablepro g2音箱说明书
格莱声蓝牙音箱说明书

格莱声蓝牙音箱说明书
1.首先你的电脑必须带有蓝牙模块,如果没有请配置一个USB 接口的蓝牙接口。
2.有了蓝牙模块后电脑还必须安装一款蓝牙管理软件,比如
IVT BlueSoleil,安装IVT BlueSoleil后把外置蓝牙(如果电脑没有内置蓝牙)插入电脑USB接口
3.打开该软件,打开蓝牙音箱电源,双击软件界面中的搜索设备,当找到蓝牙音箱
4.设备后,双击搜索服务,会找到蓝牙高质量音频服务,此时可能需要输入连接密码,输入密码后提示连接成功
5.此时会自动把音频设备切换到蓝牙音箱,可以使用蓝牙音箱播放音乐了。
使用方法
插U盘通电,稍等片刻让播放器读取U盘,按下播放暂停键应该能播放出来。
歌曲一定要放在U盘的根目录,否则无法读取。
如果按键失灵可以使用随机遥控器,按播放键进行播放。
另外在听音时要先检查接线是否正确,电位器位置是否过大。
现在的音箱绝大部分是220伏电源设计。
音响产品说明书使用你的蓝牙音箱
音响产品说明书使用你的蓝牙音箱音响产品说明书一、产品介绍感谢您购买我们的蓝牙音箱。
本说明书将为您提供详细的产品信息以及使用指南,帮助您充分了解和使用您的音响产品。
二、产品规格1. 型号:蓝牙音箱XYZ-1232. 尺寸:15cm*10cm*5cm3. 重量:500克4. 电池容量:2000mAh5. 蓝牙版本:4.06. 频响范围:20Hz-20kHz7. 输入电源:DC 5V8. 输出功率:10W9. 信噪比:≥80dB三、产品功能1. 蓝牙连接:本音箱支持蓝牙无线连接,您可以将您的智能手机、平板电脑或其他蓝牙设备与音箱相连,并畅享无线音乐。
2. 插卡播放:音箱自带Micro SD卡插槽,您可以将存储音乐的Micro SD卡插入音箱中并播放您喜爱的音乐。
3. FM收音机:内置FM收音机模块,您可以通过音箱收听喜爱的电台频道。
4. AUX输入口:音箱配备了3.5mm AUX输入口,您可以通过连接手机、电脑等设备的音频输出接口来播放音乐。
5. 免提通话:音箱内置麦克风,支持免提通话功能,方便您在通话时使用音箱进行通话。
6. LED炫彩灯效:音箱顶部配置LED灯带,支持多种炫彩灯效模式,营造更加炫目的音乐氛围。
四、使用指南1. 开机与关机:长按音箱背面的电源按钮2秒以上,蓝牙指示灯会亮起,音箱进入开机状态;再次长按电源按钮2秒以上,音箱将关闭。
2. 蓝牙连接:打开您的手机蓝牙功能,搜索并选择蓝牙设备“蓝牙音箱XYZ-123”进行配对连接。
3. 插卡播放:将存有音乐的Micro SD卡插入音箱的插卡槽,音箱将自动识别并播放存储在卡中的音乐文件。
4. FM收音机:开启音箱后,切换至FM模式,按照音箱背面的指示按键,进行频道搜索和调谐。
5. AUX输入:使用3.5mm AUX音频线,连接您的手机或电脑的音频输出接口与音箱的AUX输入接口,即可将设备的音乐通过音箱播放。
6. 免提通话:当您的手机与音箱成功连接后,接听来电时,音箱会自动切换至免提模式,实现通话需求。
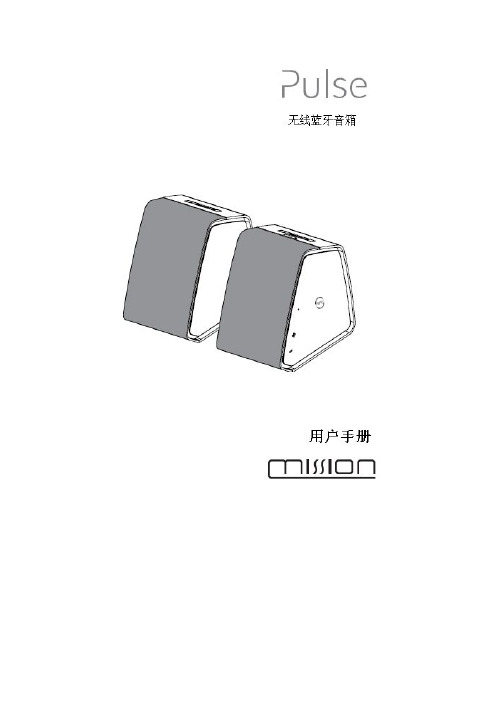
英国美声桌面音箱Mission Pulse II 中文用户手册
请勿将任何明火放置于产品上方,如蜡烛。
警告:电池更换不当时可能会发生爆炸危 险,更换电池时,仅能使用相同或等同型号 和规格的电池。
警告:请勿将电池暴露于高温状态下,如日 照、火源等。 警告:安装本产品前,请参照机壳底部的标 识,获取相关的电气或安规信息。
Mission 被公认为是一个能创造出一系列成功产品的品牌。拥有几十年技术和经验于 2001 年创造的顶级 Pilastro 音箱产品是有史以来最好的音箱之一,Pilastro 以及备受赞誉的其 他优雅系列音箱是对音响工程迈入一个全新深度的一个阐述。
以工程技术为主导的产品技术的发展使得 Mission 有着音响公司所达到的一个标准水平,有 着大量的投资与客源,具有在自己工厂生产每个音箱元件的能力,作为纵向一体化的大工厂, Mission 继续重新定义音箱的再生产水平。
请阅读此操作指引。 请保留此操作指引。
请留意所有的警示性标志。
请遵循所有的操作指引。
请勿将本产品靠近水源。
请仅使用干布清洁机身。
请勿遮挡产品上的通风出口,请按照厂商的 操作说明进行安装。
请根据本指引安装新产品,安置处请勿靠近 热源,如电暖炉、热风口、火炉及其他散热 设备(包括功放)。
请勿损坏起安全保护作用的极性插头。带极 性插头一般有两个宽度不一的插片而接地 型插头除这两个插片外还配有一个接地插 片,其中稍宽的插片及接地插片是为了保障 用户安全而提供。如果产品上的插头与用户 插座不匹配,请咨询专业人士更换合适的插 座。
注意:如果此前 Pulse 已与该蓝牙音乐源连接,当再次打开 Pulse 并切换至蓝牙输入,并
音响厅音响设备说明书

music hall stealth INSTRUCTION MANUALmusic hallIMPORTANT SAFETY INSTRUCTIONS1. Read these instructions carefully.2. Keep these instructions for later reference.3. Heed all warnings.4. Follow all instructions.5. Do not use the device near water.6. Clean only with a dry cloth.7. Do not block any ventilation openings. Always ensure a sufficient ventilation. Install in accordance with the manufacturer’s instructions.8. Do not install near any heat sources such as radiators, heat registers, stoves, or other devices (including amplifiers) that produce or radiate heat.9. Do not defeat the safety purpose of the polarized or grounding-type plug. A polarized plug has two blades, one being wider than the other. A grounding- type plug has two blades and a third grounding prong. The wide blade or the third prong is provided for your safety. If the provided plug does not fit into your outlet, consult an electrician for replacement of the obsolete outlet. 10. P rotect the power cord from being walked on or pinched or otherwise damaged, particularly at plugs, convenience receptacles, and the point where they exit from the device. 11. O nly use attachments/accessories that have been specified by the manufacturer. 12. U se only with a cart, stand, tripod, bracket or table specified by the manufacturer, or sold along with the device. When a cart is used, use caution when moving the cart/device combination to avoid injury from tip-over. 13. U nplug this device during lightning storms or when not being used for longer periods of time. 14. R efer all servicing to qualified service personnel only. Servicing is required when the device has been damaged in any way, such as: Power-supply cord or plug has been damaged, liquid has been spilled or entered the device, the device has been exposed to rain or moisture, or objects have fallen into the device, the device does not work normally, or it has been dropped. 15. W here a mains plug is used as the disconnect device, the disconnect device shall remain readily operable. 16.Please keep the unit in a good ventilation environment at any time.The lightning flash with the arrowhead symbol within the equilateral triangle is intended to alert the user to the presence of un-insulated “dangerous voltage” within the product’s enclosure that may be of sufficient magnitude to constitute a risk of an electrical shock. Le symbole de l'éclair terminé par une flèche situé à l'intérieur d'un triangle équilatéral avertit l'utilisateur de la présence de tension dangereuse non i so l ée d a n s l 'a pp a r e il , d o n t l ’a m p li t ud e p e u t c o n s t it u e r un r i s qu edec h o c él e ct ri qu e .The exclamation point within the equilateral triangle is intended to alert the user to the presence of important operation and maintenance (servicing) instructions in the literature accompanying this appliance. Le symbole du point d’exclamation dans un triangle équilatéral vise à avertir l’utilisateur de la présence, dans la documenta tion accompagnant cet appareil, d’importantes instructions de fonctionnement et d’ent retien. WARNING!/ AVERTISSEMENT!To reduce the risk of fire or an electrical shock, do not expose this device to rain or moisture. The device must not be exposed to dripping or splashing water. Furthermore no objects filled with liquids, such as vases, shall be placed on the device. Afin de réduire les risques d'incendie ou de choc électrique, n'exposez pas cet appareil à la pluie et à l'humidité. L'appareil ne doit pas être exposé au ruissellement ni à la projection d'eau et aucun objet contenant un liquide, tel qu'un vase, ne doit être posé dessus.Caution Marking and rating plate was located at rear enclosure of the apparatus. Avertissement La plaque signalétique est située a l'arrière de l'appareil.When the mains plug or appliance coupler is used as disconnect device, it shall remain readily operable. lorsque la prise du RESEAU D'ALIMENTATION sur l'appareil est utilisée comme appareil de déconnexion, cet appareil doit demeurer aisément accessible.The ventilation should not be impeded by covering the ventilation openings with items, such as newspapers, table-cloths, curtains, etc.; Minimum distances 10cm around the apparatus for sufficient ventilation. Il convient que l'aération ne soit pas gênée par l'obstruction des ouvertures d'aération par des objets tels que journaux, nappes, rideaux, etc.;Distance minimale 10cm autour de l'appareil pour une aération suffisante.No naked flame sources, such as lighted candles, should be placed on the apparatus; il convient de ne pas placer sur l'appareil de sources de flammes nues, telles que des bougies allumées.Use the apparatus only in a moderate climate. N'utiliser l 'appareil que dans des climat modéré.CAUTION: In order to reduce the risk of an electrical shock, do not remove any cover. There are no user-serviceable parts inside the device. Refer servicing to qualified service personnel only. ATTENTION : Pour réduire le risque de choc électrique, ne déposez aucun capot. L'appareil ne contient aucun composant réparable par l'utilisateur. Toute réparation doit être confiée à un centre de services qualifié.FEATURESMOTOR PROTECTION FUNCTION If the rotation of the turntable has not reached constant speed after 30 sec, the motor will stop and the power indicator #4 will flash. If the motor stops and the power indicator flashes, press any speed button to restart.STANDBY This device has an automatic standby mode which is activated after 20 minutes of non-use. At this time, the power indicator light will turn from blue to red. In standby mode, the power consumption of the turntable is reduced to less than 0.3 W to avoid unnecessary power consumption.AUTO STOP Auto stop, also known as auto shut off, stops the platter from spinning approximately 20 seconds after it has finished playing the record. The arm will not automatically raise. Pushing any speed button will restart the motor.SETUP and ASSEMBLYSome assembly is required before you can begin to use your new unit.Please follow the assembly instruction below before attempting to use your new turntable. Do not connect your turntable to a power outlet with the AC adaptor until you have finished the assembly. Do not remove the twist tie securing the tonearm until assembly is completed.PRECAUTIONS ON PLACEMENT:1. Do not place the unit in a location where it will be exposed to direct sunlight or near any type of heating appliance.2. Do not place the unit in a location where there is high humidity or a lot of dust.3. Cartridge may pick up slight sound pressure or vibrations from nearby speakers. For best results, do not install this unit too close to loudspeakers.4. Install this unit on a horizontal surface that is stable and vibration free.5. The feet have been specially designed to isolate the unit from excess vibration. The feet are adjustable and should be used to level the turntable.SETUP and ASSEMBLYASSEMBLY1. Remove the main unit with the packing material from the box.2. Mount the turntable platter onto the center spindle.3. Install the rubber mat on the platter.4. Installation of cartridge: (if required)When installing a new cartridge, refer to its’ spec. sheet in order to apply correct tracking force.During installation, attach the stylus protector to guard the stylus tip from damage.Connect the lead wires to the cartridge terminals. The terminals of most cartridges are color-coded.Connect each lead wire to the terminal of the same color.White (L+) Left channel+Blue (L-) Left channel-Red (R+) Right channel+Green (R-) Right channel-Install the cartridge to the head shell and tighten it with screws provided with the cartridge.The Stealth turntable comes with an Ortofon 2M Blue cartridge already fitted on the head shell.5. Insert the head shell firmly into the front end of the tonearm. Turn the lock nut counter- clockwise until tightlyattached.6. Slide counterweight on the tonearm with the numbers facing towards you. Twist it lightly and it will screw onto therear shaft of the tonearm. Advancing the counterweight to the white cross-hatch will give you an effective tracking force of 1.8g and allow you to skip steps8-10.7. An additional counterweight (Sub weight) is supplied for use with a heavier cartridge (see page 9)8. Adjustment of horizontal “zero” balance and stylus pressure:(a) Remove the stylus protector from the head shell, do not touch the stylus tip during adjustment.(b) Set the cueing lever to the lowered position.(c) Release the tonearm clamp and lift the tonearm from the arm rest to free it.(d) Supporting the head shell with your left hand or index finger, rotate the counterweight until the tonearm isapproximately balanced horizontally (It may move side to side but should not move up or down).(e) Refasten the tonearm with the tonearm clamp.(f) Hold the counterweight stationary with the right hand and rotate the tracking force gauge ring (withnumbers on it) until the number "0" aligns with the center line on the rear shaft of the tonearm. DO NOT TOUCH THE RING AGAIN.9. Rotate the counterweight from the back. The tracking force gauge ring will turn with the counterweight. Stop whenyou have reached the stylus pressure.If you are using a cartridge other than the one supplied, please follow the correct tracking force as specified by the manufacturer’s instructions.10. Set the anti-skating control knob to the same value as the stylus pressure.11. The feet can be adjusted by screwing or unscrewing. The table should be leveled before playing.1. Platter2. Rubber mat3. Spindle4. Power IndicatorThe LED lights blue when switched on by POWER ON/OFF button on the rear panel.5. Speed buttonsPush speed buttons to select the appropriate rotation speed to play vinyl record.Touch one more time to stop playback.The selected speed LED lights blue during playback.The LED will start flashing at end of playback when the automatic stop function is on.6. Head shell and Cartridge7. Locking Ring8. Tonearm9. Tonearm clamp and rest.Use this rest to safely hold the tonearm in position during non-use and transportation.10. Tonearm lift control leverOperates the tonearm lift.11. Anti-skate control dialWhile the record is playing, a force acts on the stylus tip to pull it inward. This force can be counteracted by setting the same values for anti-skate and the tracking force.12. Tracking force gauge ringUse to adjust the tracking force.13. CounterweightBalances the tonearm and adjusts to provide the proper tracking force.14. DC in15. Power on/off buttonTo turn main power on press the POWER ON/OFF button at the rear of the turntable.16. Auto-stop on/off switchSwitch on the AUTO STOP function with the selector switch on the rear panel. It will automatically stop theturntable at the end of playback.You can push any speed button to restart playback.17. Ground terminalConnecting the grounding terminals on the turntable and the audio device with a grounding wire may reduce hum.18. Audio output terminalsConnect the RCA-cables (white=left channel, red=right channel) with the Phono-sockets of your amplifier or phono amp.19. Locking nut for VTA adjustment.Loosen this knob by turning counter-clockwise. This will allowknob to be turned. Tighten this nut after VTA is set.2020. Adjustable VTA knobTurning this knob raises or lowers the armCONNECTIONBefore connecting the unit, it is advised that you also consult your current equipment instruction manual.IMPORTANT: Be sure to turn off the equipment before you make changes to the different connections.1. Connect the AC adapter to an AC outlet.2. Connect the RCA cable and GND wire to the PHONO input of your A MPLIFIER.Output terminals Amplifier (Receiver)L (White) L ChannelR (Red) R ChannelGND (Spade) GNDNOTE: Be sure to connect the ground terminal firmly to the amplifier or receiver. If this connection comes loose, "HUM" may result.Before you play a record, turn down the volume of the connected audio device. Wait until the stylus is completely placed on the vinyl record, and then turn up the volume. 1. Place a record onto the platter.To play a 17 cm (7 inch) vinyl record, place the supplied 45 rpm adaptor on the spindle. 2. Push the SPEED buttons to select the correct speed. 3. Unlock the tonearm lock and lift the tonearm lever. The tonearm will slowly ascend.4. Gently move the head shell to the position the stylus over the desired track.5. Lower tonearm lifter lever. The tonearm will slowly descend and playback will start. During playback, do not stop rotation of the platter by hand.6. To stop the playback before it finishes, push the selected SPEED button again and the playback will stop. Lift the tonearm lever to raise the arm.1. Lift the tonearm lever.2. Move the tonearm back to the tonearm rest.3. If desired, press the POWER ON/OFF button to turn off your turntable.NOTE: AFTER PLAYINGPLAYING a RECORD1. GENERAL SECTIONPower Supply DC12V,2.0AStandby Power consumption Less than 0.3 W, Auto stop on more than 20 minutesDimensions 453(W) x 361.67(D) x 146.7(H) mmWeight 11Kg (24lbs.)2. FEATURESTurntable Type 3-speed full manual, Auto stopCartridge Type Moving magnetic cartridgeMotor Brushless motor (Low torque)Driving Method Direct driveTurntable Platter 305mm (12”) dia. Aluminum die-castSpeed 331/3, 45 and 78rpm3. Audio SpecificationsWow and Flutter Typical: Less than 0.07% WTD at 3kHz RMS (CD-4005)Limit: Less than 0.12% WTD at 3kHz RMS (CD-4005) Signal-to-noise ratio Typical: More than 70dB DIN-B (SS-4242)(for MM) Limit: More than 65dB DIN-B (SS-4242)Speed Tolerance Constant Speed 3000Hz +/-0.3% (CD-4005)Channel Separation Typical: More than 20 dB at 1kHz (CD-4005)Limit: More than 15 dB at 1kHz (CD-4005) Channel Balance Typical: Within 1.5 dB at 1kHz (CD-4005)Limit: Within 2 dB at 1kHz (CD-4005)PHONO Output Level Typical: 5.5mV -3dB/+1dB: 3.894mV~6.172mV at 1KHz 5cm/sec (CD-4005)Limit: 5.5mV -4dB/+2dB: 3.471mV~6.925mV at 1KHz 5cm/sec (CD-4005) Frequency Response (Phono Output) Typical: 20Hz~20kHz +/-0.5dB(Signal input: -54dBV) Limit: 20Hz~20kHz +/-1dBBrushless motors torque Typical: More than 1.2kg(Direct drive) Limit: More than 1.0kg4. Cartridge: Ortofon 2M (Bule)Output Voltage 5.5mV at 1 kHz, (5 cm/sec)Channel Separation Measurement point 1KHz over 25dBChannel Balance 1.5dB or less at 1kHzFrequency Response 20Hz ~ 20kHz +2/-1 dBVertical Tracking Force 1.6~2.0g (1.8g, Recommended)5. TONEARM SECTIONType Static balanced S-shaped tonearm with detachable head shell Effective Arm Length 230mm (9”)Overhang 15mm (0.59”)Offset angle 22⁰Tracking Error Angle Less than 3 degreeApplicable cartridge weight 6~10gAnti-skating adjustment range 0~4gHeight of cue (first track) 8~10.5mmDescent time of cue 1~3 secInner null point 58.8mmOuter null point 113.52mm6. ACCESSORIES SUPPLIEDInstruction manual x 1 45 rpm adaptor x 1Counter weight x 1 Rubber mat x1Platter x1 Head shell assembly x 1RCA cable x 1 Ground wire x 1Power Adapter x 1 Cloth dust cover x 1Additional counterweight, Sub weight x 1 Transfer plug x4 (UL/PSE x1, VDE x1, UK x1, SAA x1)7. NOTES: Music Hall reserves the right to change, modify or substitute parts.WARRANTYThis entitles you to have the music hall Stealth repaired free of charge, at our discretion, for one year after the date of purchase, at any authorized Music Hall Service Center, provided the unit was purchased from an authorized dealer. Your original sales receipt is proof of purchase date. Music Hall takes no responsibility for defects arising from accident, misuse, abuse, wear and tear, neglect or unauthorized repair and/or adjustment. Music Hall cannot accept responsibility for damage or loss that occurs during transit.The warranty does not cover transportation costs.CLAIMS UNDER WARRANTYThe Stealth should be packed in the original packing and returned to the dealer from whom it was purchased, or, upon authorization, to a Music Hall Service Center. It should be sent by a reputable carrier, carriage prepaid. Do not send the turntable via USPS (United States Postal Service). Since no responsibility will be accepted for a unit in transit to the dealer, customer, or authorized service agent, customers are advised to insure against loss, damage, or theft.FOR FURTHER INFORMATION CONTACT:Music Hall108 Station RoadGreat Neck, NY 11023USATel: 516-487-3663Fax: 516-773-3891***********************。
BassPro Nano 电子音响说明书

Owner’s ManualENWIRING FOR POWER AND GROUNDWIRING FOR AUDIO SIGNALLine-level from aftermarket stereoNOTE: When connecting an aftermarket stereo to the BassPro Nano’s line-level inputs and remote turn-on wire, set thebutton to .Speaker-level from factory or aftermarket stereoHarness high-level input wire guide White/White with black stripe Left + / Left -Gray/Gray with black stripeRight + / Right -ABOUT THE MANUALThis manual displays general Owner’s Manual guideline. However, please note that proper installation of mobile audio components requires qualified experience. If you do not have the knowledge and tools to successfully perform this installation, we strongly recommend consulting an authorized JBL dealer about your installation options. Keep all instructions and sales receipts for reference.WHAT’S IN THE BOXMOUNTING THE BASSPRO NANORecommended location: under the passenger seatNOTE: Before securing the BassPro Nano with mounting screws, check beneath the mounting surface to ensure you will notpuncture fuel lines, brake lines, or any vehicle wires. Also ensure that the BassPro Nano will not interfere with seat operation or wiring, or block underseat heater/air conditioning vents.Note: When connecting a factory or aftermarket stereo to the BassPro Nano’s speaker-level inputs, set the button to .SETTING GAIN, ADJUSTING PHASE, LOW-PASS FILTER, AND BASS BOOST1. Start with GAIN control set to minimum, and the crossover control rotated midway.2. Choose music with substantial bass content and turn the volume control on your receiver to ¾ of its total output.3. Adjust the GAIN control clockwise, listening carefully to the bass output. If you hear distortion, turn the GAIN control counterclockwise to decrease the GAIN.4. Switch the PHASE back and forth todetermine which setting provides the mostclean bass output.5. Adjust the LOW-PASS FILTER control until the BassPro Nano plays only low-frequency information – you should not hear elements such as vocals coming fromthe woofer.6. Adjust the BASS-BOOST controlclockwise or counterclockwise to suit your taste.CONNECTING THE REMOTE BASSCONTROL MODULESPECIFICATIONS• Driver Complement: 6” x 8” (152mm x 203mm) woofer • Amplifier Power Output: 100WRMS, 200W Max • Frequency Response: 30 Hz – 150 Hz • Fuse: 15A• Maximum Current Draw: 13A• Quiescent Current Draw: <600 mA• Input Sensitivity: 0.1 V – 4.0 V low-level input; 0.25 V – 10V high-level input• Crossover Frequency: 50 Hz – 150 Hz • Crossover Slope: 12 dB/octave• Bass Boost: 0 dB to +12 dB @ 50Hz• Dimensions (L x W x H): 10-1/4” x 7-11/16” x 2-15/16” (260mm x 195mm x 74.6mm)•Weight: 7.78lbs. (3.53kg)TROUBLESHOOTINGNo audio and POWER indicator is off• No voltage at BATT+ and/or terminals, or bad or no ground connection. Check voltages at amplifier terminals with VOM .No audio and indicator flashes every 4 seconds • DC voltage on amplifier output. Amplifier may need service; see enclosed warranty card for service information.No audio and and indicators flash • Voltage less than 9V on BATT+ connection. Check vehicle charging system.No audio and indicator is on• Amplifier is overheated. Make sure amplifier cooling is notblocked at mounting location. Or, there may be voltage greater than 16V (or less than 8.5V) on connection. Check vehicle charging system.Amplifier fuse keeps blowing• The wiring is connected incorrectly or there is a short circuit. Check wiring connections.Distorted audio • is not set properly. Check setting. Check wires for shorts or grounds. Amplifier or source unit may be defective.Music lacks dynamics or “punch.”• If using speaker-level inputs, check connections for proper polarity. Switch back and forth between 0° and 180° and leave on setting with best sound.Engine noise—whining or clicking—in system when the engine is on• Amplifier is picking up alternator noise. First, check ground connection on the amplifier – a loose or improper ground is one of the main causes for noise. Turn down . Move RCA audio cables away from power wires. Installing an alternator noise filter on power line between battery and alternator might also be necessary.HARMAN International I ndustries, Incorporated 8500 Balboa Boulevard,N orthridge, CA 91329 USA © 2019 HARMAN International Industries, Incorporated. All rights reserved.JBL is a trademark of HARMAN International Industries, Incorporated,registered in the United States and/or other countries. Features, specifications and appearance are subject to change without notice.。
Positive grid 音箱说明书pdf

Positive grid 音箱说明书pdf
1、使用蓝牙音箱将其与电脑连接,这样可以播放出电脑上的音乐或者视频音效。
在连接电脑的时候,首先要确保电脑自带蓝牙设备,如果没有的话需要另行为电脑配置一个蓝牙适配器。
2、在电脑的蓝牙设备设置当中添加设备,将蓝牙音箱连接电源之后打开,然后在“添加设备”中找到蓝牙音箱的型号,点击下一步继续,电脑就会为蓝牙音箱安装一个驱动程序,驱动程序安装完成之后蓝牙音箱也添加成功了。
3、在电脑的菜单栏里找到“单击设备和打印机”,找到蓝牙音箱的图标,双击它,然后您就会发现电脑正在于蓝牙音箱连接,连接的过程比较缓慢,需要耐心的等待。
等到蓝牙音箱连接完成之后,就可以在电脑的音效选项中调整播放设备,将蓝牙音箱设为默认播放器,确认后蓝牙音箱就能发出声音了。
高级音响设备说明书

T1T U R N TA B L EV P T-1000Top ViewBack ViewAnti-Skating KnobTone Arm Lift LeverTone ArmCartridgeSlipmat Turntable Platter RCA Output Jacks Switchable Phono Pre-Amp Dust Cover HingeRecord Speed SwitchGrounding Terminal AC Power PortFUNCTION KNOB - BASIC OPERATIONVINYL STREAM: Turn the Function Knob to the right to connect the unit to an external Bluetooth speaker.Note:POWER ON /OFF: Turn the Function Knob to the left to turn the unit ON. Turn the Function Knob to the middle to turn the unit OFF.Note: The dial will illuminate solid white when turned ON. When the unit is OFF thedial will not be illuminated.U S T C O V E R I N S T A L L A T I O NDUST COVER: Locate the plastic hinges in the accessory box. Slide the hinges into the supports on the back of the turntable. Locate the dust cover and match the unit hinges with the dust covers slots and slide the lid down into the slot.Note: When the unit is not in use, it is best to leave the lid covered.GETTING STARTEDRemove the needle cover, by gently pulling towards the front of the unit.Carefully plug in the unit, install platter and tone arm weight.Note: It is recommended that this product should be operated only fromthe type of power source indicated on the rating label. This unit uses AC power and is powered by a standard wall outlet.RCA LINE OUT: Use the red & white plugs on the back of the unit and includedRCA cables to connect to an ampli er/stereo device. Once connected, switch ON the unit and the ampli er device you connected. Then adjust the volume on the ampli er device.SWITCHABLE PHONO PRE-AMP : This switch allows the internal stereo phono pre-amp to be bypassed when the turntable is used with equipment that has magnet phono inputs. Unless you are using equipment with magnetic phono inputs, the switch should be set to “LINE”. Improper setting of the switch may lead to no sound or loud unwanted feedback.CONNECTING THE SPEAKERS:***IMPORTANT, THE TONE ARM MUST BE SET UP AS INSTRUCTED BELOW OR DAMAGE MAY OCCUR TO THE UNIT OR RECORDS.VINYL: Playing a Vinyl recordNote: -Before using, make sure the tone arm is properly setup.See TONE ARM SETUP page.Using the Function Knob, turn the knob to ON.(the dial will illuminate solid white.)Remove the needle cover, by gently pulling towards the front of the unit.Select the proper record speed (see back of unit).If using a 45 RPM record, use the included 45 adaptor.Release the Tone Arm from the holder and gently place on the record using the lift lever. Use your external device to control the volume.Note: -Make sure to only touch the center or edges of the record to avoid damage to the vinyl grooves.-Do not adjust the counter weight while playing a record as this couldbreak the needle and scratch the record.-If no sound is playing, the unit may be in Vinyl Stream modeThe record will stop spinning automatically when playback is complete.To stop manually, lift the tone arm from the record and return it to the rest.VINYL STREAM: Playing a Vinyl record on a external Bluetooth speaker orheadphones.Simply turn the Function Knob to the “ ” to place in Vinyl Stream mode(the dial will ash white).Turn ON your external Bluetooth speaker or headphone, and set to pairing mode. Wait a few seconds for the unit to nd your device.The unit will illuminate solid white.Use your external device to control the volume.Note: -We recommend placing the Bluetooth device within 1m (3.3')of the product when initially pairing.-Make sure the unit is within 10m (33ft) from your external device for thestrongest connection.-Vinyl Stream is only compatible with vinyl record playback.-The product stays in the pairing mode for 30 seconds. If pairing is notproperly completed, follow the above steps again from the beginningafter turning all devices OFF.I F I C A T I O NSGENERAL Power Requirements.................................................................................AC 100-240V~50/60HZ Power Consumption..................................................................................6 W Dimensions (W x D x H).............................................................................350mm x 420mm x 120mm (approx)Weight........................................................................................................4.81 kgsRECORD PLAYER Motor..........................................................................................................DC servo motor Drive System..............................................................................................Belt Drive Speeds.......................................................................................................Off/33-1/3 rpm, 45 rpm Cartridge Type...........................................................................................Moving Magnetic Cartridge Moving Magnetic Cartridge ......................................................................Victrola VPC-190BLUETOOTH Bluetooth Version......................................................................................Bluetooth V5.0Bluetooth Pro les......................................................................................A2DP, AVRCP Bluetooth Frequency range.......................................................................2.402GHz-2.480GHz Operating Distance ...................................................................................10 meters (33 ft.)REPLACEMENT CARTRIDGE:VICTROLA VPC-190The VPC-190 Cartridge is rated in excess of 1000 hours of normal use.As soon as you notice a change in sound quality or damage to the stylus,it is recommended that it be changed.1. Unplug the unit and put the needle cover on the old cartridge.from the back of the old cartridge.3. Loosen the 2 allen head screws with the included 2mm hex keys on the top of the tone arm / cartridge. Remove old cartridge.4. Mount the new cartridge, and adjust the position to ensure it will track parallel to the record grooves and tighten the screws.5. Connect the wire leads to the new cartridge by pushing them rmly on to the connector pins . WHITE Left channel positive (L+) RED Right channel positive (R+) BLACK Left and Right channel negative (L- & R-)For best results, use a cartridge alignment protractor or download our Cartridge Alignment Protractor at /cartridgealignmentINCLUDED:T1 Turntable & Dust Cover, 45 RPM Adapter, Silicone Slipmat, RCA Cable, Power Cable , Instruction Manual, Quick Setup Guide, 2mm/2.5mm hex key, Dust Cover HingesImportant Safety Instruction1. Read these instructions – All the safety and operating instructions should be read before this product is operated.2. Keep these instructions – The safety and operating instructions should be retained for future reference.3. Heed all warnings – All warnings on the appliance and in the operating instructions should be adhered to.4. Follow all instructions – All operating and use instructions should be followed.5. Do not use this apparatus near water – The appliance should not be used near water or moisture – forexample, in a wet basement or near a swimming pool, and the like.6. Clean only with dry cloth.7. Do not block any ventilation openings. Install in accordance with the manufacture’s instructions.8. Do not install near any heat sources such as radiators, heat registers, stoves, or other apparatus (includingamplifiers) that produce heat.9. Protect the power cord from being walked on or pinched particularly at the plugs, conveniencereceptacles, and at the point where they exit from the apparatus.10. Only use attachments/accessories specified by the manufacturer.11. Use only with the cart, stand, tripod, bracket, or table specified by the manufacturer,or sold with the apparatus. When a cart is used, use caution when moving the cart/apparatuscombination to avoid injury from tip-over.12. Unplug the apparatus during lightning storms or when unused for long periods of time.13. Refer all servicing to qualified personnel. Servicing is required when the apparatus has been damaged inany way, such as power supply cord or plug is damaged, liquid has been spilled or objects have fallen into the apparatus has been exposed to rain or moisture, does not operate normally, or has been dropped. 14. This lightning flash with arrowhead symbol within an equilateral triangle is intended to alert the userto the presence of non-insulated “dangerous voltage” within the product’s enclosure that may be ofsufficient magnitude to constitute a risk of electric shock.a. Warning: To reduce the risk of electric shock, do not remove cover (or back) as there are nouser-serviceable parts inside. Refer servicing to qualified personnel.b. The exclamation point within an equilateral triangle is intended to alert the user to the presence ofimportant operating and maintenance instructions in the literature accompanying the appliance.15. This equipment is a Class II or double insulated electrical appliance. It has been designed in such away that it does not require a safety connection to electrical earth.16. The mains plug is used as disconnect device, the disconnect device shall remain readily operable.17. WARNING: To reduce the risk of fire or electric shock, do not expose this apparatus to rain or moisture.The apparatus shall not be exposed to dripping or splashing and that no objects filled with liquids, such as vases, shall not be placed on apparatus.18. The use of the equipment in moderate climate.19. WARNING: Please refer the information on exterior bottom/back enclosure for electrical and safetyinformation before installing or operating the apparatus.20. The ventilation should not be impeded by covering the ventilation openings with items such as newspaper,table-cloths, curtains etc.21. No naked flame sources, such as lighted candles, should be placed on the apparatus.22. Do not install this equipment in a confined space such as a book case or similar unit.Safety Information1. In order to shut off power to this product completely, unplug the power cord from the wall outlet. Be sureto unplug the unit if you do not intend to use it for an extended period of time, such as during a vacation. 2. Use of controls, adjustments and performance of procedures other than those specified herein may resultin hazardous radiation exposure.3. To prevent electric shock, match wide blade of plug to wide slot, fully insert.4. If this product is experience problems during operation, contact qualified service centers, and do notuse the product in defective states.Before Use1. Choose unit installation location carefully. Avoid placing it in direct sunlight or close to a source of heat.Also avoid locations subject to vibrations and excessive dust, cold or moisture. Keep away from sources that hum, such as transformers or motors.2. Do not open the cabinet as this may result in damage to the circuitry or electrical shock. If a foreignobject should get into the set, contact Customer Service.3. Be sure not to handle record with dirty fingers. Never play a record that has a crack on the surface.4. When removing the power plug from the wall outlet, always pull directly on the plug, never pull the cord.5. To protect the stylus, don’t forget to put on the white protective needle cover after use.6. Do not attempt to clean the unit with chemical solvents as this might damage the finish. Use a clean, dry cloth.7. In order to shut off the power to this product completely, unplug the power cord from the wall outlet. Besure to unplug the unit if you do not intend to use it for an extended period of time, such as a vacation.8. Keep this manual in a safe place for future reference.This device complies with Part 15 of the FCC Rules. Operation is subject to the following two conditions: (1) This device may not cause harmful interference, and (2) this device must accept any interference received, including interference that may cause undesired operation.NOTE: This equipment has been tested and found to comply with the limits for a Class B digital device, pursuant to Part 15 of the FCC Rules. These limits are designed to provide reasonable protection against harmful interference in a residential installation. This equipment generates uses and can radiate radio frequency energy and, if not installed and used in accordance with the instructions, may cause harmful interference to radio communications. However, there is no guarantee that interference will not occur in a particular installation. If this equipment does cause harmful interference to radio or television reception, which can be determined by turning the equipment off and on, the user is encouraged to try to correct the interference by one of the following measures:- Reorient or relocate the receiving antenna.- Increase the separation between the equipment and receiver.- Connect the equipment into an outlet on a circuit different from that to which the receiver is connected.- Consult the dealer or an experienced radio/TV technician for help.WARNING: Any changes or modifications not expressly approved by the party responsible for compliance could void the user's authority to operate this equipment.The device must not be co-located or operating in conjunction with any other antenna or transmitter. To maintain compliance with the FCC’s RF exposure guidelines, place the product at least 20cm fromnearby persons.Déclaration d’IC sur l’exposition aux radiations:Cet équipement est conforme aux limites d’exposition aux radiations définies par le Canada pour des environnements non contrôlés. Cet équipement doit être installé et utilisé à une distance minimum de 20 cmentre l’antenne et votre corps. Cet émetteur ne doit pas être installé au même endroit ni utilisé avec une autre antenne ou un autre émetteur.This device complies with RSS247 of Industry Canada. Cet appareil se conforme à RSS247 de Canadad'Industrie. This device complies with Industry Canada license-exempt RSS standard(s). Operation is subject to the following two conditions: (1) this device may not cause interference, and (2) this device must accept any interference, including interference that may cause undesired operation of the device appareils radio exempts de licence. Son fonctionnement est sujet aux deux conditionsSuivantes: (1) le dispositif ne doit pas produire de brouillage prejudiciable, et (2) Ce dispositif doit Accepter tout brouillage recu, y compris un brouillage susceptible de provoquer un fonctionnement indesirable.Victrola is a registered trademark of Innovative Technology Electronics, LLC.United StatesVictrola (Innovative Technology Electronics, LLC) warrants to the original retail purchaser that this product will be free from defective materials and workmanship for one (1) year from the date of purchase, subject to the limitations below. This warranty period is not extended if we replace the product.To obtain a replacement under the terms of this warranty, you must contact the dealer from which it was purchased with your original receipt. If assistance from the dealer from which it was purchased is impossible, you may contact our customer service for warranty assistance at /contact. Except as limited below, if the product proves defective in either material or workmanship within one (1) year from the date of purchase, Victrola will replace the product at no charge. If the product model is no longer available and cannot be replaced with an identical model, Victrola will issue a merchandise credit for the purchase price to be redeemed at .Limitations:• This limited warranty does not cover failure of the product arising, in whole or in part, from improper installation, storage, transportation, misuse, abuse, accident, neglect, mishandling,unauthorized repair, modi cation, or wear from ordinary use or environmental deterioration.• This limited warranty does not cover cosmetic damage, including paint damage, or consequential damage to other components or premises which may result for any reason from the failure of the product.• This limited warranty is null and void for products not used in accordance with Victrola’s instructions. • This limited warranty terminates if the original retail purchaser sells o otherwise transfers this product.• This limited warranty is null and void for defects or damage caused by installation or repairperformed by any person or entity other than a Victrola authorized installer or dealer.This warranty gives you speci c legal rights, and you may also have other rights which vary from state to state, jurisdiction to jurisdiction or country to country. All express and implied warranties for the product, including but not limited to any implied warranties of merchantability and tness for a particular purpose, are limited in time to the term of this warranty. Some states, jurisdictions or countries do not allow the exclusion of certain implied warranties or conditions, or limitations on how long an implied warranty or condition lasts, so this limitation may not apply to you. Victrola’s responsibility for malfunctions and defects in hardware is limited to replacement or repair as set forth in this warranty statement. Victrola does not accept liability for special, punitive, consequential or incidental damages or losses, whether direct or indirect, including without limitation, any liability for third party claims against you for damages or losses or for products not being available for use. The maximum liability for which Victrola may be responsible will be no more than the amount you paid for the product that is the subject of the claim. Some states, jurisdictions or countries do not allow the exclusion or limitation of special, indirect, incidental or consequential damages, so the above limitation or exclusion may not apply to you.Canada and US TerritoriesThe Warranty on this product shall comply with applicable law when sold to a consumer in Canada or a US Territory. To obtain any applicable warranty service, please contact the dealer from which you purchased the product, or the distributor that supplied the product, with your original receipt.If assistance from the dealer from which it was purchased is impossible, you may contactour customer service for warranty assistance at /contact.If this product proves defective in either material or workmanship, Victrola will replace the product at no charge. If the product model is no longer available and cannot be repaired effectively or replaced with an identical model, Victrola at its sole option may replace the unit with a current model of equal or greater value. Outside the U.S, Canada, and US TerritoriesThe Warranty on this product shall comply with applicable law when sold to a consumer outside of the United States, Canada, and US Territories. To obtain any applicable warranty service, please contact the dealer from which you purchased the product, or the distributor that supplied the product, with your original receipt.VPT1000-102621。
迷你音响说明书(参考)
迷你音响说明书迷你音响说明书篇一:无线蓝牙音箱使用说明书感谢您选用领秀科技生产的dg sh迷你音箱,为了让您轻松体验产品,我们配备了内容详尽的使用说明,您从中可以获得有关产品的介绍,使用方法等方面的知识,在您使用本机前请先仔细阅读说明书,如果有印刷错误或翻译失误望广大用户谅解。
此款迷你音箱共有两个版本:蓝牙版(型号DG-MS008-B)、普通版(型号DG-MS008-T);只有蓝牙版(型号DG-M S008-B)才能实现蓝牙相关的功能,请您核对购买的产品型号以及产品底部标签上:加图。
一、注意事项为了使用者正确使用播放器,确保播放器性能良好,请认真阅读并遵守:? 切勿严重撞击主机。
? 切勿接触苯、稀释剂等化学药品。
? 请不要靠近强磁场、电场。
? 请避开直射光线或发热器具。
?切勿自行拆卸、修理、改造。
? 骑车、驾驶汽车及摩托车时,请勿使用播放器及耳机,以免造成危险。
? 切勿以较大音量收听,以免对听力造成不良影响。
? 废弃包装、电池、旧电子产品,请分类妥善处理。
二、功能特点[蓝牙音频] Bl uetth3.0+EDR,最大接收距离10米。
[蓝牙通话] 语音清晰、无回声。
[MP3 播放]直接播放TF卡内存放的MP3文件。
[FM收音机] F M数字立体声收音机,电台记忆播放。
[音频输入] 立体声音频输入接口,轻松连接电脑、数码音乐播放器、手机等音源设备。
[断点记忆] 自动记忆上次退出时的曲目,音量大小。
[内置电池] 内置可充电锂电池,环保,节能,实用。
[USB读卡器] 连接电脑,可拷贝或删除TF 卡中的歌曲。
[USB声卡] 连接电脑,播放电脑音频文件,可控制电脑上下曲、音量大小。
三、播放音乐操作本机开机时自动检测识别外接设备,开机后进入蓝牙/FM模式,插入TF卡自动识别播放,后者优先原则,也可自行切换播放模式;插入音频信号线不自动切换,通过[/PLA Y]键切换到AUX模式下播放,详细功能操作请阅读第四项“产品的按键、插孔功能定义”。
- 1、下载文档前请自行甄别文档内容的完整性,平台不提供额外的编辑、内容补充、找答案等附加服务。
- 2、"仅部分预览"的文档,不可在线预览部分如存在完整性等问题,可反馈申请退款(可完整预览的文档不适用该条件!)。
- 3、如文档侵犯您的权益,请联系客服反馈,我们会尽快为您处理(人工客服工作时间:9:00-18:30)。
tablepro g2音箱说明书
第一步:打开音响。
音响的蓝牙音响只需打开音响电源开关(听到提示蓝牙音响已开启),然后蓝牙指示灯呈现闪烁状态,表示蓝牙已经开启,并已经进入可搜索模式。
第二步:蓝牙搜索。
打开手机蓝牙功能,在手机蓝牙设置中设为“所有人可见”或可被搜索或开放检测,然后点“搜索”查找蓝牙设备,搜到后点击选择蓝牙设备,这时蓝牙音响会“嘟”的一声,表示已连接上。
第三步:音乐播放。
接下来就可以同步播放手机里的音乐了。
迷你蓝牙音箱使用,音箱开机后就可以发射蓝牙信号,手机搜索该型号进行配对,然后就可以通过蓝牙音箱播放音频。